
The move tool is one of Photoshop’s most basic and useful tools. It isn’t too difficult to use, but there are times the tool may not be working properly. There are several reasons this could be, and it’s quite frustrating if you don’t know how to fix the Move Tool in Photoshop.
The most common reason for the Move Tool not working properly is that Auto-Select is disabled, or Show Transformed Controls is not checked in the Options Bar. Enabling Auto-Select allows you to click on a layer to begin moving and scaling it. Meanwhile, the Show Transform Controls makes the Transform box around a layer visible when active.
Let’s take a deeper look at these and other different reasons the Move tool may not cooperate — and what you can do about it.
Common Problems & Fixes For The Move Tool In Photoshop
1. The Move Tool Won’t Move A Layer
Sometimes, when you select the Move Tool and try to click and drag an element in your project, the tool will draw a selection marquee rather than select and move the element. This can be quite frustrating. So, if you’re trying to move one of your layers using the Move Tool, but it isn’t moving, there could be a few issues at play.
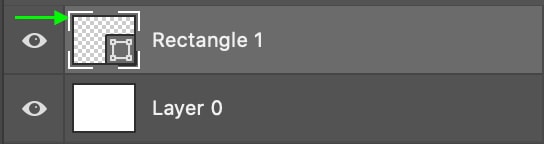
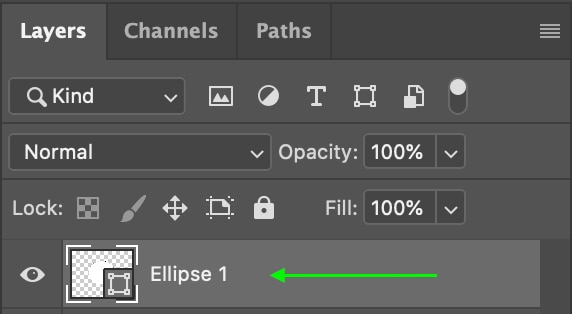
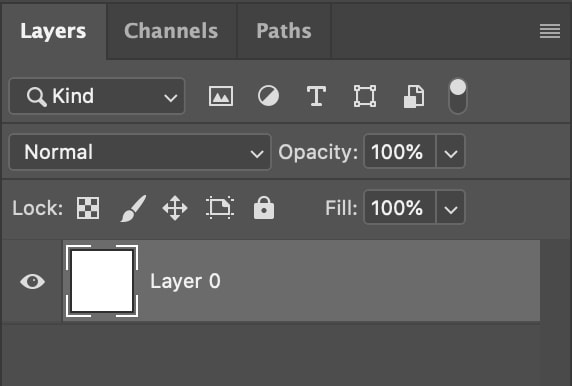
First, make sure you’ve got the layer you’re trying to move selected in the Layers panel. When selected, a layer will appear in a lighter gray with a white border around the thumbnail.
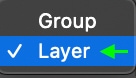
The other solution is to double-check that you’ve enabled the Auto-Select function and that it is set to Layer (rather than Group). Especially if you are used to moving items by selecting them on the canvas rather than in the Layers panel.

Once you’ve done this, you will be able to click and move the element.
2. The Move Tool Moves The Wrong Layer
If you’re trying to click an element to move it, but the tool selects and moves a different layer, you might have auto-select enabled without realizing it. Auto-Select means that Photoshop will choose whatever layer is closest to the area you click. You might need to disable Auto-Select and select the layer you want to move in the Layers panel to ensure the tool moves the exact layer you want.
To do this, head to the Options bar and make sure Auto-Select is unchecked.

Then, ensure you’ve selected the layer you want to move in the Layers panel.
Once you’ve unchecked the Auto-Select function and ensured you’ve selected the correct layer in the panel, the Move Tool should move only the layer you selected.
3. “Could Not Use Move Tool Because No Layers Are Selected” Error
Maybe you’ve received the following message before:
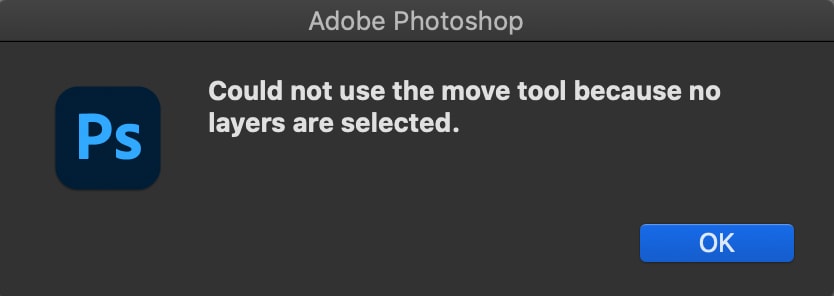
This one is a fairly easy fix because the error message tells you the problem. Head to the Layers panel and make sure you’ve selected the layer you want to work with. The selected layer will appear a lighter gray and feature a white border around the thumbnail.

Now, when you move the layer, you’ll be able to click and drag it easily.
4. The Move Tool Has Snapping Enabled
Photoshop automatically sets the cursor to snap to smart guides. So if you have snap enabled, you may not be able to move the element to the exact place you want if it keeps snapping to a smart guide.
To disable snapping to smart guides, head to View > Snap. There will be a checkmark next to Snap if it has been enabled.
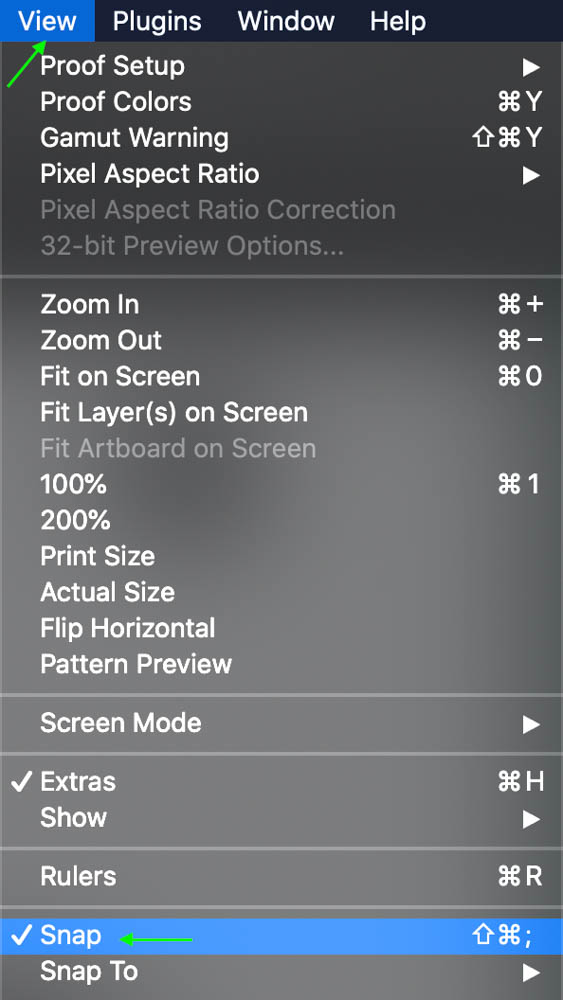
Click Snap to uncheck it and disable snapping.

Now, you will be able to move items around your canvas freely, and they won’t automatically snap to anything.
5. “Could Not Use The Move Tool Because Layer Is Locked” Error
This is another common error message you might see when trying to use the Move Tool:
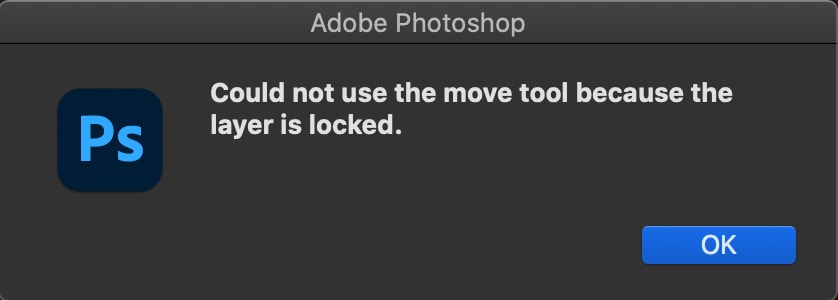
Like with the other error message, the fix here is quite simple as the message spells it out for you. The layer you’re trying to move is still locked, so you’ll need to unlock it before the Move Tool recognizes it. This is especially common when working with background layers as they are automatically locked before you can work with them, though with background layers, the message will appear as:
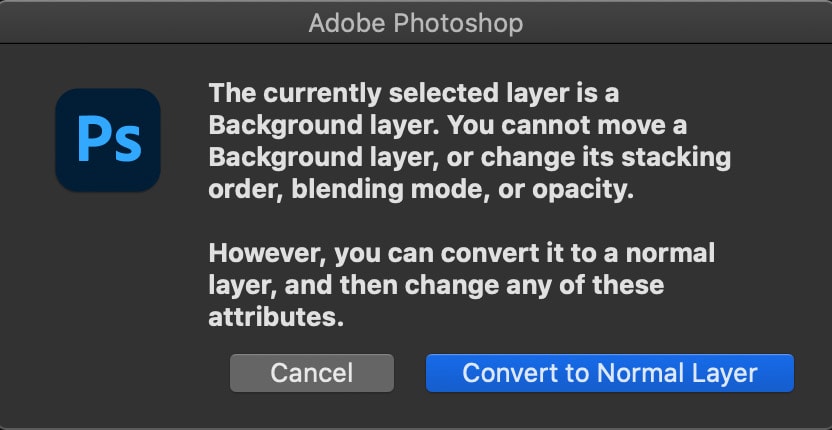
The fixes for both issues are the same: simply unlock the layer (this will also convert a Background layer to a normal layer).
To do this, you just need to head to the Layers panel and click the Lock icon on the right of the layer you’d like to work with.

You will no longer see the lock icon on the right when the layer is unlocked. The layer will appear as a normal layer, and you’ll be able to edit it as such.
You will now be able to move the layer as you wish.
Ultimately the reasons why the Move Tool stops working are usually simple ones. So hopefully, with these quick troubleshooting tips, you’re able to get back up and running in your project! If all else fails, you can always try to reset the program to really start fresh.


