

As great as presets can be, it’s a bit annoying when you want to use two different presets at once, but they only replace one another. Unfortunately, this is a common issue when working with presets in Lightroom, but luckily there’s an easy way to fix this.
To layer multiple presets together in Lightroom, the presets must only apply certain adjustments. So, when creating a new preset, make sure to uncheck all the adjustments you don’t want to edit. This way, one preset could affect just the tone curve, while another affects the HSL for example.
The problem is that if you’re using existing presets, this strategy won’t work by itself. That’s because the presets are already made to adjust and replace every setting at once. That’s why in this post, you’ll learn not only how to create presets that can be layered but how to update existing presets so you can use multiple at once! Let’s get started.
The Problem With Some Presets
Before you learn how to create presets that you can layer together, it’s important to first learn the issue with normal presets. After applying a preset to a photo, it replaces every current adjustment with a new one. This is obviously quite helpful when you want to create a specific editing style, but it’s frustrating when you want to mix and match your presets.
To give you an example, here I applied my Vintage Preset to this image. All the adjustments have been updated to give my photo a film look. My original settings are entirely replaced by this preset.
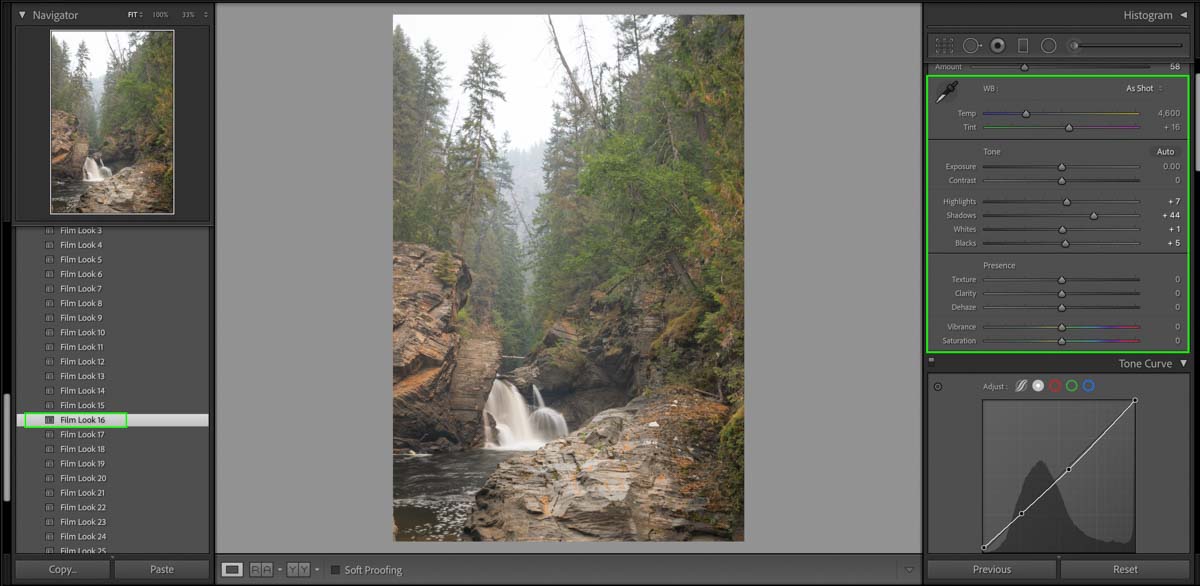
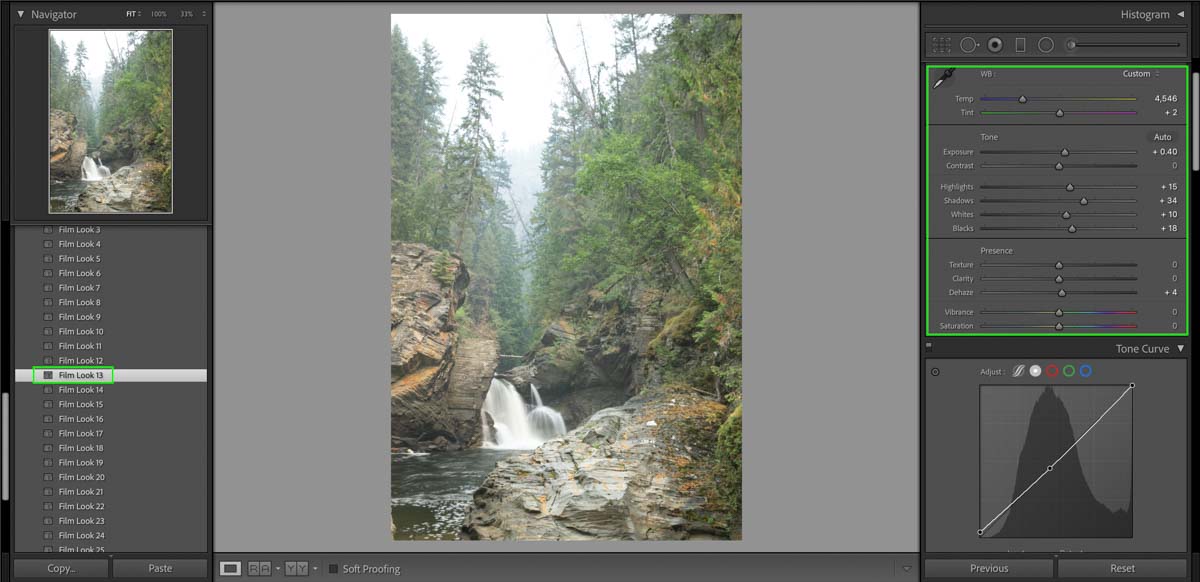
But now, when I apply a secondary preset, all of the vintage-style editing adjustments are overwritten. So even if I wanted to layer these two presets together, I couldn’t because each one replaces the other.
The reason for this comes down to your preset settings. When you make a preset in Lightroom, you can choose exactly which adjustments are included. Even if you haven’t made any edits to a particular setting, let’s say the exposure, if it’s included in your preset settings, it will get reset to 0 when the preset is applied. That means if your original image has an exposure of +1.0, it will get updated to 0 once the preset is applied.
So, in short, any adjustment that is checked off within the preset settings will be applied in the preset even if you made no adjustment. This means that every preset you use constantly overwrites one another because its settings are made to replace every adjustment. Luckily this doesn’t need to be the case with presets!
How To Create Lightroom Presets That Can Be Layered
Now that you know that it’s the settings causing the preset layering issue, you can update them with layering in mind! Let’s create a new preset together that will apply to just the Tone Curve.
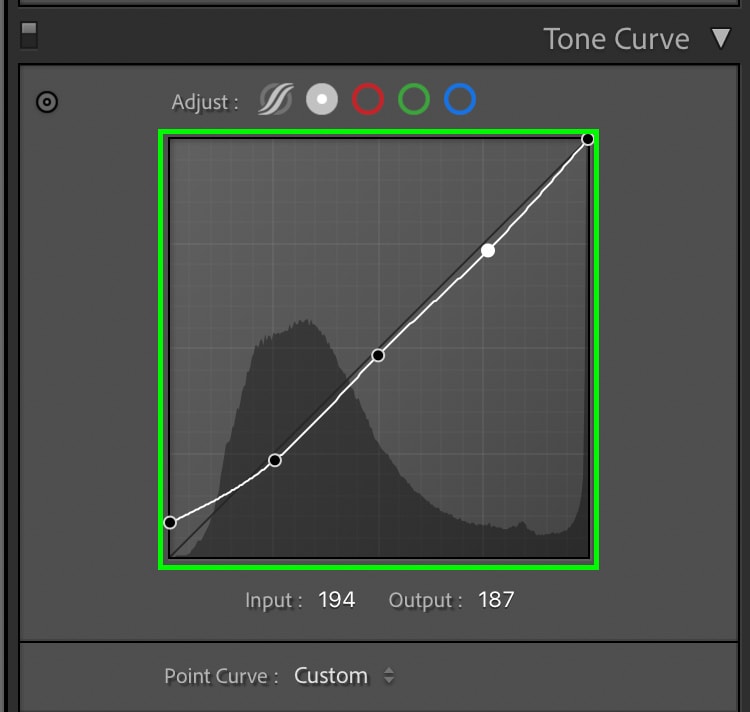
First, you need to make the adjustments that you will include in your preset. Since I am working with the Tone Curve, I will make a quick adjustment to add a matte contrast look. If your photo is already edited, then you don’t need to make any changes here.
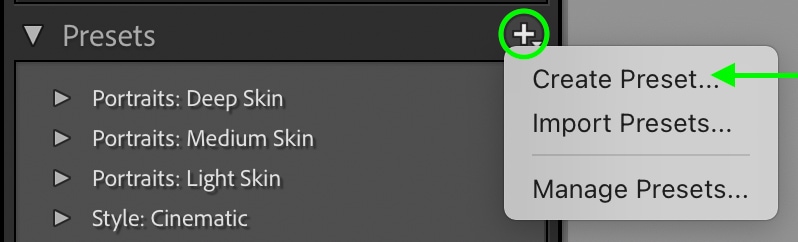
Once an adjustment is made, click on the + icon above to Preset Panel and choose “Create Preset.“
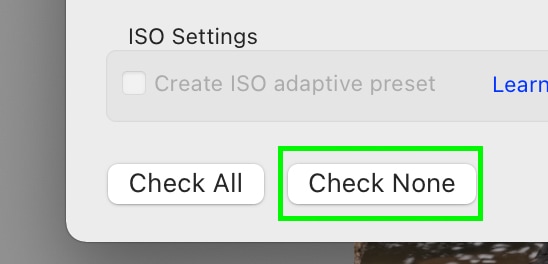
In the dialogue box that appears, click on the “Check None” option to uncheck all of your settings.
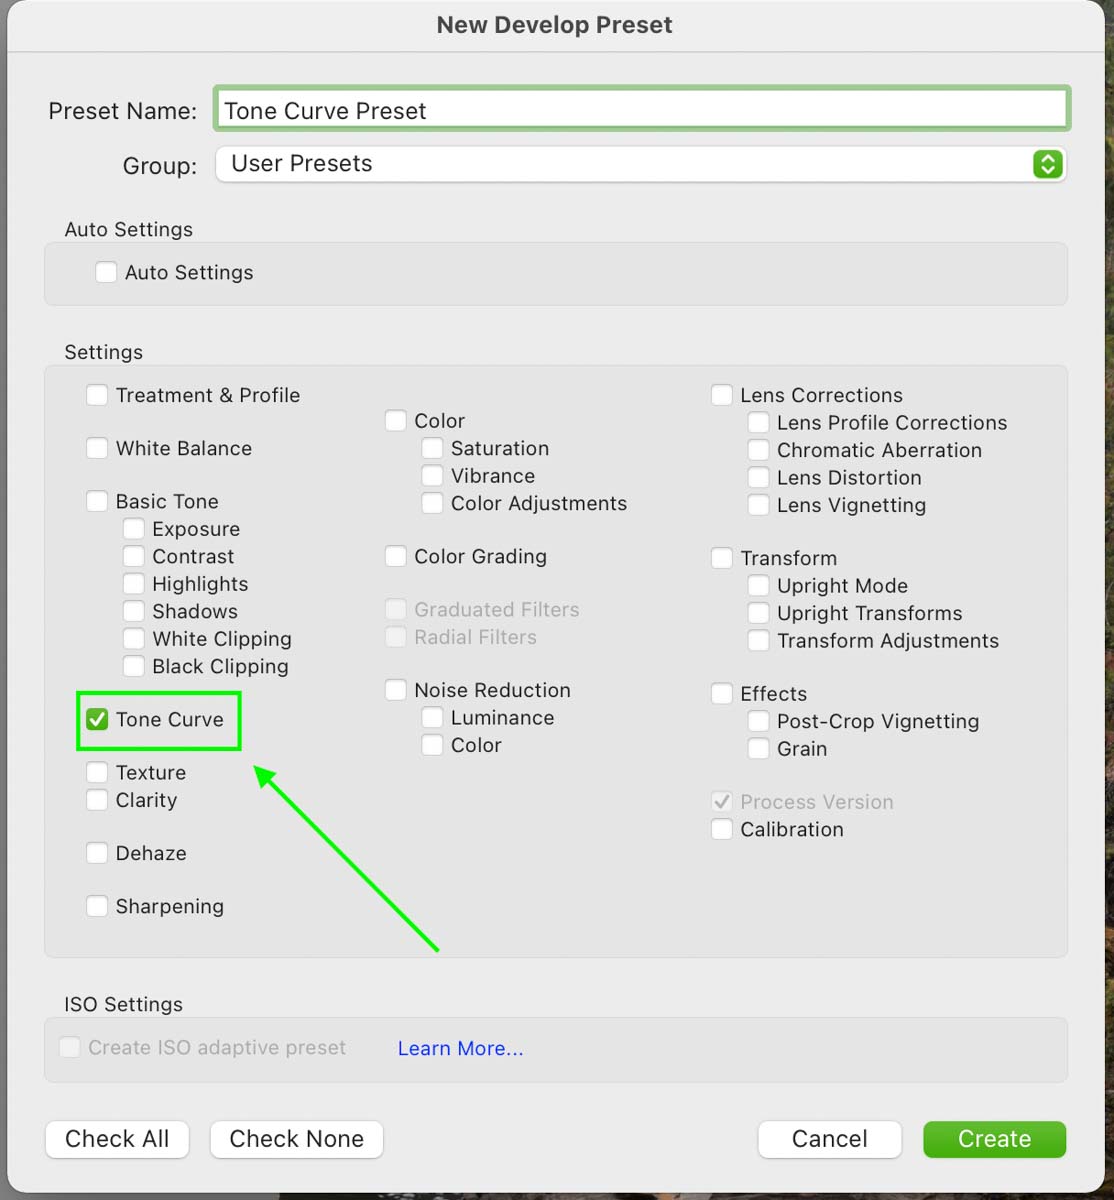
Then, since I want to save the Tone Curve adjustments only, I’ll check off Tone Curve. So now I’m left with only one setting checked off, which is the only adjustment that will be applied with this preset. Now give your preset a name, add it to a group and click Create.
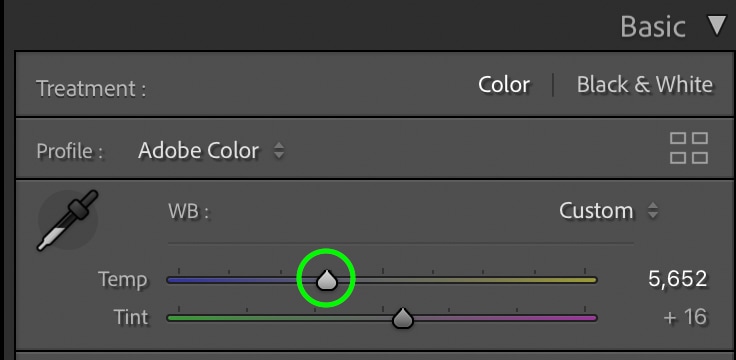
Next, I want to make a second preset that can be layered with my Tone Curve preset. So let’s add a quick white balance adjustment. Increasing the white balance, I now have a second adjustment added to the photo that I can create a preset from.
Once again, clicking on the + icon and choosing “Create Preset,” a preset dialogue box will appear. Press the “Check None” option to uncheck all your settings, then click on the new adjustment you made. In this case, that’s the white balance adjustment.
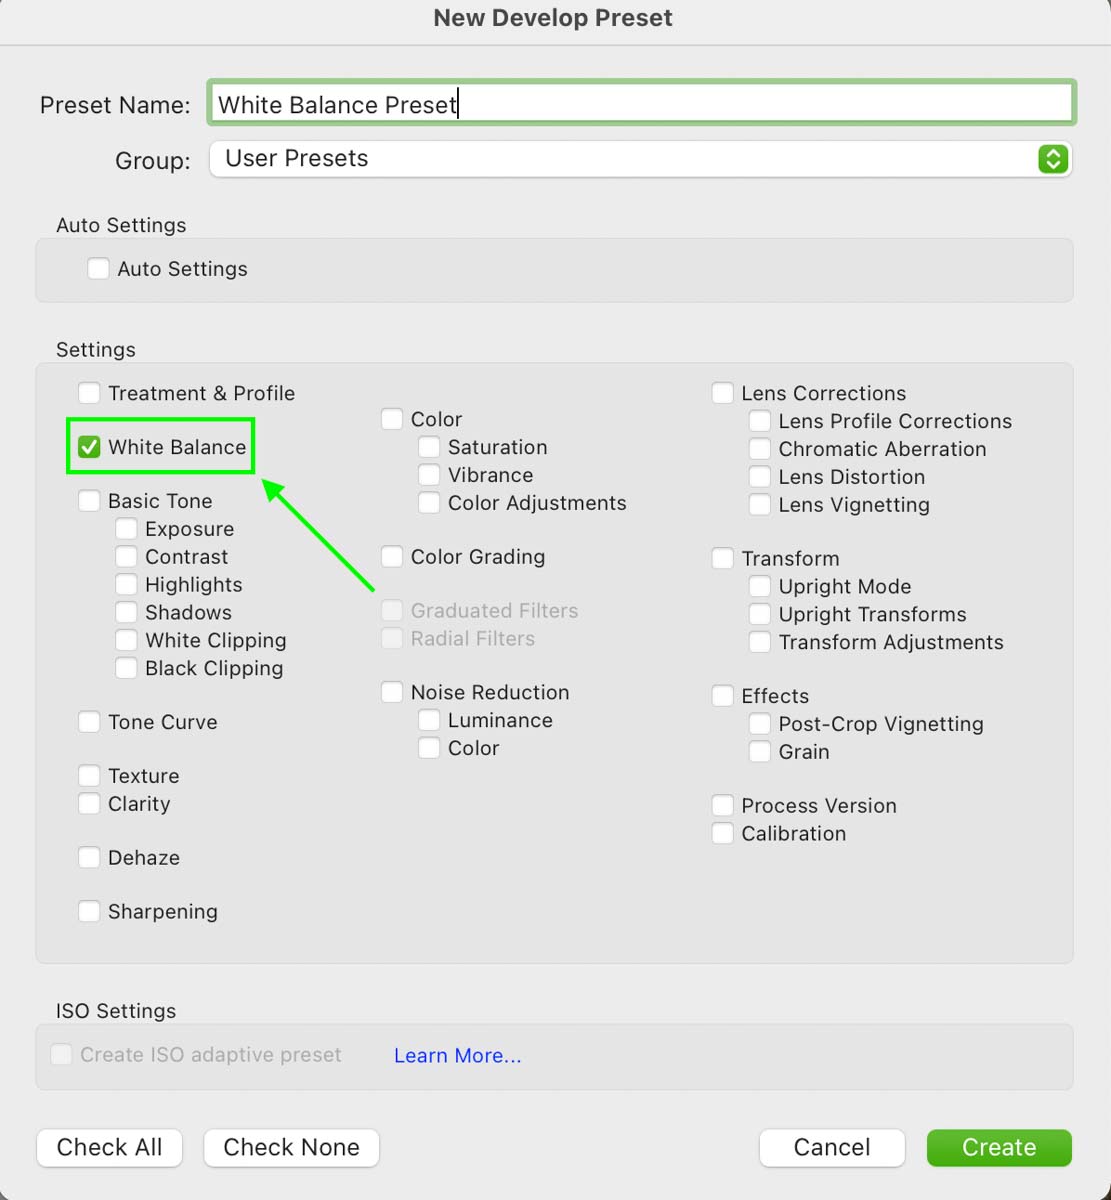
With the white balance checked off, give your preset a name, add it to a group, and click Create just like before.
Layering Your New Presets On The Same Photo
Now I have two new presets, one adjusting the Tone Curve, the other adjusting the white balance. Selecting a new image, I’ll click on the Tone Curve preset to apply it.
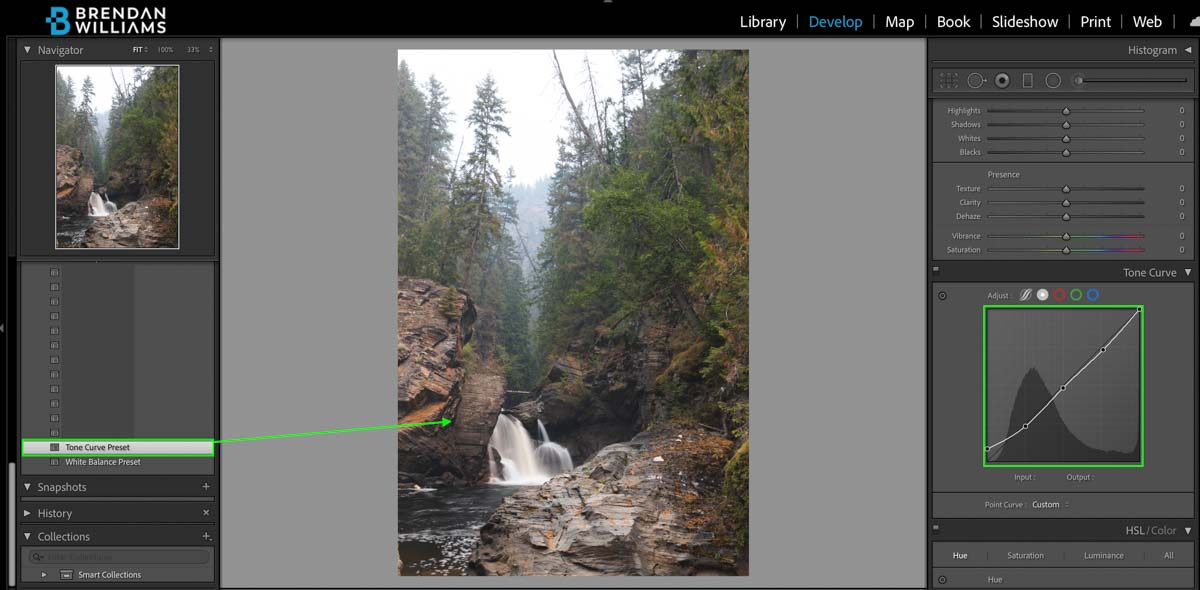
Then I’ll click on my white balance preset to apply that as well.
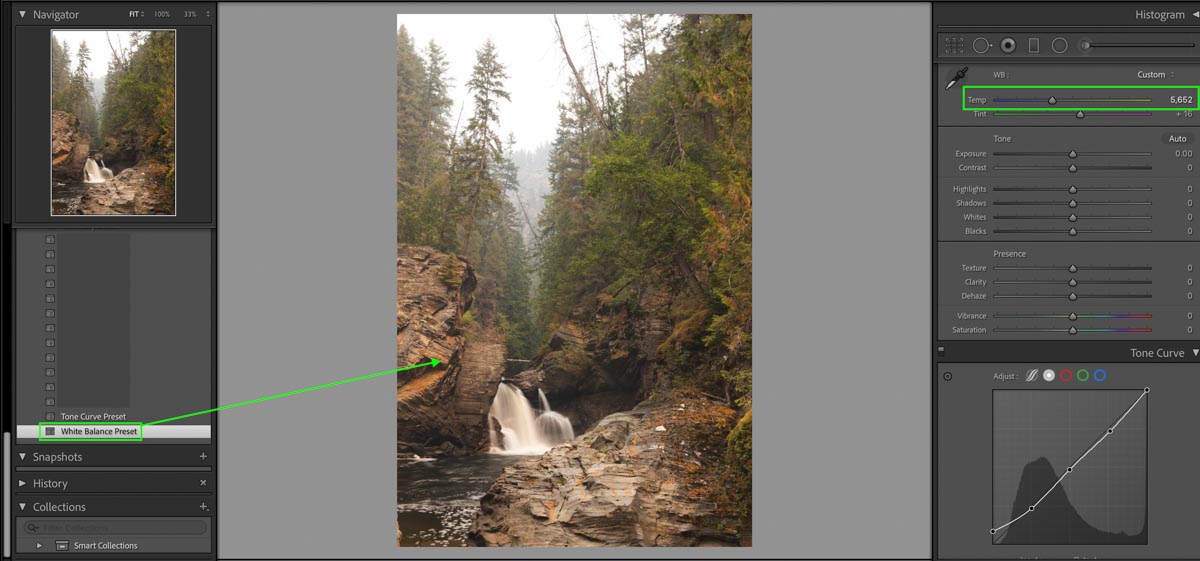
This time both of the presets have been applied without overwriting the other one. That’s because the preset settings are made to only edit that one adjustment without editing anything else. So, whenever you create a new preset, unchecking certain adjustments will allow you to add multiple presets at once.
How To Update Existing Presets To Be Used As Layered Presets
Unfortunately, you cannot directly update the settings of a preset after it’s made. However, you can easily create a more customized version of existing presets that can be layered.
First, apply a preset of your choosing onto your image. All of its adjustments will be applied at once and overwrite any previous edits made to your photo.
Now click the + icon within the Preset Panel and choose “Create Preset.”
Then you need to select the specific adjustments you want to keep from your existing preset. By choosing “Check None,” you can go through and only check off the adjustment you want to keep.
Then you can create a new preset with select adjustments saved from your original preset. You can rinse and repeat this process until you have a variety of presets based on your originals, except with only certain adjustments saved in their settings.
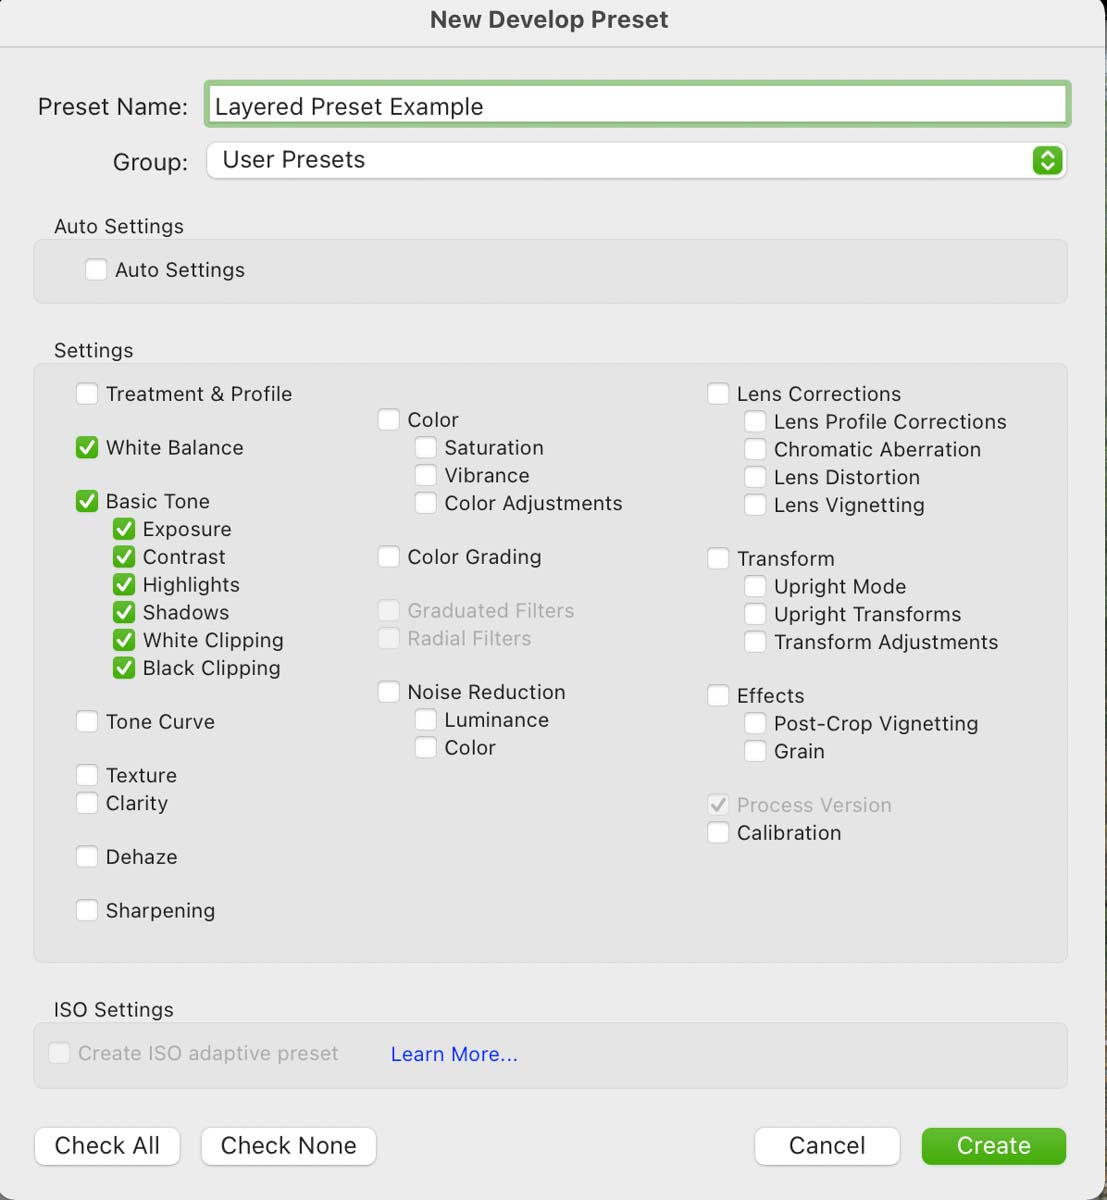
Now you can stack your existing presets together and use them on a single image. So you could take the color adjustments from one preset, the exposure adjustments from another, and a tone curve adjustment from a third preset, for example. Although you can’t directly change the presets you’ve already made, it’s a quick fix to create new presets based on the originals that only target certain adjustments.
So the moral of the story is that you can layer multiple presets together as long as the settings do not overwrite each other. For example, if one preset has white balance settings while another has exposure settings, they can be layered together. However, if both presets affect the same adjustment, then they will continually overwrite each other. So with this in mind, you can begin to create and use presets that can be layered together on a single edit!
Happy Editing,
Brendan 🙂
