

Each time you take a photo with your camera, the settings you used when you took that photo are saved in the image’s metadata or EXIF data. These include the aperture, ISO, shutter speed, focal length, and occasionally the type of lens used. While you can see camera settings in Lightroom a few different ways, you might have to search for them as their location isn’t always obvious.
It can be helpful to see which settings you used to take specific images, even when editing the image in post-processing. Your camera settings provide a point of reference for making edits to your image and could make it easier to fix things like exposure.
So here are the three main options for viewing your camera settings in Lightroom Classic & CC.
How To Find Your Camera Settings In Lightroom Classic
Option 1: The Metadata Panel
One of the easiest ways to view your settings is to head to the metadata panel. Metadata includes the camera settings and other information about your image, such as the date, time, and location where the photo was taken.
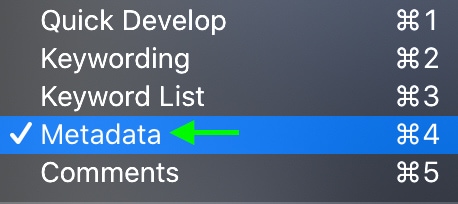
You can find the metadata panel in the Library module.

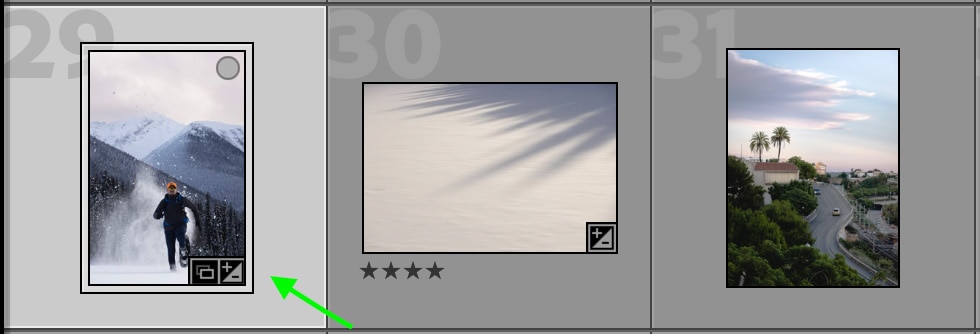
Select an image from the grid. Selected images are a slightly lighter gray than the rest.
Now, head to the metadata panel on the right side of the workspace. The metadata panel will show all the information saved for your image. Click the arrow to open the panel.
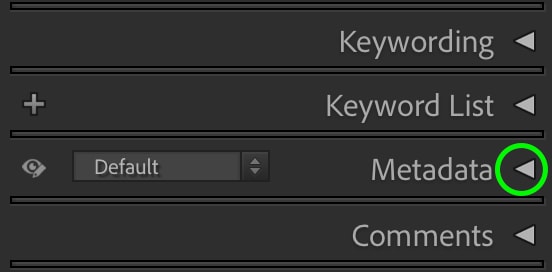
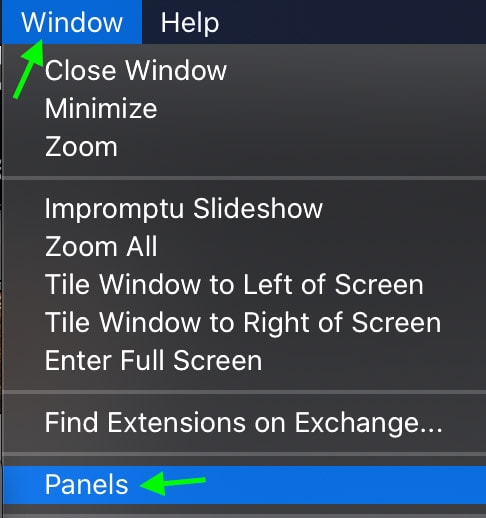
If you don’t see the metadata panel, you can head to Window > Panels and select Metadata. If there is a checkmark next to Metadata, it is available in the workspace.
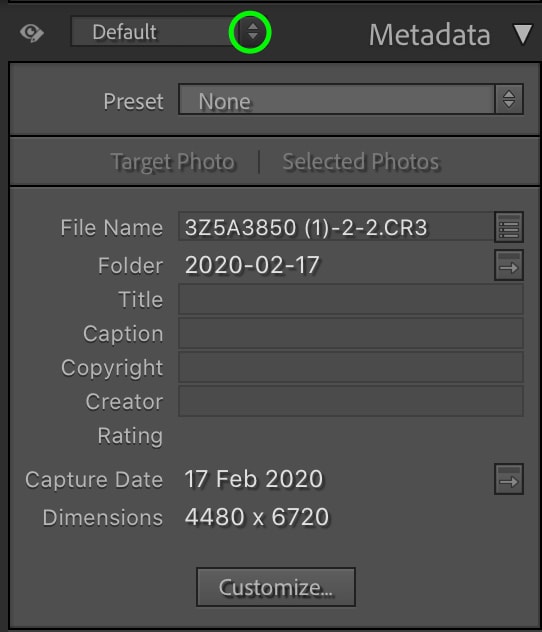
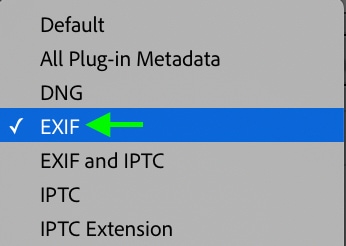
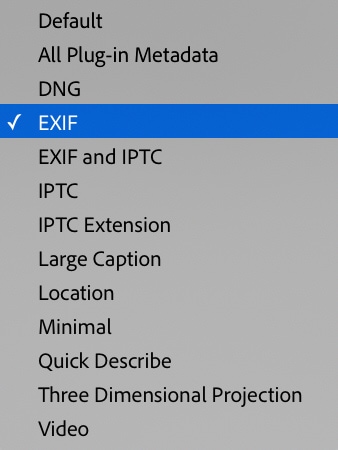
With the panel open, you’ll likely see the Default metadata settings, which only include the file name and folder, a title, caption, copyright, and capture date. If you want to see the camera settings, click the drop-down arrow next to Default and select EXIF.
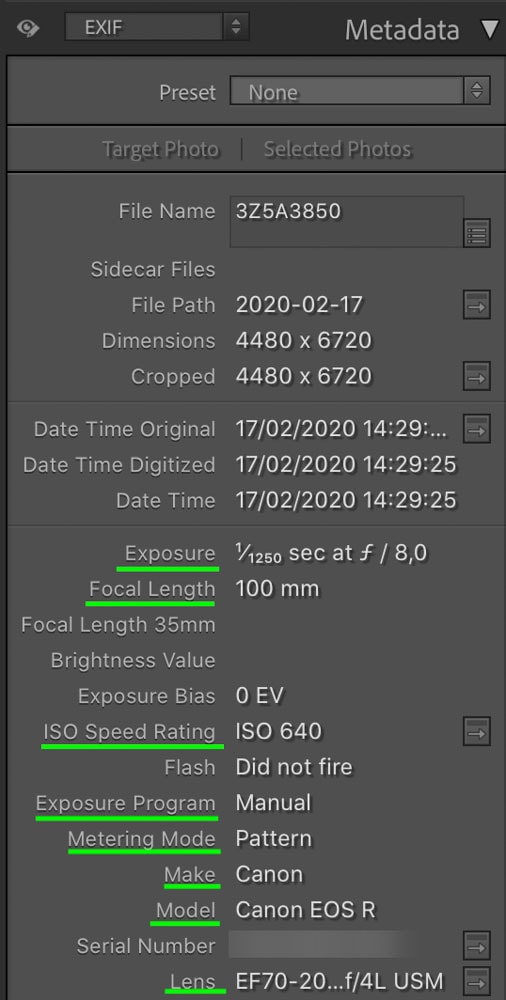
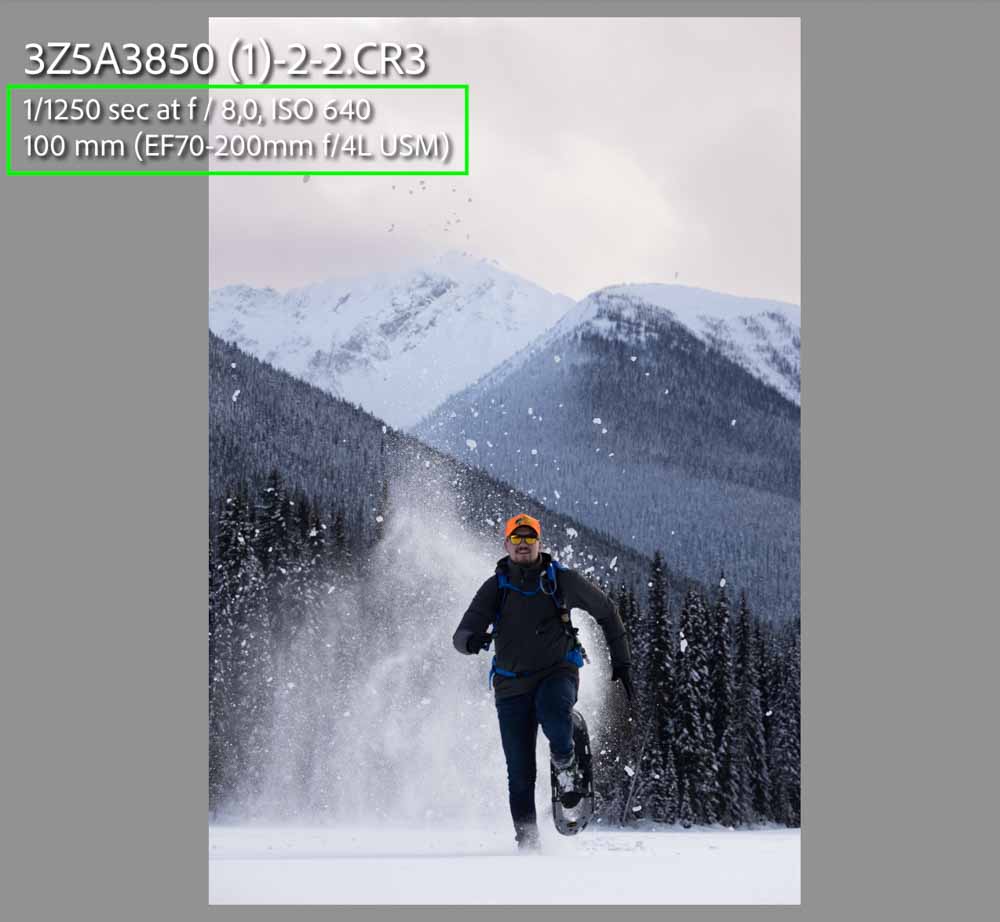
The EXIF data contains the camera settings at the time you took the image, as well as the make and model of the camera and lens. These and other relevant settings can be seen below, underlined in green.
Feel free to explore the other metadata options by returning to the drop-down bar left of the Metadata tab and selecting which type of metadata you’d like to view.

Option 2: The Loupe Overlay Shortcut
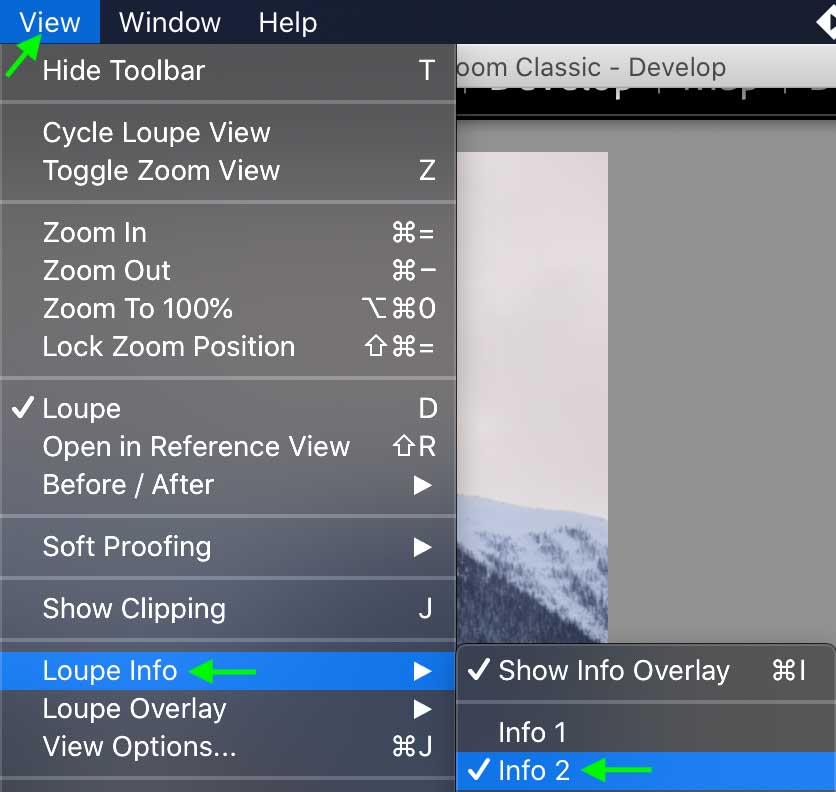
There is also a way to show your camera settings in the top left corner of your image while working in the Develop module. This is through one of Lightroom’s Loupe Overlays, the Info 2 overlay, which shows your camera settings at the time of taking the picture.
To toggle this overlay, you can use the shortcut Control + I (Win) or Command + I (Mac). The Info 2 overlay will appear in the top left corner of the image.
As you can see, in the above image, the settings appear below the picture’s name. If you do not see these settings, you may be toggling the Info 1 overlay, which shows the name and dimensions of your image. To display the Info 2 overlay with the camera settings, or if the shortcut isn’t working for some reason, you can toggle the Info 2 overlay manually by heading to View > Loupe Info > Info 2.
Again, the settings will sit at the top left corner. You can press Control + I (Win) or Command + I (Mac) again to remove the overlay.
Option 3: Beneath The Histogram
The last place you can view the camera settings is underneath the histogram within the Develop module. The Histogram is in the right panel at the top. Click the down arrow to open the panel if it isn’t already.
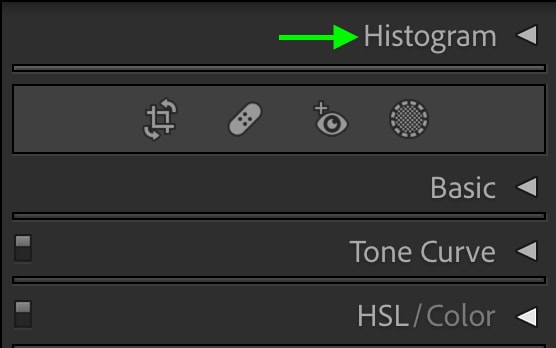
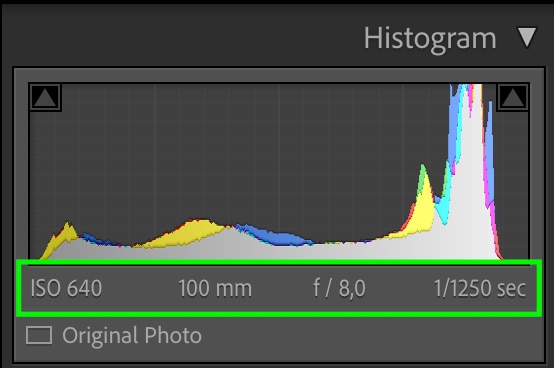
Below the histogram, you’ll see the ISO, focal length, aperture, and shutter speed.
How To View Your Camera Settings In Lightroom CC
You can also view your camera’s settings in Lightroom CC, Adobe’s cloud-compatible version of Lightroom (now commonly known as Lightroom). However, there is only one way to view your data, and the method is slightly different than in Lightroom.
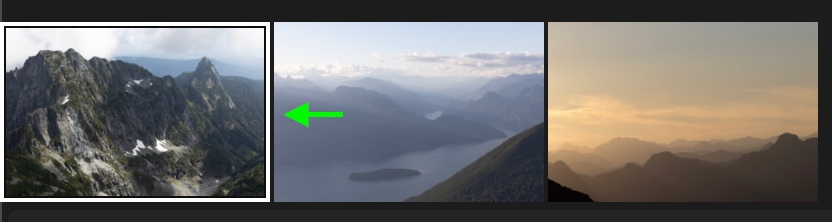
To view your metadata in Lightroom CC, first select the image you’d like to view the metadata for in the filmstrip.
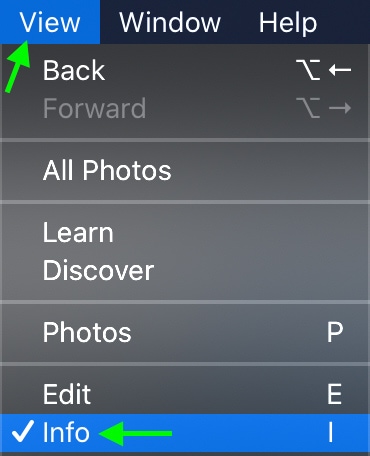
Now, you can head to View > Info.
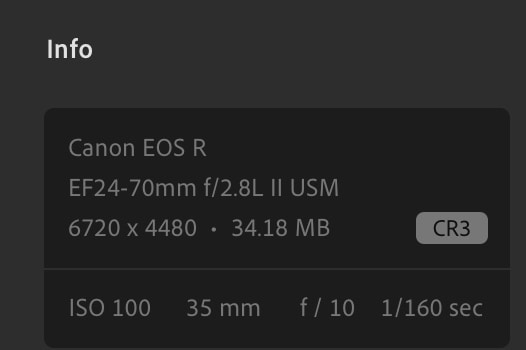
The camera info will show up in a panel on the right.
You can also click the Info icon at the bottom right to see the image’s data.

You can press the I key for a quicker shortcut, and the info will appear in the top left.
Once you can see your camera settings for an image, you can use them to assess how you took the photo and how you can improve it in post-processing. It also helps you learn what camera settings result in what kinds of images, which is information you’ll take with you in your future photography experiences.
