


When you’re trying to warp text in Photoshop, the transform and warp adjustments might be the first things that come to mind. The issue is that you’ll quickly realize warping text isn’t quite as easy as warping images or other raster layers.
Luckily, there are two easy workarounds that allow you to warp your text to any position you’d like without much effort. Let’s break them down.


Video Tutorial
How To Warp Text In Photoshop Using Warp Presets
Step 1: Select The Text And Click On The Warp Icon In The Options Bar
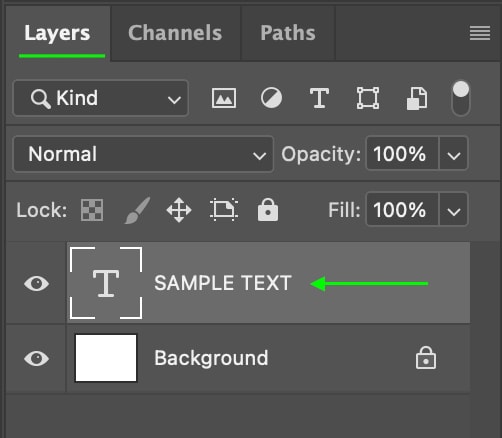
Add some text to your document using the Type Tool (T) in the toolbar. Add a text box by clicking anywhere on your document, and type whatever you want in the box. Now, make sure the Text Layer is selected in the Layers Panel.
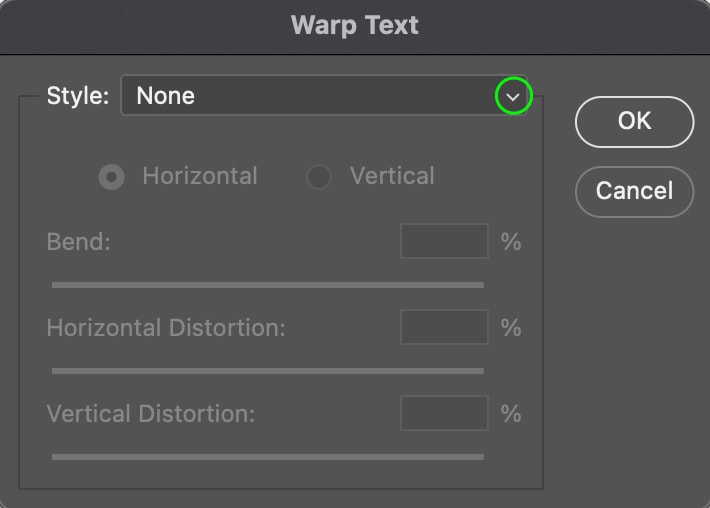
You can then toggle the Warp settings window by clicking the Warp Text icon in the Options Bar. The Warp Text window will open.

Step 2: Select A Warp Preset Style From The Drop-Down Menu
You can click the drop-down menu in the Warp Text window to view the different Warp Presets. There are many options, and each one will warp your text differently.
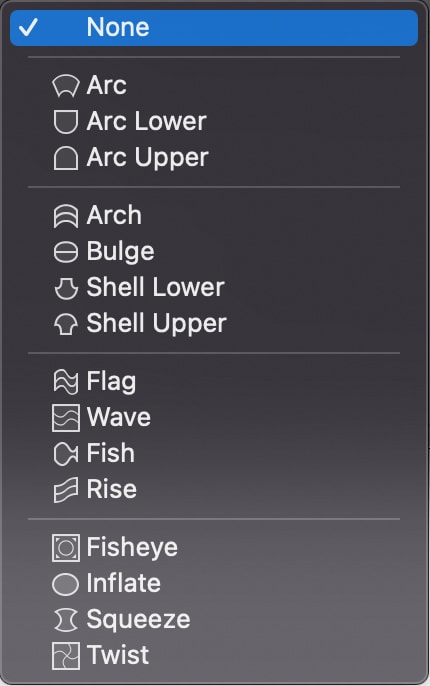
For instance, you can use the Arc or Arch presets to arc the text up or down. Or, you can opt for a funkier effect using one of the presets, like the Flag preset.


Step 3: Adjust The Effect Further Using The Settings (Optional)
Once you’ve applied one of the presets, you can make further edits to the warp effect using the settings provided.
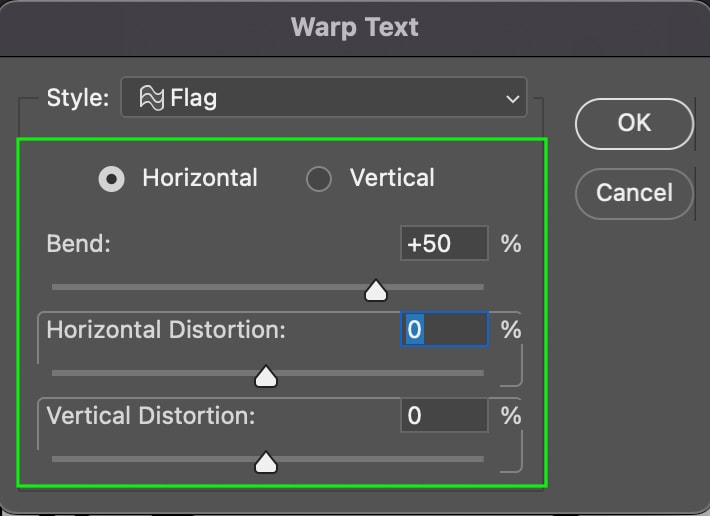
You can set whether the effect is applied vertically or horizontally, though with some settings, the vertical distortion is too much that the text becomes unreadable. Therefore, it usually is best to leave this set to Horizontal.
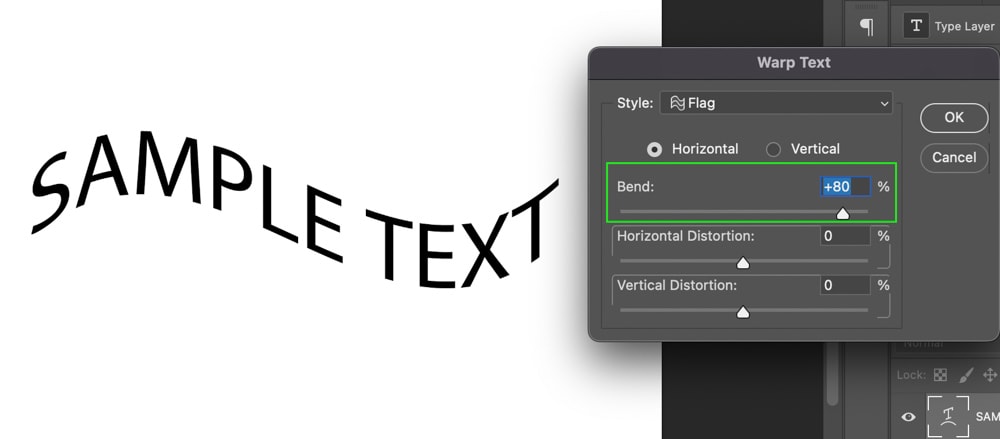
The Bend setting will increase or decrease the degree of curve in the text. If you bring the Bend setting back into the negative numbers, it will reverse the direction of the bend.
The Horizontal and Vertical Distortion settings control the amount of stretching applied to the text either horizontally or vertically. Moving the slider toward the center decreases the effect while moving it to the right increases it in one direction, and to the left into the negative numbers increases the effect in the opposite direction.
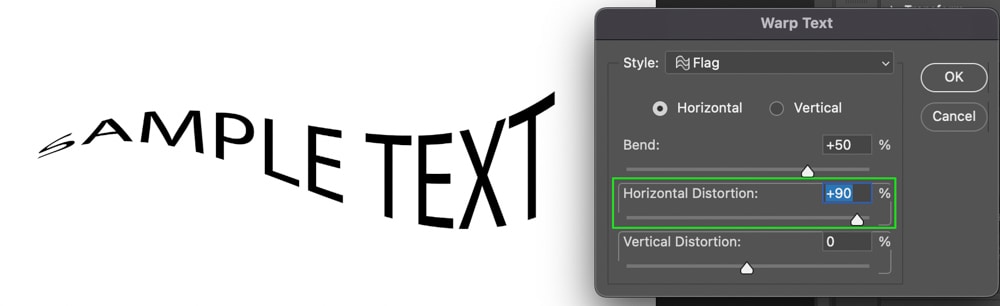
Once you’re finished, click OK. Your text will appear warped in the way you’ve edited it.
How To Warp Text In Photoshop Using The Warp Tool
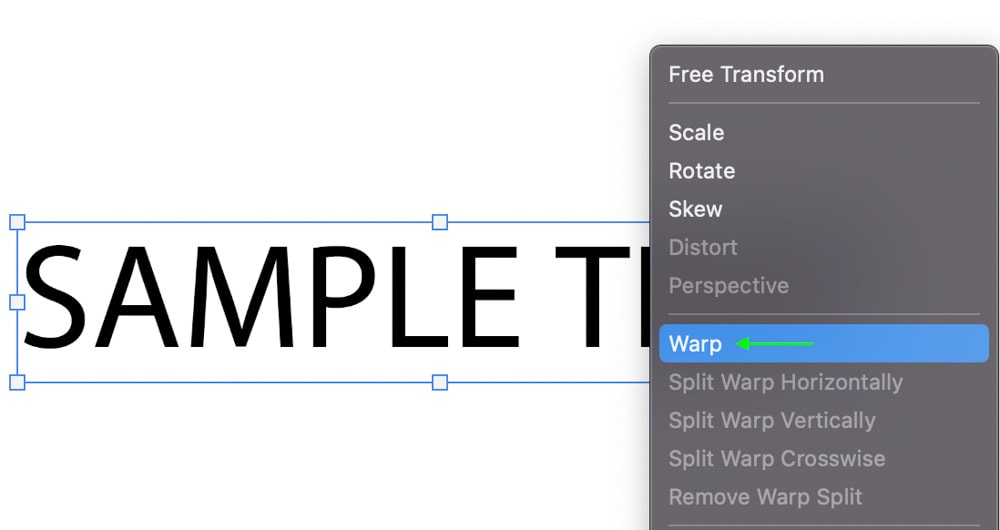
Step 1: Right-Click On The Text Layer And Select Convert To Smart Object
To edit the text using the Warp Tool, you must first convert the text layer to a Smart Object. This allows you to edit non-destructively and provides more flexibility over the warp effect.
To do this, head to the Layers Panel. With the Text Layer selected, right-click or Control + click on the Text Layer and choose Convert to Smart Object.

Step 2: Press Control/Command + T, Right-Click On The Text, And Select Warp
Now, you can toggle the warp controls by activating the Transform Tool by going to Edit > Transform > Warp. You can also press Control + T (Win) or Command + T (Mac), right-click or Control + click the text, and select Warp. The warp mesh appears over the text in a rectangular shape.
Step 3: Drag Anchor Points To Warp The Text
The warp preset should be set to Custom in the Options Bar, but you can use any of the presets we went over in the first method as a starting point if you’d like and then warp the text further.

Or, you can click any anchor points around the text and drag them to move that specific area of the text in any direction you’d like.
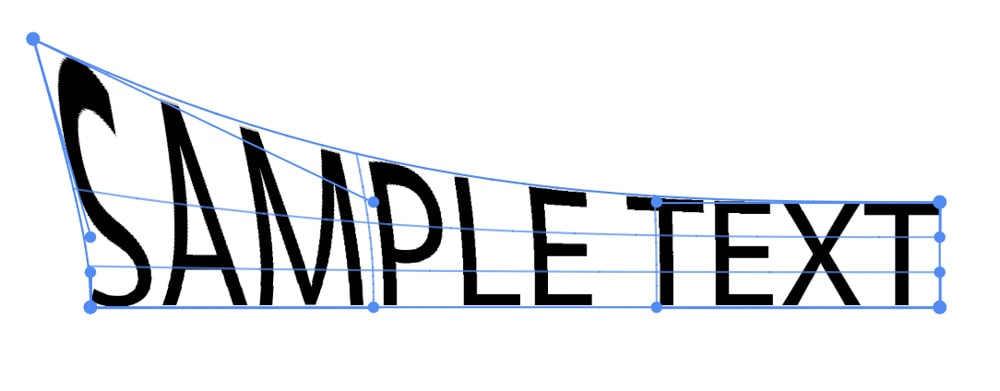
As you can imagine, the warp effects you can make by adjusting the toggles are nearly endless. Feel free to experiment with the different toggles until you achieve the desired effect. Once you’ve finished warping the text, press the Enter key to apply the warp effect to your text and exit the warp settings.

For more simple warping needs, you should use the warp presets in the Options Bar. However, if you have more specific warping adjustments in mind, converting your text layer into a smart object and using the actual Warp Tool will give you all the freedom you need!
Happy editing!
