
There are several ways to curve text in Photoshop. Some can be achieved with a few clicks, while others require more effort but give you more control over the curved text created.
Here are the three best ways to do it. Whether you want a quick warp option, a customizable path method, or to create circular text using a circle.
Method 1: Curving Text Using A Warp Preset
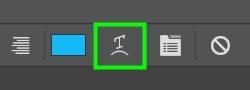
Step 1: Select The Text And Click On The Warp Tool In The Options Bar
First, you need to write any text on the canvas. To do this, enable the Type Tool (T) in the Toolbar. Then, enter the desired text on the canvas. With the Type Tool active, go to the Options Bar and click the Warp Tool button.
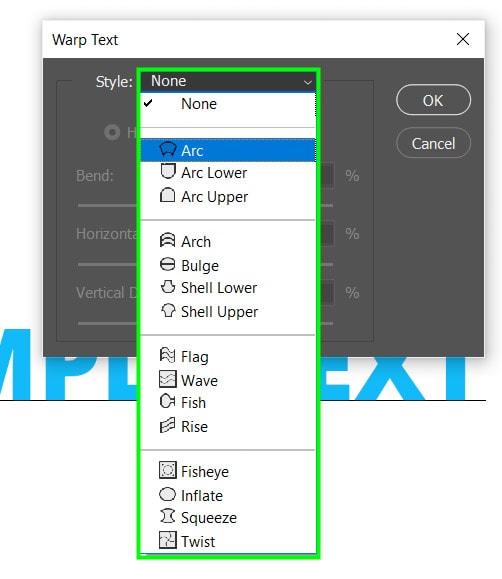
Step 2: Select A Preset Warp Style
Within the Warp Text panel, select one of the arch styles available in the Style drop-down menu. To get a curved text, it’s better to stick with the first three options.
Step 3: Adjust The Warp Tool Settings (Optional)
Adjust the warp settings as needed for the result you want.
- Leave the Horizontal option checked so you can have the text curved horizontally.
- Control the curve’s prominence and orientation by adjusting the Bend. Positive percentages bend the curve downwards, and negative percentages bend it upwards.
- In Horizontal Distortion, you can make the curve more warped on its left or right side. If you want both sides equally distorted, set the Horizontal distortion to zero.
- Adjusting the Vertical Distortion slider will make the text appear vertically farther or closer to the screen.
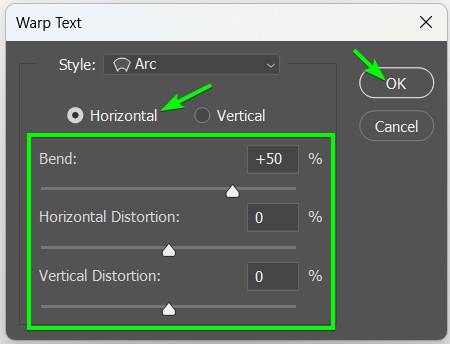
Once you’ve adjusted the settings to your liking, you will have curved the text.

Method 2: Creating A Curved Pen Path To Curve Text In Photoshop
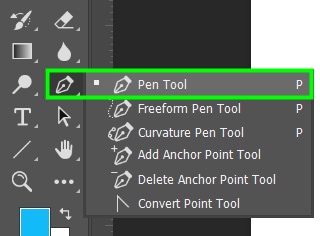
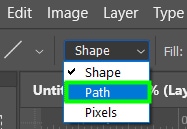
Step 1: Draw A Path Using The Pen Tool (P)
First, enable the Pen Tool (P) from the Toolbar. Then, go to the Options Bar and change the pen mode to Path.
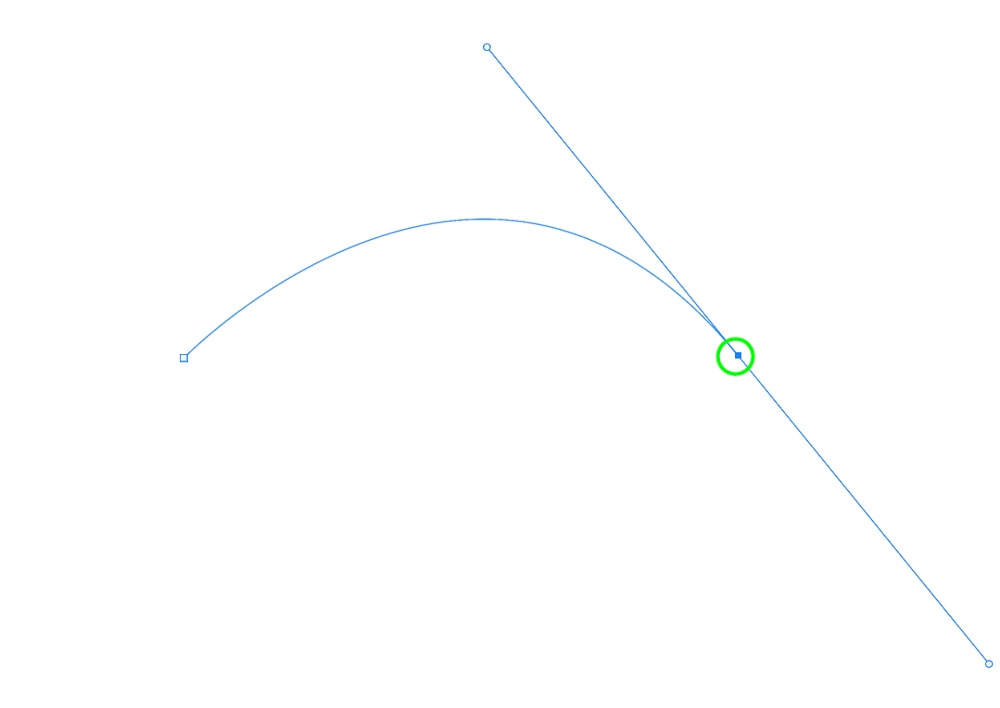
After that, click once on the canvas to add the first anchor point. Then, click another part of the canvas to place the second anchor point, but this time, hold Shift while dragging with the mouse down. That will create a curved path.
Step 2: Type Your Text On The Path Using The Type Tool (T)
Once the curved path is created, enable the Type Tool by pressing T. You can also customize the text using the options available in the Options Bar if you want. Now, hover over the path until your cursor is crossed by a curved line. Next, type any text in the curved path.
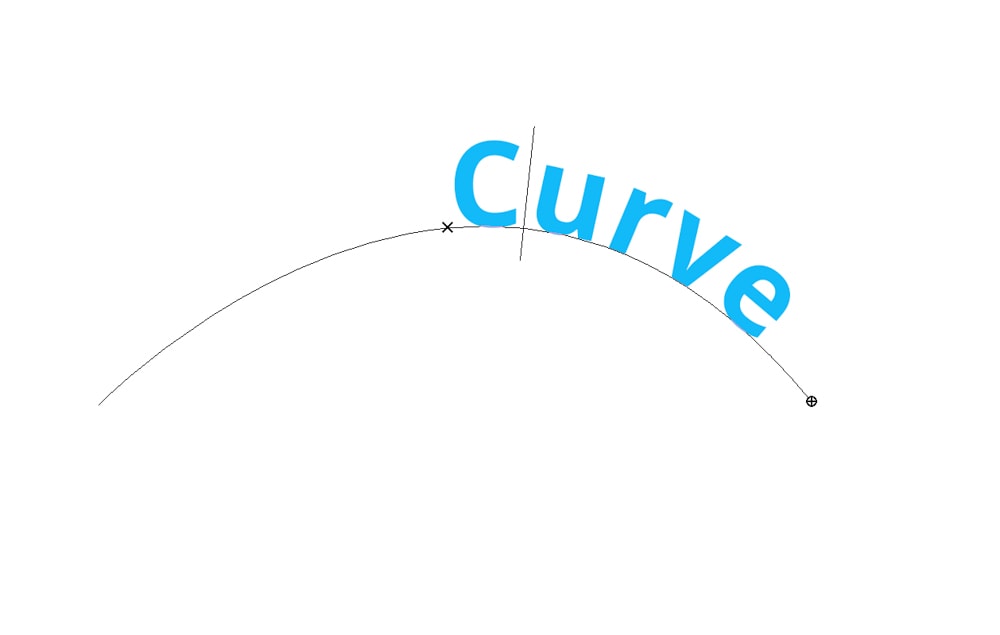
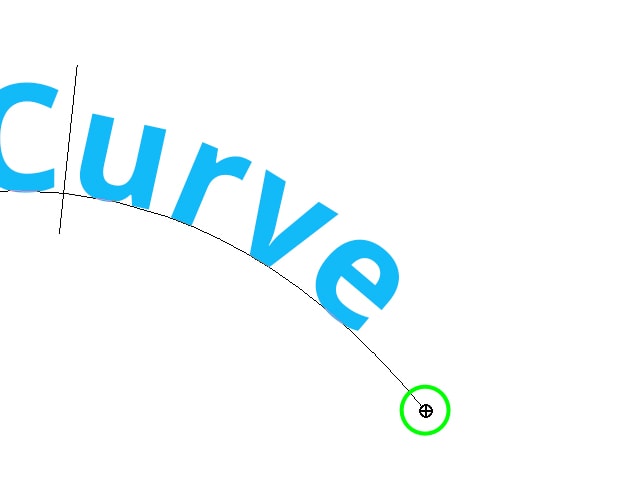
The text in the curved path has a start and end point. An X icon represents the start point. The endpoint is represented by a circle icon.
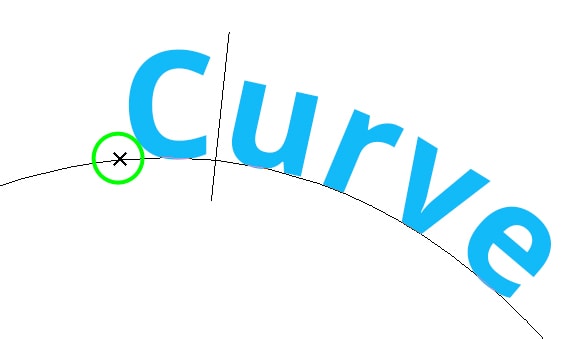
Step 3: Adjust The Start And End Points (Optional)
You can change the text start and end points so you can add more text to the path. To do this, enable the Path Selection Tool (A) from the Toolbar.

Then, hover over the text until an arrow pointing to the right appears next to your text. Position the cursor at the beginning of the text and drag it to the left. That will bring the starting point to the left and make room for more text.

Method 3: Using A Shape Layer To Curve Text In Photoshop
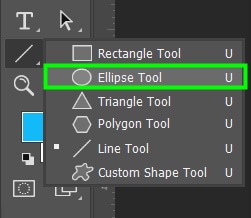
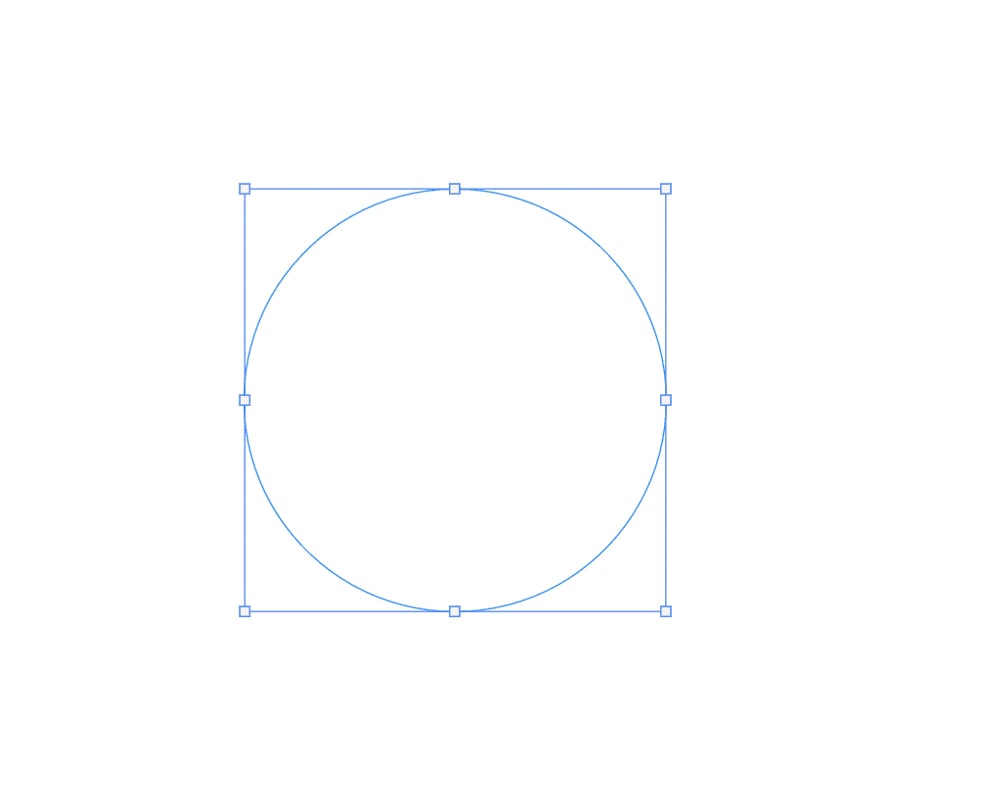
Step 1: Create An Ellipse Shape On The Canvas
First, go to the toolbar and select the Ellipse Tool (U) under the Shape Tools. Then, go to the Options Bar and change the shape mode to Path.
After that, click and drag on the canvas to create your ellipse. Ensure the Fill and Stroke options are set to Transparent.
Step 2: Type Text On The Path Using The Type Tool (T)
Once the shape is created, enable the Type Tool by pressing T on your keyboard. Then, hover over the shape until your cursor is crossed by a curved line. Next, enter your text on the curved path.
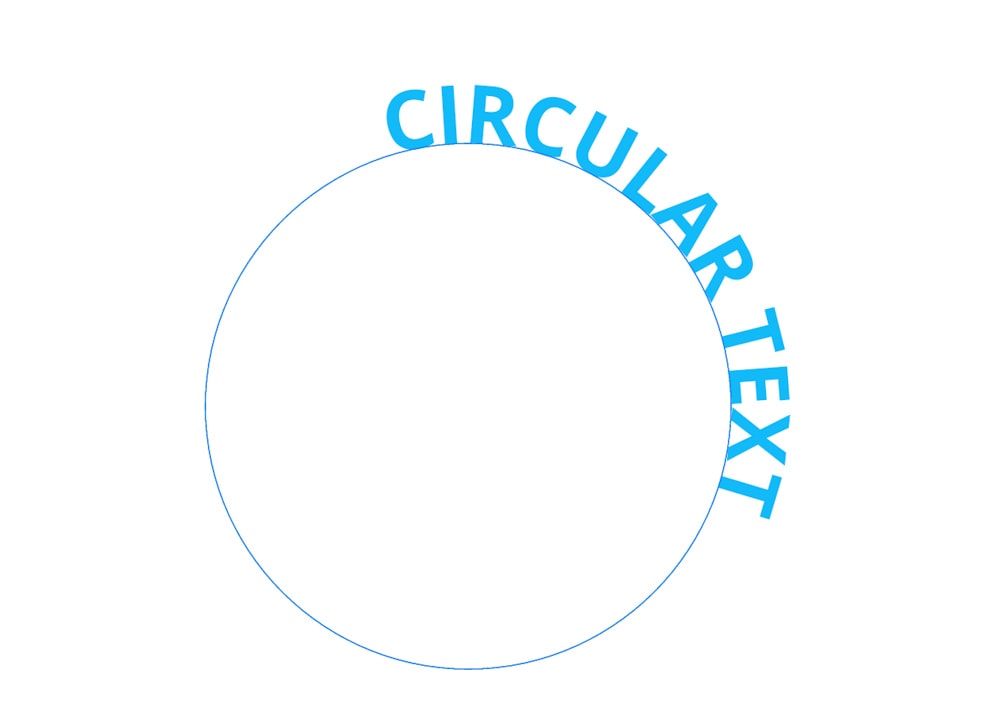
You can adjust the text start and endpoint following the steps learned in the previous section to change a curved pen path.
Step 3: Rotate The Text Position (Optional)
Select the text layer in the Layers Panel. Then, hit Control + T (Win) or Command + T (Mac) to enable the Transform Tool. After that, hover over one of the handles around the circle until it turns into a double-curved arrow.
Then, rotate the text in the direction you want. In my case, I turned my text to the center of the canvas.
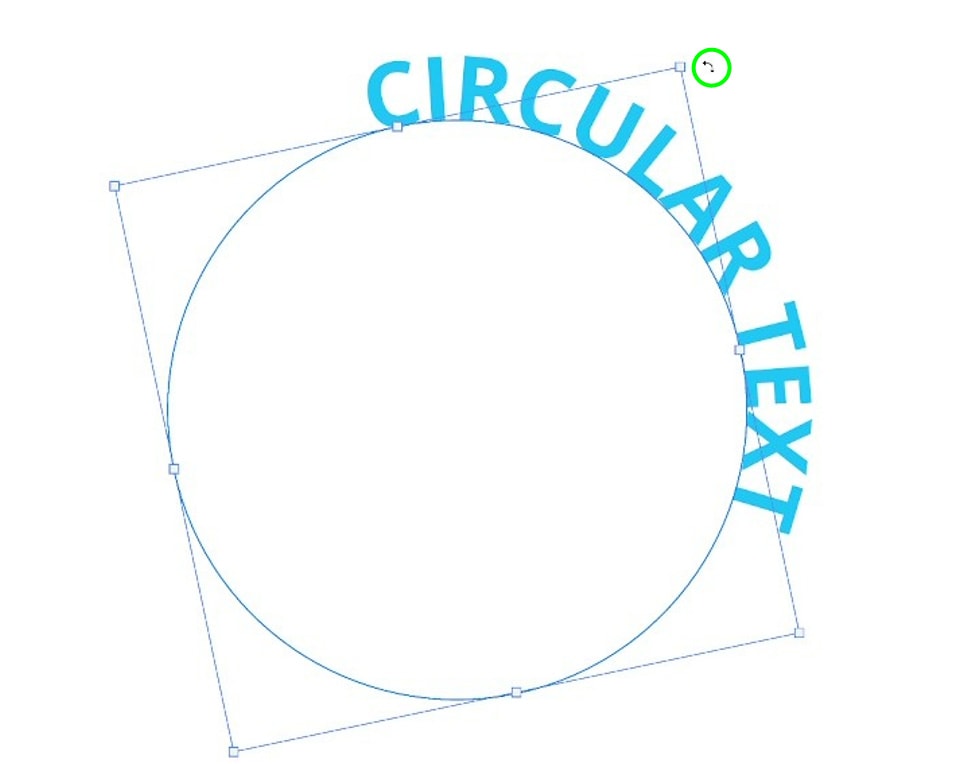

When you’re finished adjusting the text position, hit Enter on your keyboard to confirm the action, and the text will be ready to be used in any way you want.

Curving text is one of the most popular ways to stylize text. It adds an aesthetic appeal to it, which is why I often use it in posters and ads, and I also recommend you use it whenever possible. With Photoshop’s customization options for curved text, your result will surely meet your expectations.
Happy Editing!


