The Pen Tool is effective and user-friendly with multiple uses. I will show you how to use the Pen Tool in Photoshop to create complex selections, draw shapes, remove the background from an image, or create custom fills and strokes. This tool lets you create precise paths that can later turn into a selection. Once you know how to use it correctly, you can also manipulate it to form any shape or path!
Video Tutorial
What Is The Pen Tool In Photoshop?
The Pen Tool in Photoshop makes paths on an image to create complex selections, masks, or custom shapes. By creating anchor points as you click, the Pen Tool connects each point to create a path. This path can later be used to remove backgrounds or create masks without affecting any pixels directly.
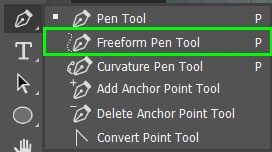
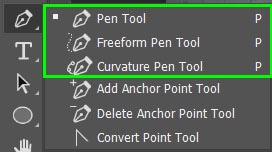
The Pen Tool is found in the toolbar or by pressing P. In Photoshop, there are three types of Pen Tools. Each creates similar results but works slightly differently to reach the desired outcome. The type of Pen Tool you use will depend on the type of the project.
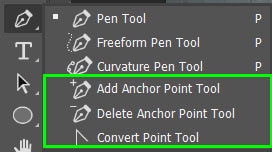
How To Use & Edit Anchor Points With The Pen Tool
How To Edit Anchor Points In Photoshop
To edit the anchor points, create a straight line with the regular Pen Tool (P). Hold Shift while placing the anchor points on the canvas to make a straight line. After creating the path, you can add an extra anchor point by hovering the mouse over an area of the path. Once you notice a plus sign appears next to the mouse icon, click to add the anchor point. You can also use the Pen Tool fly-out menu to select the Add Anchor Point Tool.


To delete an anchor point, hover the mouse over an existing anchor point until you notice a minus sign next to the mouse. Click on the anchor point when the minus sign appears, and the anchor point will be deleted. You can also use the Delete Anchor Point Tool from the fly-out window to delete an anchor point.
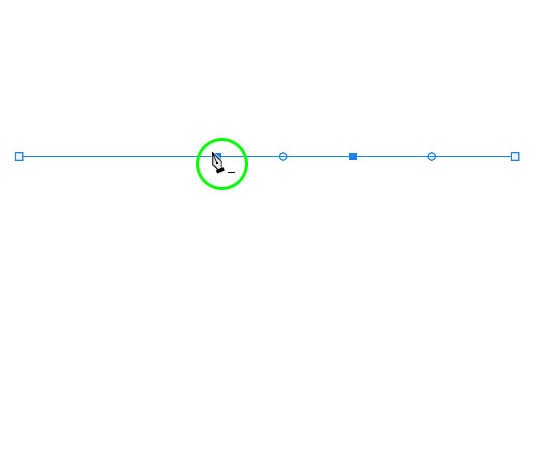
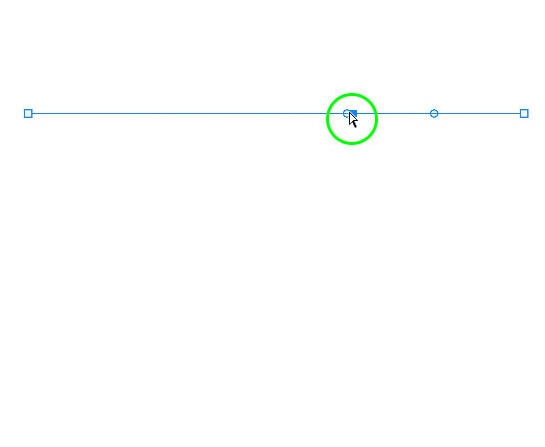
If you want to move an anchor point, either along the current path or to change the path’s shape, hold Control (Win) or Command (Mac) while clicking on an anchor point and dragging it to the new point. When you hold Control/Command, you will notice the pen icon turns to a white mouse icon, which means you can move the point around.
How To Create A Curved Path With The Pen Tool In Photoshop
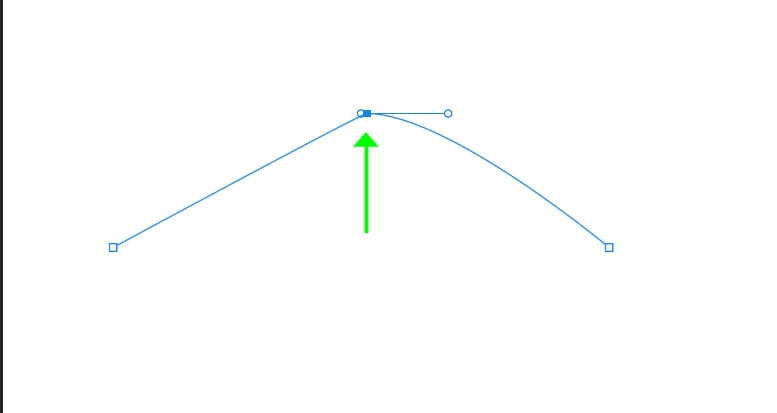
To curve a path, start by clicking on a point where you want the path to begin. Choose a point on the curve to place the next anchor point. When you click to add the point, hold the mouse down while moving it around. The anchor point will remain on the point you selected, and when the mouse moves, a control arm will move with it. Let go of the mouse when you are happy with the curve.
At some point, you may find that the new point won’t follow the line accurately because it follows the control arm’s direction to place new points. To delete the last anchor point to correct the path, press Control + Z (Win) or Command + Z (Mac). You can also click on the anchor point and press Delete.
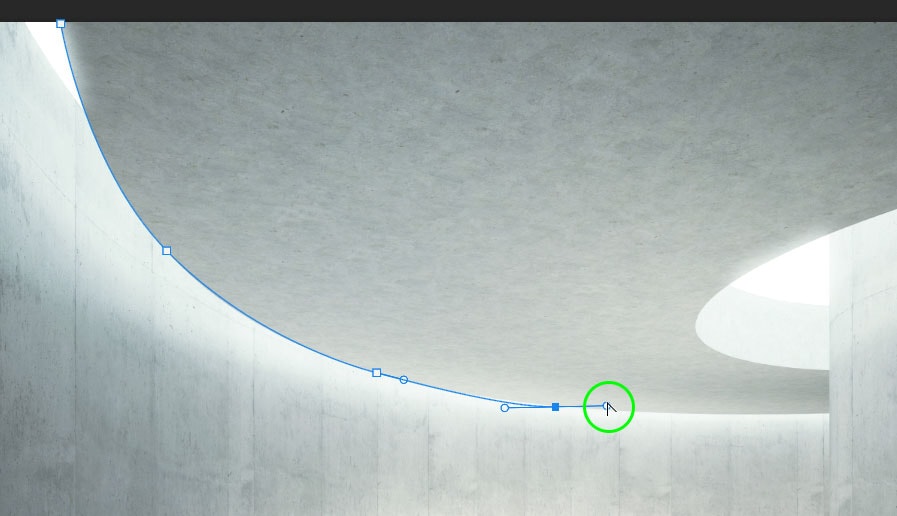
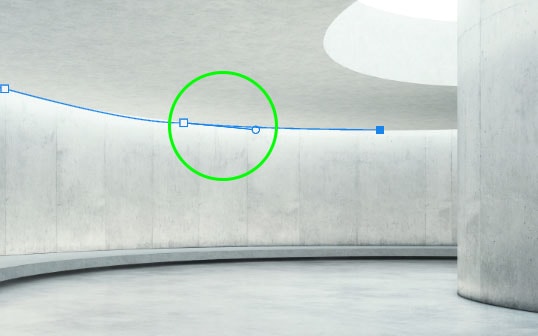
Select the Convert Point Tool from the Pen Tool fly-out menu or hold Alt (Win) or Option (Mac) and click on the white circle attached to the control arm. When holding Alt/Option or choosing the tool from the toolbar, the pen icon will turn into a triangle icon.
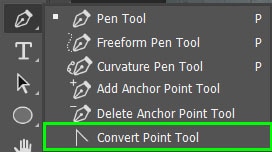
Once the cursor is a triangle shape, you can click on the circle of the control arm and move it around. Place the control arm in the direction you want the new path line to follow. The path will move in the direction the control arm is placed.
How To Create A Selection From A Pen Path In Photoshop
To create a selection from the path you have created, you can do one of two things. Firstly, click the Selection button next to Make in the Options Bar.

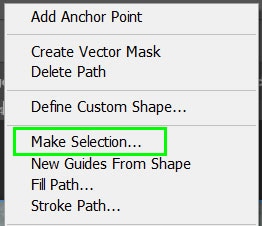
The other option is to right-click (Win) or Control + click (Mac) anywhere on the path you created and select Make Selection.
Once you have done either of these options, the Make Selection Dialogue Box will open. In this box, you can set the Feather Radius according to how sharp you want your selection to look. For sharp edges, use a low radius, such as 0.5, and for a more feathered selection when cutting objects out of the background, set the Radius slightly higher.
Then check the box next to Anti-aliased, and check the box next to New Selection.
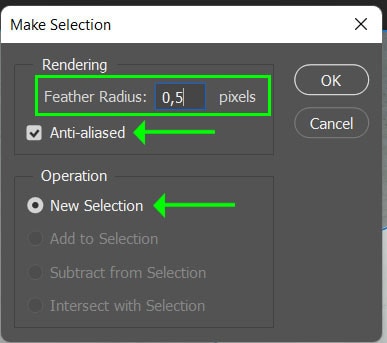
Once you have changed the settings, press OK, and you will see a selection instead of the path you created.

How To Remove Backgrounds With The Pen Tool
Step 1: Select The Pen Tool Of Your Choice And Create A Path Around Your Subject
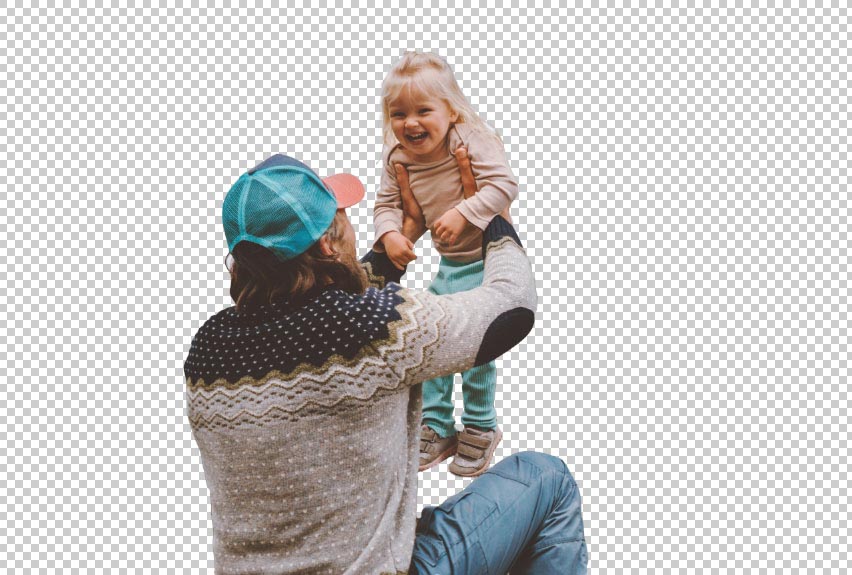
To remove the background with the Pen Tool, open your image and select the Pen Tool of your choice. In this instance, I will choose the Freeform Pen Tool with the Magnetic setting activated to create a path around the two people in the image.

Once the tool is selected, draw around the people in the image. Stay close to the edges to allow the path to snap to the edges.

Step 2: Convert The Path To A Selection
Once the path is created, convert the path to a selection by clicking the Selection option in the Options Bar.
Set the Feather Radius to 0.5, and check Anti-aliased and New Selection. Then click OK.
Once you make the selection, you will see the marching ants pattern in place of the path.

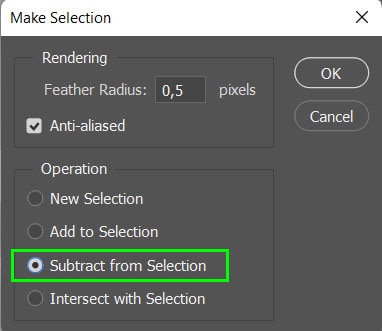
Step 3: Remove Areas From The Selection (Optional)
There may be areas to remove from the selection, such as between the man and the girl. Create new paths in these spaces, then hit Selection in the Options Bar. When the dialogue box opens, check the box next to Subtract from Selection.
You now have a better selection of the subjects. You can refine the selection as you would when using the Quick Selection Tools.
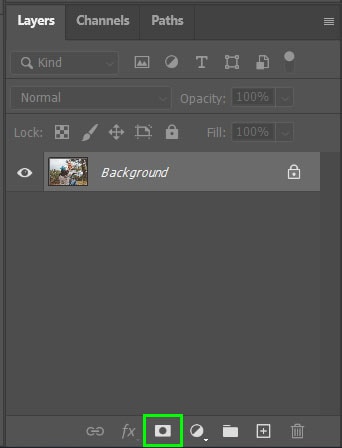
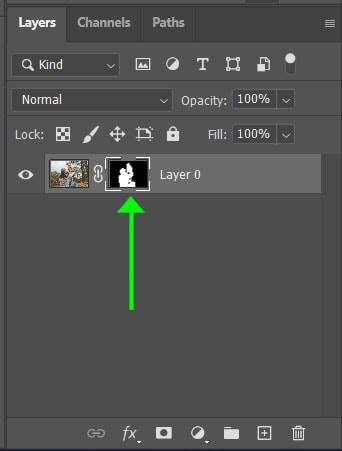
Step 4: Remove The Background By Adding A Layer Mask
Once you have refined the selection, click on the layer mask icon at the bottom of the Layers Panel. Once the layer mask is added, the mask thumbnail will be added to the layer in the Layers Panel, and the background will be removed from the image.

How To Create Shapes With The Pen Tool In Photoshop
You can also use the Pen Tool to create any shape you want. Before making the shape, you can adjust the stroke, fill, and stroke size. Start by selecting the Pen Tool you need. In this case, I will choose the Curvature Pen Tool.
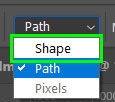
Next, I need to adjust a few settings in the Options Bar. Firstly, click the drop-down menu next to Path and select Shape. The rest of the settings in the Options Bar will change once Shape is selected.
Then, you can add a Fill color to the shape or keep it transparent. You can change the Stroke color or make it transparent and increase the Size of the stroke and change the nature of the stroke if you want Dotted or Dashed lines.

Once you have changed the settings, start drawing your shape by adding anchor points in the shape you want.

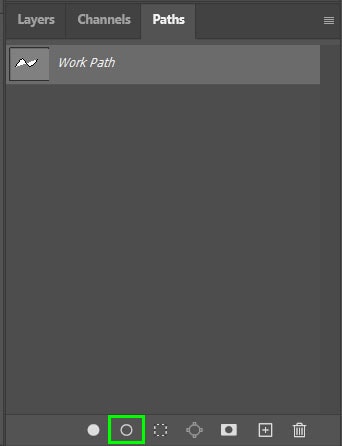
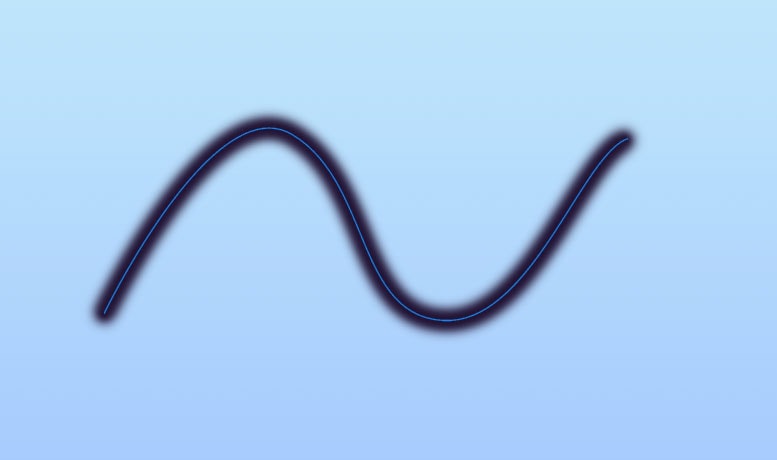
How To Add A Stroke To A Pen Path In Photoshop
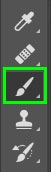
Once you have created a path, you can add a stroke to the path using any brush. To add a stroke to a pen path, select the Pen Tool (P) and draw a path on the canvas. Then select the Brush Tool (B) and change the settings in the Options Bar to set the Brush Type and Size.
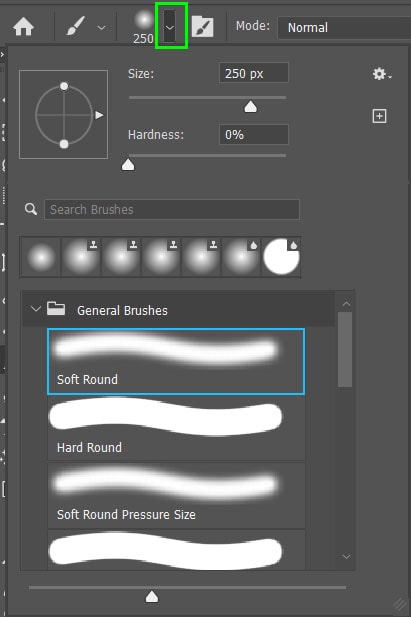
Next, navigate to the Path Panel, which should be a tab next to the Layers and Channel panels. If it’s not visible, navigate to Window > Paths. Then press the Stroke Path with Brush icon at the bottom of the panel. The Path will now have a Stroke added to it with the Brush settings you chose.
Types Of Pen Tools In Photoshop
In Photoshop CC, there are three primary pen tools available to create paths:
- The Pen Tool
- The Freeform Or Magnetic Pen Tool
- The Curvature Pen Tool
To access the different types of Pen Tools, click and hold the Pen Tool icon. The fly-out window will contain the Freeform Pen Tool and the Curvature Pen Tool. The first three tools are used to create new paths. The bottom three tools are used to manipulate paths that are already created. You can use the last three tools to delete or add anchor points to a path and re-adjust the control arms to determine how the anchor point interacts with the surrounding anchor points.
– The Pen Tool
The first Pen Tool lets you manually place anchor points to create a specific path that you can use to make a selection, shape, or stroke.
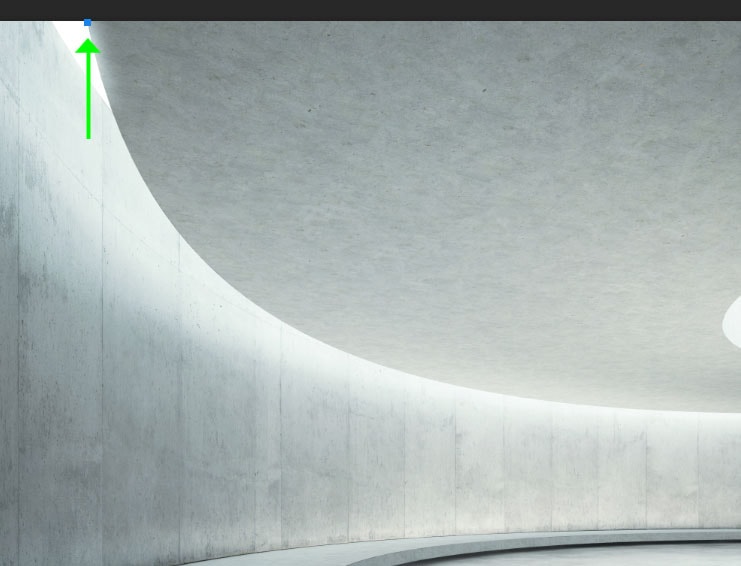
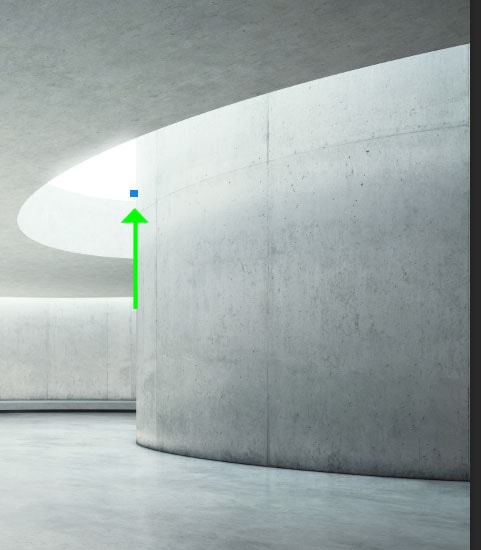
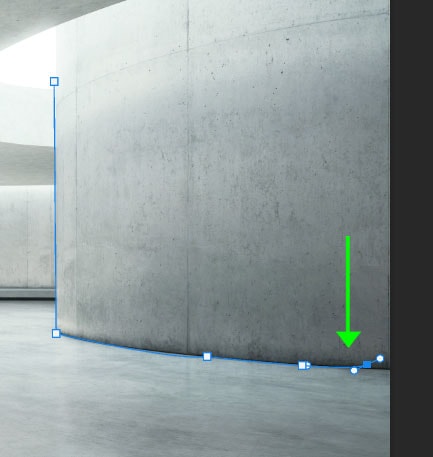
To use this tool, select a point on your image where you want the path to start and click on the spot. A blue square will appear to indicate the starting point of the path. Move away from the block and click on an area where you want the path to appear. A straight line will form between the two points you created, indicated by a blue line. The block at the starting point will turn white, while the new point will have a blue block, indicating where the last point is.
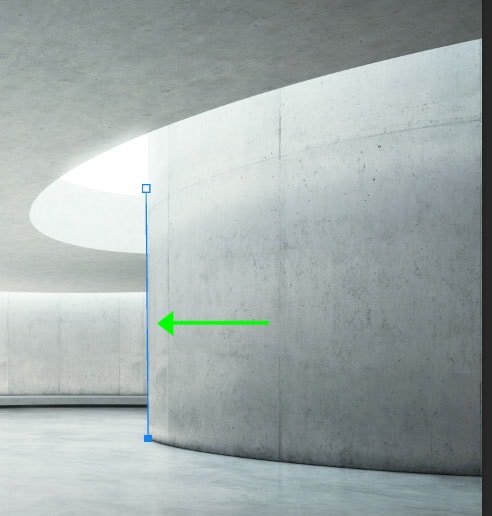
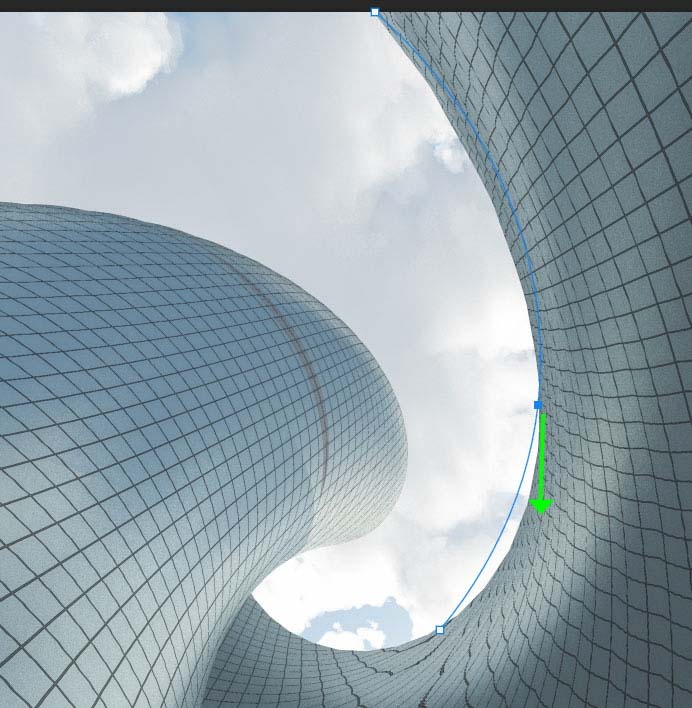
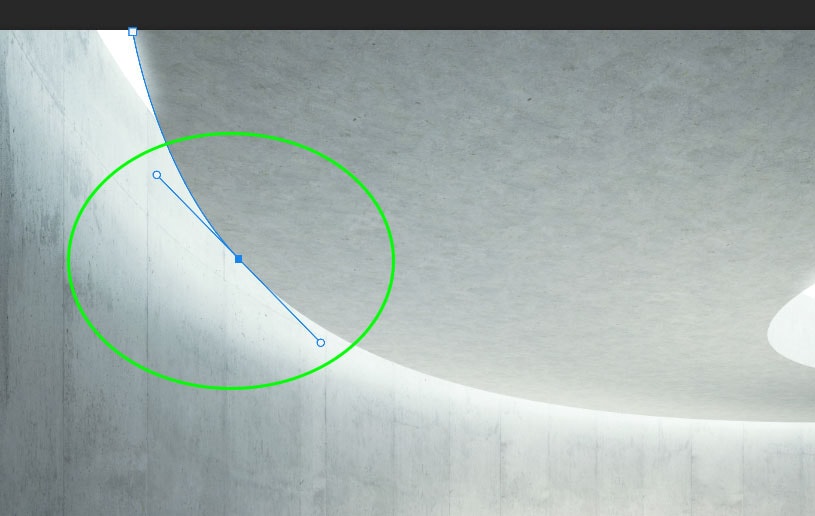
If you want the next line to curve along the bottom of the wall, choose a suitable spot for the next anchor point. Now, when you click on the spot, hold the mouse and drag away from the spot to create a curve. You will notice one control arm moves with the mouse and the anchor point remains where you first clicked. There is also another control arm at the bottom of the anchor point.
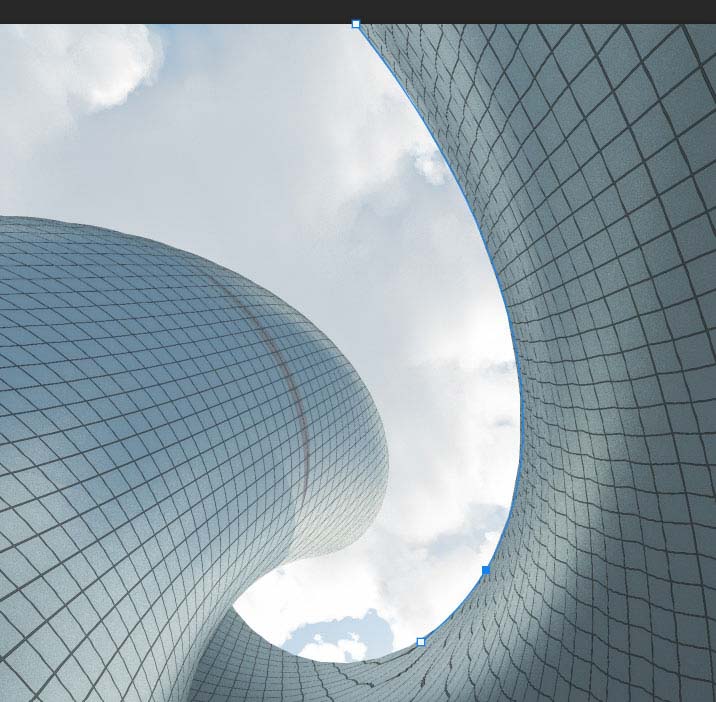
Continue adding points until you finish making the path. To close a path, simply click on the starting anchor point at the end to create a complete path.
– The Freeform & Magnetic Pen Tools
The Freeform Pen Tool works like a regular pen because you click and drag the cursor around the image to create a path. Once you let go of the mouse, the path will have numerous anchor points.
To use the Freeform Pen Tool, click and drag an element on your image. Anchor points will be added automatically along the path. While the path may seem reasonably accurate at first, if you zoom into the image using Control + + (Win) or Command + + (Mac), you will notice that it doesn’t follow the line on the image.

You can check the block next to Magnetic in the Options Bar for a more precise path. The pen will now snap to the closest line in the image to create a more accurate path. You will need to close out the path as the magnetic setting won’t allow you to leave the path open.

– The Curvature Pen Tool
The Curvature Pen Tool guesses the amount of curve you want between two anchor points and quickly creates the curve.
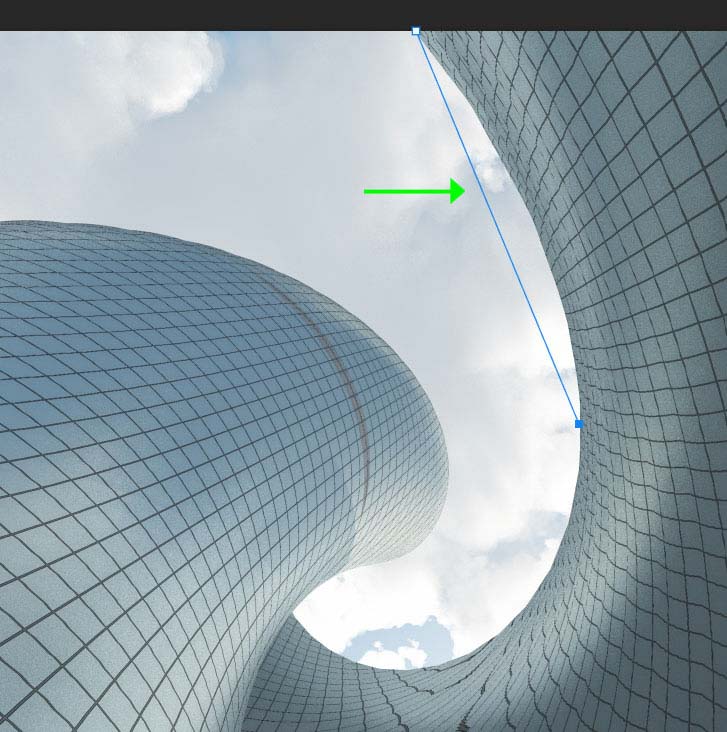
To use the Curvature Pen Tool, add an anchor point where you want the path to start. Once the first anchor point is in place, decide where you want the middle of the curve and place your second anchor point. You will notice a straight line is formed between the two points. Add a third anchor point where you want the curve to end. As you click to place the anchor point, hold in the mouse and move it around to set the curve where you want it.
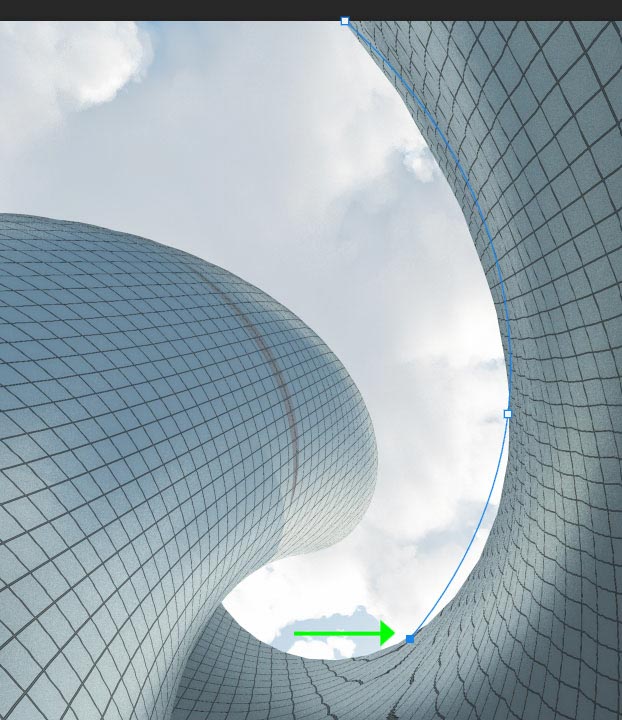
If you haven’t placed the anchor points correctly, you may have an out-of-place curve. You can fix the curve by clicking on the middle anchor point and dragging it down until the curve sits correctly on the building’s curved line.