


There are different customizable methods to make dotted and dashed lines in Photoshop. These lines create interesting patterns that can be used as decorative elements for documents, backgrounds, and images.
Instead of getting stuck creating dotted and dashed lines manually, as I have before, here are three much easier ways of making these lines in Photoshop.
Video Tutorial
How To Create A Dotted Or Dashed Line With The Line Tool
One of the easiest ways to create a dotted line is using the Line Tool. But you need to alter a few settings to create a dotted line.
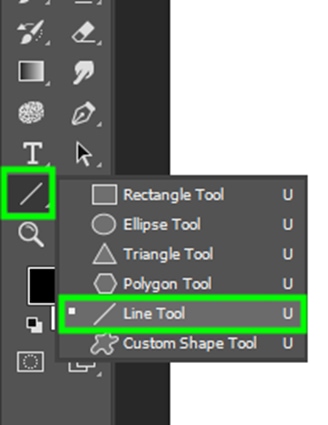
Step 1: Activate The Line Tool (U)
First, select the Line Tool (U) in the Toolbar. It’s the fifth shape listed within the shape tools.
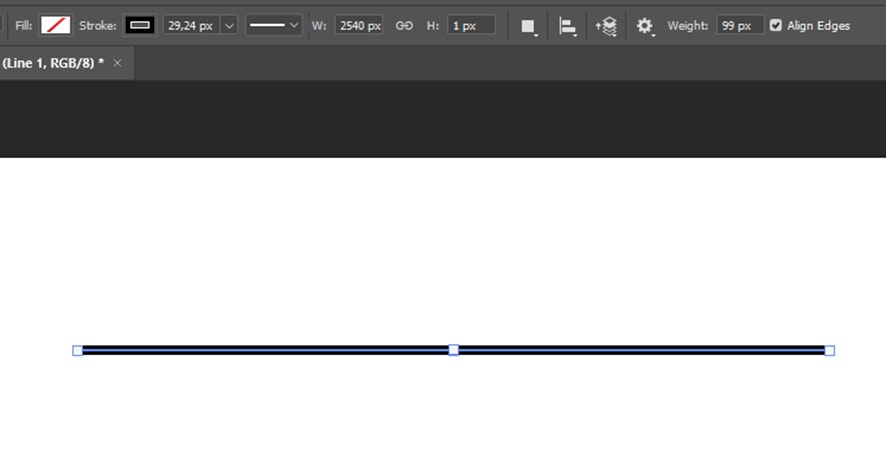
Step 2: Draw A Line On The Canvas
Then, draw a straight line on the canvas by clicking and dragging while holding Shift from one point to another.
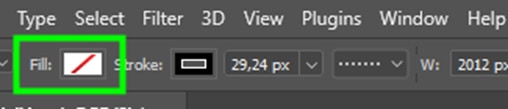
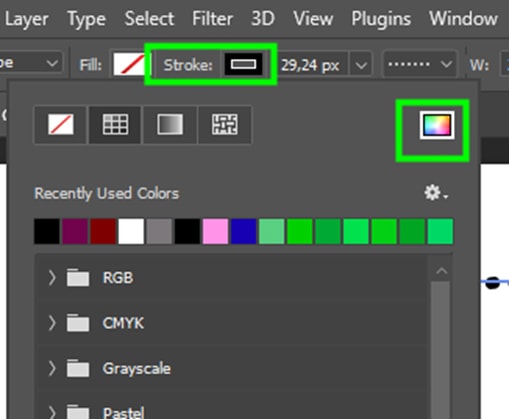
Step 3: Adjust The Line Fill, Stroke, And Thickness
With the line still selected, go to the Options Bar and make sure the fill is transparent.
Choose any color you like for the stroke. The stroke color will be the color of the dotted line. You can choose one of the colors listed in the panel or click the colorful icon on the top right corner of the panel to open the color picker panel, where you can find more options.
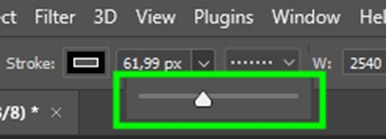
You can also change the line thickness in the Options Bar by moving the thickness slider to the left to decrease it or to the right to increase it.
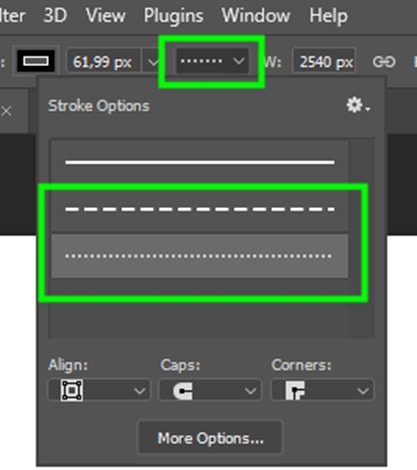
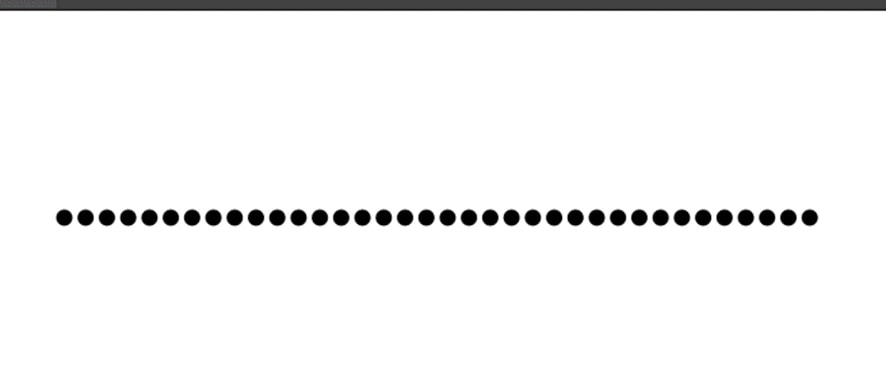
Step 4: Open The Options Menu And Set The Stroke Type To Dotted Or Dashed
Finally, go to the Stroke Options Menu and set the stroke type to a dotted or dashed line (the second and third options listed).
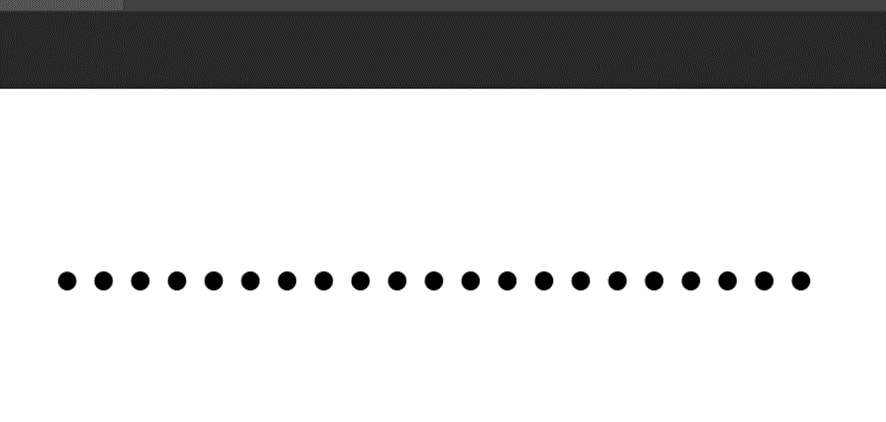
This will turn your straight line into a dotted or dashed line, depending on which option you select.
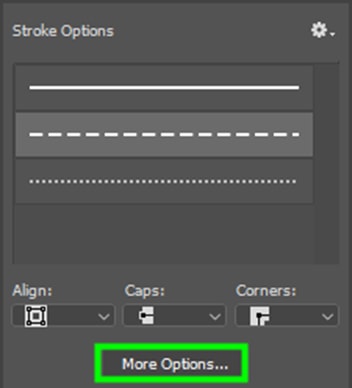
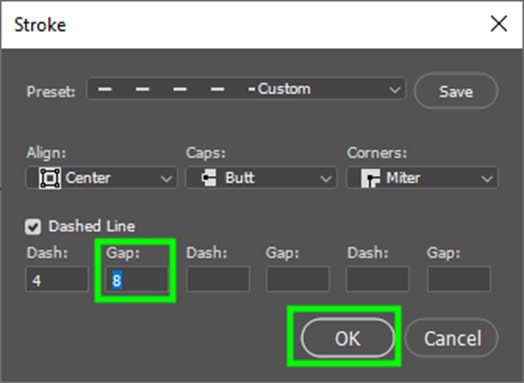
Step 5: Adjust The Spacing (Optional)
You can also adjust the space between the dashes. To do this, click More Options in the stroke options menu.
The stroke panel will appear. In the Gap input box, enter the amount of spacing you want between the dashes. Click OK when you’re finished.
How To Create Dotted Lines Using The Pen Tool
The Pen Tool (P) is versatile and allows you to create straight and curved lines for creative results. To create dotted lines with the Pen Tool, you need to adjust some brush settings.
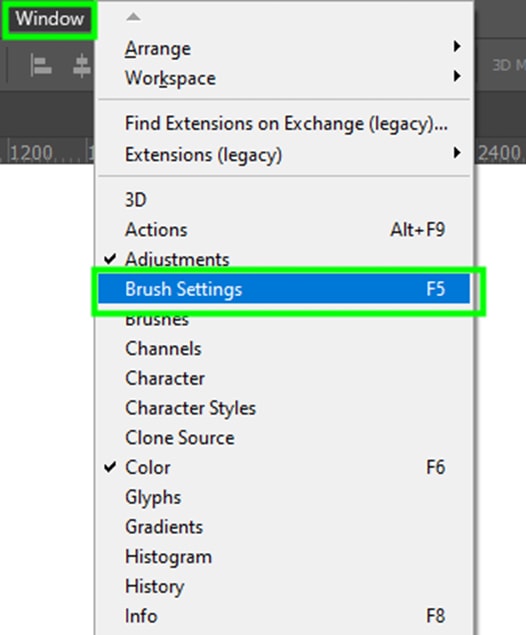
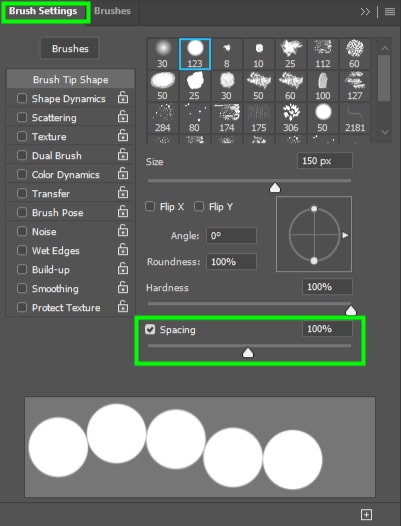
Step 1: Open The Brush Settings Panel And Set The Spacing To 100% Or More
First, open the Brush Settings Panel. To do this, go up to Window > Brush Settings (F5).
Then, choose a hard round brush and set the brush Spacing to 100% or more.
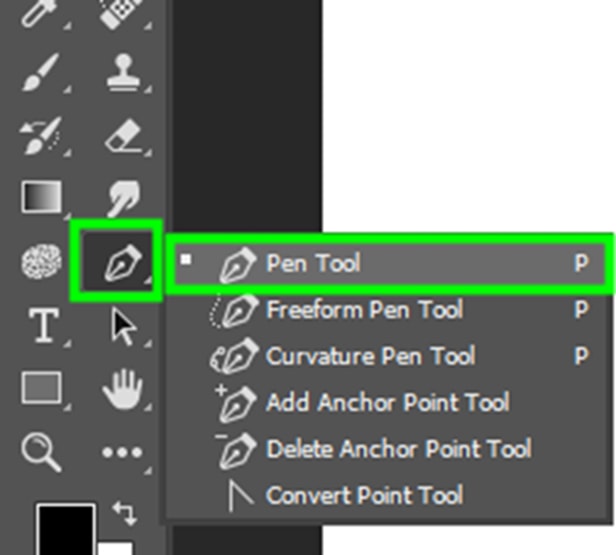
Step 2: Activate The Pen Tool (P)
Now, to create a dotted line, select the Pen Tool from the Toolbar (P).
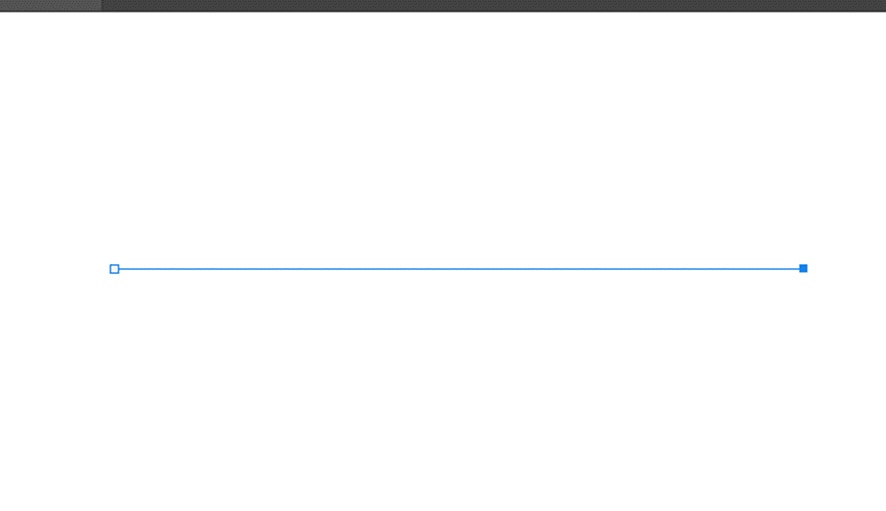
Step 3: Create A Path With The Pen Tool
Then, click somewhere on the canvas as the starting point. Next, click another part of the canvas while holding Shift. The connection of the two points makes up a straight line.
If you want a curved line, add three anchor points and select the middle point. You’ll notice two control handles on either side of the anchor.
Lift the left handle by clicking and dragging it upwards while holding Control (Win) or Command (Mac). The curve will increase as you drag the control handle upward. If you want to decrease the curvature, drag the control handle down.

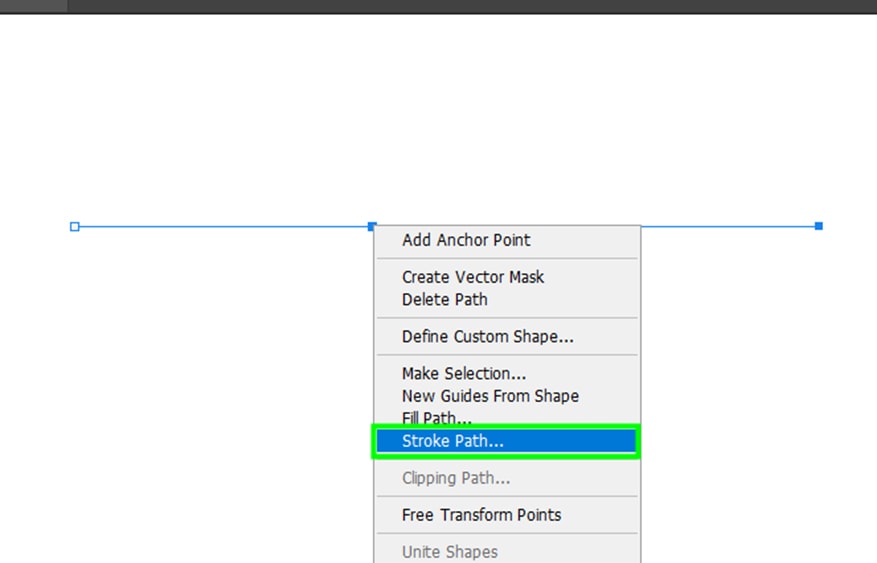
Step 4: Open The Context Menu And Select Stroke Path
Now, right-click (Win) or Command + click (Mac) on the straight line and choose Stroke path.
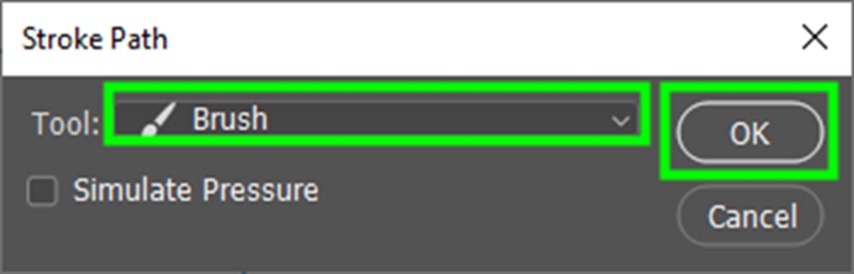
Step 5: Set The Tool To Brush And Click OK
In the dialog box that opens, set the Tool to Brush and click OK. This will create a dotted line using the settings you chose in the Brush Settings Panel.
How To Make Dotted Lines With The Brush Tool
To create dotted lines with the Brush Tool (B), you need to adjust some of the brush settings for the brush strokes to look like dotted lines rather than regular brush strokes.
Step 1: Open The Brush Settings Panel
To do this, go up to Window > Brush Settings (F5).
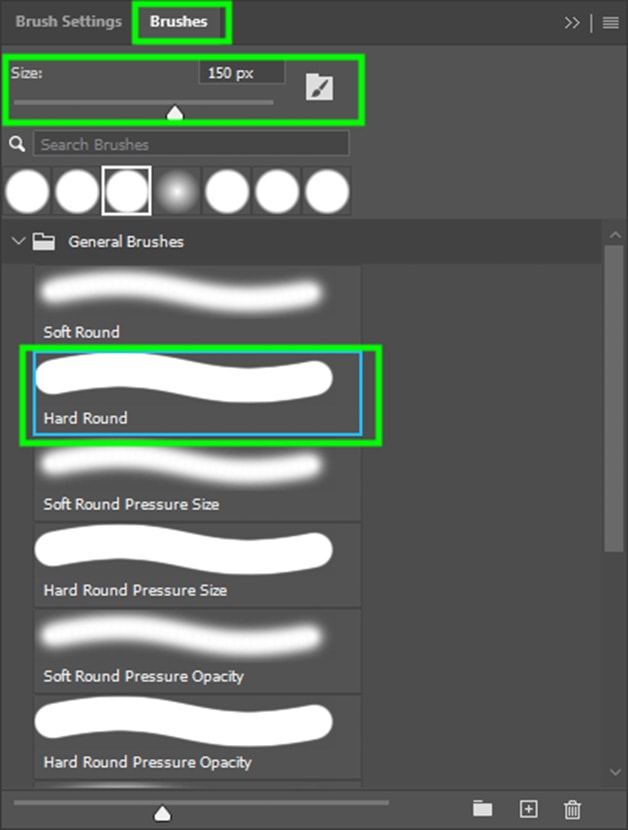
Step 2: Adjust The Brush Size And Type
In the Brush Settings Panel, click the Brushes tab. Then, move the slider to the left to decrease the brush size or to the right to increase it.
Then, choose a hard round brush.
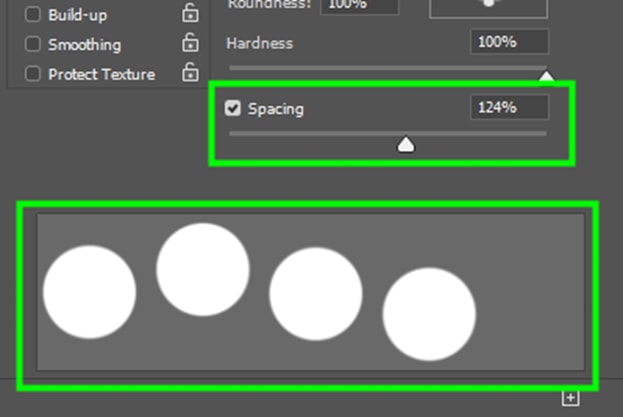
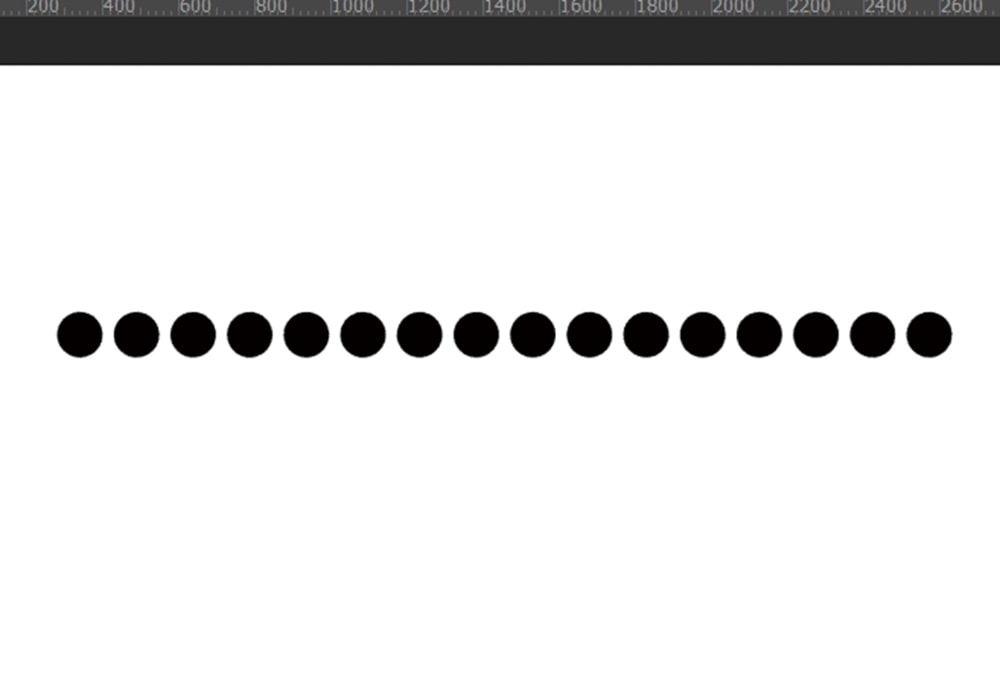
Step 3: Adjust The Spacing Under The Brush Settings Tab
Then, click the Brush Settings tab, go to the Spacing slider, and move the slider to 100% or more to create the dotted line effect.
The distance between the dots increases as you increase the spacing percentage.
Step 4: Click And Drag On The Canvas While Holding Shift
Click and drag on the canvas while holding Shift to draw a dotted line. Holding Shift allows you to draw a straight dotted line.
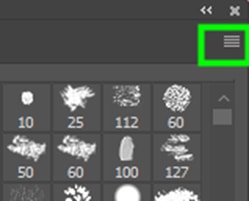
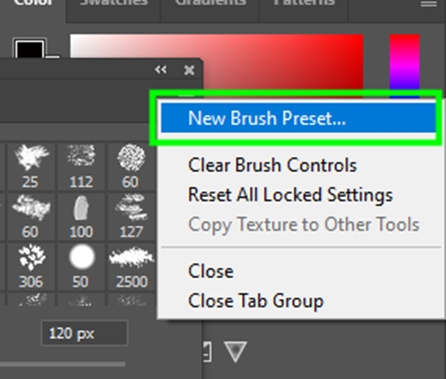
Step 5: Click New Brush Preset Under The Menu Options (Optional)
Once you are happy with the dotted line settings, you can save them as a brush preset. This will allow you to use the same settings next time you open Photoshop.
To do this, click the menu icon on the top right side of the brush settings panel. Then, choose New Brush Preset.
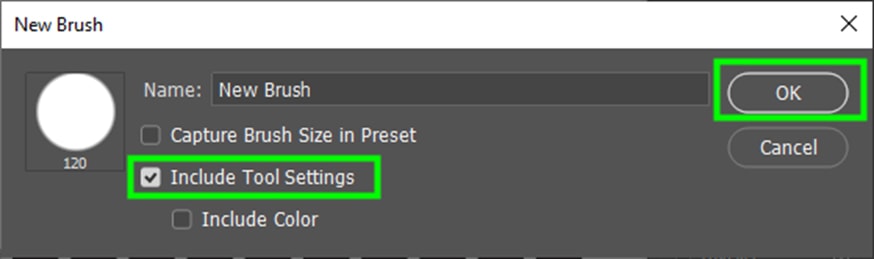
Step 6: Enable Include Tool Settings Option
This will bring up the New Brush dialog box, where you can name your new brush.
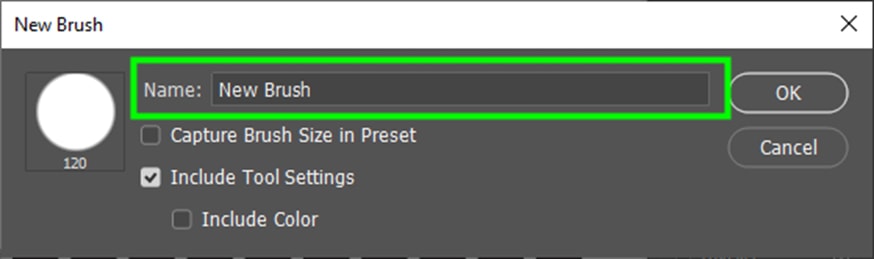
After naming the brush, leave Include Tool Settings checked, click OK to close the dialog box, and save the new brush.
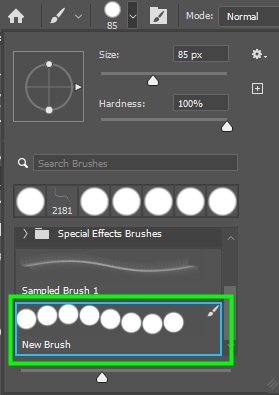
When you open the brush panel again, your new brush will be at the bottom of the panel.
So whether you’re using the Line Tool, the Brush Tool, or the Pen Tool, creating dotted and dashed lines in Photoshop is surprisingly straightforward! To help master all your line-creating skills, check out this next tutorial on creating lines in Photoshop!
