

Surprisingly, Photoshop can function as a basic PDF Editor, and for this to work, you need to know how to import a PDF in Photoshop.
Photoshop has enough capabilities to import, edit, and save PDFs. Although it won’t have as extensive features as Adobe Acrobat DC or Illustrator, it still is a valid option for creating PDF presentations. Here’s how to quickly save a PDF in Photoshop.
Video Tutorial
How To Import A PDF In Photoshop
To import the PDF file, go to File > Open or press Control + O (Win) or Command + O (Mac). Now select the PDF from your computer and click on Open.
You’ll see a dialogue box with some controls to adjust before opening.
You will have two options in the Select panel called Pages and Images. Selecting Pages will make Photoshop select individual pages for editing. If you select Images, then Photoshop will extract separate images from the pages for editing.
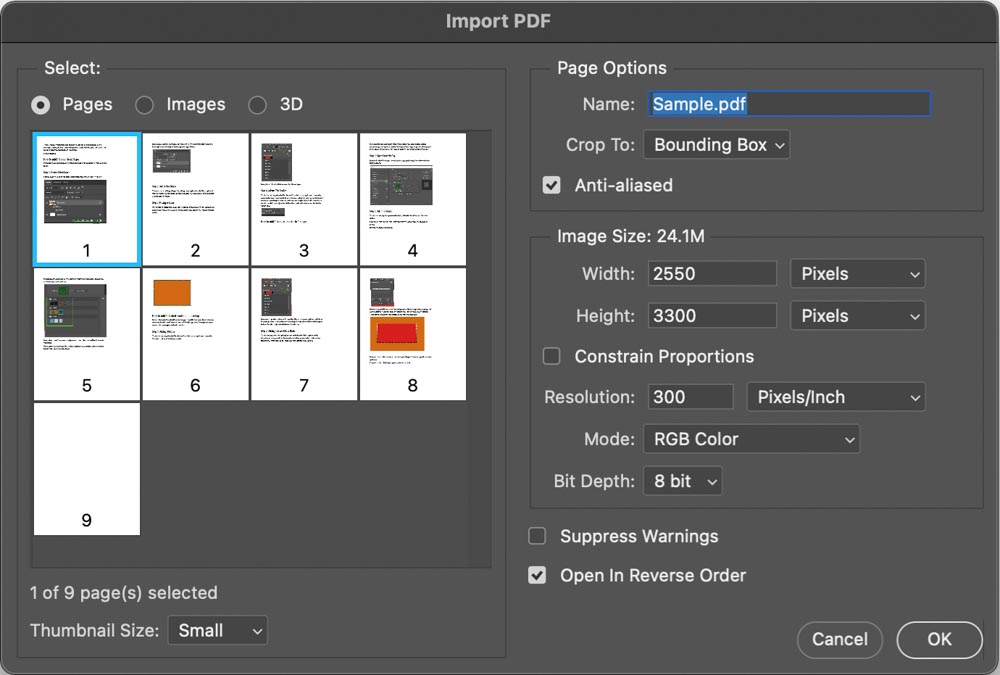
With Pages chosen, you can select a single page, or, to select multiple pages, hold in Control (Win) or Command (Mac) and click on the desired pages. Selected pages will be represented by the blue highlight around them.
Most of these settings are self-explanatory or can be left untouched. However, take note of the Crop To option, as this setting will vary depending on your files.
- Media Box: The media box defines the final page dimensions. It is the largest of all boxes.
- Crop Box: Specifies the region that a PDF viewer prints
- Trim Box: It is the final size of your page after printing and corrections
- Bleed Box: Bleed Box is like a Trim box with some more space given. It is bigger than Trim Box
- Art Box: It defines the content of your page along with some extra margin. It is the smallest of all boxes.
Most of these are used for commercial printing purposes. Select one that you need, but if you aren’t sure, the Media Box setting will get the job done.
With your settings in order, click on OK. Now Photoshop will open all your pages in individual tabs (aka projects).
How To Edit A PDF In Photoshop
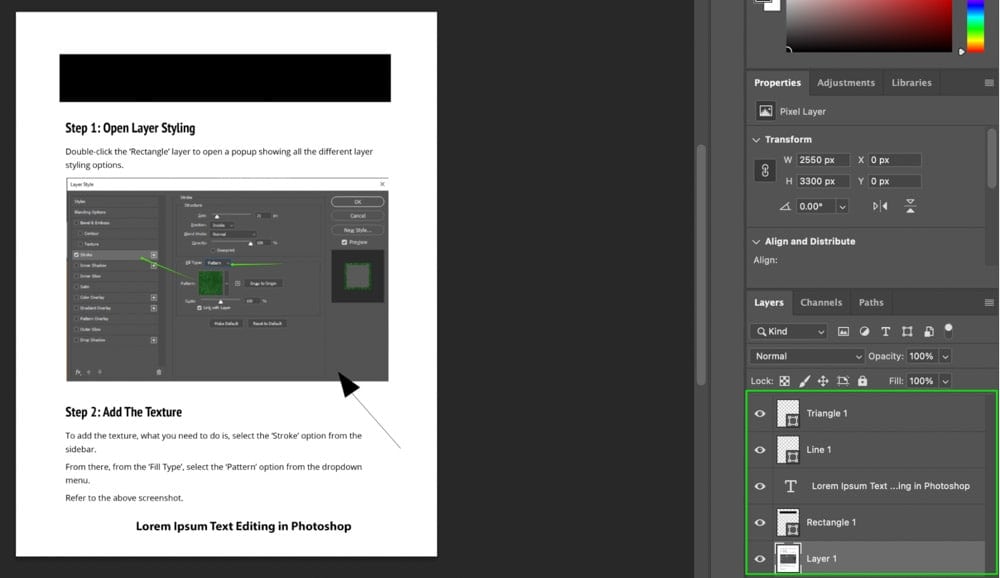
Once you have all the pages opened, select one of the tabs for editing.
One important thing to note is that you can add extra things like annotations to your PDF but you cannot edit the existing elements like text or images as they are a part of the PDF itself and not editable.
If you wanted to remove something from your PDF, you would need to cover it up using the Clone Stamp Tool or hide it behind a white shape layer for example. From there, you could add new elements, such as text, to replace the covered area.
Apart from that, you can do pretty much everything else, like adding shapes, annotations, text, adjustment layers, and more to stylize your PDF pages.
If you want more PDF editing options, then Adobe Acrobat is what you might want to consider.
How To Save A PDF In Photoshop
Step 1: Go To File > Automate > PDF Presentation
To save your PDF, select File > Automate > PDF Presentation from the top menu.
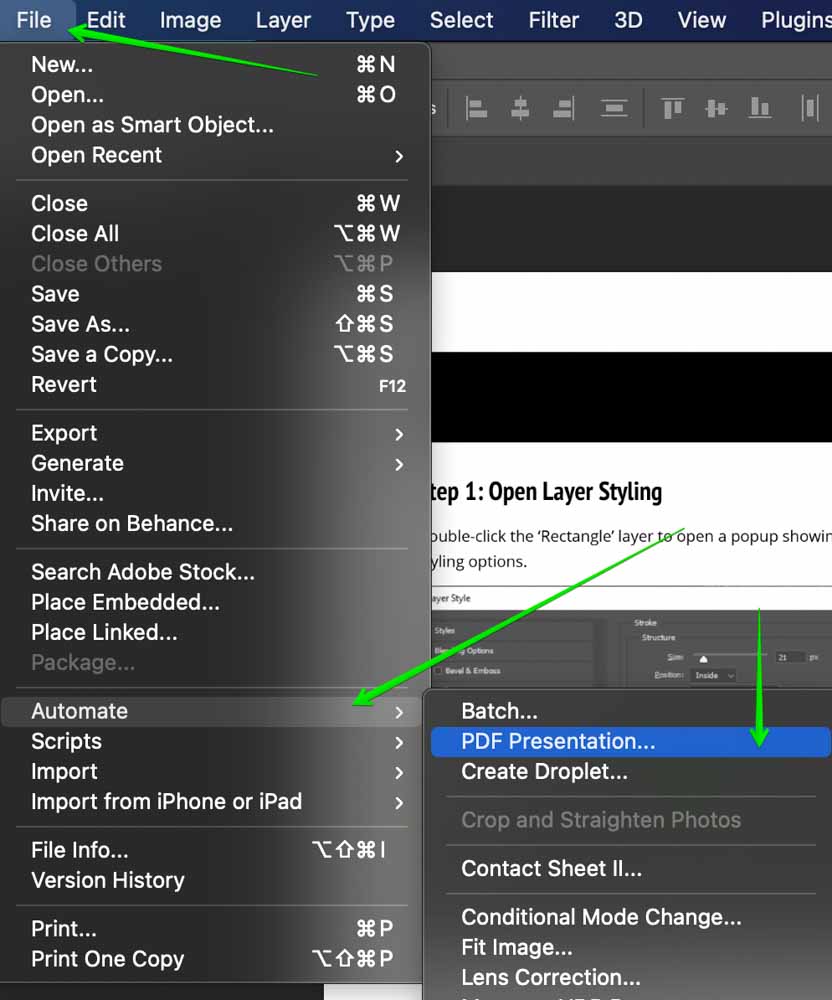
Now, you’ll be greeted by a dialogue box where you can configure some export settings.
Step 2: Click “Add Open Files”
If you were editing a multi-page PDF, then you need to select all your pages to be exported. With all the pages you want to include in the export already opened in Photoshop, select the checkbox that says Add Open Files.
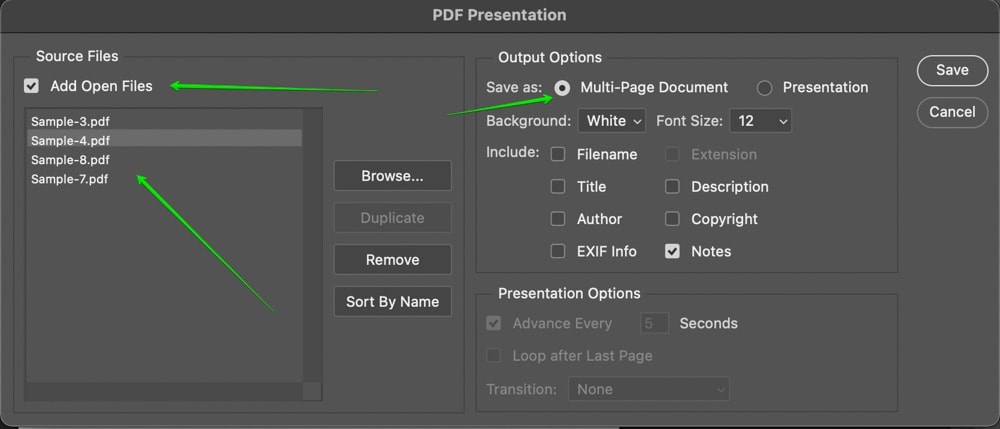
Step 3: Organize PDF Pages In Desired Order
Before exporting, you’ll want all your PDF pages to be in the correct order. You can reorder your pages by just clicking on them in the file list and dragging them up or down.
The topmost file in your list will be the first page, and the bottom-most will be the last.
Step 4: Confirm The PDF Page Settings
Once page reordering is done, you can edit some other options too. Here’s what each of them means:
- Save As: Select Multi-Page document to make sure that your PDF gets exported with all the pages you want.
- Background and Font Size: Select a PDF background color. White is the best, and font size, 12 is what I would recommend.
- Include: You can select the various elements you want to include at the bottom of your PDF. It can be Author, Copyright, Notes, EXIF Info, etc.
Once you’re happy with these settings, click Save to export your edited PDF.
Step 5: Finalize The PDF Export Settings
Once you click on Save, you’ll be greeted with yet another box where you can configure additional settings.
Here’s what options are available in this dialogue box:
- Adobe Acrobat Preset: Specifies some preset Adobe Acrobat export settings. Choose High Quality (Modified) here
- Standard: Select the PDF standard to be compatible with. None is best.
- Compatibility: Select the version of the PDF you want to export. Choose something in the middle so that your PDF remains compatible with older services too.
Last, you will have a description box if you wish to have an embedded description with your PDF export. As for the other options, they can be left as default.
In the sidebar, you will have other options where you can compress your PDF for a smaller file size. You can also configure some output color settings in the Output tab.
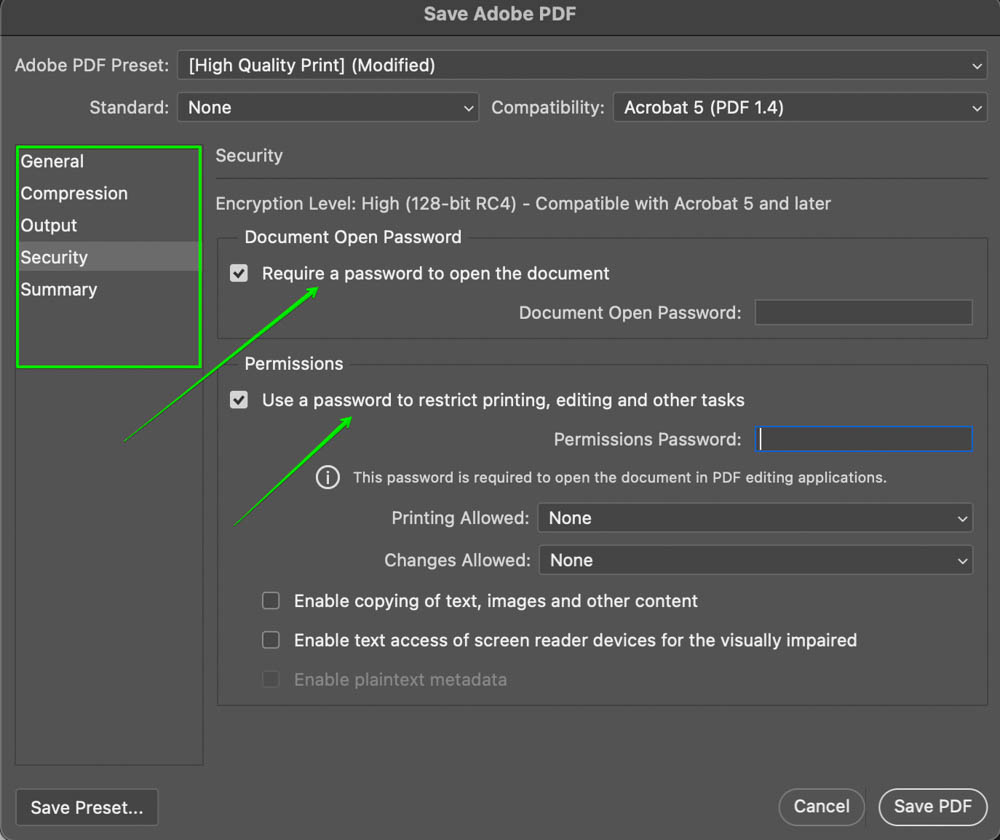
In the Security tab, you can set a password for opening the file and a password for even limiting actions like printing a PDF. This is a great way to protect your PDF presentation from being wrongly used without permission.
Finally, the Summary tab contains a summary of your whole page if you wish to view the settings.
Once you’re done, click on the Save PDF button.
Now check your File Explorer/Finder, and you’ll see the PDF file saved to your computer directly from Photoshop.
How To Export An Editable PDF In Photoshop
You can also save an editable PDF in Photoshop using a different export method. When using this method, you can re-open the PDF in Photoshop at any stage and continue editing any text, shapes, or additions you added in using the program, as the layers are preserved.
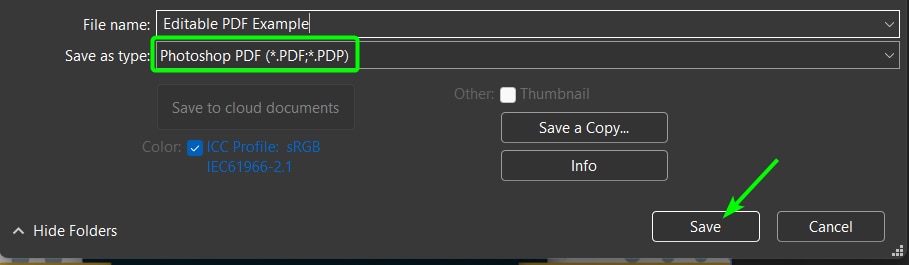
Simply go to File > Save As or press Shift + Control + S (Win) or Shift + Command + S (Mac).
In the Save As window, open the Save as type drop-down menu and select Photoshop PDF, then click Save.
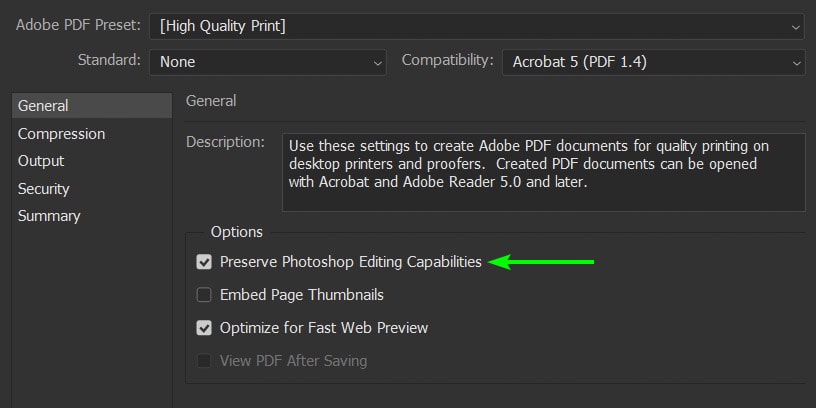
In the next window, ensure you enable Preserve Photoshop Editing Capabilities before clicking Save PDF.
Although it doesn’t have the most advanced features, Adobe Photoshop can easily edit PDF files and export them with ease. Since the information on your PDF pages is baked into one file, none of the elements are directly editable. Luckily, there is an endless pile of tools to help you customize these PDF pages and make them look exactly as you need.
Happy PDF’ing!
