
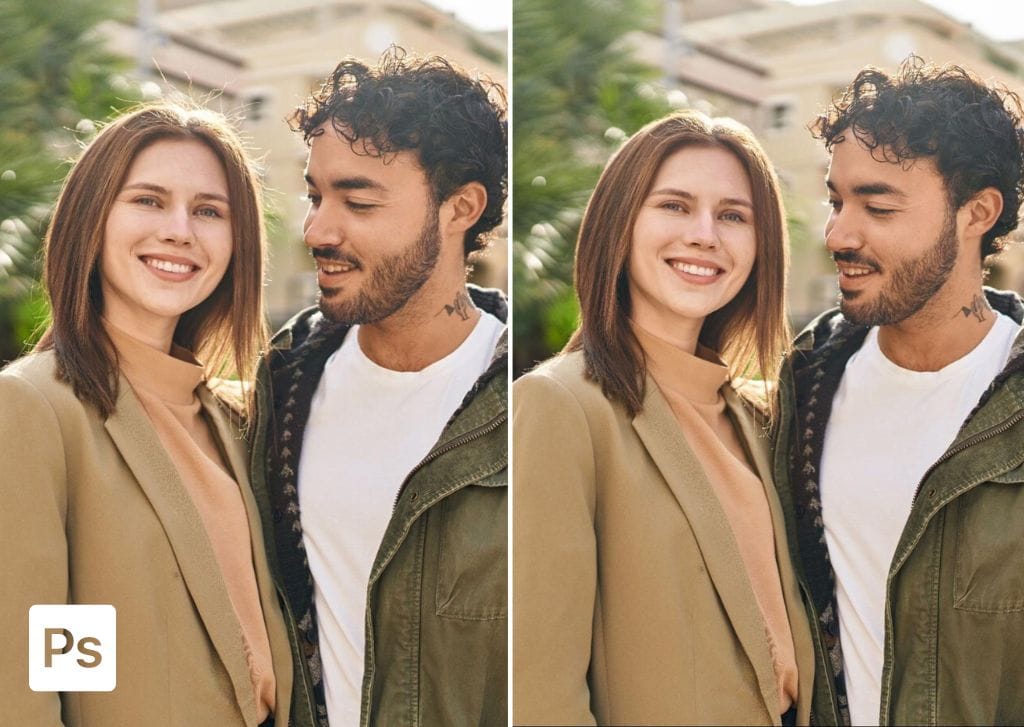

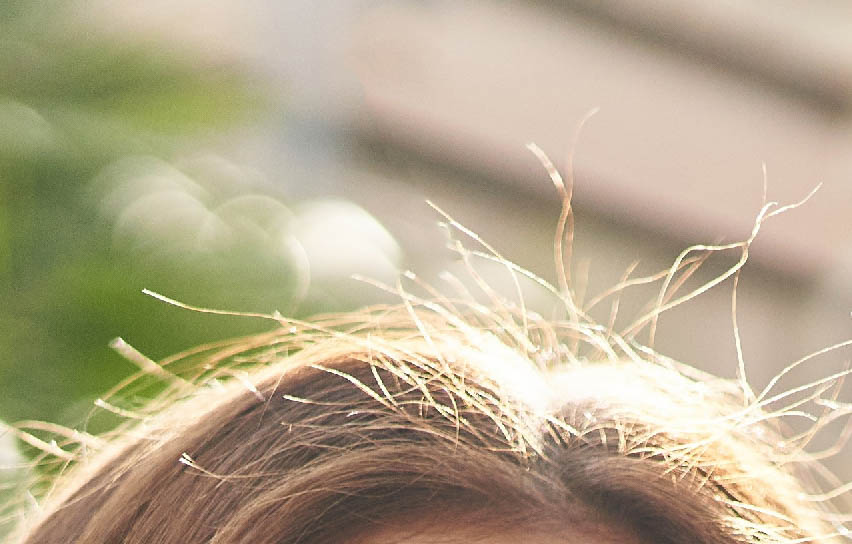
Imperfections like flyaway hair can ruin a perfect photo. However, it doesn’t mean you should delete the image. Instead, you can easily learn how to remove flyaway hair in Photoshop.
Here are my two go-to methods to remove those rebel hairs that often show up in images. Whether you want a quick process using the Spot Healing Tool or a more precise option using the Clone Stamp Tool, I’ve got you covered.
Option 1: How To Remove Flyaway Hairs In Photoshop Using The Spot Healing Tool
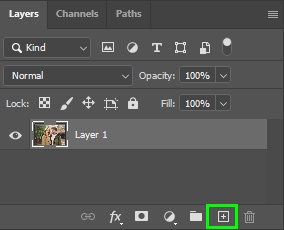
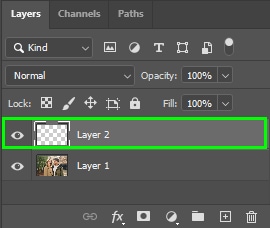
Step 1: Click The Add A New Layer Icon In The Layers Panel
First, insert your image in Photoshop. Then, go to the Layers Panel and create a new blank layer by clicking the Add a New Layer icon.
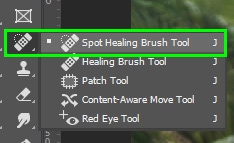
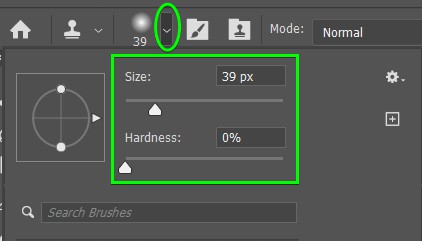
Step 2: Adjust The Spot Healing Brush Tool Settings
Activate the Spot Healing Brush Tool (J) from the Toolbar.
Then, open the Brush Options and set the Size. The brush Size needs to be slightly larger than the flyaway hair. You can also alter brush size by pressing your keyboard’s right or left bracket key. The right bracket key ] increases brush size while the left bracket key [ decreases it.
Set the Hardness to 50%. This removes the strands of hair quickly while preventing the background from being stained.
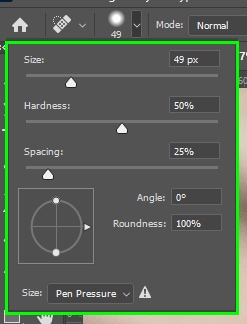
As for the rest of the settings, adjust them as follows:
- Set the Blend Mode to Normal.
- Set the Type to Content-Aware. This uses artificial intelligence to determine the best way to fill the target area seamlessly, preserving the area’s luminance and hue values.
- Enable the Sample All Layers checkbox. This option allows you to sample pixels from any layer in the Layers panel. That way, you can work with multiple layers. Thus, you can sample pixels from a photo and place them on a blank layer, which allows you to work non-destructively.
- If you have a drawing tablet, you can take advantage of the Pen Pressure option since it gives you more control over the pressure to which the brushstrokes are applied to your image.

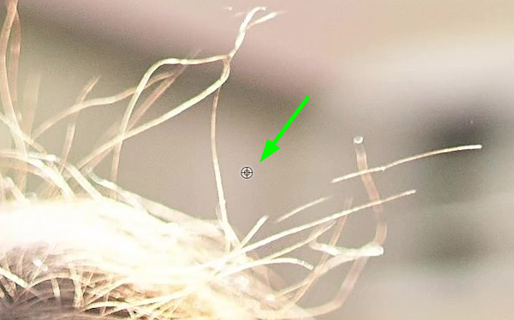
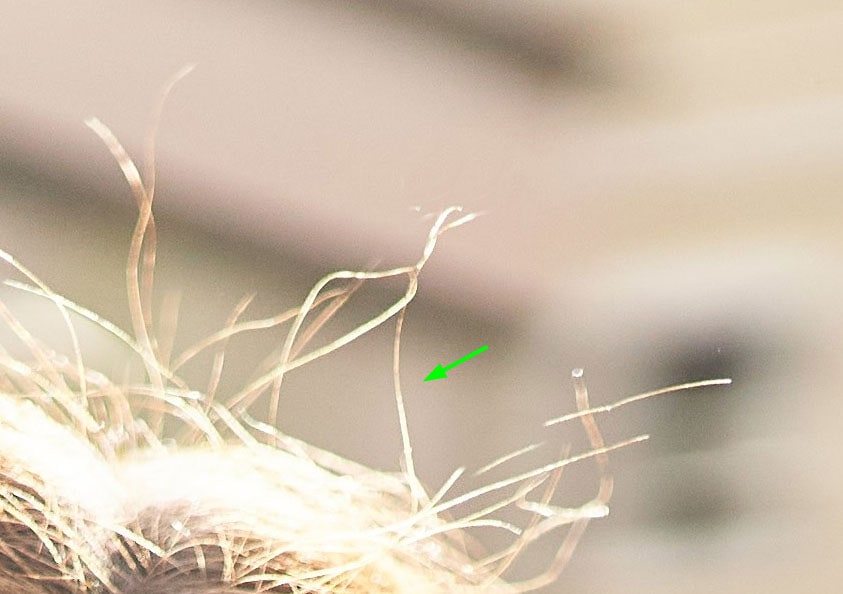
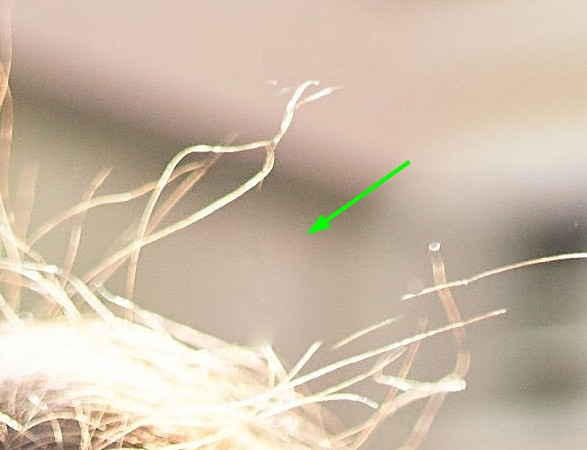
Step 3: Paint Over The Flyaway Hairs To Remove Them
With the necessary settings adjusted, keep the layer you created selected. Then, zoom in on the strand of hair and drag over it from end to end. The strand of hair will disappear immediately after this.
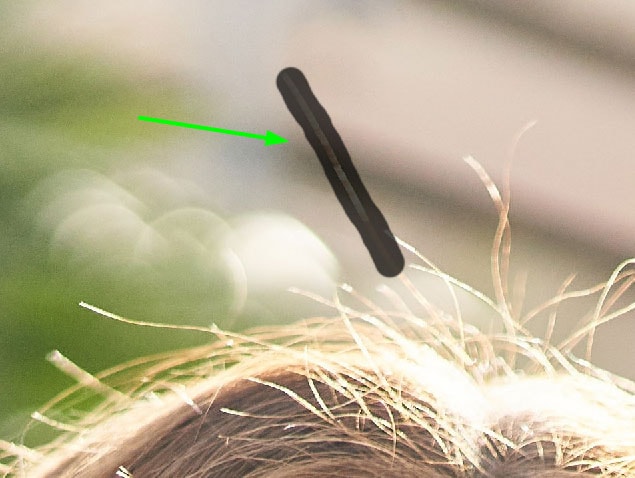
Generally, you will only need to drag over the flyaway hair once. However, if the background of your photo is too busy, you may need to drag over the target area a couple of times until the flyaway hairs disappear entirely.
Repeat the step above in other parts of the hair until all the flyaway hair from your subject’s head is gone.


Option 2: Using The Clone Stamp Tool To Remove Flyaway Hair
Step 1: Click On The Add New Layer Icon In The Layers Panel
To use the Clone Stamp Tool to remove flyaway hair, you first need to create an empty layer by clicking the Add New Layer icon at the bottom of the Layers panel. This will separate the corrections from the original photo, preserving the image.
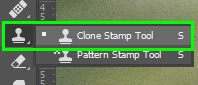
Step 2: Activate The Clone Stamp Tool And Adjust The Settings
Afterward, select the Clone Stamp Tool in the Toolbar (S).
The brush Size should be slightly larger than the strand of hair you want to cover. Leave Hardness at 0% so that the pixels covering the flyaway hair blend seamlessly with the pixels from the surrounding area.
- Set the Blend Mode to Normal.
- Set Opacity to 100%. You can also lower the opacity depending on the area. For example, if your background is blurred or composed of various colors, lessening the opacity will help blend pixels better.
- Leave Flow at 100%.
- Check the Aligned checkbox since it makes the Clone Stamp Tool sample different pixels as you drag with the mouse, avoiding repeated pixels.
- Lastly, set Sample to All Layers. This allows you to work with more than one layer from the Layers Panel, which is essential since you created an empty layer for the corrections.

Step 3: Hold Alt/Option And Click To Sample Pixels
After adjusting all necessary settings, zoom in on the strand of hair to be removed. Then, hold Alt (Win) or Option (Mac). Your cursor will turn into a target icon. Then, drag over the pixels to be sampled, preferably those adjacent to the strand of hair to be removed.
Step 4: Paint Over The Flyaway Hairs To Remove Them
Drag over the target area to cover the strand of hair with the sampled pixels. Photoshop’s AI will seamlessly blend the pixels in.
Repeat these steps to sample new areas and then paint over the hairs close to the sampled pixels until you remove all the flyaway hairs.
You can combine the Spot Healing Brush Tool with the Clone Stamp Tool for a more optimal result. You can also consider using other similar tools like the Healing Tool. This operates very similarly to the Spot Healing Brush but with the option to sample before you paint over the unwanted strands of hair. To see all three of these tools compared, check out my guide to removing objects in Photoshop.
