

The brush tool in Photoshop allows you to add creative elements to your project. Using the brush tool, you can paint different colors and patterns onto your image. However, sometimes you may make a mistake with a brushstroke. Knowing how to erase brush strokes in Photoshop will help you fix the error.
Whether you are editing destructively or non-destructively, you will be able to erase brush strokes from your image. However, when editing destructively, your options to erase brush strokes are limited and you may lose some of your work.
To edit non-destructively, create a new layer to add your brush strokes, as this will give you a lot more freedom with your work. Non-destructive editing will allow you to fix any mistakes, no matter how far back in your project you made them.
4 Ways To Erase Brush Strokes In Photoshop
Depending on how you created your brush strokes on your image, here are 4 ways to erase brush strokes from your image. Choose the right method based on whether you created the brush strokes on the image layer or a separate layer.
Option 1: Using The History Brush
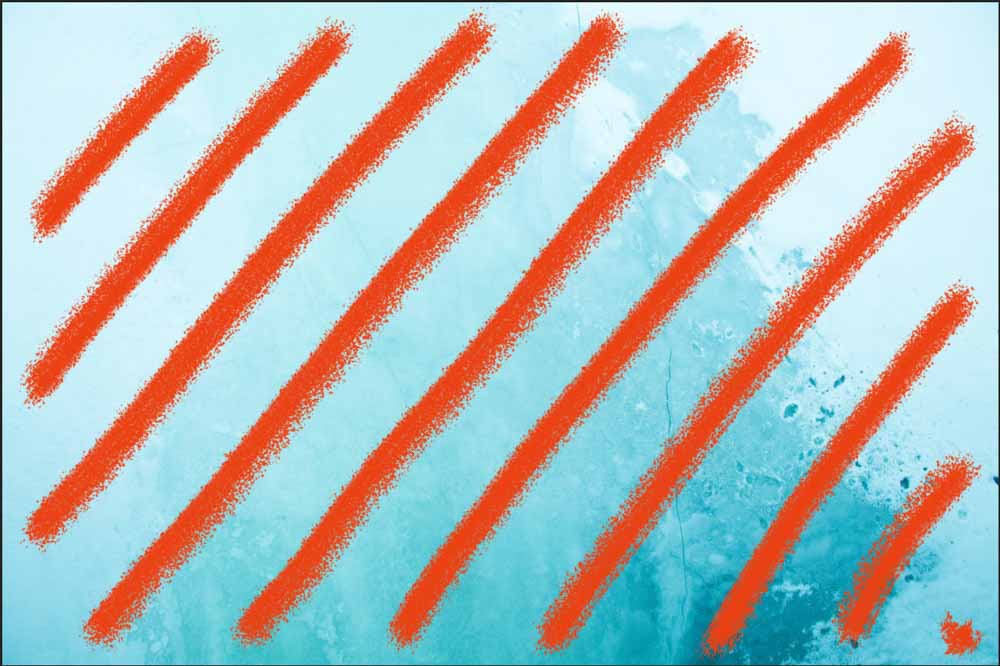
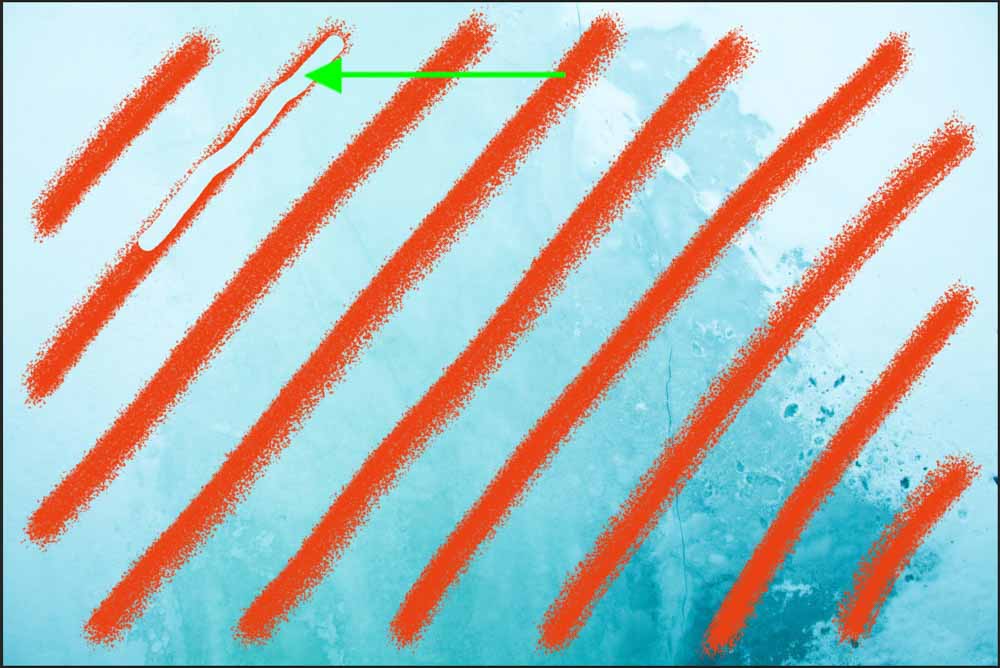
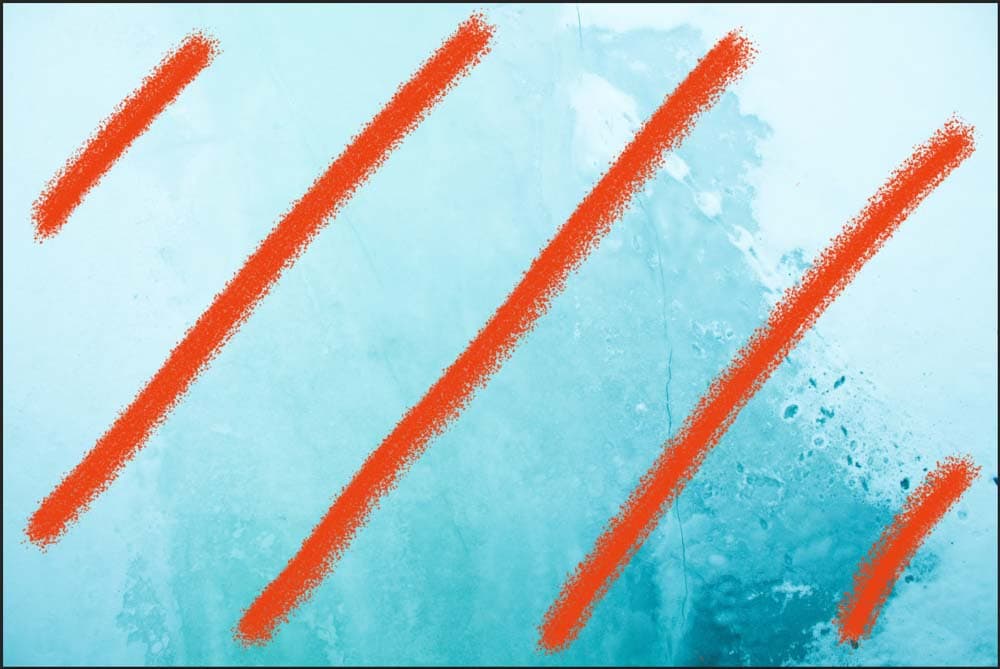
The history brush tool is a good method to erase brush strokes when you have been editing destructively, which means that the brush strokes have been added to the image layer. This method allows you to paint over unwanted brush strokes to remove them.
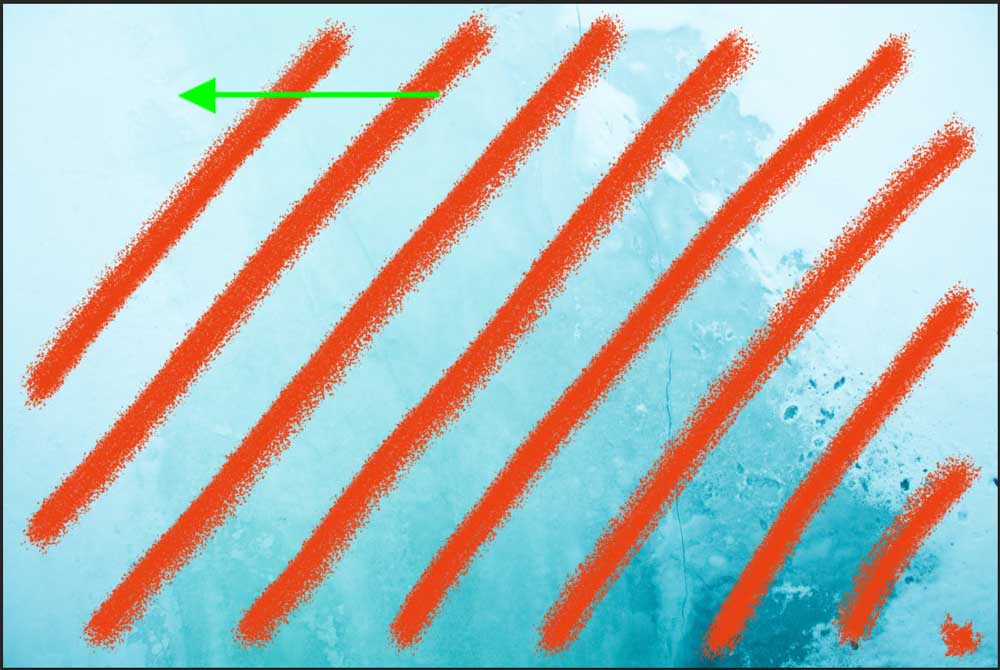
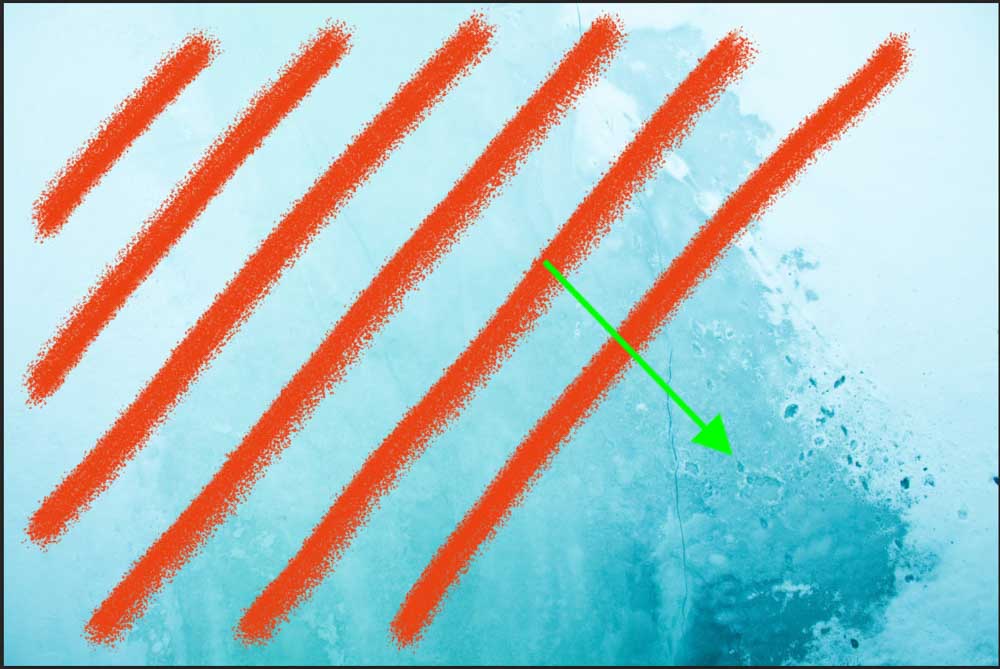
For example, once you have selected the brush tool (B) and painted a few strokes onto your image layer, you can use the history brush tool to selectively remove some brush strokes.
Select the history brush tool from the toolbar or press Y. Then use the tool to draw over the strokes you would like to delete. You will notice that the history brush stroke is different from the brush stroke you used to draw the lines.

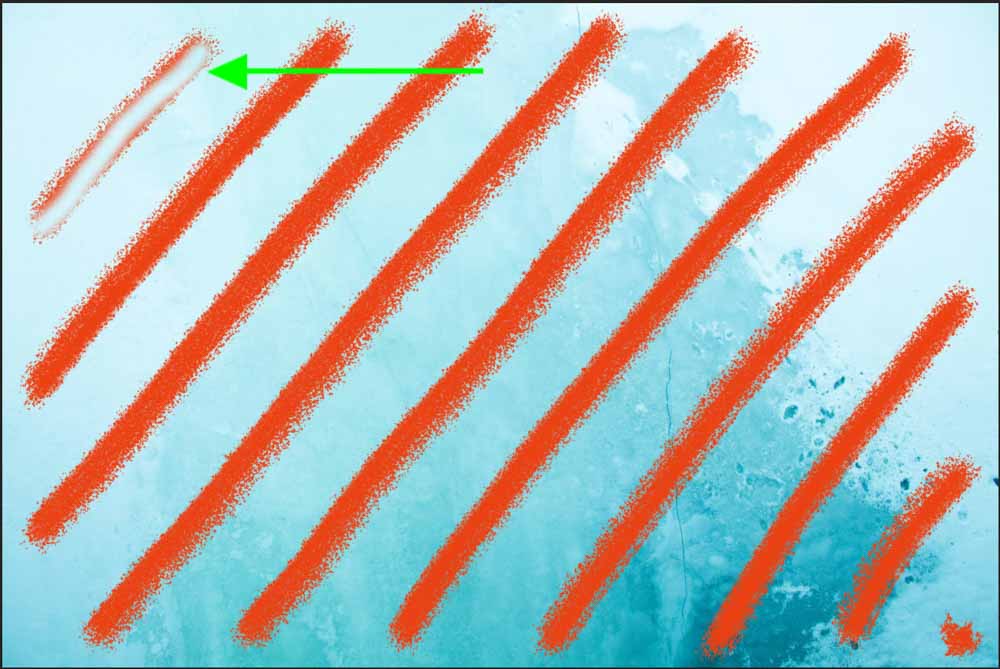
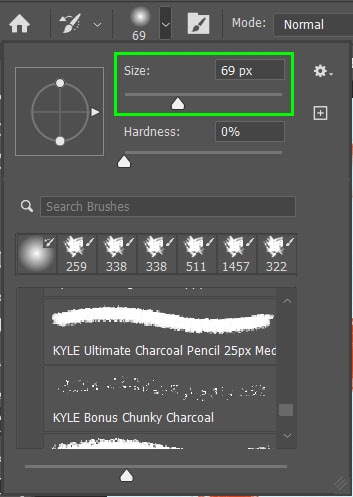
To increase the brush size, select the arrow next to the brush size on the options bar and increase the size. You can also use the ] key to increase the size and the [ key to decrease the size.

Once the brush size is larger, you can erase the brush stroke by clicking and dragging over it until it is erased.
Option 2: Delete The Layer The Brush Stroke Is On
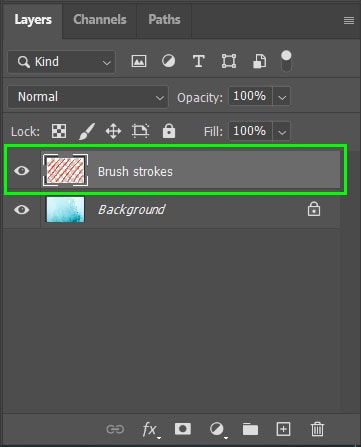
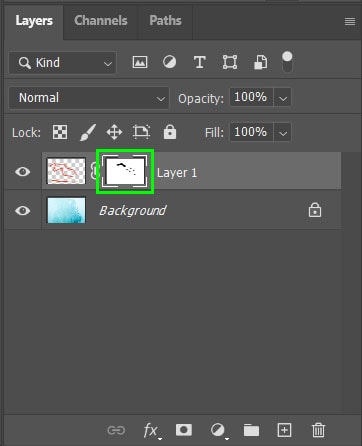
If you are editing non-destructively by creating new layers for each new element, you will have created a new layer to add your brush strokes on. This layer will be visible in the Layers panel above your image layer.
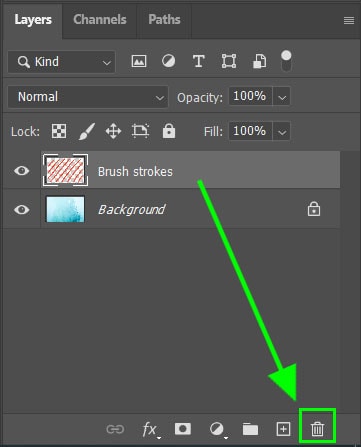
You can delete the brush strokes by deleting the layer on which they have been added. The problem with this method is that it will delete all the brush strokes on that layer. This method won’t work if you are trying to delete selective brush strokes.
To delete the layer, click on it and drag it to the bin icon in the Layers panel. Alternatively, press delete on your keyboard when the layer is selected.
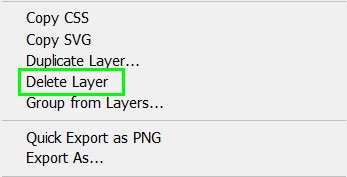
You can also delete the layer by right-clicking (Windows) or Control + click (Mac) and selecting Delete Layer from the menu.
Option 3: Undo
If you have just created the brush strokes and want to erase a few of them, you can undo the previous actions. When using the undo function, Photoshop will revert the project to the history state before your last action.
To undo the previous action on Photoshop, select Edit > Undo Brush Tool or use the shortcut Control + Z (Windows) or Command + Z (Mac).
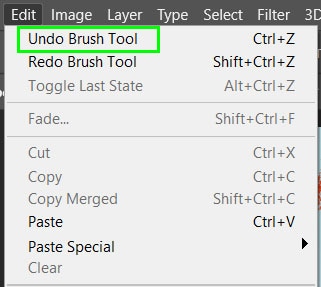
Repeat these steps as many times as you would like to, to remove the brush strokes.
The undo action works in chronological order, so if any other actions were taken in between the brush strokes, these actions will be erased as well.
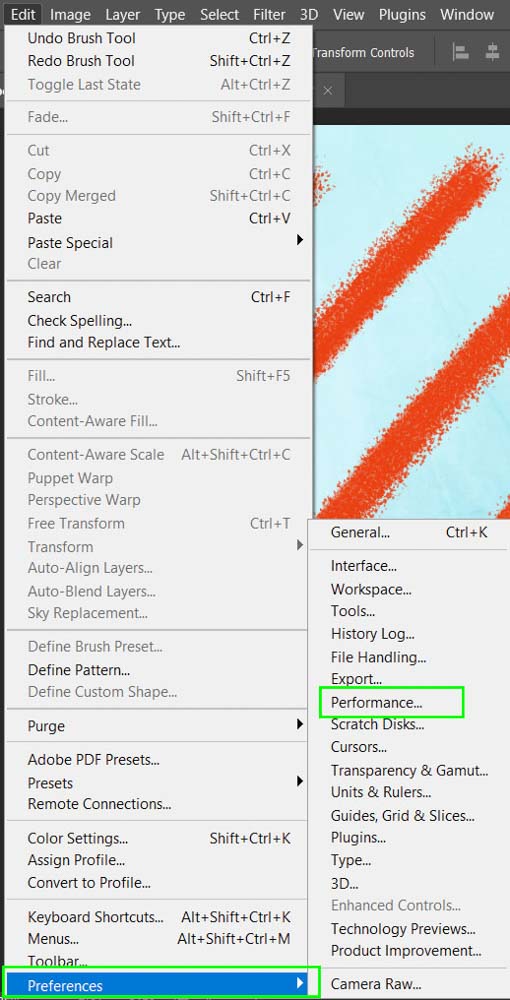
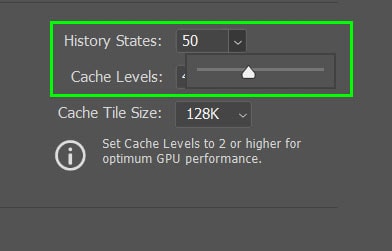
The undo action is set to 50 history states by default. If you need to undo more actions, you can increase the history states up to 1000.
To increase the number of history states, navigate to Edit > Preferences > Performance… or press Control + K (Windows) or Command + K (Mac) and select the performance tab on the left-hand side of the window. Then click on the History States on the right-hand side.
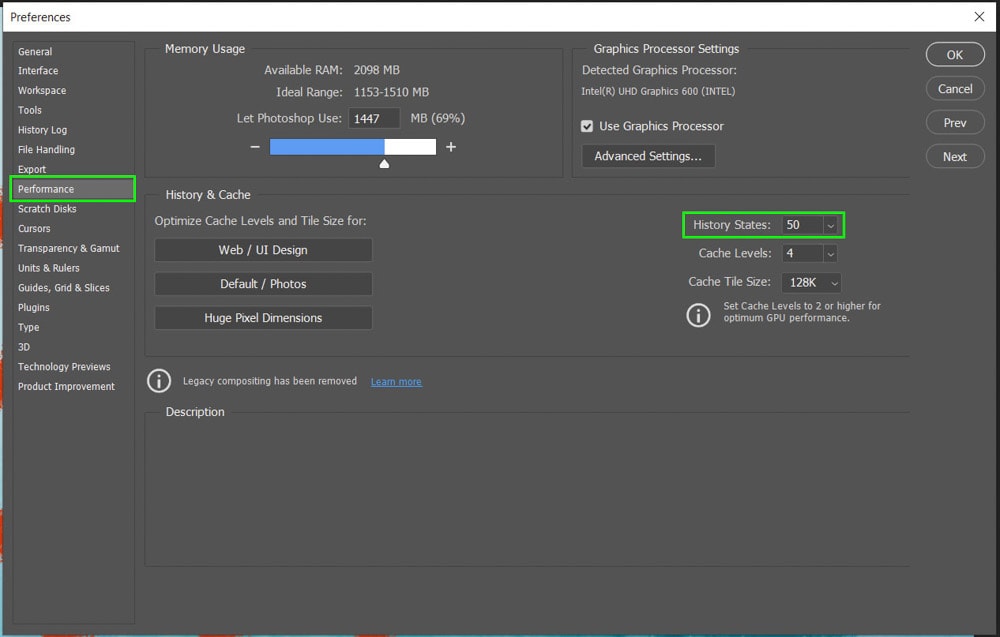
Use the drop-down menu to access the slider next to the History States to increase the number of times you can use the undo action.
Option 4: Manually Erase From Your Layer
When editing non-destructively with a separate layer for the brush strokes, you can manually erase the brush strokes. This function works similar to the history brush and allows you to erase parts of the brush strokes instead of the entire brush stroke.
To manually erase the brush strokes, make sure the correct layer is selected in the Layers panel and select the eraser tool from the toolbar or press E.

Adjust the size of the eraser tool using the ] key to increase and the [ key to decrease the size. Then click and drag across the areas of the brush tool you would like to erase.
Continue erasing the brush strokes and areas you would like deleted.
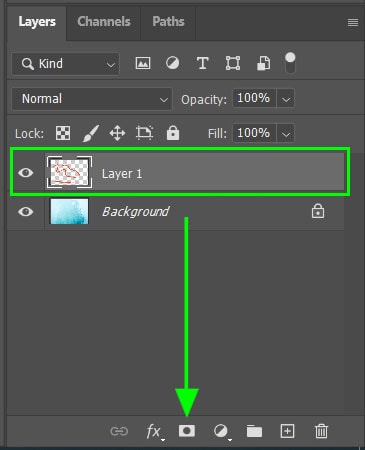
How To Remove Brushstrokes With A Layer Mask
Using layer masks in Photoshop provides a lot more editing options as well as makes it easier to erase brush strokes. Layer masks are useful when you need to edit images non-destructively and make it easier to go back to previous edits and re-edit those areas.
If you have created brush strokes on a separate layer to your image, add a layer mask to the stroke layer. Do this by clicking on the layer mask icon at the bottom of the Layers panel when the correct layer is selected.
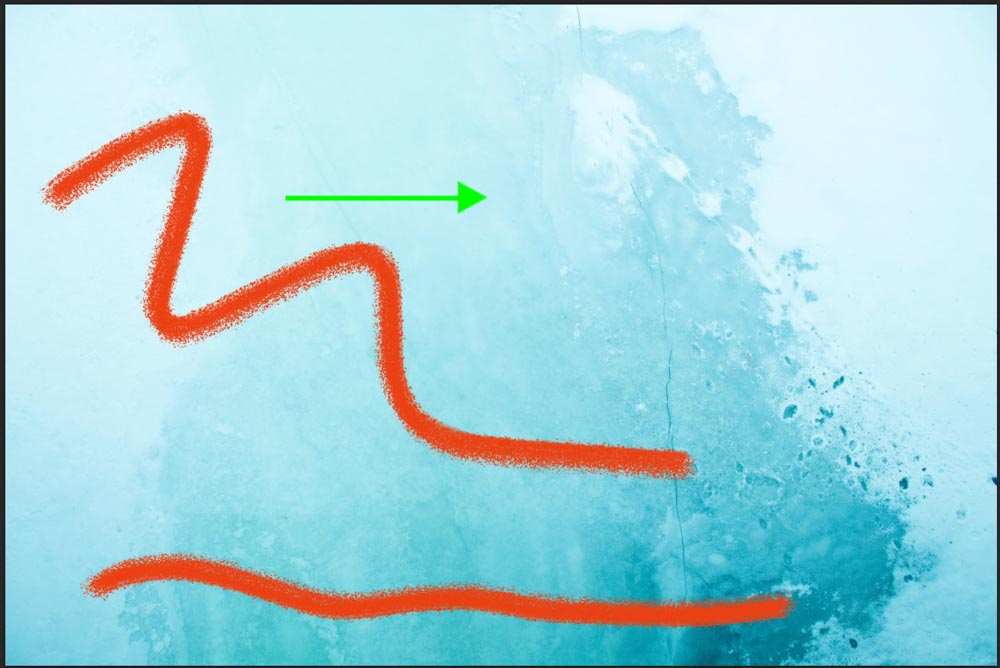
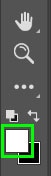
Once the layer mask is selected as indicated by the white border around the layer mask thumbnail, select the brush tool (B) and make sure the color is set to black.

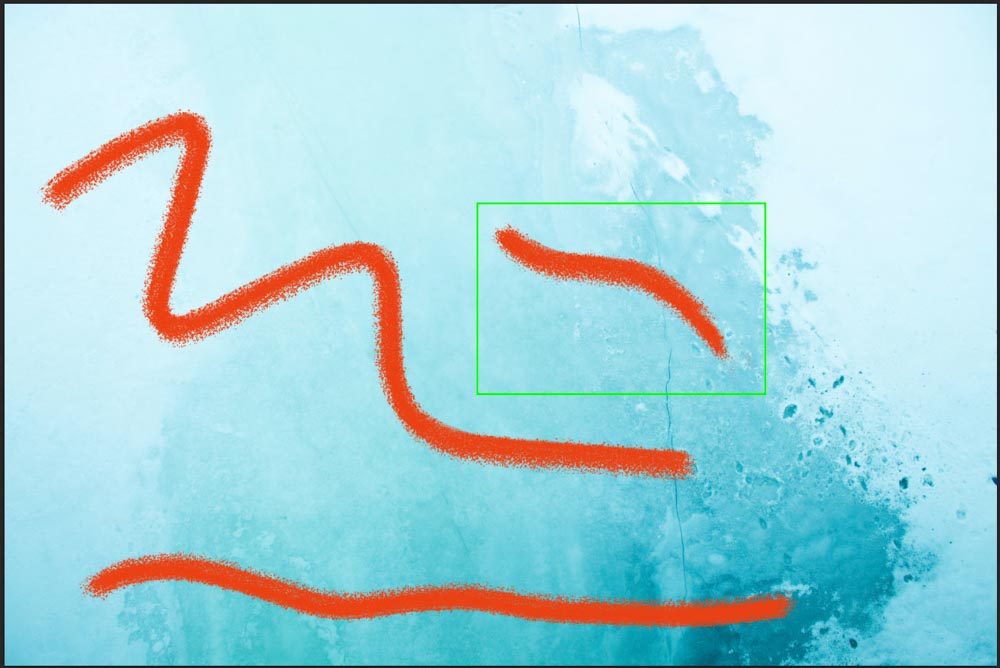
Then brush over the areas where you want to erase the strokes. The areas where you have erased the brush strokes will be shown in black on the layer mask thumbnail.

Layer masks work similarly to the eraser, except work non-destructively. By painting black on a mask, you can “hide” the layer, while painting white will “reveal.” Switching between black and white and painting on your layer mask is an easy way to remove or reveal brushstrokes that appear on their own layer.
Bonus Shortcuts To Erase Brush Strokes
If you have your brush strokes on a separate layer, you can erase areas of the brush strokes by holding in the tilde key (~) while clicking and dragging on the areas to be erased.
You can also switch the blend mode to clear to erase areas of the brush strokes on a separate layer. To change the mode, when the brush tool is selected, click on the mode dropdown menu and select clear before brushing over the areas to erase.

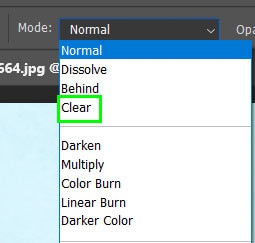
You can also press Shift + Alt + R (Windows) or Shift + Option + R (Mac) to change to the clear blend mode. Then press Shift + Alt + N (Windows) or Shift + Option + N (Mac) to switch the blend mode back to normal.
So if you have placed your brush strokes on the same layer as another element in your project, the history brush is your main option to salvage your layer. Otherwise, you will have to undo which may result in a loss of your recent work. That’s why it’s very important to add new adjustments, like brushstrokes, onto new layers so they can be easily edited on their own. While editing non-destructively like this, you have far more options to remove unwanted brushstrokes from a project.
Happy Editing!
