
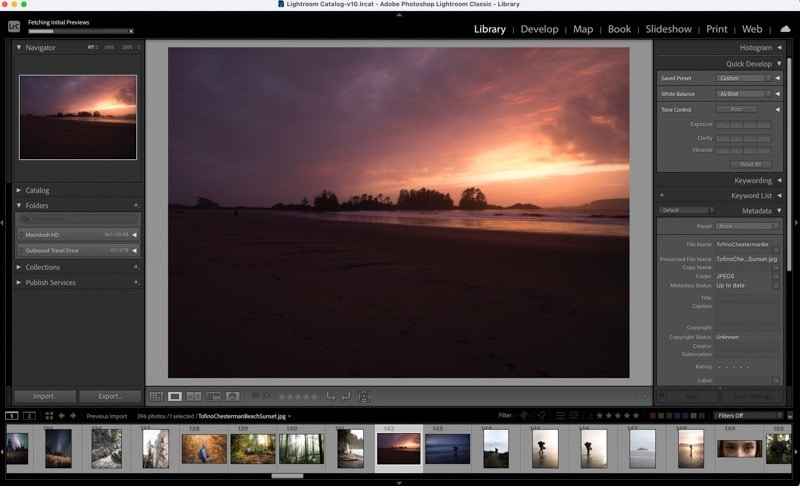
If you want to full screen a photo in Lightroom, you’ve probably come to realize it’s less obvious than you might expect. Luckily it’s very easy to full screen any image in Lightroom with a single keyboard shortcut.
To full screen a photo in Lightroom, press F on your keyboard or go up to Window > Screen Mode > Full Screen Preview. This will hide all other panels and fit your image to the screen for a larger viewing experience. To exit this full screen preview, just press F once again.
With that said, there are a variety of helpful tips to improve your full screening experience in Lightroom. In this post, you’ll learn the ins and outs of screen modes in the program and some easy ways to customize them to your liking. Let’s get started!
How To Full Screen Preview In Lightroom
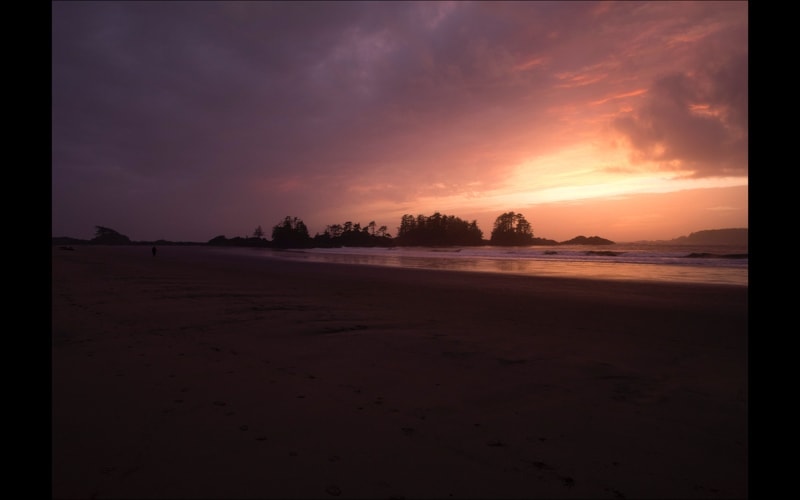
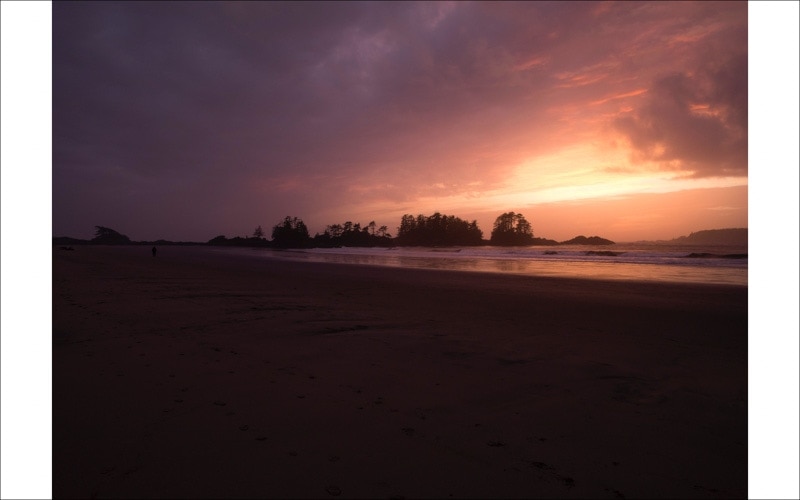
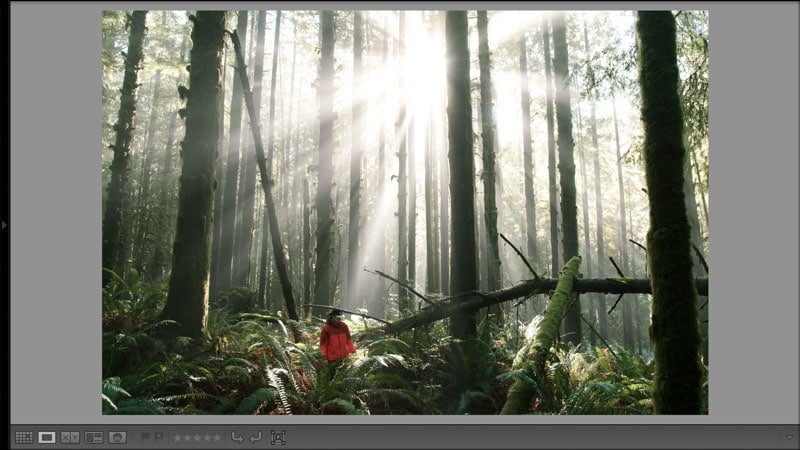
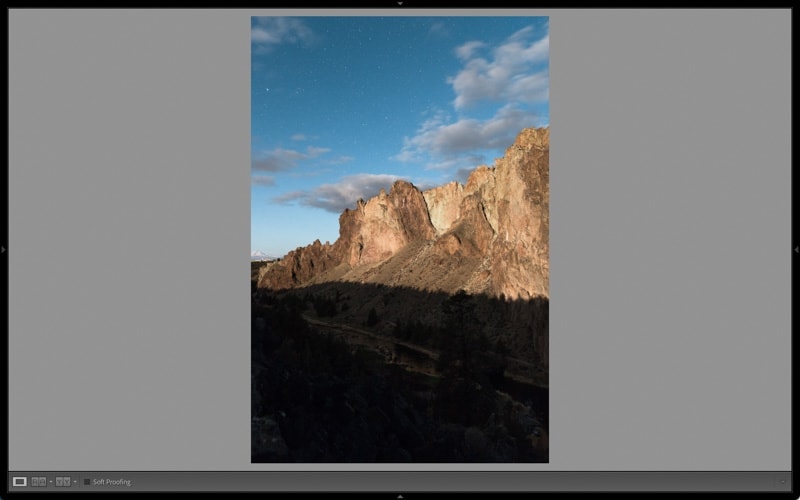
A full screen preview is when you see a single photo as large as possible on your screen. Rather than dealing with panels all around the photo, full screen preview fills your image to the screen against a colored background.
There are two different ways to access full screen preview. The easiest way is by pressing F on your keyboard. Alternatively, you can go to Window > Screen Mode > Full Screen Preview to achieve the same result.
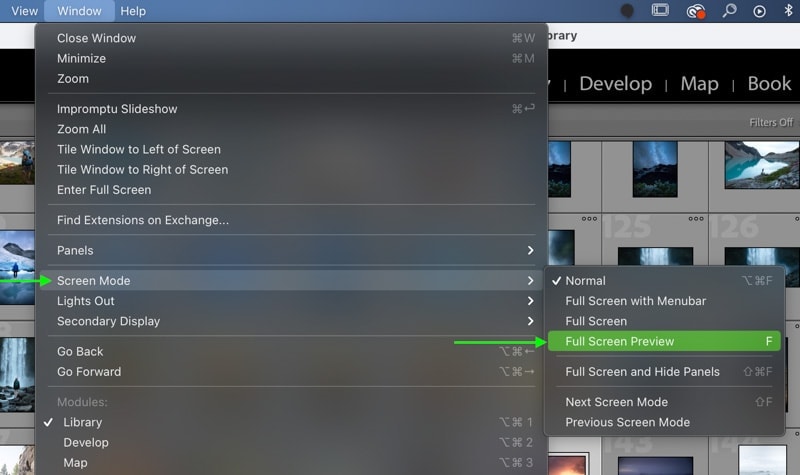
Once in full screen preview, your photo will fit to your screen, giving you the biggest possible viewing option. In this mode, all of the adjustment panels are hidden, making it only useful for previewing images.
I suppose that makes sense, considering it’s called full screen ‘preview’!
Don’t worry; if you want to full screen your images while still having your adjustment tools, I talk about how to do that later in the post.
How To Full Screen Preview With A White Background
To full screen a photo in Lightroom with a white background, press F on your keyboard to switch to the full screen preview mode. In this mode, right-click on the background and set the background color to white. Now your full screened image is against a white background!
This is a great option to make your photo pop a little more on your screen, especially if there are a lot of darker tones.
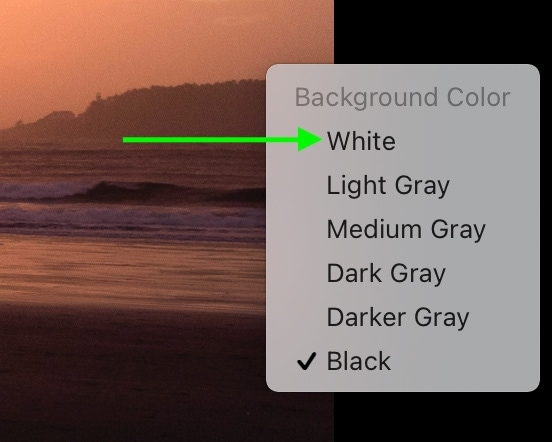
Besides white, there are a variety of background color options to choose from while in the full screen preview mode. By right-clicking on the background, you can choose between the following colors:
- White
- Light Gray
- Medium Gray
- Dark Gray
- Darker Gray
- Black
Unfortunately, you can’t make the background color anything other than these preset color options. So if you were hoping for some type of whacky color like neon green, well, you’re out of luck. Sorry to break it to you like this…
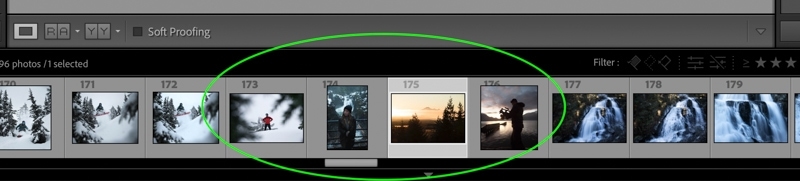
How To Switch Between Photos In Full Screen Preview Mode
To switch between photos in full screen mode, use the left or right arrow keys on your keyboard. By pressing these keys, you will toggle to the next image on your filmstrip and bring it into full screen view. This is a great way to view multiple photos at once without exiting full screen preview.
As a slightly different option, you can use the scroll wheel on your mouse to also cycle through your images in full screen.
It’s important to remember that you will only be able to view and switch between photos from your active image folder. If you have any sort of filters set, such as to only view flagged or rated images, these will affect which photos you can view in full screen.
If you want to view images in a separate folder, you’ll need to exit full screen mode by pressing F, then select your desired image folder. Once selected, you can reaccess full screen mode by pressing F again and continue to cycle through your photos.
Exiting Full Screen Modes In Lightroom
To exit full screen mode in Lightroom, press Command/Control + Option/Alt + F on your keyboard. If you are in full screen preview mode, press F on your keyboard instead to exit this screen mode.
To clarify further, full screen ‘preview’ is when your photo fits your screen and is placed against a black background (by default). By pressing F on your keyboard, you will exit full screen and go back to your regular view with the adjustment panels.
With that said, you may find yourself in a situation where pressing F doesn’t fully exit you from full screen viewing. This can happen when you’re in the standard full screen view and not the full screen ‘preview’ view. You’ll know this is the case when all your panels disappear from around your image, but it’s still against the same light-gray background as before.
If this sounds like your situation, just press Command + Shift + F (Mac) or Control + Shift + F (PC) to exit regular full screen mode.
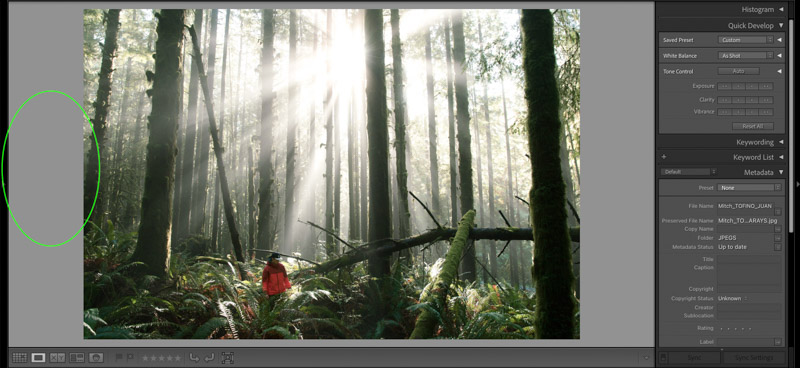
How To Hide Panels In Lightroom
To hide your Lightroom panels, press on the gray triangle found along the outer edge of each panel. This hides the specific panel from view until you click on the triangle again. Alternatively, you can right-click on this outer edge and select ‘Auto Hide & Show’ to make panels hide when not in use.
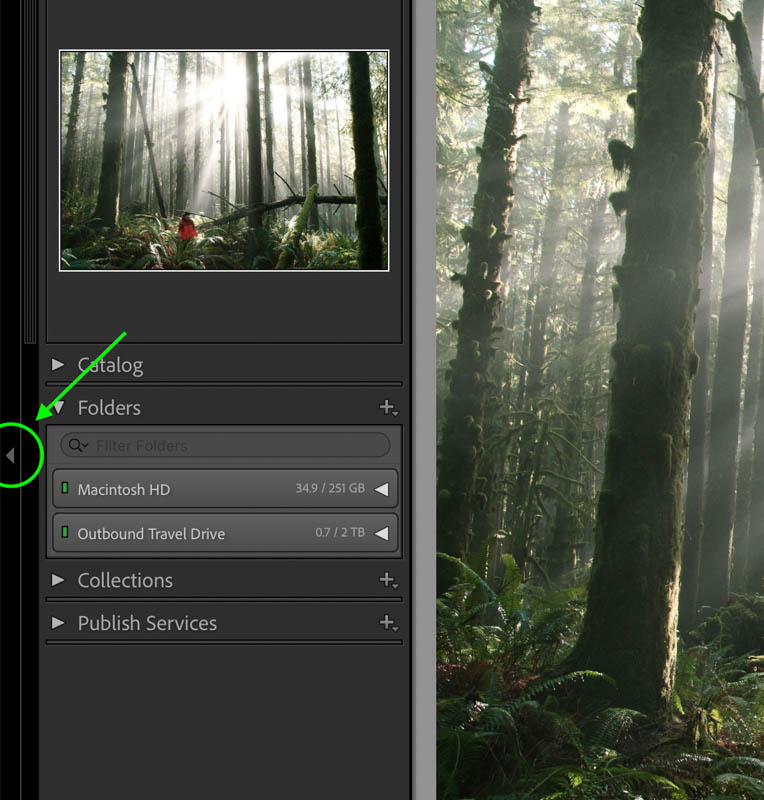
When your panels disappear, there is more room for your photo to display, so it becomes noticeable larger.
With hidden panels, you get the best of both worlds, getting a larger photo but still having access to your adjustment options. By hovering your cursor near any edge of your screen, the respective panel will appear.
For example, if you moved your mouse to the left edge, the adjustment panel would come into view.
If you went to the bottom of the screen, the filmstrip comes into view.
You get the idea.
To ensure a panel stays in view permanently, just click on the gray triangle again to set the panel in place.
Now, what if you want to quickly hide all of your panels at once? Well, that’s easily done by using Command + Shift + F (Mac) or Control + Shift + F (PC) to hide everything.
How To Hide Lightroom Panels Automatically
I don’t know about you, but manually clicking each time I want to hide a panel seems like a bit of a pain. Luckily there’s a way to hide individual panels automatically.
By right-clicking on the outer edge of the panel, you’ll have the option to change its view settings. The setting options you have are:
- Auto Hide & Show
- Auto Hide
- Manual
- Sync With Opposite Panel
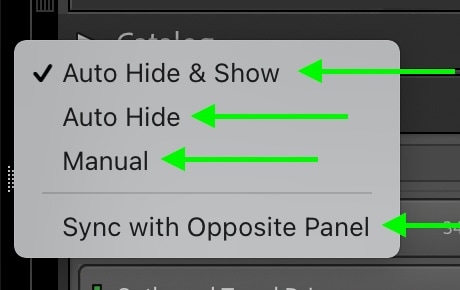
The Auto Hide & Show setting is generally the best option to use. With this setting, your panel will automatically hide after it feels you’re done working with it. For example, after hovering your mouse over the edge to reveal the panel and you begin to do something else, it will automatically hide.
Auto Hide means that you have to actually click on the panel sidebar to reveal it. Once your mouse moves away, it will automatically hide itself once again. This is a slightly less ideal view but is worthwhile for panels you rarely use.
The Manual setting is pretty self-explanatory as it gives you manual control over whether or not your panel is visible. To hide or show the panel, you need to manually click on the panel sidebar every time.
As for the Sync With Opposite Panel option, this will give your selected panel the same settings at the opposite panel on your screen. For example, if my right-side panel is set to “Auto Hide & Show,” setting the left-side panel to Sync With Opposite Panel will give it the “Auto Hide & Show” setting as well.
How To Change The View In Lightroom
You can quickly change between normal view, full screen with menu bar view, and full screen view in Lightroom by pressing Shift + F on your keyboard. This keyboard shortcut will cycle through to the next viewing option each time it is used.
To elaborate further, the three main screen modes in Lightroom go like this:
– Normal
The normal screen mode is the default view in Lightroom. In this view, all of your panels and upper toolbars are visible.
– Full Screen With Menu Bar
In the full screen with menu bar screen mode, you can hide the program bar at the top of your screen. This little bar doesn’t do much besides offering your minimize and exit buttons for the window. By using the full screen with menu bar mode, this bar becomes hidden out of view.
– Full Screen
Full screen mode hides both the upper program bar, as well as the menu bar. With these two bars hidden, Lightroom takes up more area on your screen and has a cleaner feel to the workspace.

Each of these screen modes can be manually accessed by going to Window > Screen Modes > and select your desired view.
Useful Full Screen Shortcuts For Lightroom
So far, you’ve learned about a ton of different screen modes and shortcut options in Lightroom. To make it easier to remember, here’s a list of full screen shortcuts for Mac and PC:
- Shift + F – Cycle Screen Modes
- F – Toggle Full Screen Preview
- Command/Control + Shift + F – Full Screen & Hide Panels
- Option/Alt + Command/Control + F – Active Normal View
With these four full screen shortcuts, you can quickly switch views while you edit. Rather than going through the menu bar to manually select things, these shortcuts make the whole process much easier.
Common Questions When Using Full Screen Modes In Lightroom:
Especially when you’re new to using full screen modes in Lightroom, you may run into a few common issues or questions. Let’s break them down.
1. How Do I Get My Minimize Button Back In Lightroom?
If you’ve lost the minimize button in Lightroom, it’s because you’re in the full screen view mode. To bring it back, press Option + Command + F (Mac) or Alt + Control + F (PC) to enable normal screen view.
Alternatively, you can press Shift + F to cycle through the screen modes until the minimize button appears again.
2. How Do I Reset My Lightroom Back To Regular View?
If you’ve accidentally hidden a panel or entered full screen preview mode, you might feel like the entire workspace has gotten messed up. Luckily there are two things you can try.
If you’re in full screen preview mode, just press F on your keyboard to exit this mode and enter back to the regular Lightroom view.
Now, if you’ve accidentally hidden some panels, you can reaccess everything by pressing Command/Control + Shift + F. If the panels are still hidden, click on the gray triangle near the outer edge of each panel to reveal them once again.
3. Is Loupe View The Same As Full Screen?
Although somewhat similar, loupe view and full screen modes are two different things. Loupe view allows you to view a single image at once rather than seeing a grid. This is the view you see while in the Develop Module or are in the Loupe Viewing Mode within the Library Module.
On the other hand, full screen mode allows you to hide panels around your photos to provide a larger view of your images. In full screen mode, you have fewer distractions with unneeded panels surrounding the photo while you edit.
Full screen mode can be toggled on or off by pressing Command + Shift + F (Mac) or Control + Shift + F (PC). Through the menu bar, it can also be accessed by going Window > Screen Modes > Full Screen And Hide Panels.
4. Where Did The Filmstrip Go?
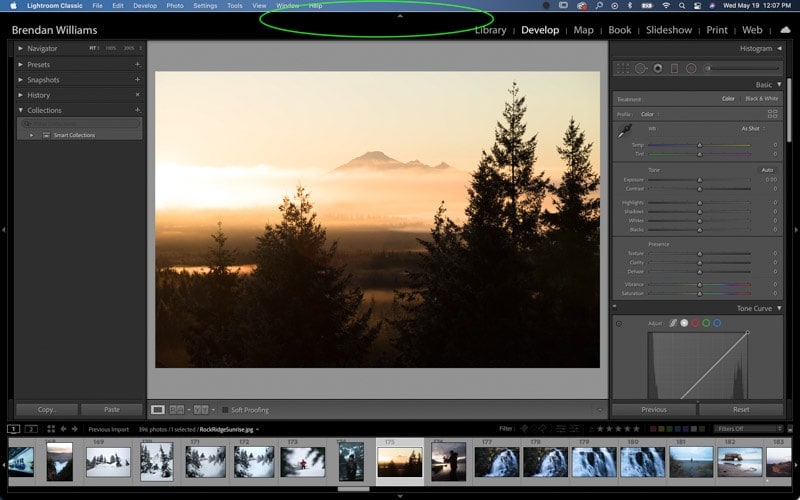
If you’re messing around with different screen modes and panel options, it’s not uncommon for the filmstrip to suddenly disappear. Luckily you can make it visible once again simply by clicking on the gray triangle along the bottom edge of your screen.

So now you know the ins and outs of full screen modes and panel options in Lightroom. With these techniques and helpful shortcuts, you can easily customize your workspace and always have the best view of your images while you edit.
Happy Editing!
– Brendan 🙂


