


Lightroom may be a widely-used tool for editing photos, but did you know you can use Lightroom to edit videos, too? Some photographers like to expand their creative skills by dabbling in videography. And while video editing can get quite complex, you can accomplish some basics easily right in Lightroom.
Now, Lightroom’s video editing capabilities are limited, so if you’re looking to make lots of complex edits, you should seek more advanced editing software. Adobe’s own Premiere Pro is a great option that lets you do some seriously comprehensive video editing. However, Lightroom does allow you to make some edits to the appearance of your video and even put some clips together to create a movie. Let’s see what we can do with Lightroom’s video editing tricks.
Can You Edit Video In Lightroom?
In Lightroom, you can do basic video editing such as trimming videos, reviewing clips, or color grading. Although Lightroom is not meant as a replacement for a dedicated video editing program, it can work with any video clips you import to your Lightroom catalog.
So you might be surprised to find out that, yes, you can edit videos in Lightroom— to an extent. For the longest time, I automatically assumed that Lightroom didn’t have video-editing capabilities. While it technically doesn’t, there is a little-known trick that allows you to make some basic edits on your videos using the Develop module.
This means you can color grade, change exposure, and even add presets. You can also trim small clips out of a longer video and even put multiple clips together. At the very least, it gives you more control over your video’s aesthetic without having to move over to a different program like Premiere.
How To Import Video Into Lightroom
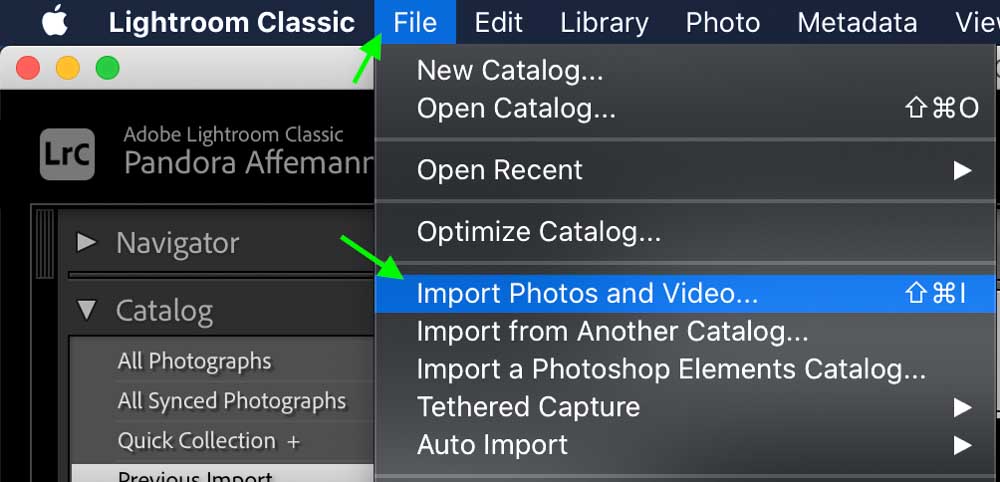
Video can be imported into Lightroom the same way as a photo. By going to File > Import Photo and Video, you can locate and select the video files you wish to import. After clicking “Import” your video files get added to Lightroom and can be reviewed within the Loupe View of the Library Module.
At the very top of your screen, click File > Import Photos and Video. You can also press Shift + Command + I on a Mac, or Shift + Control + I on a PC.
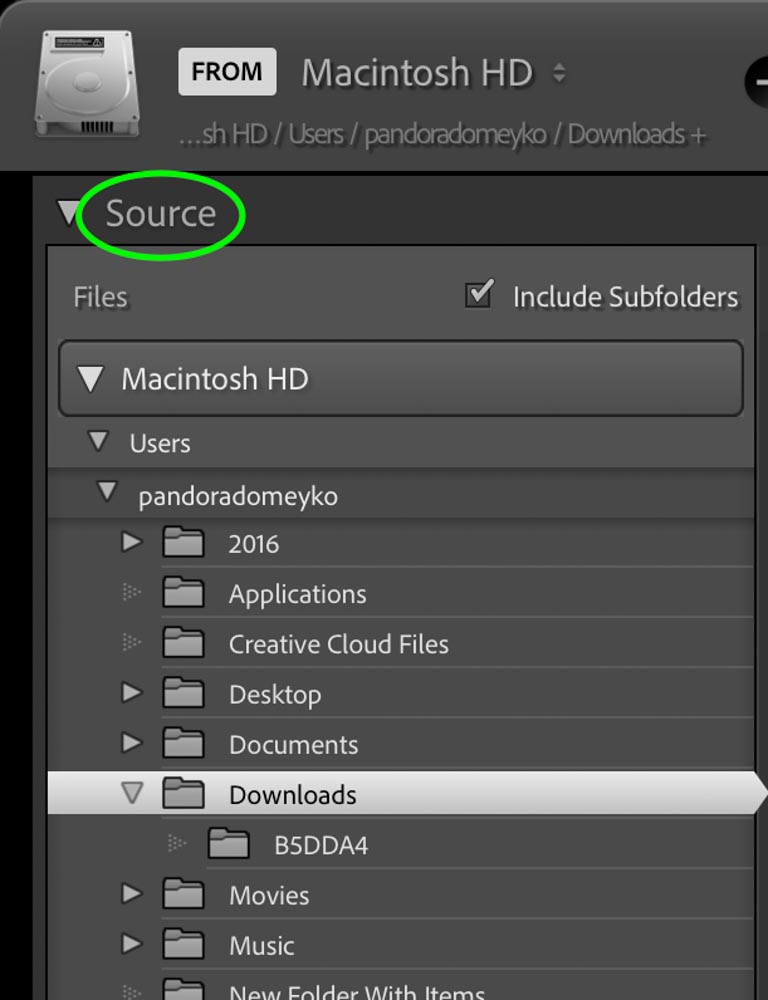
Find the location of your video clip in your files under the Source section on the left.
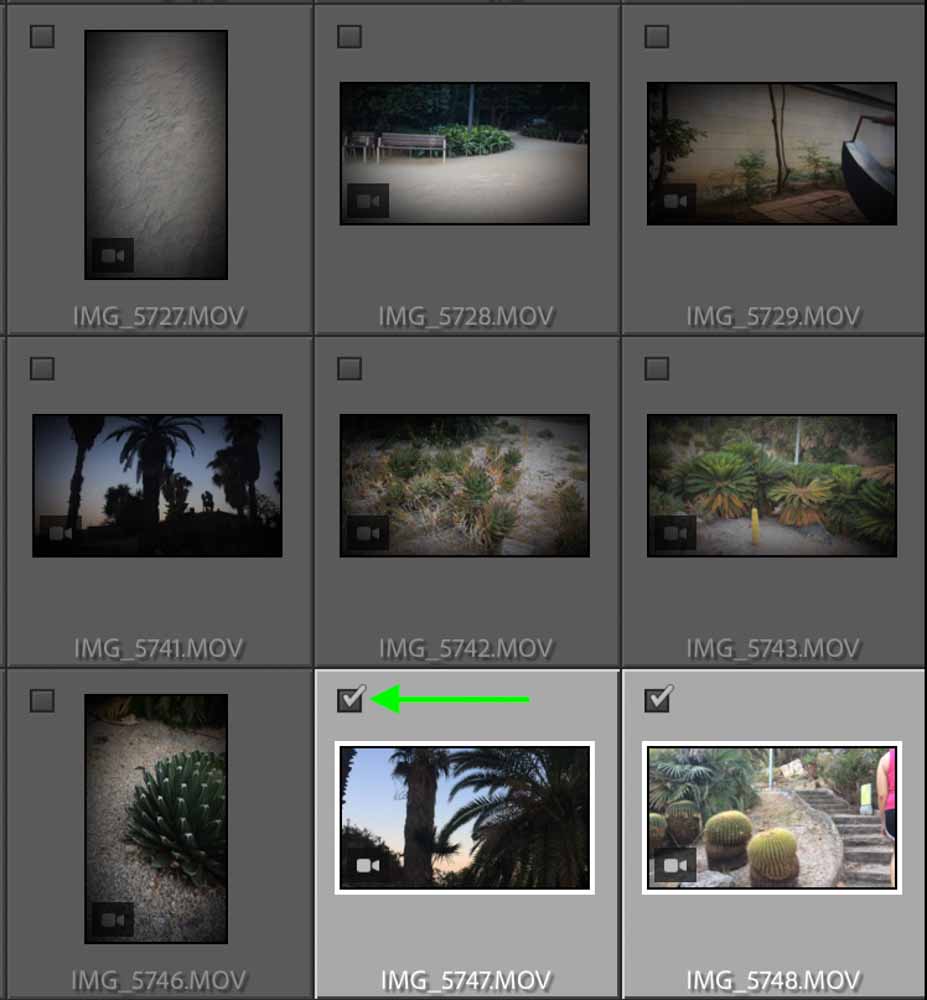
Once you have your Source destination, you’ll notice all the photos and videos you see in the center section have the top left box check marked. Unless you’d like to import all of these files, click Uncheck All.

Now you can find the video clip you’d like to edit and check off the box on the top left of the video thumbnail. To import multiple videos at a time, hold Command on a Mac, or Control on a PC, while clicking the videos you’d like to import. You can also select multiple files by clicking the first one you’d like to import, holding down shift, and clicking the last (this works forward and backward).
Once you have all the videos selected, click the box on the top left of one of them to add checkmarks for all.
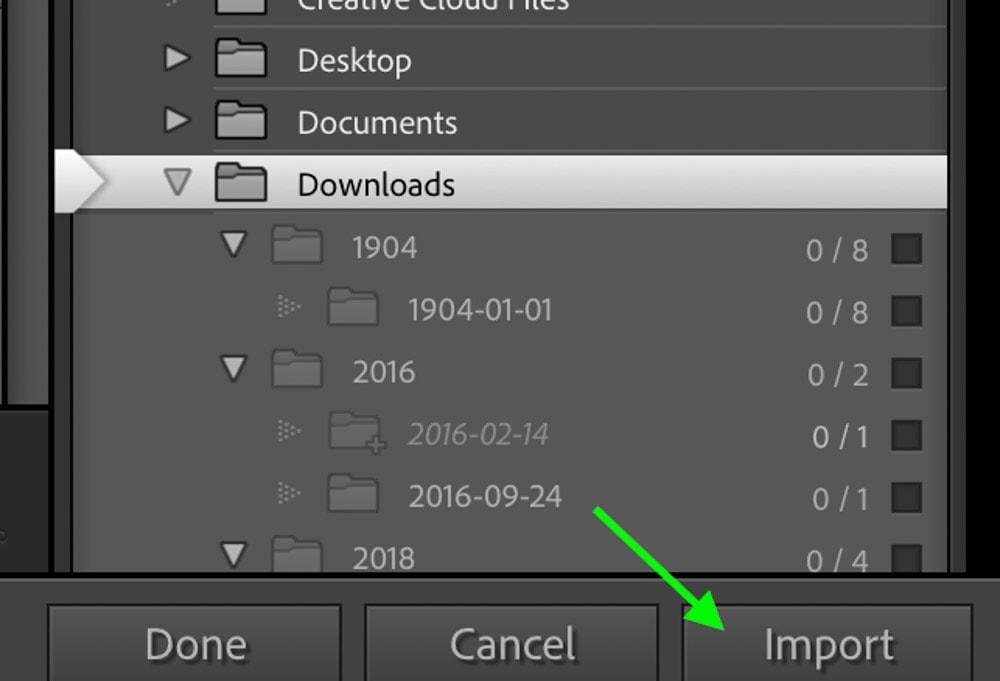
Once you have selected the clips you’d like to edit, click Import on the bottom right.
Voila! The videos will then appear in your Lightroom Library alongside your photos. You can easily tell the difference between the video and image files based on the clip duration displayed on the video thumbnail.
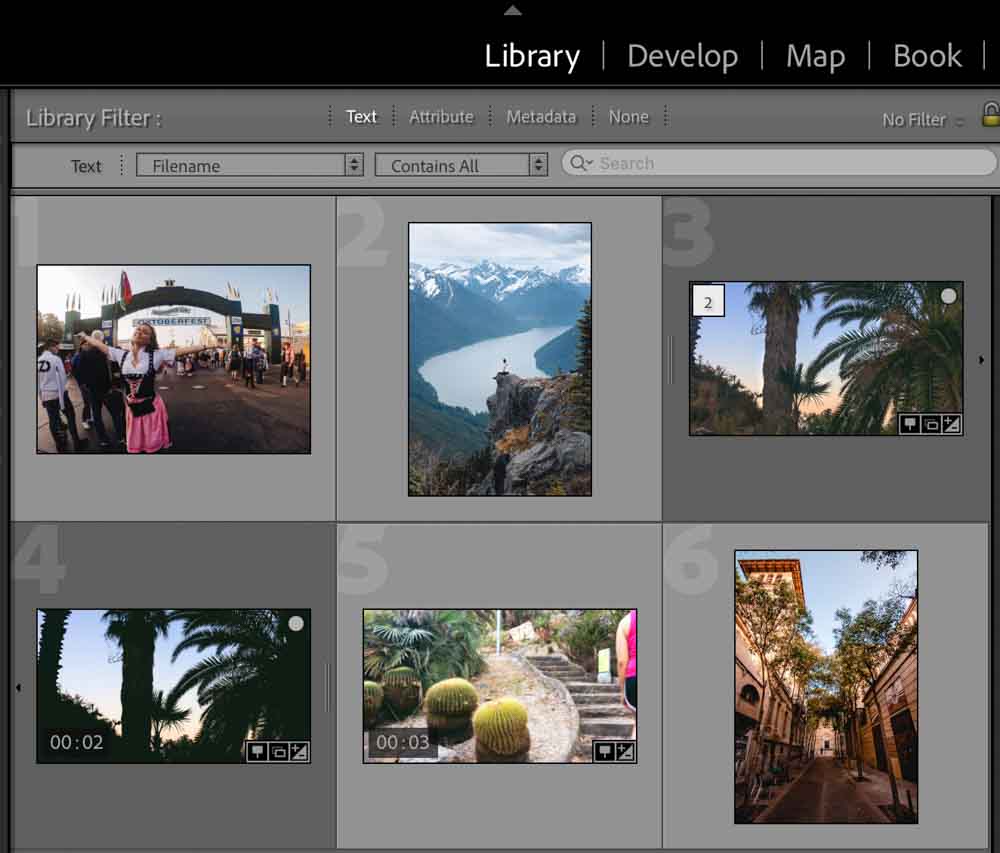
How To Locate Video In Lightroom
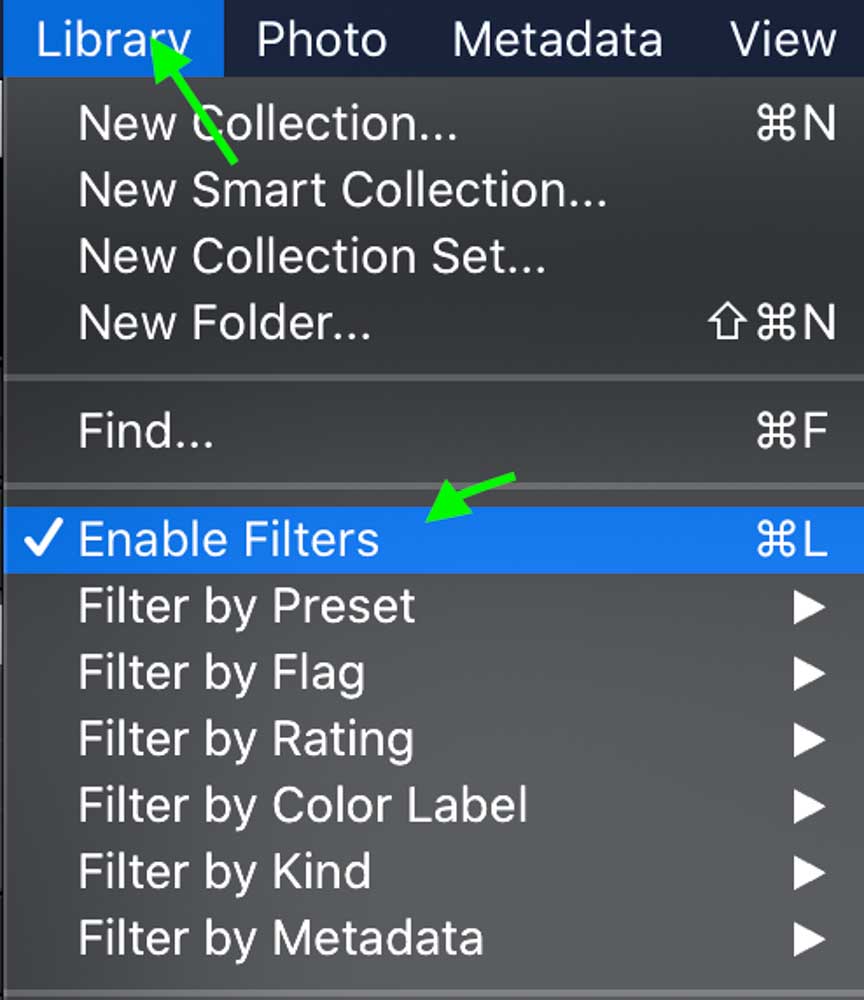
To locate video in Lightroom, go to Library > Enable Filters and set the filter method to “Text.” Set your text filter setting to Filename and type the video file extension in the search bar such as MOV. This will filter your Lightroom folder to only show the imported files listed as video files.
Let’s break this down more in-depth.
You can find videos in the same place as your photos, in the Library module, but this can sometimes make it hard to tell the different file types apart and locate your video. To avoid confusion, you can filter the library so that you only see videos. Do this by first enabling filters by clicking Library > Enable Filters.
Once you’ve enabled filters, you should see an area above your photos called Library Filter. Click Text, and in the bar that comes up, click the first drop-down and select Filename. In the search bar, type .mov. You should then be able to see only files that end in .mov (aka video files).

How To Edit Video In Lightroom
To color grade video in Lightroom, open a clip in the Loupe View within the Library Module. Select a frame of the video to work with, then press the Capture Frame button to save the frame. Bring this frame into the Develop Module, apply your edits, then sync the saved frames setting with the video.
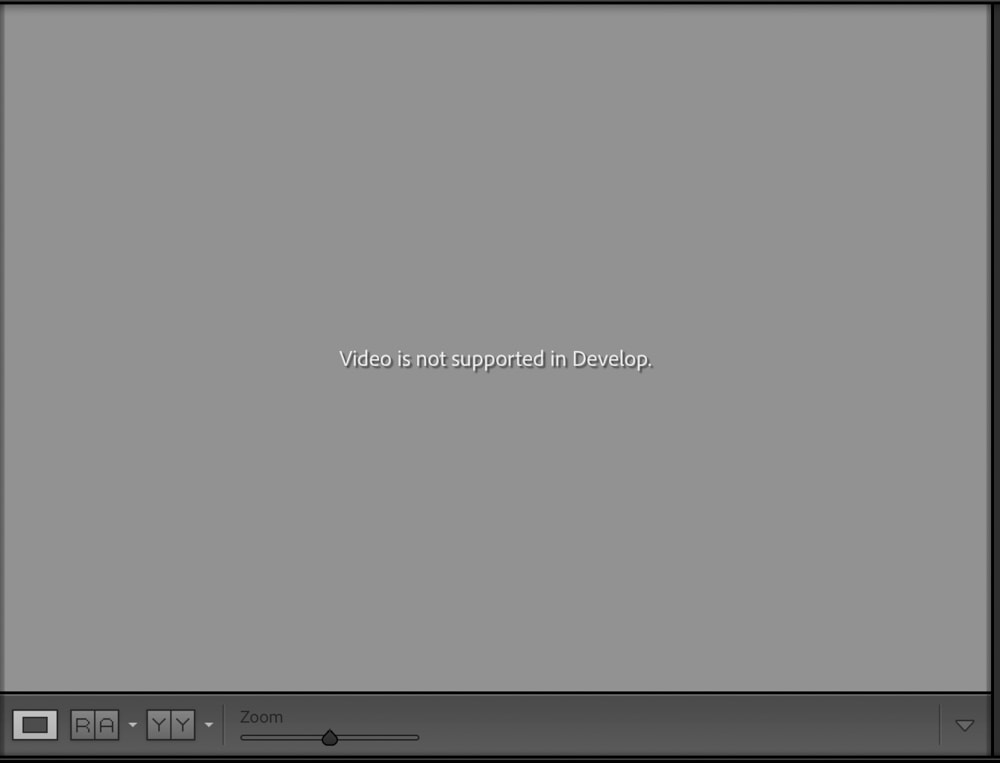
To start editing your video, select your video from the Library and click the Develop module. Here, you’ll see a message from lightroom that says: Video is not supported by Lightroom.
Don’t get dismayed! There is a loophole of sorts that allows you to make some basic edits. What you’ll do is take a single frame from your video and edit it as if it was a photo. Once it’s edited to your satisfaction, you can apply those edits to the entire video.
To start this process, head back to the Library tab and double-click your video. You’ll notice a playback bar at the bottom.
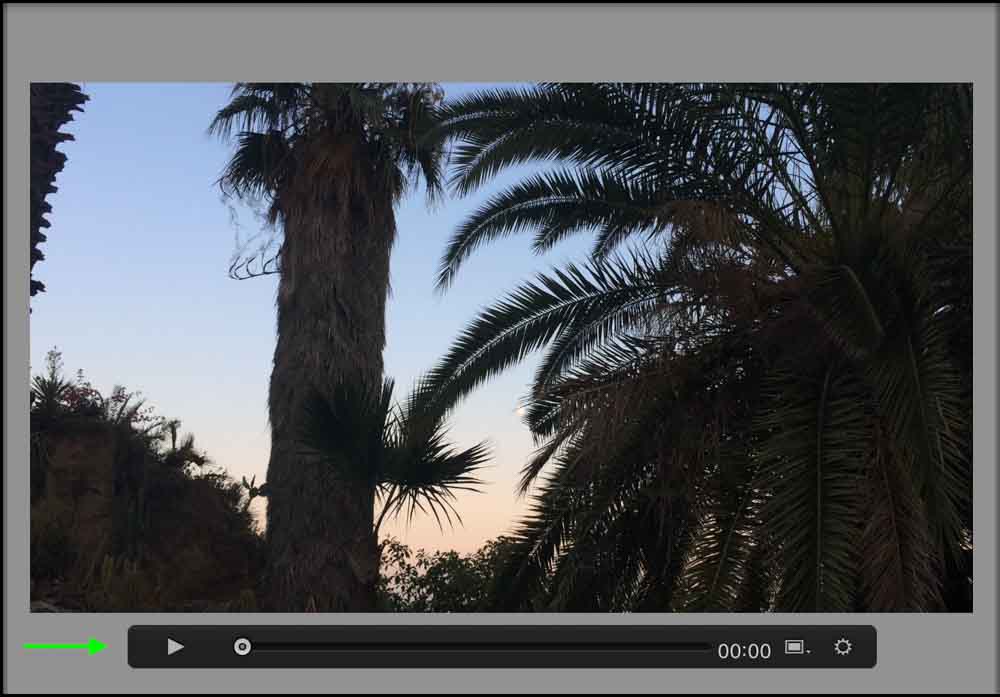
Click the last icon on the left, the one that looks like a gear. This icon will show your entire video frame-by-frame.
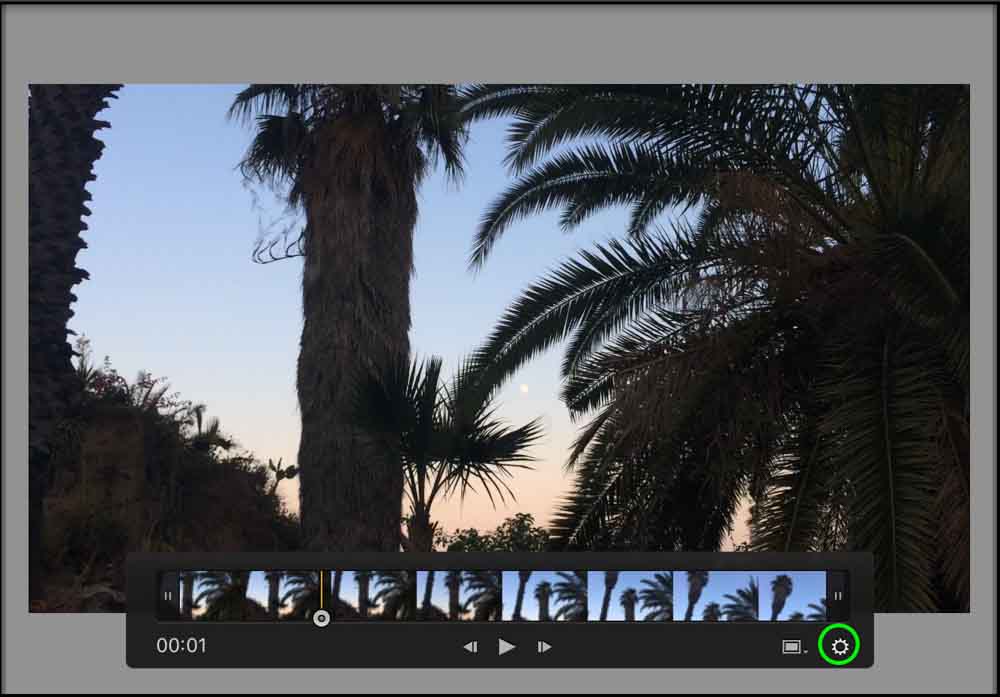
At this point, you can also trim your video, by moving the Trim buttons on either side of the bar. You don’t need to do anything else to trim, just leave the trimmed area as it is and when you export the video, it will be trimmed.

Now, move the current-time indicator to any frame in the video.

Choose a frame you’d like to edit, preferably one that acts as a good representative of the clip as a whole, with an overall average exposure and white balance. Once you’ve chosen the frame you want to edit, click the icon to the left of the gear, which is shaped like a box. In the drop-down, select Capture Frame.
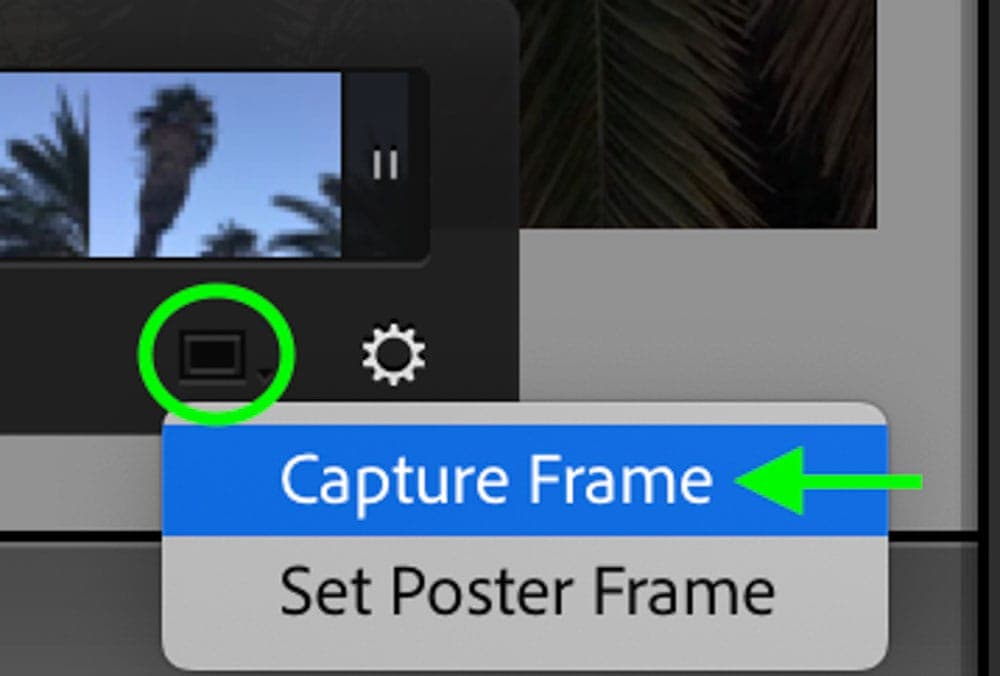
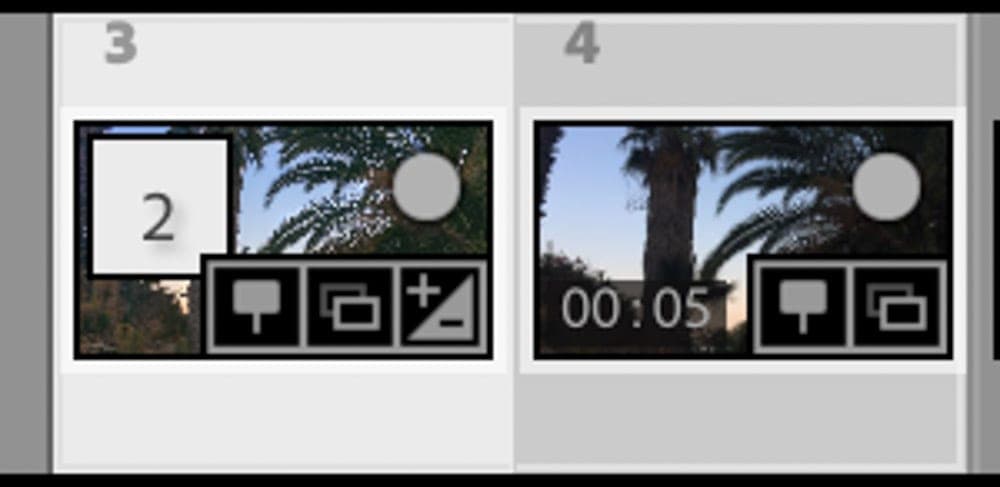
You’ll then see that a photo has appeared next to your video in the view bar below.
Head back to the Develop module to start editing this frame. You can edit it the exact same way you would a normal photo using the available adjustments you see in the Lightroom Develop module. This means you can edit the exposure, white balance, colors— pretty much anything you’d normally edit in a photo.
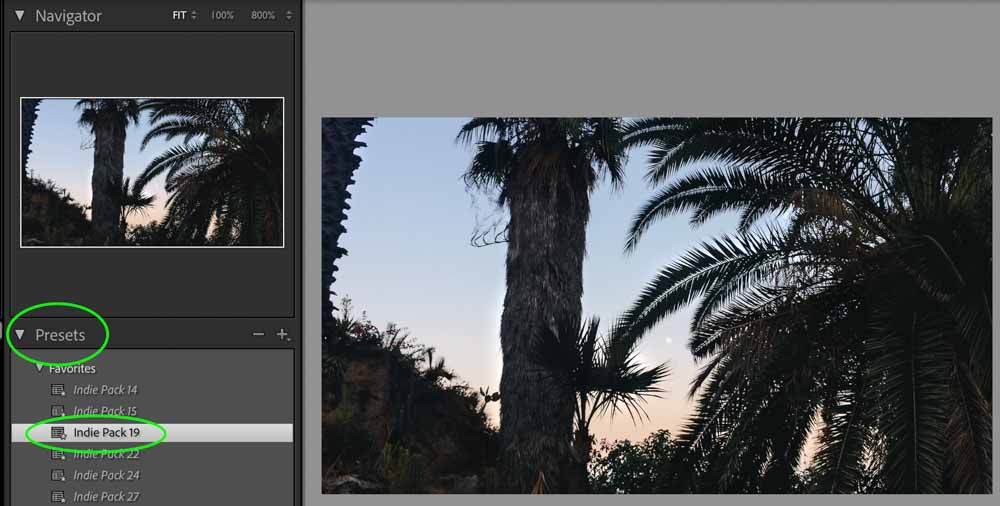
You can even add presets, too. Click the Presets section, and scroll to select which preset you’d like. Click to apply the preset to your photo.
(To get rid of preset settings, head to the tone editing area, hold down ALT or Option and click Reset Tone at the top. This will set all of your tone settings back to what they were originally.)
My personal favorite thing to do with videos on lightroom is add a cinematic effect using the Tone Curve. First, click the white circle and edit the curve so that the very first dot is moved slightly up, preventing any pure black areas. Adjust the other areas as needed.

Next, click the green circle to edit the amount of green in the tone. Repeat the same as before, moving the first dot up to tint the shadows green just slightly— you don’t want the shift to be too noticeable. To prevent the entire photo from appearing green, make sure the rest of the dots in the curve remain in the same places along the diagonal line.
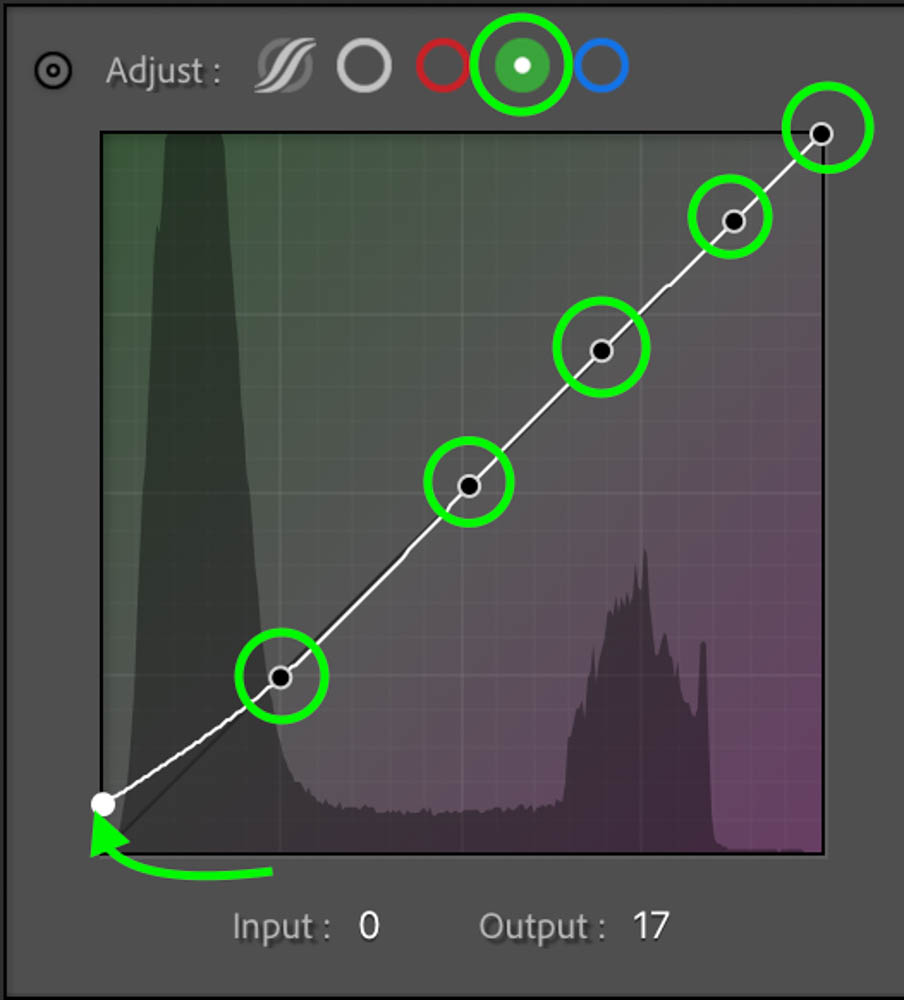
This creates a vintage style that is commonly used in films and will add a bit of drama to your video clip.

As you edit your clips, keep in mind that the edits you make will eventually be applied to the entire video. So, this might not be the best tool if your clip contains lots of different exposures, as you won’t be able to edit for the specific frames.
When you’re happy with how the image looks, it’s time for the magic trick. While holding Command on Mac or Control on PC, select the two files— the video and the saved image frame.
Go to Settings > Sync Settings.
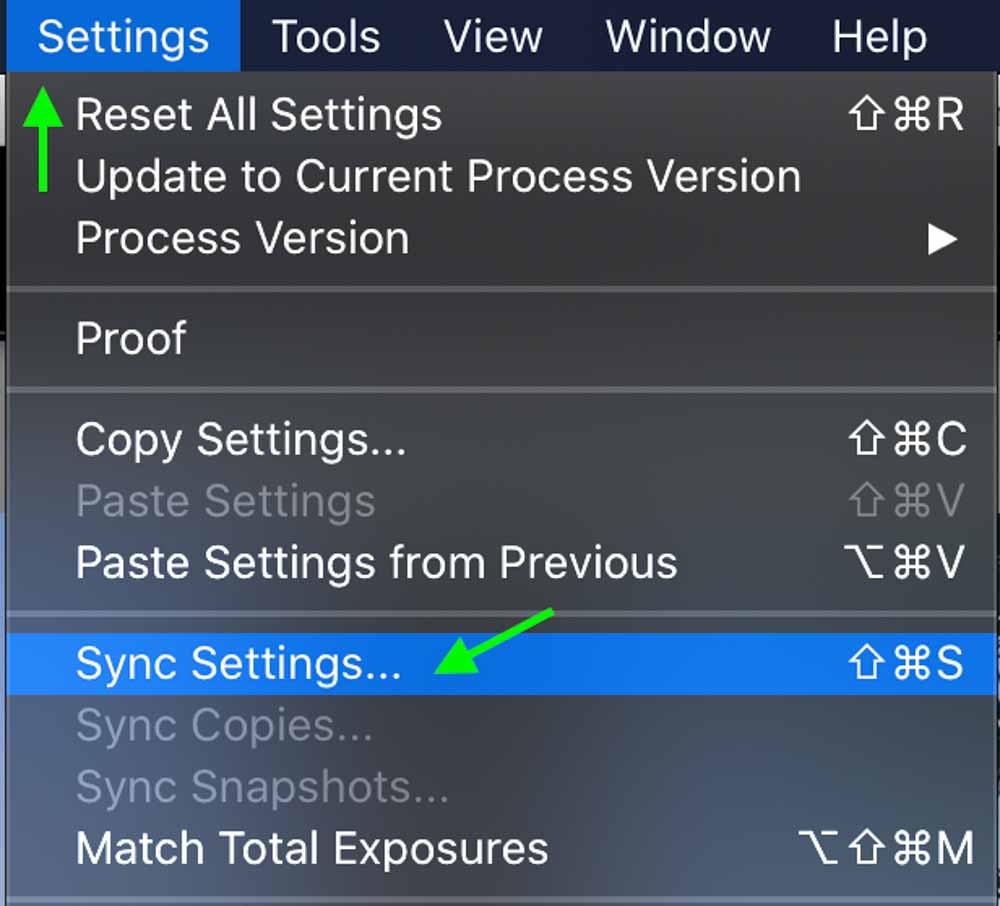
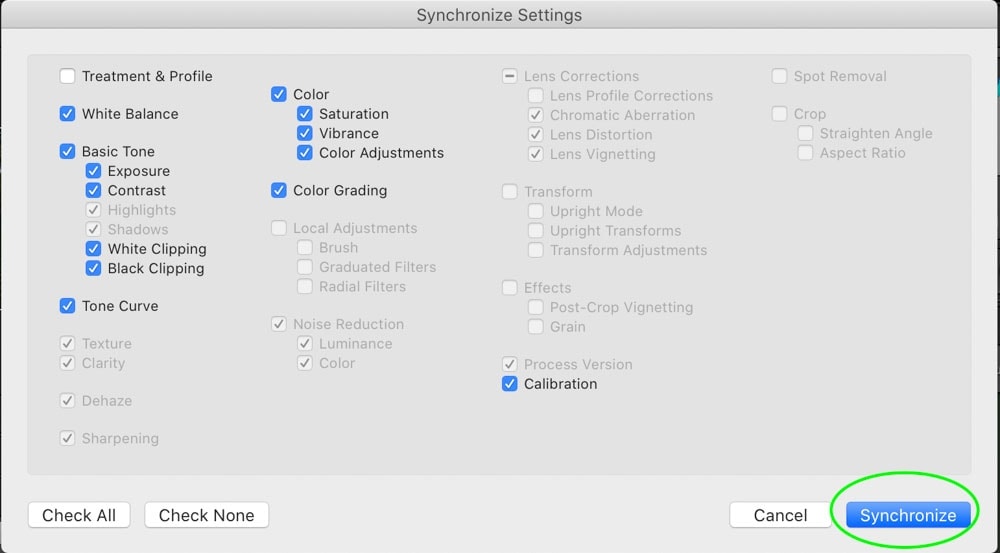
In the box that comes up, select which edits you’d like to keep. You’ll notice not all are available, but you will be able to keep the basic edits. Click synchronize to match the edits of two files and apply all the edits you made on the still image to the video.
Now you can head back to the Library Module and double-click on the clip to watch your new color-graded video.
From there, you can combine multiple clips into one longer video. Select the clips you’d like to combine and go to the Slideshow panel.
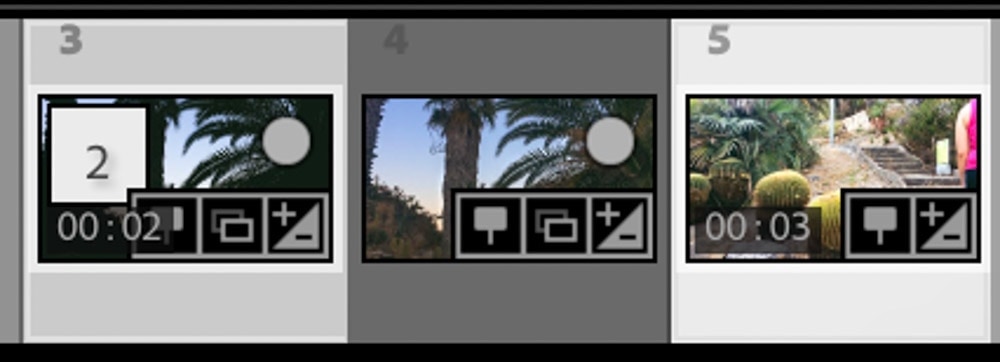
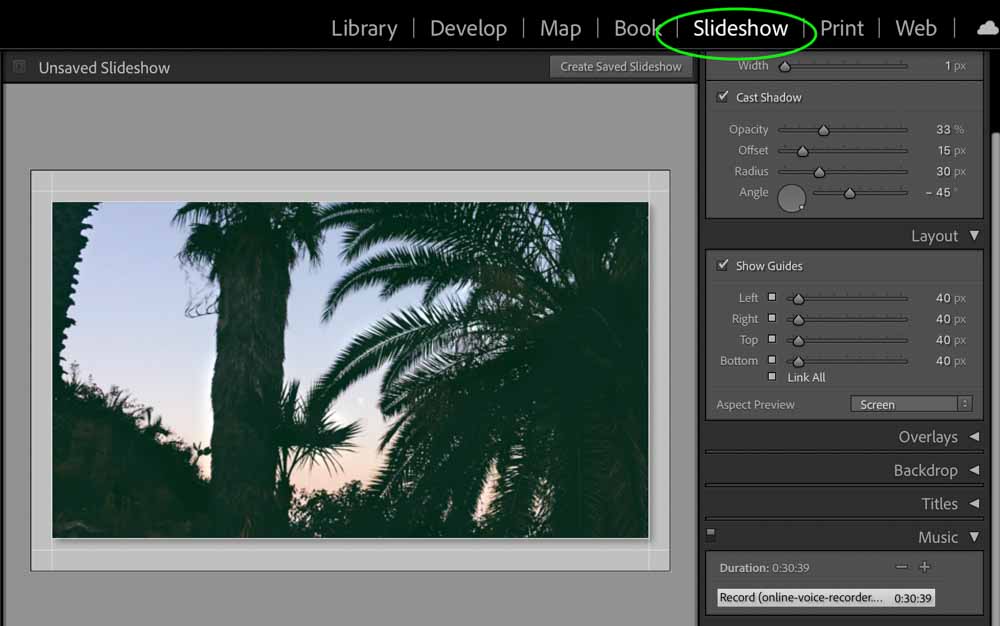
Below the photo, where it says Use, click the dropdown and choose Selected Photos to ensure the slideshow only contains the clips you have selected.

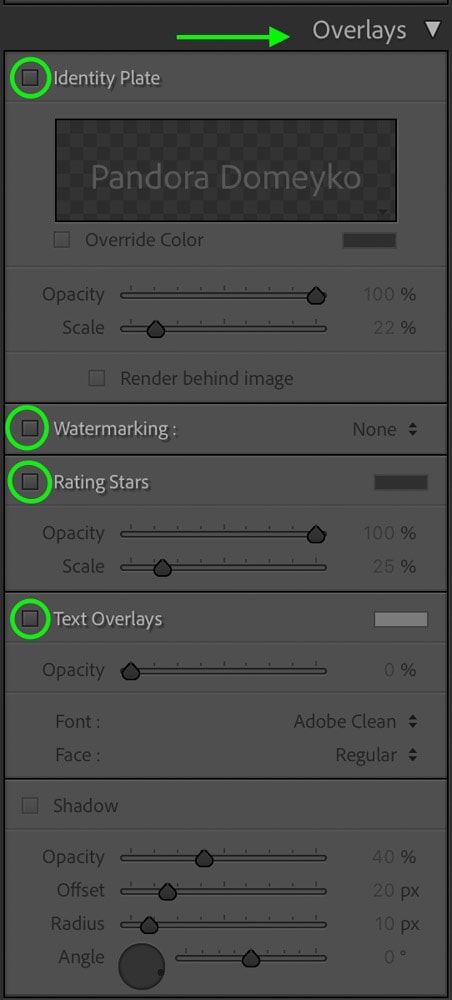
Make sure any overlays on the photo are turned off for a clean look. Head to the Overlays panel and uncheck everything that might be checked.
You can even add audio by going to the Music panel and clicking the + sign. If you want to add music to your video in Lightroom, I’d highly recommend Artlist for high-quality, royalty-free music. I use it in all my youtube videos!
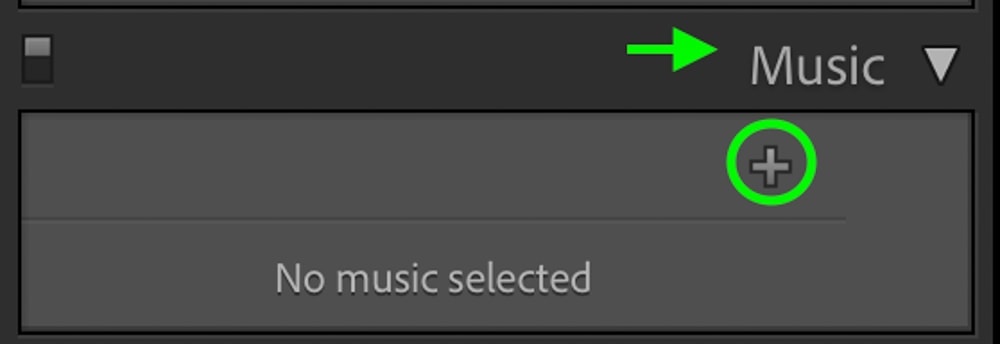
You can’t do much with the music in Lightroom, like trim the audio file or move it to a specific part of the file, but at least you can add some type of audio if need be.
How To Export Video From Lightroom
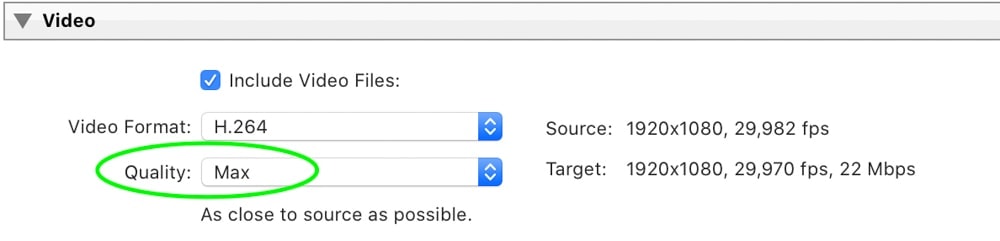
To export a slideshow, from the Slideshow module go to File > Export (you can also press Shift + Command + E on a Mac, or Shift + Control + E on a PC.)
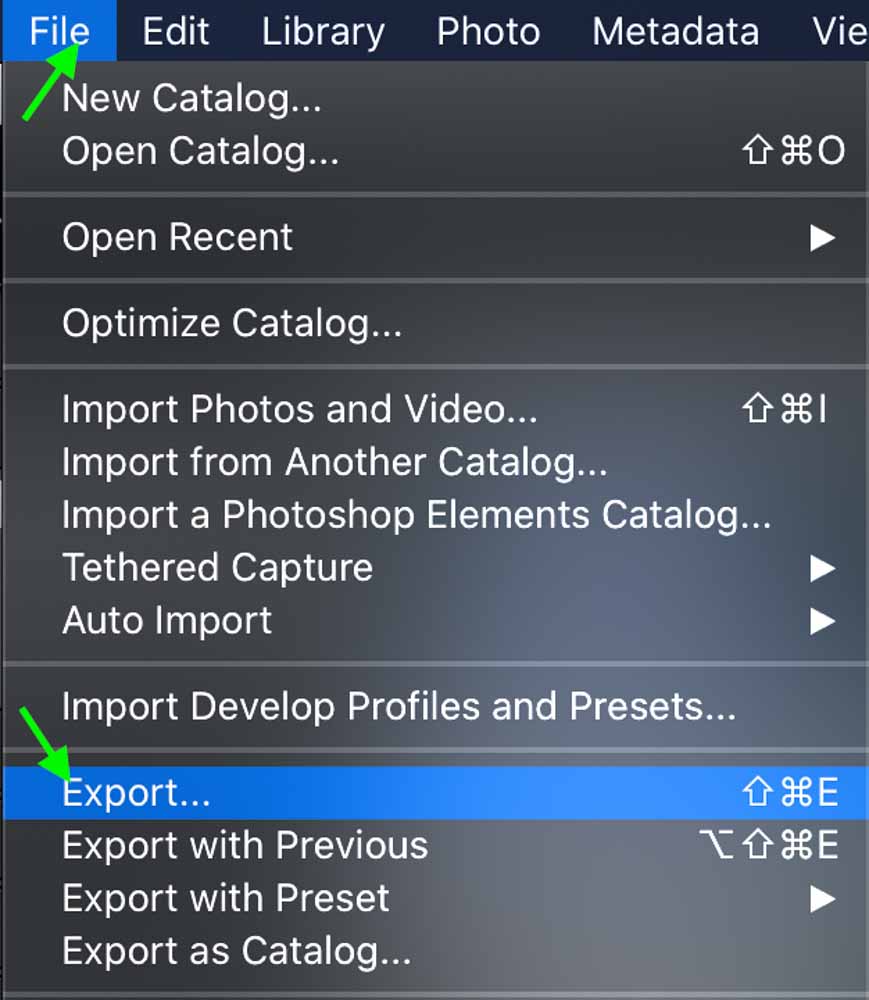
In the box that comes up, you can choose the file name and destination. You can also edit the video format and quality under the Video section. Set quality to Max for the best final result.
You can also export one specific clip with all of its new edits by taking the same steps: select the clip, go to File > Export, and set the name, destination and quality.
While Lightroom may not allow you to make all the edits you want in your video, the Develop module can be useful for creating a specific mood or tone with your video, fixing any issues with exposure, or making a simple video out of your clips. This can be a great starting point for new videographers or provide a quick fix for any videos that only need a bit of light editing.
Happy Editing!
