
Black and white photography has captivated artists for decades for its emotional expression and focus on shapes. You, too, can make stunning black and white photos in Lightroom Classic and CC, pulling the distracting color away to reveal a powerful story! By turning an image into black and white, you can play with exposure, contrast, and the B&W mix to bring your vision to life.
In today’s tutorial, I will be showing you how to convert your color photography to monochromatic images, from a single image to an entire batch. With Lightroom’s easy adjustment tools, you can even adjust each aspect of the image independently of one another.
How To Convert An Image To Black & White In Lightroom Classic
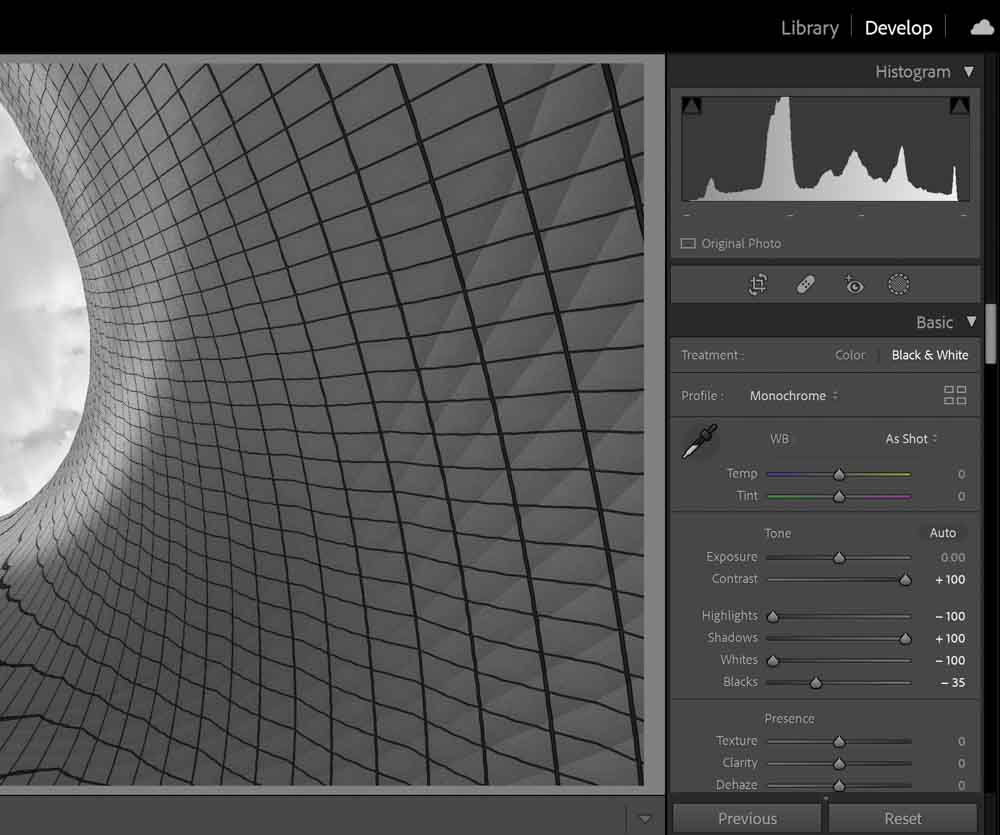
To convert an image to black and white in Lightroom, access the Develop Module and set the Treatment to Black & White at the top of the Basic Panel. You can now refine the look of your black and white image using the exposure sliders as well as the Black & White Color Mix tool to adjust the luminance values.
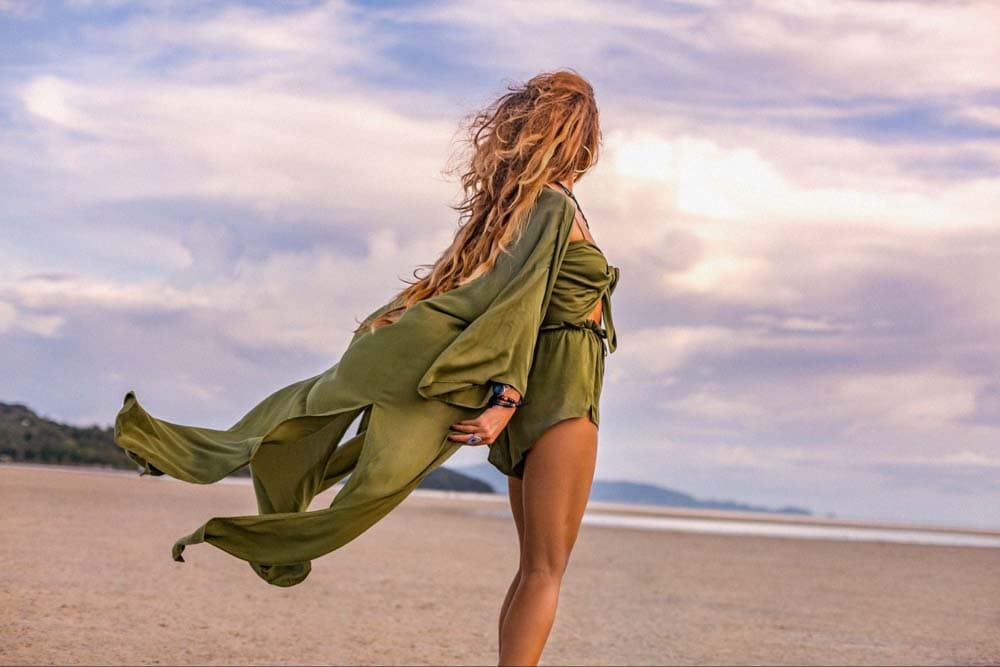
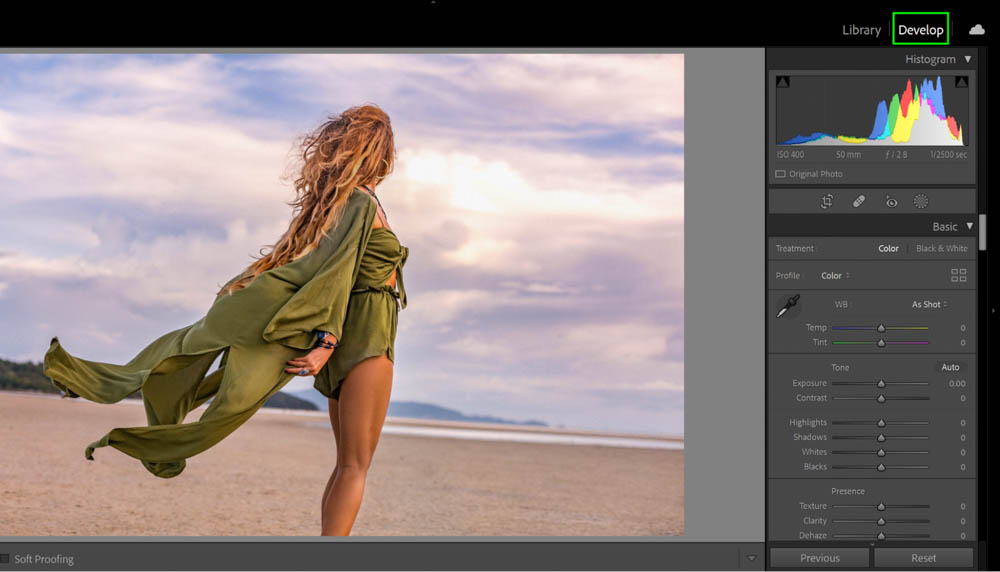
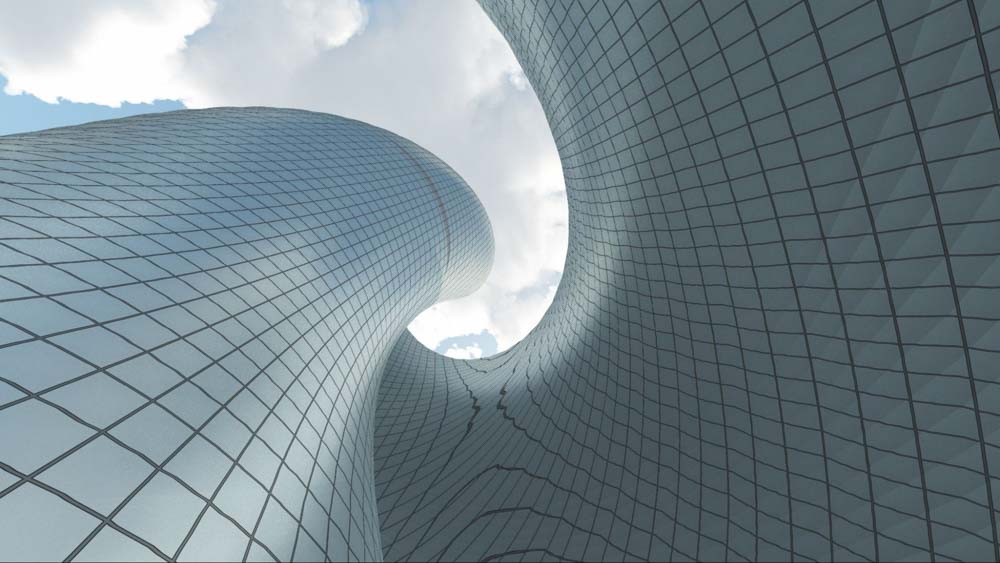
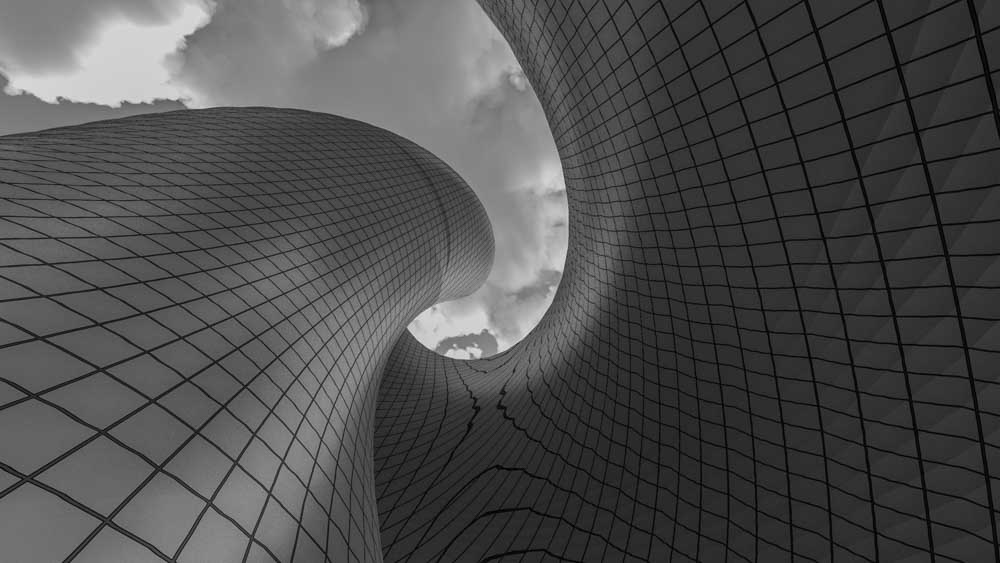
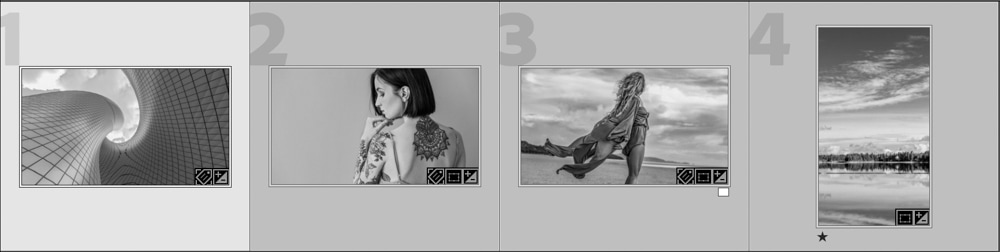
Let me walk you through that process more in-depth. Here’s the image I’ll work with today.
Step 1: Select Your Desired Image(s)
The first thing is first: Go ahead and load the desired image(s) into Lightroom Classic.
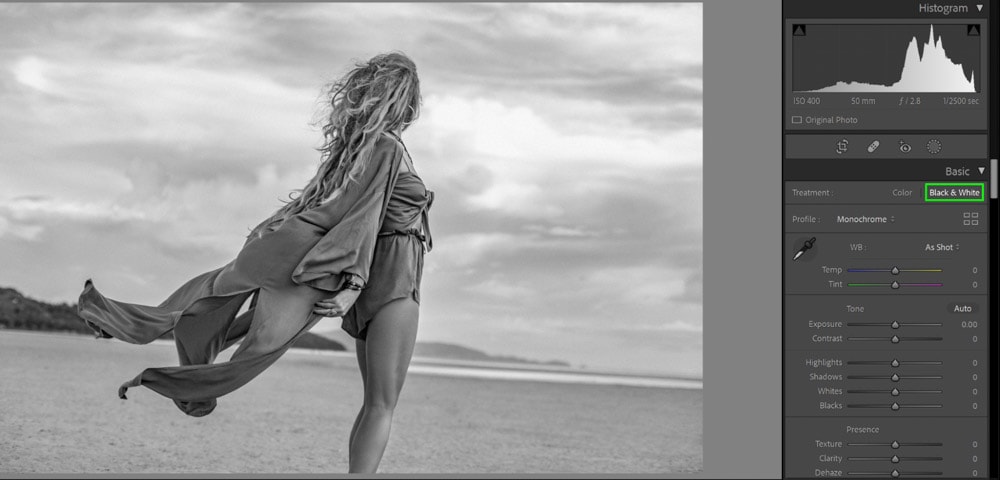
Step 2: Set The Treatment To Black & White
With the image selected, go to the Develop Module found in the upper bar.
Now in the Basic panel, click Black & White. If the Basic panel is hidden, just tap on the arrow to open it up!
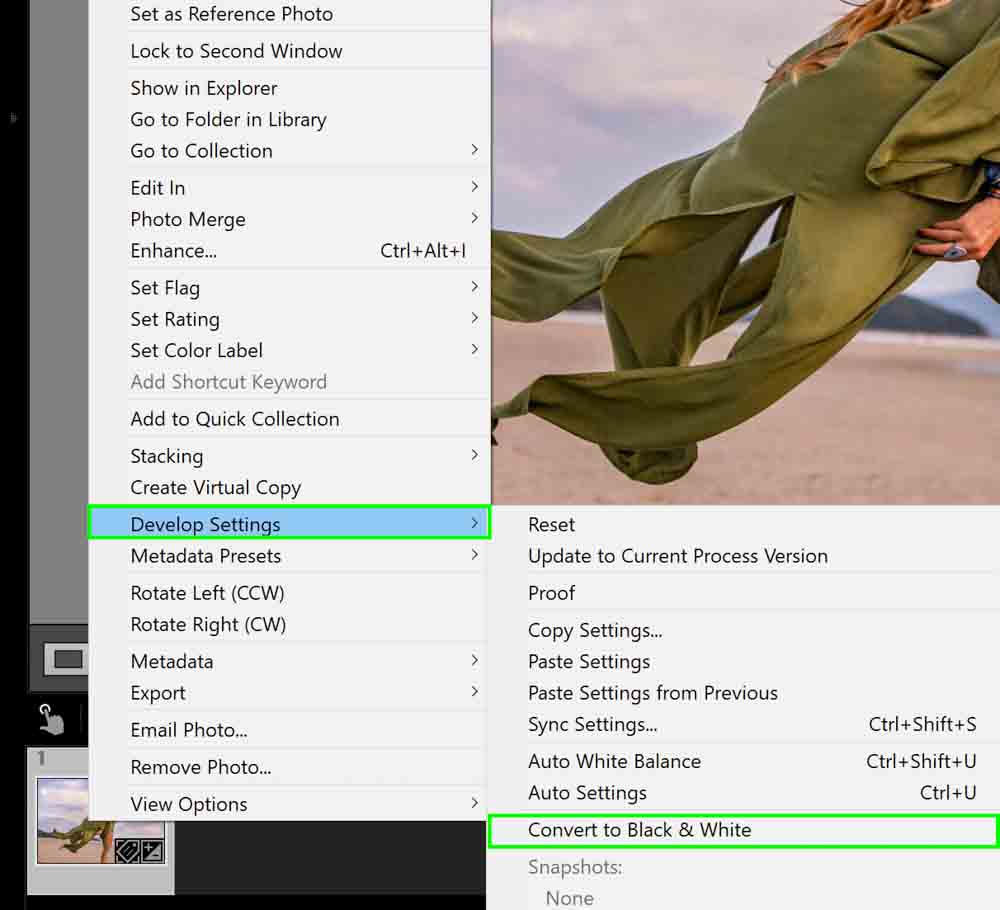
Alternatively, you can convert your photo to black and white by right-clicking on your image and choosing Develop Settings > Convert to Black & White.
An even faster way is to press V on your keyboard to convert the photo. This toggles the black & white color mode. If you want to temporarily preview how a photo would look in black and white, just hold down V.
All of the above three options lead to the same result, so it’s just a matter of what becomes a habit for you.
Bonus: Lightroom’s Black & White Presets
If you keep up with Adobe’s updates to Lightroom, you may have noticed some new presets appear. Presets (which we’ll discuss more in another section) are saved photo edit settings applied to a selected image with one click. One of the newer additions to Lightroom (both Classic and CC) is a series of black & white presets.
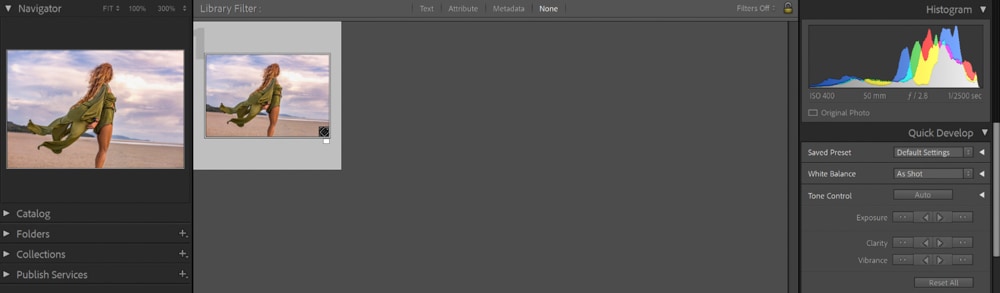
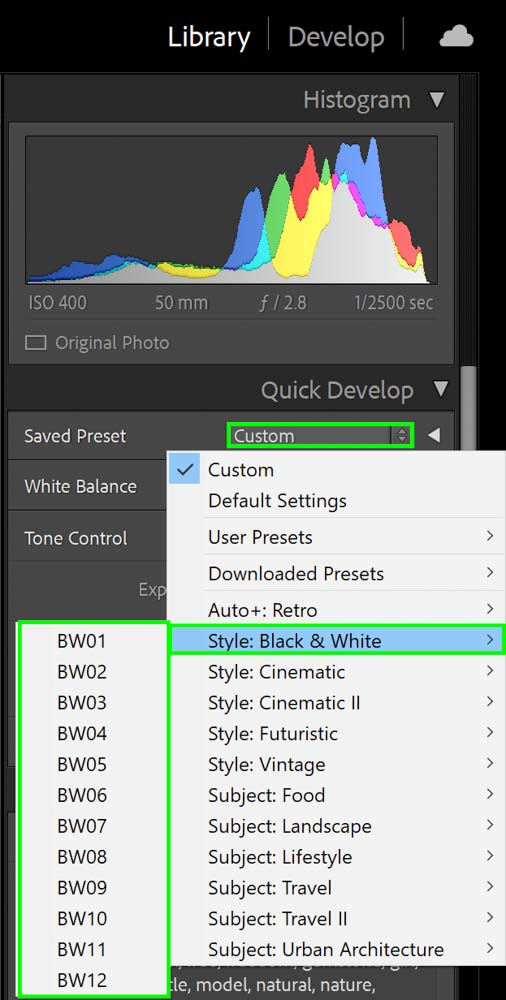
For Lightroom Classic, if you stay on the Library module, you can go to the Quick Develop panel on your right-hand side.
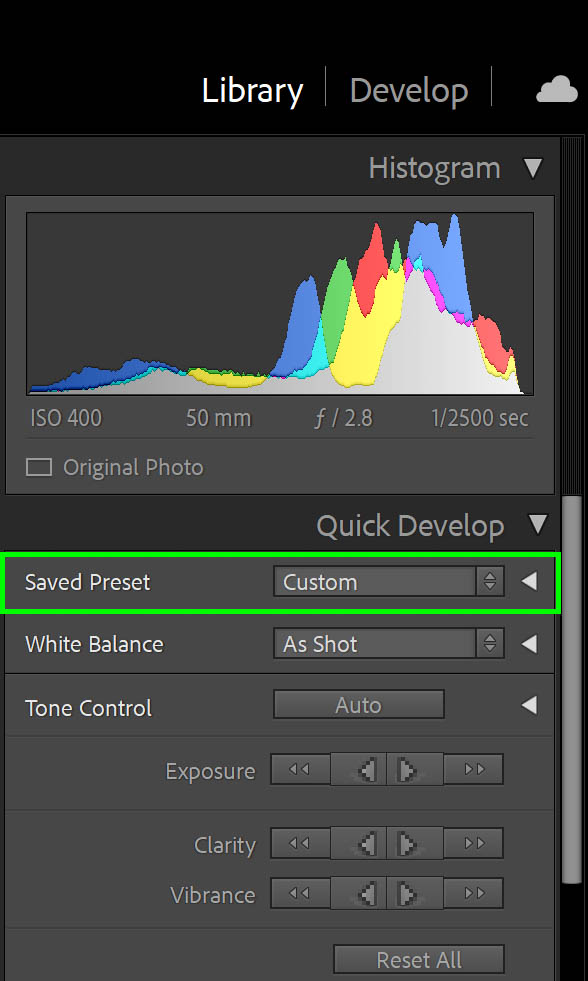
In the Quick Develop panel, find the Saved Preset option and click the dropdown menu (which would say Custom by default). In this menu, you can scroll down and find Adobe presets titled Style: Black & White. Hovering over this line will bring forth twelve preset options to choose from.
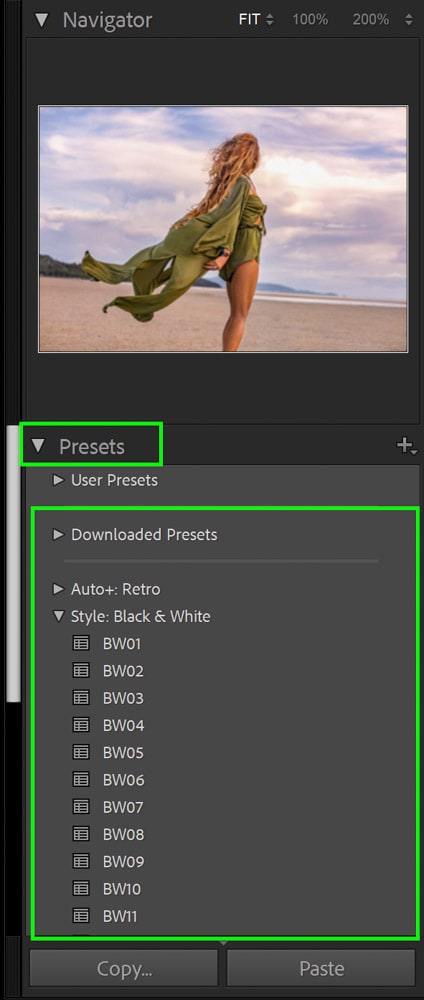
If you are in the Develop tab, you can find those same presets. On the left-hand side of your screen, find the panel that says Presets. If it isn’t open, go ahead and click the down arrow to open the panel in full. Scroll down, and you’ll find Style: Black & White.
Remember, the presets are very general and may not necessarily work well with every photo.
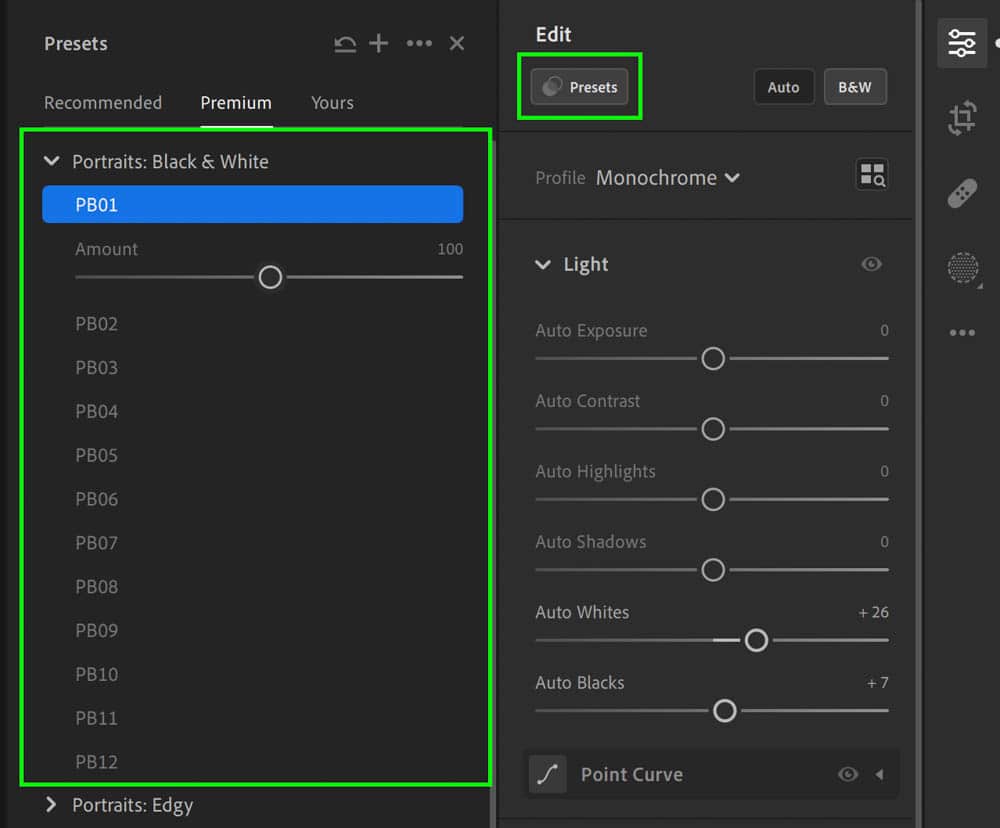
Converting To Black & White In Lightroom CC
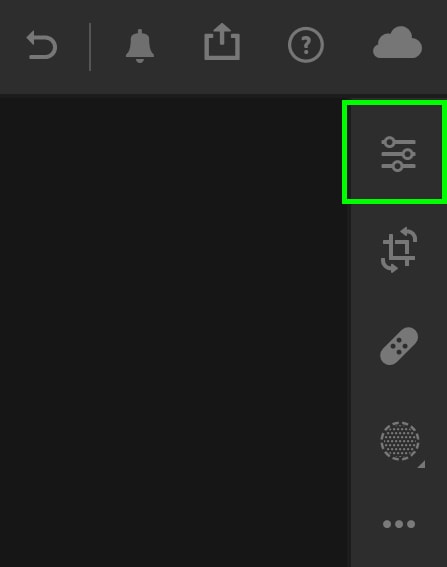
Lightroom CC is very similar to Lightroom Classic, with a minor difference or two. Where Lightroom Classic has all of its side panels open when you go to Develop, Lightroom CC requires you to select the Edit button in order to bring all of the options up.
Look to your right-hand side and click the icon with the sliders to bring up the Edit panels.
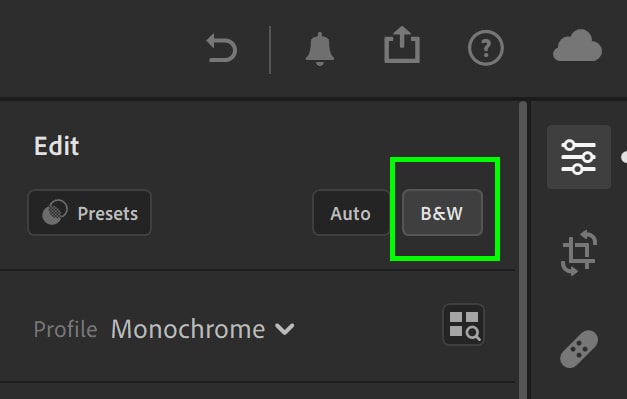
In the Edit panel, in the upper right-hand corner, you will see a button that says B&W. Click this to convert your photo to black and white.
If you want to access the black and white presets, simply click the Presets button, and you will see the Portraits: Black & White option. A big benefit to Lightroom CC is that you can adjust how much of that preset effect is being applied to your photograph with a convenient slider.
How To Edit Exposure And Contrast For Black And White Photos
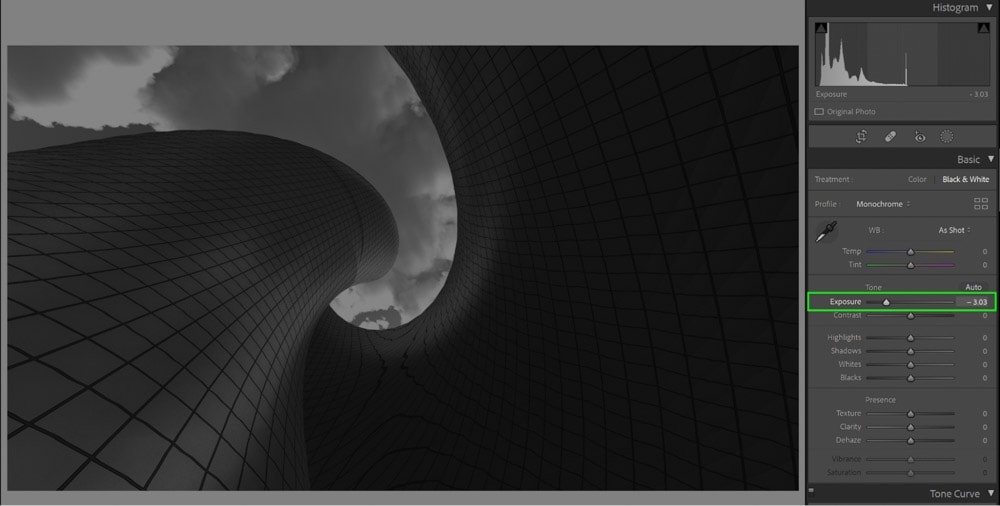
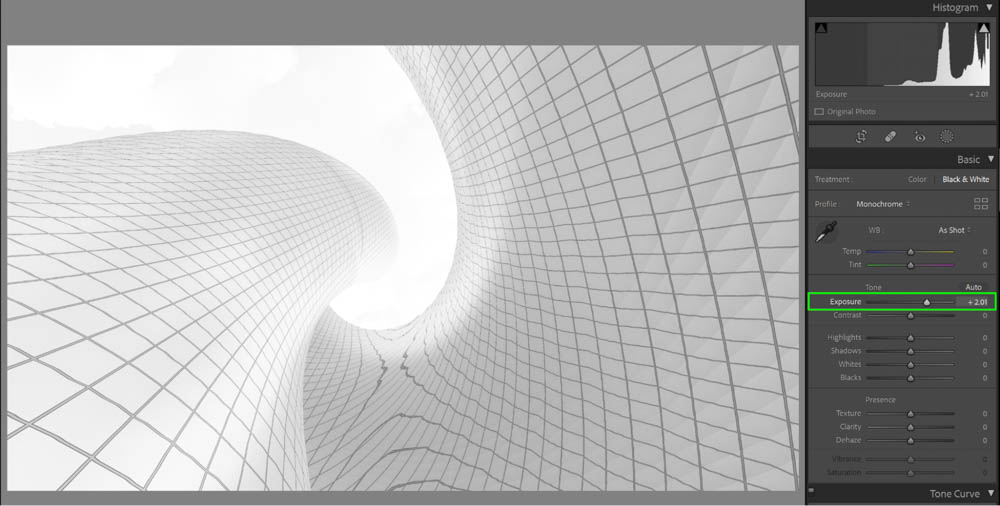
For some, the editing stops at the conversion. For others, adjusting the image’s exposure and playing with contrast can bring out further details. I’ll be editing this photograph to make it a bit bold in black and white.
First, adjust the exposure and contrast sliders in the Basic panel and play with the Exposure and Contrast sliders for Lightroom Classic or click the Edit icon for Lightroom CC. You will see the same options appear for both programs.
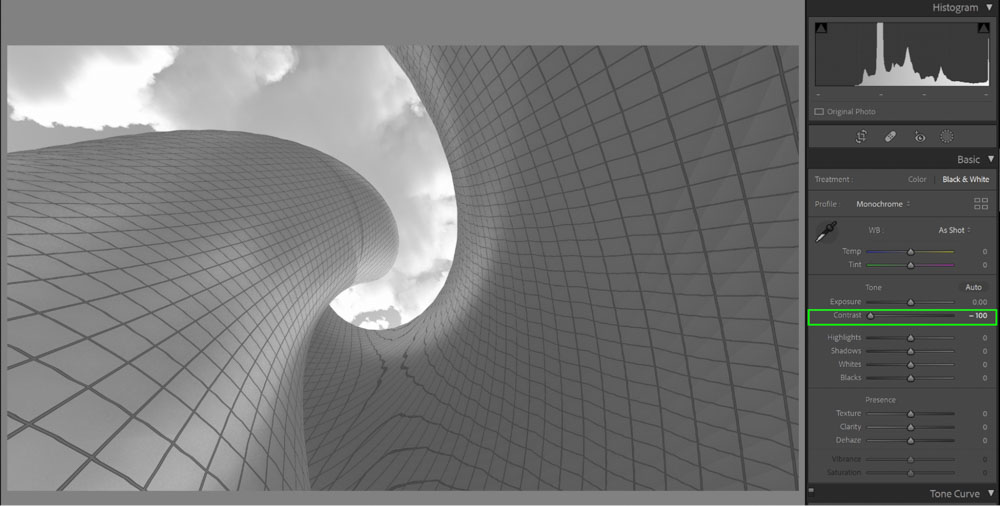
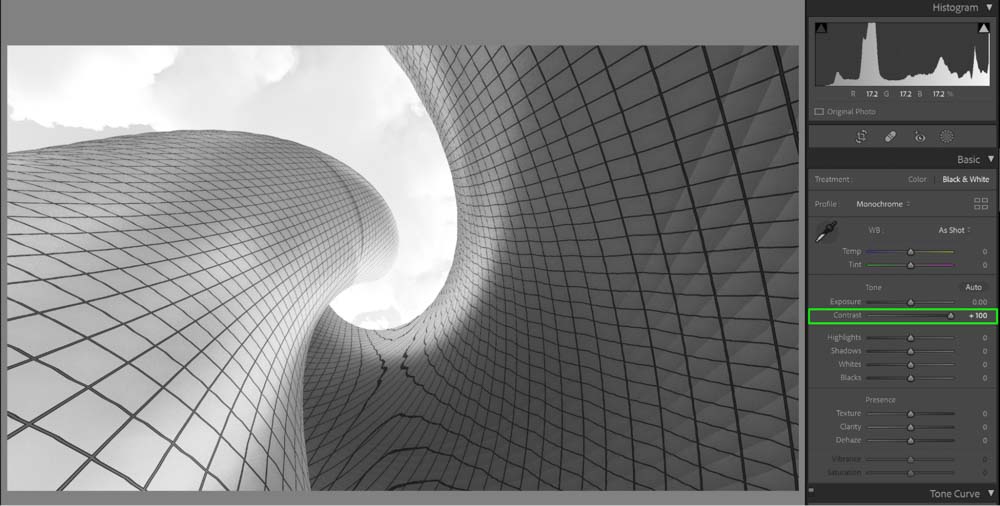
For Exposure, pull the slider to the left to darken the image and to the right to lighten the image.
For Contrast, pull the slider to the left to lessen the effect and to the right to increase the effect.
Your exposure and contrast are also impacted by using the other sliders in the Basic panel. All of the sliders in the Basic panel are a bit like a math formula: editing each of them in unison equals the look of your final image (Exposure + Contrast + Shadows + Highlights + Blacks + Whites = your final image). Like a math problem, changing one variable affects the rest of them.
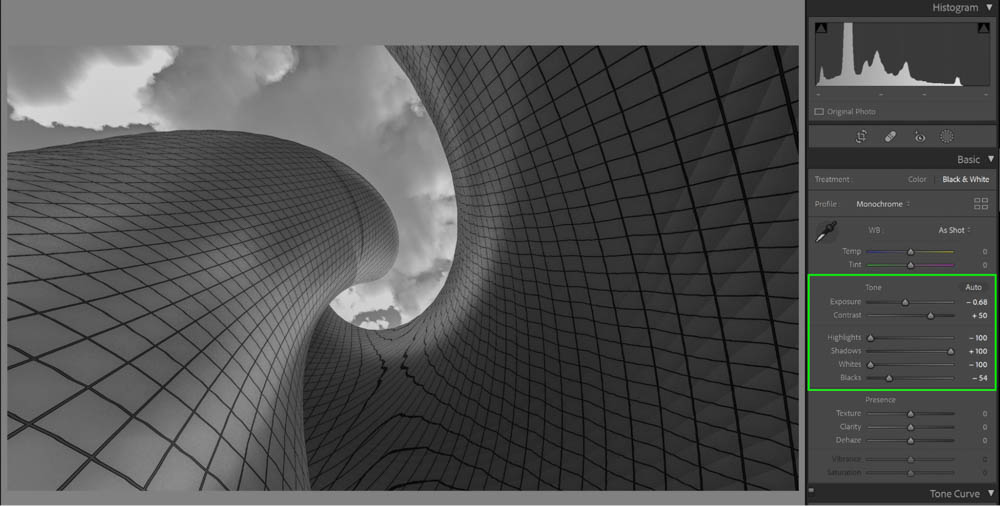
If you pull the Whites slider to the right, for example, your whites will become brighter, which will make the image have more contrast. If you grab the Blacks slider and pull it to the right, the blacks will lighten, and the image will appear to have less contrast.
If you used one of Adobe’s black and white presets on your image, you will see that the sliders in your Basic panel have already been adjusted. You can keep editing this effect by continuing to move the sliders around until you find your perfect edit.
Keep This in Mind
As you play with these sliders, there are a few things to keep in mind. First, contrast refers to the difference between the darkest parts and lightest parts of your image, while exposure defines how bright or dark your photograph is. Remembering these two definitions can help you when editing.
Although photography and editing are in the eye of the beholder, there can come a point where you are causing the photo to lose its appeal. Avoid extremes and keep your editing moderate. A well-exposed and contrasted black and white image has dark shadows and bright highlights, but you can still see the details in both ranges.
Using The Black & White Mix Adjustment In Lightroom
Another way you can edit your photographs is through the Black & White Mix panel. This panel replaces the HSL / Color panel when you convert an image to black and white. To find the Black & White Mix, just scroll down the panels on the right-hand side until you come across it in either the Develop window for Lightroom Classic or the Edit panel for Lightroom CC.
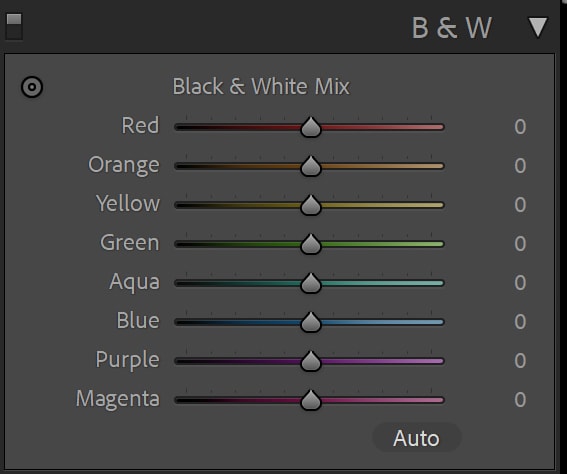
When looking at the panel, you will see that each color channel in your image will be isolated into its own slider. By pulling the Blue slider to the left, for example, you will see that only the blues in your image go dark.
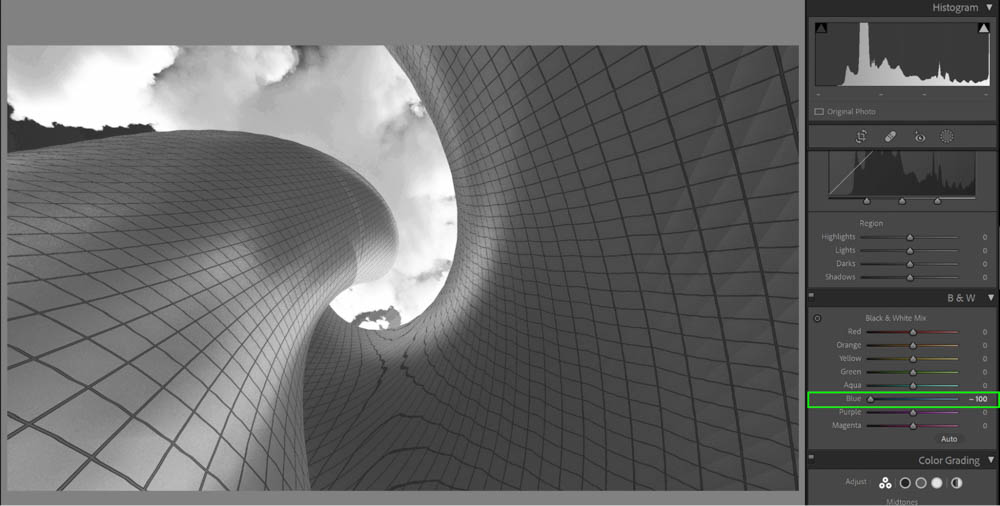
The benefit of this panel is that you can do much more detailed adjustments to your photograph than just playing with the Basic panel sliders. Here, you can make sure specific colors that were once present in your image are either lighter, darker, or pretty even. This can help soften certain aspects of your image that look too dark or brighten other parts of the photograph that should be lighter.
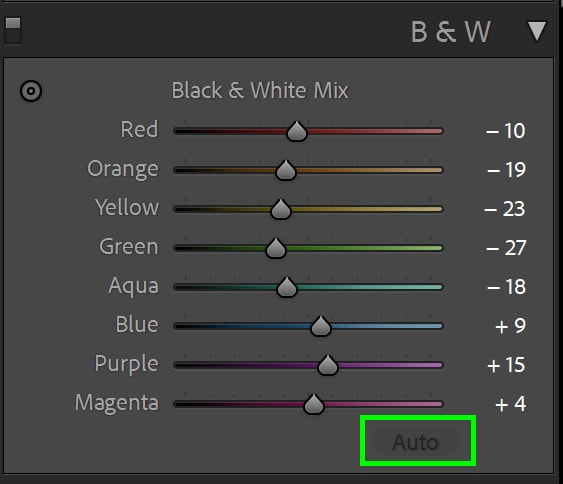
If you want to see what Lightroom’s “ideal” determination is, you can click the Auto button at the bottom of the panel. This will automatically adjust the Black & White Mix.
How To Convert Multiple Photos To Black & White In Lightroom Classic
What if you have more than one photograph to turn black and white? Fear not; Lightroom has a batch processing feature that allows you to convert multiple photographs without much manual effort.
Step 1: Select The Images
You have a few options for doing so that work in both the Library window and the Develop window.
The first is to press Control + A (Win) or Command + A (Mac), which will select all of the images displayed on your screen.
The second option is to Control + Click (Win) or Command + Click (Mac) on each image you want to select. This is great if you only want specific images selected that are out of sequence.
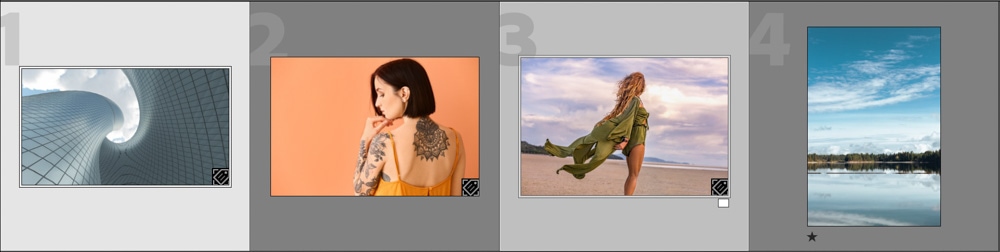
Lastly, you can click on one image, hold Shift, and click on another image to select every photo between your first and second click. This is great for selecting a short sequence of photos.
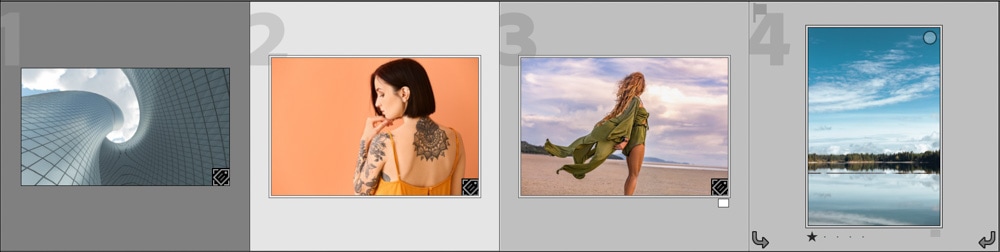
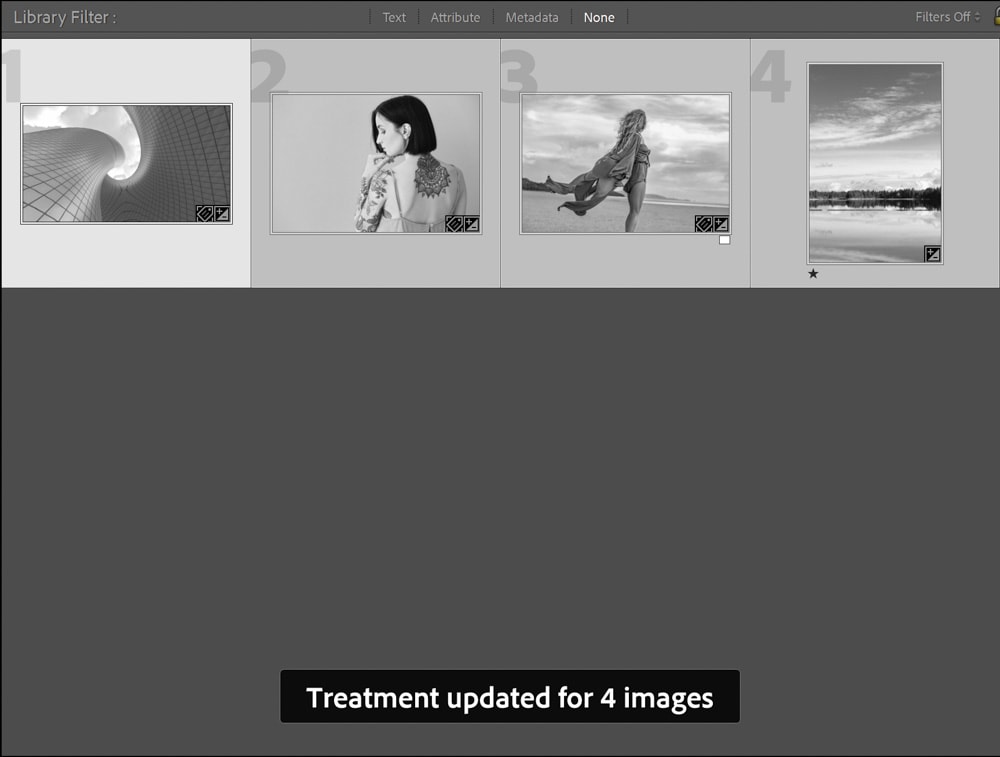
Step 2: Press V To Convert Your Images In The Library Module
To convert your selected photos to black and white, just press V on your keyboard. Make sure you’re in the Library Module for this to work.
If you need to do exposure, contrast, or black & white mix edits, continue on to the next steps.
Step 3: Make Adjustments In The Basic Panel
Start with the first image in your lineup and adjust the Basic panel sliders as needed to refine your black and white look.
Step 4: Batch Processing
With your first photo complete, you can apply those adjustments to other images too. There are two ways to do this.
– Copy and Paste
The first is to Copy and Paste. For this, you will be saving all of the adjustments from your first image that you can then paste onto the other photo(s) you want it to apply to.
On the first image you edited, Right Click and go to Develop Settings > Copy Settings.
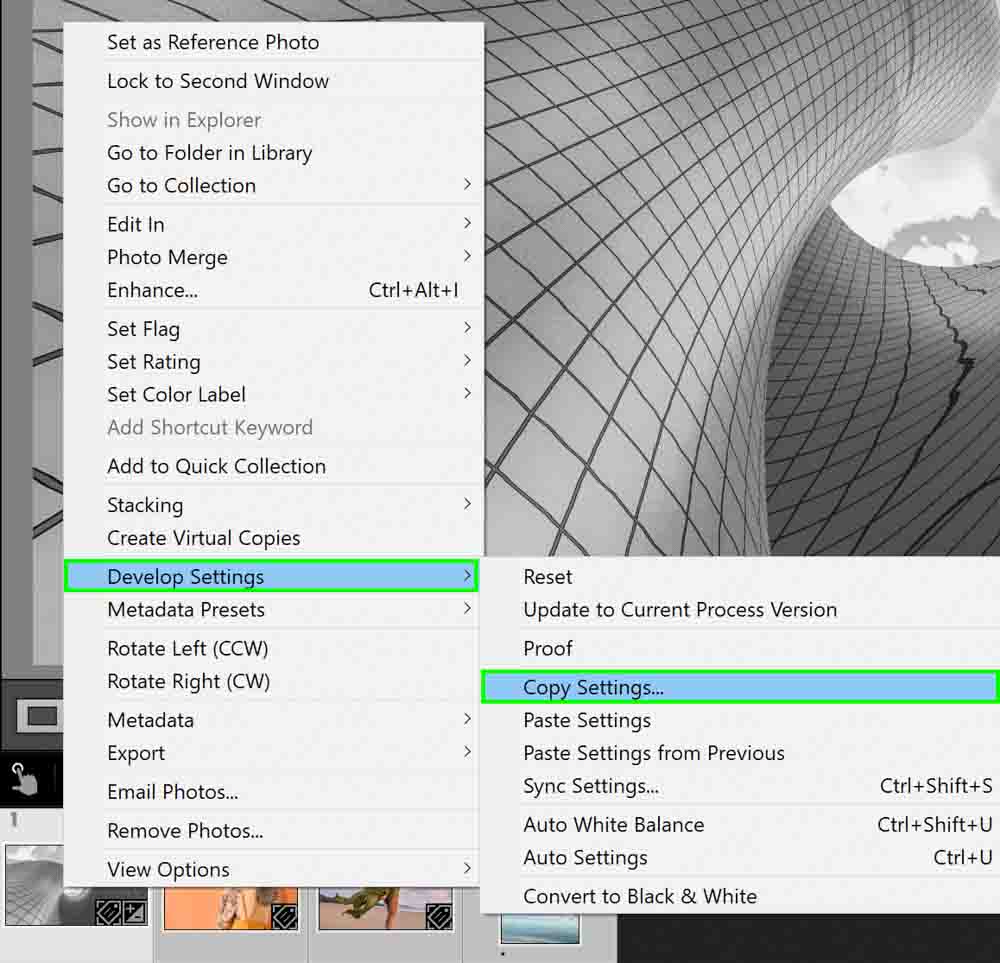
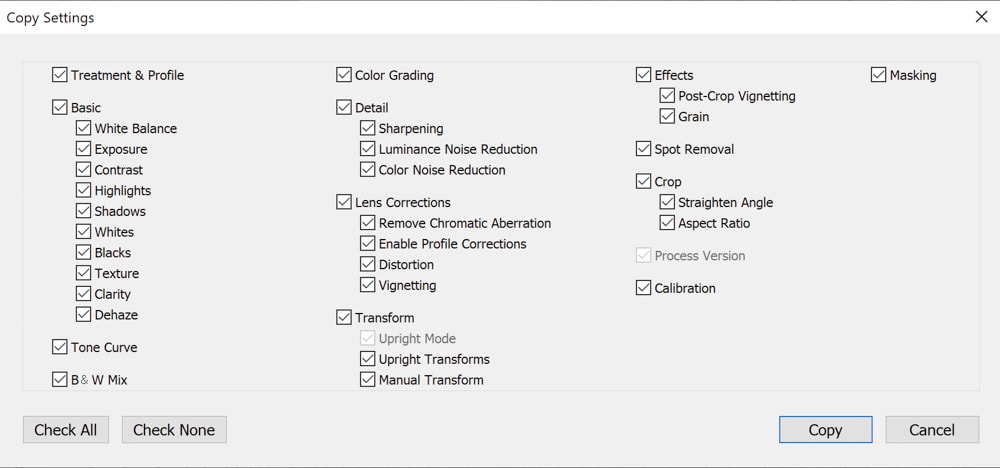
A window will appear asking what adjustments in specific you want to be copied. You can select all if you want all of them to apply or just select a few.
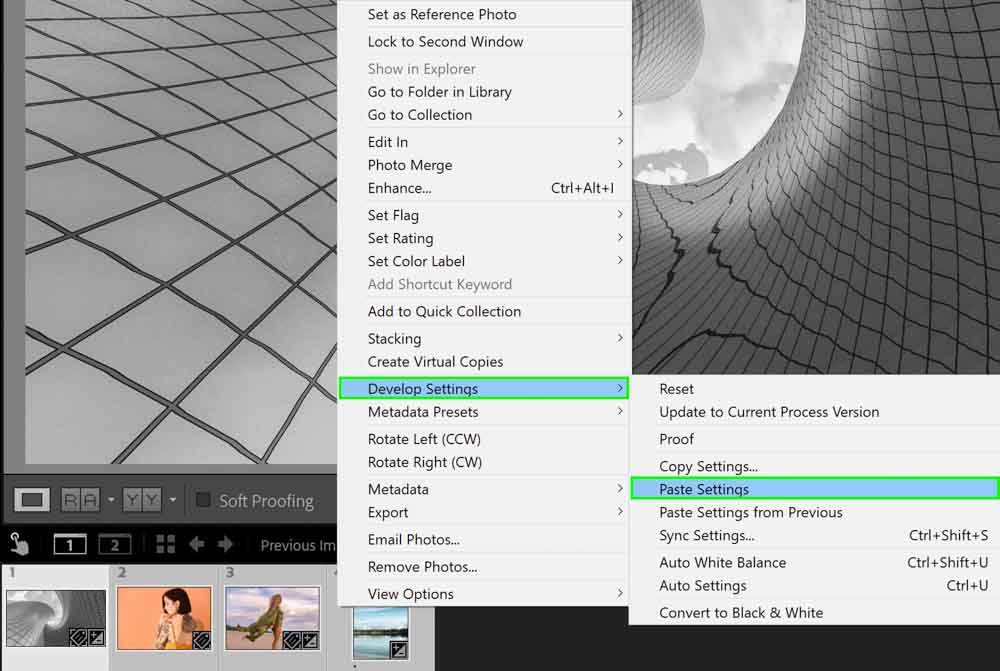
Then, right-click on the image you want the settings pasted to and go through the same step (Develop Settings > Paste Settings).
Alternatively, press Control + C (Win) or Command + C (Mac) to copy and Control + V (Win) or Command + V (Mac) to paste.
If you have multiple images selected, this still works and will apply to all, but syncing is easier for this.
– Syncing
If you want a mass group of images to have their settings synchronized, you would use the Sync option. Similar to the previous method, this time, right-click and choose Develop Settings > Sync Settings.
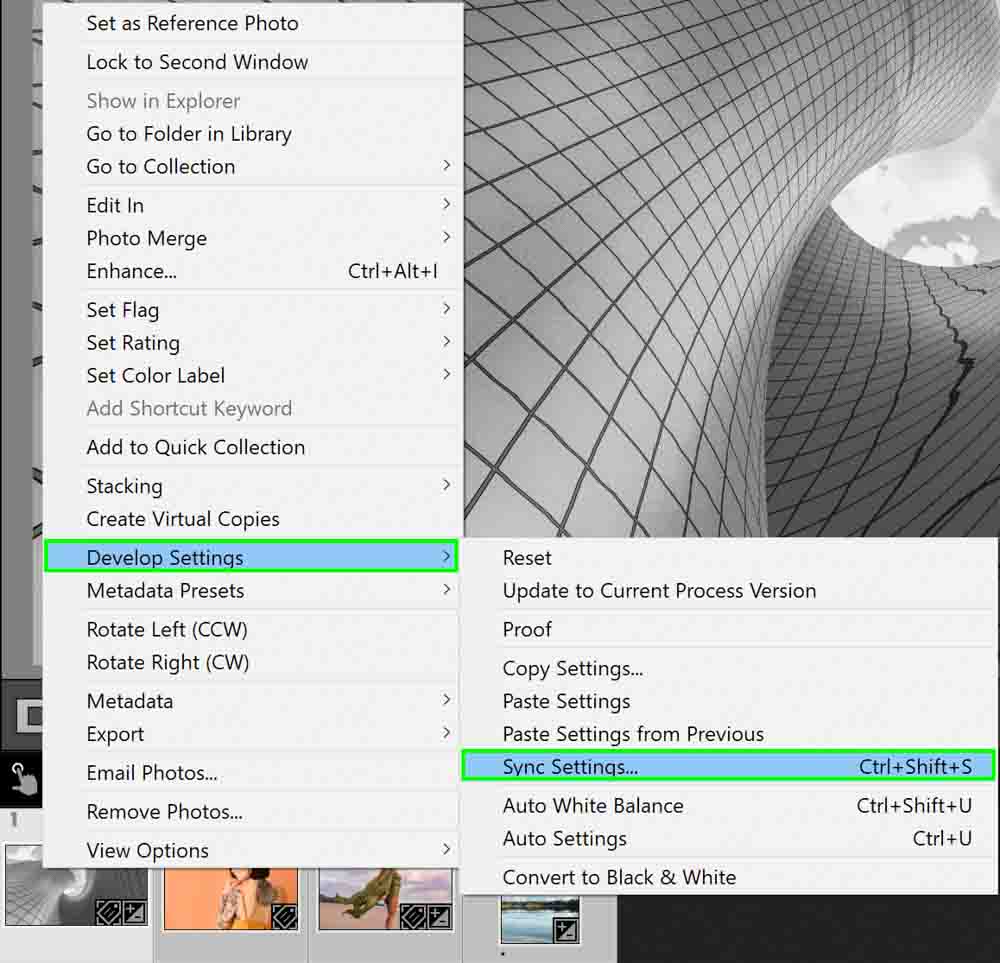
The same exact window asking what settings you want to synchronize will appear.
You can also quickly access this through Control + Shift + S (Win) or Command + Shift + S (Mac).
Step 5: Watch the Magic Happen
Now you can sit back, relax, and watch Lightroom Classic do all the work!
Batch Converting To Black & White In Lightroom CC
To batch convert in Lightroom CC, the steps are different. There is no sync option, only copying and pasting.
After loading your images and editing one of them in black and white, go to Grid view, located in the lower left-hand corner of your screen. Select the Grid icon or press G on your keyboard.

Next, make sure the black and white image you’ve just edited is selected. Click Control + C (Win) or Command + C (Mac) to copy the adjustments.
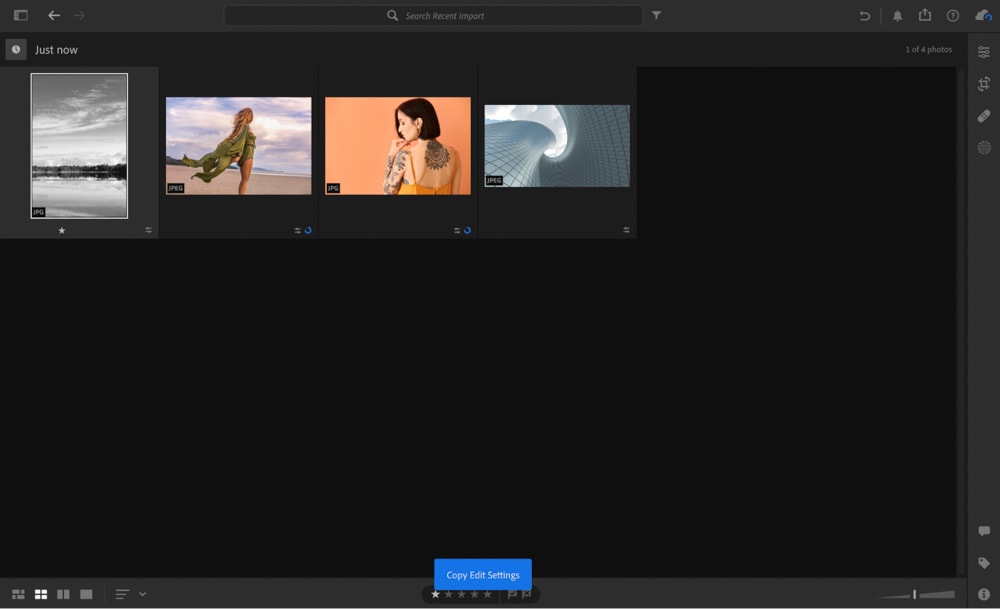
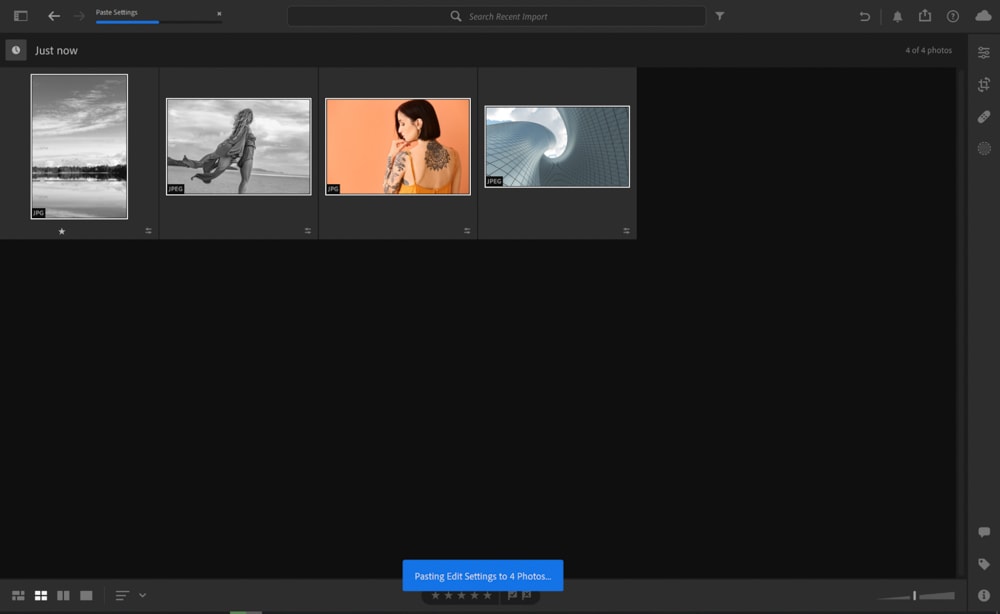
Next, select all of the images you want the settings applied to or Control + A (Win) or Command + A (Mac) to select all of the images.
Press Control + V (Win) or Command + V (Mac) to paste.
Converting one photo or a whole folder of images to black and white is possible. You will just need to copy and paste each image. With a few tweaks in the Exposure, Contrast, and Mix sliders, you can bring out the deepest of black tones and the softest of whites in your photography.