

Flagging images in Lightroom is a quick way to sort your images and allows you to reject photos easily. The primary purpose of flagging is to set which images you do and do not plan to edit or use. Flagging images as rejected makes it easy to tell which images are not worth editing or can even help you to see which files need to be deleted later on.
So in this tutorial, you’ll learn how reject flags can be used as an organizational technique in Lightroom to narrow down a folder of images to only the best few.
How To Add Reject Flags In Lightroom Classic
There are two ways to reject images in Lightroom Classic. You can add a reject flag from the Library module or the filmstrip with the same techniques. However, for these examples, I will be working in the Library Module.

To reject images from the Library module, ensure you’ve selected an image. Chosen images are a lighter gray.
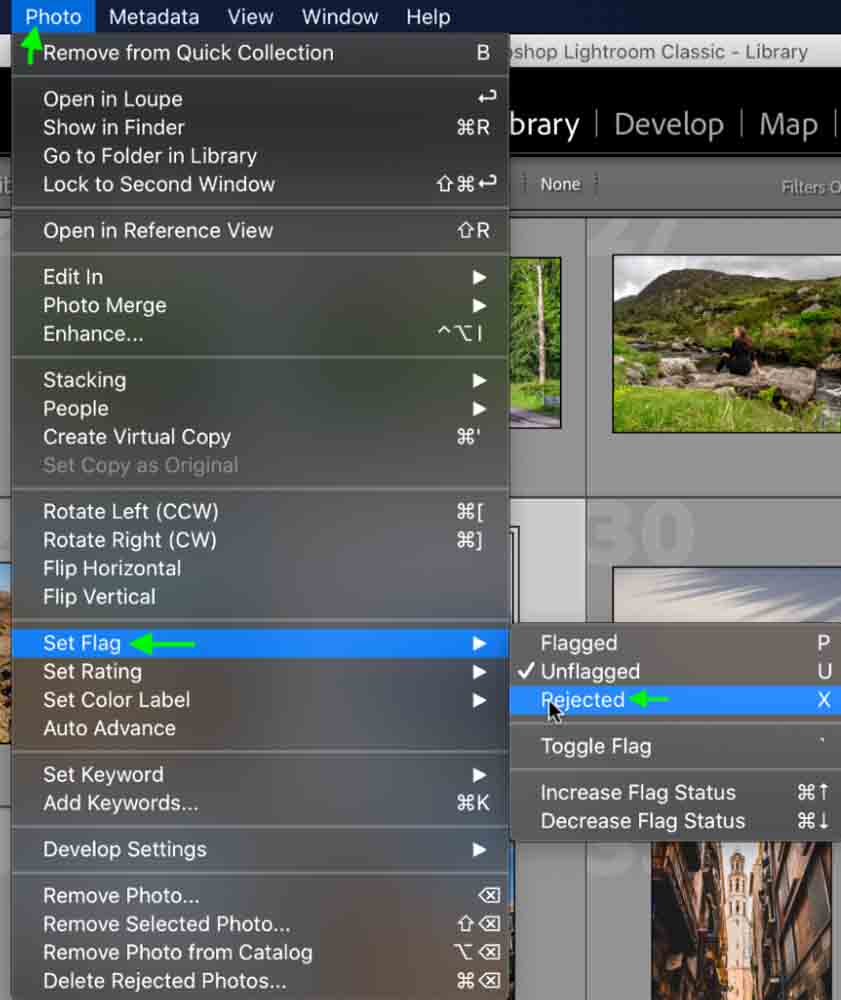
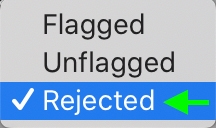
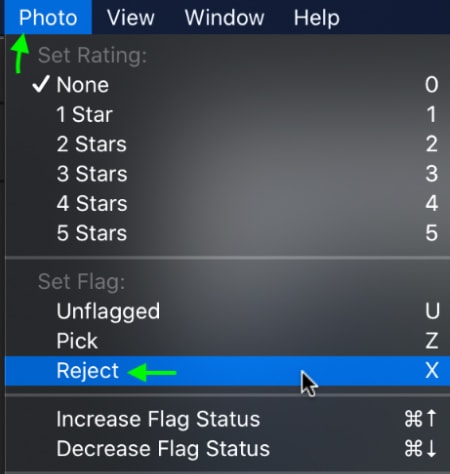
With the image selected, head to the Menu bar and go to Photo > Set Flag > Rejected.
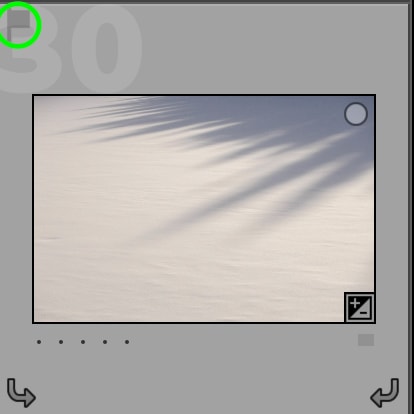
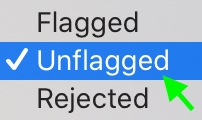
Another way to set a photo as rejected is to hover over it and Control + click the flag that appears in the top left corner. Select Rejected from the options that appear.
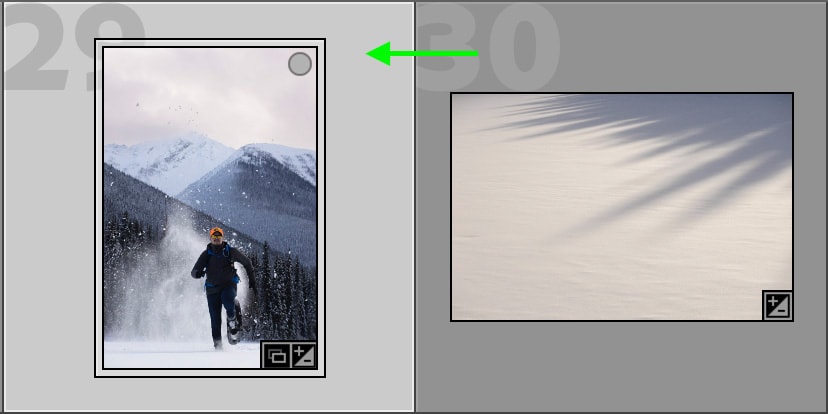
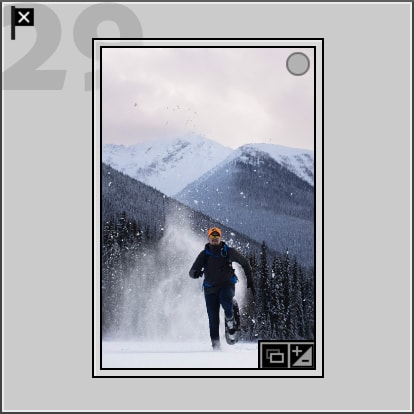
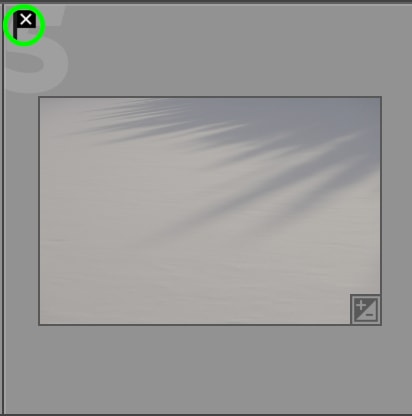
The easiest way to set an image as rejected is to select it from the grid and press the X key. This will set the image as rejected. Rejected images will have a black flag with an X in the top left corner.
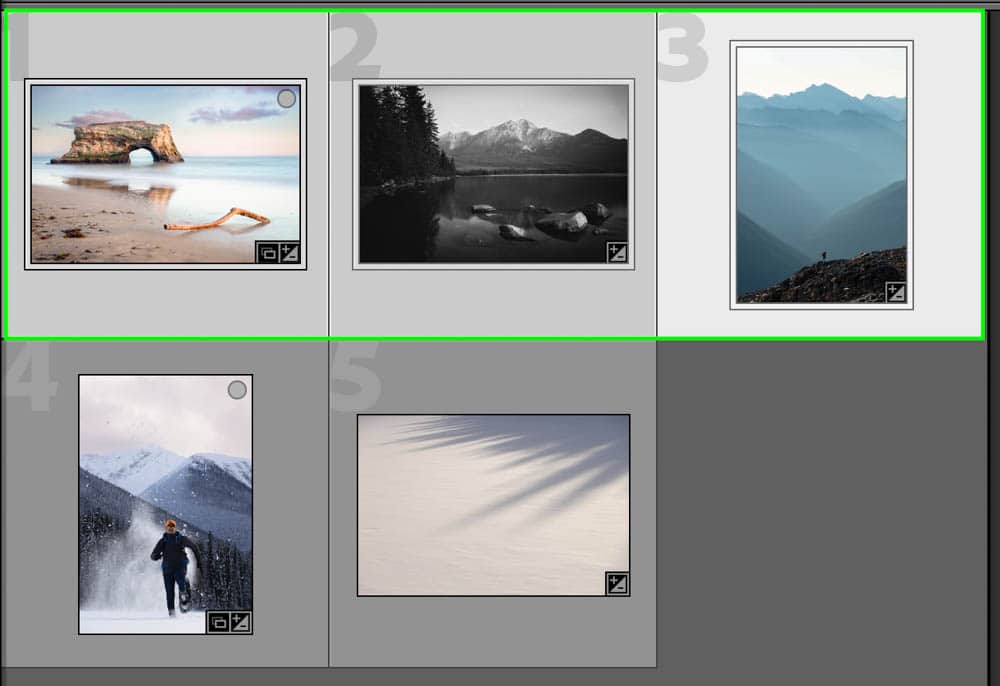
All rejected images will appear dimmed compared to the rest when looking at the grid.

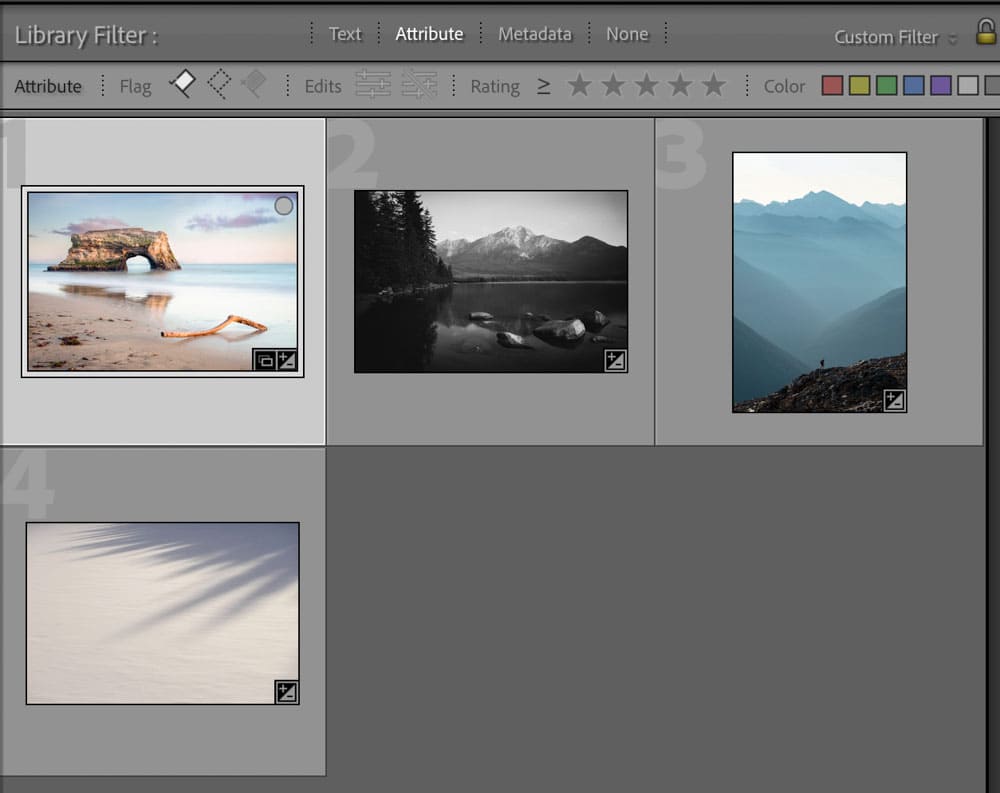
You can filter images to view rejected photos in the library module via the attribute option at the top or within the flag attribute on the filmstrip.
How To Reject Multiple Images At Once
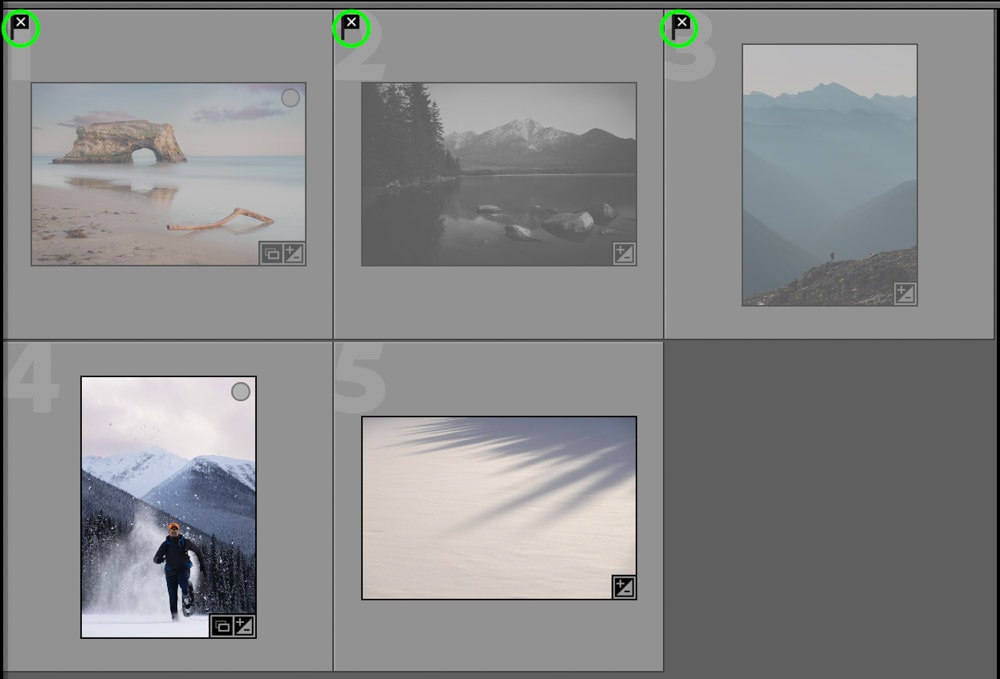
If you have several images in your Library that you’d like to flag as rejected all at once, you can do so easily by selecting all the photos you’d like to reject. You can do this by shift-clicking a series of images or holding Command (Mac) or Control (Win) and clicking between individual images you’d like to reject.
Once you’ve chosen the rejected images, hit the X key on your keyboard. All of the photos selected will be marked with the black reject flag.
How To Remove Reject Flags
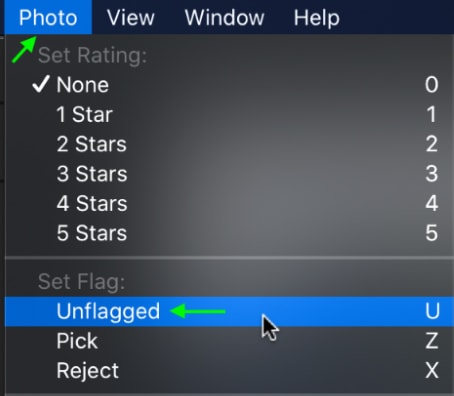
If you change your mind, it’s easy to remove a reject flag for an image. You can either select the rejected image and head to Photo > Set Flag > Unflagged to set the image as unflagged.
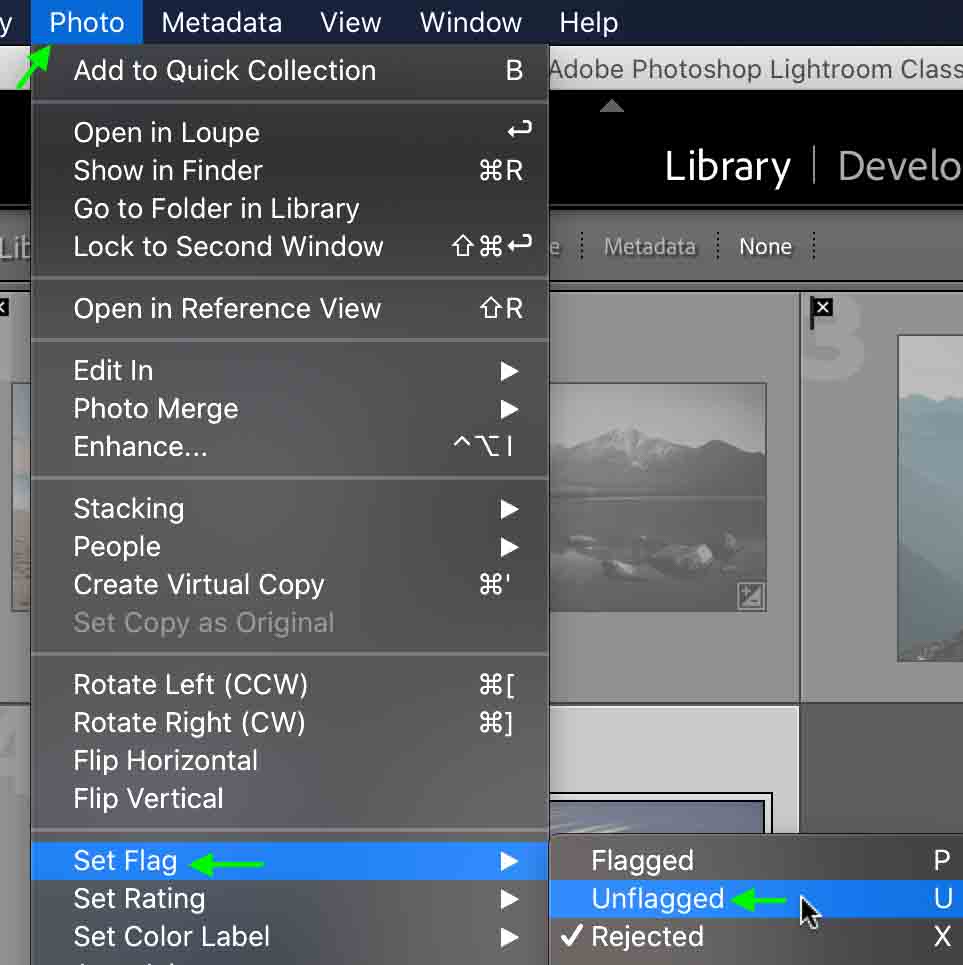
Or, you can Control + click the rejected flag at the top left of an image and select Unflagged from the options.
How To Hide Images With Reject Flags In Lightroom
While Lightroom doesn’t offer an explicit way to hide rejected images, you can use the filter toolbar to ensure Lightroom only shows flagged or unflagged photos in the Library panel.
To do this, first, make sure you can see the correct filter options by clicking Attribute in the filter toolbar.

Another toolbar will appear underneath with different attributes you can use to sort the images.
Here, select only flagged and unflagged pictures by clicking the two flags below.

You’ll only see the flagged and unflagged photos in the grid, while rejected images will be hidden.
This will significantly clean up your workspace so that you’re only working with images you may use, and all the extras remain out of sight and out of mind.
How To Delete Rejected Images From Lightroom Or Your Disk
You can delete rejected images either from Lightroom or from your Disk using a quick trick featured in Lightroom.
First, use the steps above to flag all the photos you’d like to delete as rejected. Once you’ve rejected the images, use the shortcut Control + Backspace (Win) or Command + Delete (Mac). A window will appear that allows you to delete all rejected photos from Lightroom or your disk.
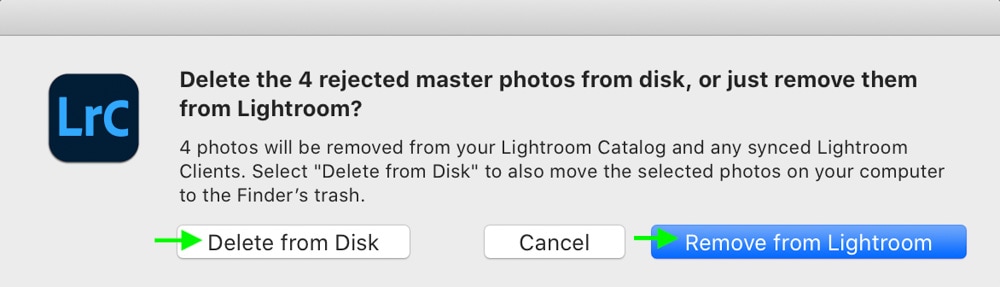
To delete images from Lightroom, click Remove from Lightroom. To delete the pictures from your computer files, select Delete from Disk.
Remember that you should only delete photos from your disk if you’re sure you won’t need to use them again.
Understanding Reject Flags In Lightroom CC
Reject flags work similarly in Lightroom CC (also known simply as Lightroom), though the different interfaces may confuse some. First, select an image from the grid or filmstrip.

Then, you can flag the image as rejected by heading to the Menu bar and selecting Photo > Reject.
You can remove the reject flag by heading to Photo > Unflagged.
To view only rejects, head to the filter icon to the right of the search bar.

This will bring up the filter toolbar. Click the reject flag to only see photos you’ve flagged as rejected.

Reject flags are an important part of staying organized in Lightroom. They also help remove unwanted files and save space on your hard drives. To better understand how you can use reject flags in your workflow, see my guide to staying organized in Lightroom to learn more about managing large quantities of images without getting overwhelmed.
