Imagine one of your favorite photos as a painting hung on your wall, but unfortunately, you’re not a painter. Or you may have a client asking you to create a painting from a picture you took for them. Luckily in both these cases, you can turn a photo into a painting in Photoshop in two ways.
You can use various techniques to make a painting from an image because the process involves adding various filters and effects to smooth the details and create an oil paint look.
I have two approaches for you, one of which is done manually using various filters and sharpening techniques. You can use this method if you want more control over the result.
The second method uses the Filter Gallery, which does most of the work for you. This is useful if you don’t want to go through complex processes, but it does limit your customization options.
How To Make A Photo Look Like A Painting In Photoshop
The first technique I will show you is to manually make a photo look like a painting by adding several filters and sharpening effects. While there are several steps, and this may seem confusing, it’s not too difficult. Follow the process closely, but you can switch up the amounts in some steps to match your photo better.
Once you have the basics down, you can always play around with slightly different filters and see what other painting effects you can create.
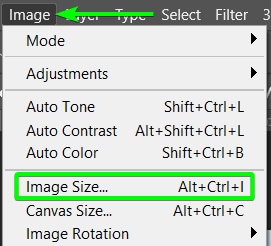
Step 1: Use A Correctly Sized Image
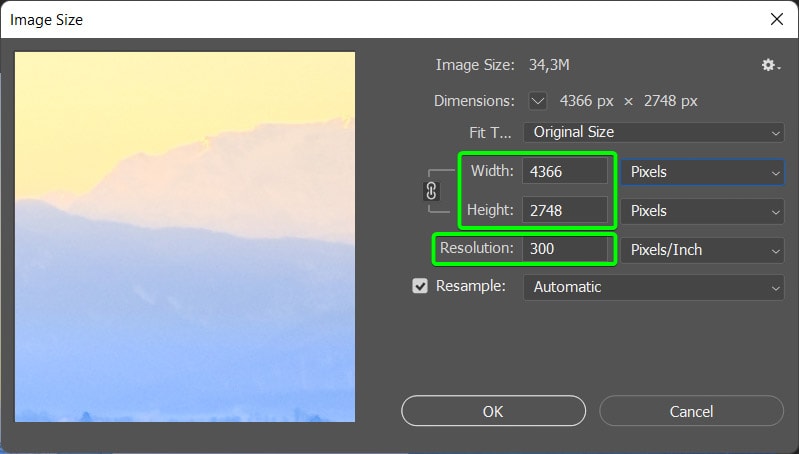
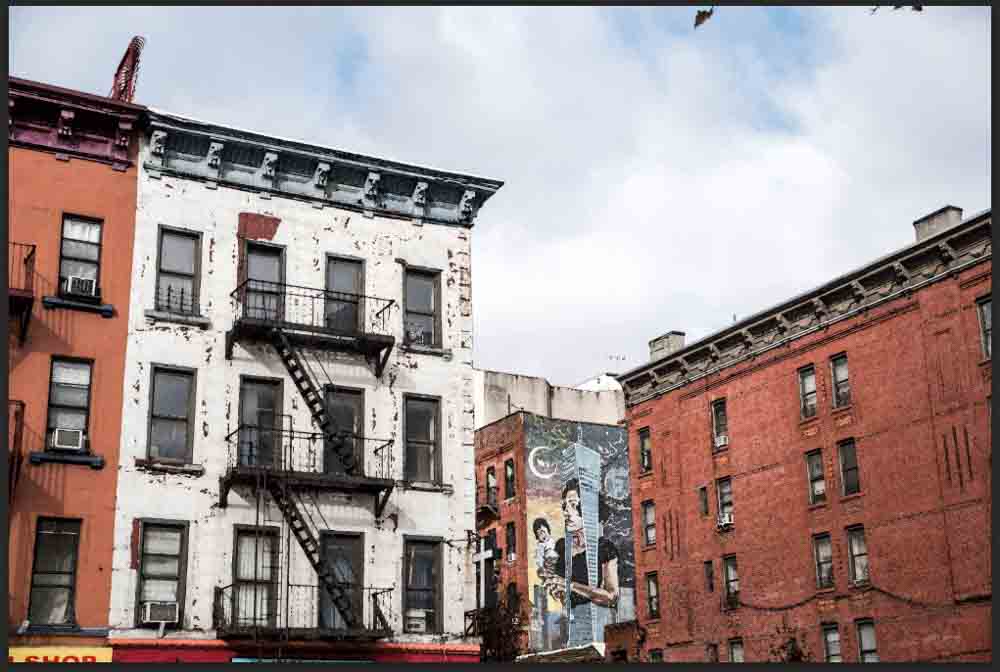
To manually create the paint effect on an image, open the picture and check the Image size by going to Image > Image Size. You can also press Alt + Control + I (Win) or Option + Command + I (Mac).
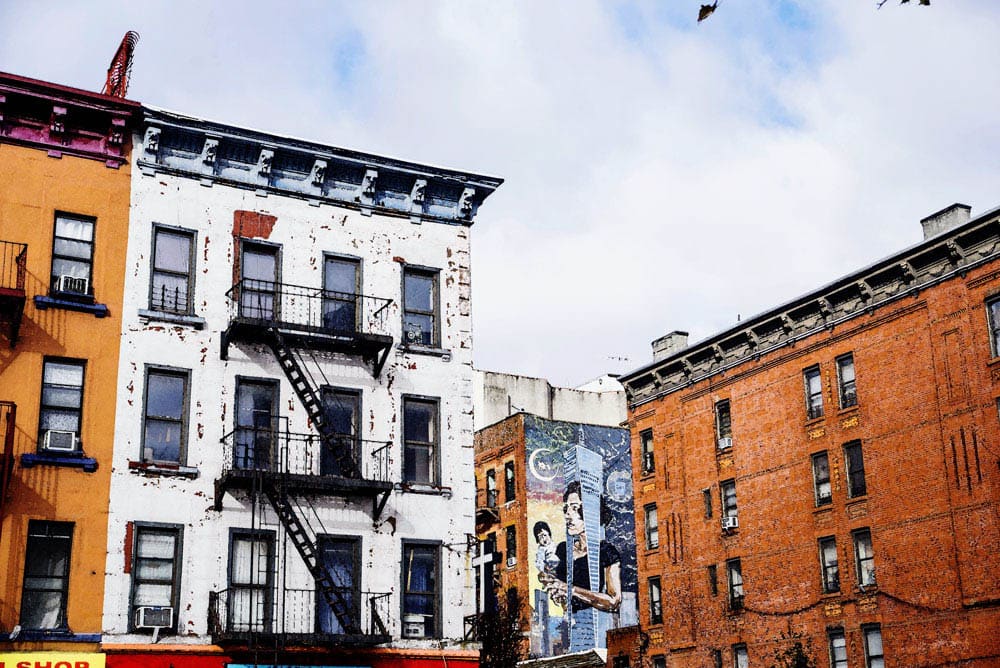
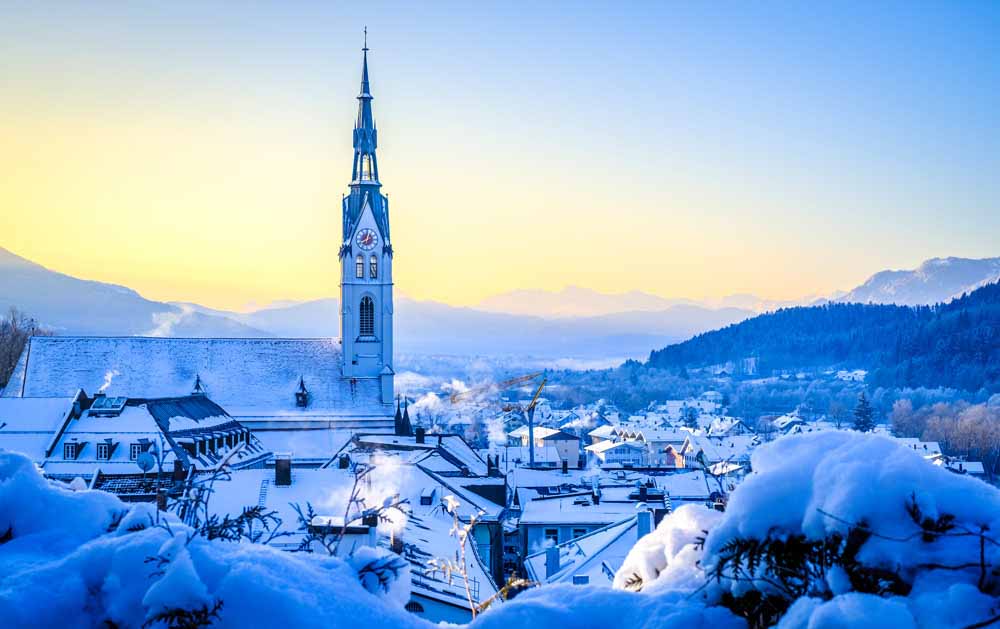
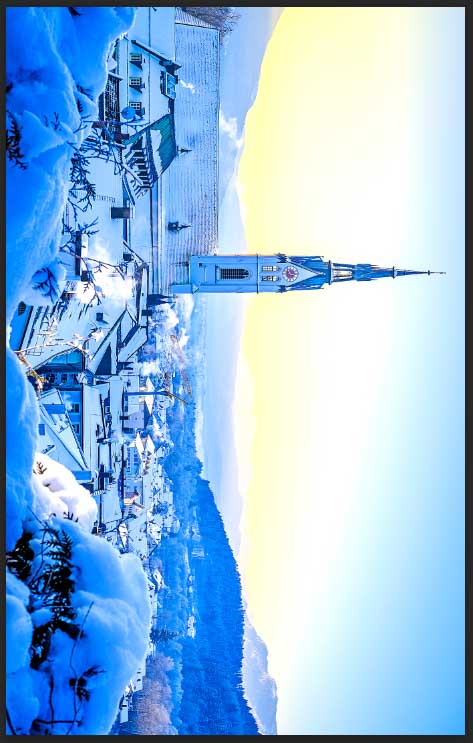
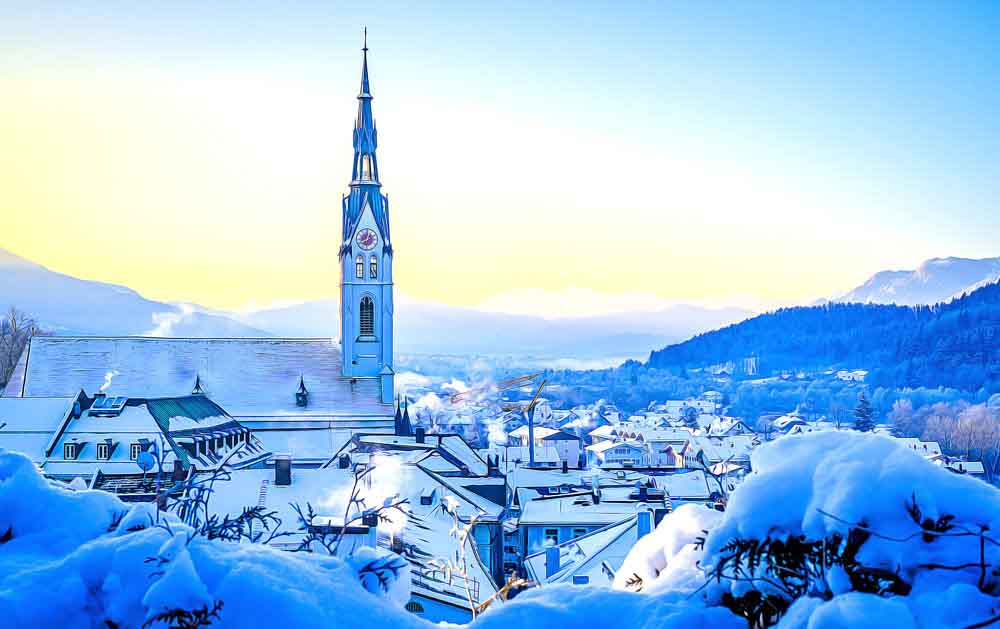
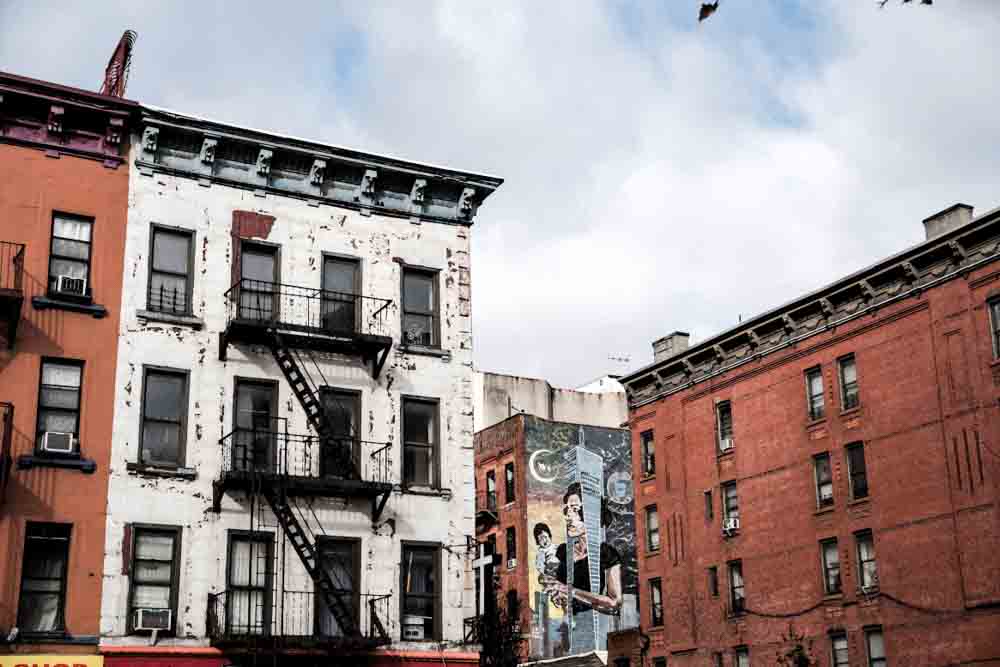
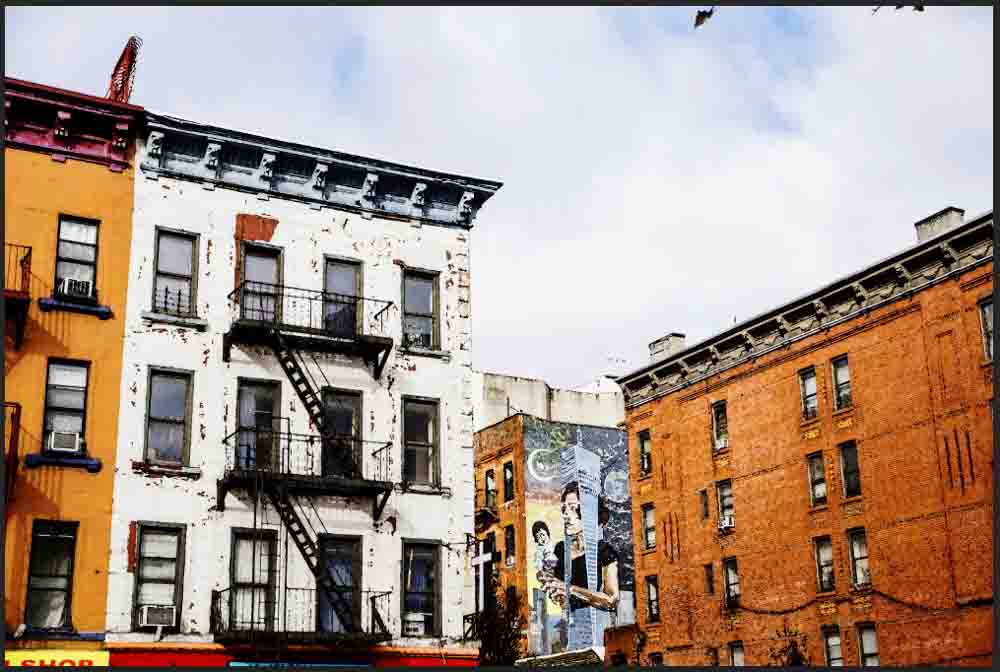
You need a high-quality image to ensure the paint effect works well. Your image width and height shouldn’t be below 1500 pixels. The image should also be at least 300 PPI. Try a different image to add the effect if your image doesn’t meet the requirements or increase the image size without decreasing the quality.
Step 2: Duplicate The Image Layer And Lighten The Shadows
Once you’re sure the image is the correct size, you can start adding the paint effect. First, you need to lighten the shadows in the photo. To lighten the shadows, duplicate the image layer by selecting it and pressing Control + J (Win) or Command + J (Mac).
Rename any new layers you create the keep your Layers panel organized.

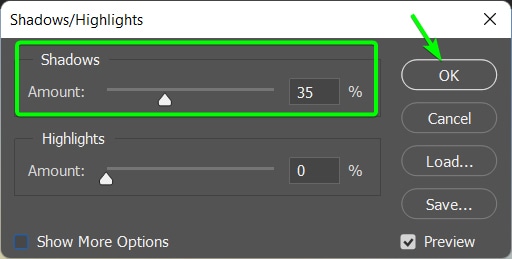
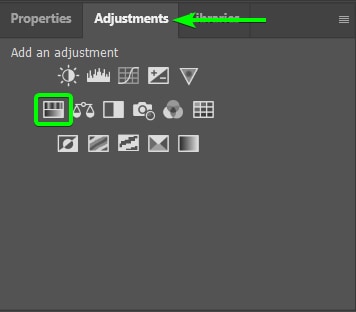
Go to Image > Adjustments > Shadows/Highlights to lighten the shadows.
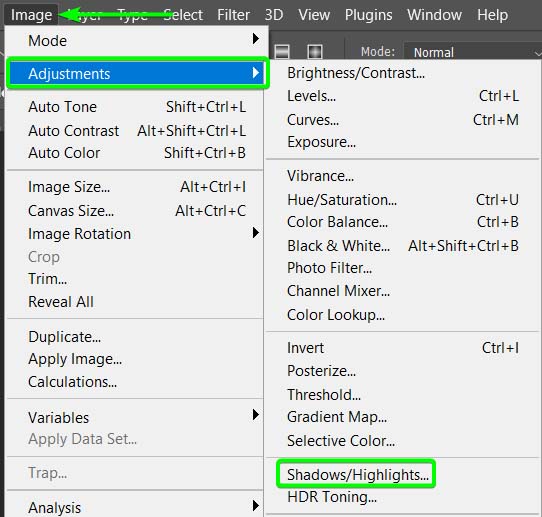
The Shadows slider lightens the darkest areas in the image, and the Highlights slider darkens the lighter areas in the picture. You only need to focus on the Shadows slider and increase it to between 25% and 40%. Click OK to accept the change.
Step 3: Adjust The Contrast Using The Levels Adjustment
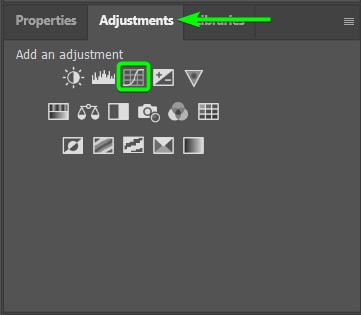
Since lightening the shadows decreases the contrast slightly, you need to increase the contrast again. To do this, you can use the Level Adjustment. To access the Levels adjustment, go to Image > Adjustments > Levels. You can also use the shortcut Control + L (Win) or Command + L (Mac).
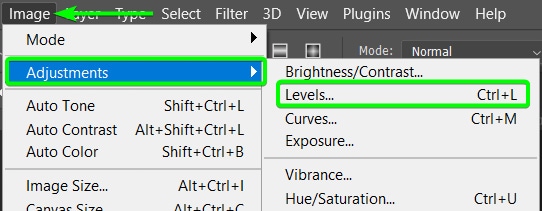
In the Levels Adjustment window, adjust the shadows, midtones, and highlights (the toggles from left to right) to brighten the image and correct the contrast. Each photo is different so balance the adjustments in a way that works for your photo.
Bring out the areas that you want to be more prominent in the painted image and lighten any dark shadows if you want the details to show in the painting. Drag the three toggles to adjust the levels, and click OK when you’re done.

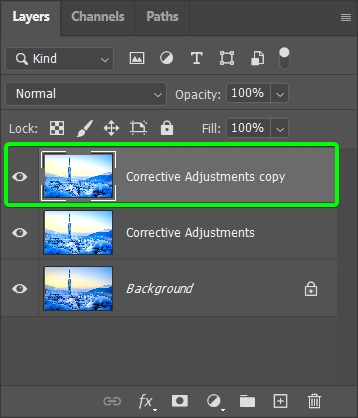
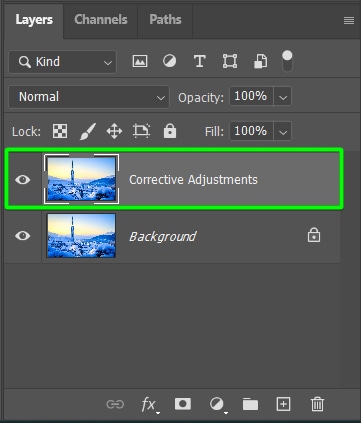
Step 4: Duplicate The Layer And Add A High Pass Filter
Duplicate the layer you’ve been working on, which I’ve named Corrective Adjustments, by selecting it and pressing Control + J (Win) or Command + J (Mac).
Then add a High Pass Filter to the new layer by going to Filter > Other > High Pass.
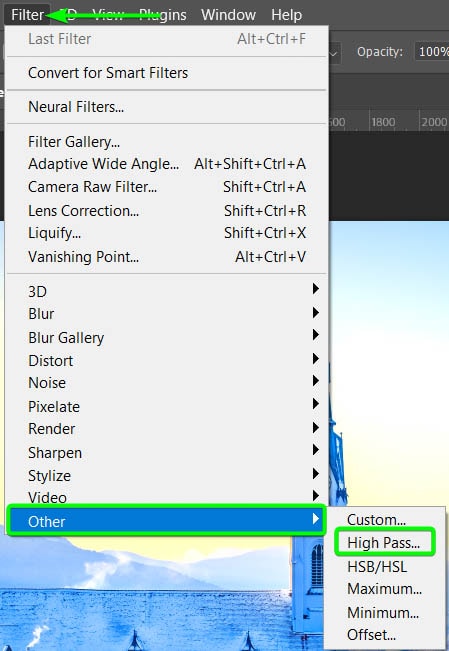
Set the Radius to 2.0 pixels, and click OK to add the filter.
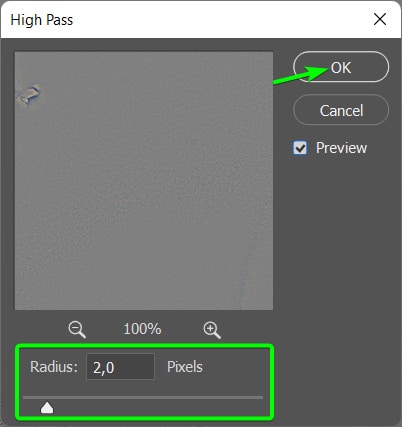
This filter sharpens and adds detail to the image, but it will first turn it completely gray.
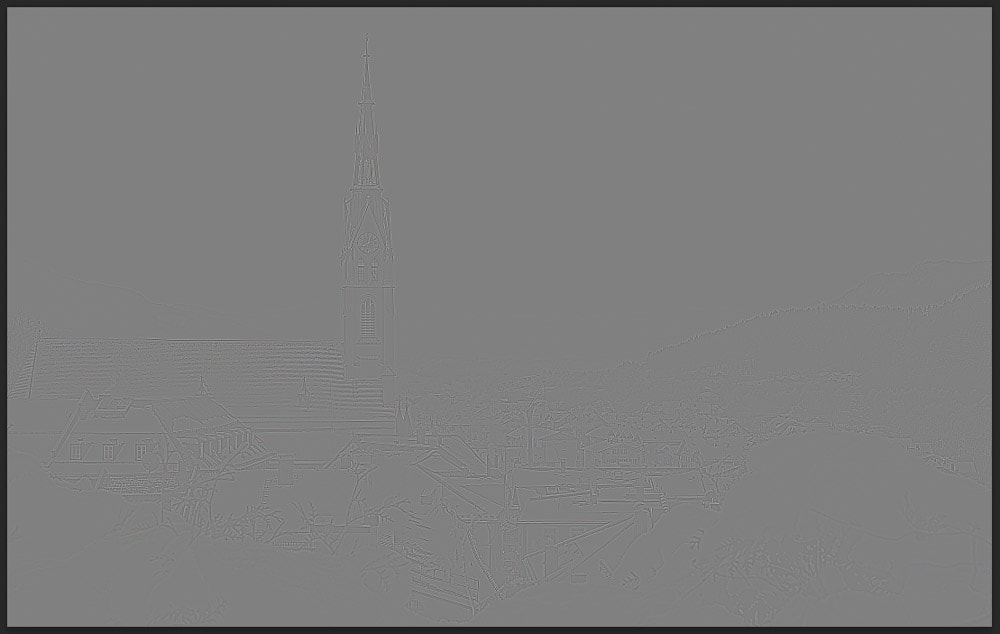
You need to change the Layer’s blending mode to bring back the details in the photo. To do this, locate the Blend Mode drop-down menu in the Layers panel. It is set to Normal by default.
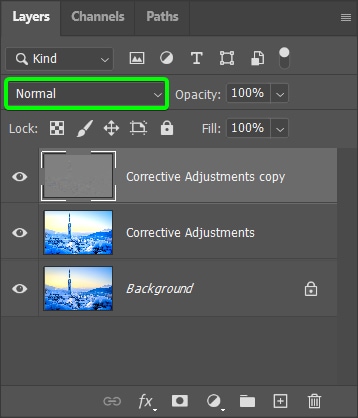
Click on the drop-down menu and select Overlay.
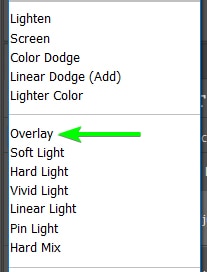
You will see your image once more, along with a bit of sharpening and detail added.
Step 5: Merge The Layers
Next, you need to Merge the layers you have created minus the Background layer. To merge the layers, select both by holding in Control (Win) or Command (Mac) while selecting them. Then right-click (Win) or Control + click (Mac) and select Merge Layers.
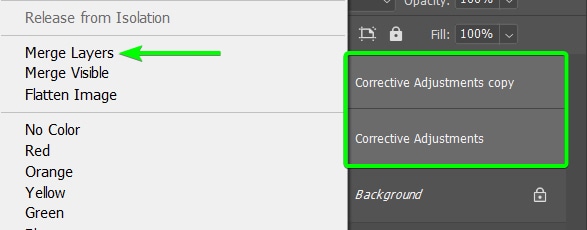
You now have one layer above your Background layer.
Step 6: Add An Unsharp Mask To The Layer
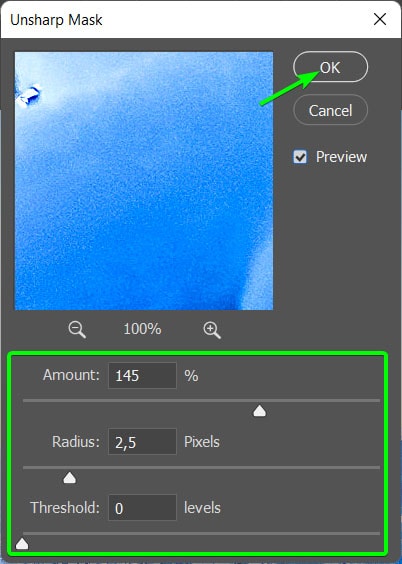
You need to sharpen the image more by adding an Unsharp Mask. This brings out even more detail in the picture, which is necessary to create the “brush strokes” when the oil effect is applied. To do this, keep your newly merged layer selected, then go to Filter > Sharpen > Unsharp Mask.
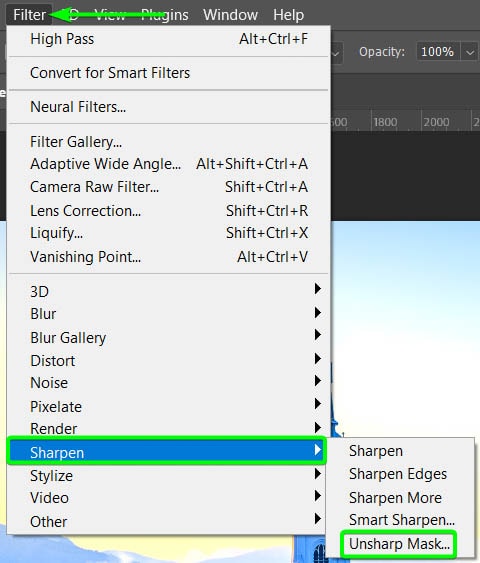
Adjust the settings in the Unsharp Mask window to bring out more detail and sharpen the image. Set the Amount between 130% and 150%, the Radius to 2 or 3, and leave the Threshold at 0. Click OK to apply the filter.
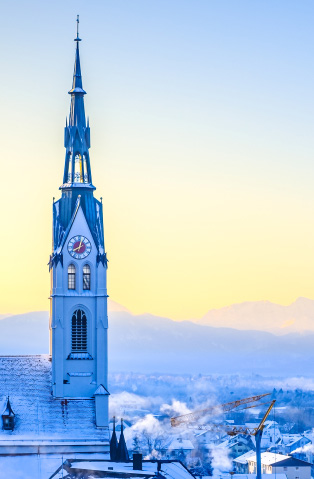
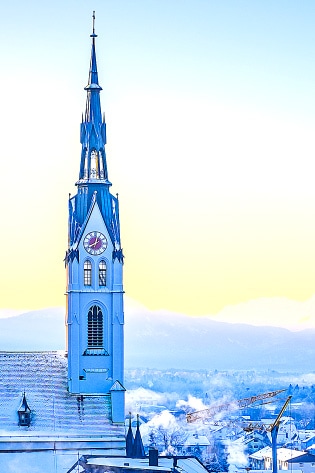
You can see the difference in detail and sharpening if you look at a zoomed-in element of the image before and after the edits.
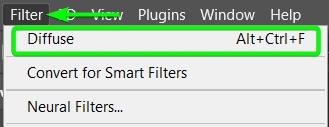
Step 7: Add A Diffuse Filter 3 to 5 Times At Different Angles
Now that the image is full of details and sharpened, you can add the oil effect using the Diffuse Filter. You will be repeating this step up to 5 times, but I will show you how to use a shortcut to repeat it.
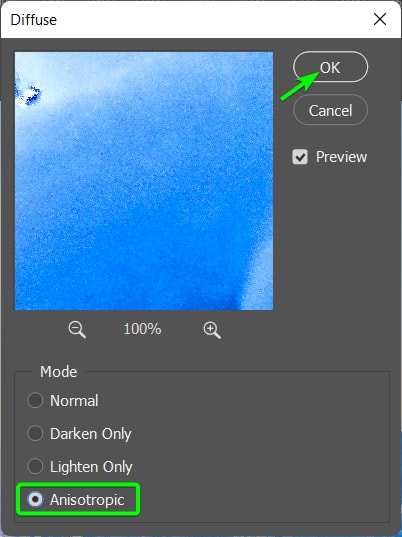
First, apply a Diffuse Filter to the photo by going to Filter > Stylize > Diffuse.
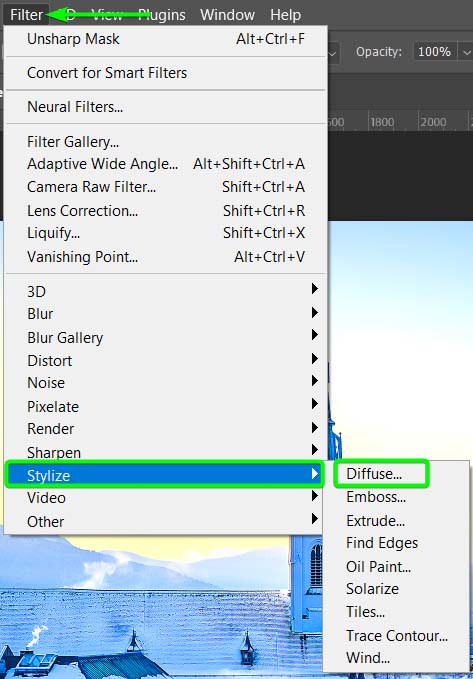
Select the Anisotropic option at the bottom and click OK to add it to the image.
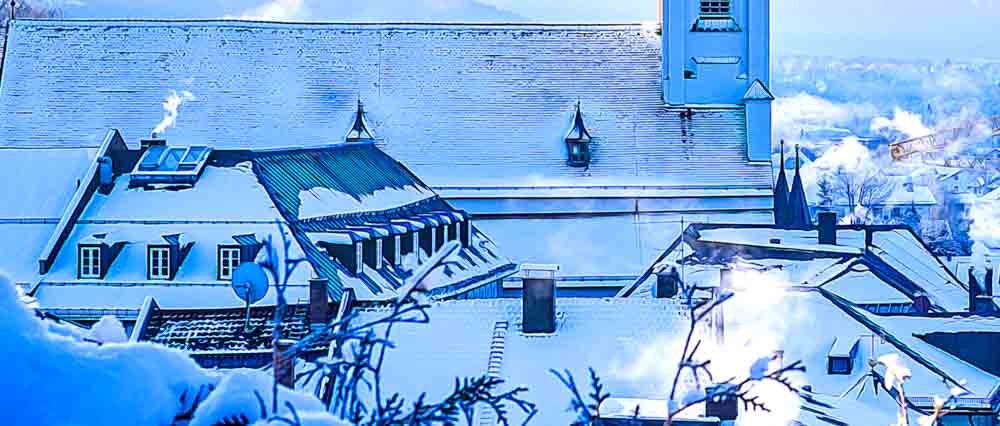
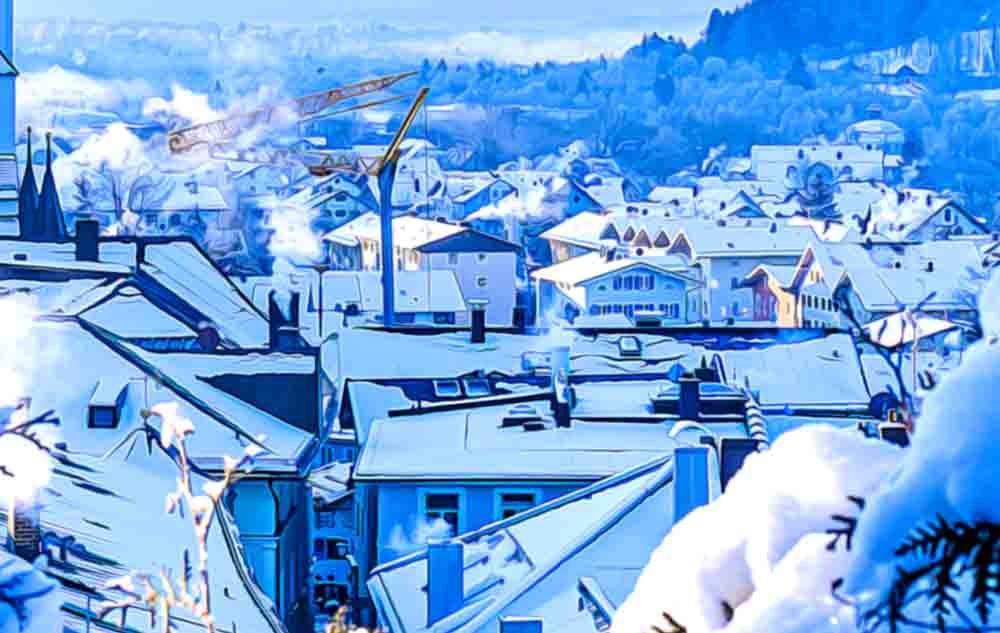
If you zoom in on your image, you will see the painting effect starting to take shape, where the details have started to blend and take on a painted look.
You must add the Diffuse Filter to the image another 2 to 4 times, depending on how bold you want the effect. However, adding the Diffuse Filter at different angles is best to make the painted effect more realistic.
To add the filter to a new angle, rotate the canvas by going to Image > Image Rotation > 90° Clockwise.
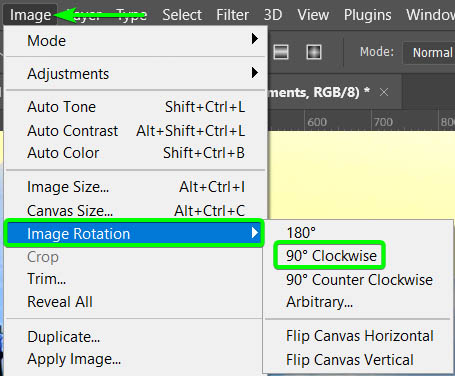
This will flip the entire canvas on its side.
Now, add the Diffuse Filter again. Since it was the last filter you used, you can go to Filter > Diffuse, which is now at the top of the menu. You can also use the shortcut to apply the last used filter by pressing Alt + Control + F (Win) or Option + Command + F (Mac).
Using these two options automatically adds the filter using the previous settings, so you don’t need to change the diffuse type each time.
Keep rotating and adding the Diffuse Filter as much as you need but try to stay within 5 times in total, or it may overdo the effect. Zoom in to the image using Control + + (Win) or Command + + (Mac) to see how the effect works and when to stop adding the filter.
I completed a full rotation and added the filter 5 times. You can see how the image has taken on a painted look.
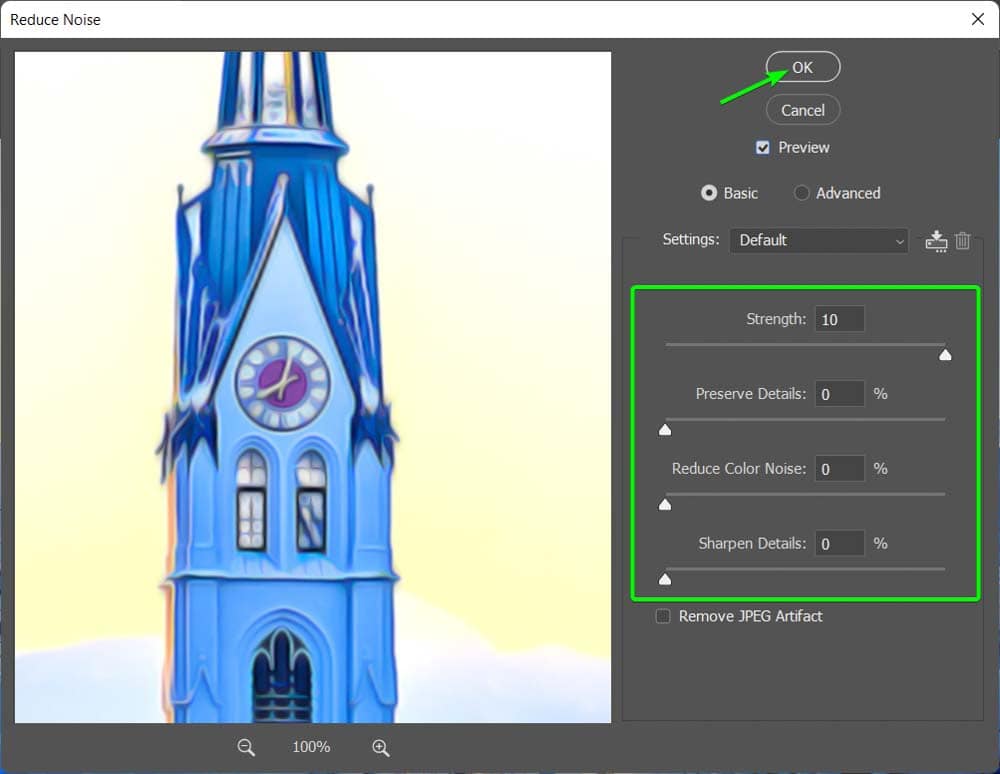
Step 8: Reduce The Noise In The Image
The next step is to reduce the noise in the image to smooth the paint effect. To do this, go to Filter > Noise > Reduce Noise.
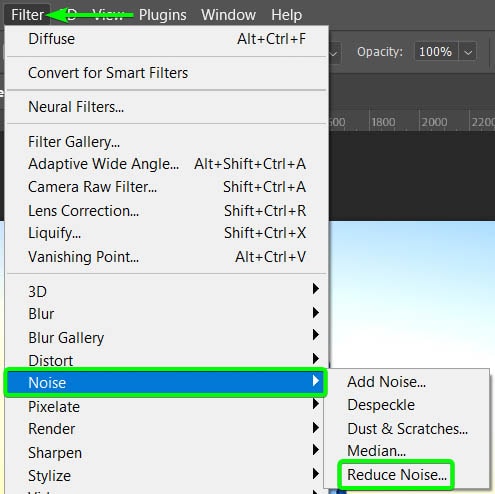
Change the Strength to 10, set the rest of the sliders to 0, and click OK.
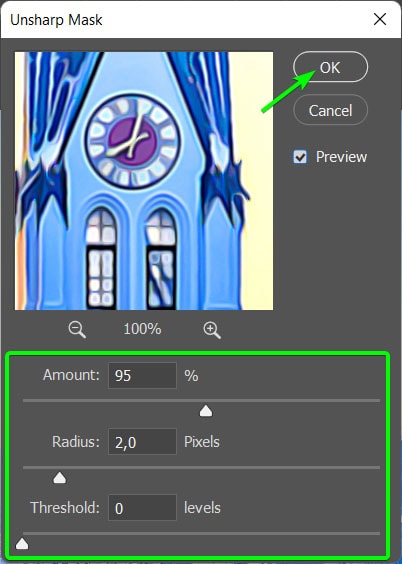
Step 9: Sharpen The Image Using An Unsharp Mask Filter
Since you smoothed out the image, you must now add a bit more sharpening to the photo. This is to sharpen the smoother paint look since you have removed the image details enough.
To do this, go to Filter > Sharpen > Unsharp Mask again.
Set the Amount below 100, the Radius to 2, and the Threshold to 0, then click OK to apply the effect.
Step 10: Duplicate The Layer And Add A High Pass Filter
You must now add a new High Pass filter to sharpen the painted image. First, duplicate the layer by pressing Control + J (Win) or Command + J (Mac). I renamed the layer to “Oil Paint Effect” to keep track of the edits.

Then, go to Filter > Other > High Pass.
Set the Radius to 2 and click OK to add the filter. This turns your image gray again.
Change the blend mode to Overlay to show the image again with the added details the filter gives.
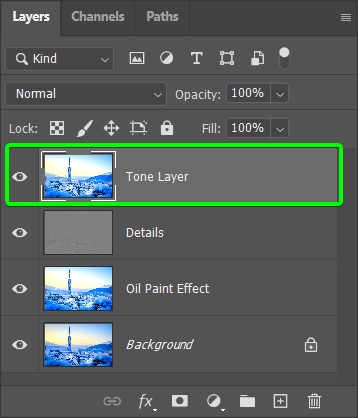
Step 11: Create A Merged Copy Of All The Layers
Now, you need to merge all the layers you have while still keeping a copy of them. To do this, you can quickly merge a copy of the layers by pressing Shift + Alt + Control + E (Win) or Shift + Option + Command + E (Mac).
You will see a new merged layer above the other layers in the Layers panel. This layer will be the Tone layer, so I have named it accordingly.
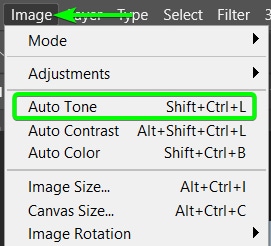
Step 12: Tone The Image Using Image > Auto Tone (Optional)
You can now automatically tone the image by going to Image > Auto Tone or pressing Shift + Control + L (Win) or Shift + Command + L (Mac). This allows Photoshop to fix the tone of the image automatically. This step isn’t necessary for every photo, so see if you need to add this step to your image.
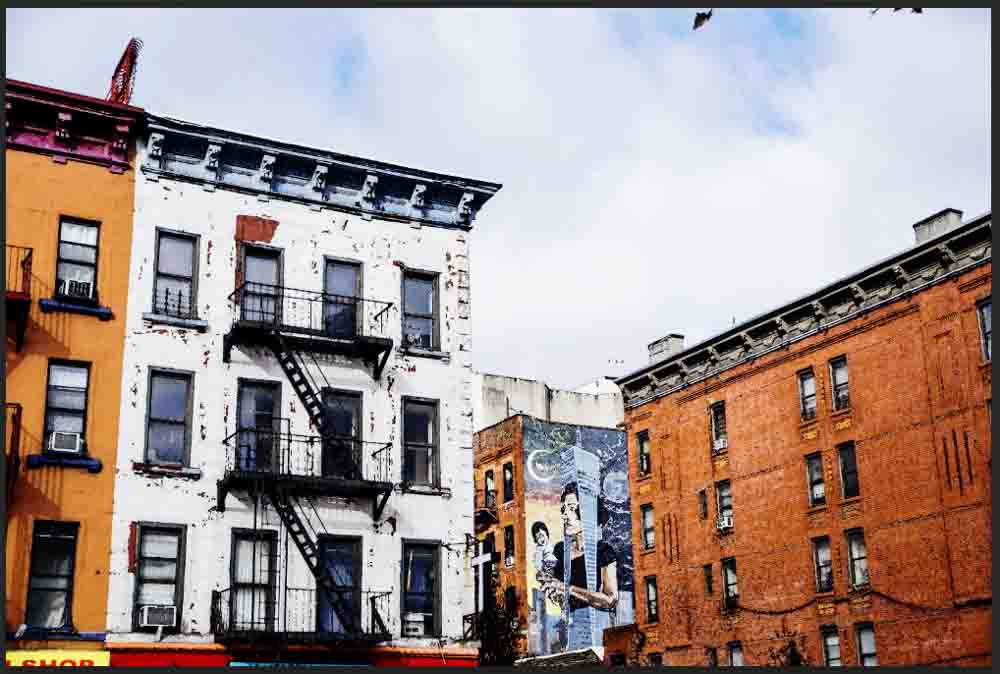
My image only changed slightly after auto-toning the image. However, I now successfully converted this photo into a painting.
How To Turn Photos Into Paintings Using The Filter Gallery
If the first method is too complicated and you want a faster and easier method to turn your photo into a painting, you can use the Filter Gallery instead. This option gives you less control and customization over the final effect.
However, the gallery has several options to use on your image, so set some time to try a few out to get the best results.
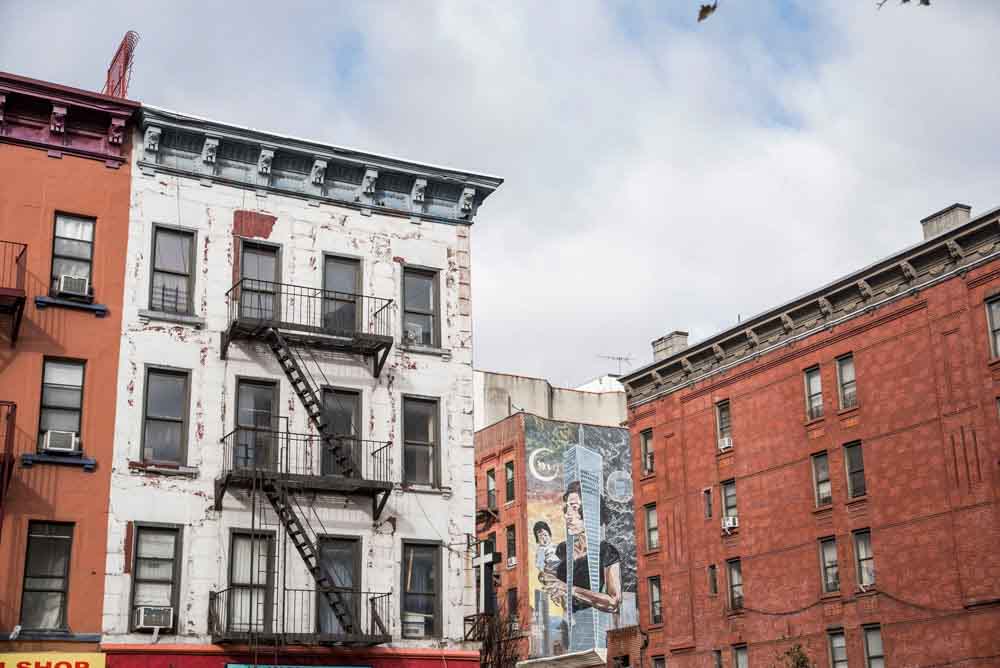
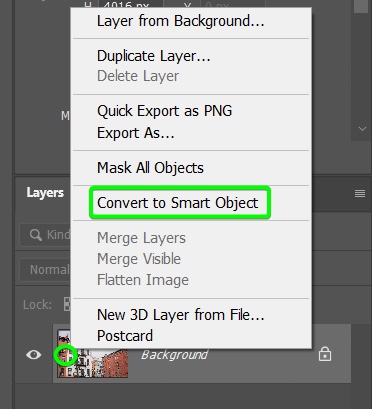
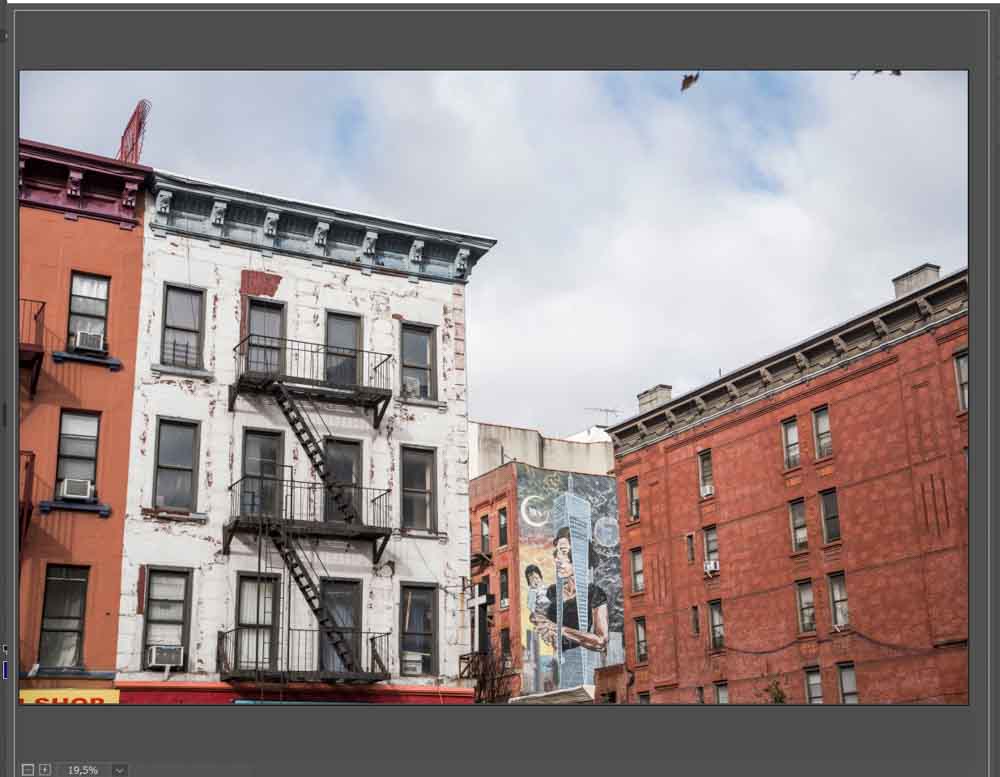
Step 1: Convert The Image Layer To A Smart Object
Before you add the filter to your image, you must convert it to a Smart Object. This will add the filter as a smart filter to the image, allowing you to go back and edit the filter at any stage. This is a non-destructive editing method.
To convert your image, right-click (Win) or Control + click (Mac) on the background layer once your image is open in Photoshop, then select Convert to Smart Object.
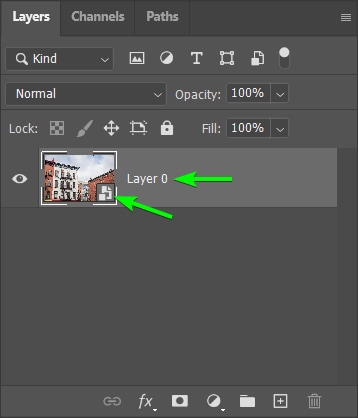
You will know that your layer is a smart object if the name changes to Layer 0 and you see the smart object icon in the layer thumbnail.
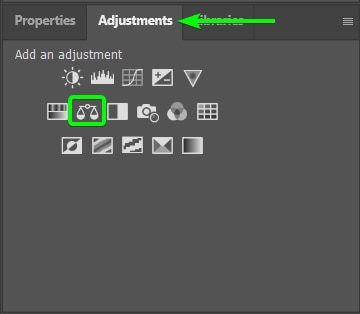
Step 2: Open The Filter Gallery
Now, you can open the Filter Gallery to add an artistic filter to the image. To open the gallery, go to Filter > Filter Gallery.

Your image will open up in a new workspace.
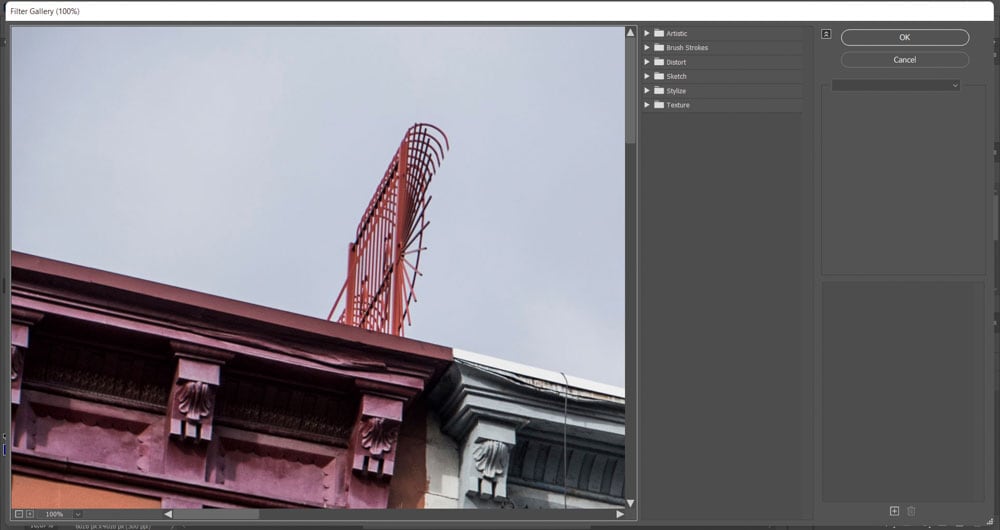
If you can’t see your image clearly, zoom out using Control + 0 (Win) or Command + 0 (Mac) to see a full view of the image again.
Step 3: Choose An Artistic Filter
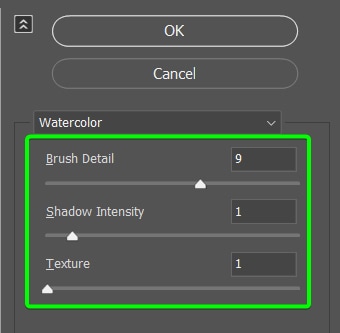
You can now choose an artistic filter for the image by opening the Artistic tab in the middle panel. Click on the arrow next to Artistic to open the tab, and you will see a variety of filters to choose from.
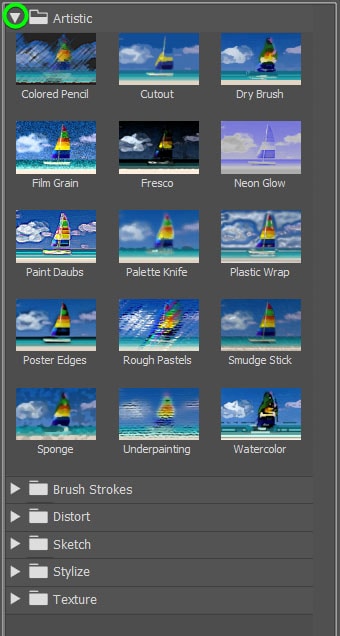
You can choose any filter based on how you’d like your image to look. Each filter produces a different result. Here are a few of the filters applied to my image.

Step 4: Adjust The Filter’s Settings
Once you have selected a filter, settings appear in the right-hand panel. These settings are different for each filter, but they all affect various aspects of the filter, such as the intensity, brush size, detail amount, and more.
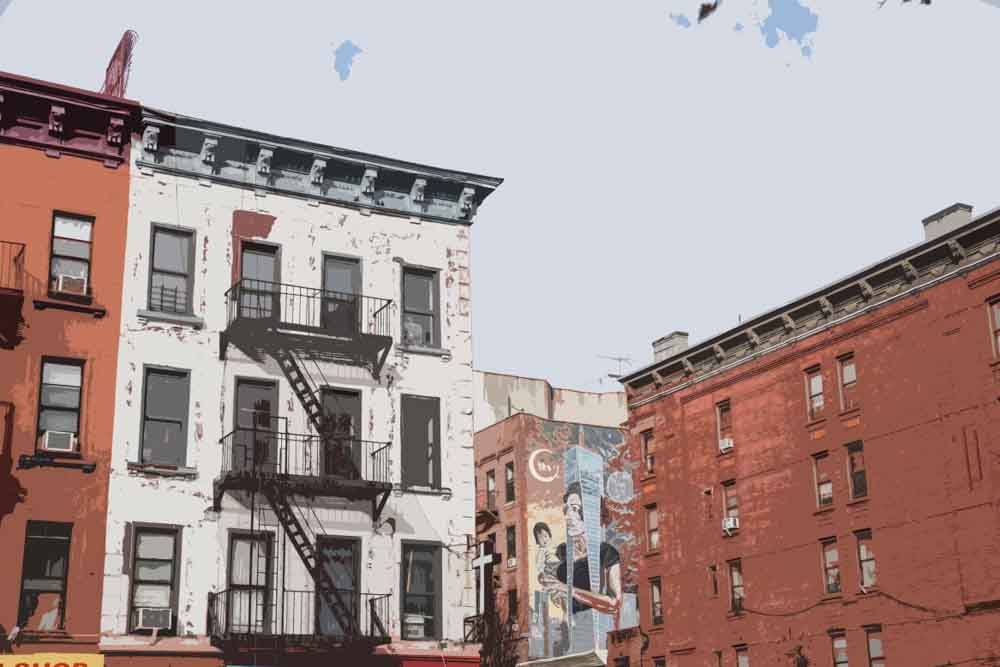
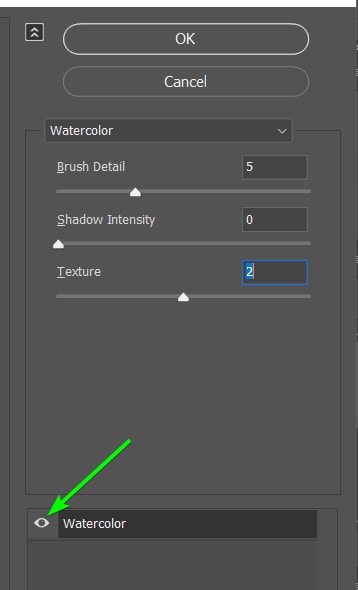
I have chosen the Watercolor effect for my image. Now in the right-hand panel, I can adjust the settings for the Brush Detail, Shadow Intensity, and Texture.
When applying any filter effect, you can switch the preview on and off by clicking on the eye icon next to the filter you applied in the right-hand panel. This gives you a good look at the before and after.
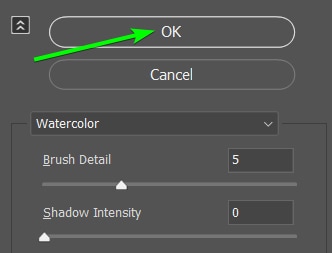
Once you have chosen your filter and adjusted the settings, you can click OK to apply the effect to your image and move back to the Photoshop workspace.
Your image will have the new filter applied in the workspace, and you can now add further adjustments if needed.
Step 5: Add Further Adjustments To The Photo
You can now add various adjustments to the painted image to bring out the colors, change the colors, or adjust the exposure. For instance, I have added three adjustments to the picture.
First, I added a Hue/Saturation Adjustment layer to change the color and bring out the vibrancy of the image.
Then, I added a Curves Adjustment layer to adjust the exposure and to make the colors pop.
Lastly, I added a Color Balance Adjustment layer to balance the colors by slightly dulling the orange hues and adding more blues to the image.
You can add adjustment layers and filters that work for your image.
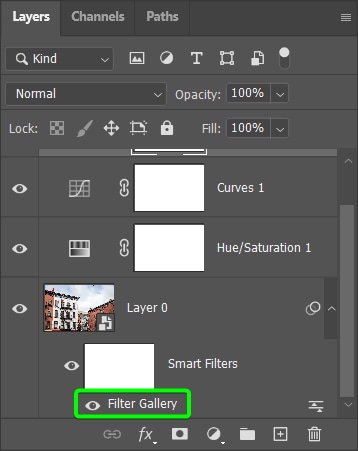
Step 6: Re-edit The Filter (Optional)
If you change your mind about the filter you added, you can easily go back and change the filter in the filter gallery. You will notice that a new sub-layer was added to your image layer as soon as you added a filter, which contains the Smart Filter you added.
Double-click on the Filter Gallery sub-layer under your image layer to reaccess the Filter Gallery and adjust the filter.
The gallery will open again, allowing you to adjust or select a new filter. Once you are happy with your changes and adjustments, you will have turned your photo into a painting in a few easy steps.