
Printing images takes more effort than preparing an image for digital use. When printing a picture, you need to ensure that the photo has the correct dimensions, color mode, and quality. If you print a low-resolution at a large scale, you’ll end up with a pixelated picture. Luckily, you can easily resize images in Photoshop to print them without losing the original quality.
Correctly preparing any images for print by setting the color mode to CMYK, cropping to the dimensions, and ensuring that the quality is up to printing standards is essential. Using the right resizing method will keep your clients happy or give you a flawless print of your photographs to hang on your walls or add to your photo collages.
2 Ways To Resize An Image For Print In Photoshop
There are two ways to resize a photo for print in Photoshop, and the method you choose depends on the dimensions and resolution of your original picture and the purpose of the picture after printing. The first option is preferred if the original image is larger in size and resolution than the final print size you need.
The second method is your best option if your photo is smaller in size and resolution than the final picture size you want to print. This method shows you how to upsize the picture without making it pixelated and blurry once printed, as long as the original image has a decent resolution, to begin with.
Option 1: Cropping To Your Print Dimensions
When printing a photo, you can choose to print it at any size you wish as long as the original resolution of the image is enough for the printed size. However, it’s much easier to print a picture using a standard photo size and aspect ratio. Commercial printers effortlessly print images at these common sizes.
If you were to ask for a custom size, you would need to add your photo to a larger canvas and add bleed and crop marks to help the printers correctly print the image.
So here is how to crop your image to standard print dimensions easily with the help of Photoshop. Just remember that this method only works when your image has a larger size and resolution than what’s required for your print.
Step 1: Check The Current Image Size And Resolution
First, find out what size and resolution your current image is. To do this, open the image in Photoshop.
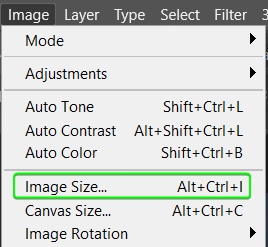
Then, open the Image size panel by going to Image > Image Size or pressing Alt + Control + I (Win) or Option + Command + I (Mac).
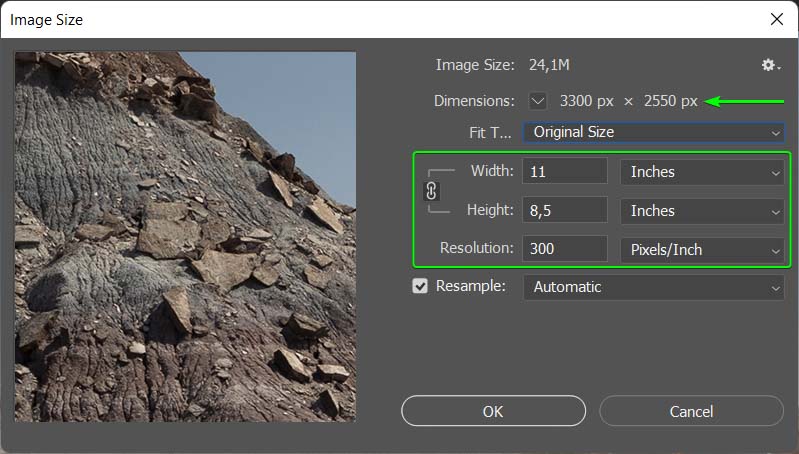
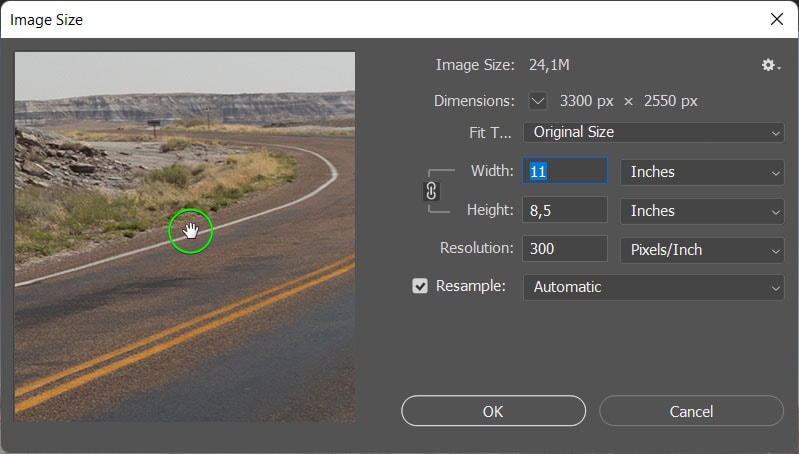
Once the Image Size panel opens, you will see certain information about the image, such as the current file size, dimensions, and resolution.
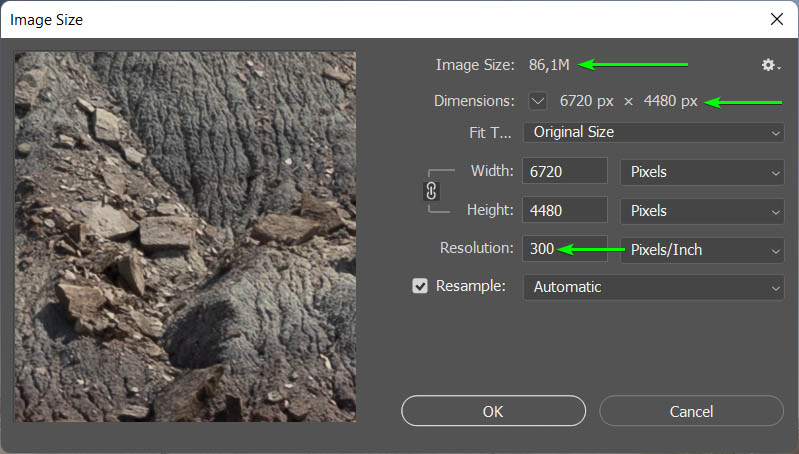
If the resolution is 300 PPI or higher, then your image is at a high enough resolution for a high-quality print. You can then continue to use this method to resize the photo.
If the resolution is less than 300 PPI, you’ll need to use the second method for your picture.
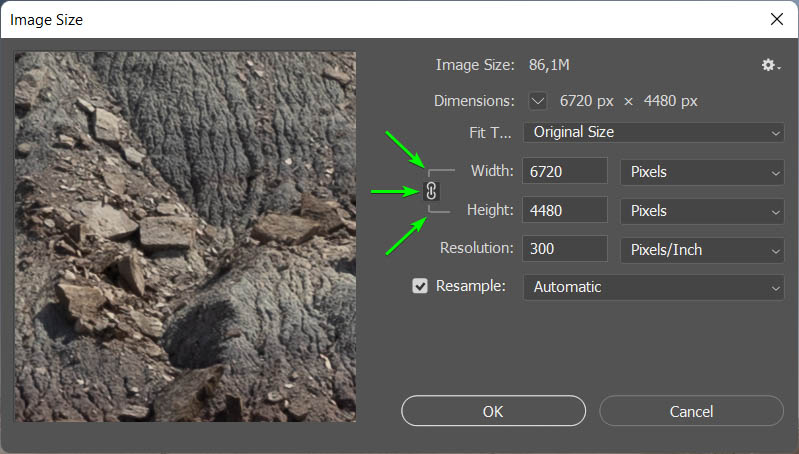
To check the Inches size of your image, ensure the Link icon is active next to the Width and Height options. The lines on either side of the link icon show that it’s active and that any changes in the Width or the Height will automatically change the other one. Click on the Link icon to activate it.
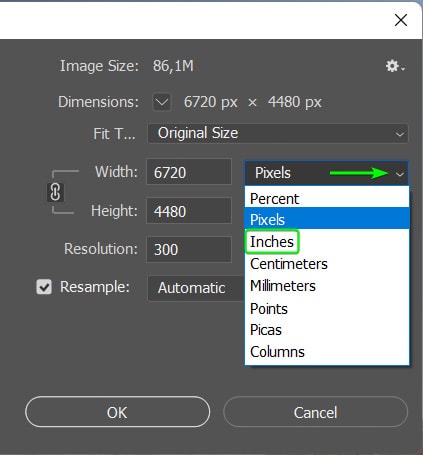
Then use the drop-down menu next to the Width or the Height and select Inches (or the unit of measurement you are printing in).
You can now see the original size of the image in Inches. If you are going to print the photo at a smaller size, you can continue using this method. Otherwise, use the second method to preserve the image quality if you need a larger picture.
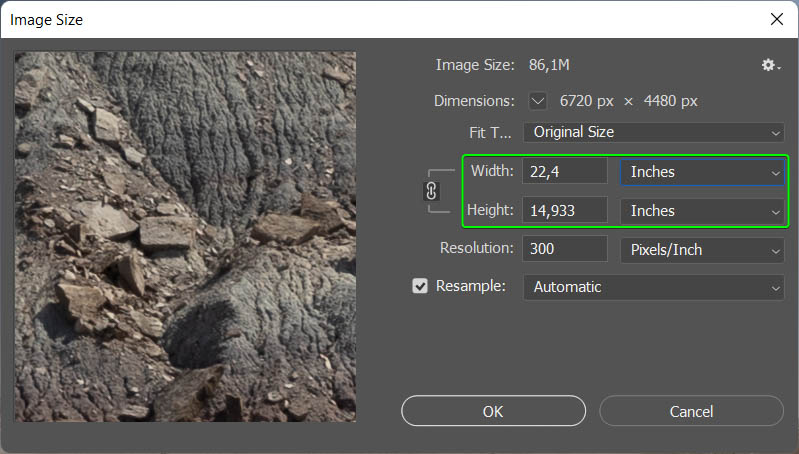
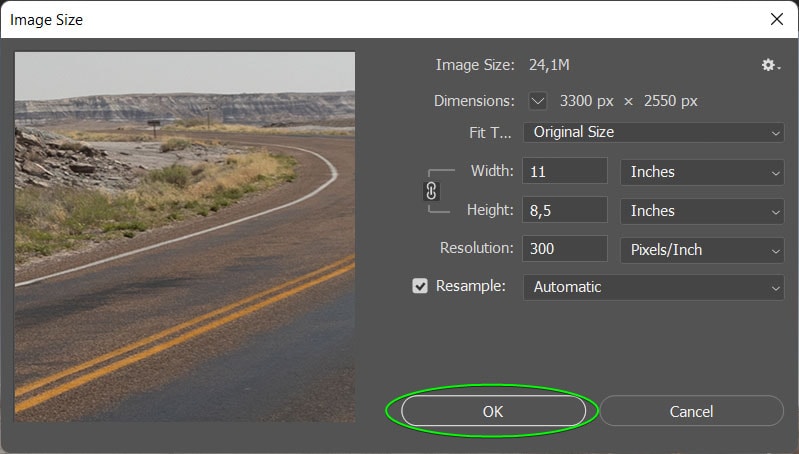
Now, if I want to print this photo at 11 x 8.5 inches, which uses a 3:4 aspect ratio, you can easily resize the image. Click the OK to exit the Image Size Panel.
Step 2: Activate The Crop Tool And Select W x H x Resolution
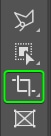
To crop the image to the correct size, select the Crop Tool from the Toolbar or press C.
You can change the image size in the Options bar. First, you can choose various presets from the first drop-down menu.

Some of these presets are helpful if you need a standard aspect ratio or one of the available picture dimensions and resolution combinations. To set your own dimensions, select W x H x Resolution.
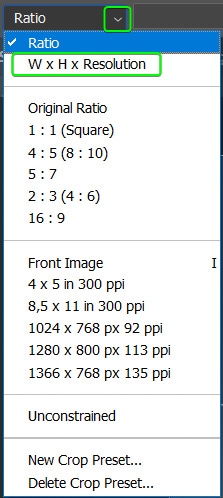
There are now three blocks in the Options bar where you can add the Width, Height, and Resolution values for your photo. Type “in” after the Width and Height values to ensure the image is resized to inches and not pixels.
Type 300 in the last block and ensure the unit is px/in. This will set the resolution to 300 PPI.

Step 3: Adjust The Crop On The Image
The crop overlay on the image will change to the dimensions you set. This will often crop off parts of the picture. You can use one of the corner anchors to crop the photo more if you want a different composition. When moving an anchor, the aspect ratio remains locked, so you don’t have to worry about changing the ratio by accident.
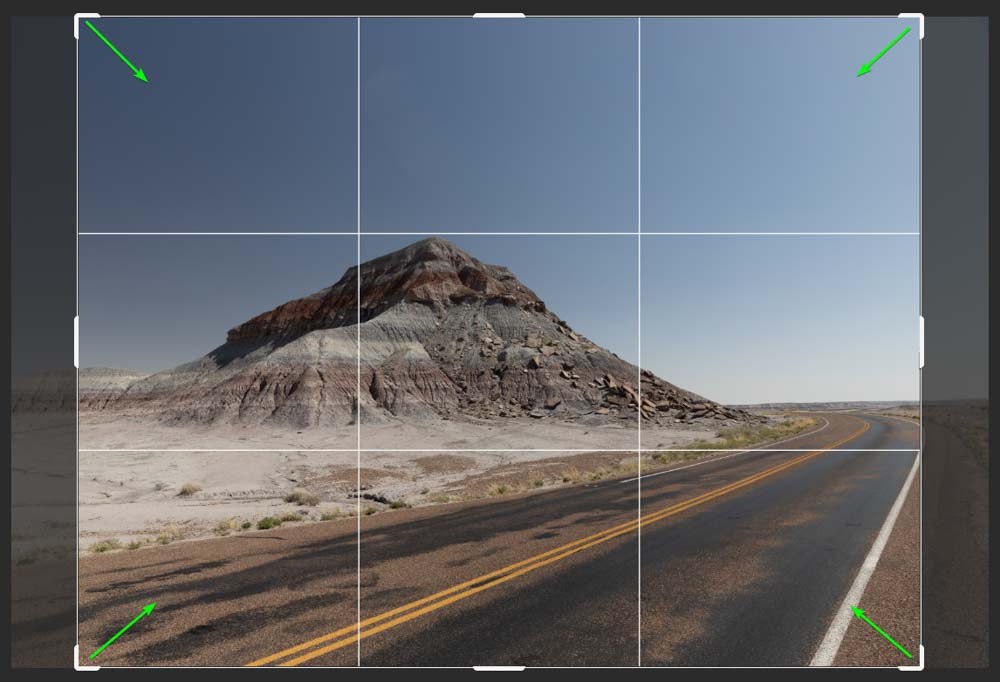
You can also keep the crop as it is if you want to crop the image as little as possible. Move the picture left or right to ensure the crop is how you want it.
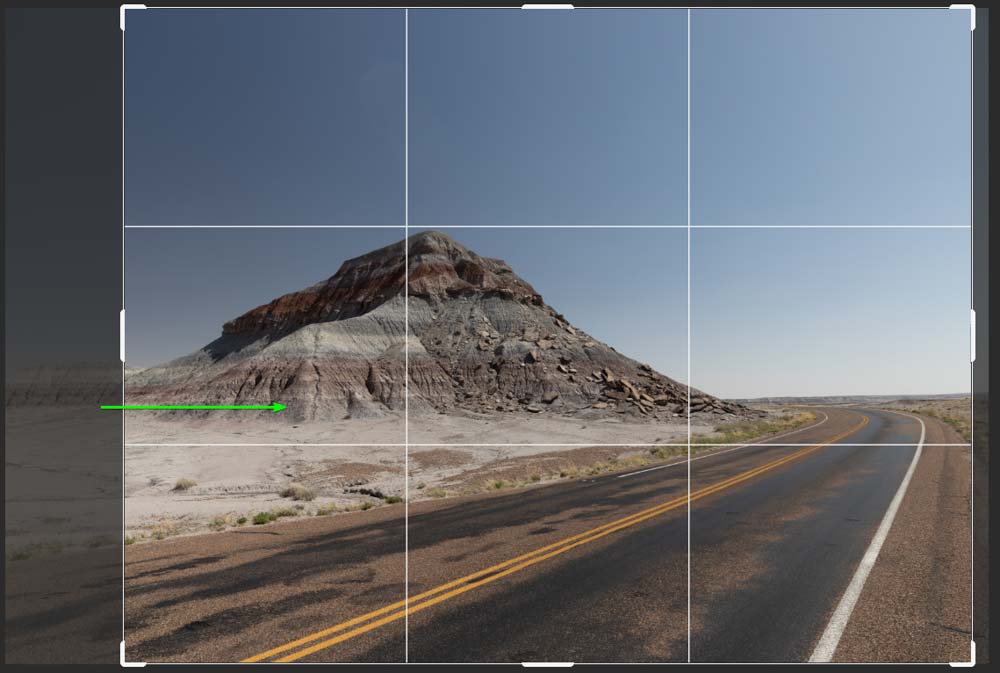
Once you are happy with the crop, click on the Checkmark in the Options bar or press Enter to accept the crop.

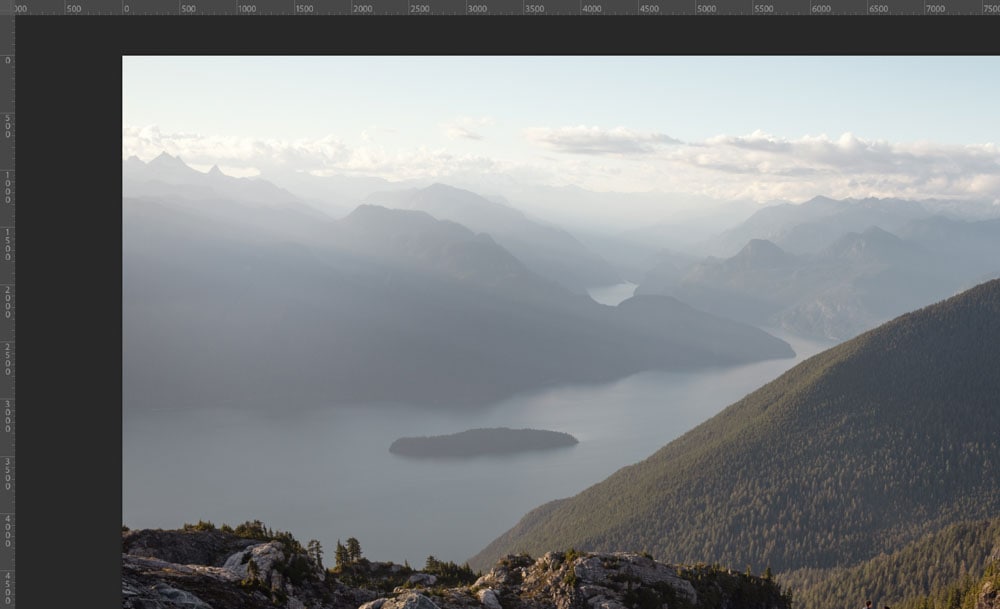
Once you accept the crop, you will notice the image becomes smaller in the workspace, indicating that you have reduced the image size.
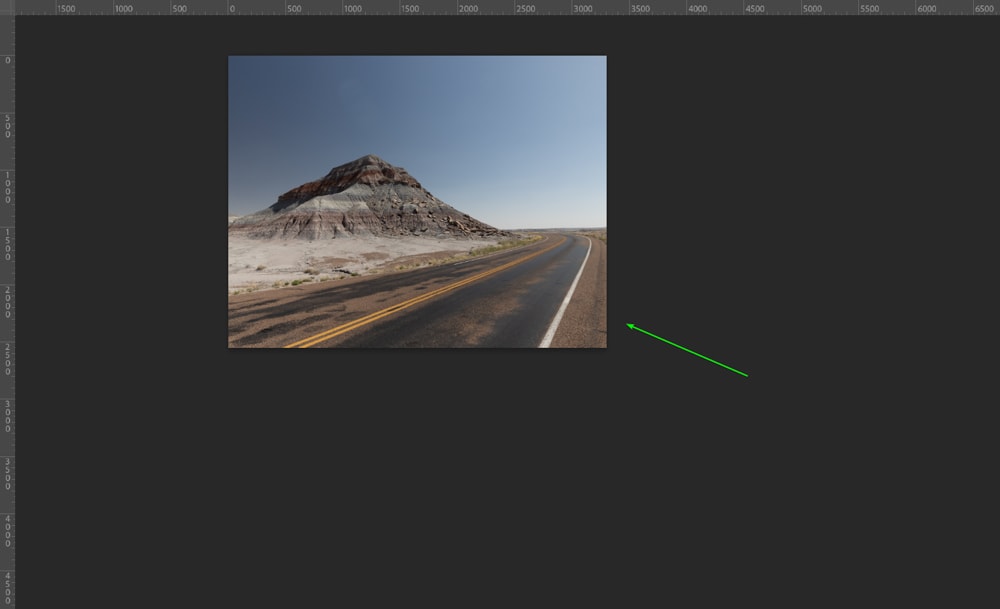
You can zoom in using Control + 0 (Win) or Command + 0 (Mac) to view the image up close again. You can now see how the new composition of the image looks after you have changed the size and aspect ratio.
Step 4: Check The New Image Size And Resolution
You can also ensure that you have correctly resized the image by opening the Image Size panel again by pressing Alt + Control + I (Win) or Option + Command + I (Mac). You will see your new Width and Height in the boxes, and you should ensure that the Resolution is still 300PPI.
You can click on the preview of the image and use the Hand icon to drag the image around if you want to check that the quality is still high enough for print.
Click OK to close the Image Size panel.
Your photo is now resized to the exact printing size and aspect ratio. You can now send the image to the printers without worrying about how the printed image will look.
Option 2: Rescaling To Your Print Dimension
Typically, you want a photo to have a resolution of at least 300 PPI for high-quality printing. However, in some cases, you have an image with a low resolution that isn’t enough for print, or the picture’s dimensions are smaller than the size you want to print the image. In these cases, you must rescale your photo while preserving the quality.
It’s important to note that this method isn’t a magic solution to fix extremely low-resolution pictures. You won’t be able to add more details to images or enlarge photos that don’t have enough details in them. This method only works to enlarge high-quality photos that are just below your requirements.
The amount you can enlarge your photo depends on the starting quality of the image. You can check your image’s original dimensions and resolution by following step 1 in the previous example. Once your image is open in Photoshop, press Alt + Control + I (Win) or Option + Command + I (Mac). You can also use the menu by clicking on Image > Image Size.
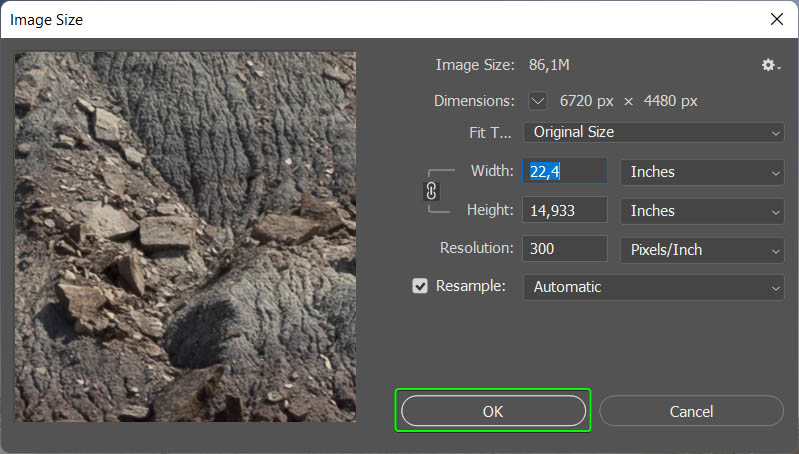
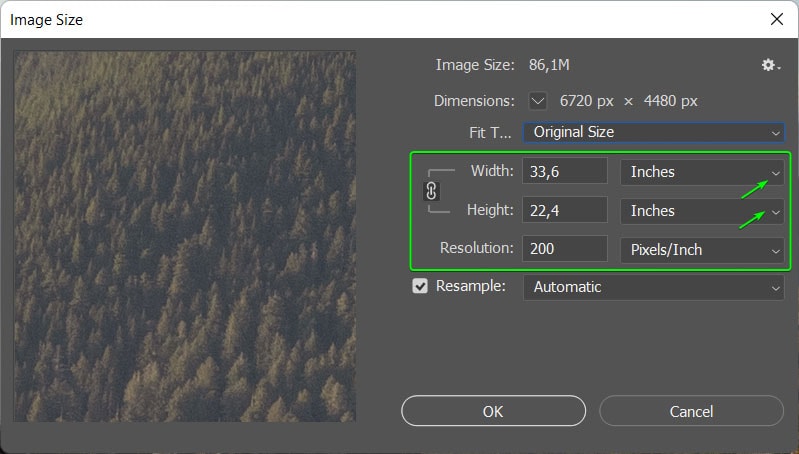
In my image, you can see that the image dimensions are 33.6 x 22.4 inches with a resolution of 200 PPI. If you want to see the dimensions in inches, use the drop-down menus to select the unit of measurement.
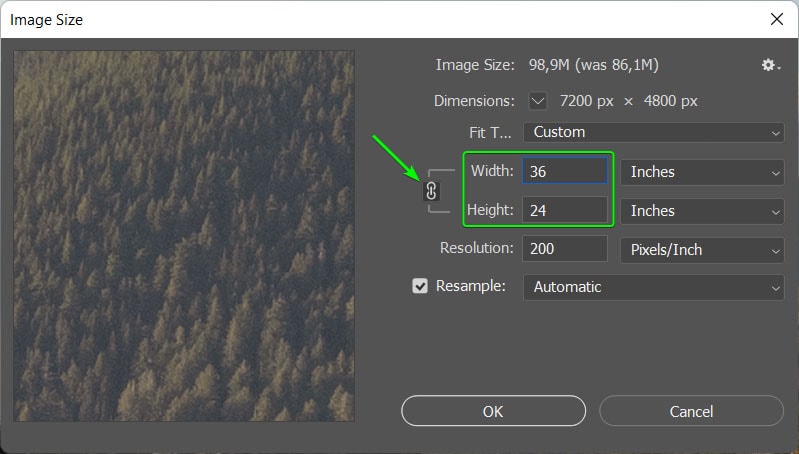
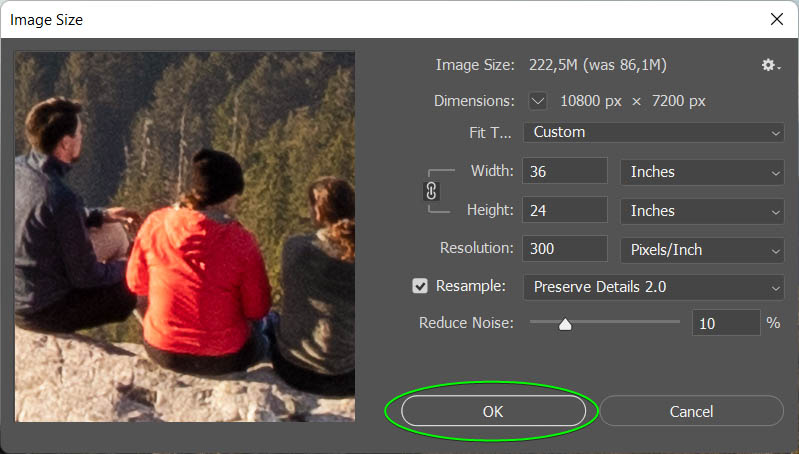
Since the photo is high-quality, to begin with, I can slightly increase the dimensions and resolution. So I can print this photo at 36 x 24 inches with a resolution of 300 PPI.
To change the size and resolution, add the new values in the Width and Height boxes. Although to prevent your image from distorting if the new dimensions don’t match, ensure that the Link icon is active and then only add in the Width or the Height.
I added 36 into the Width box, and the Height automatically changed to 24. This worked since my photo had the correct aspect ratio. If the Height doesn’t add up to what you need, you will need to crop the image to the correct aspect ratio using the first method once you have upscaled it.
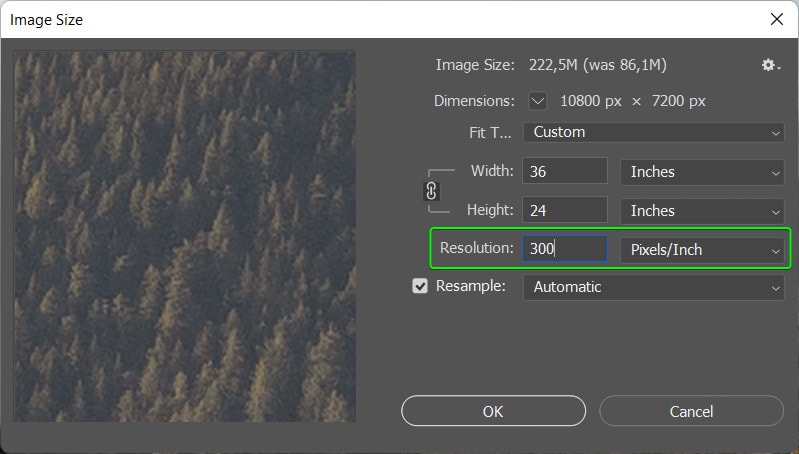
Then, change your resolution by adding 300 into the box and ensuring the unit of measurement is set to Pixels/Inch.
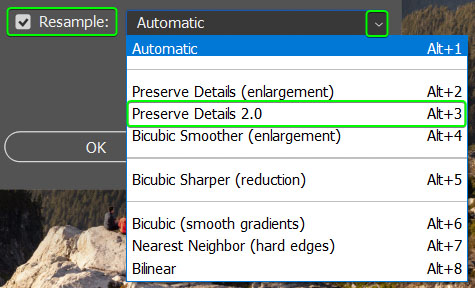
Now, the most crucial step is the Resample option below. Ensure that the box next to Resample is checked. Then, use the drop-down menu to select Preserve Details 2.0.
This resample option is a great way to convert low to high resolution because it increases the resolution while keeping the original details of the image as best as possible. If you don’t see this resample option, follow the instructions in the next section.
Once the resample option is selected, a Reduce Noise slider appears, allowing you to minimize the amount of noise added to the image during the resize process. You can click and drag around the image preview window to find the focus of your image to see how much noise you need to take out. Usually, a small amount (up to 10%) is acceptable for high-quality photos.

Click OK once you have set the details, and Photoshop will enlarge your image.
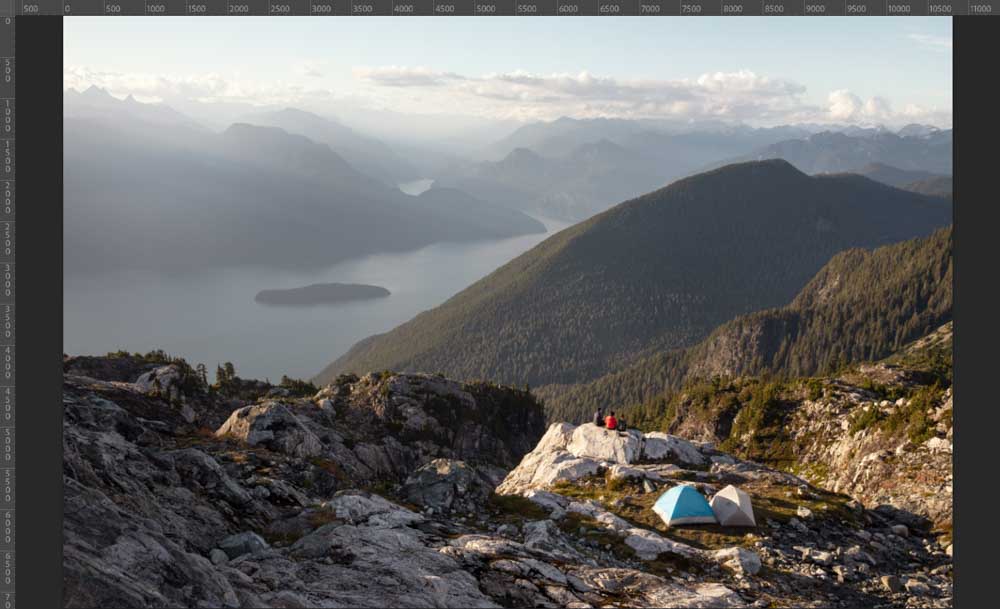
Your image will increase in the workspace and result in a zoomed-in view. You can press Control + 0 (Win) or Command + 0 (Mac) to view the full image once more.
What To Do If The Preserve Details 2.0 Option Is Not Visible?
In some cases, the Preserve Details 2.0 Resample option is not visible in the drop-down menu. You can easily fix this problem in Photoshop’s preferences settings.
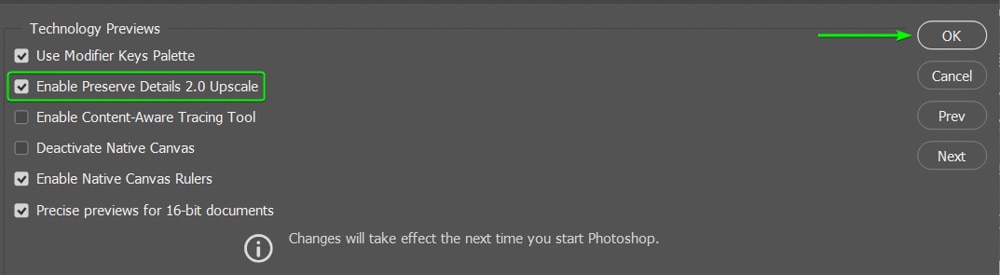
To do this, go to Edit > Preferences > Technology Previews (Win) or Photoshop > Preferences > Technology Previews (Mac).
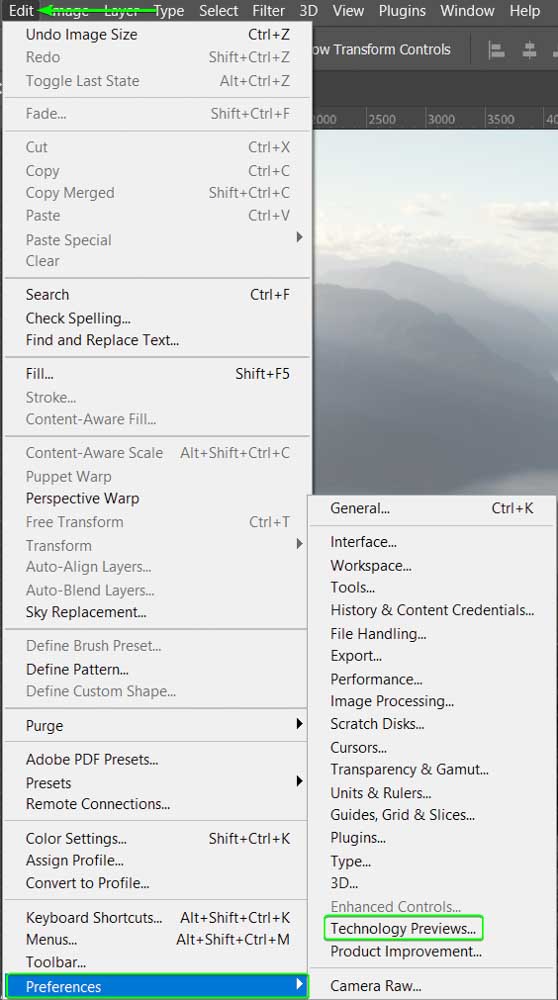
Then, ensure that the box next to Enable Preserve Details 2.0 Upscale is checked, and press OK.
After you restart Photoshop, the changes will be active, so save your work, exit the program, and open it again. Then when you open the Image Size panel, you’ll be able to use the resample option.
Why Do Photos Get Cropped When Printing To Certain Dimensions?
When resizing images for print, you will often need to crop them and lose parts of the picture. This usually occurs when printing to a different aspect ratio than the original image. In the first method I used above, I needed to crop the sides of the photo to fit the new aspect ratio.
Aspect ratio refers to the shape of the photo using the image’s width relative to the height. If you have an aspect ratio of 3:2, the image’s width is more than the height, so you have a landscape photo. You can also have a square image at a 1:1 aspect ratio since the width and height are the same.
The aspect ratio is not directly proportional to the actual image size in inches, but these two are linked. If you send an image to print that is not sized precisely to the print size, you can still receive the photo with all the details as long as the aspect ratio remains the same.
If you want to ensure that your photo will be printed as is without losing details, check that the aspect ratio matches the print dimensions, which you can compare in my standard photo sizes guide.
Sometimes, you will need to crop the image before printing to set it to the correct aspect ratio. If you have an image that needs to be printed at a 3:2 (or 2:3) aspect ratio, you should crop it before printing to keep the important details in the picture.
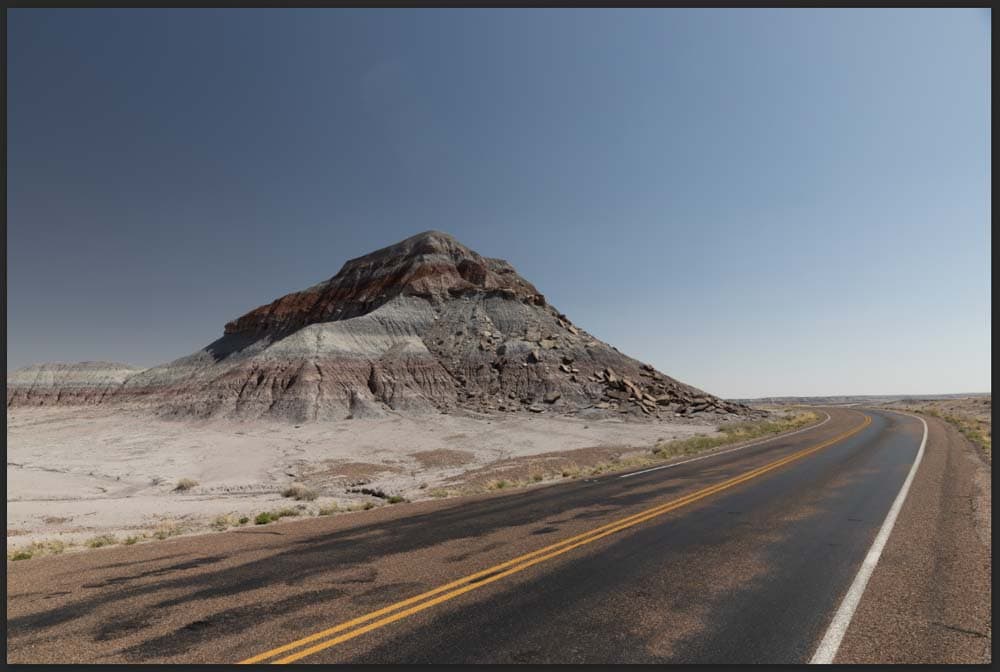
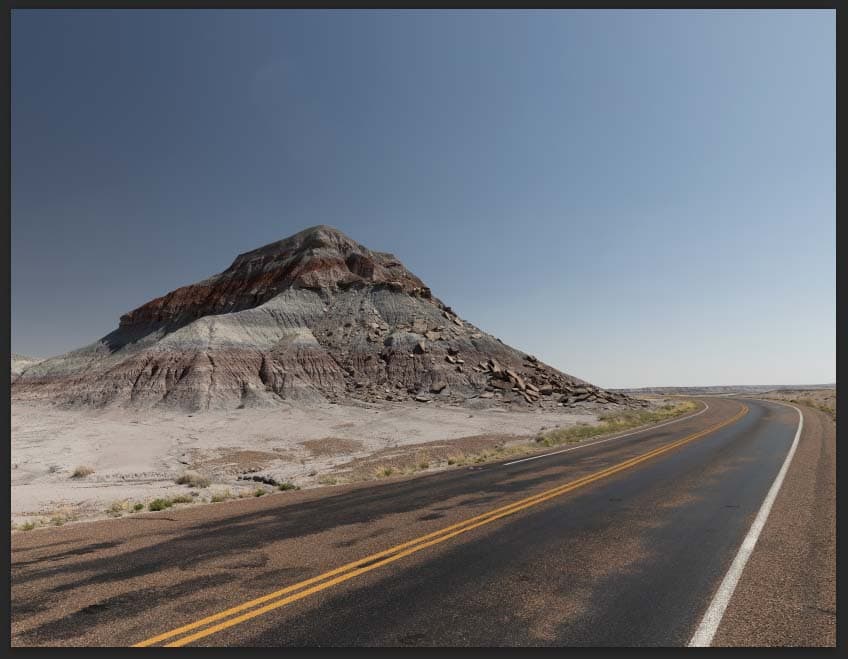
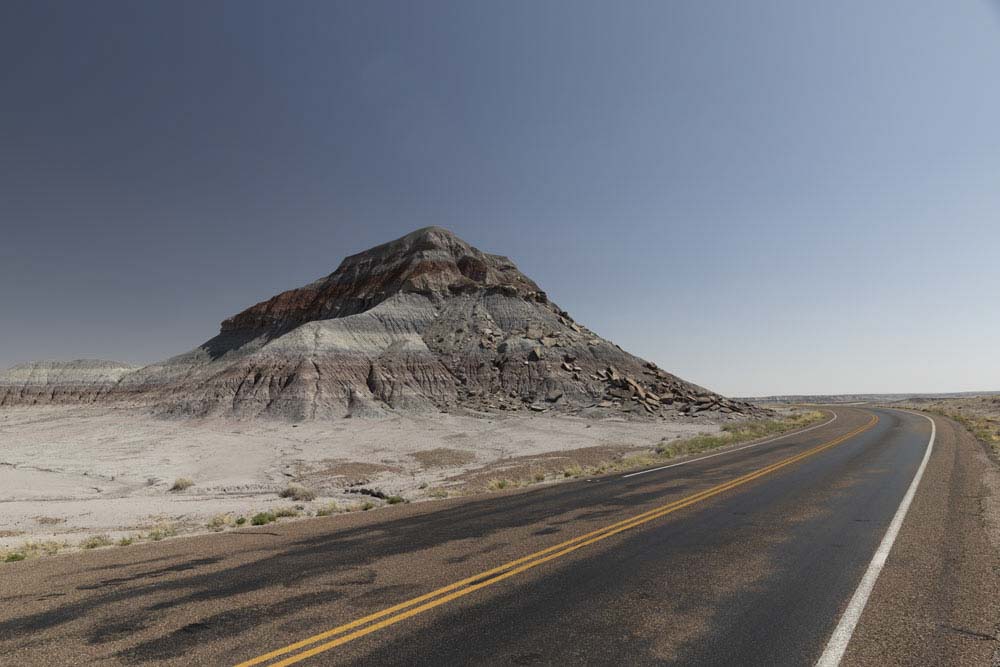
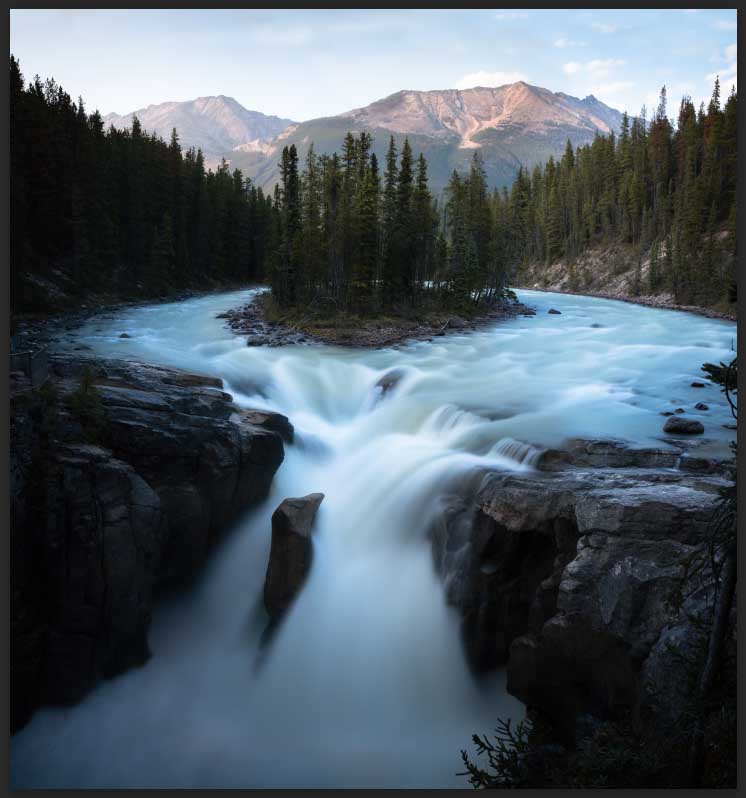
For instance, this image doesn’t have the correct aspect ratio, so when I send it to print and ask for a size that matches a 2:3 aspect ratio, the printers will need to crop the image.
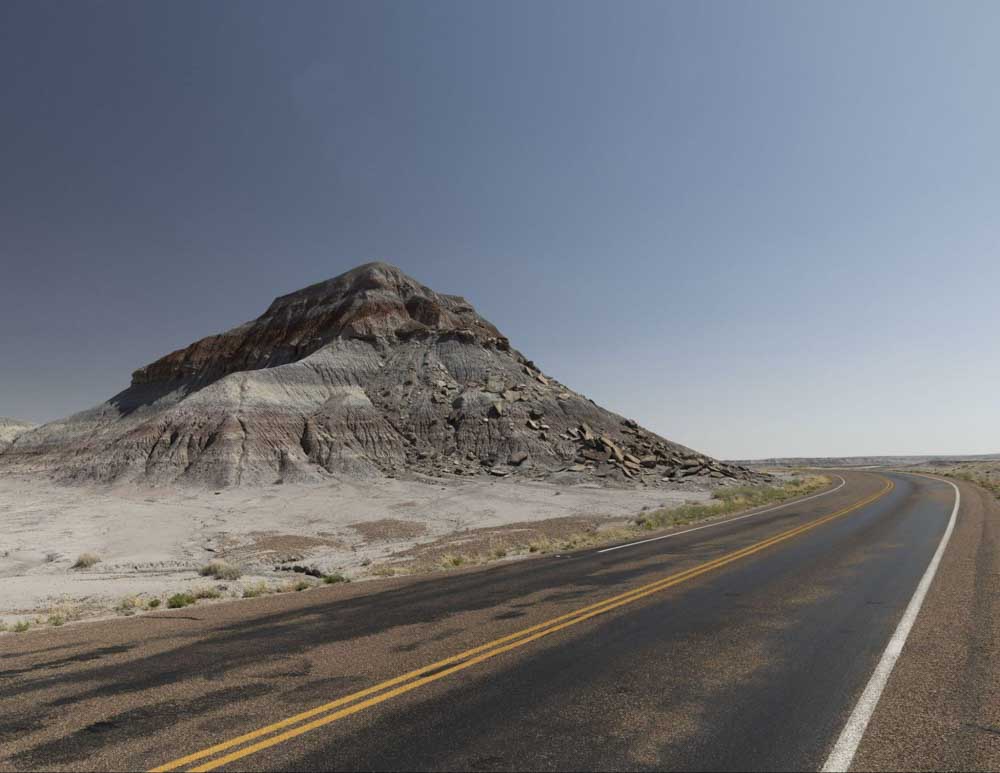
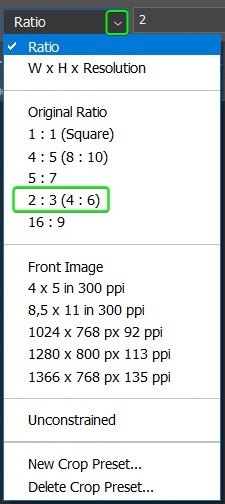
To choose how the photo must be cropped, follow the crop process in the first method to ensure you have the correct aspect ratio. Once the Crop Tool (C) is selected, choose the 2:3 aspect ratio from the menu in the Options bar.
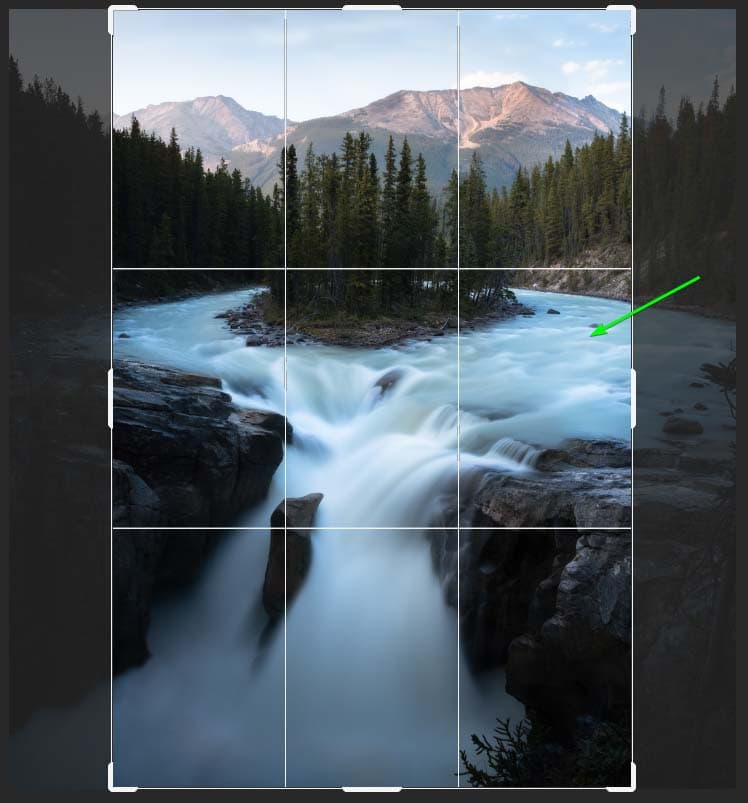
You can now move the crop box to crop the image as you want. Then when you send it to print and request a printed size that matches a 2:3 aspect ratio, such as 6 x 4 inches, the photo won’t get cropped.
You now know how your printed photo will turn out.