

A Color Lookup Table, or LUT, is a set of adjustments to the color of an image or video. You can use LUTs in Photoshop to change the style or mood of the picture with a bit less effort than creating your color adjustments from scratch.
Photoshop comes with a set of LUTs you can use, but you can also find LUTs online to download and even create your own in Photoshop. So let’s take a look at how to apply an existing LUT to a photo or save your own color adjustments as a LUT that you can use for projects later on.
To load a LUT, add a Color Lookup Adjustment layer from the Adjustments Panel. Click the Color Lookup Adjustment and pick the 3D LUT you’d like to load. To install a LUT, open Photoshop’s LUT folder in your system files and copy/paste your LUTs into there. Now, when you add a new Color Lookup Table Adjustment Layer from the Adjustments Panel, you will be able to see your added LUTs from the 3DLUT file dropdown menu.
To create a LUT, first, add a Color Balance Adjustment Layer and make your adjustments using the color balance sliders. Create a new document and paste the Adjustment Layer onto the new document. Now, you can save the document as a new LUT by heading to File > Export > Color Lookup Tables.
To load a LUT, add a Color Lookup Adjustment layer from the Adjustments Panel. Click the Color Lookup Adjustment and pick the 3D LUT you’d like to load. To install a LUT, open Photoshop’s LUT folder in your system files and copy/paste your LUTs into there. Now, when you add a new Color Lookup Table Adjustment Layer from the Adjustments Panel, you will be able to see your added LUTs from the 3DLUT file dropdown menu.
To create a LUT, first add a Color Balance Adjustment Layer and make your adjustments using the color balance sliders. Create a new document and paste the Adjustment Layer on to the new document. Now, you can save the document as a new LUT by heading to File > Export > Color Lookup Tables.
How To Use & Install A LUT Into Photoshop
Option 1: Load Directly Into The Color Lookup Adjustment Layer
Step 1: Use Camera RAW To Fix Exposure And White Balance
First, you’ll need to ensure your image’s Exposure and White Balance are set correctly. If you’ve loaded a raw photo into Photoshop, the Camera Raw window will appear automatically, and you can make the adjustments here by heading to the Basic tab on the right.
Here you can use the adjustments to fix the exposure and white balance of your image. The goal is to get the base exposure and contrast to a balanced point. That way, the LUT will look its best when applied to your photo.
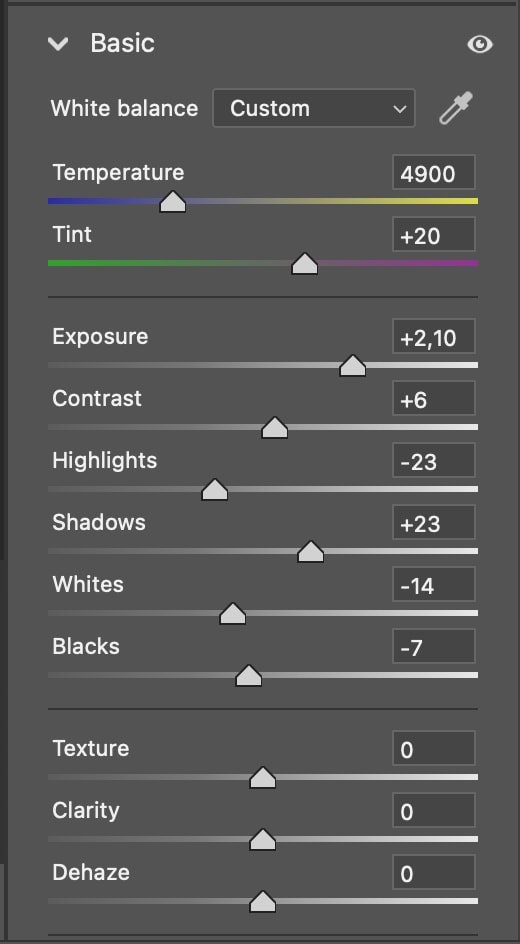
If you’re not working with a raw file, you can access Camera Raw by heading to Filter > Convert for Smart Filters and then Filter > Camera Raw Filter. The Camera Raw window will appear. Click Open when you’re finished (not Done, as this will not open the image), and the edited photo will appear as a new document in the main Photoshop workspace.
Step 2: Go To Window > Adjustments To Add A Color Lookup Adjustment Layer
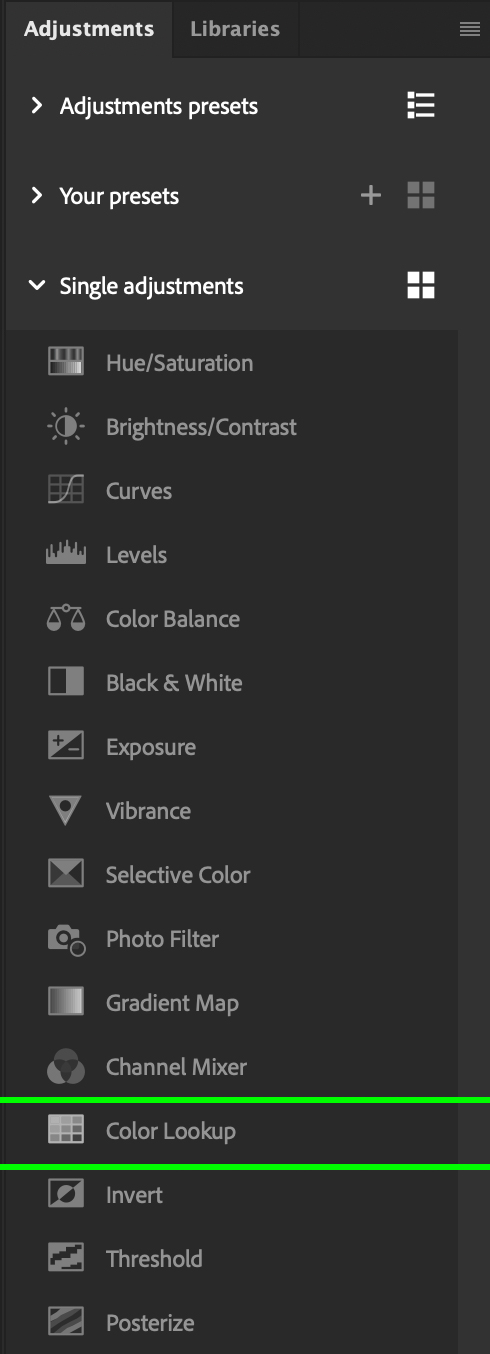
Once you’ve made the adjustments, add a new Color Lookup Adjustment Layer by heading to the Adjustments Panel (Window > Adjustments) and clicking the icon that looks like a table.
Once you’ve added the adjustment layer, you’ll see it appear in your Layers Panel as Color Lookup 1.
Step 3: Click The Color Lookup Layer And Load The 3D LUT File
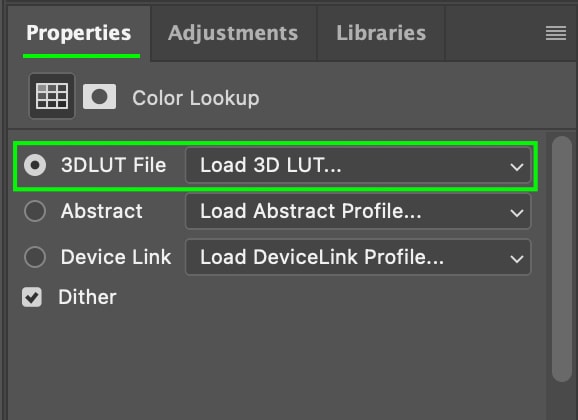
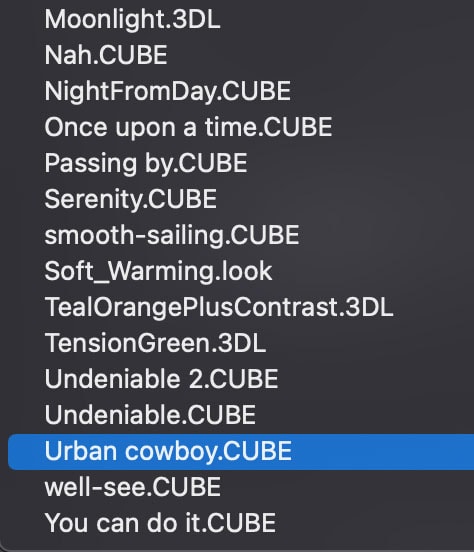
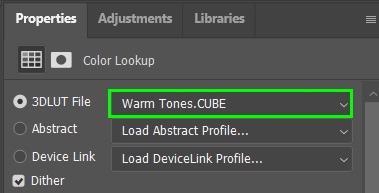
Click the Color Lookup layer, and you’ll see the Properties Panel. From the options, select 3DLUT file, and click the Load 3D LUT dropdown.
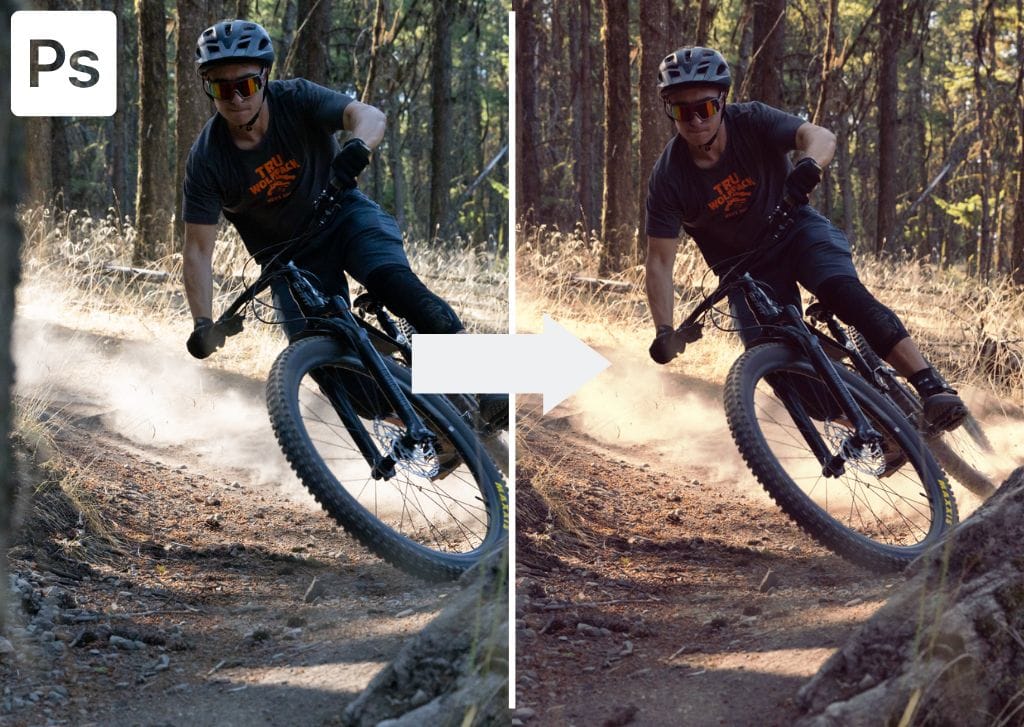
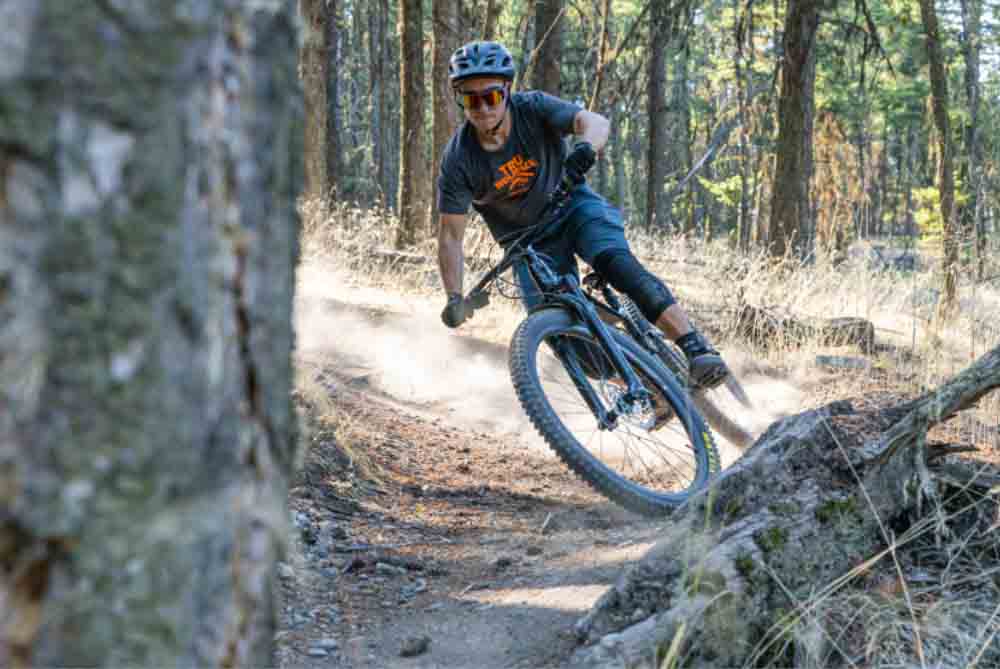
From the options in the dropdown menu, click the one at the top that says Load 3D LUT. Find and select the LUT from your files and click Open. The LUT I’m using is the Urban Cowboy LUT from Giggster which you can find and download here in this pack of 12 free LUTS.

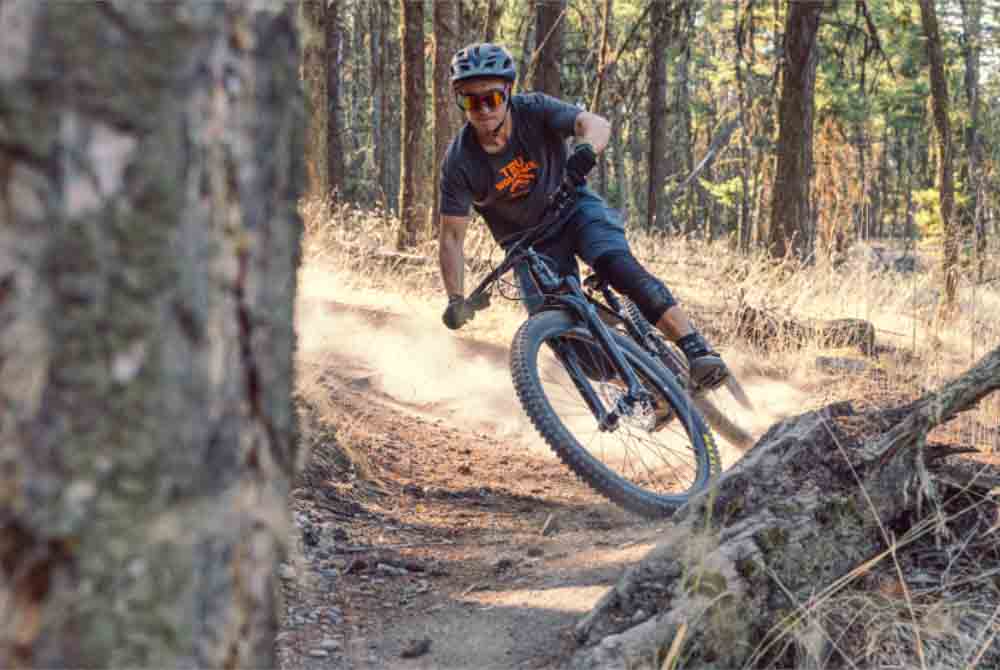
This will apply the LUT to your image, and you’ll see the color grading effect from the LUT you just loaded.

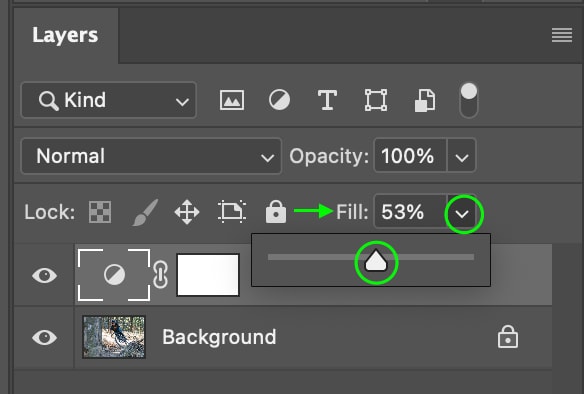
Step 4: Reduce The LUT’s Intensity (Optional)
The LUT might appear a bit too intense, in which case you can lower the intensity using the Fill slider, which you can find at the top of the Layers Panel. Click and drag the toggle to adjust the intensity. I’ll reduce the intensity of my LUT to make the effect more subtle.
Option 2: Install The LUT Directly Into Photoshop’s Program Files
Step 1: Download Your LUTs And Unzip The File
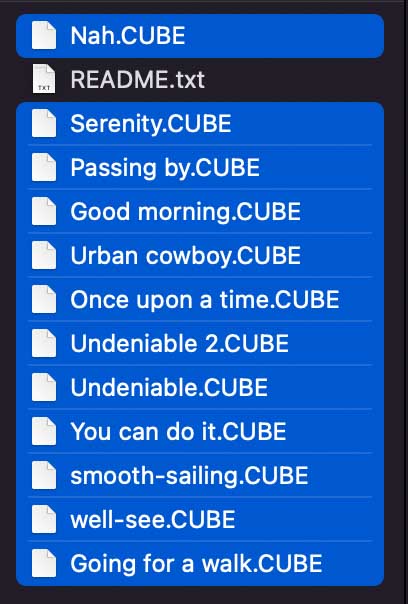
Download the LUTs and then locate them in your files. Double-click the zipped file. It will change to a folder, double click again to open it, and you’ll see all the LUTs that come with the pack. On Windows, right-click and select Extract All to unzip the folder.
Step 2: Copy Your LUTs Using Control/Command + C
Once you find and unzip the folder within your files, hold Control (Win) or Command (Mac) while clicking each of the LUTs you’d like to add to Photoshop. Once you have selected all the LUTs you want to add, use Control + C (Win) or Command + C (Mac) to copy the selected files.
Step 3: Open Photoshop’s LUT Folder
You can find the folder where Photoshop stores LUTs by following the file path below. Change the part of the link in bold to whichever version of Photoshop you’re running.
Windows:
C:\Program Files\Adobe\Adobe Photoshop [current year]\Presets\3DLUTS
Mac:
Applications/Adobe Photoshop [current year]/Presets/3DLUTS
For instance, on a Mac OS, the file path looks something like this.
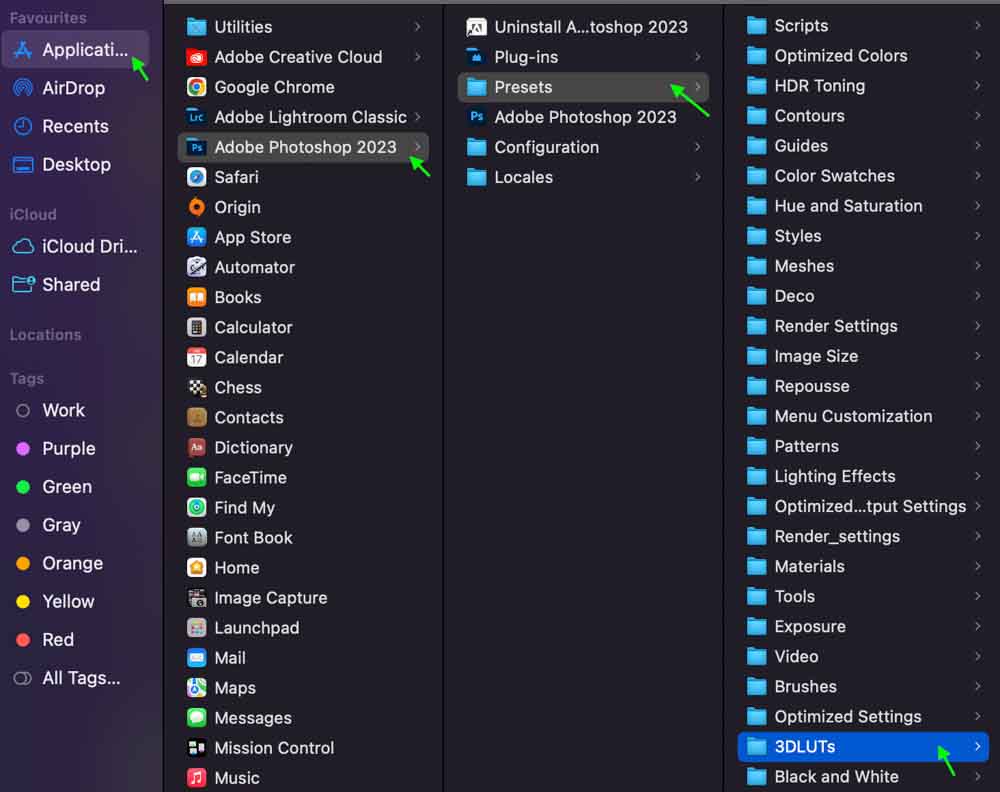
You’ll likely see many LUTs already in this folder, as Photoshop comes with LUTs you can use.
Step 4: Paste The LUTs Into The Folder Control/Command + V
Open the folder called 3DLUTs. Then, paste the LUT files into the folder using Control + V (Win) or Command + V (Mac). Once you do, the files will appear in the folder.
Step 5: Apply The LUT To An Image
Now, you’ll be able to follow the same steps as in the first section above to access and apply the LUT to your image. To reiterate, with an image open in Photoshop, add a new Color Lookup Table Adjustment Layer from the Adjustments Panel. Then, in the Properties Panel, select 3DLUT file and click the dropdown menu. Scrolling through the options, you will see the LUTs you’ve just added.
How To Create Your Own LUT In Photoshop
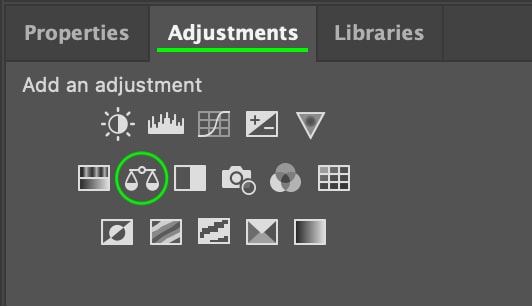
Step 1: Add A Color Balance Adjustment Layer From The Adjustments Panel
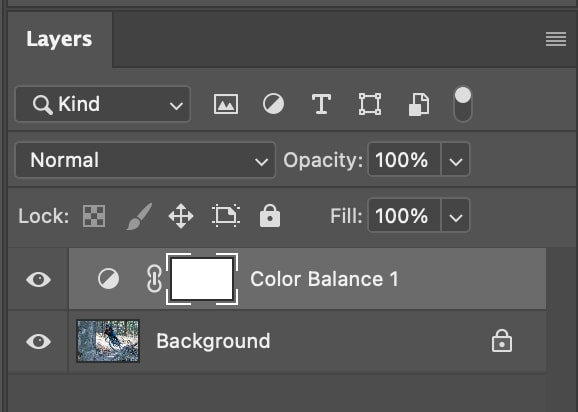
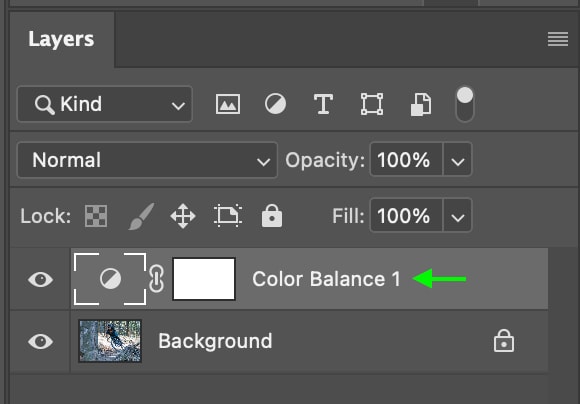
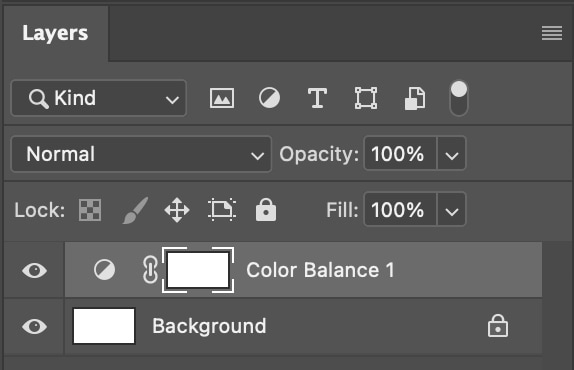
Once the photo is open in a document, you can head to the Adjustments Panel and add a new Color Balance Adjustment Layer. The layer will appear in the Layers Panel as Color Balance 1.
Step 2: Set The Color Grading In The Properties Panel
With the Color Balance Layer still selected in the Layers Panel, head to the Properties Panel. Use the toggles to adjust the amount of cyan, red, magenta, green, yellow, and blue in the image.
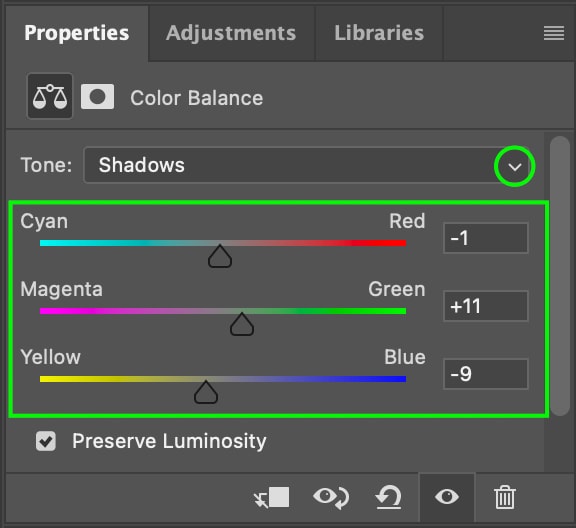
For my purposes, I’ll warm the image by adding a bit of yellow and red and then add a cinematic tone with a green tint. The image will change as you adjust, so feel free to adjust until you’re content with the coloring in the picture. These adjustments will form your new LUT. You can add more adjustment layers if you’d like.
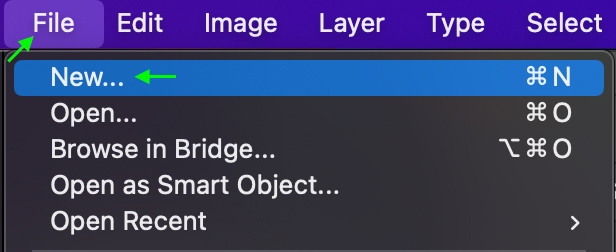
Step 3: Go To File > New To Create A New Document
Now we’ll make a new document to apply the LUT we made on our sample image. Open up a new blank document by heading to File > New. The New Document window will appear. Your document can be any size if it has at least 1920×1080 pixels. Click Create, and the blank document will appear in a new tab at the top.
Step 4: Use Control/Command + C To Copy Your Adjustment Layer
Return to the original image with your color grading applied. In the Layers Panel, copy the Adjustment Layer(s) by clicking it and using Control + C (Win) or Command + C (Mac).
Step 5: Use Control/Command + V To Paste The Layer Into The Blank Document
Return to the tab with the new document you just created. That should still be a blank page. Click the Layers Panel and use Control + V (Win) or Command + V (Mac) to paste the Adjustment Layer into the document. The page’s color will change according to the new color grading you’ve applied, and the pasted Color Balance layer will be visible in the Layers Panel.
Step 6: Go To File > Export > Color Lookup Tables To Save Your LUT
Now, you can save the document as a new LUT by heading to File > Export > Color Lookup Tables. In the Export window, you can give your LUT a description. Leave the Grid Points at 32 and Medium, and ensure you have only 3DL and Cube checked. Click OK.
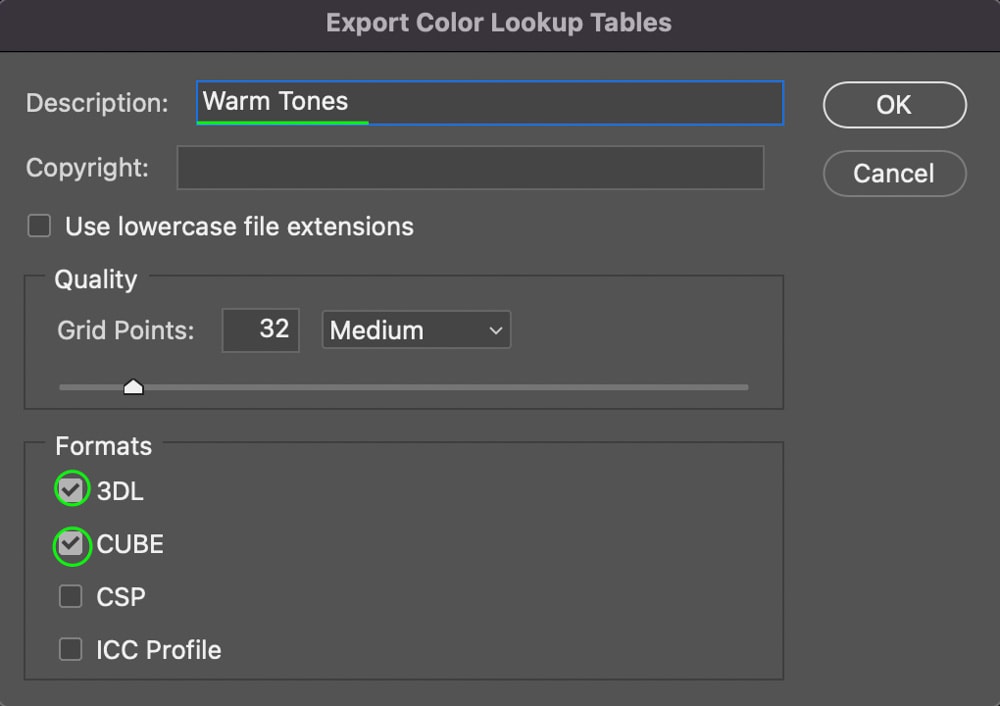
A Save As window will appear next, and you can write the same name as the description in the file name. Click Save to save the LUT to your hard drive. You can apply the LUT to future projects by adding a new Color Lookup Table Adjustment Layer and finding the LUT as you’ve named it from the 3DLUT File dropdown menu.
LUTs are a great way to save time in the color grading process or allow you to keep a consistent look across a set of images or videos. With these tips in Photoshop, you can now use LUTs to their full potential!
Happy Editing!
