

You’ve likely realized by now that different lighting conditions can create different color temperatures in your images. This is particularly obvious if you shoot indoors with your ISO increased, only to discover that your images turned out with an odd orange or yellow tint. Similarly, if you use flash in low light situations, your image might come out with a cooler, bluish tint. Even different times of day can affect your image’s temperature such as more yellow tones at sunset, or more blue tones on a gloomy day.
That change of color in your image is your white balance at play. Although it’s easy to correct in camera (especially if you’re using auto white balance), it’s also easy to change the white balance during post-processing too. This helps to either correct weird hues in your photo or allows you to get creative with the overall mood of your images.
So to master the use of white balance in your photo editing, let’s learn how to correct white balance in Photoshop.
What Is White Balance & How It Affects Your Photos
White balance refers to the balance of color temperature in your image and can be measured by looking at the colors in your image which are supposed to be white. When the white balance is balanced, the whites will appear as true white — otherwise, they will have either a yellowish or a bluish tint.
This is affected by different lighting conditions, so the “correct” white balance will change depending on where you shoot. While the white balance settings on your camera often do a good job, there are times when you will want to refine the white balance in post. For this reason, it is important to understand how white balance affects your images, and how to adjust it to correct any color tone issues or create a different feel to your photos.
How To Correct White Balance In Photoshop
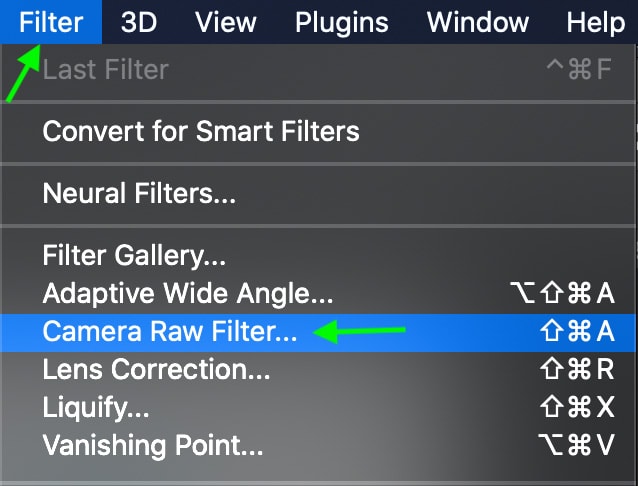
To correct the white balance in Photoshop, select your image layer and go to Filter > Camera Raw Filter. You will find the Temperature and Tint sliders within the Basic panel on the right side of the Camera Raw window to adjust your white balance. Once finished, press OK to save your adjustments.
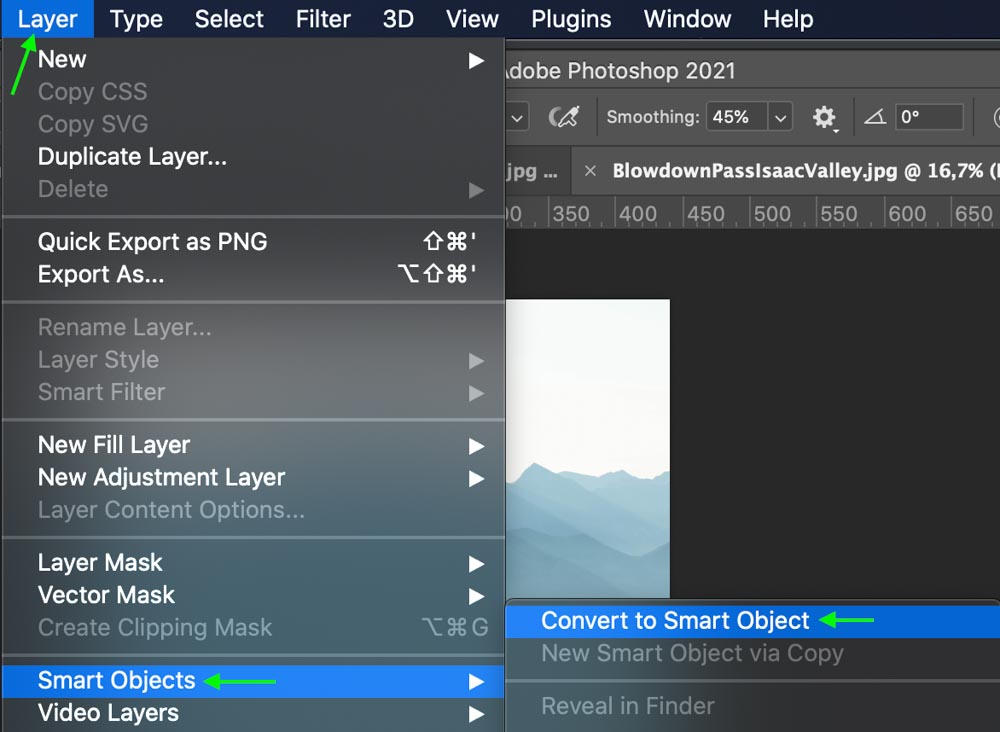
Camera Raw will come up automatically if you open a RAW image in Photoshop. For other file formats, you should first convert your image into a Smart Object by heading to Layers > Smart Objects > Convert to Smart Object.
Now you can open up Camera Raw by heading to Filter > Camera Raw Filter.
This will bring up the Camera Raw window.
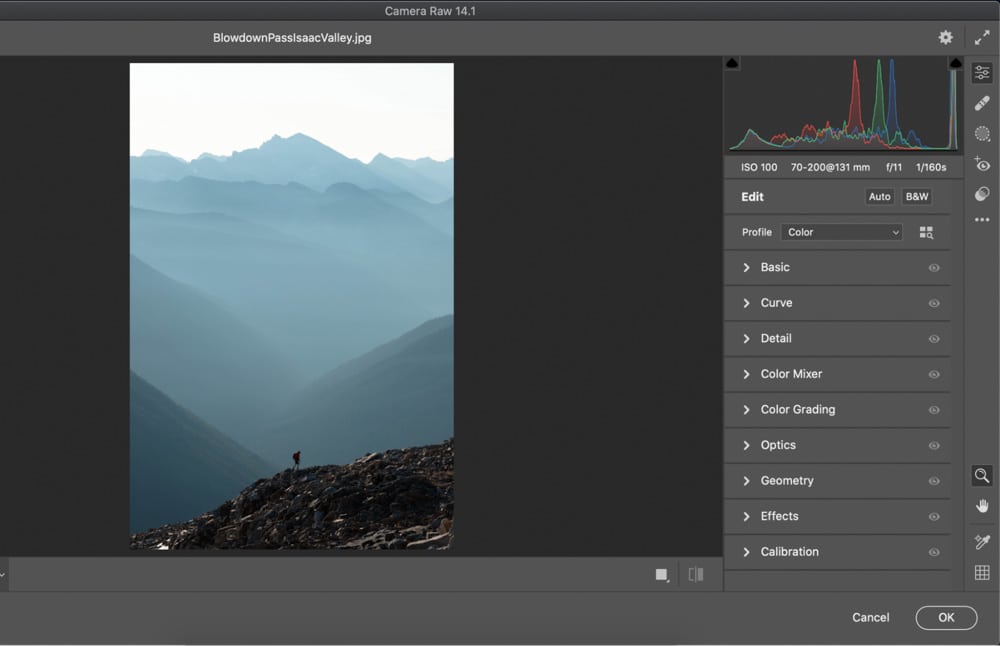
On the right, you’ll see the different adjustment tools available to edit your image. Click the arrow next to Basic to open the tab.
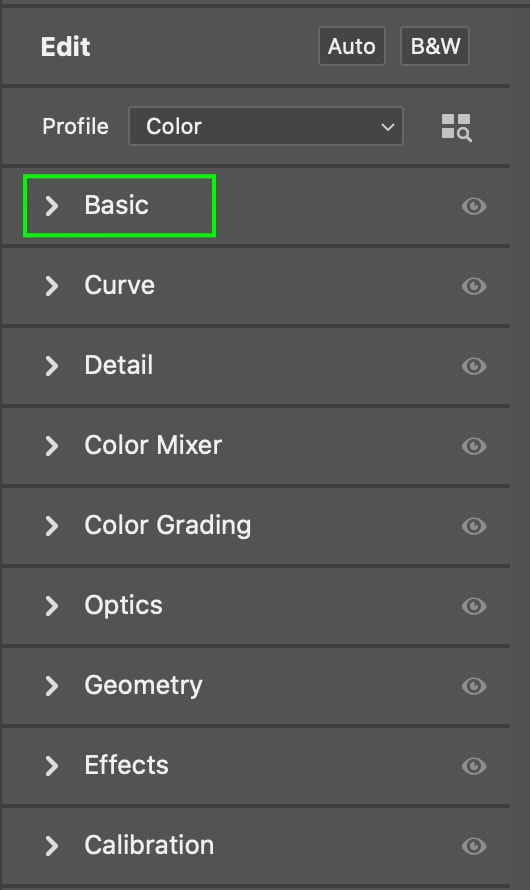
At the top, you’ll see that the first few adjustments relate to the image’s white balance.
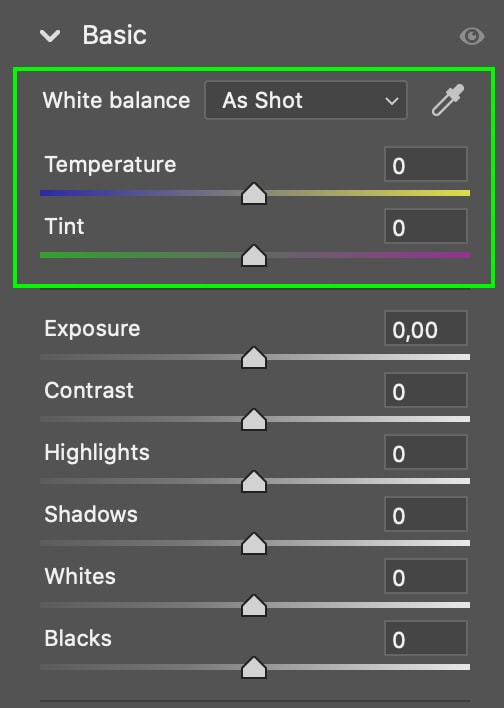
We’ll get into each of them more in-depth, but let’s start with the one you’ll likely use the most: the Temperature slider. Depending on your image, you’ll want to move the toggle in the center either to the left to reduce warm tones like orange and yellow, or right to reduce cool tones like blue.

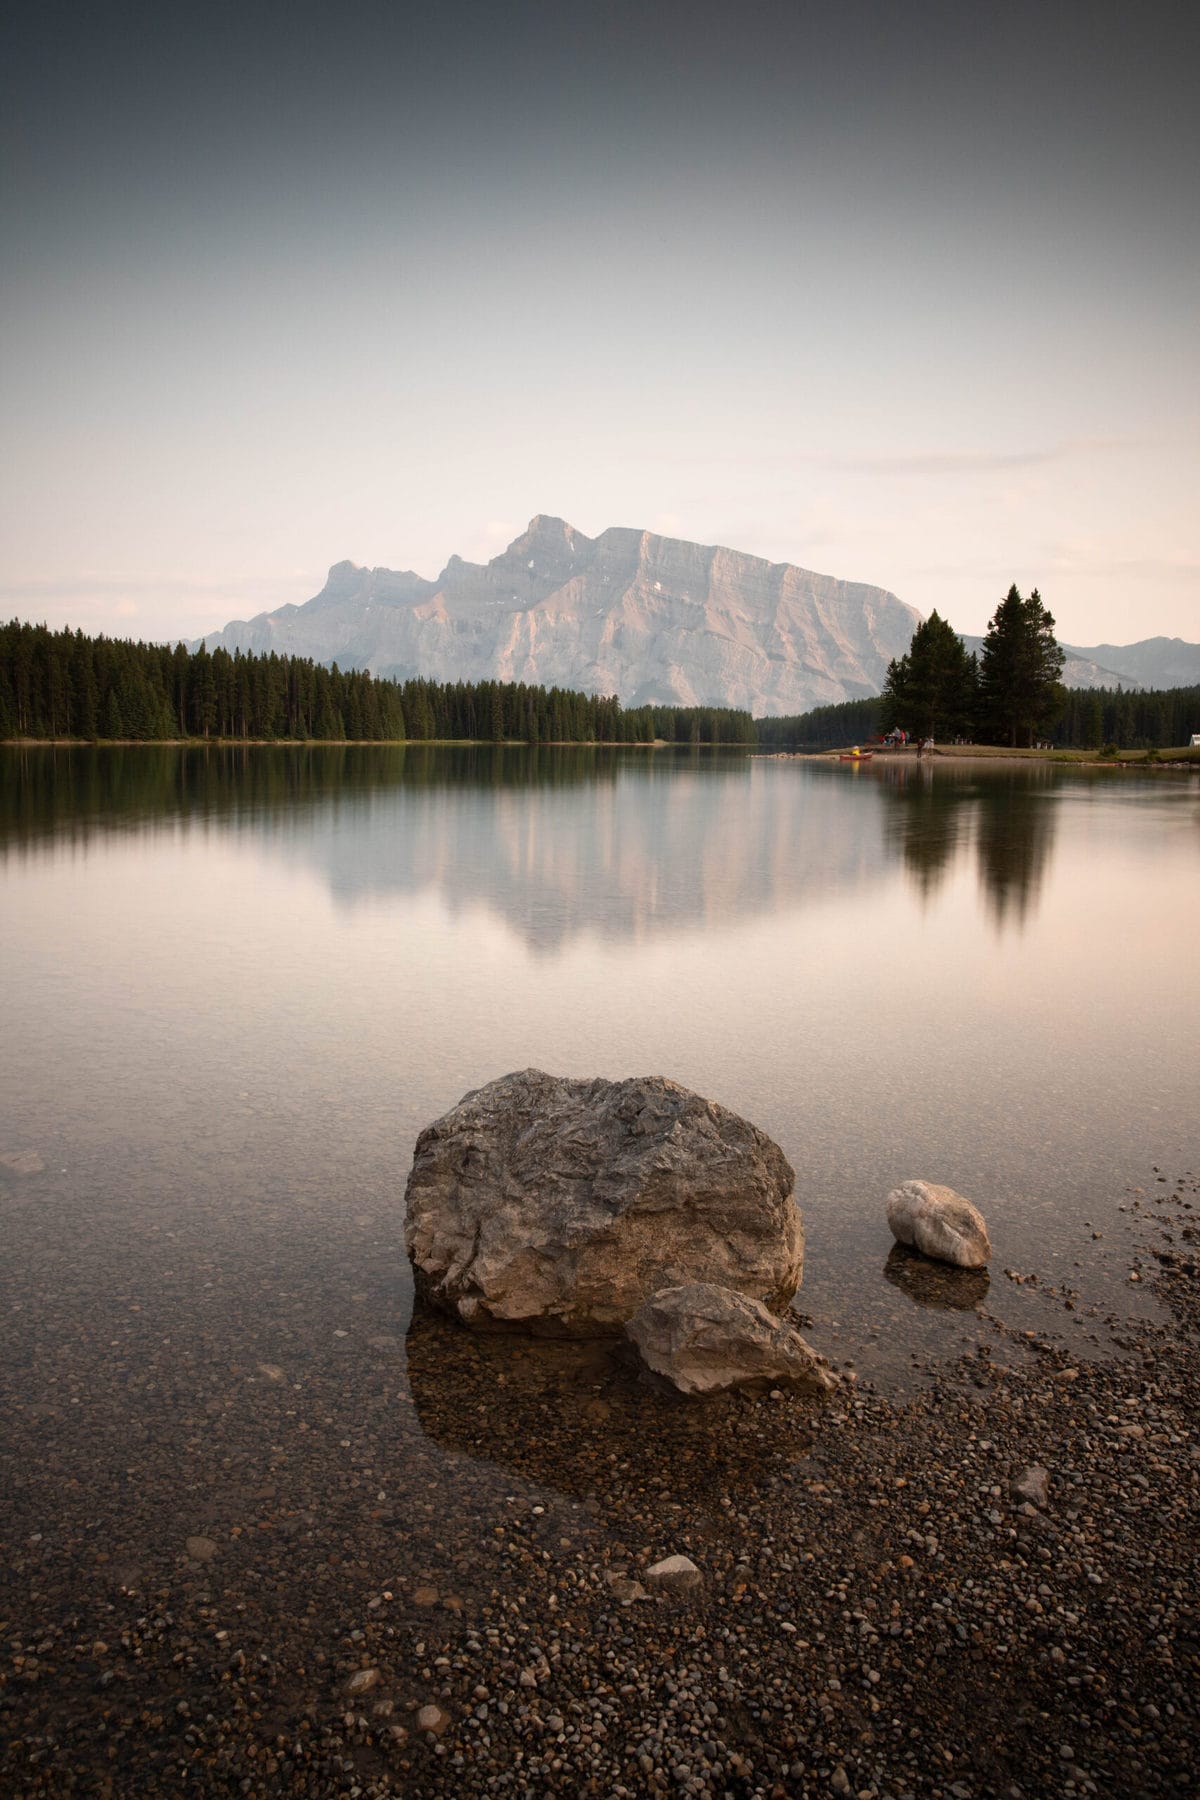
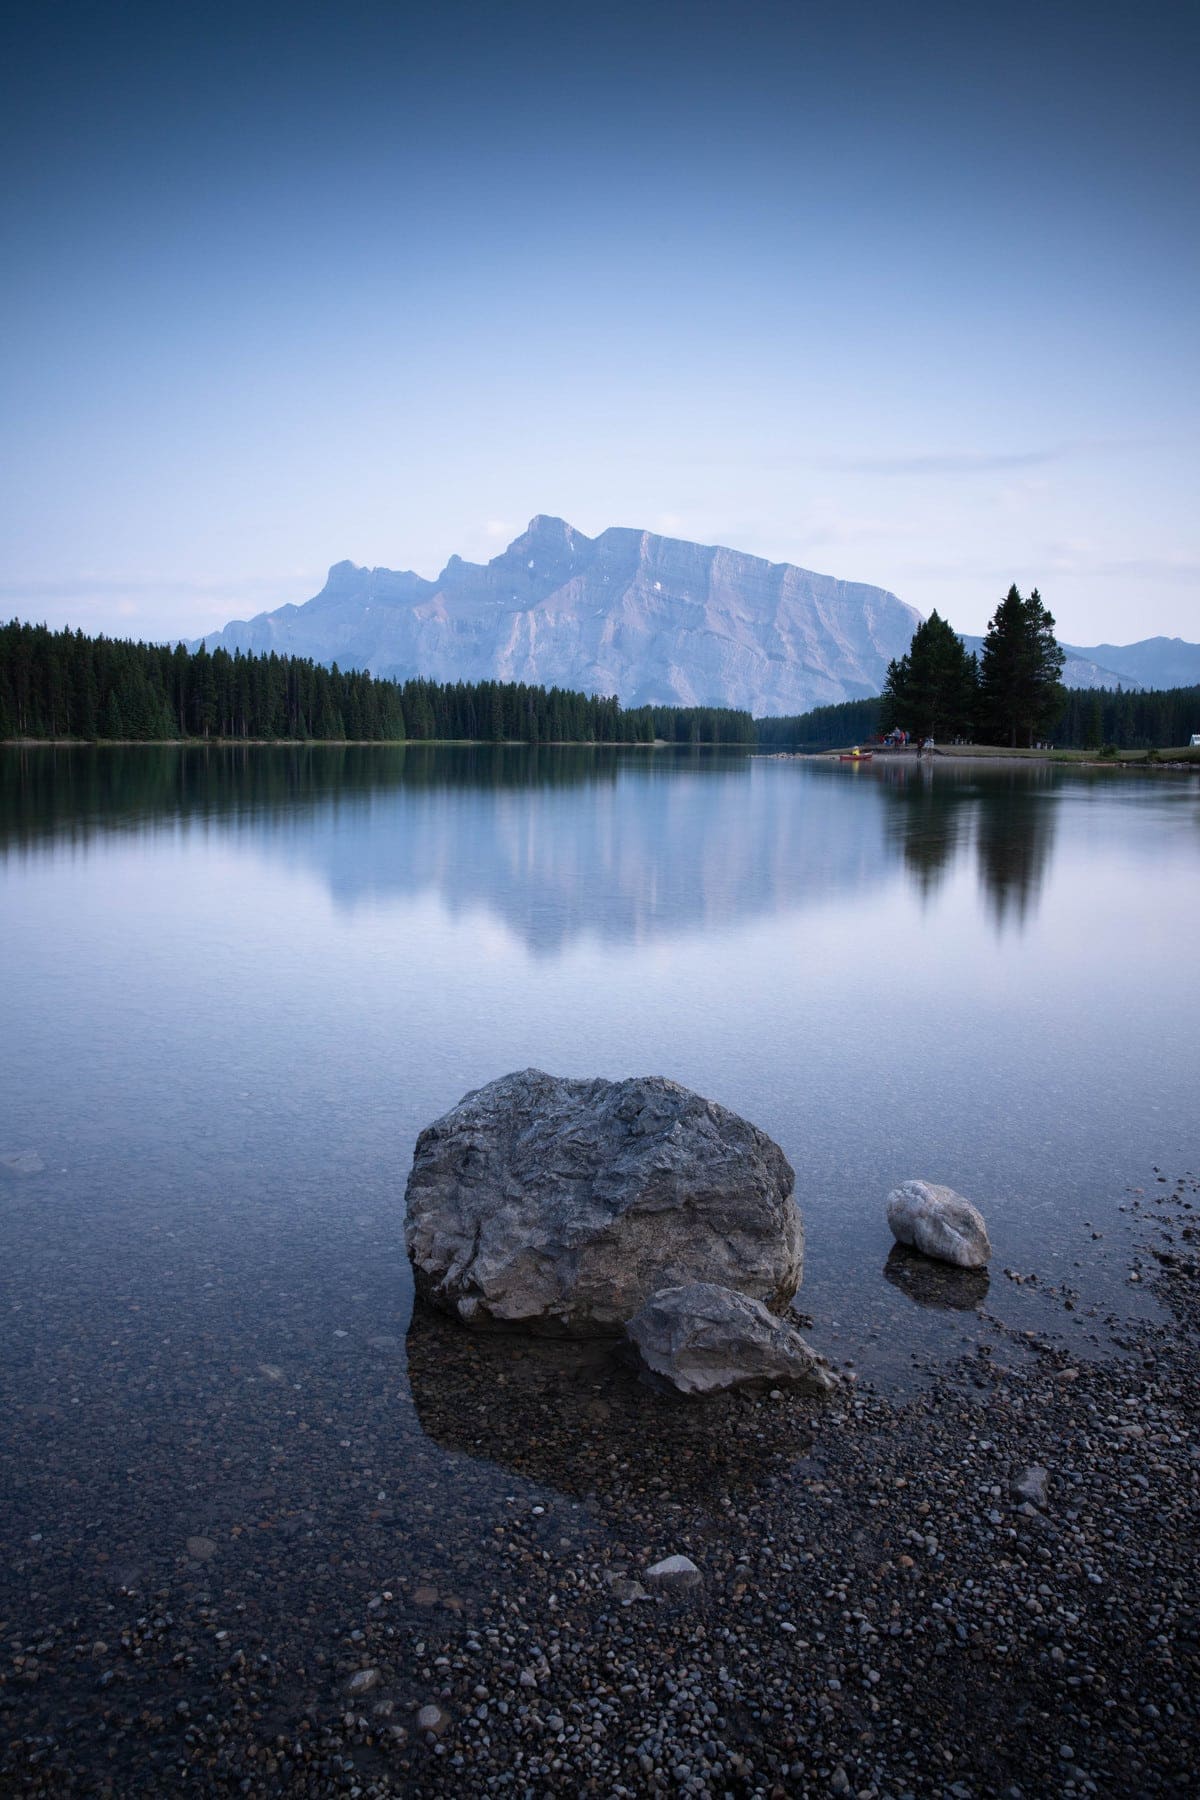
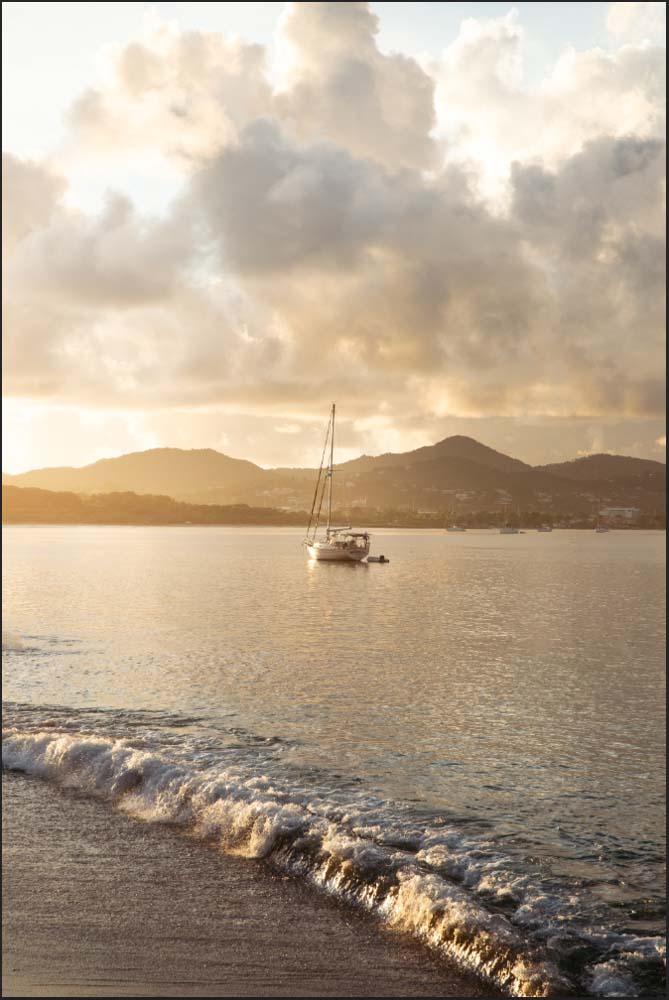
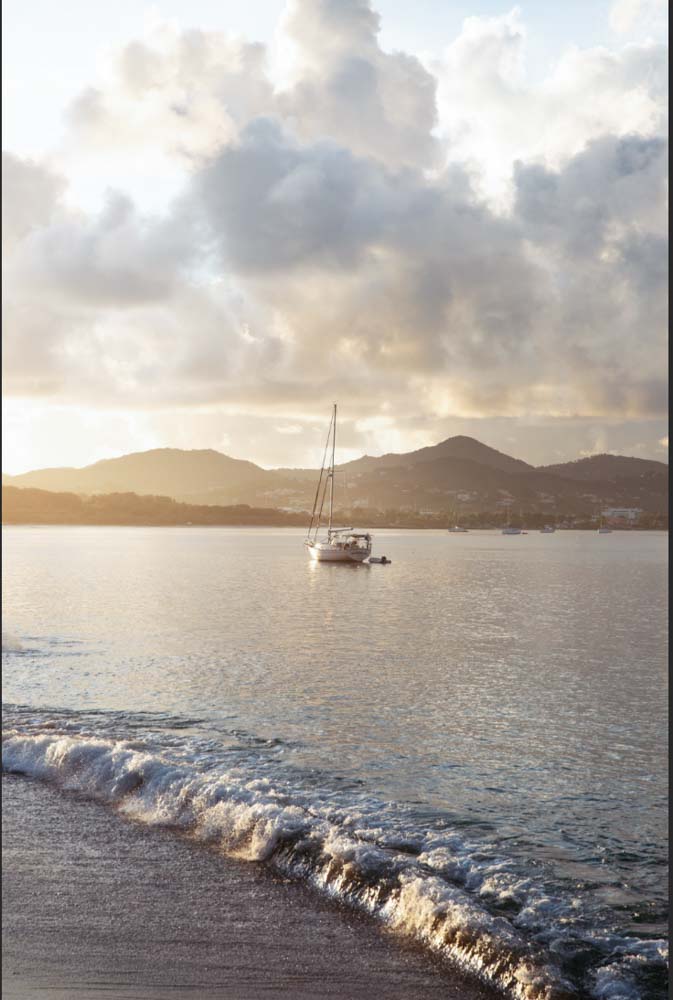
For instance, this image below has a bit of a warm tint, due to the sunset lighting when it was taken. You’ll notice the whites seem slightly yellow/orange. This is a nice look for creative purposes, but let’s say we want to tone down the golden hour vibe a bit. We can do that by adding more blue to the image with the temperature slider.
We can correct this easily by moving the toggle slightly to the left. The image’s temperature will change as you move the toggle, so you can decide when the image looks right to you.

The resulting image is much closer to how it really looked, with more blue in the sky and less of a yellow cast that I added as a creative addition when editing this image.
You can also utilize the Tint setting to balance and correct colors in an image, which is right below the Temperature slider.

This slider allows you to adjust the amounts of greens and purples in the image. You can play with this slider, as well. You’ll notice the change in the image as you move the toggle left, to increase greens, and right, to increase purples.
For instance, maybe we want to increase the purples in the above image with the ship at sunset, to really emphasize the sunset lighting. To do this, we can drag the toggle to the right slightly, so it sits closer to the purple zone.

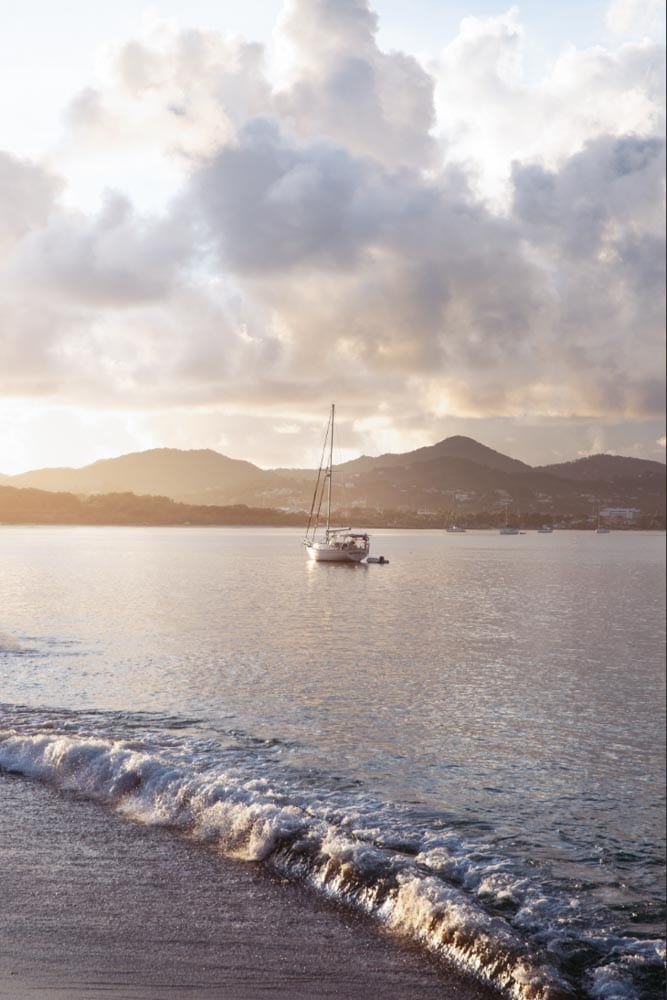
The image takes on a dreamy quality, which brings us to the next use of the white balance tools. Both of these sliders have a purpose beyond simply correcting the color tones in your image, which is to create different effects or moods in your image.
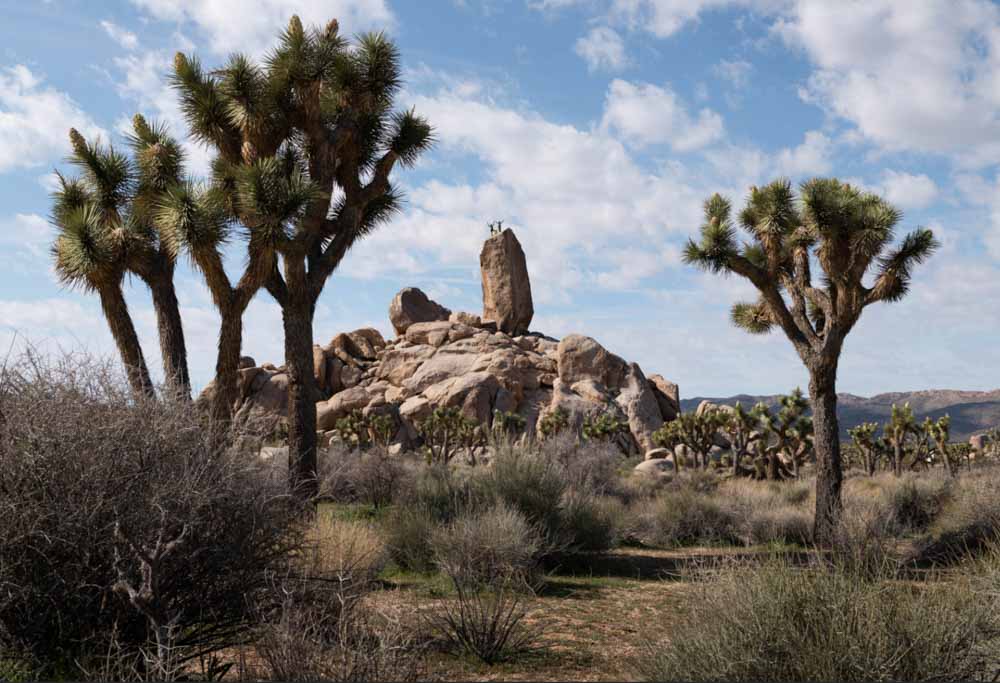
For instance, if you’d like your image to have a vintage, sepia-toned appearance, you can slide the Temperature slider to the right to increase the warmth beyond what you normally would to simply correct the white balance.
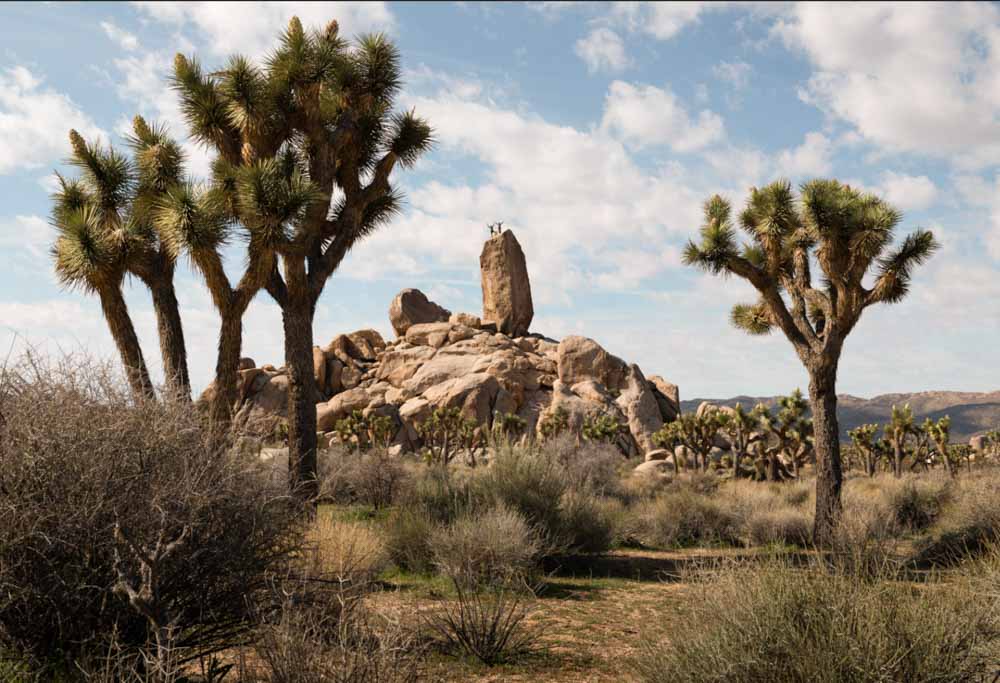
In the image below, I took the original and warmed it up so that the mood of the image reflects the heat of the desert.
How To Automatically Correct White Balance In Photoshop
Beyond the sliders we touched on in the above section, there are a few other settings related to white balance you can use to automatically correct the color tones in your image. You can find the Auto White Balance tool and the Color Sampler in the white balance area of the Basic tab with Camera Raw open.
Option 1: Using The Auto White Balance Preset
The easiest and fastest way to correct white balance is to use the Auto White Balance selector.
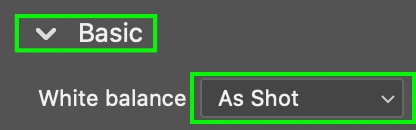
Click the drop-down box and you’ll see the different options available to automatically balance the colors in your image.
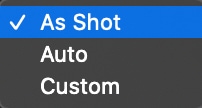
As Shot leaves the white balance how it is, while Auto will assess and correct the white balance in the image automatically. See the image below with As Shot white balance compared with the Auto white balance correction.
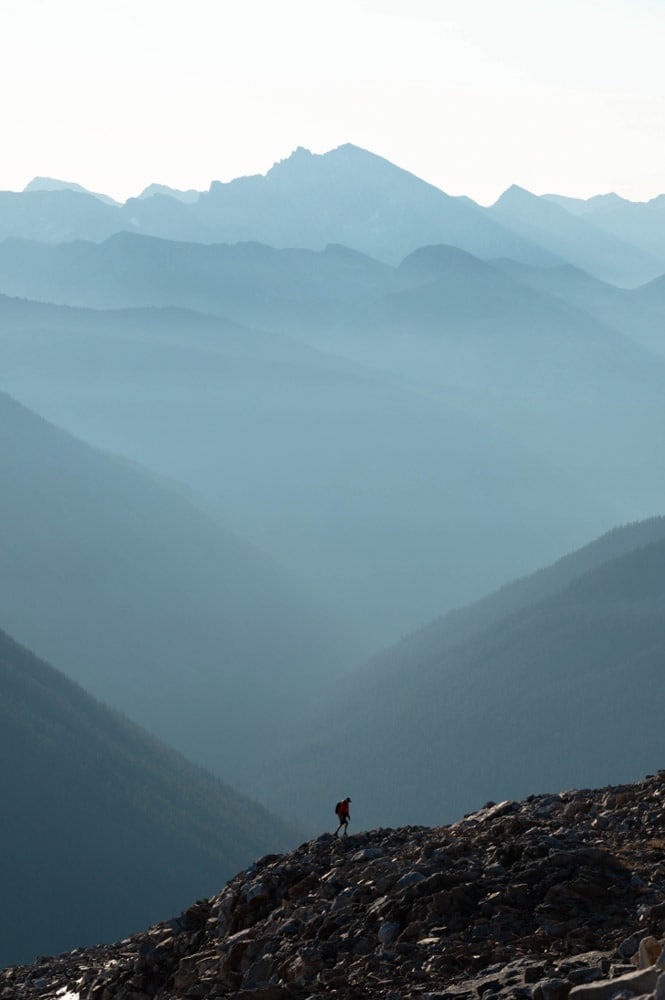
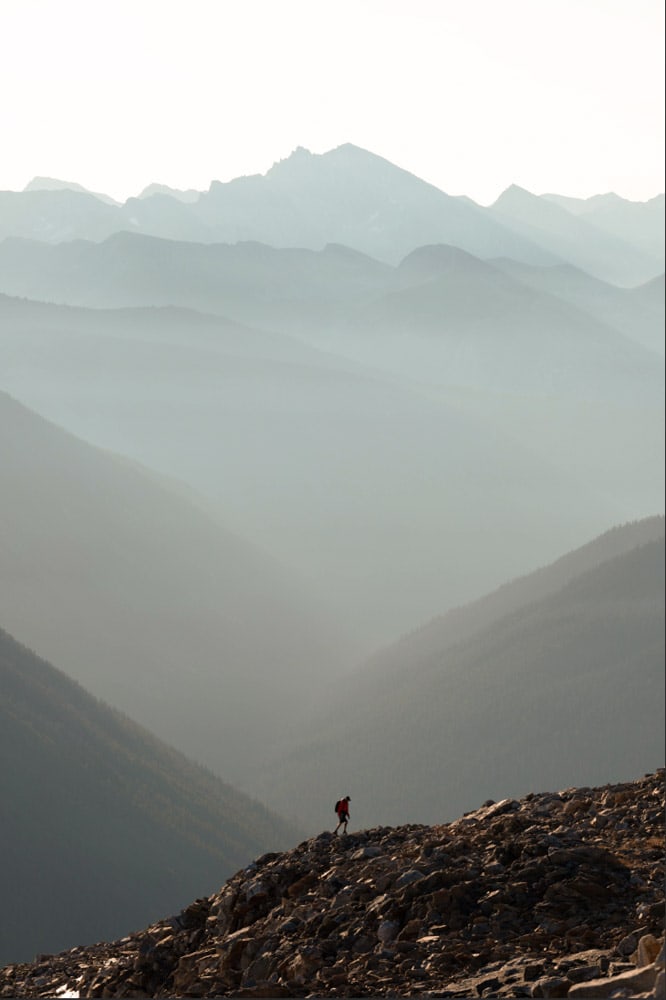
You can see the mountains are not quite so blue, and the terrain in the foreground takes on a brownish cast. In some images, auto white balance can give more favorable results than others. In this case, I prefer the cool blue hues from the original out-of-camera white balance, but where I find auto white balance shines most is with portraits and indoor images!
The last thing to mention about the white balance presets is that you don’t need to worry about the Custom option. This will automatically be selected and shown once you adjust the Temperature or Tint sliders, so selecting it yourself won’t change your image.
Option 2: Sampling Your Image To Determine White Balance
The other option to correct your image’s white balance is to take a sample of a white area of the photo using the White Balance Tool.

Click the icon and your cursor will turn into a color picker. Click on an area of your image (or click and drag to select a rectangle-shaped portion) that should represent white. In the image below, I could sample the waterfall since it is the closest thing to white in the image. You can also sample things like a white wall, a white light, or the whites in your subject’s eyes.
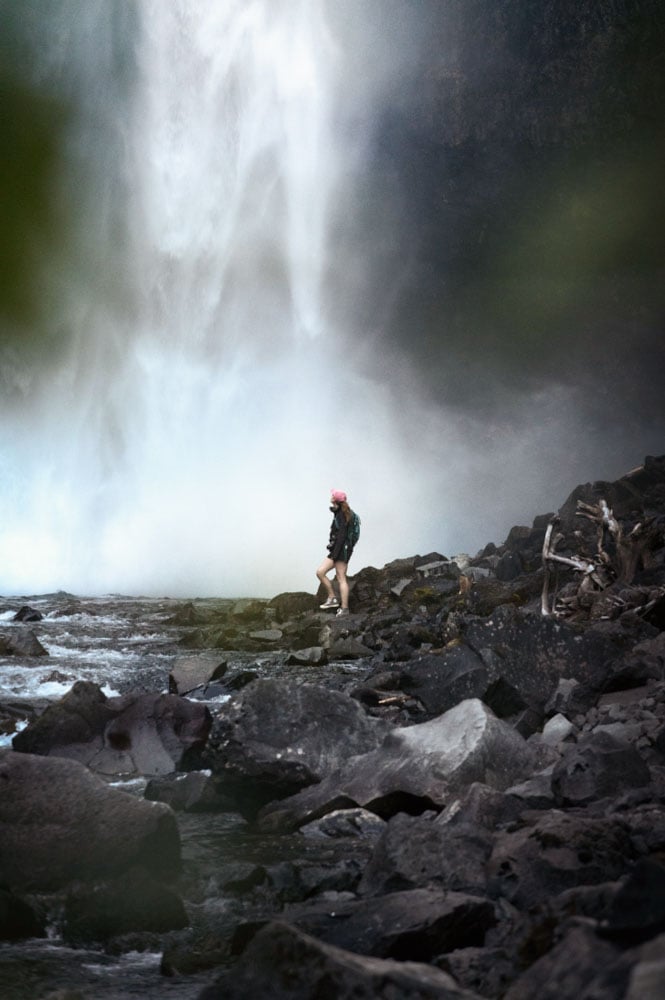
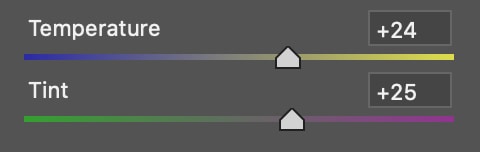
The Temperature and Tint sliders are adjusted automatically once you click your sample area, so you can easily adjust them further by moving the toggles. Sometimes you may want to sample a few different areas to find a white balance setting that works for your photo.
With the white balance sliders in Camera Raw, it’s easy to change the temperature and tint of an image in Photoshop. By converting your image into a smart object before opening Camera Raw, you can easily edit your white balance settings later on. To learn more about white balance and how it plays a role in your photography, read this next article about using white balance in photography.
Happy Editing!


