
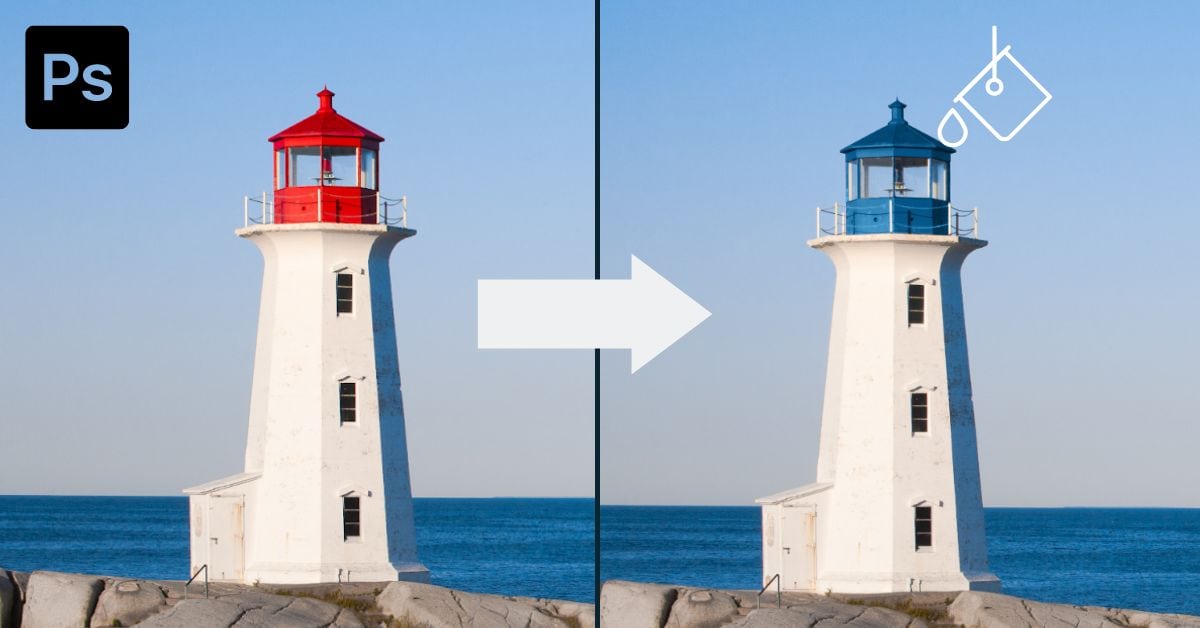

The Paint Bucket Tool in Photoshop is one of the most helpful tools to fill selections, objects, or layers with color. Without needing to remember keyboard shortcuts, this tool makes filling anything with a color a breeze, along with opening doors to fill objects with a pattern.
Now, this touches the tip of the iceberg in terms of understanding the settings related to this tool. Luckily, this tutorial will provide everything you need to know to gain an in-depth understanding of this tool.
How To Use The Paint Bucket Tool In Photoshop
Step 1: Click On The Add A New Layer Icon At The Bottom Of The Layers Panel
Go to the Layers panel and create a new layer by clicking the plus sign icon at the bottom of the panel.
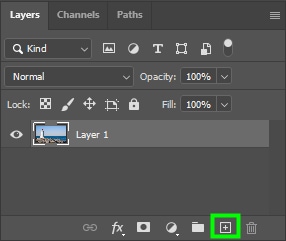
The changes in the object’s color will be placed on that layer. You can apply the paint bucket tool to an image layer directly, but this makes it harder to make changes to the new color applied.
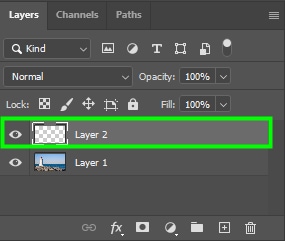
Step 2: Create A Selection Using The Rectangular Marquee Tool
Now, keep the new layer selected and click the Rectangular Marquee Tool in the toolbar (M).

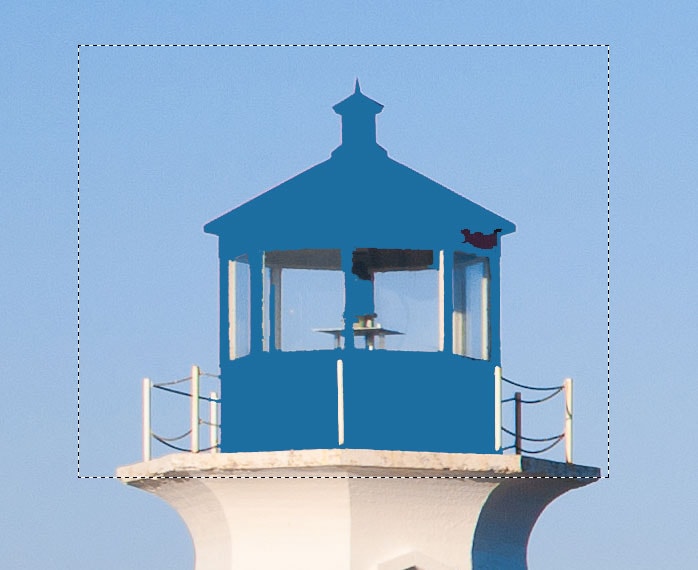
Next, drag around the object to create a selection. It doesn’t need to be precise. The key here is to delimit the area to be painted so that you don’t risk affecting other regions. It’s not mandatory to select an object if you are using the Paint Bucket tool to change its colors. Ensure that the entire object is placed inside the selection and that no part of it is left out.
After that, select the Paint Bucket Tool in the toolbar (G).

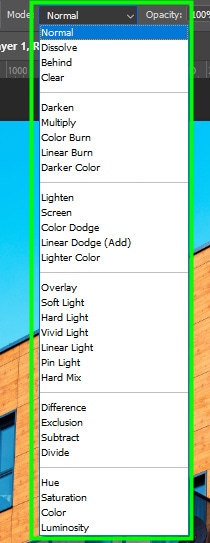
Then, go to the Options bar and change the following settings:
- Source to Foreground
- Mode to Normal
- Opacity to 100%
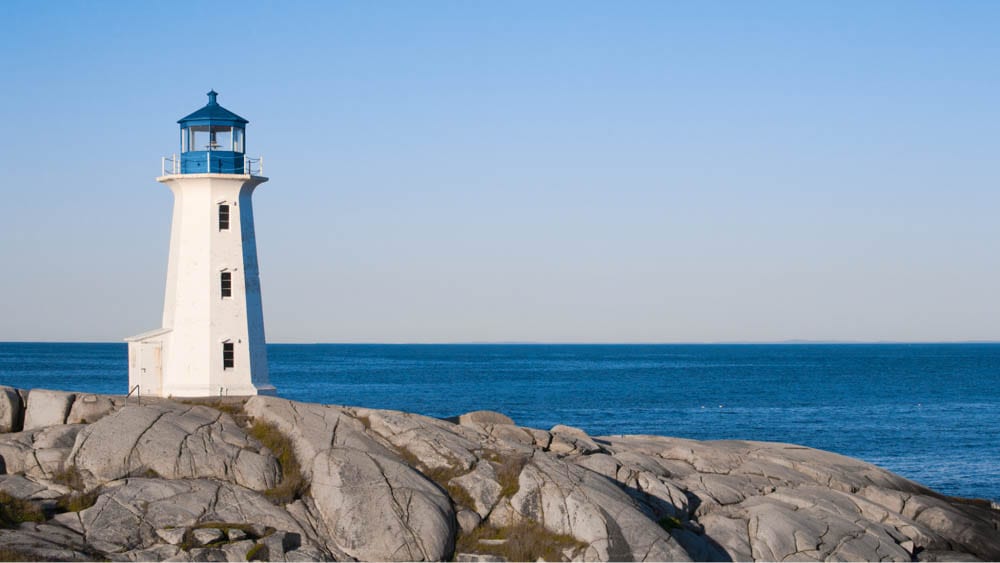
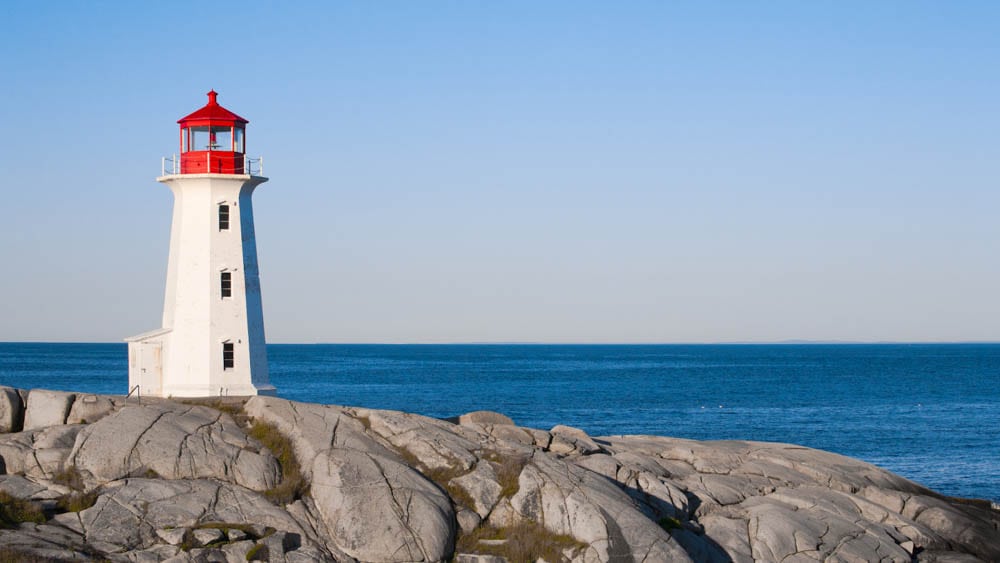
Try to set Tolerance to a value that covers the entire object or at least the most part of it. In my case, I set the Tolerance to 150 since the area I wanted to cover consists primarily of red and variations of red.
Make sure that the Contiguous, Anti-Alias, and All Layers are checked in the checkboxes. You will need to check All Layers if you are painting with the paint bucket tool non-destructively.

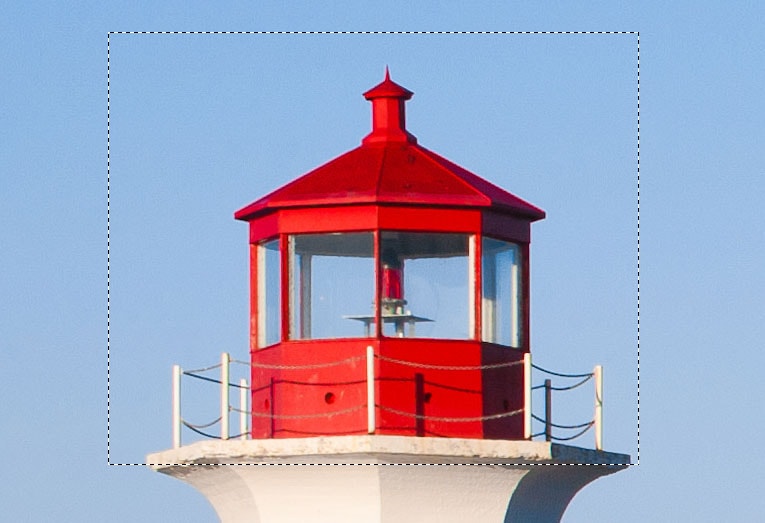
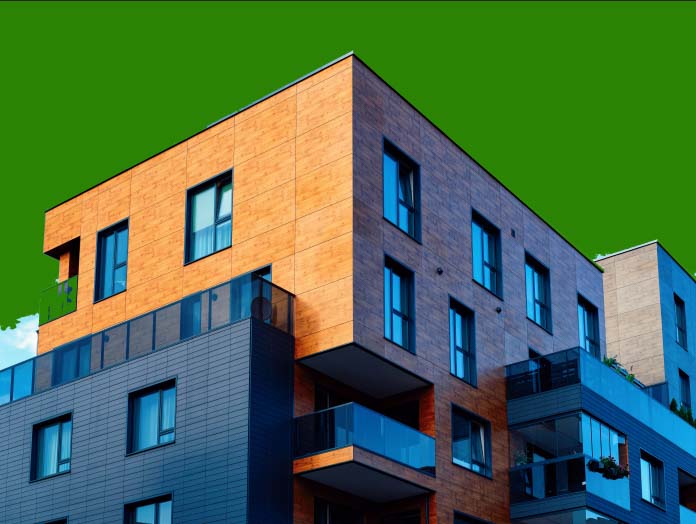
Step 3: Select A Color To Cover The Target Area
After adjusting all the necessary settings, choose a color to cover the target area. To do this, go to the color boxes at the bottom of the toolbar and double-click the foreground color swatch.

From the Color Picker panel, pick any color to paint your object.
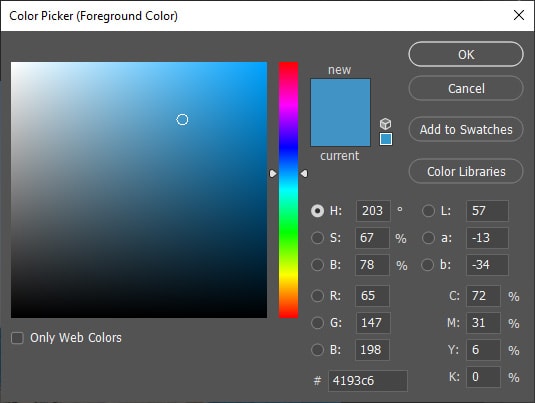
Once you choose a color, click the area you want to paint with the paint bucket tool. The color you picked will cover your object.
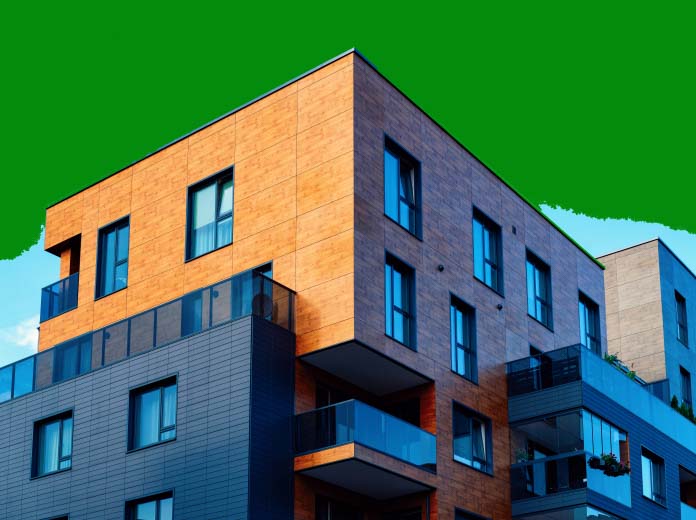
Step 4: Change The Blend Mode To Color
The new color will be very opaque. To fix that, go to the Layers panel and change the Blend Mode to Color.
The Color blend mode preserves the luminance values of the original object and blends it with its new color. As a result, your object’s color will change, but its luminance values will remain the same, giving your object a more natural appearance since the shadows and lights are still there.
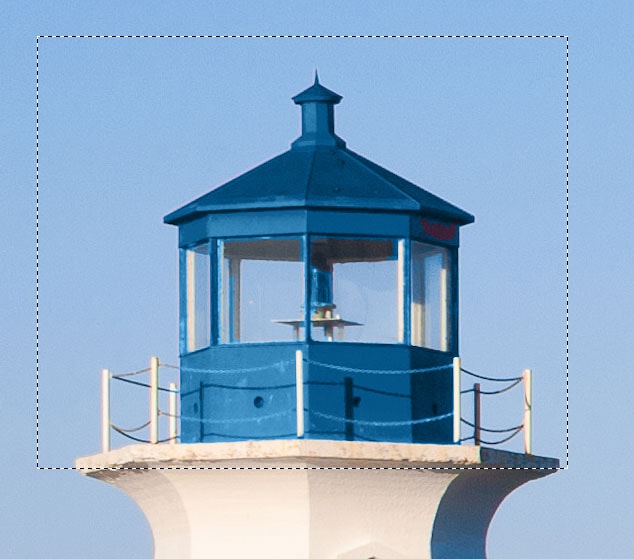
Changing the blend mode will also allow you to see the details of the painted area.
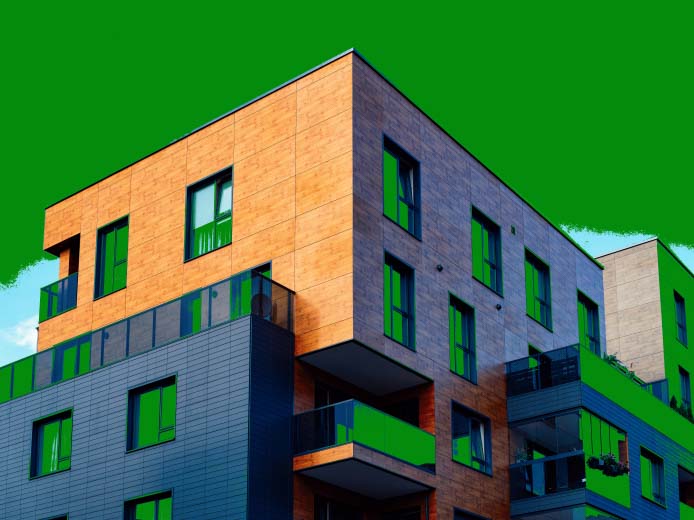
Step 5: Fix Areas That Are Missing Color With Tolerance And The Brush Tool (Optional)
If you think some areas are missing colors, decrease Tolerance and cover those areas. For the area below, for example, I set Tolerance to 20px, and that was enough to fill the region that was left out.
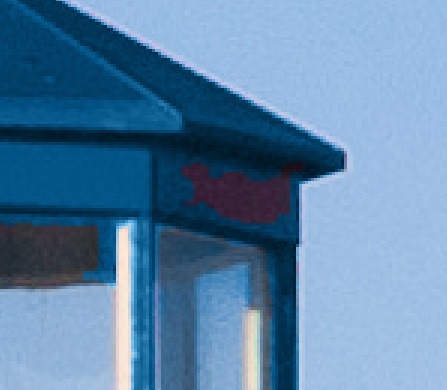
You can also use the Brush Tool (B) from the toolbar to cover the left-out area. To use the brush tool, drag it over the area you want to paint. If you think you have painted too much, you can grab the Eraser Tool (E) and erase that extra color.
To use the eraser tool, drag it over the desired area. Keep using the paint bucket, brush, and eraser tools until you feel that your object is well-painted.
The Paint Bucket Tool Settings Explained
Once you enable the Paint Bucket Tool, some settings will appear in the Options bar for you to adjust. Every setting you adjust makes the paint bucket tool behave differently, affecting the area you fill. I will show you what each setting does and how they affect the paint bucket tool.
The foreground/pattern drop-down menu allows you to set the source of the fill area. You can choose between filling areas with the foreground color or with a pattern.


Mode controls how the color used to fill an area interacts with the layer you paint.

There are several Blend Modes available, and each one of them gives the areas you paint a different look. Some effects are only possible if you choose the right blend mode.

Opacity controls the transparency of the color used to fill an area.


Tolerance controls the range of colors affected by the paint bucket tool. If you set tolerance to zero, only a specific pixel color is affected; if you increase Tolerance, you can paint more pixels.
If you use the paint bucket tool on an empty layer, it will fill that entire area regardless of the value you set for Tolerance because there will be no variation of colors. That makes the paint bucket tool one of the best tools for filling empty layers.


Anti-Alias slightly blurs the edges of your selection, making them look smoother. Keep this setting checked to prevent problems such as jagged or rough edges.

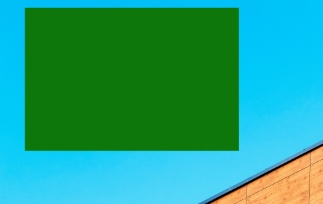
In the example below, you can see two stars I drew. For the star on the left, I unchecked Anti-alias, and for the star on the right, I left Anti-alias checked. See the difference in the edges of the object.


Contiguous restricts the area affected by the paint bucket tool.

When you enable this option, only pixels close to each other are painted. If you uncheck this option, the paint bucket tool will change the colors of pixels across an entire layer.
All Layers allows you to expand the painted area to all layers in the Layers panel. As a result, when working with two or more layers, you can paint both layers simultaneously instead of painting one layer after another.

