
You can easily learn how to make a heart in Photoshop in a few simple steps. When starting out, trying to create a heart shape can seem tricky. However, creating heart shapes using the custom shape tool is easy since Photoshop has many built-in heart shapes for you to use.
To create a heart in Photoshop, go to Window > Shapes, click the hamburger menu in the upper right corner, and select “Legacy Shapes and More.” Type “heart” in the search bar of the Shape panel to locate the heart shapes. Click on the desired heart shape, then drag out on your canvas to create it.
Let’s break down how to access these legacy heart shapes more in-depth.
Lesson Summary
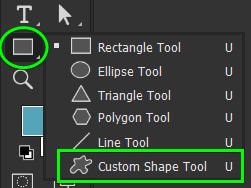
- Step 1: Select The Custom Shape Tool (U) Located Under The Shape Tool Menu
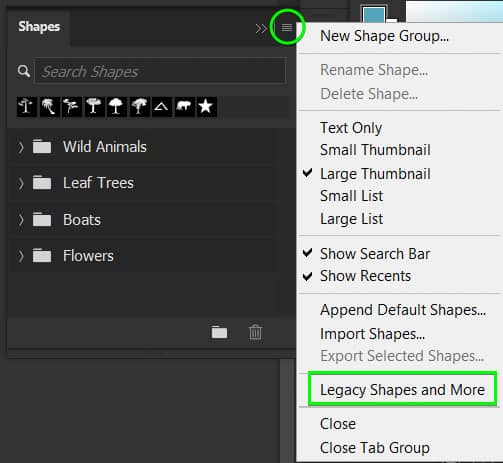
- Step 2: Go To Window > Shapes To Open The Shape Panel
- Step 3: Click The Hamburger Menu And Select Legacy Shapes And More
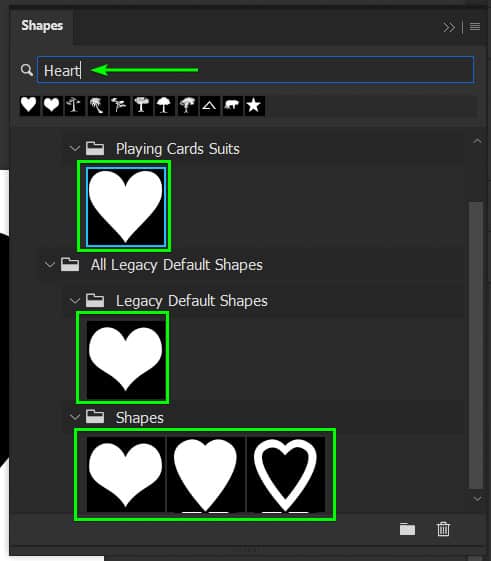
- Step 4: Search For “Heart” In The Search Bar
- Step 5: Select A Heart Shape And Click And Drag To Add It To Your Canvas
How To Make A Heart In Photoshop Using The Custom Shape Tool
Step 1: Activate The Custom Shape Tool (U)
First, click and hold on the Shape Tool (U) to open the fly-out menu and select Custom Shape Tool.
Step 2: Go To Window > Shapes And Open Legacy Shapes And More
To access the heart shapes, you need to go up to Window > Shapes. In the Shapes Panel that opens, click the hamburger menu located on the right side of the panel and choose Legacy Shapes and More. The folder will now appear at the bottom of the panel.
Step 3: Search For “Heart” In The Shape Panel
Once the new folder appears in the Shapes Panel, type in “Heart” in the search bar to find heart shapes. This will show you all the heart shapes within the Legacy Shapes and More folder.
Step 4: Select A Heart And Click To Add It To The Canvas
Select the heart shape of your choosing then click and drag on the canvas to create the shape.

Step 5: Change The Shape’s Stroke And Fill Color (Optional)
To change your heart shape color, go up to the Options Bar with the shape tool selected and change the Shape’s Fill and Stroke Color using the color swatches.
You can also adjust the Stroke width using the Width option next to the Stroke fill. If you want a different type of stroke, go to Stroke Options and choose dotted or dashed lines.


Step 6: Adjust The Heart Shape’s Size (Optional)
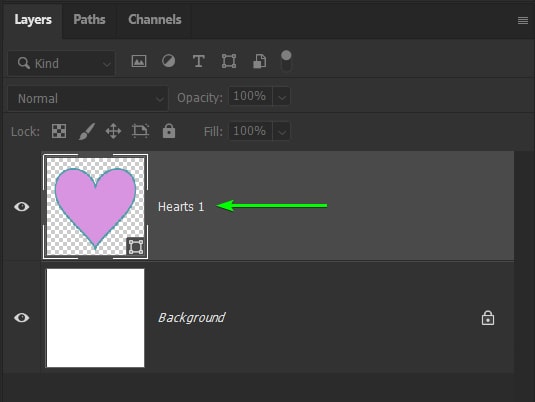
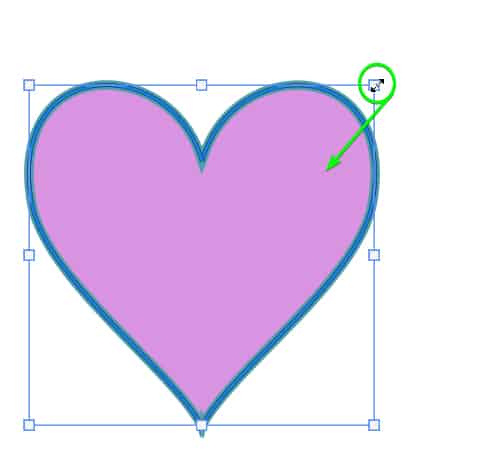
To change the size of your heart shape, select its layer. Then, press Control + T (Win) or Command + T (Mac). This will activate the Free Transform Tool. Once Free Transform is activated, control handles will appear around the shape edges.
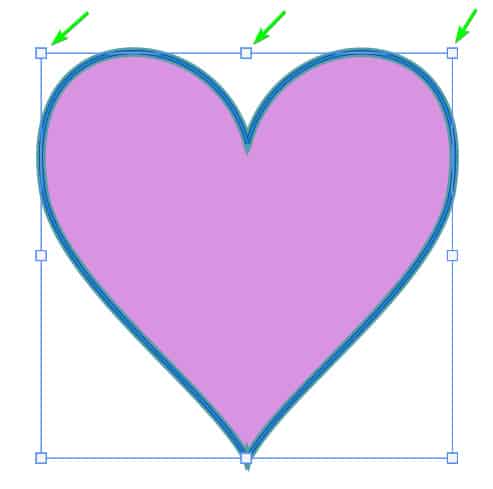
Drag any of the control handles on the corner of the shape to resize the shape. Drag a control handle inwards to reduce the heart shape size or outwards to enlarge the shape.
How To Save A Custom Heart Shape As A Brush In Photoshop
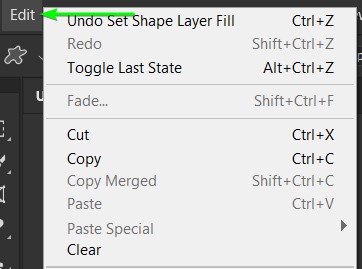
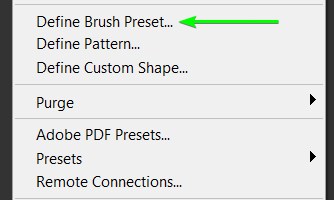
Step 1: Go To Edit > Define Brush Preset
Once you have added a custom heart shape on the canvas, go to Edit > Define Brush Preset.
Note: When you turn your shape into a brush, you lose some customization options. So, you can’t change its stroke size and shape after saving the brush preset.
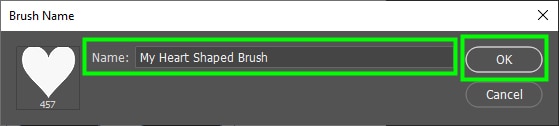
A dialog box will pop up asking if you want to name your new brush. Enter a name if you wish to, and click OK.
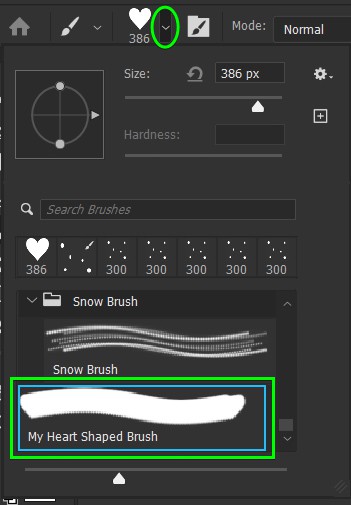
Step 2: Locate The New Brush In The Brush Preset Picker
Open the Brush Preset Picker Panel to select your new heart-shaped brush.
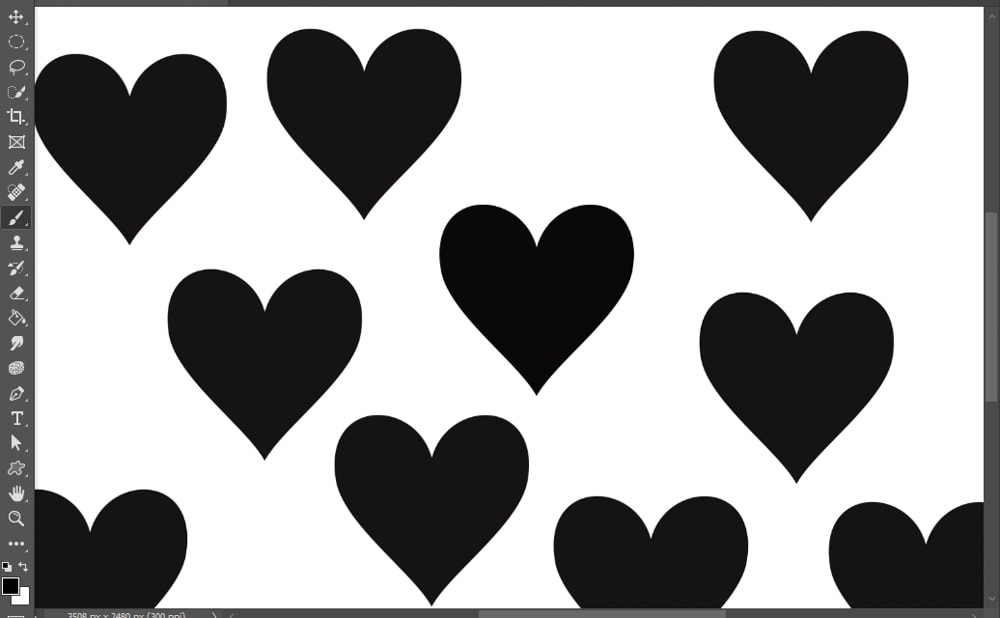
Step 3: Use Your Brush As A Stamp By Clicking On The Canvas
Use the brush like a stamp and click on the canvas to add one heart or multiple hearts. You can change the color of your heart brush just as you would change the color of a regular brush.
In addition to the built-in heart shapes in Photoshop, many other heart shapes are available online, such as from myPhotoshopBrushes. Once you’ve downloaded a brush, simply install the brush into Photoshop and use it as needed.
So whether you want to use the custom heart shapes inside of Photoshop or download some free heart shapes online, there are lots of easy ways to create heart shapes in Photoshop!
Happy Editing!


