

If the clone stamp tool in Photoshop has suddenly stopped working, there are a few common reasons why. Usually, with the help of a few basic settings, you can get the clone stamp tool back to working order in seconds. However, if you feel like you have tried everything, here’s how to reset this tool quickly.
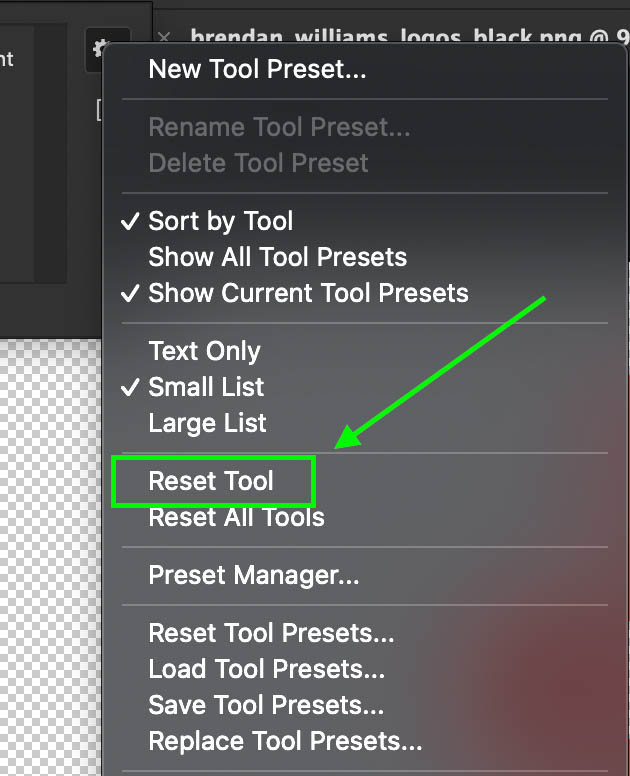
To reset the Clone Stamp Tool, press S to activate the tool, then click on the Clone Stamp icon in the upper setting bar to reveal the tool presets. Next, click on the gear icon on the right of this panel, then select “Reset Tool.” Now the Clone Stamp Tool is restored to its default settings.
I’ll share the resetting process more in-depth later in this post, but let’s talk about some more basic solutions to your Clone Stamp problems before we get there. This way, you don’t lose any tool presets you might have created for clone stamping!
How To Solve Common Clone Stamp Tool Problems In Photoshop
1. Make Sure The Correct Layer Is Selected
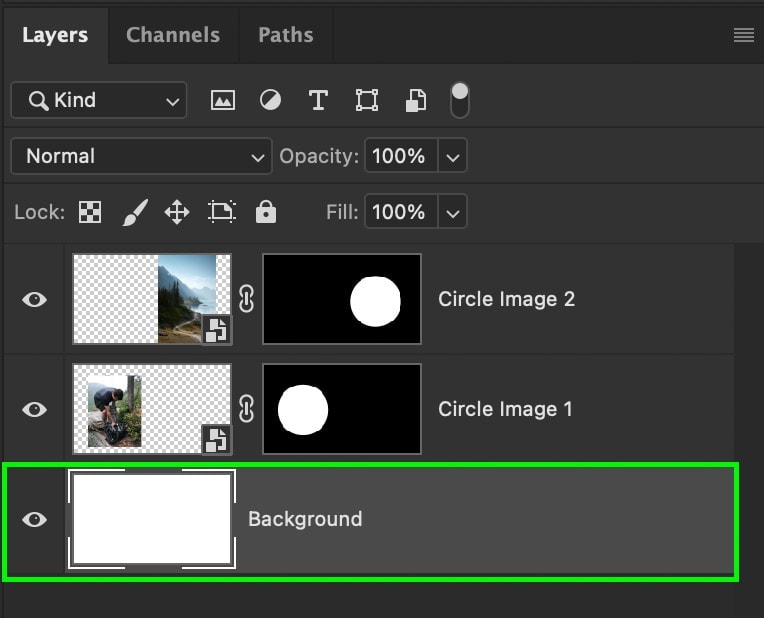
The most common reason why the Clone Stamp stops working is simply that the wrong layer is selected. If you have the incorrect layer chosen in the Layers Panel, your adjustments may be hidden or sampling the wrong thing.
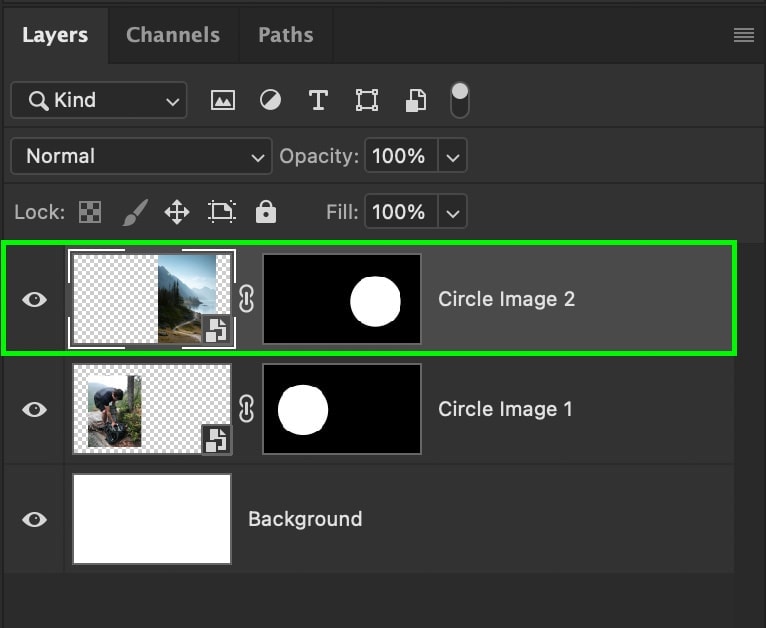
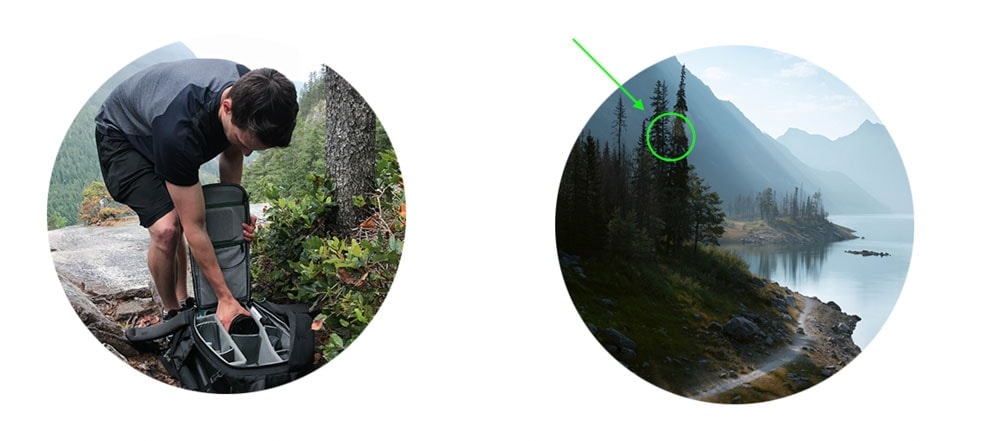
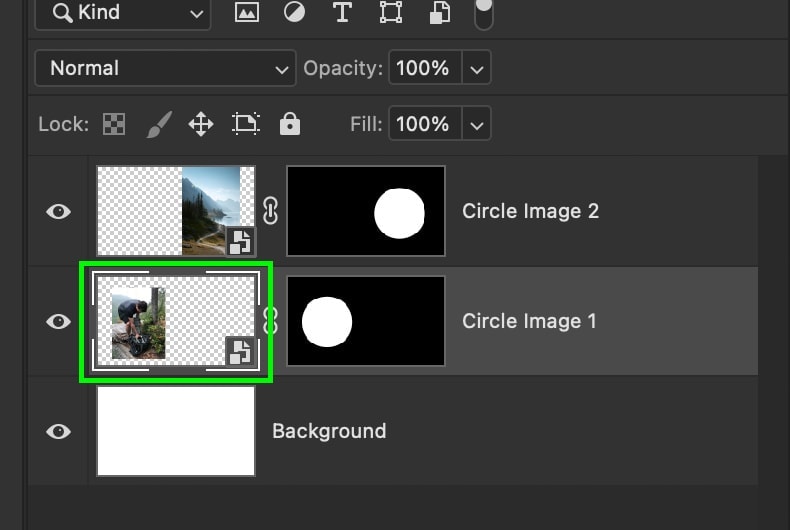
For example, I have two images inside of a shape on their respective layers. If I want to make a clone adjustment to the shape on the left, I need to make sure that the layer is selected in the layer panel.
If you were trying to paint on a new layer to work non-destructively, then you’ll want to select that layer instead.
As you can see, my background layer is currently selected, meaning that I will only be painting white with the clone adjustments since that’s what is sampled.
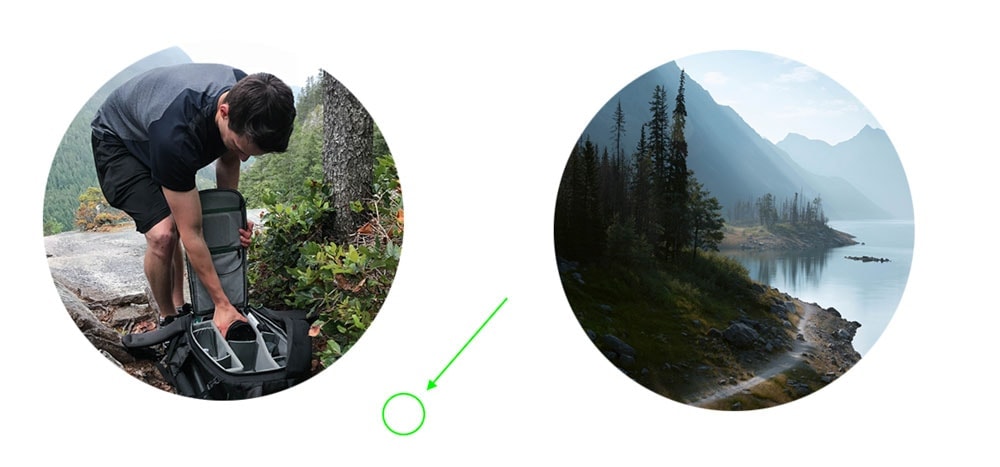
To solve this, I’ll click on the layer I want to clone, then press Alt/Option to sample, and now the Clone Stamp Tool works again!
2. Check Your Sample Settings
Another very common reason for this tool not to work is the incorrect sample settings. For example, in the upper setting bar, while the Clone Stamp Tool is active, there are three different sample options:
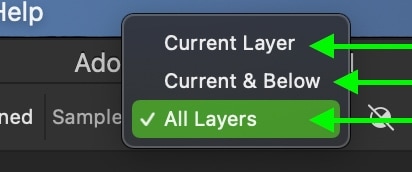
- Current Layer: will only sample from the layer that is currently selected.
- Current And Below: will sample both your currently selected layer, and the layer directly below it.
- All Layers: will sample all of the layers below your currently selected layer.
If, for example, you have a new transparent layer above an image layer, you will want this sample setting set to “Current And Below.” This way, you can paint on your new layer while sampling the image layer directly beneath it.

You will find yourself constantly changing this setting depending on your needs with the tool. If your Clone Stamp Tool suddenly stops working, this setting is usually the culprit.
3. Make Sure Your Layer Mask Isn’t Selected
Just as you need to ensure the correct layer is sampled, you also need to ensure that you aren’t sampling the layer mask. If you do, you’ll end up with some weird results. This is a possible issue when you are adding clone adjustments directly to your image layer.
You can tell that the layer mask is selected by the white boxes surrounding it. This means when that layer is selected, you will be sampling the masking values rather than the actual image.
To fix this, click on your image layer thumbnail. Now those white boxes will move to the layer thumbnail and off of the layer mask.
Now when you sample and make your clone stamp adjustments, you will be sampling the image directly.
4. Select The “Soft Round Brush” Preset
If you have been experimenting with new brush settings, it’s possible to select a brush tip that won’t work for clone stamp adjustments. If you had a brush tip chosen with a large amount of spacing, it would appear like the clone stamp tool isn’t working. However, the clone adjustments are just being painted in a way you weren’t expecting.
For the best results and general-purpose use, using a soft round brush preset works best for the Clone Stamp Tool.
First, access the Clone Stamp Tool by pressing S, then go to the upper settings bar and click on the brush preset options.
At the top of the brush preset panel, look for the preset that says “soft round brush,” then click on it to select it.
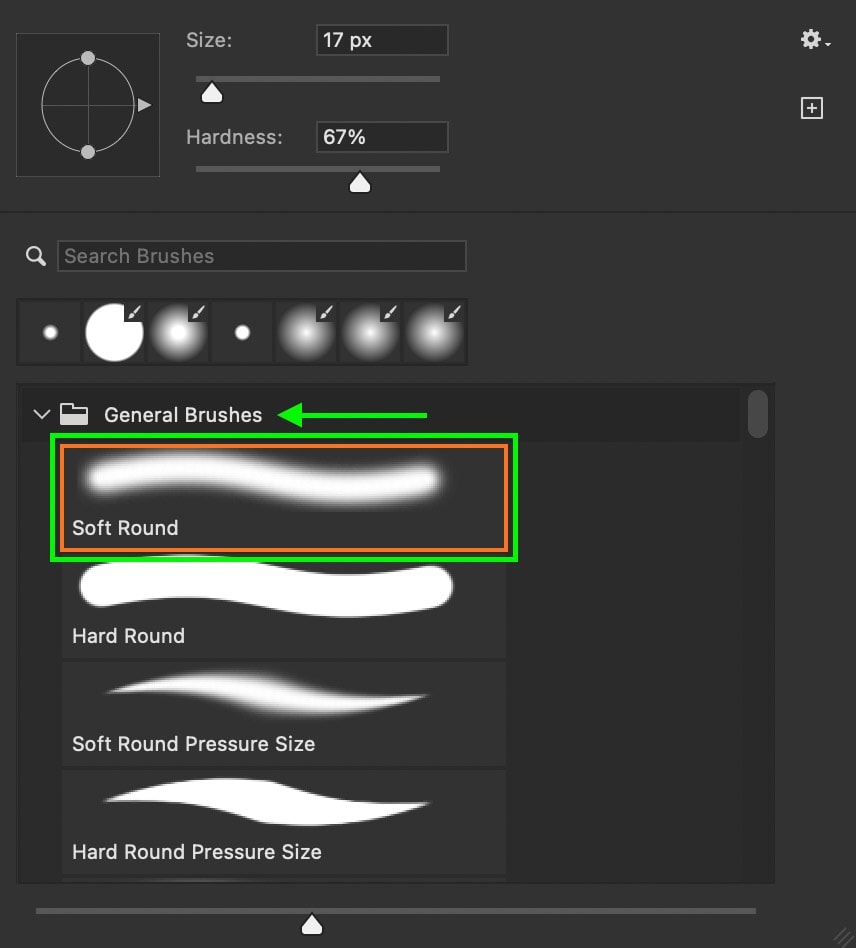
This will change your brush tip and fix any issues you may have had if you had a custom clone stamp brush in use.
5. Set The Opacity And Flow To 100%
Similar to the brush tool in Photoshop, there are opacity and flow settings for the clone stamp tool. If you don’t have either of these settings adjusted correctly, your clone adjustments will be hardly visible or totally transparent!
With the clone stamp tool active (S), go to the upper settings bar and make sure the opacity and flow options are at 100%.

If they aren’t, adjust them accordingly to make your clone stamp adjustment be fully visible.
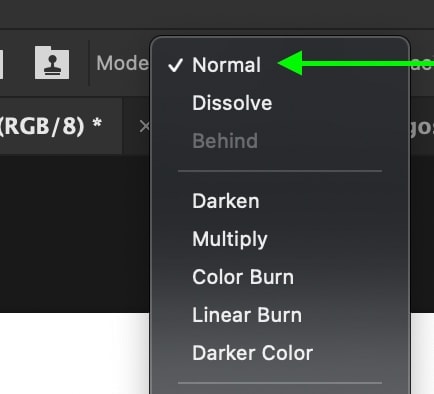
6. Set The Blending Mode To “Normal”
Like a layer blending mode, the clone stamp blending mode changes how your cloning adjustments blend into your image. If you have changed this setting and forgot to set it back to normal, it’s easy to think that the clone stamp tool is broken.
Luckily changing the blending mode back to Normal is easy. Simply press S to access the clone stamp tool, then go to the upper settings bar. In the Blending option, this should be set to “Normal.”

If it isn’t, click on this option to reveal a drop-down menu. Select “Normal” at the top of the list to make your clone adjustments work the way they usually do!
7. Try To Redefine Your Sample Area
Another reason for the clone stamp tool not to work is because of your sample area. The sample area is the place you define before painting clone adjustments to tell Photoshop what you want to use as the cloning material.
If you have yet to create a sample, you will want to do that first.
To do that, hold Alt or Option and click on your canvas to define your sampling area while the clone stamp tool is active.
However, if you have already set your sample area, you may have sampled a transparent area on your canvas or layer. If that happens, nothing will be painting with your clone adjustments since you sampled transparency.
To fix this, hold Alt or Option and click on an area of your canvas or layer that is not transparent and try again. Now your clone stamp tool will be working correctly again.
Clone Stamp Tool Still Isn’t Working? Here’s How To Reset It:
Now, if you’ve tried all the other troubleshooting methods above and still aren’t finding a solution, you can always reset the clone stamp tool. The only problem with this is that you will lose any clone stamp presets you may have created by doing this. That’s why I only suggest this as a last resort option.
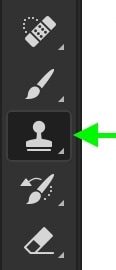
To reset the clone stamp tool, press S to access the tool, then click on the clone stamp tool icon in the upper settings bar.
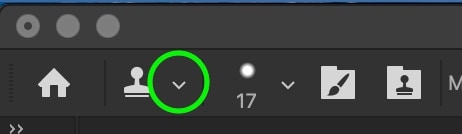
In the panel that appears, click the gear icon.
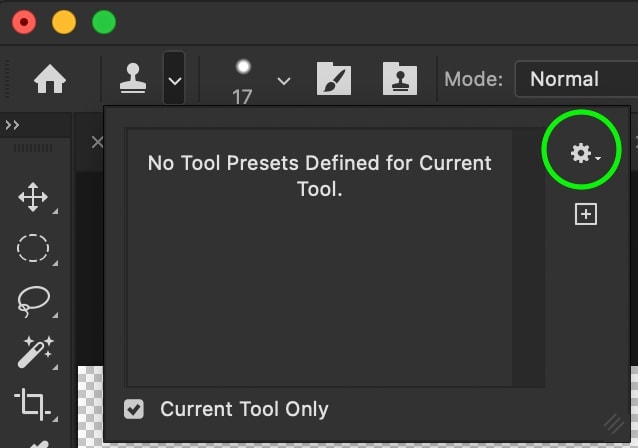
Then select “Reset Tool” from the provided options.
This will reset all of your custom settings for the clone stamp tool and reset it to its default state. This way, you will get rid of any weird settings that may be throwing off the tool and causing it not to work.
Happy Cloning!
Brendan 🙂
