
The eraser tool is one of the most important tools Photoshop has, allowing you to erase areas of your project or image. When it isn’t working right, it can really slow down your workflow.
The most common reason for the Eraser Tool to stop working is that the layer thumbnail is not selected. In the layers panel, click on the desired layer thumbnail to select it. With the white box surrounding the thumbnail, your eraser will work to remove parts of that layer.
Now, this is just one of several reasons that could cause errors with this tool. So let’s take a deeper look at some common problems and fixes for the Eraser Tool in Photoshop!
How To Fix The Eraser Tool In Photoshop
1. Check Your Eraser Brush Settings
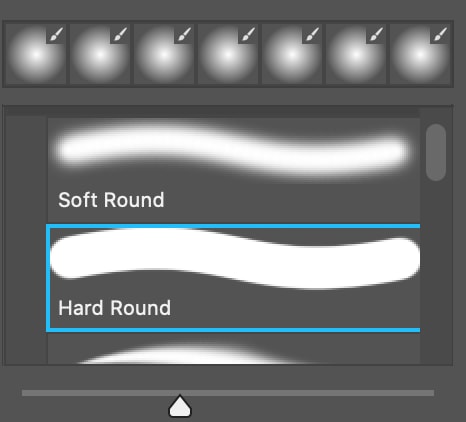
There are some settings that will cause the eraser brush not to erase fully or not erase at all. Double-check the eraser brush settings by heading to the Brush Settings area in the Options bar.
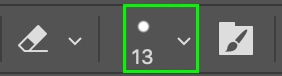
If the size is too small, the brush will not appear to erase more than a few pixels. Make sure you have set the Brush Size big enough for your needs. You should also check the Hardness setting and ensure it is set to 100%. If the brush is set too soft, you won’t be able to see the erased areas well. Increase the hardness until you can see the erased areas well enough.

You also want to ensure your brush isn’t too soft. There are hard and soft brushes, so you can change the brush hardness in the settings area by selecting a hard brush — the Hard Round brush is always a good option.
2. Check Your Opacity & Flow Settings
The Opacity and Flow settings are also important to set correctly. If you want to see the eraser fully, you’ll need to set the Flow and Opacity to 100%. You can find the Flow and Opacity in the Options bar.

Drag the toggle to increase both values to 100%.
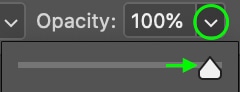
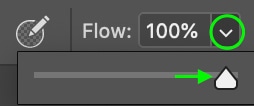
This will ensure the eraser is fully erasing the area, not just partially.
3. Make Sure A Layer Is Selected In The Layers Panel
If you haven’t selected a layer in the Layers panel, none of the brushes will work, including the eraser brush. To ensure you can use the eraser, head to the Layers panel and double-check that you have selected the layer you’d like to use the eraser brush on.
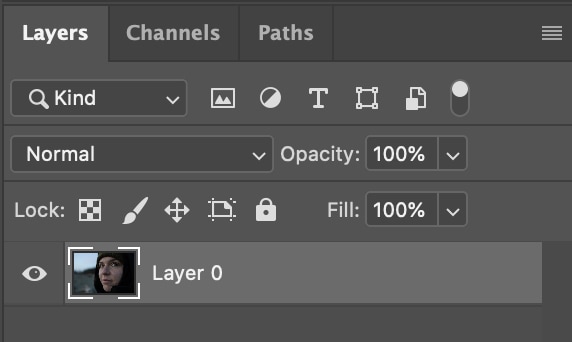
When selected, a layer will turn a lighter gray than when it is not selected and form a white border around the thumbnail. Remember that the eraser tool will not work unless a layer is selected, not a layer mask. A selected layer mask looks like this:

The layer itself needs to be selected, or the tool will only work on the selected layer mask.
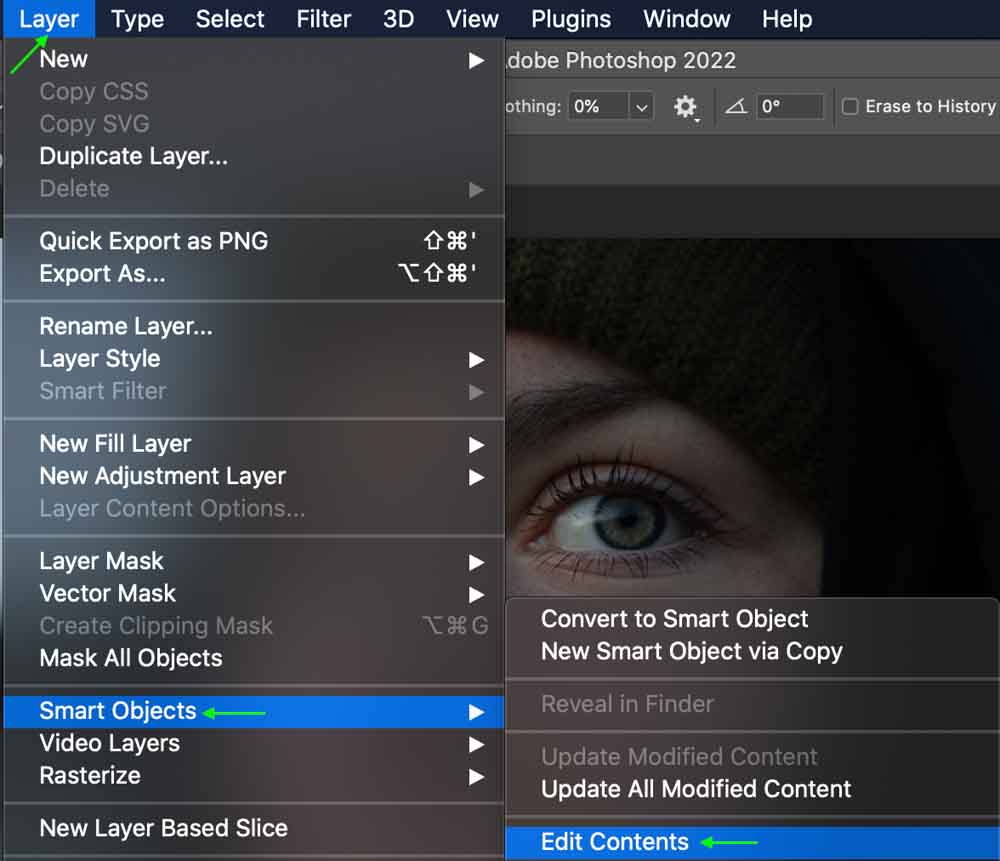
4. Ensure Your Layer Is Not A Smart Object
If you’re working with a smart object, you might have some issues trying to erase parts of the layer. The error message will tell you that the smart object is not directly editable. To fix this, you can edit the smart object separately by using the Eraser Tool on it. To check if the layer is a smart object, head to the Layers panel. Smart Objects have an icon in the corner of the thumbnail that looks like this:

To edit the contents of the Smart Object and use the Eraser Tool on that layer, you can either double-click that Smart Object icon in the corner of the thumbnail in the Layers panel or head to Layer > Smart Objects > Edit Contents.
The layer opens in a separate document tab. Here you can edit the layer and use the Eraser Tool as needed. Once you are done, press Control + S (Win) or Command + S (Mac) to save the edits. You can then close the tab, and your layer is edited in the original document.
5. Unlock Your Layers
When you open a new document in Photoshop, you’ll notice that the background layer is automatically locked. It is also possible to accidentally lock a layer. The eraser won’t work properly if the layer is locked. When using the tool on a locked background layer, instead of showing transparency where you erase pixels, you will see white areas when you use the tool on a locked layer.
You get an error message when you use the tool on a layer that you have locked yourself.
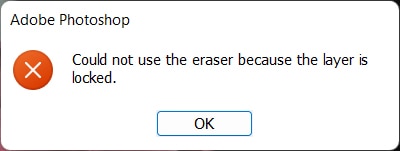
You can easily fix this issue by unlocking your layer. In the Layers panel, click the Lock icon to the right of the layer.
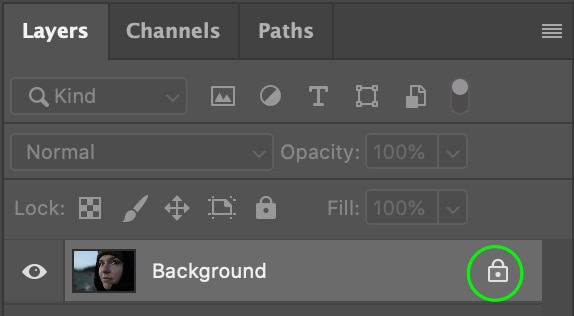
This will unlock the layer so that you can use the eraser. Remember that once a Background Layer is unlocked, it will transform into Layer 0. An unlocked layer will not have the lock icon.

6. Deselect Any Selected Areas
If you have used any selection tool to make a selection on an area of your document, the eraser tool will only erase pixels in that selection. Make sure you have not selected anything and don’t see any selection borders around any areas of your image. The tool will only work on the pixels inside the marching ants.

To deselect an area, press Control + D (Win) or Command + D (Mac). As long as nothing is selected, the eraser should work fine on all the pixels in the image.

While the selection above is obvious, there are instances where you may have selected a small area that you don’t notice immediately. Use the shortcut to deselect any pixels and try the tool again.
These are the main reasons the eraser could malfunction. Run through these quick solutions, and your eraser should work fine in no time.
Happy Editing!


