
To use Photoshop for photo editing and graphic design effectively, you need to know Photoshop tools. The tools, found in the Toolbar on the left-hand side, allow you to edit and manipulate images and make designs from scratch. In this article, I explain each tool and what it’s best used for.
Whether you are a beginner opening Photoshop for the first time or a seasoned user, this article has something for you. Adobe is constantly updating the program, and in some updates, new tools appear, and you may not be familiar with what the tool does. Here is all you need to know about the current Photoshop tools.
How Many Tools Are In Photoshop?
Adobe does a significant upgrade of its software every six months or so, and some of these upgrades include new tools for Photoshop. So while there are currently 69 tools in Photoshop 2022 version 23.5.0, this may change in the future.
You can find the tools in the Toolbar, either from the visible icon or within the hidden panel, which I will discuss how to access shortly.

Understanding The Toolbar In Photoshop
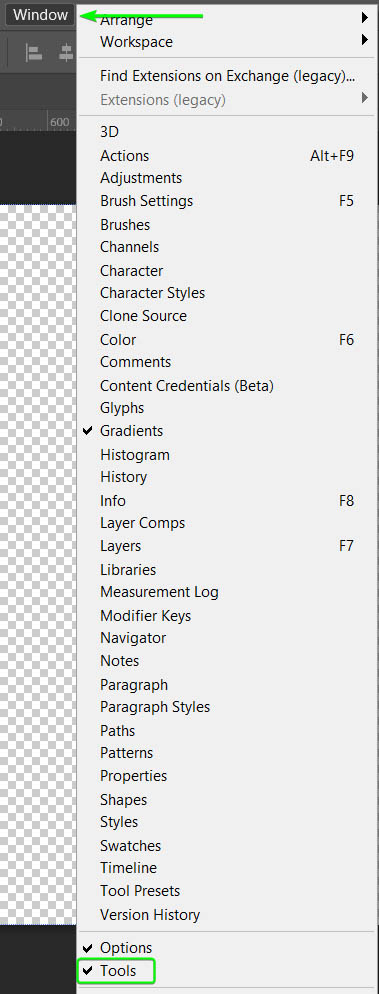
By default, the Toolbar is located on the left-hand side of the Photoshop workspace. If your Toolbar isn’t visible and you can’t find it, navigate to Window > Tools. The bar is visible in your workspace when there is a checkmark next to Tools.
You can expand the Toolbar or keep it tight against the side of the workspace. Use the double arrow icon at the top of the Toolbar to expand or contract the bar. This icon changes the Toolbar from keeping the icons in a single or double row.


The visible icons aren’t the only tools available for you to use. The small arrow below the tool icon shows the tools that contain other hidden tools.

You can access hidden tools by clicking and holding on an icon to open the fly-out menu, which contains other tools in the group.
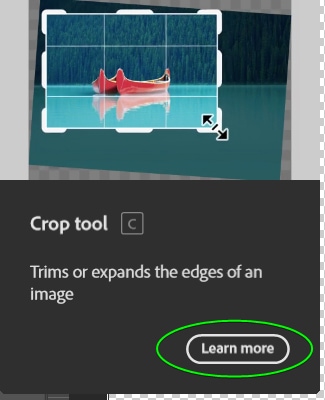
Photoshop also offers Rich Tooltips for each tool in the Toolbar. These tips give you the name of the tool, the shortcut, a brief description, and a quick video showing the tool in action. You can access these tips by hovering your mouse over a tool icon until a window shows you the information.
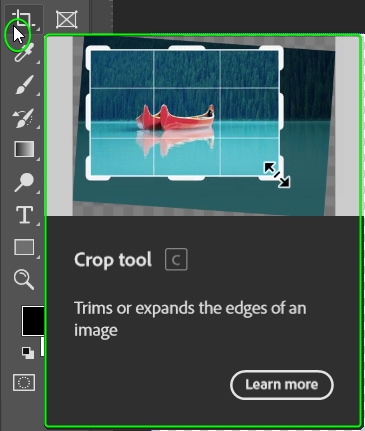
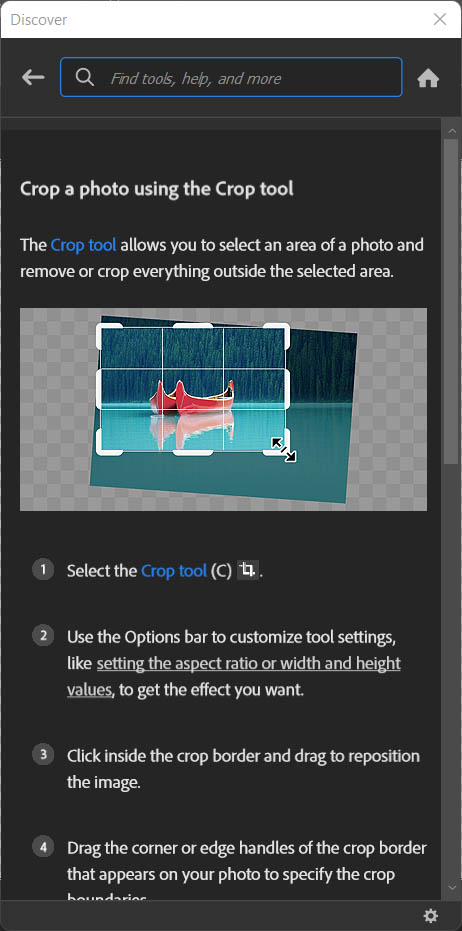
Click on Learn More to open the Discover dialogue box, which has a more in-depth explanation of the tool.
Summary Of Every Tool In Photoshop
Learning to master each tool takes some understanding and plenty of practice. Here is a summary of every tool in the Photoshop Toolbar to give you an idea of how it works and why you would use it.
The Selection Tools
The first group of tools is used to move layers and objects or make selections of various elements.
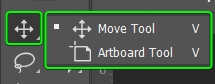
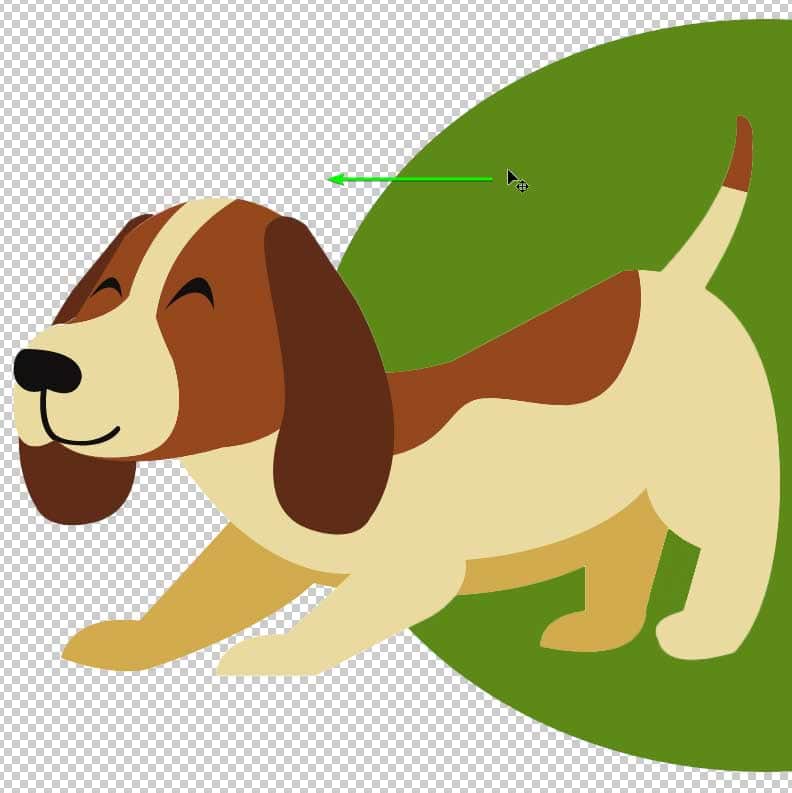
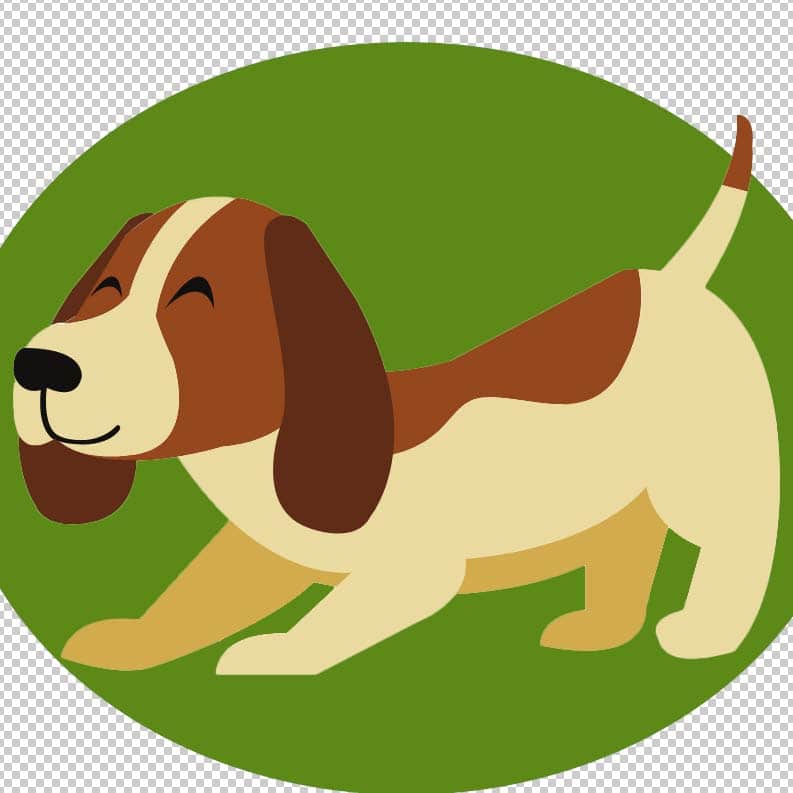
– Move Tool (V)
The Move Tool (V) is at the top of the Toolbar and is used to move layers, selections, and guides around the canvas or artboard.
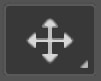
Select the Move Tool and click on a layer or element to move it around. This tool is key to organizing the objects on your canvas. For instance, I can use the tool to move the circle behind the dog graphic into the position I want.
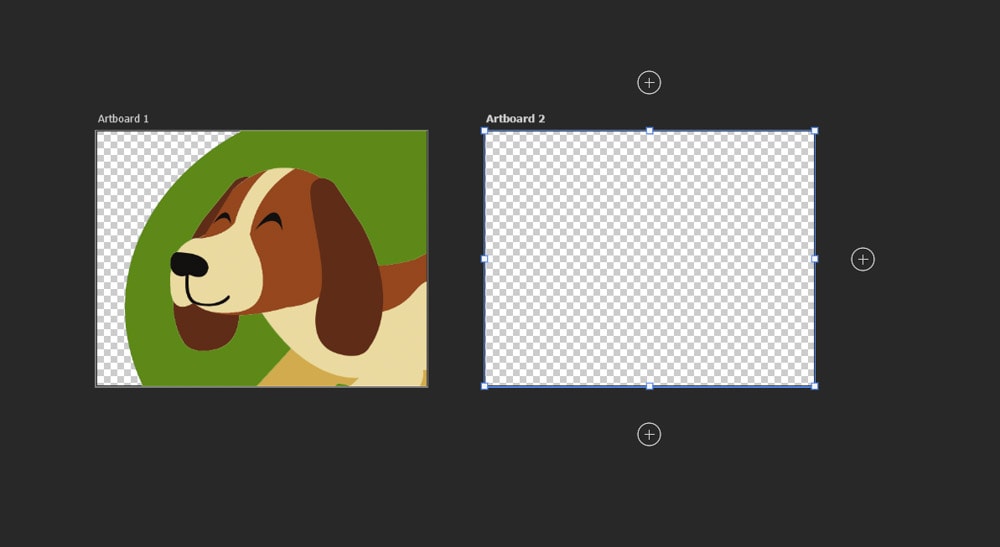
– Artboard Tool (V)
The Artboard Tool (V) is valuable when using artboards instead of a single canvas. The tool allows you to move and create artboards.
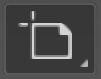
When the Artboard Tool is active, you can change various settings in the Options bar and add new artboards in the workspace.
– Rectangular Marquee Tool (M)
You can use the Rectangular Marquee Tool (M) to create rectangular or square-shaped selections on the canvas. Hold in Shift while creating the selection to make a square shape.

Once you have made the selection, you can cut out objects, add selective adjustments to the image, and much more. The limitation of this tool is the shape, although it is useful to make a quick selection in this shape.
You can then cut the selection out of the image by adding a layer mask or adding an adjustment to the selection.

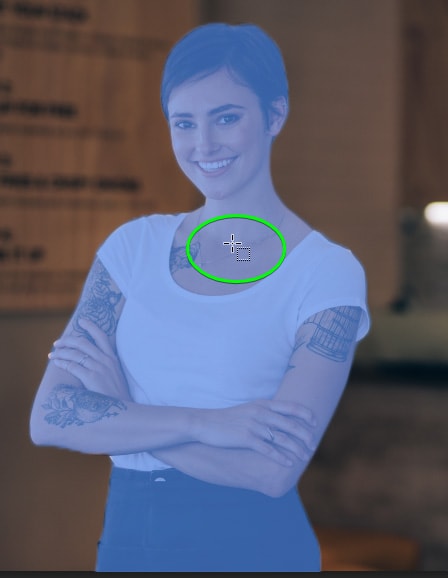
– Elliptical Marquee Tool (M)
You can find the Elliptical Marquee Tool (M) in the Marquee Tool group, which functions similarly to the Rectangular Marquee Tool. However, this tool is in an elliptical shape, and you can create a circle by holding Shift while making the selection.

This tool is best used for making circular selections on the canvas.

You can then use the selection as needed, such as cropping the layer.

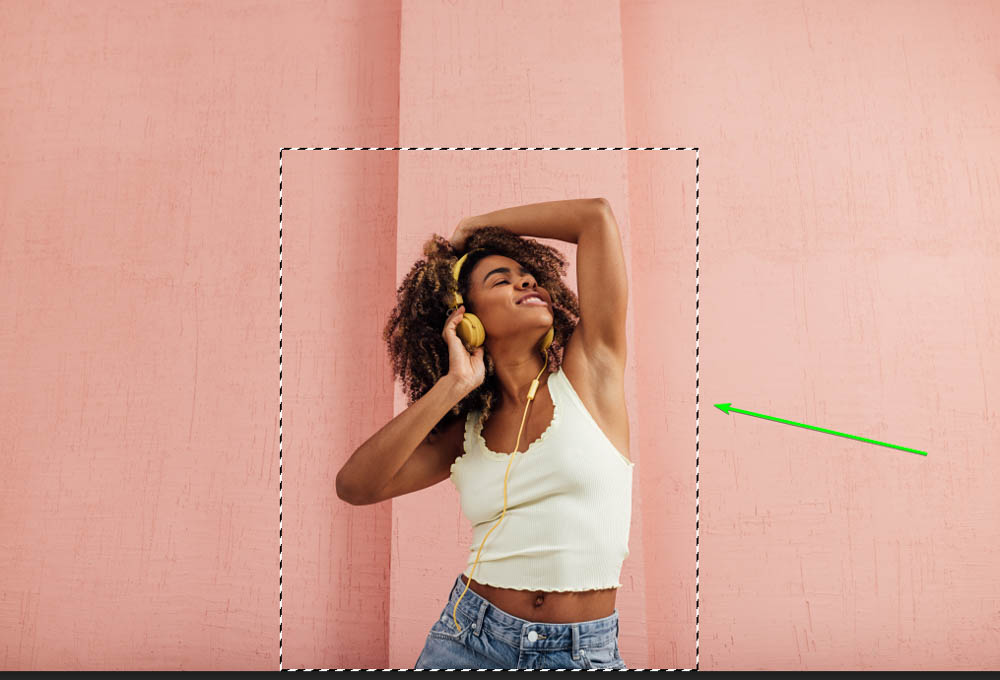
– Single Row Marquee Tool
The Single Row Marquee Tool functions like the other Marquee Tools, except it creates a one-pixel thick selection across the whole canvas.
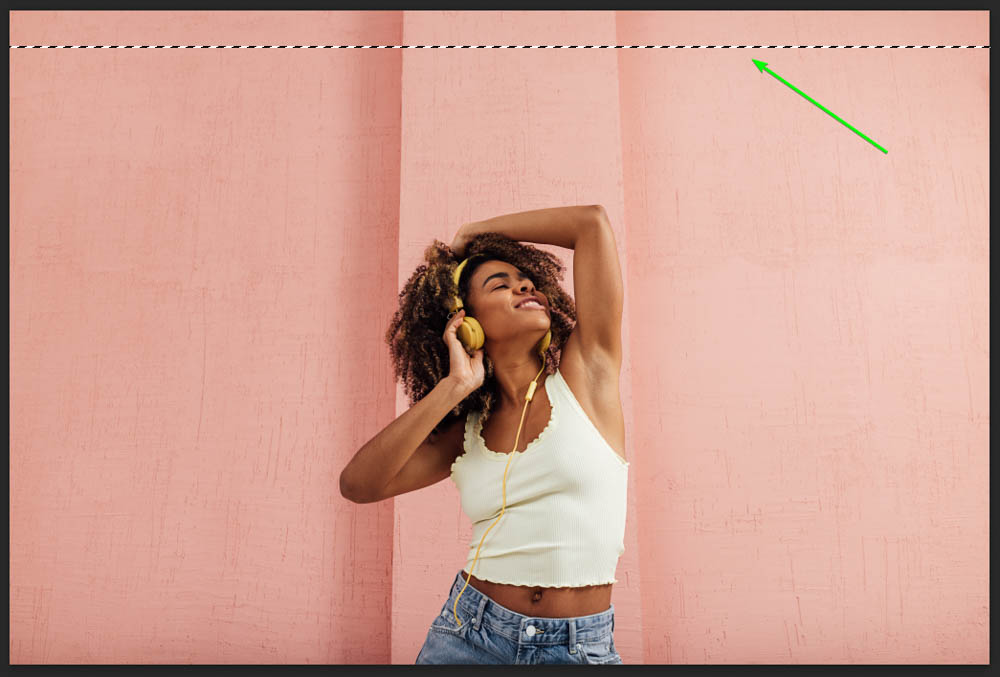
– Single Column Marquee Tool
The Single Column Marquee Tool creates a vertical line across the canvas that is one pixel wide.

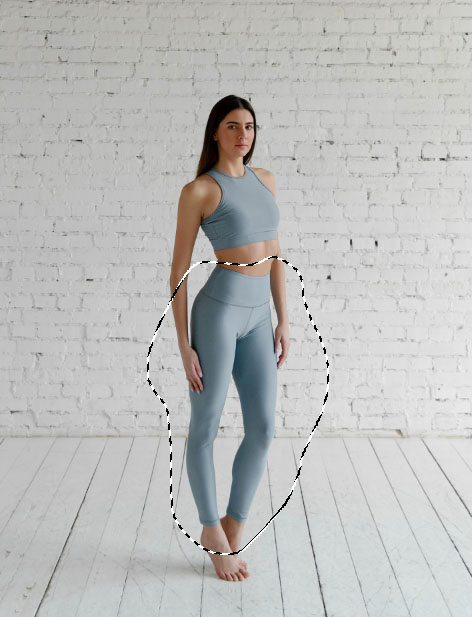
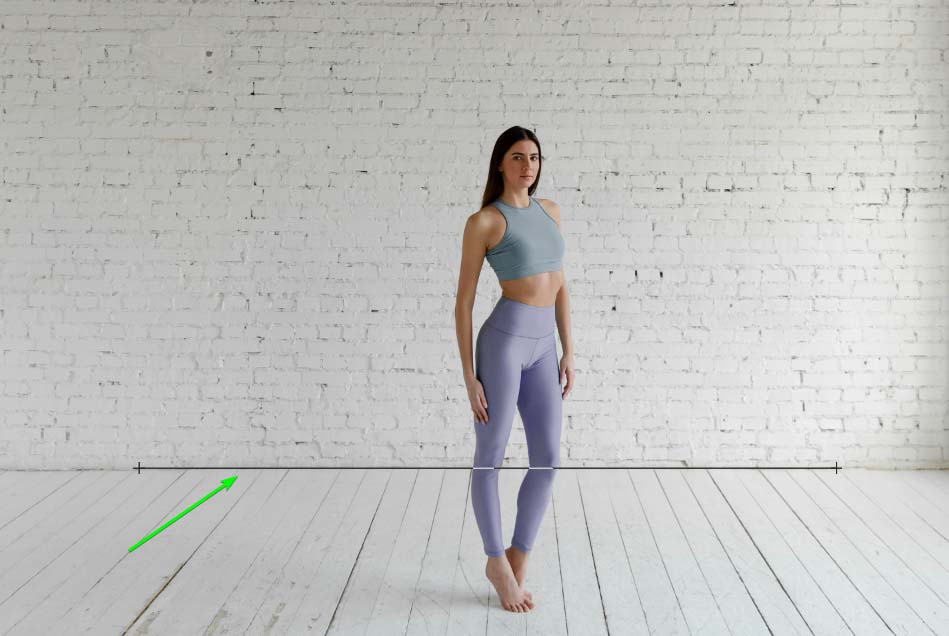
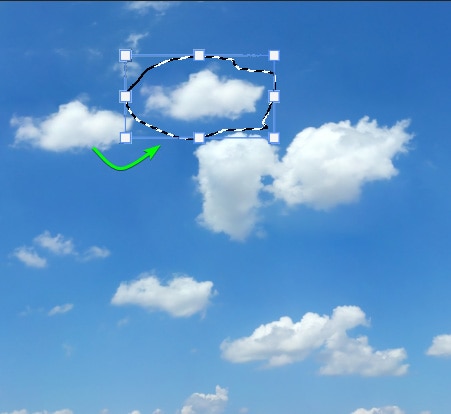
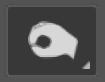
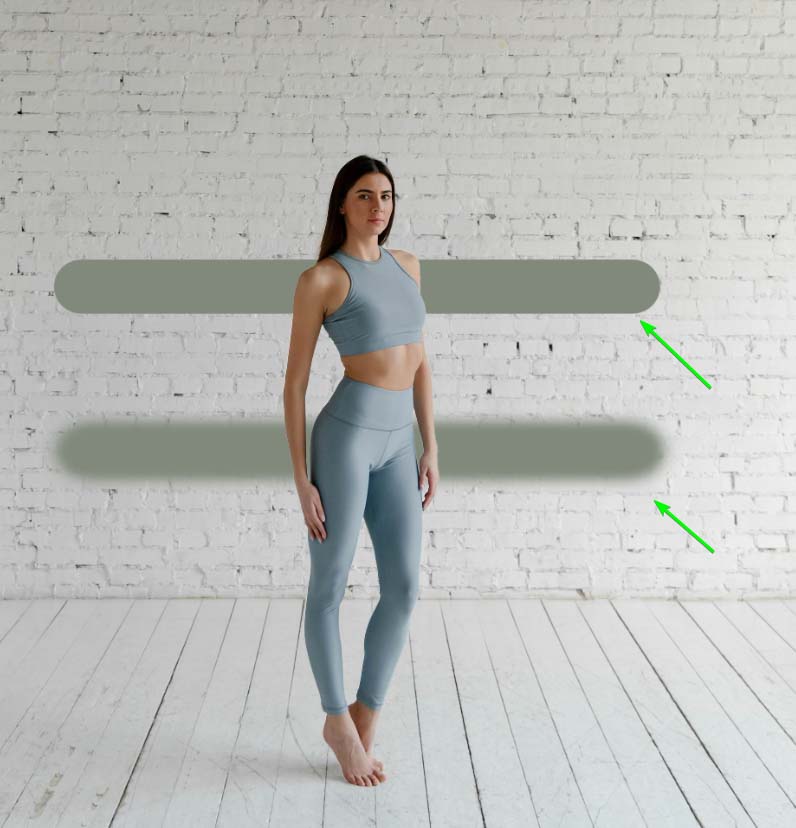
– Lasso Tool (L)
The Lasso Tool (L) is the next icon on the Toolbar and is a freeform selection tool.
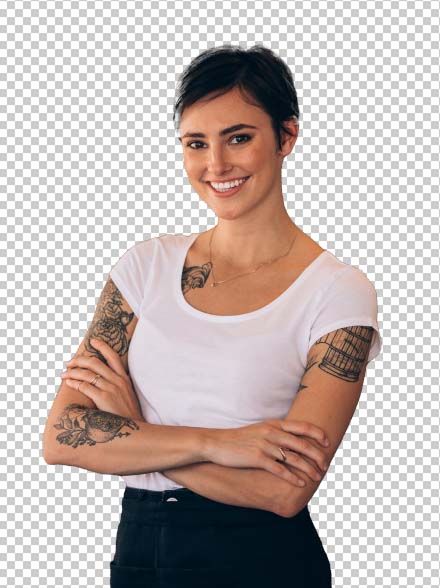
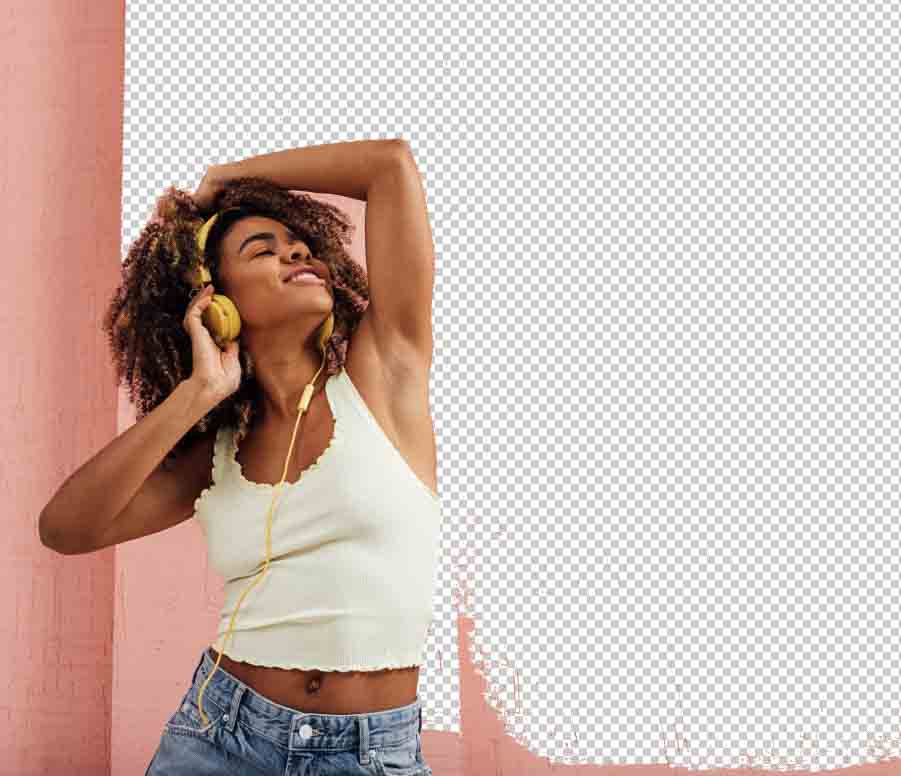
You can use the Lasso Tool to create rough selections on the canvas by clicking and dragging around the area. This tool is excellent for making quick selections and adjustments, such as selectively changing a color. For example, I changed the woman’s tights without affecting the top.

– Polygonal Lasso Tool (L)
The Polygonal Lasso Tool (L) also creates freeform selections.
However, this tool keeps the lines straight, allowing you to create straight-lined selections.
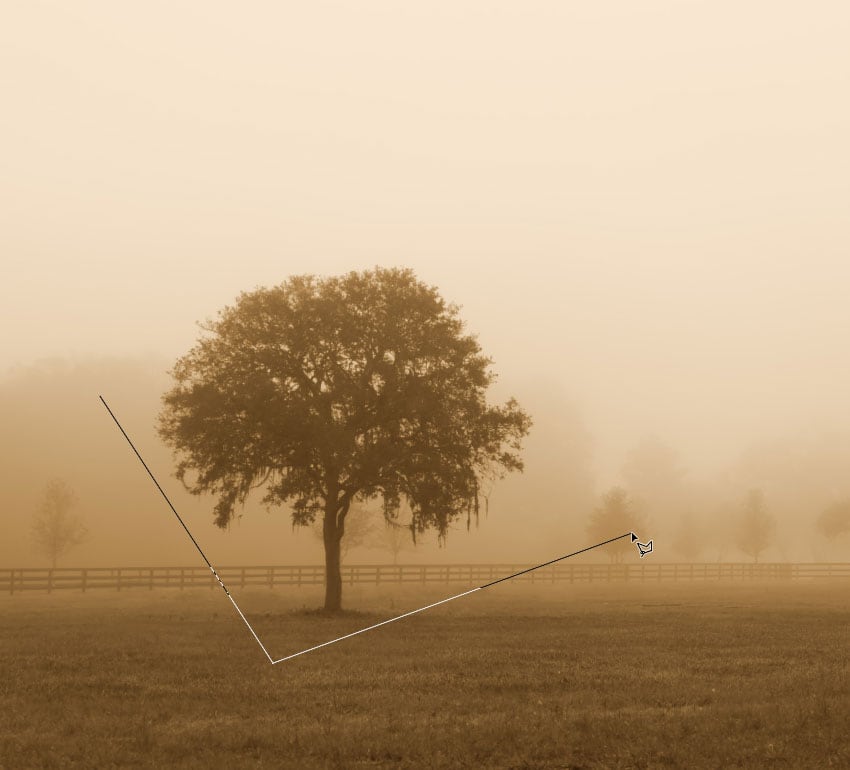
You can get creative by slicing text using this tool or cutting rough but straight-lined selections out of your image.
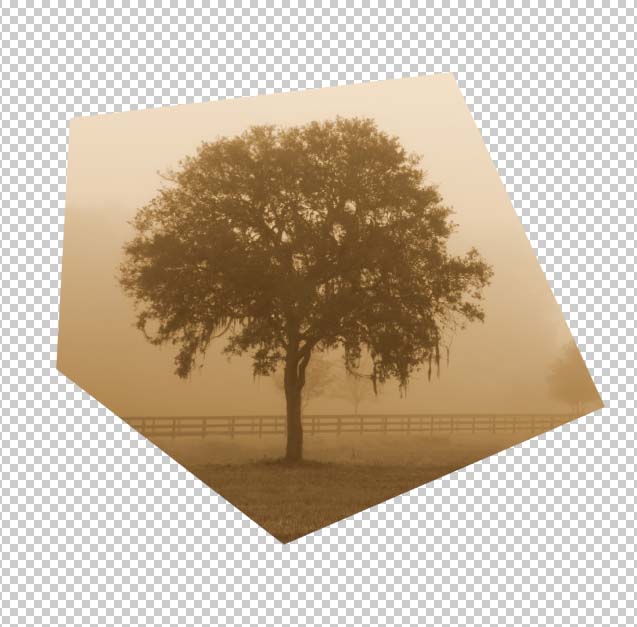
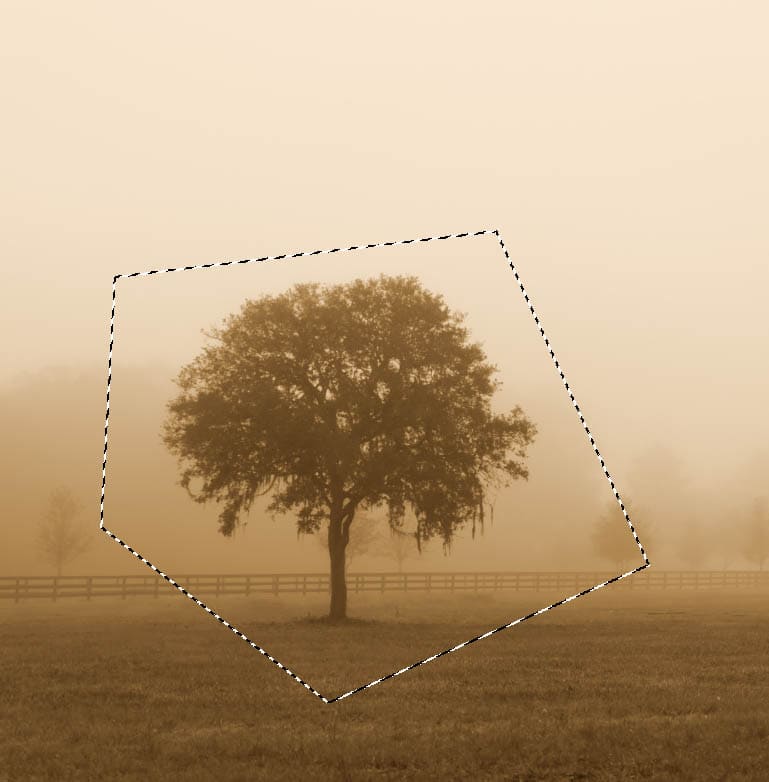
– Magnetic Lasso Tool (L)
The Magnetic Lasso Tool (L) is a more intuitive lasso selection tool, which is excellent for making selections around complex objects with precise edges, especially when you need a quicker solution than the Pen Tool.
This tool uses AI to detect the edges of an object in the image to create a more precise selection. To use the tool, click and drag close to the subject’s edge, and the selection snaps to the edge.
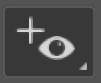
– Object Selection Tool (W)
The Object Selection Tool (W) is the fastest tool to make a selection when there is a prominent object in your image.
Use this tool by clicking on the object in your photo. The Object Selection Tool is an excellent choice for selecting multiple objects in an image or quickly removing the background from a picture.

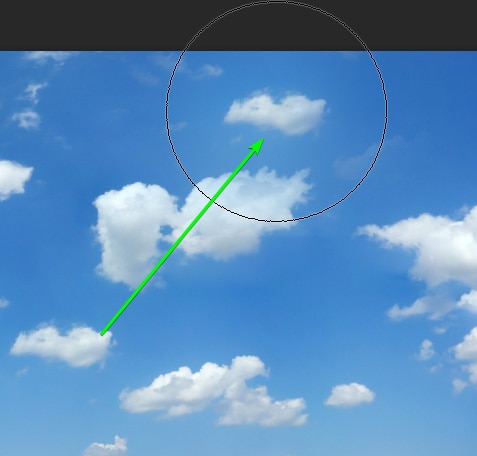
– Quick Selection Tool (W)
The Quick Selection Tool (W) is another intuitive selection tool that detects edges in the image while you paint over the area using a brush.
Use the tool by clicking and dragging around the object you want to select, and Photoshop will detect the most likely edges of the selection. You can keep painting over the area to select more pixels.
This tool is best used when there are precise edges, and you only need a rough selection.
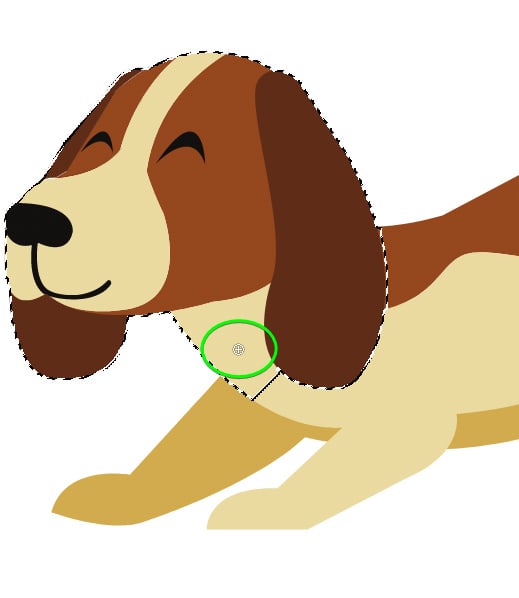
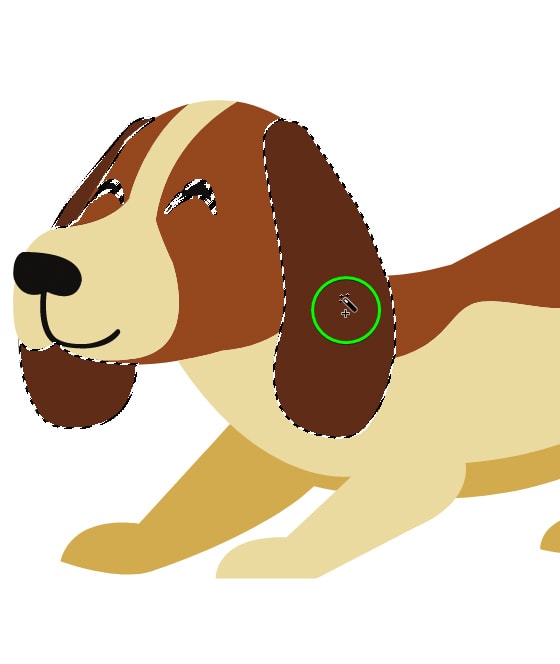
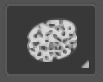
– Magic Wand Tool (W)
The Magic Wand Tool (W) selects pixels in an image based on color. Use this tool to select a color accurately and its various shades in a picture.
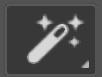
To use the tool, click on the color you want to be selected, and Photoshop only selects that color in the picture and other colors are left unselected. You can use this tool to change a particular color in an image without affecting the rest.
Crop And Slice Tools
The Crop and Slice Tools are used to cut the image by cropping the sides or slicing an area to save it separately from the entire picture.
– Crop Tool (C)
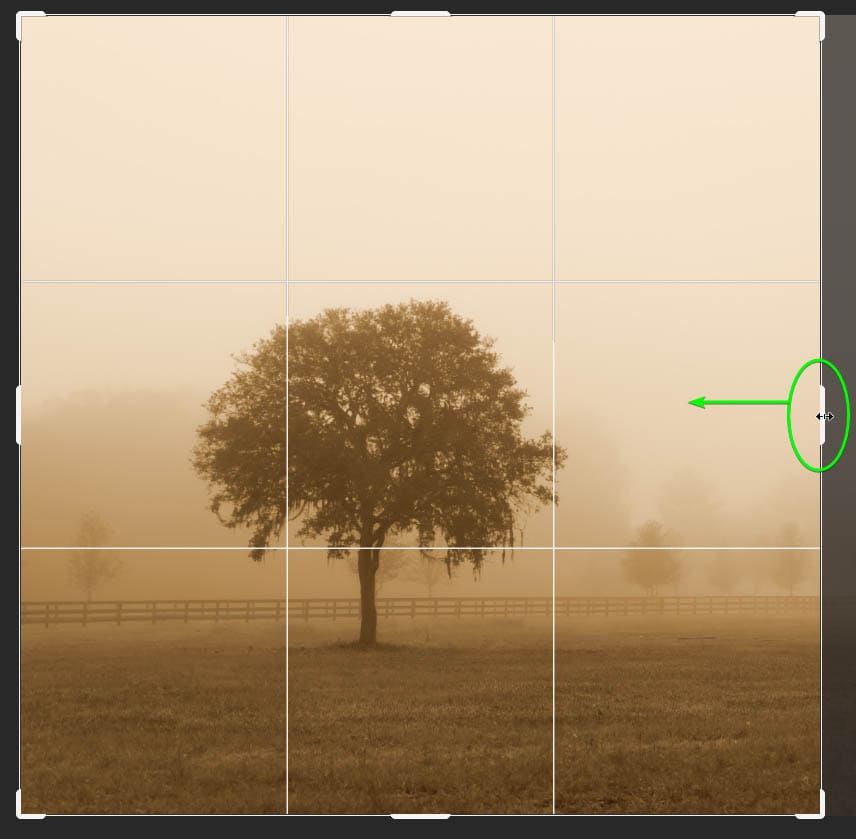
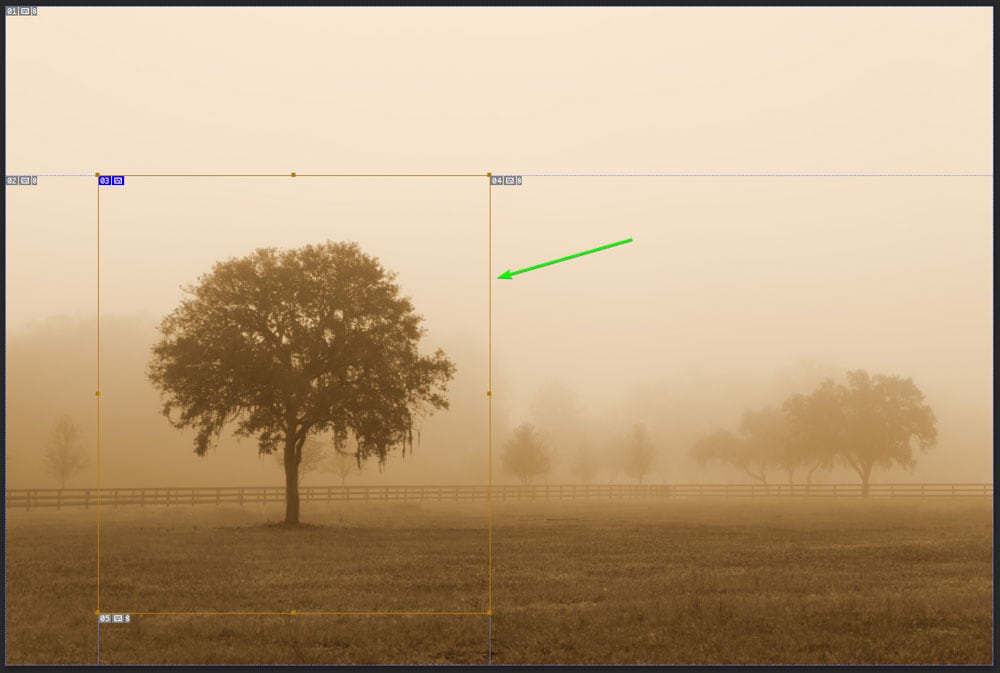
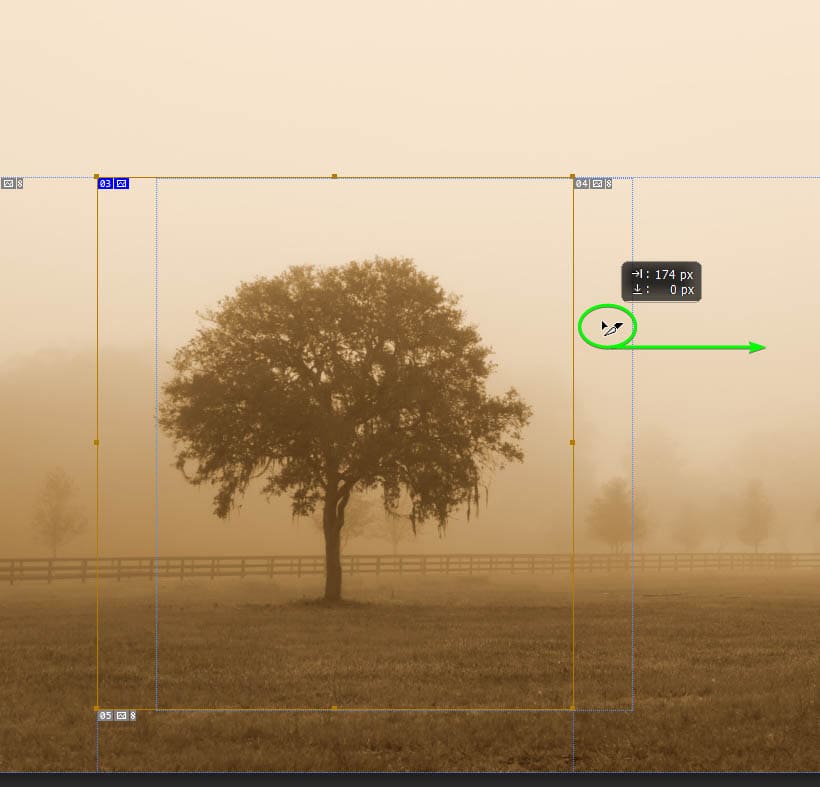
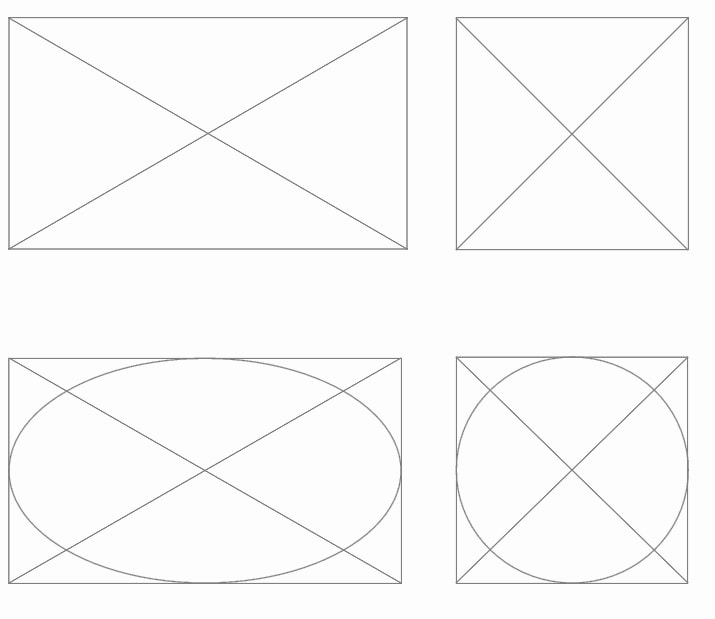
The Crop Tool (C) crops your image to a freeform ratio or a set size or ratio. You can use this tool to crop or straighten images.
Use this tool by dragging the handles inwards to crop the image. The best use for this tool is to remove unwanted distractions around the edges of an image or to change the photo ratio.


– Perspective Crop Tool (C)
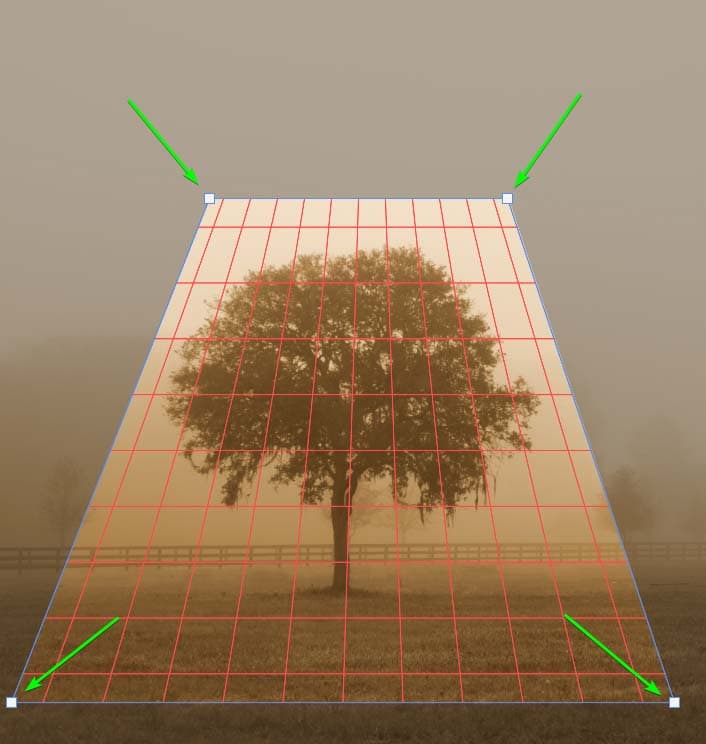
The Perspective Crop Tool (C) also trims the image, except you can change the perspective of the cropped area.
Use each anchor point of the crop box to warp the area you are trimming as needed.

– Slice Tool (C)
The Slice Tool (C) creates slices on an image that you can extract and save separately to the picture without committing to a crop.
Click and drag to create a slice around the object in the image.
– Slice Select Tool (C)
Use the Slice Select Tool (C) to select and move a slice around the photo to a new spot.

– Frame Tool (K)
The Frame Tool (K) creates a rectangle, square, elliptical, or circle frame onto the canvas.

Once you click and drag to create a frame, you can easily add an image into the frame by going to File > Place Embedded.

Measuring Tools
Use the measuring tools to measure the canvas, add notes, or sample various colors.
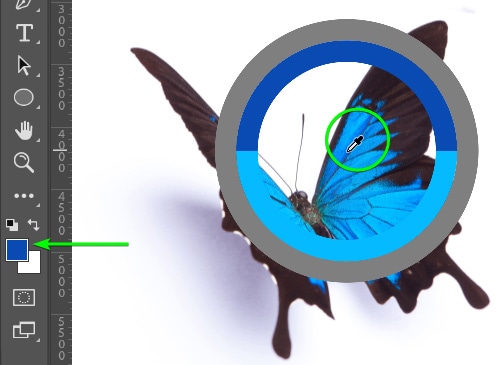
– Eyedropper Tool (I)
The Eyedropper Tool (I) samples colors on the image.
Use this tool by clicking on a color in the image. The color is then added as your foreground color, and you can save it or use it to create new elements.
– 3D Material Eyedropper Tool (I)
The 3D Material Eyedropper Tool (I) samples colors and textures in the 3D workspace.

Photoshop is discontinuing the 3D functionality, and users can use Adobe’s Substance line for these capabilities.
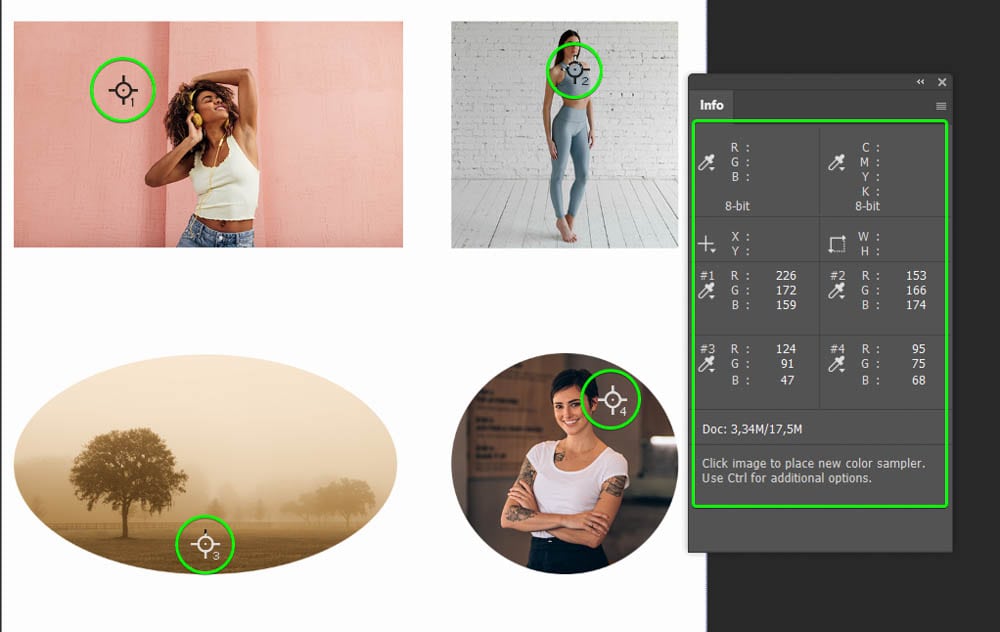
– Color Sampler Tool (I)
The Color Sampler Tool (I) samples up to 10 different colors and displays the values.

– Ruler Tool (I)
The Ruler Tool (I) creates a temporary straight line on the canvas.
Click and drag a line on the canvas to add the ruler. You can then use this temporary line to measure angles, distances, and straight lines.
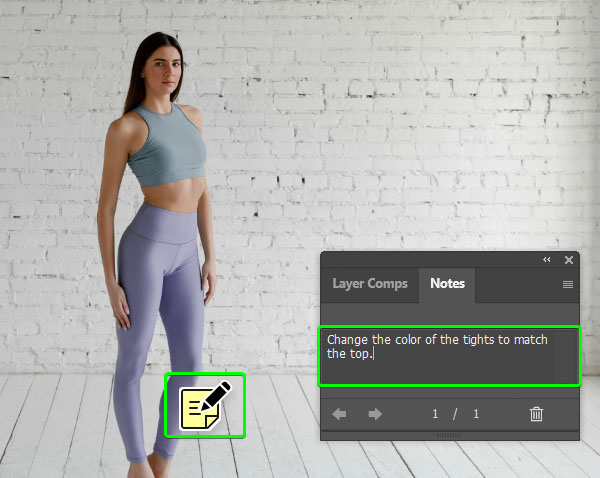
– Note Tool (I)
The Note Tool (I) allows you to add temporary notes to specific areas of the image.

This tool helps give team members instructions to edit an image or to provide feedback on edits.
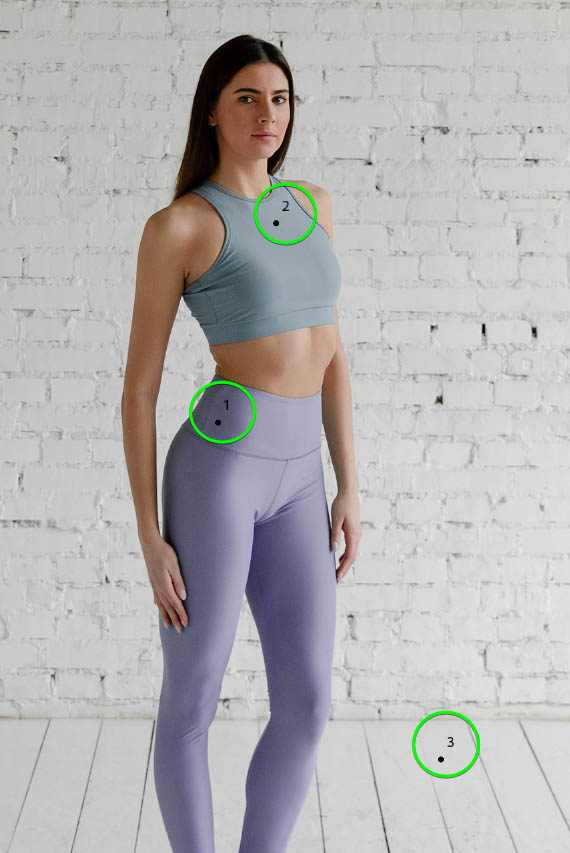
– Count Tool (I)
The Count Tool (I) adds temporary numbers to the image by clicking on the area to add a number.
You can use the Count Tool to count objects in an image or to point out editing areas for other team members.
Retouching Tools
Photoshop offers multiple retouching tools to remove an image’s blemishes, distracting objects, and minor imperfections.
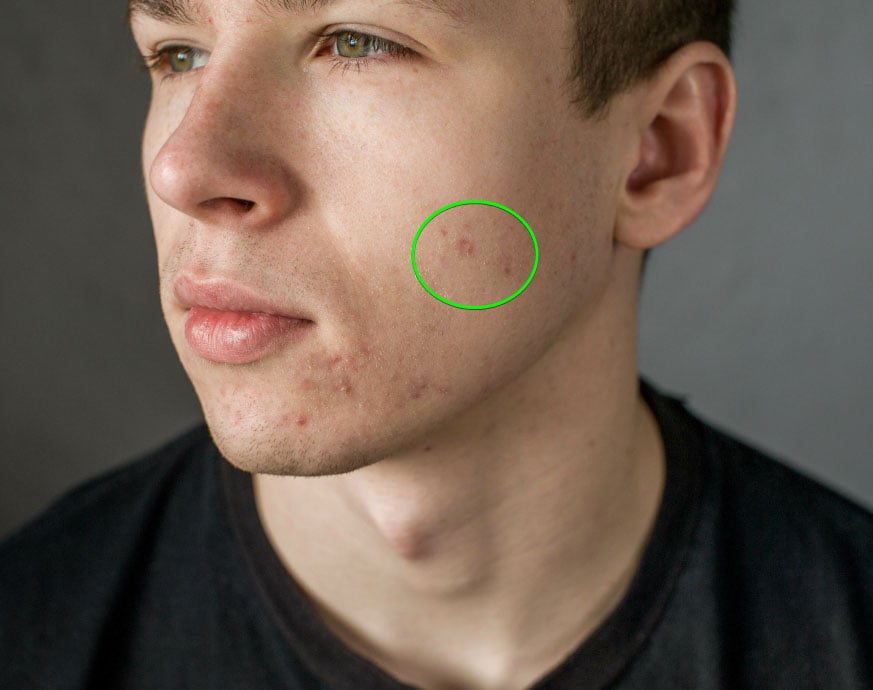
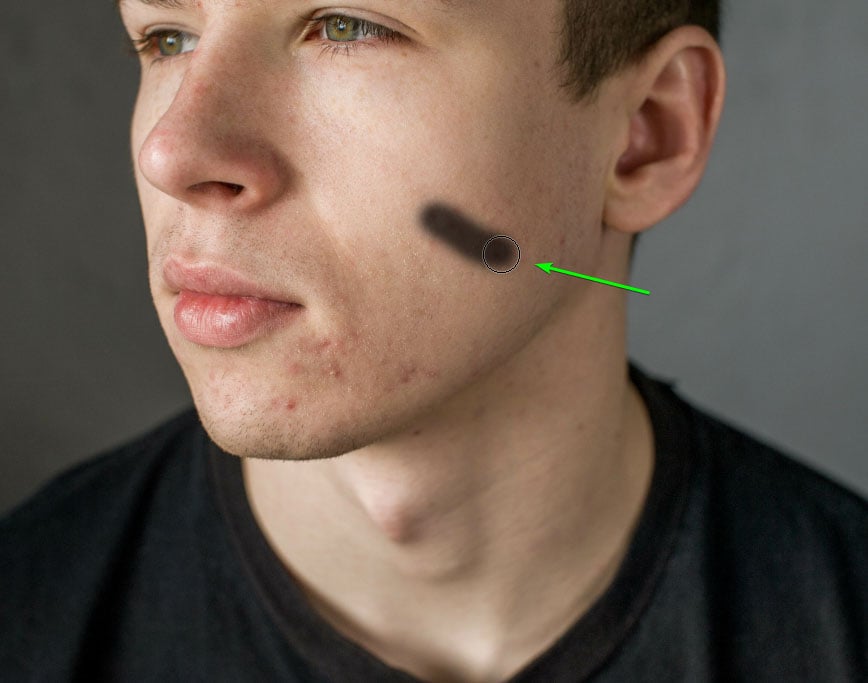
– Spot Healing Brush Tool (J)
The Spot Healing Brush Tool (J) removes blemishes and marks with a click or brush stroke.
To use the tool, click on a spot or brush over an area, and Photoshop replaces the pixels with the closest match.

– Healing Brush Tool (J)
The Healing Brush Tool (J) covers marks and blemishes with sampled pixels.

To use the tool, hold in Alt (Win) or Option (Mac) to sample an area. Then click on the spot you want to cover with the sampled pixels. Use this tool when you want control over the replaced pixels when covering blemishes.
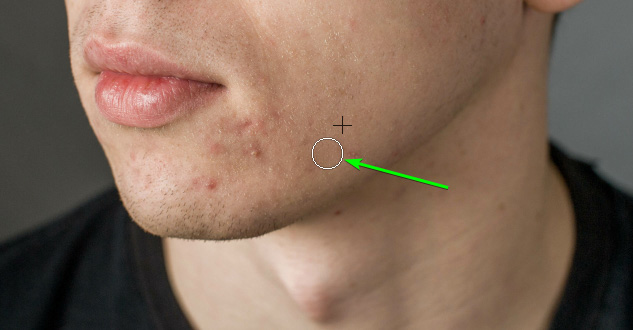
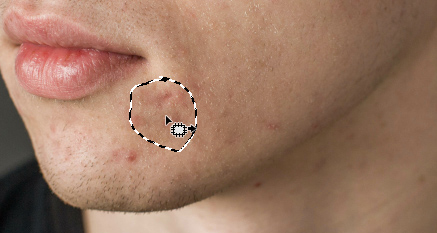
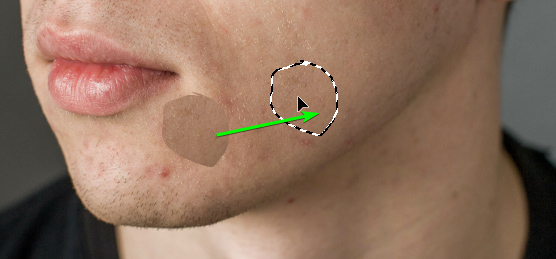
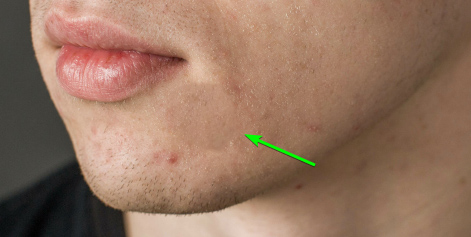
– Patch Tool (J)
The Patch Tool (J) fixes imperfections in an area by blending pixels from a sample or pattern.

First, use a lasso selection to section an area, then drag the selection to where you want to replace the initial selection. The tool blends the pixels but isn’t as accurate when used on skin tones.
– Content-Aware Move Tool (J)
The Content-Aware Tool (J) allows you to move objects in an image.
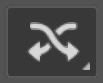
Create a rough selection around the object and drag it to a new spot. Photoshop will blend the object as best as possible into the new area.

– Red Eye Tool (J)
The Red Eye Tool (J) removes the red reflection in a person’s eye caused by the flash of a camera. All you need to do is click on the red eye or drag the block around the eye.
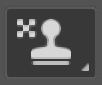
– Clone Stamp Tool (S)
The Clone Stamp Tool (S) intuitively copies an object in a photo and pastes it in a new location.

First, hold Alt (Win) or Option (Mac) to sample an area, then click on the new location to paste the copied pixels.

– Pattern Stamp Tool (S)
The Pattern Stamp Tool (S) paints a chosen pattern onto the canvas.

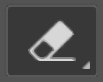
– Eraser Tool (E)
The Eraser Tool (E) destructively deletes pixels from the canvas. Drag over the pixels using the brush to delete them.

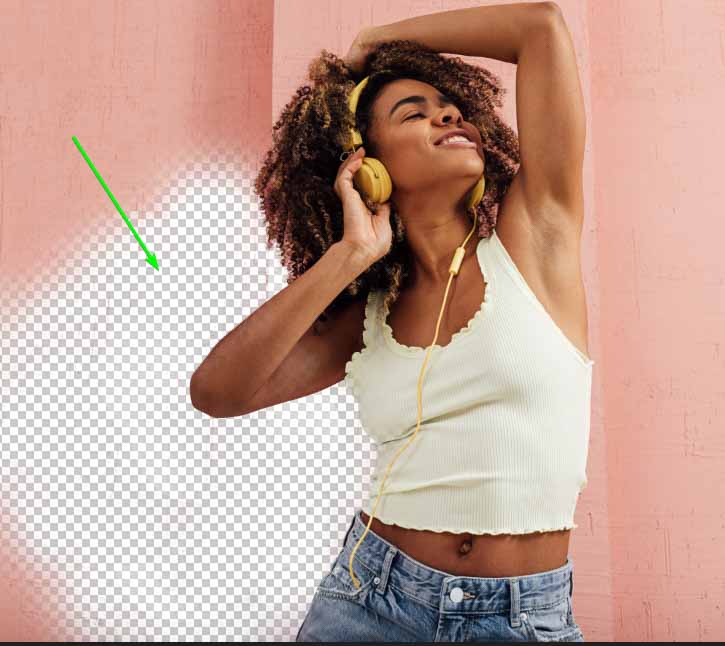
– Background Eraser Tool (E)
The Background Eraser Tool (E) deletes the background pixels while protecting the subject pixels.
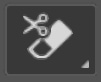
Click and drag the brush over the background color to delete background pixels.
– Magic Eraser Tool (E)
The Magic Eraser Tool (E) deletes pixels of the same color.

Click on a color, and Photoshop deletes all pixels with that color.
– Blur Tool
The Blur Tool softens the areas you brush over, causing a blur effect on the image. Use the tool by clicking and dragging over the area to blur it.
– Sharpen Tool
The Sharpen Tool crisps up soft edges in an image creating a sharper effect.
– Smudge Tool
The Smudge Tool blotches pixels in an image, causing a smudged effect.
– Dodge Tool (O)
The Dodge Tool (O) lightens areas you brush over in an image, increasing the exposure in that area. Use this tool to lighten areas selectively.

– Burn Tool (O)
The Burn Tool (O) darkens areas you brush over in an image, decreasing the exposure of those pixels. Use this tool for selective darkening.
– Sponge Tool (O)
The Sponge Tool (O) changes the saturation of the pixels you brush over. Use this tool for selective adjustments to the saturation levels.
Painting Tools
The Painting Tools offer several methods of painting colors onto a canvas or making selective adjustments.
– Brush Tool (B)
The Brush Tool (B) is the most commonly used painting tool and creates a hard or soft brush stroke on the canvas.

This tool is also used to add to or remove from a layer mask.
– Pencil Tool (B)
The Pencil Tool (B) works the same as the Brush Tool, except it creates hard-edged lines and doesn’t make softer strokes.

– Color Replacement Tool (B)
The Color Replacement Tool (B) replaces a specific color you brush over without affecting the surrounding colors.
– Mixer Brush Tool (B)
The Mixer Brush Tool (B) mimics a real paintbrush by mixing colors and giving you control over the wetness and flow of the brush. Use this tool to create realistic brush strokes.
– History Brush Tool (Y)
The History Brush Tool (Y) erases edits you made on the canvas by undoing the adjustments when you brush over them using a selected history state or snapshot. Use this tool to undo destructive edits without affecting your image.
– Art History Brush Tool (Y)
The Art History Brush Tool (Y) uses stylized brush strokes to replace the edits you’ve made using a selected history state or snapshot.

– Gradient Tool (G)
The Gradient Tool (G) creates a gradient on the image using your chosen colors.

Click and drag to create a gradient on the canvas once you have selected the desired settings in the Options bar.

– Paint Bucket Tool (G)
The Paint Bucket Tool (G) drops a selected color into the desired area or over the entire canvas.

To use the tool, choose a foreground color and click on the canvas to fill it with your selected color.
– 3D Material Drop Tool (G)
The 3D Material Drop Tool (G) functions with the 3D workspace, which will be discontinued in favor of Adobe’s Substance line.
Drawing And Type Tools
The Drawing and Type Tools allow users to create specific drawings and selections and add text to a project.
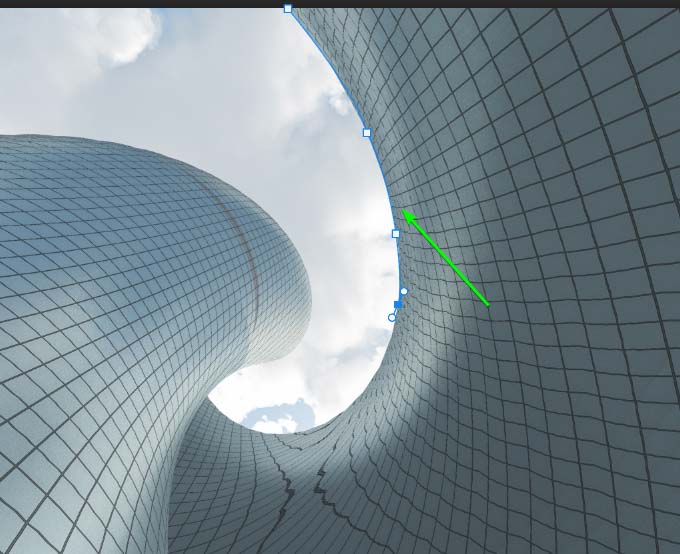
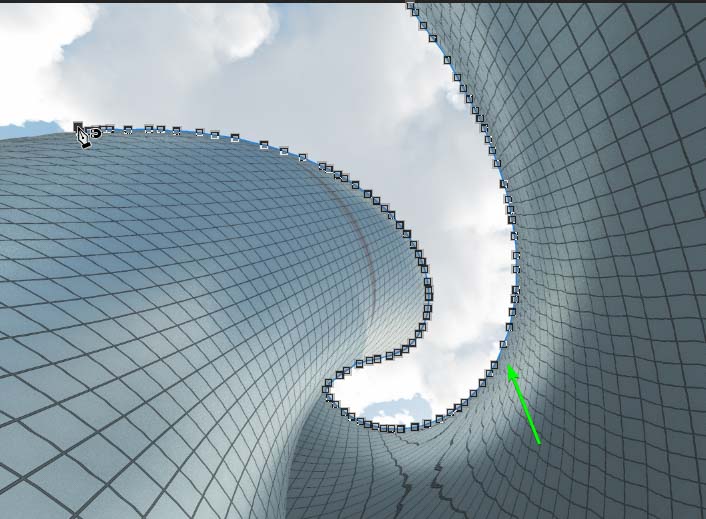
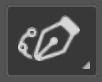
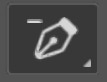
– Pen Tool (P)
The Pen Tool (P) lets you draw precise and smooth paths on a canvas.
Use this tool to create precise paths or selections around objects, especially curved objects. Click on the canvas to add anchor points and adjust the anchor points as needed.
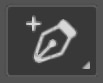
– Freeform Pen Tool (P)
The Freeform Pen Tool (P) works like a magnet and creates anchor points against the closest edge.

Click and drag the pen around the canvas, and anchor points appear snapped to the closest edge.
– Curvature Pen Tool (P)
The Curvature Pen Tool (P) creates curved paths using anchor points. Use this tool to create paths or selections around curved objects.
– Add Anchor Point Tool
Use the Add Anchor Point Tool to add new anchor points onto an existing path by clicking on the path.
– Delete Anchor Point Tool
Use the Delete Anchor Point Tool to delete anchor points along an existing path by simply clicking on the anchor point.
– Convert Point Tool
Use the Convert Point Tool to manipulate anchor points and handles on an existing path by clicking and dragging on the anchor point or handle to reposition it.
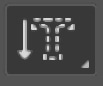
– Horizontal Type Tool (T)
The Horizontal Type Tool (T) adds horizontal point or paragraph text onto the canvas.

You can alter the text by changing the font, color, size, and more.

– Vertical Type Tool (T)
The Vertical Type Tool (T) places vertical point or paragraph text on the canvas. You can edit the text as you would with horizontal text.

– Vertical Type Mask Tool (T)
The Vertical Type Mask Tool (T) makes a selection in the shape of the vertical text you type on the canvas.
– Horizontal Type Mask Tool (T)
The Horizontal Type Mask Tool (T) creates a selection in the shape of horizontal text typed onto the canvas.

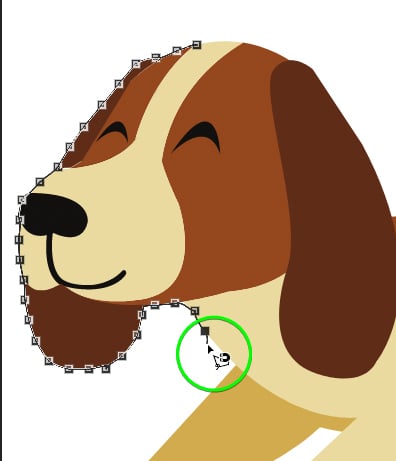
– Path Selection Tool (A)
The Path Selection Tool (A) selects an existing path and allows you to move the path around. It also moves any anchor points, direction points, and lines.
– Direct Selection Tool (A)
The Direct Selection Tool (A) allows you to select anchor points on an existing path and reposition the anchor point without affecting the rest of the path.

– Rectangle Tool (U)
The Rectangle Tool (U) creates a rectangle or square (hold Shift) shape on the canvas. Click and drag on the canvas to create the shape. All the shape tools work in the same manner.


– Ellipse Tool (U)
The Ellipse Tool (U) makes an elliptical or circle (hold Shift) shape on the canvas.


– Triangle Tool (U)
The Triangle Tool (U) creates a triangle shape on the canvas.

– Polygon Tool (U)
The Polygon Tool (U) creates shapes with three or more sides.
Change the number of sides in the Options bar, then click and drag to create the shape on the canvas.

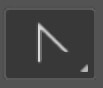
– Line Tool (U)
The Line Tool (U) makes straight lines on the canvas.

– Custom Shape Tool (U)
The Custom Shape Tool (U) creates custom shapes on the canvas. You can choose from Photoshop’s default shapes, create your own, or download custom shapes.

Navigation Tools
The Navigation Tools help you move, rotate, and zoom into the canvas for more precise edits.
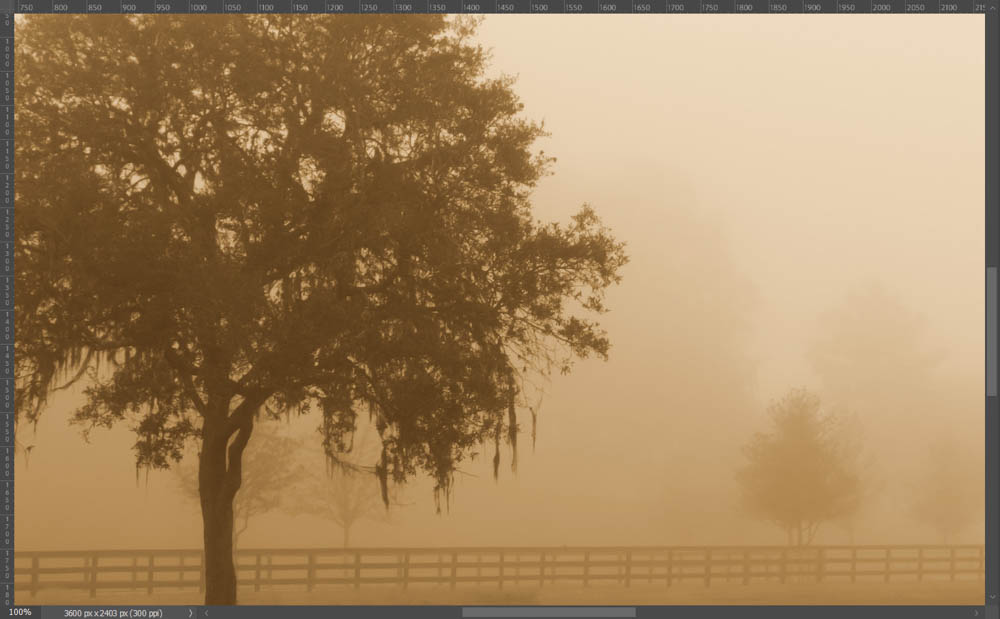
– Hand Tool (H)
The Hand Tool (H) allows you to grab (by clicking) and move the canvas around. This tool is useful when you are zoomed into the document and don’t have a full view of the canvas. You can temporarily access the Hand Tool by holding in the spacebar while another tool is active.
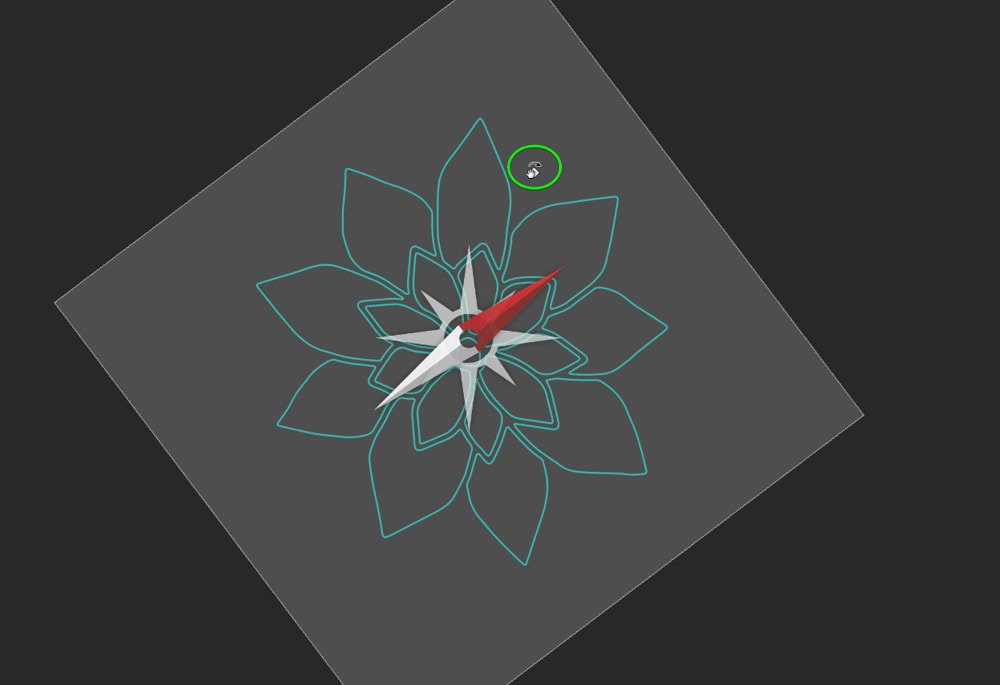
– Rotate View Tool (R)
The Rotate View Tool (R) allows you to click and drag the canvas to rotate it clockwise or anti-clockwise non-destructively.
This tool is helpful if you need to view your artwork from a different angle, such as upside down.
– Zoom Tool (Z)
The Zoom Tool lets you zoom in and out of the canvas by clicking on it to make precise edits or view details up close.

You can also use the shortcut Control + + (Win) or Command + + (Mac) to zoom in, or Control + – (Win) or Command + – (Mac) to zoom out.
Additional Icons On The Toolbar
Below the tools explained above, there are a few more icons that you can use.
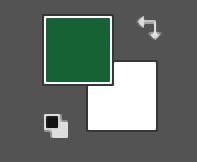
The first icon is the foreground and background color, which portrays which colors are selected in the tray. The foreground color is used to create lines and shapes and is the default color for any new text you add to the canvas.
The small icons behind the main colors show the default black and white so that you can switch back quickly.
The next icon is the Quick Mask Mode, which allows you to paint masks onto the image and easily create masks.

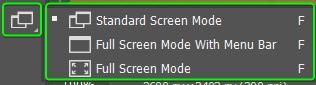
Lastly, the Change Screen Mode (F) icon allows you to toggle between the various screen modes.
How To Customize The Toolbar In Photoshop
Photoshop allows you to customize the Toolbar depending on your workflow. You can remove or add tools to the bar to speed up your work.
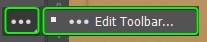
To customize the Toolbar, click on the three dots and then click on Edit Toolbar.
You can re-organize the tools in the lefthand panel of the Customize Toolbar window.
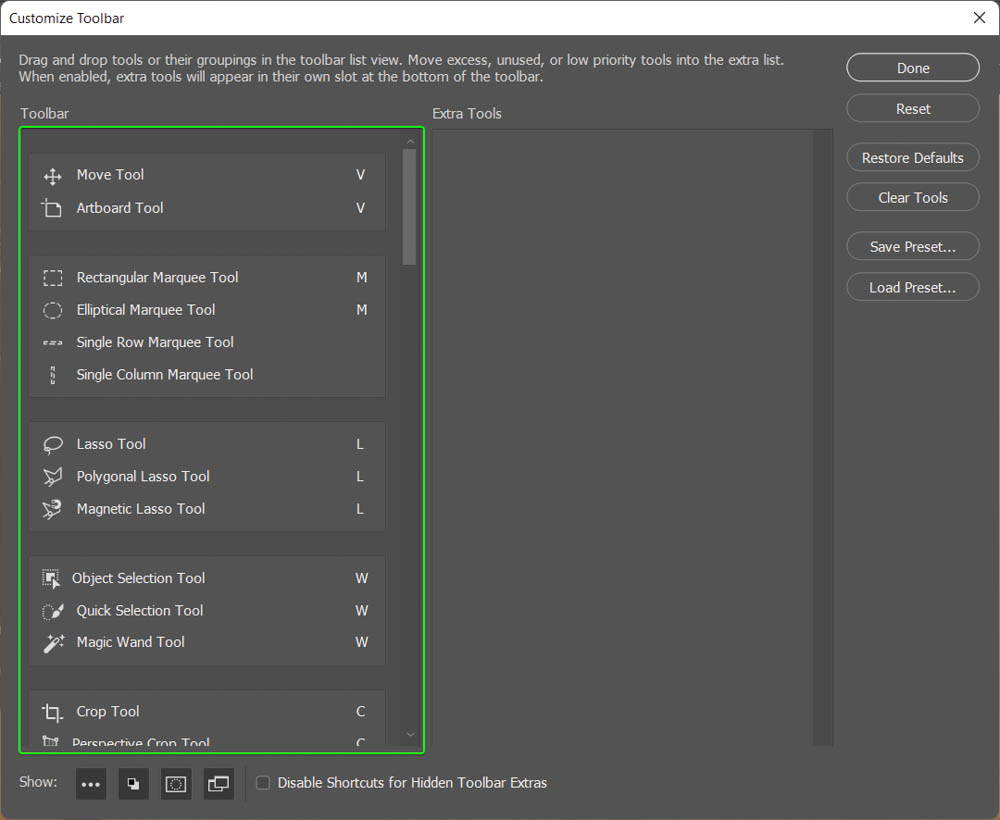
Click and drag tools to re-arrange them, or move them out of the grouping and onto the Toolbar.

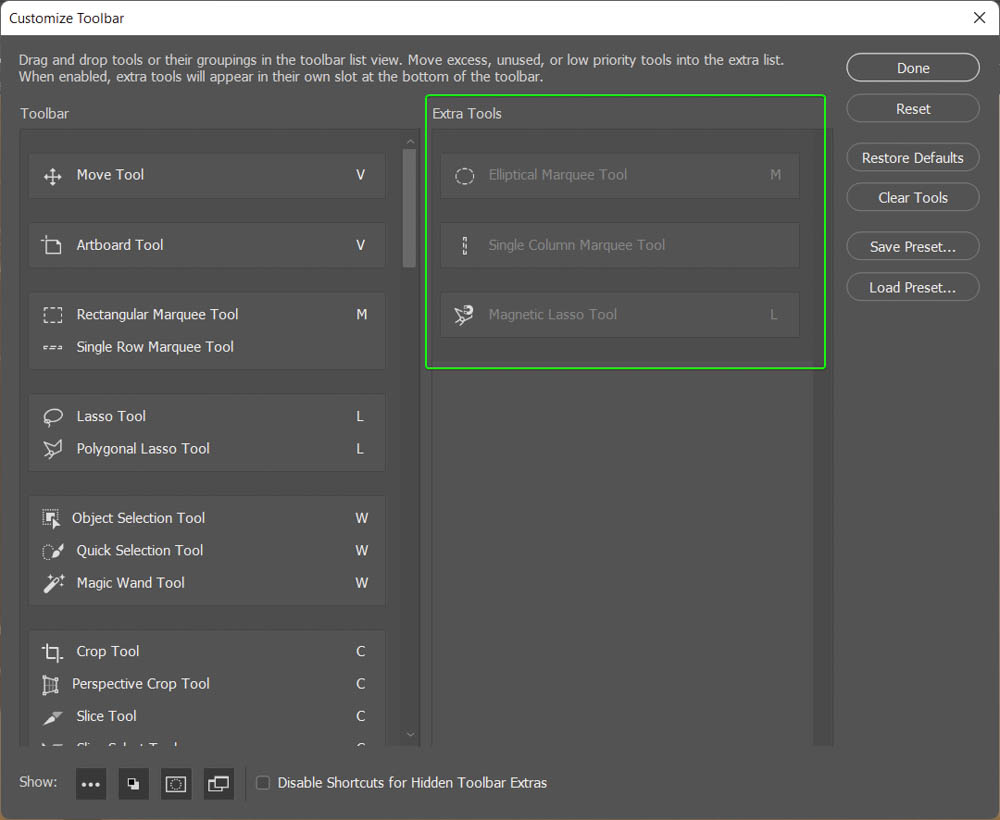
If you don’t use specific tools often and don’t want them taking up space in the Toolbar, you can drag them to the right-hand panel. This action places the extra tools into one grouping at the bottom of the Toolbar, so they are out of your way, but you can still access them.
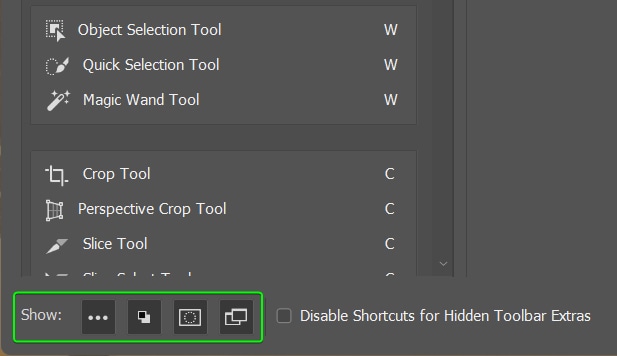
You can also show or hide the additional icons that appear on the Toolbar by clicking on the icon at the bottom of the panel.
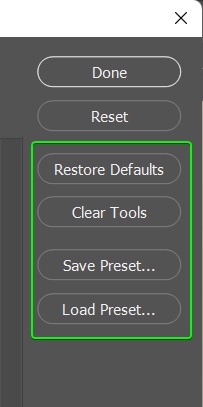
You can use the options on the right to move all the tools into the Extra Tools section by clicking Clear Tools. You can restore the default settings using Restore Defaults or Save and Load Preset settings for the Toolbar.