

The mixer brush is a simple way to create beautiful and creative effects while painting in Photoshop. The brush itself creates a blended, realistic effect with additional settings to elevate your images. If you want to take your brush strokes to the next level, let’s learn how to use the mixer brush in Photoshop.
The Mixer Brush in Photoshop allows you to blend brush adjustments into your canvas as if it were real paint. With settings to change the blend of colors and brush intensity, it’s great for skin retouching and digital art. To access the Mixer Brush, click and hold on the Brush Tool in the toolbar.
The mixer brush tool is useful not only for graphic designers and digital artists but also for photographers. The tool is commonly used by photographers to help with skin retouching, as the effect gives a natural look while blending seamlessly with the subject’s skin.
Let’s explore how the mixer brush works and the settings that can give you the exact type of effect you’re looking for.
What Is The Mixer Brush In Photoshop
The Mixer Brush tool is a type of Photoshop brush. It works by mixing the brush color with the color of the area you’re painting on. This means that you can mix colors, or blend the brush color with the color of the background.
What makes the mixer brush useful is that you can set both the amount of color the brush picks up from the area you’re painting on, and the rate at which the canvas paint “dries”.
The effect created is not only beautiful but realistic, as if you’re painting on a canvas with real paint.
How To Use The Mixer Brush
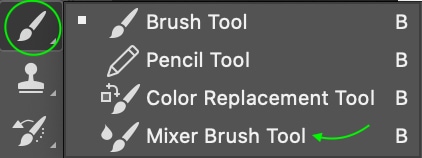
You can find the Mixer Brush at the toolbar on the left, by clicking and holding the brush icon and clicking Mixer Brush Tool from the options that appear.
Set the tip and size for your brush by clicking the brush size icon at the top and selecting from the options in the window.

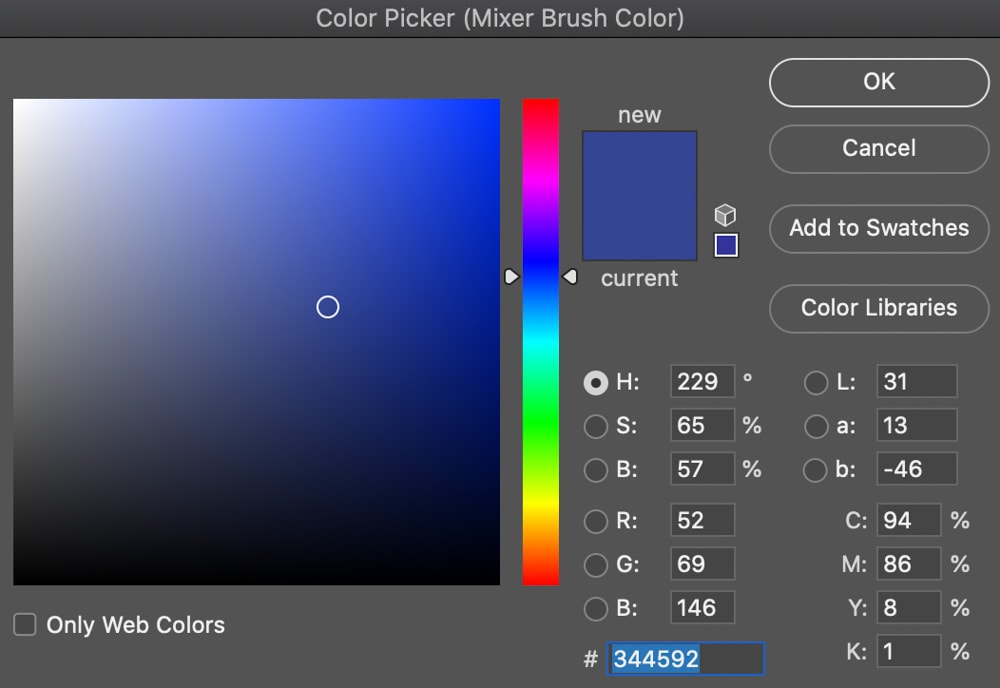
Next, set the color of your brush by clicking the square at the top. Choose your color from the color palette and click OK.

The chosen color will blend with the area you paint on. If you paint on a plain white canvas, it will show up quite light unless you paint over it several times. There are also some places where the brush picked up the white of the canvas and drew it into the patch of blue, behaving as if you’d painted blue paint on top of white paint.

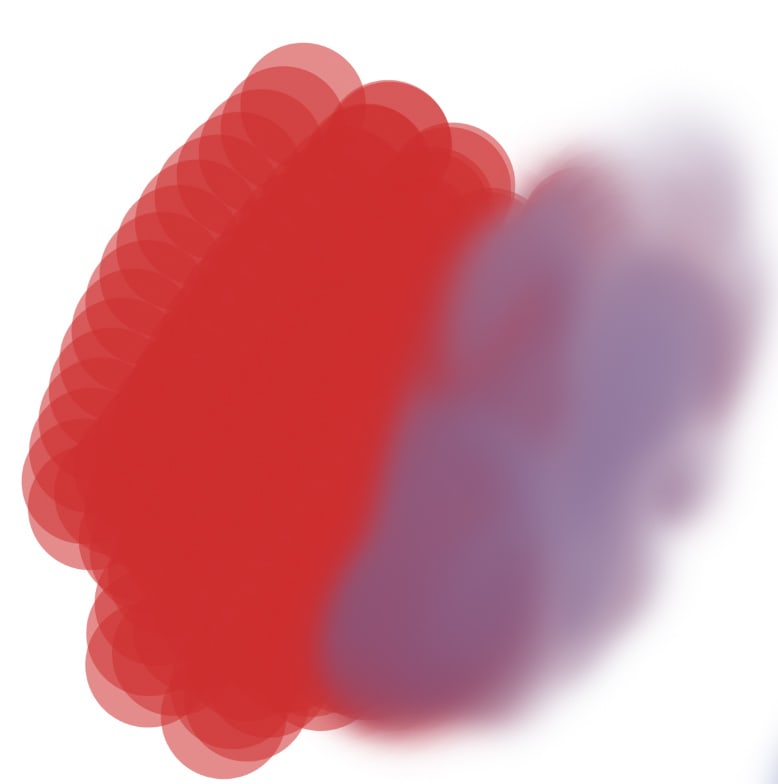
You can use the Mixer Brush on any type of project, be it an image or otherwise. I’ll test it out on a patch of red I’ve painted with the normal Brush Tool. With the Mixer Brush selected, I began to paint over the red. You can see the brush picked up the red color, blended it, and added a hint of blue to make purple from the two colors.
If you’d like a colorless brush to blend out a color you’ve already used on your canvas, you can click the arrow next to the color square and select Clean Brush.
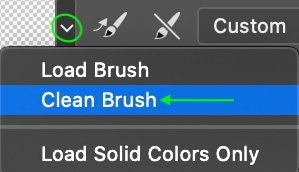
This will clean all the color from your brush, allowing you to blend colors out like I’ve done with an edge of the red color, below.

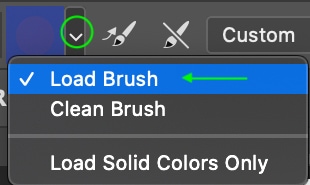
Each time you use the brush again, the square will fill with the color the brush has picked up. You can clean it as many times as you need to, or load the brush again with the color you chose before by clicking the arrow next to the square and selecting Load Brush.
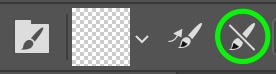
You can also set the brush to automatically load itself with the color in the square after each stroke by clicking the icon to the right of the square.

Clicking the next icon will set the brush to automatically clean itself of color after each stroke.
Understanding Mixer Brush Settings
There are three different settings that will alter the way the Mixer Brush behaves. They are Wet, Load, and Mix. Each setting has a different effect on the paint’s appearance.
– Wet
The Wet setting refers to how much color your brush picks up from the area you’re painting on as if the canvas is still ‘wet’. A higher value means more color will mix, while a lower value means less color will mix.
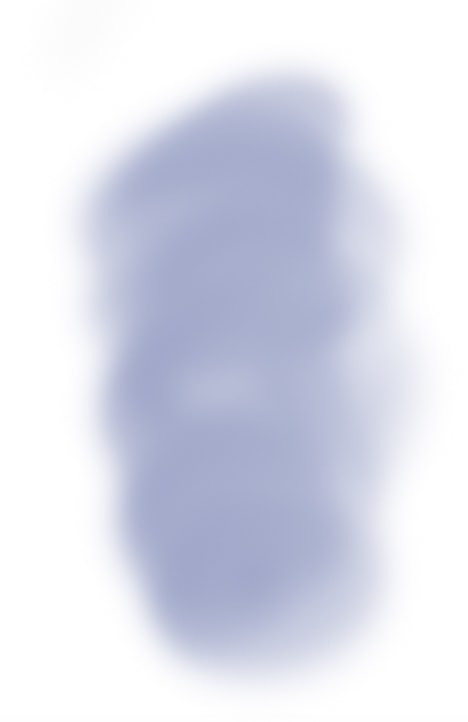
The below image shows a Wet value of 70, with the blue color easily blending with the white background.
The Wet setting should always be above 0, or the tool won’t work properly. Instead, the brush will create a solid-colored line instead of blending with the canvas. In the below image, the blue sits on top of the white background rather than blending into it.

– Load
The Load setting alters how much of the color you’re using is “loaded” onto the brush to mix with the canvas.
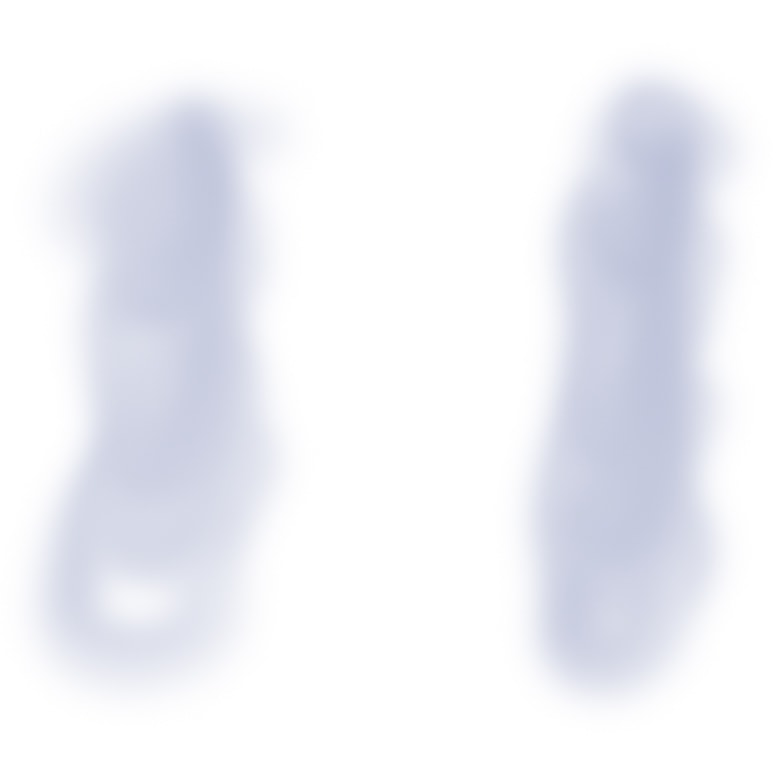
The higher the load value, the more of the color you’ll see as you work. In the blue swatch on the left, the load value is 1; in the swatch on the right, the load value is 100. The difference is subtle, but the swatch on the right has more color coming through.
Mix
This refers to how much of the two colors, that of the brush and the canvas, mix when the brush is applied. The lower this value is, the more of the color on the brush you’ll see when you paint over the canvas, as the colors won’t mix too much.
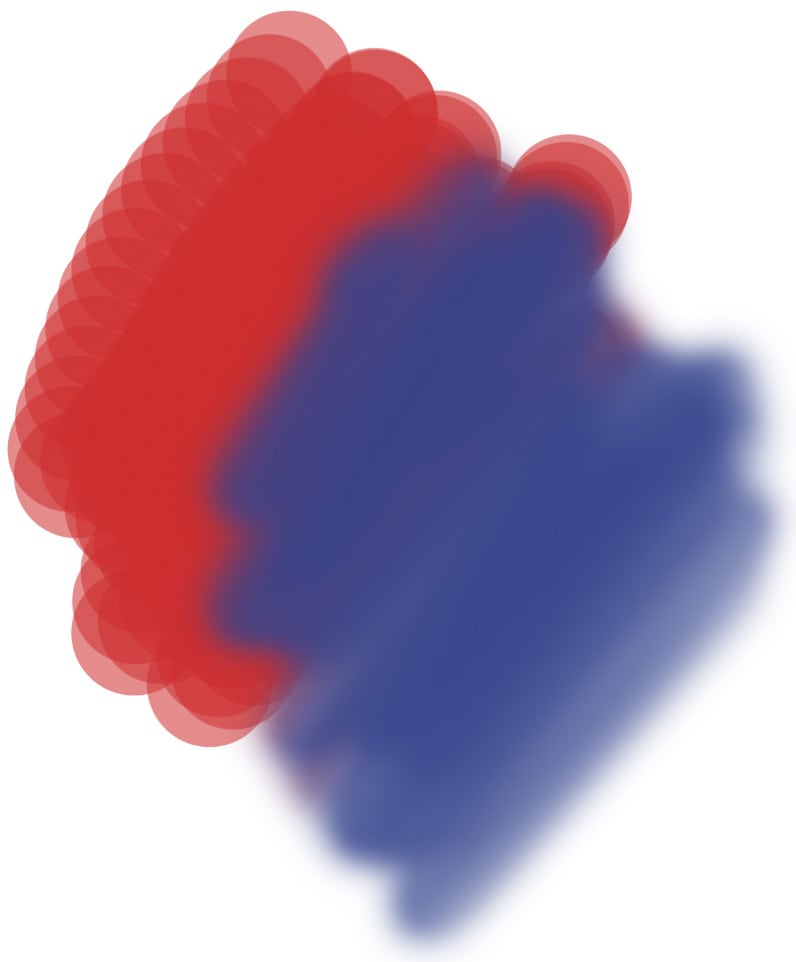
In the image below, the Mix value is 10, so when blue is painted over red, the color is almost entirely blue with a little red mixed in.
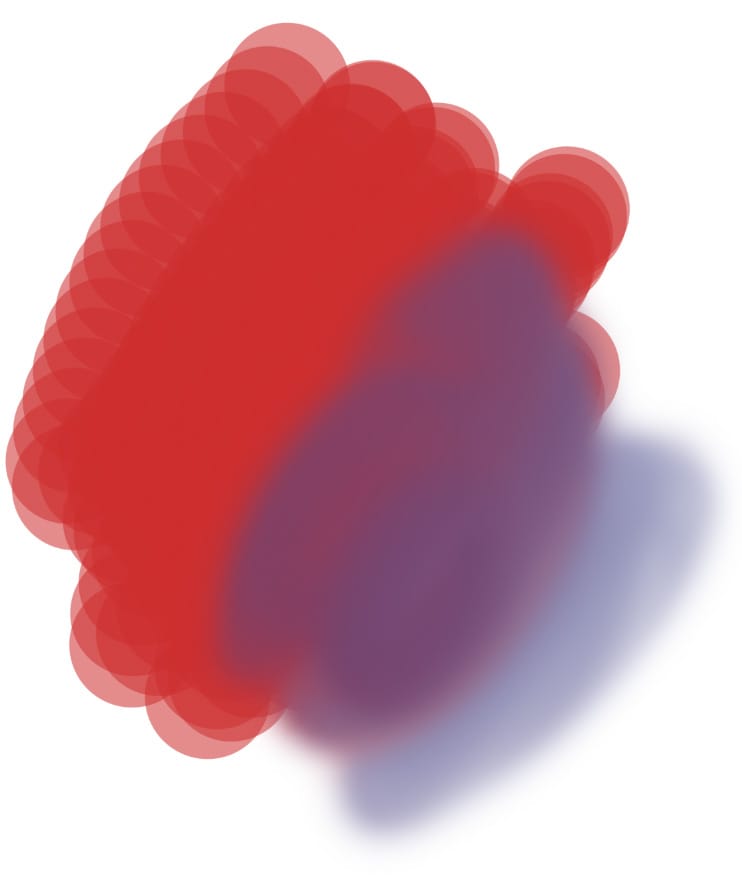
However, in the following image, the Mix value is 80. Note the difference in how the colors blend.
Common Reasons Why The Mixer Brush Isn’t Working
There are times the Mixer Brush may not be working properly – perhaps the color isn’t blending, or the brush is functioning as a normal brush.
First, make sure you’ve set your mix and wet values high enough. You must set the mix and wet values to get a blended effect. The values should not be set to zero.
If you’re still having issues, try working with a different brush tip. Photoshop’s default brushes are compatible with the mixer brush, however, there could be a bug or a stray setting in a third-party brush that prevents it from mixing properly.
The Mixer Brush can help you create beautiful illustrations and retouch photos. While the effects the brush makes are unique, it is not a complicated tool to understand and use, and it can make a difference to your creative work.
Happy Editing!
