


Using the Frame Tool in Photoshop is a simple way to mask images into specific shapes. You can use this tool to create collages or crop your images into any shape. Simply use the rectangular or circular frame shapes by default or convert shape and text layers into frames for a more customized look.
This tutorial will walk you through everything you need to know about the Frame Tool, including how to customize how your images appear within them!
Lesson Summary
- Step 1: Activate The Frame Tool (K)
- Step 2: Select A Frame Shape In The Options Bar
- Step 3: Click And Drag To Add The Frame On The Canvas
- Step 4: Go To File > Place Embedded to add an image
How To Use The Frame Tool In Photoshop
Step 1: Activate The Frame Tool (K) And Select The Frame Shape
To create a simple frame on your canvas, select the Frame Tool from the toolbar or use the keyboard shortcut K.

The default frames offer rectangular or elliptical frame options. Select the shape you would like your frame to be from the Options Bar.

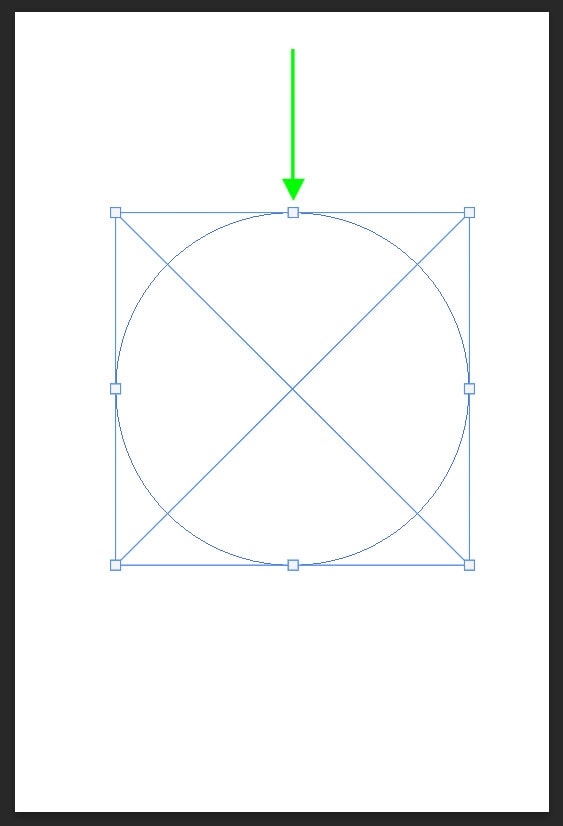
Step 2: Drag On The Canvas To Add The Frame
Once your shape is selected, click and drag on your canvas to create your frame. If you want to create a uniform square or circle frame, hold shift while creating your frame. The frame becomes a container for your image, which is also converted to a smart object.
Note: Frames can only hold images, not text or shapes.
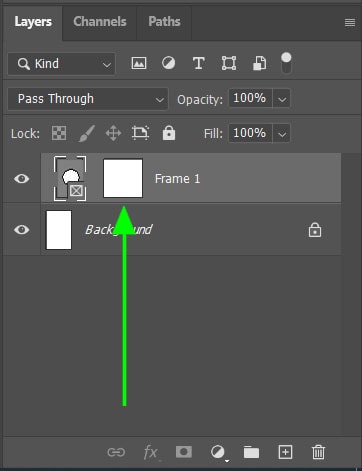
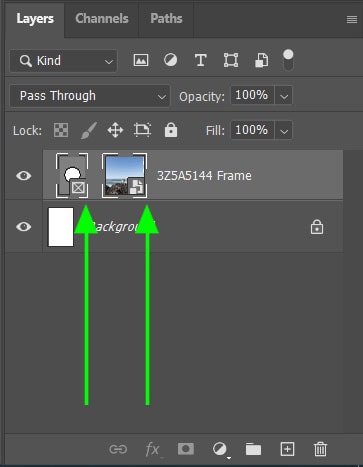
Once a frame is added to your document, it will create a new frame layer in the Layers Panel. The frame layer has two elements: the frame itself and the image that is in the frame. The frame thumbnail is shown by the frame icon in the bottom right corner.
The content thumbnail is represented by the white box, usually where a layer mask is added to normal layers. If there is no image in the frame yet, the content thumbnail will remain white until an image is added.

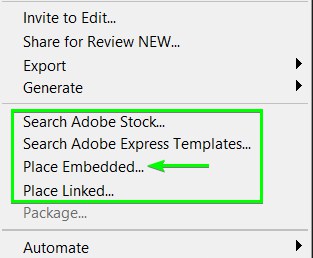
Step 3: Add An Image To The Frame
To add an image to the frame, navigate to File and choose one of three options:
- Search Adobe Stock
- Place Embedded
- Place Linked
These options allow you to select a stock image, embed an image from your computer, or link to an image on your computer. In most cases, embedding the image is probably what you want to do.

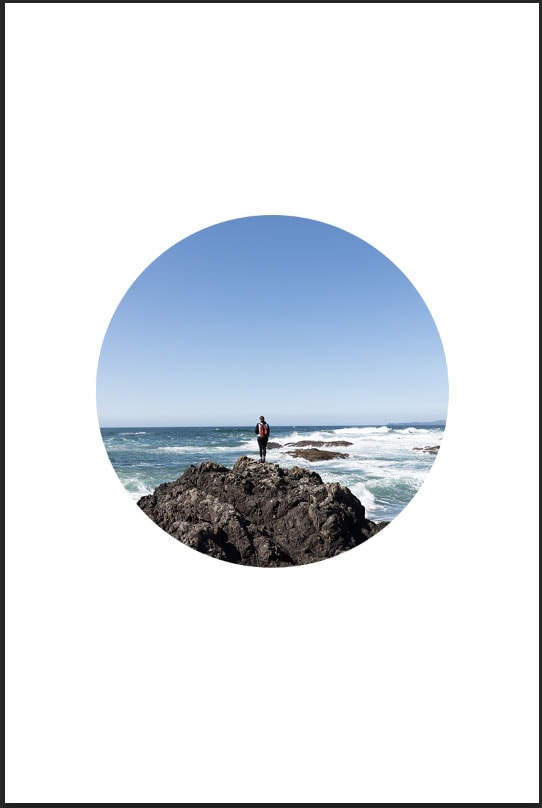
Once you have selected an image from your computer, it will be placed into the frame and re-sized to fit the frame as best as possible. The image will be converted to a smart object to allow for non-destructive editing when you resize or edit the image.
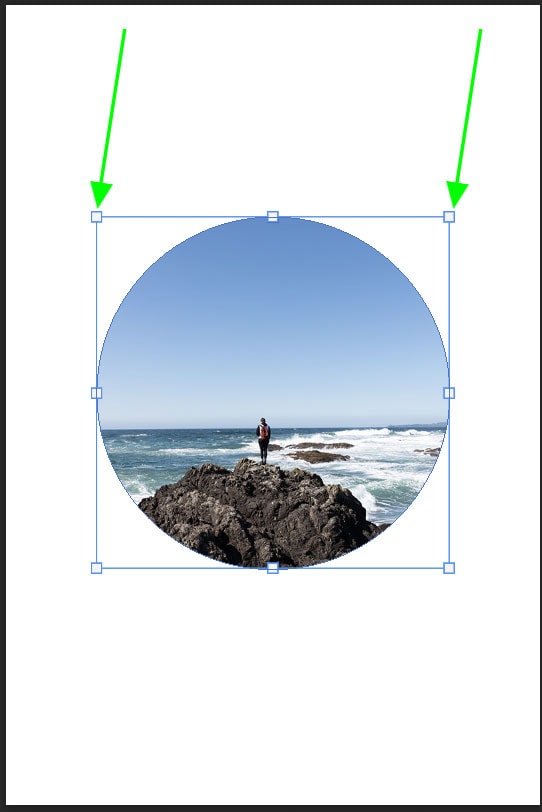
Step 4: Resize The Frame And Image Together (Optional)
To resize your frame, you need to ensure that both elements are selected. Start by selecting your frame layer, then hold Control (Win) or Command (Mac) and click on the image content thumbnail. You can make sure both images are selected by looking for the white frames around the thumbnails.
Then, navigate to Edit > Free Transform or use the shortcut Control + T (Win) or Command + T (Mac). Use the anchor points around the frame to adjust the size of the frame. If you want to keep the original ratio of the frame to prevent distortion, hold Shift while resizing.
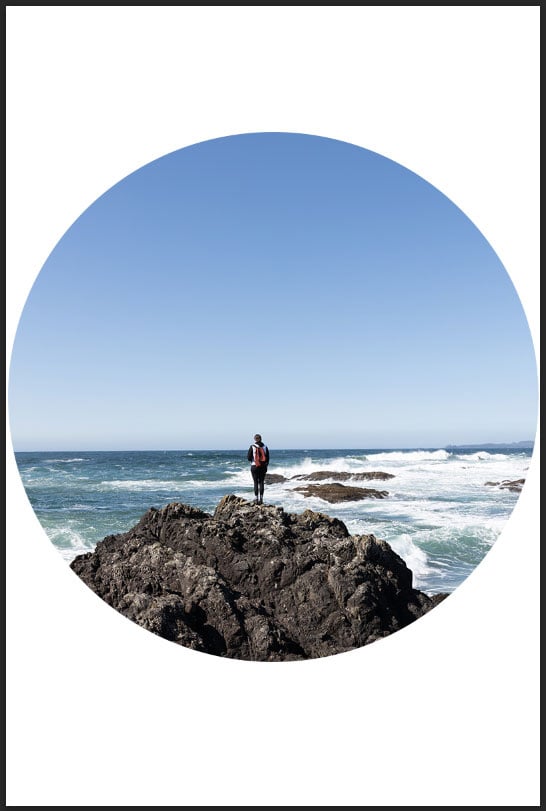
You will now have a re-sized frame, which has scaled the image along with the frame size to keep the content in the same position.
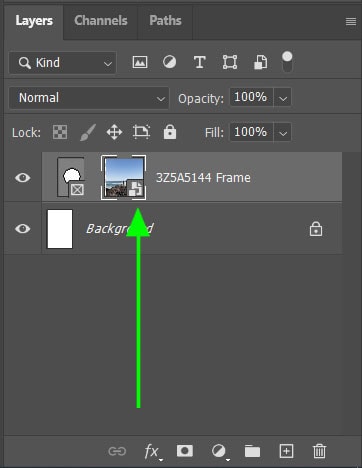
Step 5: Adjust The Image Size Within The Frame (Optional)
To resize your image without affecting the frame, select the image thumbnail on the frame layer. This is indicated by the white frame around the image only.
Then, navigate to Edit > Free Transform or use the shortcut Control + T (Win) or Command + T (Mac). Next, use the anchor points from the image to drag and resize it. To prevent the image from distorting, hold Shift while scaling.
You can also reposition the photo by clicking on the center of the image and moving it around.
Click the checkmark in the Options Bar to confirm your changes, or press the Enter key on your keyboard. Your image will now be resized and adjusted within the frame without affecting the actual frame.


How To Add A Stroke To A Frame In Photoshop
Step 1: Select The Frame Layer In The Layers Panel
To add the outline, select the frame layer by clicking on it within the Layers Panel.

Step 2: Change The Stroke Color In The Properties Panel
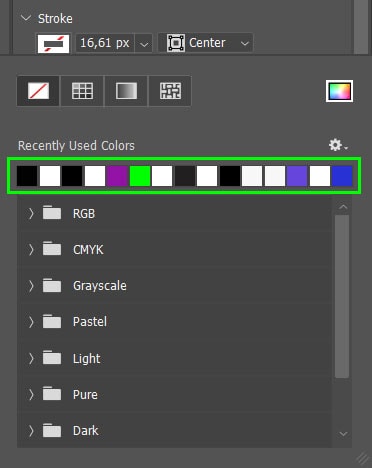
If the Properties Panel is not visible, navigate to Window > Properties to open the panel. Then, click on the colored box below Stroke to choose a color for the outline.
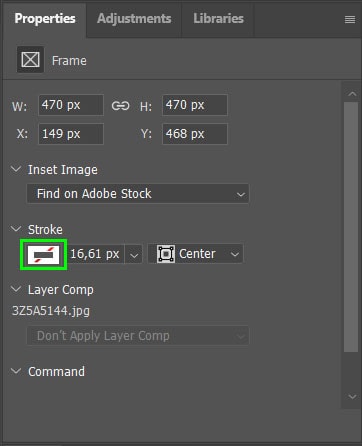
Step 3: Adjust The Stroke Size
Next, use the size slider next to the color setting to choose the size for the outline.

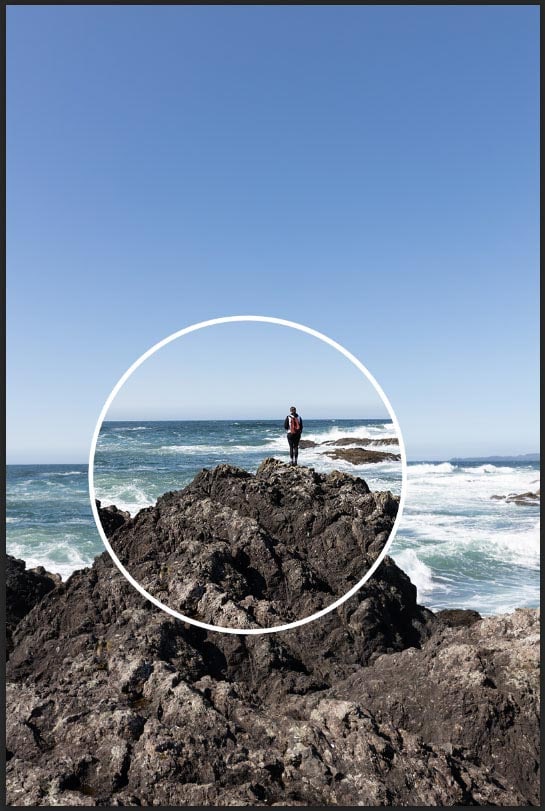
Your frame will now have an outline around it.
Step 4: Remove The Stroke (Optional)
If you want to remove the stroke from a frame, open the Properties Panel and change the stroke color to transparent (the white block with a red line through it).
How To Make A Frame From A Shape In Photoshop
Step 1: Add The Shape Or Text To The Document
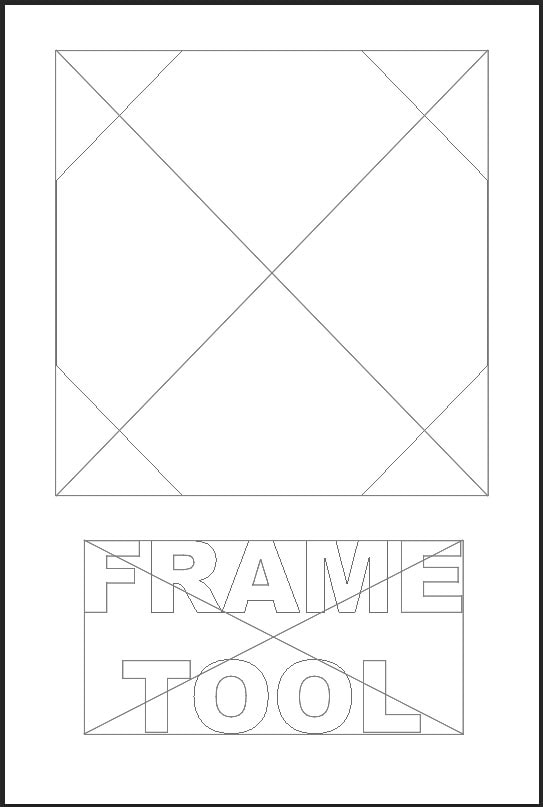
To turn a shape into a frame, start by creating the shape of your choice on a blank document. Select the Shape Tool (U) from the toolbar, and create a shape on your document.
Alternatively, you can add text to your document by selecting the Type Tool (T) in the toolbar. Add the text and format it as needed.


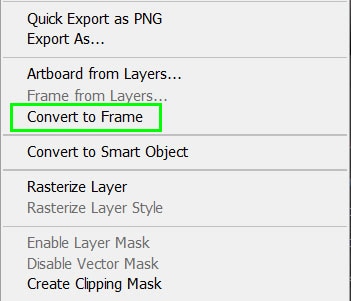
Step 2: Right-Click On The Layer And Select Convert To Frame
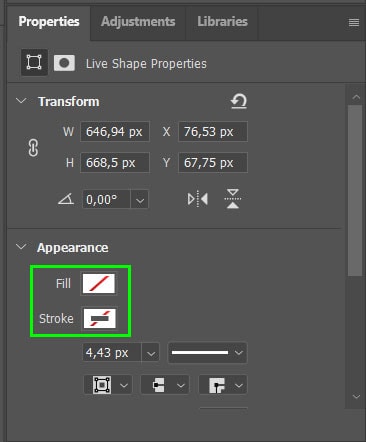
If you are converting a shape, remove the stroke and stroke fill of the shape in the Properties panel. The white block with a red line through it indicates that there is no fill or stroke color.
Then, convert the shape or text to a frame by selecting the desired layer in the Layers Panel. Right-click on the shape or text layer and select Convert to Frame.
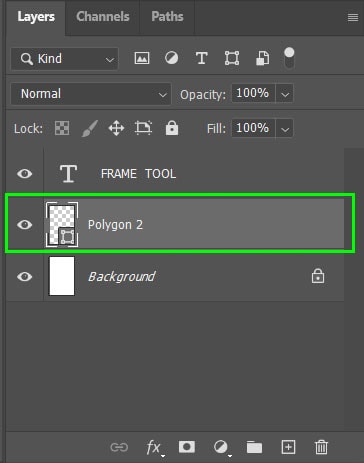
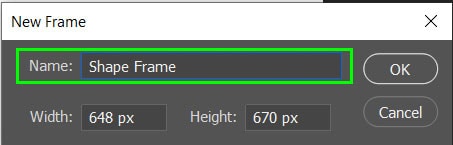
Rename the frame layer before clicking OK. You can then repeat this process for the text layer. Your shape and text will now be converted to a frame.
Step 3: Go To File > Place Embedded To Add An Image
Select each layer individually and import your image by navigating to File > Place Embedded and selecting your image of choice. You will then have an image within your shape and text.

You can also create a border around the shape or text by changing the Stroke options in the Properties Panel after an image has been added. This is the same process as what I mentioned previously for outlining a regular frame such as a rectangle or ellipse.
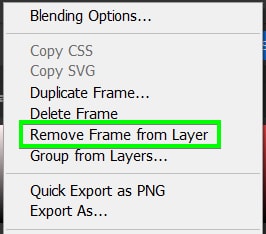
How To Remove A Frame From An Image
If you change your mind and want to remove the frame from an image without affecting the rest of your document, you can delete the frame very easily.
Right-click on the frame layer and select Remove Frame from Layer to delete the frame without deleting the image. To delete both the frame and its contents, select Delete Frame.
Learning how to use the Frame Tool in Photoshop is a helpful skill for creating collages or customized graphics. With other methods of adding images to shapes, your layer panel can get a lot more disorganized. By using frames, both the image and the frame are consolidated on one layer, making everything easy to keep track of.
Now that you know how to create these frames, let’s learn how to make a collage in this next tutorial on creating collage templates in Photoshop!
Happy Editing!
