
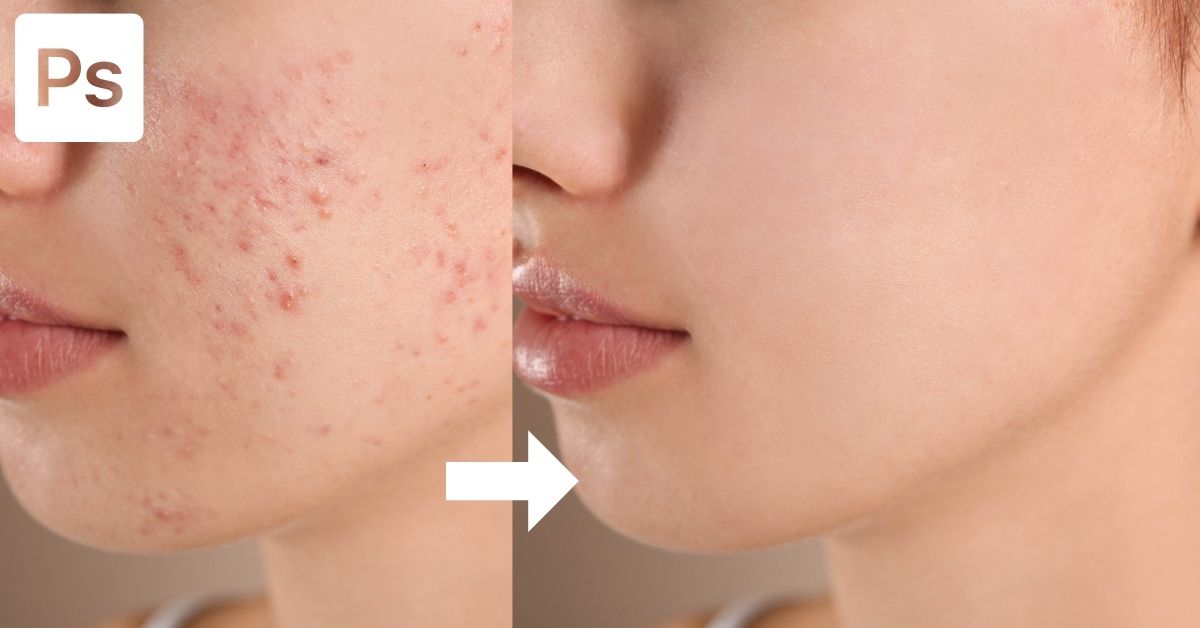

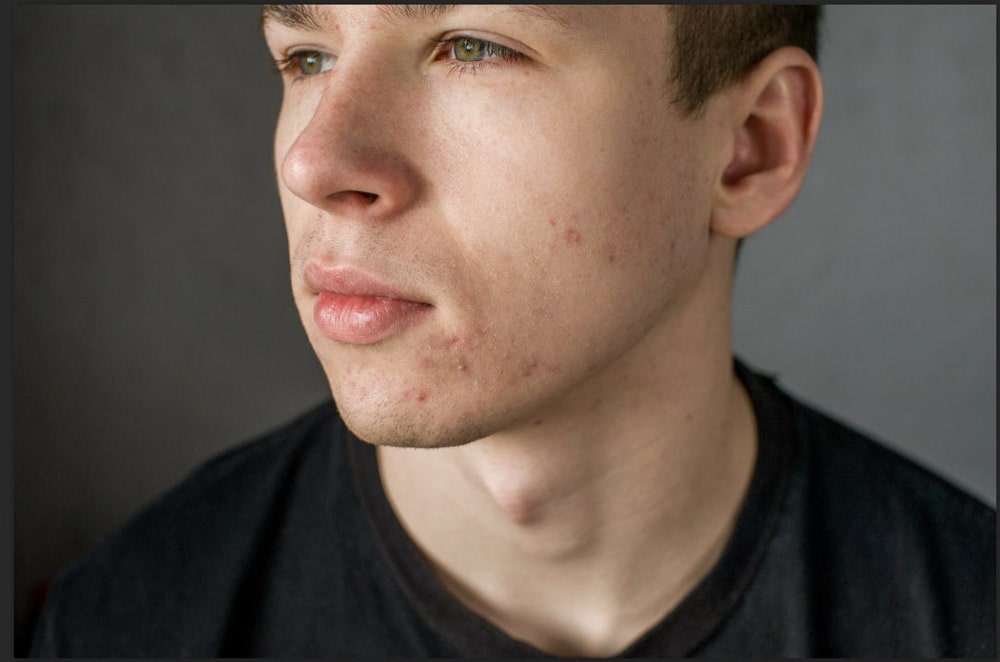
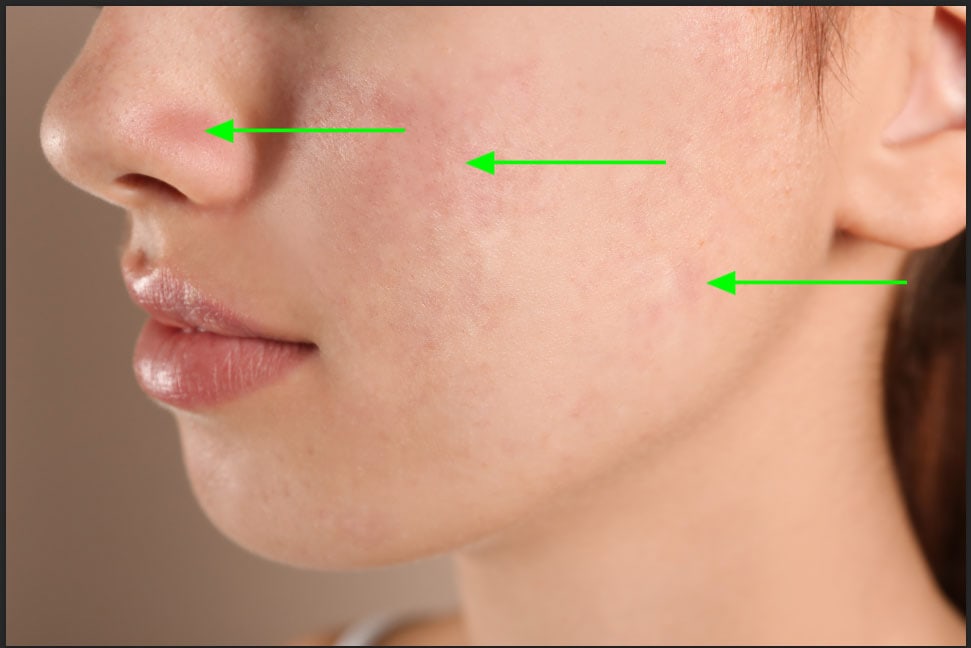
If you’re a photographer who has been requested to edit out blemishes from a client’s portrait, knowing exactly how to remove blemishes in Photoshop is essential.
In some situations, there are a few minor blemishes that need to be touched up, and this can be done in a matter of seconds. However, some images require more attention than others. Luckily, either way, it’s easy to remove blemishes in Photoshop with a few basic adjustments.
Video Tutorial
Method 1: Using The Spot Healing Brush Tool To Remove Blemishes In Photoshop
Step 1: Select The Spot Healing Brush Tool (J) From The Toolbar
The Spot Healing Brush Tool is found on the toolbar as the default healing tool in Photoshop. You can also access this tool by pressing J.

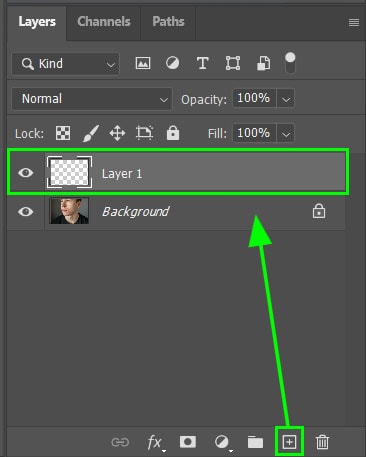
Step 2: Add A New Blank Layer Using The New Layer Icon In The Layers Panel
Create a new layer by clicking the New Layer icon at the bottom of the Layers Panel. This will allow you to edit the image non-destructively.
Step 3: Adjust The Spot Healing Brush Tool Settings
Select a Soft Round Brush, then, in the Options Bar, make sure to select the Content-Aware option next to Type and check the box next to Sample All Layers. This will ensure that any edits you have made to the image will be taken into account and allow you to paint on a separate layer from the image.

Once the settings are correct, adjust the brush size by pressing [ to decrease the brush size and ] to increase the brush size.
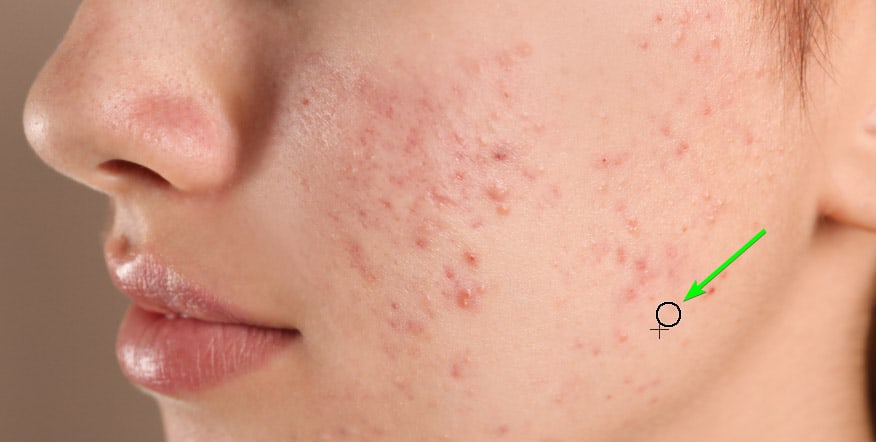
Now, either click on the acne in the image to retouch the area or click and drag over larger areas to retouch a few spots at once. The tool will automatically replace the areas with well-blended pixels from the surrounding image.
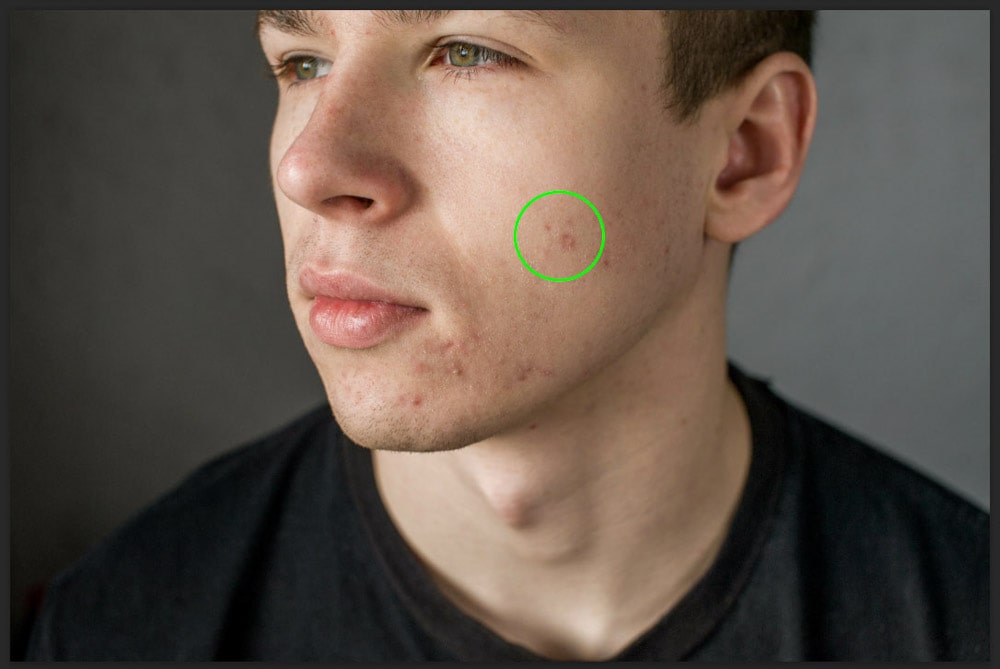
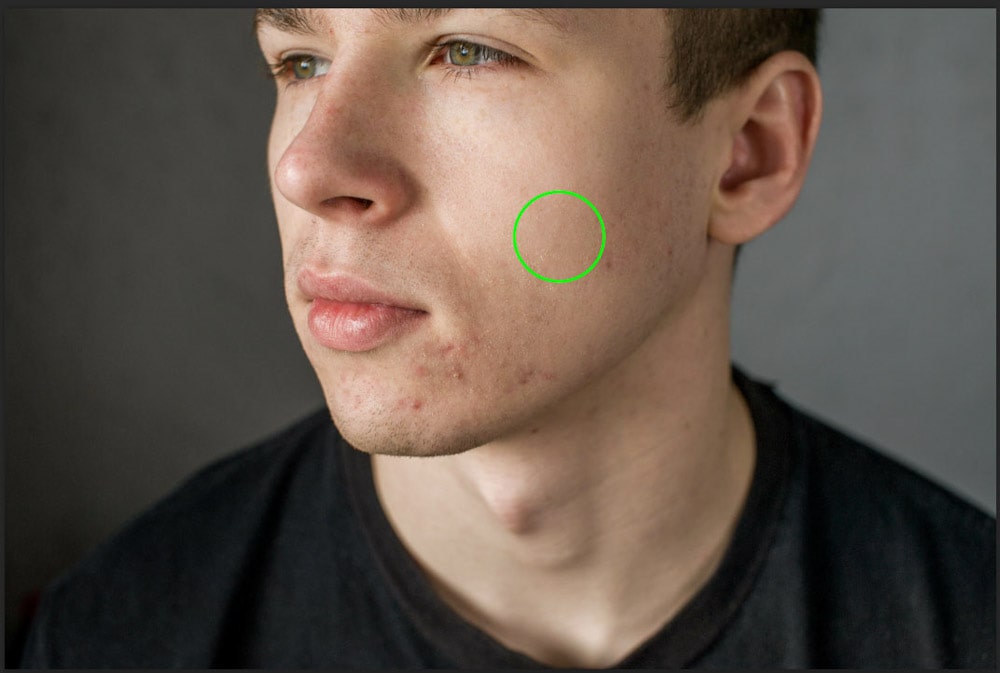
Keep clicking on or brushing over the area you want to cover and retouch until you have removed the blemishes from the image.
Ultimately, the spot healing brush should be used for clearing up minor blemishes or acne in areas that have clear sample areas next to the spot you are retouching.
Method 2: Using The Healing Brush Tool To Remove Blemishes In Photoshop
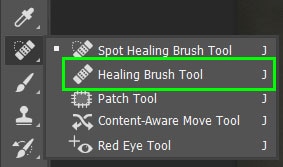
Step 1: Select The Healing Brush Tool (J) From The Toolbar
Once your image is open, create a new layer by clicking on the New Layer icon at the bottom of the Layers Panel. Then, access the Healing Brush Tool from the Toolbar.
Step 2: Adjust The Settings In The Options Bar
Once the Healing Brush Tool is selected, make sure the Mode is set to Normal, the Source is set to Sampled, and the Sample is set to All Layers. These settings can be changed in the Options Bar.

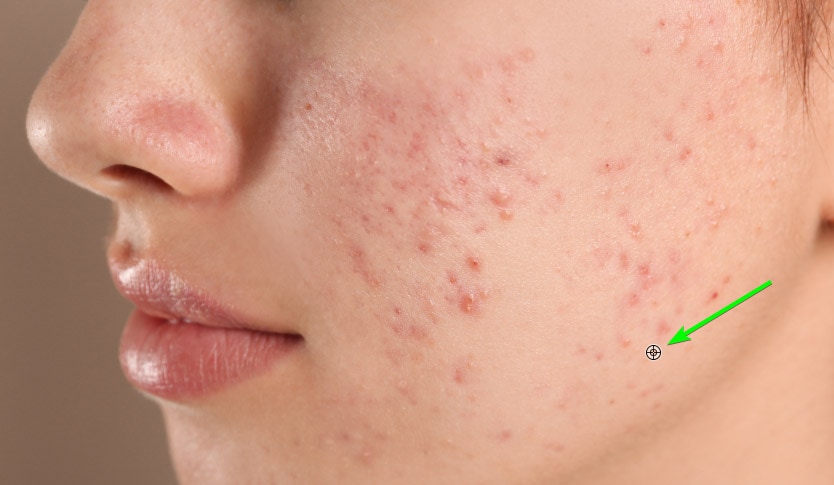
Step 3: Hold Alt/Option And Click On An Area To Sample The Pixels
To select a source point, hold Alt (Win) or Option (Mac) while clicking on an area of the image. When selecting a source point, it is best to sample an area as close to the blemish as possible. This will keep the area similar in tone, luminosity, and shading.
Step 4: Paint Over Blemishes To Replace The Pixels
Once you have selected the source point, release the Alt/Option button, and the cursor will look like a regular brush again. You can increase (]) or decrease ([) the brush size to retouch larger areas. Paint over blemishes close to the sample point.
Clear up small areas at a time to ensure the sample point remains close to the blemishes you are retouching.
If you are retouching multiple areas of an image, you can continue sampling new locations before painting over the new area you want to retouch. It is good to constantly reset your sample location to get the best results when removing blemishes. Repeat these steps until you have removed all the acne.

Method 3: Remove Blemishes in Photoshop Using Frequency Separation
Step 1: Duplicate The Layers Using Control/Command + J
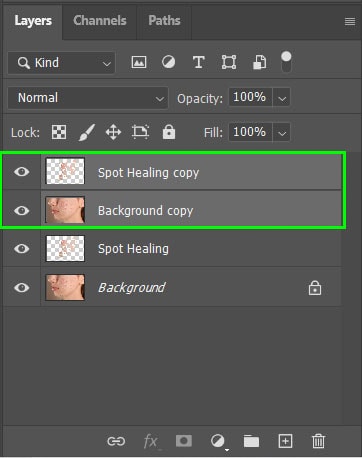
Once you have removed the main blemishes, using one of the two methods above, you can remove the blotchy red areas and smooth the skin using this technique. To do this, select both layers in the Layers Panel and press Control + J (Win) or Command + J (Mac) to duplicate the layers.
Step 2: Merge The Layers Using Control/Command + E And Duplicate Again
With the two duplicated layers selected, press Control + E (Win) or Command + E (Mac) to merge the layers. Then, with the merged layer selected, press Control + J (Win) or Command + J (Mac) to duplicate the merged layer.
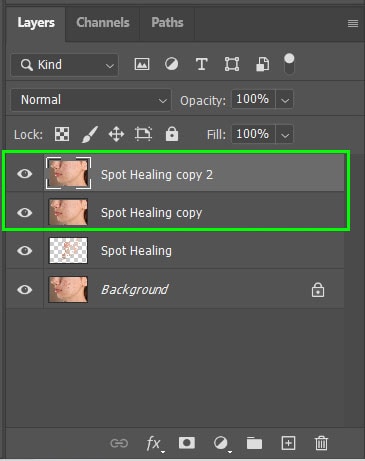
Rename the two new layers with the bottom of the two layers called “Blur” and the top layer renamed to “Texture”. Then, hide the top layer by clicking on the eye icon next to the layer’s thumbnail so the box is empty. Now click on the Blur Layer to select it.
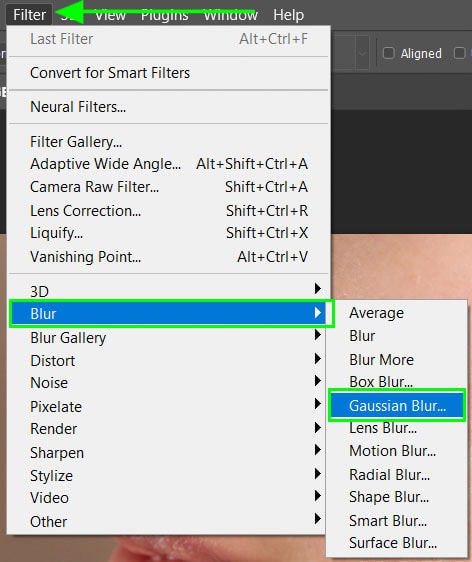
Step 3: Go To Filter > Blur > Gaussian Blur
Add a blur to the Blur layer by navigating to Filter > Blur > Gaussian Blur.
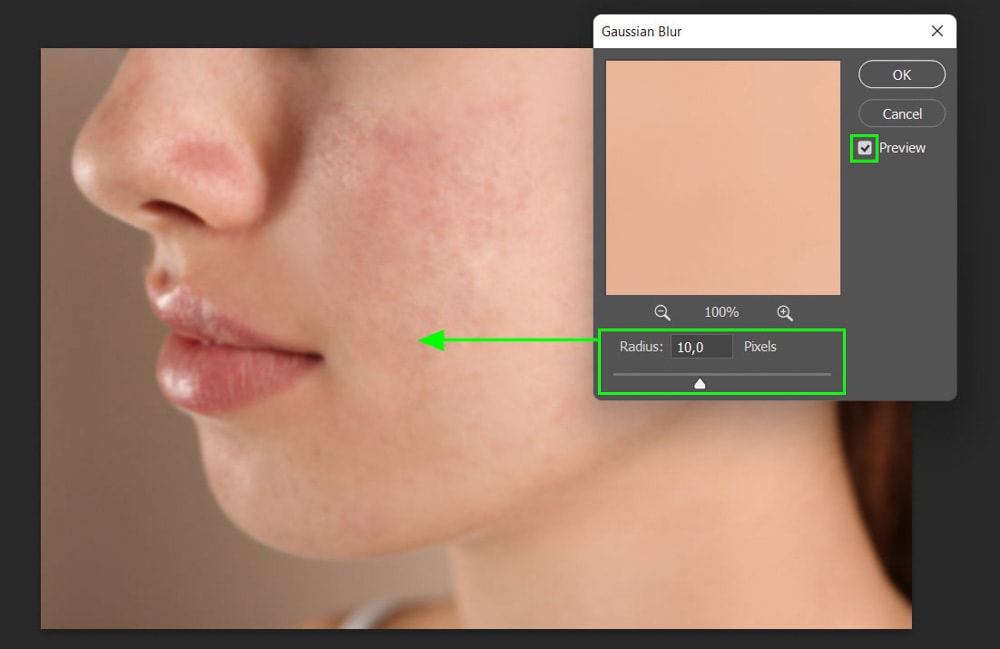
When the Gaussian Blur window opens, click on the box next to preview and add enough blur to soften the skin by adjusting the slider at the bottom of the window. Be careful not to overdo the blur, as this will make the image look unrealistic. Click OK when you have added the right amount of blur for your image.
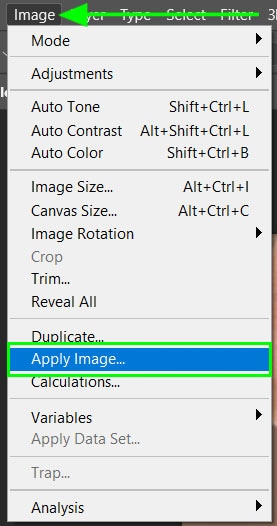
Step 4: Select The Texture Layer And Go To Image > Apply Image
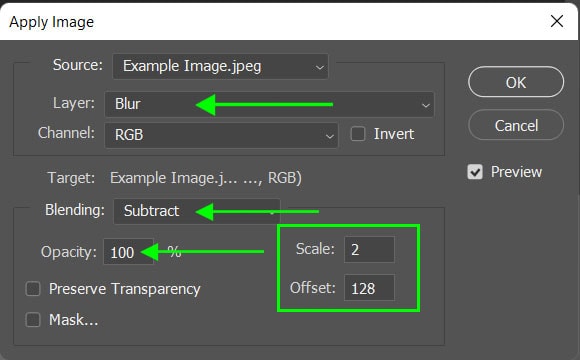
Next, turn on the Texture layer visibility by selecting the box next to the layer thumbnail. Then click on the Texture layer to select it. Once the Texture layer is selected, navigate to Image > Apply Image. Once the Apply Image window opens, change the following settings before pressing OK:
- Change the Layer to the Blur layer
- Set Blending to Subtract
- Set the Scale to 2
- Then, set the Offset to 128
- Lastly, make sure the Opacity is set to 100%
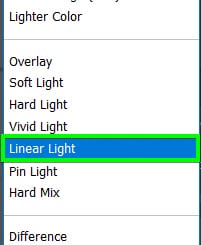
Step 5: Change The Layer’s Blend Mode To Linear Light
Once these settings have been applied, the image should be completely gray, with only a light outline of the face visible. Change the blending mode of the Texture layer by selecting the Mode dropdown menu in the Layers panel and choosing Linear Light.

Step 6: Add Blur To Red Areas Using The Lasso Tool (L)
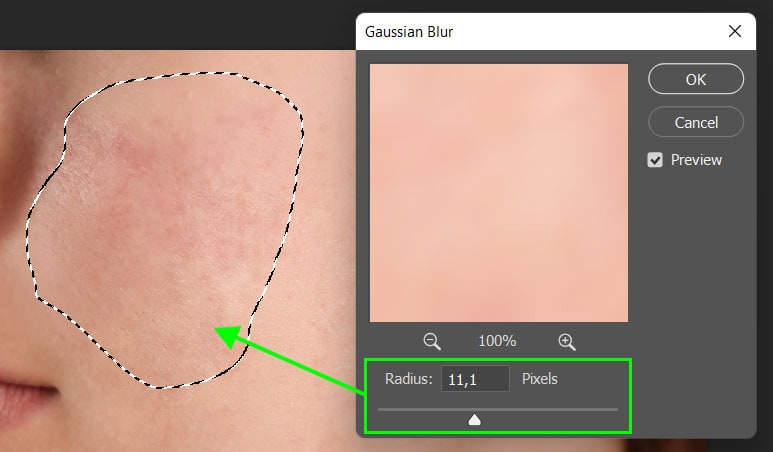
Next, click on the Blur layer again and select the Lasso Tool from the toolbar or press L. Adjust the Feather amount of the Lasso Tool to anywhere between 10 and 20 pixels in the Options Bar.

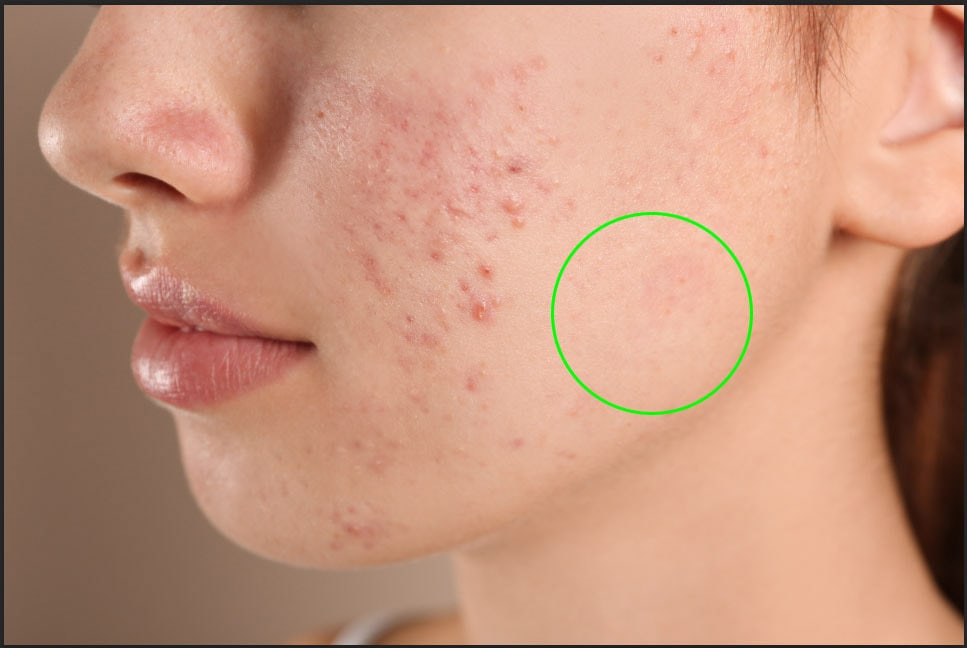
Make a rough selection around a red area of the skin using the Lasso Tool by clicking and dragging around the area you wish to select. Then, navigate to Filter > Blur > Gaussian Blur and use the slider to smooth the skin. Be careful not to add too much blur that makes the area look unrealistic. Select OK when you have the right amount of blur added.
Press Control + D (Win) or Command + D (Mac) to deselect the area. Then, use the Lasso Tool to select the next area and repeat the step above to add the Gaussian Blur. Repeat this process with all the red areas on the skin. This will smooth the redness and reduce any oiliness on the subject’s face.
Step 7: Smooth Redness Using The Brush Tool (Optional)
For the last stage, create a new layer on top of the rest by selecting the New Layer icon at the bottom of the Layers Panel. Select the Brush Tool from the Toolbar, and set the Blend Mode to Lighten and the Opacity to anywhere between 10% and 40% on the Options Bar.

Next, select a skin color from the image to use as a sample point by holding in Alt (Win) or Option (Mac) while clicking on the area of the face. This should be a spot that is not red, as this color will be used to brush over the red areas. Release Alt/Option, and then brush over the red areas.
Make sure to brush over the areas nearest to your sample point. Then, re-sample a new area to brush over the red areas near the new sample point. Keep repeating this as many times as you need to brush over all the red areas on the skin.
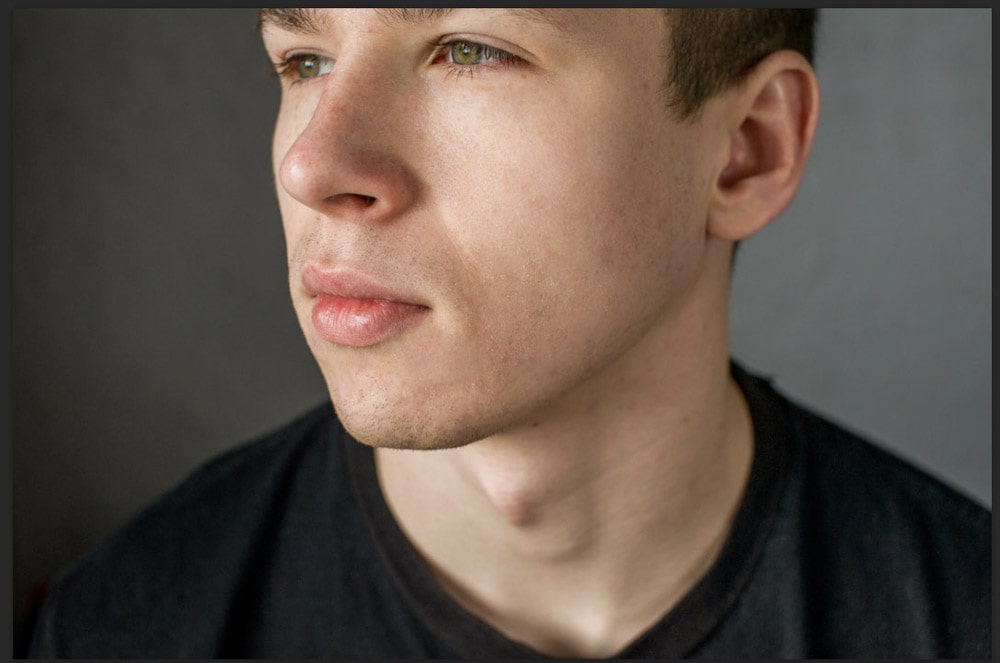
Although you can use simple tools like the Spot Healing Brush tool, a full skin retouch often requires a bit more work, such as frequency separation and brush blending. It may seem like a lot to remember at first, but with time, it can all be done in just a couple of minutes, and the results you get are always worthwhile!
Happy Editing!
