
Creating vertical text in Photoshop is surprisingly easy with the help of the Vertical Type Tool. However, if you have horizontal text that you’d like to convert to vertical text, there’s still an easy solution.
To create vertical text in Photoshop, you can use the Vertical Type Tool. This tool can be found by clicking and holding on the Type Tool and choosing the Vertical Type Tool. Alternatively, you can convert horizontal text to vertical by pressing the Toggle Text Orientation Button in the Options Bar.
Let’s talk about these processes more in-depth with a few demonstrations.
How To Use The Vertical Type Tool In Photoshop
Typically when using the Type Tool, you’d write horizontally. Of course, that’s how we read, so it makes sense that’s how you’d write. But sometimes, you might want to write vertically. It’s easy to do using Photoshop’s Vertical Type Tool.
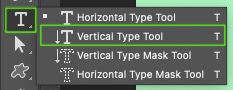
With your document ready to be written on, click and hold the Type Tool icon in the toolbar to reveal other Type options.

Choose the Vertical Type Tool (T).
In the Options Bar, the text alignment tools are now vertical to reflect the Vertical Type Tool being selected.

The Type Tool’s cursor will change to suit its new vertical direction instead of the typically horizontal direction of writing.

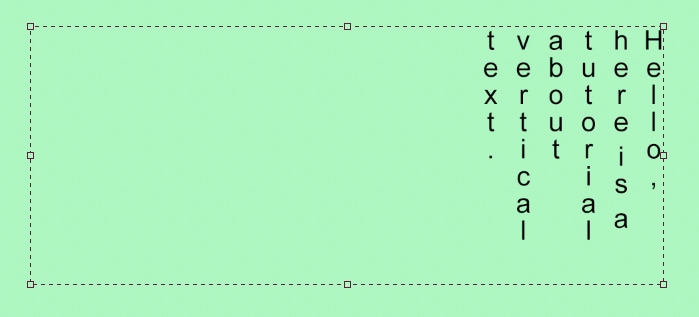
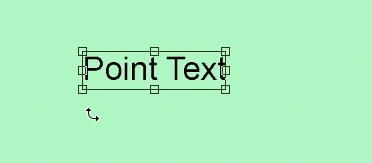
You can write using Point Text by clicking once on your canvas. This inserts placeholder text vertically.

Writing vertically may create hard-to-read text. One word is easy to read; however, typing multiple words using only the Spacebar between them hinders readability.
I’ve written “Hello” and “Vertical Text” as examples. The spacing between two words is hard to make out, which makes it hard to read.

If you type with the Vertical Type Tool and press Enter between words — how you would make a line break for horizontal text — the new line of text moves left of the first line. Since, in English, we read left to right, this also hinders readability.
See my example where I’ve written “Hello Vertical Text” with a line break between each word.

Using Paragraph Text creates a similar result. Click and drag the Vertical Type Tool across your canvas to create Paragraph Text. The text box will first fill with placeholder text.
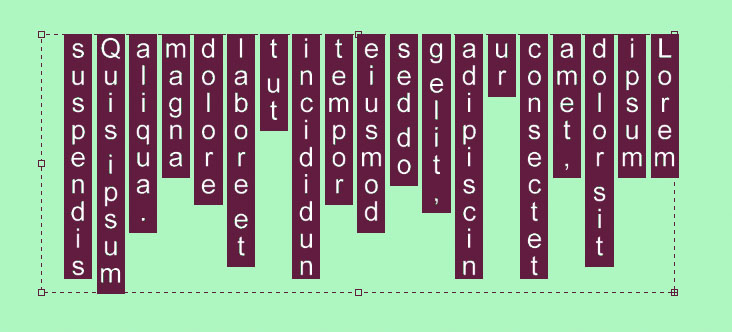
Type your text in the text box, and you’ll notice, again, that the typing starts on the right of the box, and each new word moves left. Punctuation marks are placed in the space below the letter, rather than tight to the letter like with horizontal text.
My example reads, “Hello, here is a tutorial about vertical text.”
The Vertical Type Tool is a great tool for writing a few words in a creative way that works well in certain situations.
How To Convert Horizontal Text To Vertical In Photoshop
When you need to convert your text from horizontal to vertical or vice versa, Photoshop offers a very quick way to do that.
First, select or highlight the text you wish to convert.

Then, with either the Vertical or Horizontal Type Tool selected, go to the Options Bar at the top of the workspace.

Next to the font selection dropdown, click Toggle text orientation.

Your text will immediately convert to either horizontal or vertical, depending on its original format. You can toggle this button infinite times to revert your text back and forth.

How To Rotate Text Vertically In Photoshop
To avoid the readability issues when using the Vertical Type Tool, you can rotate the horizontal text.
This keeps the formatting the same, ensuring better readability, but rotates all the text, so the letters are now on their sides, with the rows of text being vertical rather than horizontal. It may mean your readers have to turn their heads slightly to read the text, but the readability is better.
To rotate text, you must first write some horizontal text. Select the Type Tool and set it to Horizontal Type Tool.

Type your text using either Point Text (click and type) or Paragraph Text (click and drag to make a text box to type into).


To rotate the Paragraph Text, it is easiest first to resize the text box, so it fits tighter to your text. Hover over the farthest corner anchor from the text until the cursor changes to opposite-facing arrows.

Click and drag the text box until it is smaller.

You can rotate Paragraph Text while the Type Tool is selected or also by selecting the Move Tool (V) to select the text.

Using either tool, select the text to reveal the text box. Then hover the cursor just outside any corner anchor point.
When the cursor changes to two arrows connected by a rounded line, click and drag the text box sideways.

As you drag to rotate the text, a small box will appear with the angle’s degree.

Holding Shift while dragging to rotate will rotate in segments of 15 degrees.
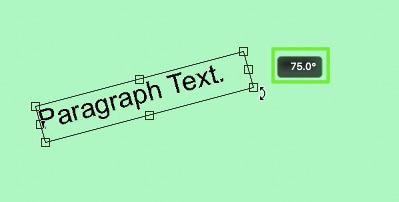
This helps to ensure the text snaps to a right-angle if you’re rotating to create vertical text.

To rotate text written as Point Text, you can only rotate using the Move Tool (V) rather than by also selecting the Type Tool. Apart from that, the process is the same as with Paragraph Text.

It is easy to rotate any type of text you’ve written using this method.

Now with this method, you can rotate your entire text layer as one, but if you want to get more creative with it you can try rotating a single letter at a time. I share how to do that in my guide to flipping, scaling, and rotating text in Photoshop.
Happy Typing!


