


Resizing text in Photoshop seems like a simple task, and there are many different ways to do it. The easiest method to resize text isn’t always the most appropriate for your project. That’s why learning the following methods will help prevent any frustrations over resizing your Photoshop text.
Ultimately, the best way is whatever works for you. For that reason, I’m sharing three different techniques to resize your text in Photoshop so you can figure out which technique works best for your designs.
How To Quickly Resize Text In Photoshop
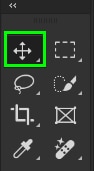
Step 1: Select The Move Tool (V)
Once you have some text on the canvas, select the Move Tool (V).
Step 2: Enable The Transform Controls In The Options Bar
In the Options Bar, ensure the Auto-select box is checked and set to Layer in the dropdown menu. Also, check the Show Transform Controls box. Alternatively, to enable the Transform controls, you can also go to Edit > Free Transform with the text layer selected.

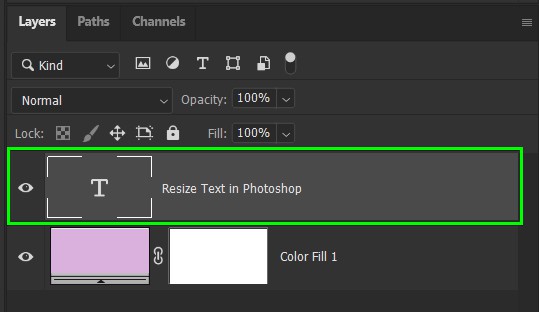
Step 3: Select The Text Layer
Then, select the text in the Layers Panel to show the transform box around the text.
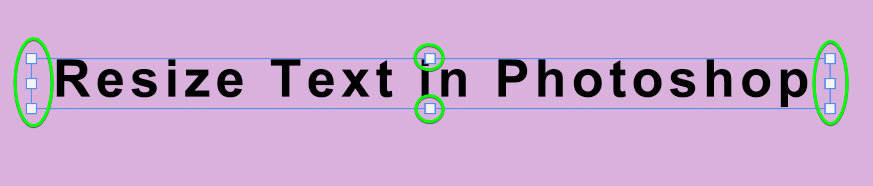
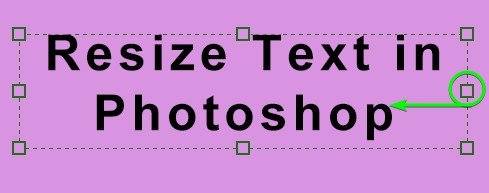
Step 4: Resize The Text By Adjusting A Control Point
To resize the text, hover your cursor near an anchor point on the transform box. Click and drag one of the anchor points inwards to shrink the text or outwards to expand.
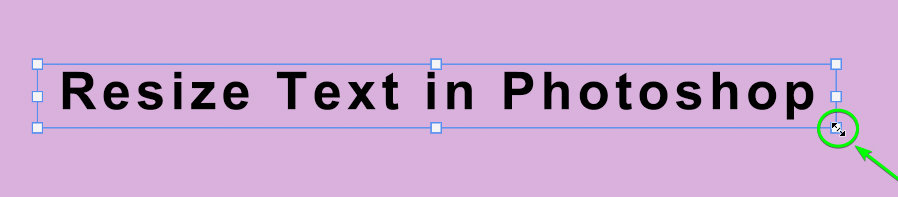
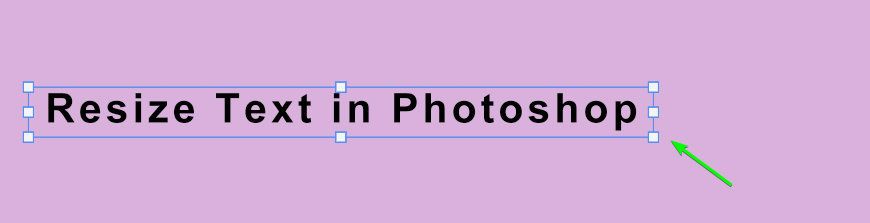
Dragging the anchor point scales the text equally and won’t stretch or warp it. If it does warp your text, hold the Shift key while scaling to lock the aspect ratio.
Additional Ways Of Resizing Text In Photoshop
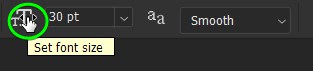
Option 1: Highlight And Rescale In The Options Bar
To start, highlight the text you wish to resize and ensure the Type Tool (T) is active. Then, in the Options Bar, go to the font size option. You can adjust the size here in a couple of different ways.
Firstly, you can type the exact size into the box if you know it.

Secondly, you can hover your cursor over the text size option until two opposite-facing arrows appear. Then click and drag left or right, like an invisible slider, to change the font size.
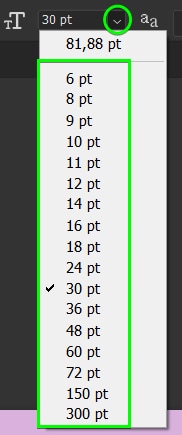
Lastly, you can click the arrow next to the size box. This opens a menu of common text sizes. Select any of these to set your text to that size.
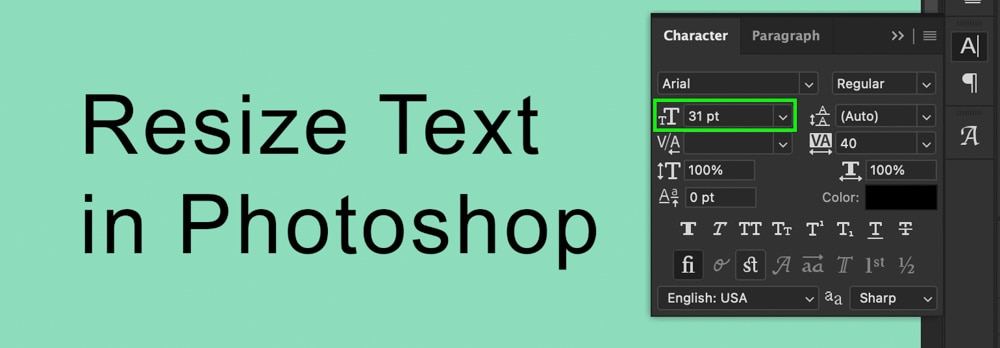
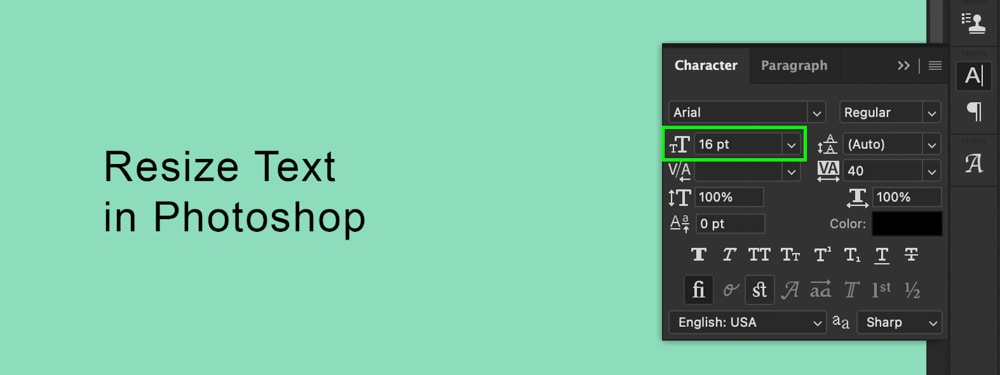
Option 2: The Character Panel
You can also use the Character panel to resize your text. Open the Character panel by going to Window > Character. With your text layer selected in the Layers Panel, find the font size option within the Character Panel. Change and set the font size, and watch as your text changes size as you enter a new point value.
How To Resize A Text Box In Photoshop
If you want to resize a text box with paragraph text, this is a little different than simply resizing the text. Resizing a text box will only change the size or shape of the box as you drag it, but the size of the text will remain the same inside, which may hide parts of the text.
To resize the text box, ensure you have the text selected, meaning that your cursor is inside the text box, and you can edit the actual text. Then, click and drag an anchor point inward or outward to adjust the text box size.
In some cases, when reducing the box size, some words will begin to disappear because there is not enough room for the large text to fit within the parameters. The bottom right-hand corner anchor point will show a plus icon, which tells you there are hidden words.
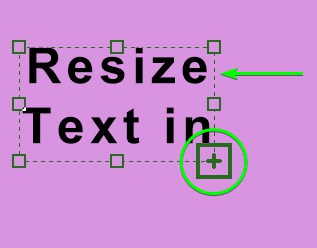
To avoid losing words, you can highlight everything (or individual words) and then change the font size as needed.
Now that you know the different ways to change text size, you’ve just reached the tip of the iceberg with what’s possible with this tool. To learn more about working with text in Photoshop, check out my ultimate guide to working with Photoshop text here.
