
Editing directly on your image layer in Photoshop makes it difficult to undo errors, so new layers should be created for edits. However, mistakes happen and even I have edited directly on my image layer and only realized a few steps later. When this happens, knowing how to use the history brush tool will help.
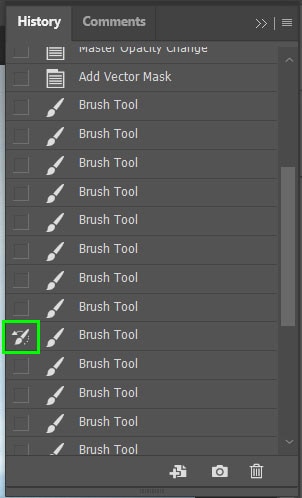
To use the History Brush in Photoshop open the history panel by going to Window > History. Next click on the left side of the history state you want to target to reveal a history brush icon. Now press Y to access the History Brush and paint on your canvas to selectively remove the history state.
Until you have mastered the art of non-destructive editing, by adding layers for each edit, you will need the history brush in some instances. Even when you edit non-destructively, you may make a mistake or want to use the history brush for creative reasons.
Here is everything you need to know about the history brush tool.
What Is The History Brush In Photoshop?
The history brush is a brush tool that allows you to restore parts of your image to a previous history state. By brushing over parts of your image, the history brush will undo actions taken on those areas without affecting other edits.
While the undo action will revert your project to its original state in chronological steps, the history brush lets you selectively undo certain actions. This is helpful when you don’t want to lose other edits.
By brushing over parts of your image with the history brush, you will reveal the pixels of the chosen history state beneath the edit. This is similar to how layer masks work on a layer.
How To Use The History Brush
Once you have been editing a project for a long time, you will have taken various actions on your image. If you realize that you need to undo an action you did previously, here is how to use the history brush to undo an action.
To use the history brush tool, select it from the toolbar or press Y.
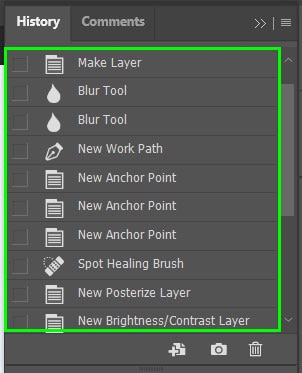
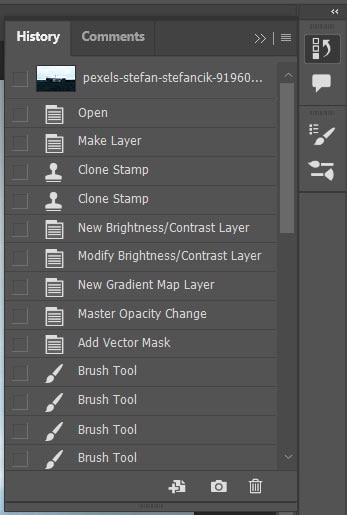
Open the history panel on the right-hand side of your workspace and select a history state to use as a source. By default, the history panel shows you up to the last 50 history states (actions) you have created since you opened the project.
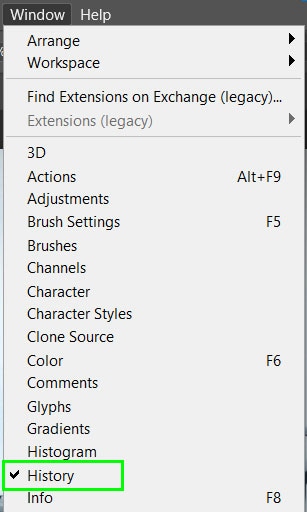
If the history panel is not visible, navigate to Window > History to open the panel.
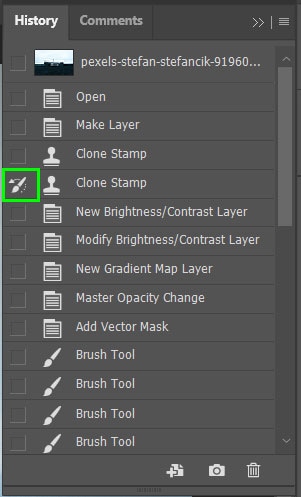
Choose the history state you would like to revert to by clicking the empty box icon to the left of the history state. The history brush icon will appear next to the history state.
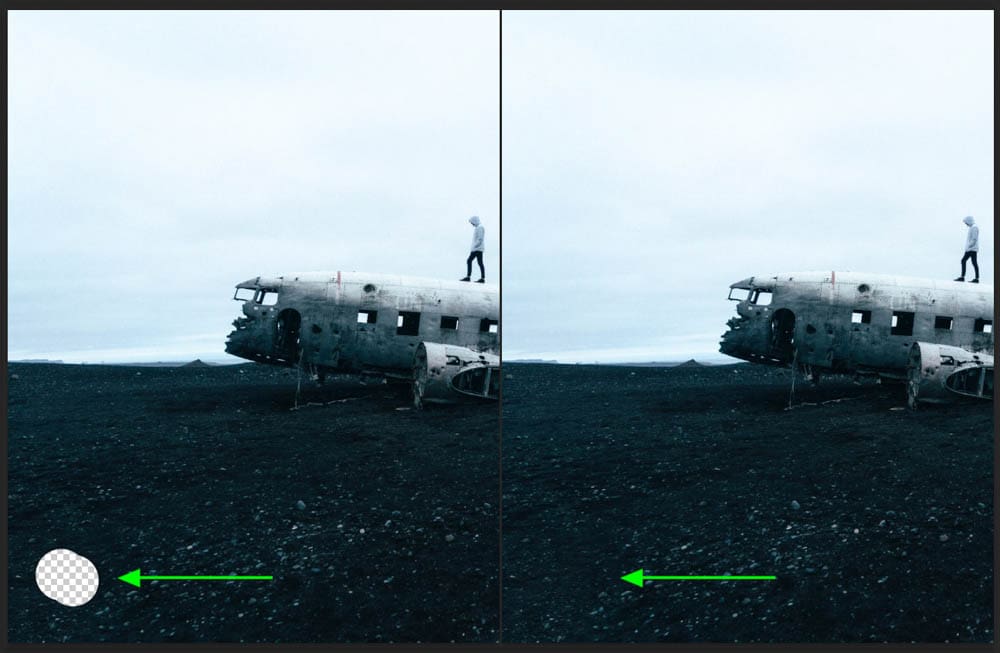
The history brush will use the history state you have chosen as the source to revert the image to. This means that you will be painting back in the pixels from the source history state.
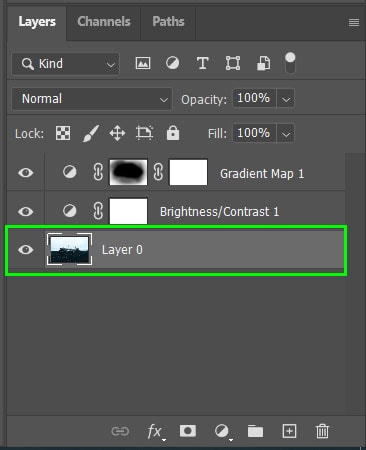
Make sure you have selected the right layer that corresponds with the history state you have chosen, i.e the history state needs to have been applied to that layer.
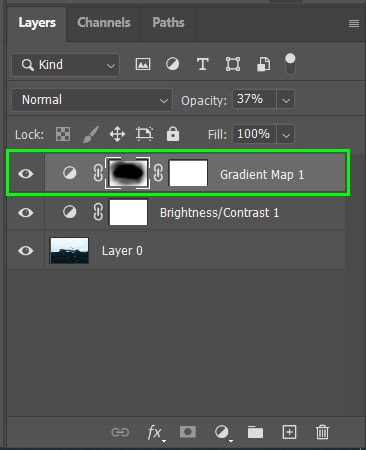
You can then change the settings of the brush in the options bar including the brush size, opacity, flow, and blend mode. You can also change the brush size by pressing [ to decrease and ] to increase the size.

Click and drag the brush over the areas of the image you would like to undo back to the chosen history state. This won’t affect any changes made on other layers in the document.
You can then change the history state by clicking on a new state in the history panel, switching to another layer, and undoing effects made on that layer.
How To Take A Snapshot Of A History State
During your workflow, you can take a snapshot of your project to easily revert to at any time. This will undo multiple actions to revert the image to a chosen history state.
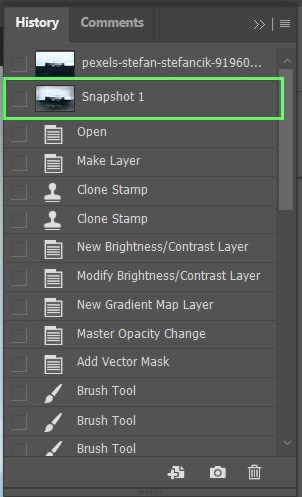
To take a snapshot of a history state, click the snapshot icon at the bottom of the history panel.
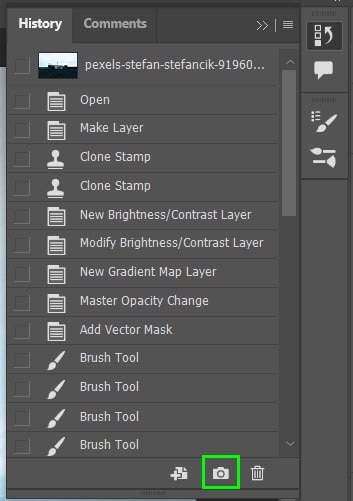
The snapshot will appear at the top of the history panel. Click on the snapshot at any time to go back to how your image looked when the snapshot was taken.
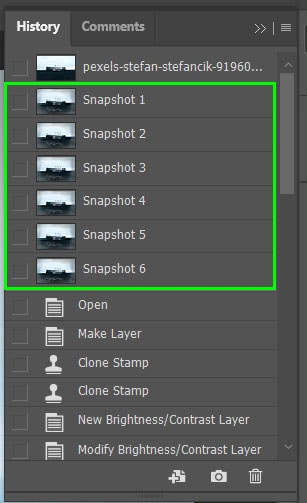
You can create as many snapshots as you like to keep certain versions of your image saved in case you need to restore any edit states.
Reasons Why The History Brush Isn’t Working
The history brush requires certain elements to be in place in order to work correctly. Since this brush deals with layers and history states, you may run into problems where the history brush won’t work. Here are a few common issues that may happen with the history brush and how you can fix them.
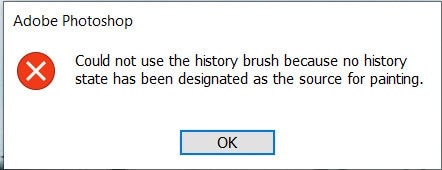
1. No History State Is Selected
If you select the history brush and attempt to paint on your image before choosing a history state as the source, you will receive an error message.
Open the history panel and select the history state by clicking on the empty box next to the history state.
Once the history state has been selected, you can use the history brush to undo edits on the image from the selected state.
2. No History States Left
By default, Photoshop saves up to 50 history states each time you open and work in Photoshop. This means that the first action will be lost as soon as you complete your 51st action during your project.
If you have an extensive project and would like to record more history states in case you need to undo them, you can increase the history states to up to 1000 history states.
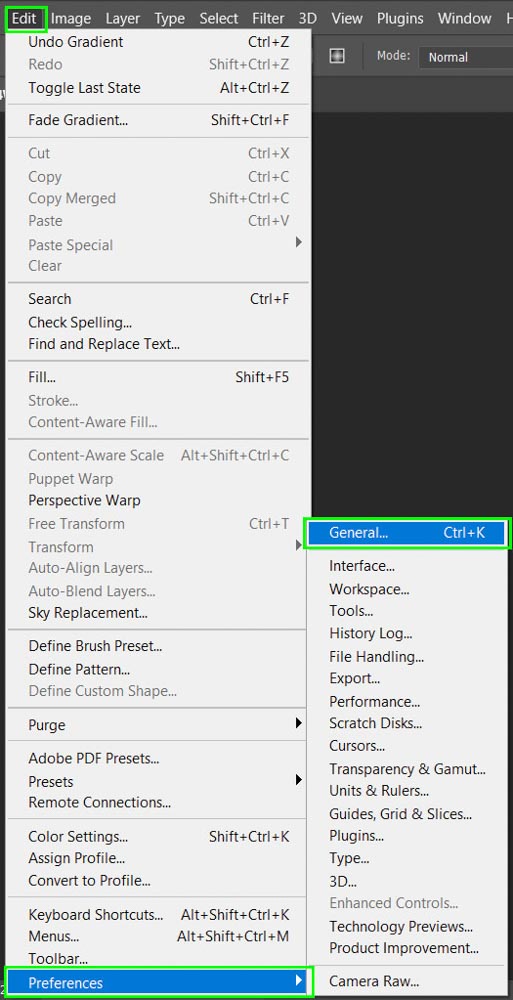
To increase the history states, navigate to Edit > Preferences > General or press Control + K (Win) or Command + K (Mac).
Once the window is open, select Performance on the left-hand side then select the History States drop-down menu on the right-hand side.

Use the slider in the drop-down menu to increase the history states to the amount you would like and select OK to save it.
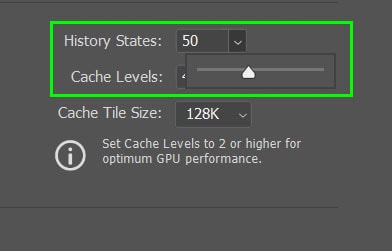
When more than 50 history states are saved by Photoshop the RAM usage of the program will increase and may slow down your computer depending on your processing capacity.
3. Photoshop Was Closed
History states are temporarily saved as soon as you begin editing on Photoshop, however, they are not saved like other elements such as layers, adjustments, and tool edits.
History states and any snapshots created from history states will be deleted when Photoshop is closed. When you reopen your document, the history panel will be empty.
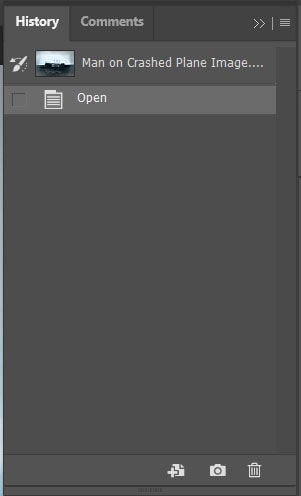
If you attempt to use the history brush as soon as you open a document, you will be able to paint with the brush on the image but nothing will happen. In this case, there is no information for Photoshop to use as a source for the pixels you want to retrieve from previous edits.
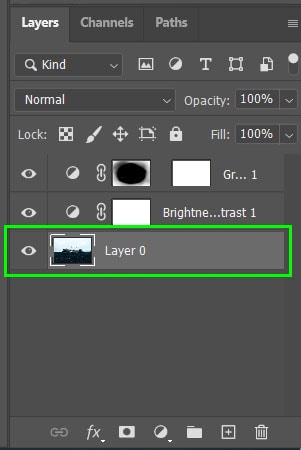
4. The Wrong Layer Is Selected
If you are using the history brush tool, but it is not reverting an edit to a previous history state, you may have the wrong layer selected. If you are painting over an area where you used a certain tool on the image layer, you need to have the image layer selected in the layers panel.
5. An Incorrect History State Was Selected
If you are attempting to undo an action that was done before the selected history state, it will not be able to undo that action. Photoshop needs the history state’s pixels to replace parts of the image. If the history state has been covered with new pixels, you will not be able to retrieve the information without going further back in the history states.
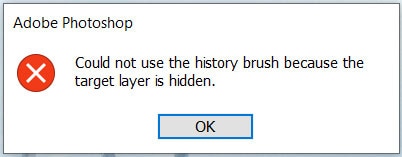
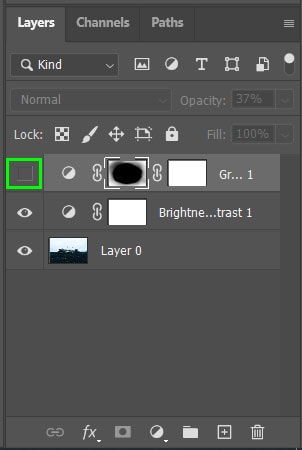
6. Target Layer Is Hidden
Photoshop allows you to turn the visibility of each layer on and off. If the layer you are trying to use the history brush tool on is hidden, you will receive an error message.
Turn the layer visibility back on by clicking on the empty box icon next to the layer thumbnail. Once the layer is visible, you can use the history brush again.
7. Tool Settings Have Been Changed
Every time you make changes to a tool’s settings, Photoshop will save these new settings. This may cause issues when you come back to use the tool for a new project and can’t get it to work normally.
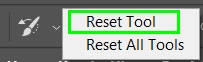
When you don’t know which settings have been changed, you can reset the tool and its settings to revert it to the default settings.
To reset the history brush tool, press Y to select it. Then on the options bar, right-click (Win) or Command + Click (Mac) on the tool’s icon.

Select Reset Tool to revert to the default settings. The history brush should work in its default settings and shouldn’t cause any problems.
8. If All Else Fails
If you have tried all the problem-solving methods above and the tool still won’t work as intended, you can reset Photoshop’s preferences. This will clear out any corrupt presets or settings that may have been loaded onto the program.
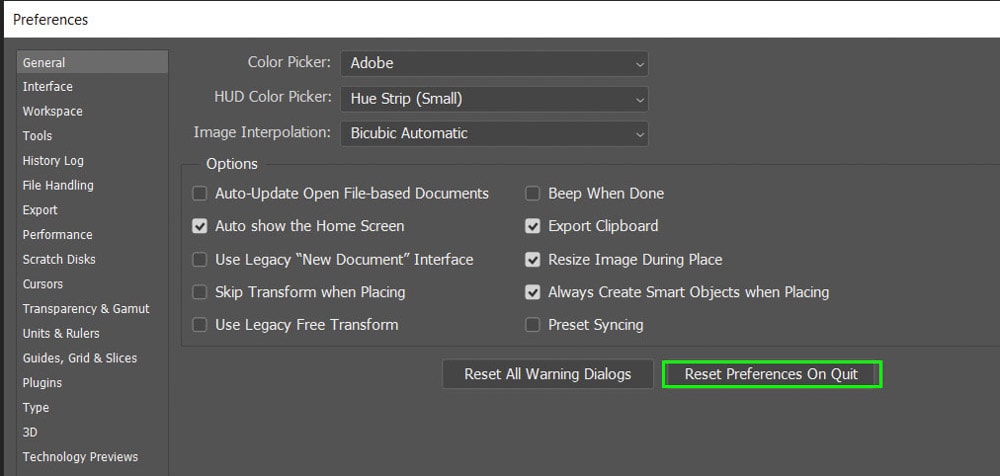
If you are okay with the Photoshop settings all being turned back to the default settings, then navigate to Edit > Preferences > General or press Control + K (Win) or Command + K (Mac).
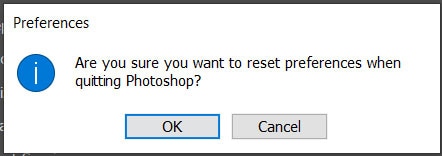
Select Reset Preferences On Quit and select OK when the window prompts whether you are sure. Once you exit and reload Photoshop, all the settings will be back to the default settings.
This may solve your history brush issues, however, the history state will be wiped clean. This method is only useful for fixing up the history brush issue for the next time you intend to use it.
The history brush is a useful tool for removing parts of selected history states without affecting ones before it. Unlike undo, none of the history states will be affected except for the one that’s selected with the history brush. This makes it one of the ultimate tools for stepping back in your project and fixing accidental mistakes.
Happy Editing!


