
Capturing excellent photographs requires having good control over your depth of field and how you balance areas in an image that are in or out of focus. In some cases, that blurred background or foreground object just doesn’t come out as you wanted. Luckily, you can easily use the Blur Tool in Photoshop to soften areas of your image in post-processing.
An easy way to blur images in Photoshop is with an Iris Blur. With your image layer selected, go to Filter > Blur Gallery > Iris Blur. Place the center of the blur ring on your subject, and expand the blur ring to the edges of your photo. Now increase the blur amount slider to refine the effect.
The iris blur is one of the blur options available within the gallery blurs in Photoshop. Although it’s slightly different than that actual blur tool, it can streamline the process of an image-wide blur.
Since there are several different types of blurs in Photoshop, this tutorial will break down how to use the Blur tool, along with all the standard blur filters and blur gallery options within the program. That way you will know all your options to perfectly blur parts (or all) of an image! Let’s start by focusing on the Blur Tool itself.
How To Use The Blur Tool In Photoshop
Once you understand a few settings you can get on your way to using the Blur Tool.
Blur Tool Settings Explained
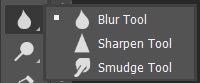
To activate the Blur Tool, click on the Blur Tool icon in the toolbar. Its icon looks like a teardrop and if you can’t see it immediately, it will be in the fly-out menu with the Sharpen Tool and Smudge Tool.

Once you enable the Blur Tool, you can change its settings in the Options bar.

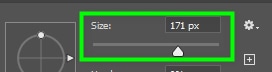
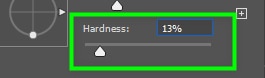
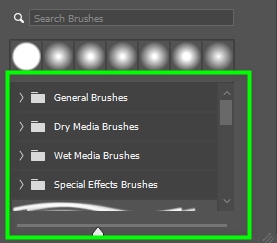
In the Brush Preset Picker, you can alter the brush Size and Hardness. You can also choose the type of brush you want.
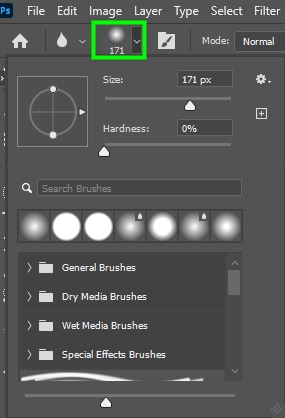
In order to blur an area properly, the brush size should match the area to be blurred. If you choose a brush size that is too large for the target area, you will blur regions you don’t want to blur.
Hardness controls how blurred pixels blend with other pixels in the image. Setting hardness to a very high value will blur the image more than a lower hardness value. A lower value blends the blurred pixels with the surrounding pixels a lot better.
Moving down the panel, you can find the available brush types.
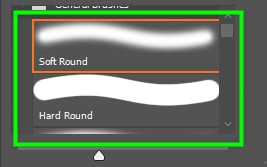
Set your brush to either the hard round brush or the soft round brush. The effect of the hard round brush is harsh because the brush edges are more well-defined, while the soft round brush’s effect is more subtle because it has a blur applied to its edges. These are the only brushes you should use to blur images manually.
Strength controls the amount of blur applied by the brush when the blur tool is active.

Another useful blur tool setting is Sample All Layers. This option applies a blur effect to multiple layers at once.

Using The Blur Tool On An Image
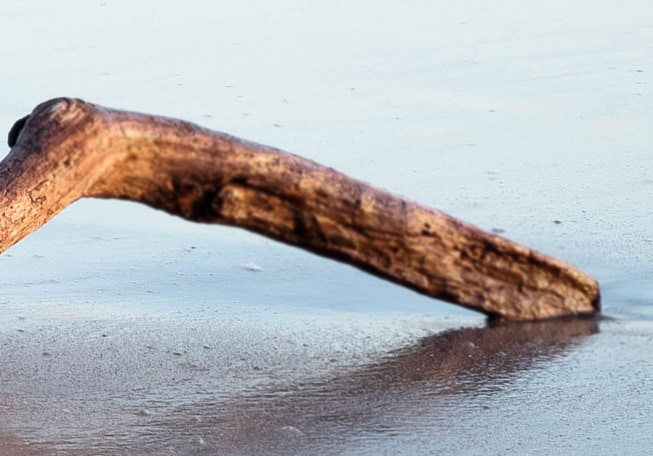
To use the Blur Tool to edit an image, the first thing to do is to duplicate its layer. To do this, press Control + J (Win) or Command + J (Mac).
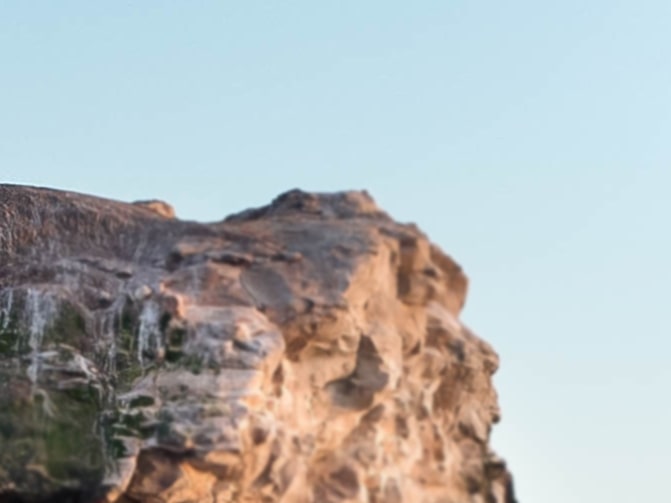
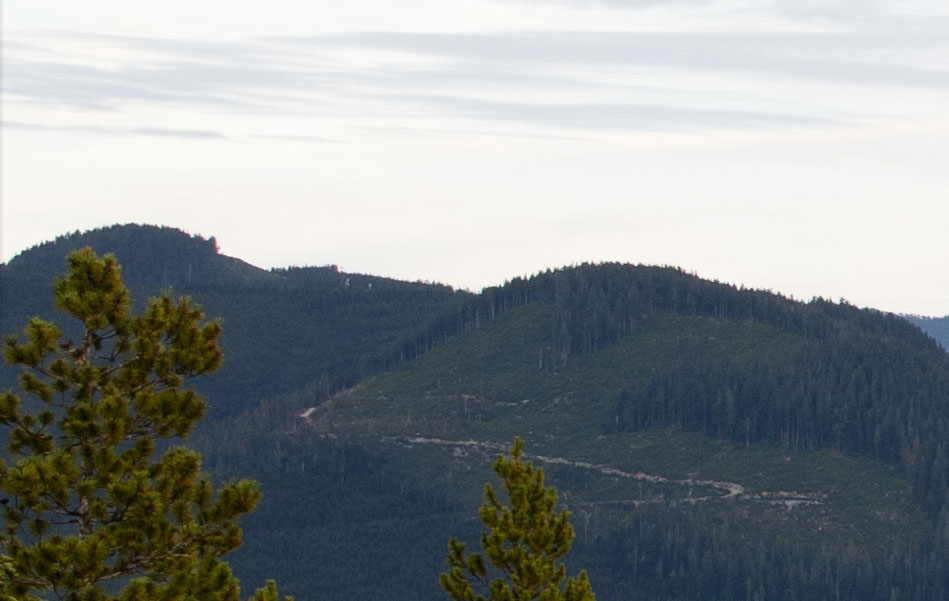
Then, decide what area you will apply the blur effect. In my case, I want to blur the mountains in the background of this image, while leaving the trees in the foreground sharp and in focus.
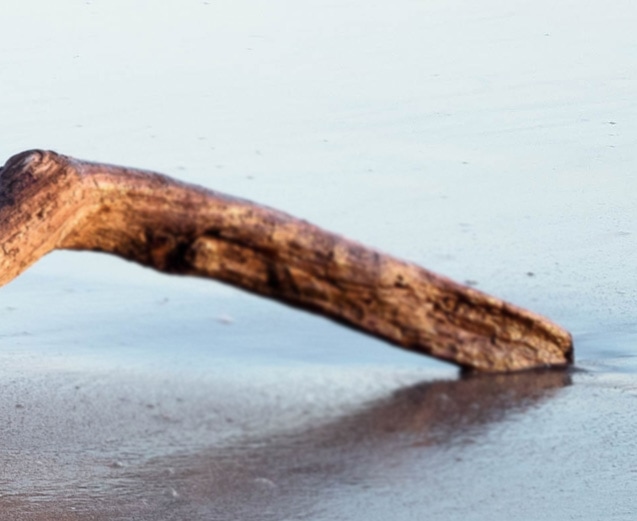
Then, go to the toolbar and grab the Blur Tool.

Next, go to the Options bar and change the blur tool settings, as shown in the previous section of this tutorial.
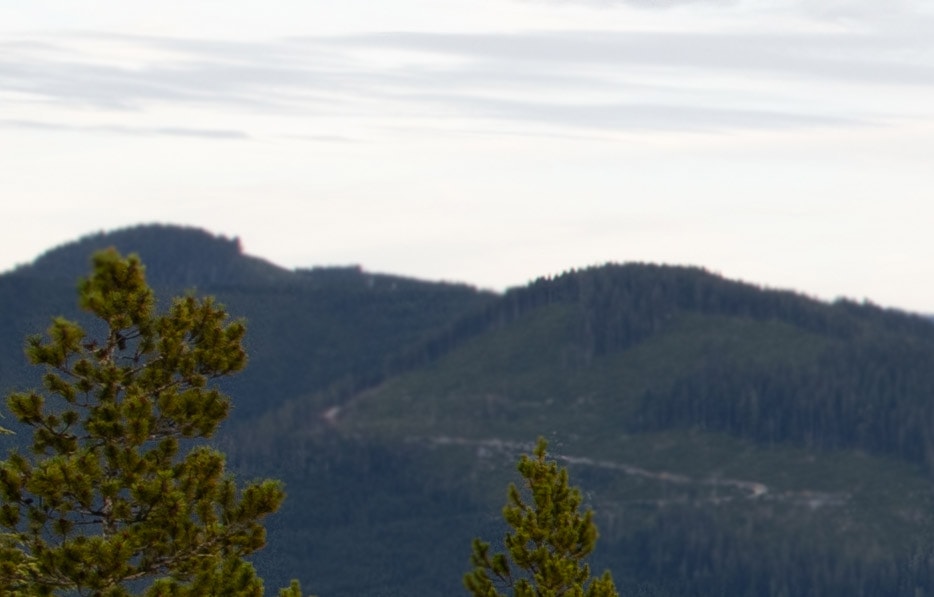
After changing all the necessary settings, paint over the areas you want to blur. You can keep changing the brush size, hardness and strength as you cover the desired area.
Other Ways To Blur An Image In Photoshop
Instead of adding blur to your image manually, you can use the Blur Filters available in Photoshop. They are handy, and each serves a different purpose.
Standard Blur Filters
To access the standard blur filters, go to Filter > Blur.
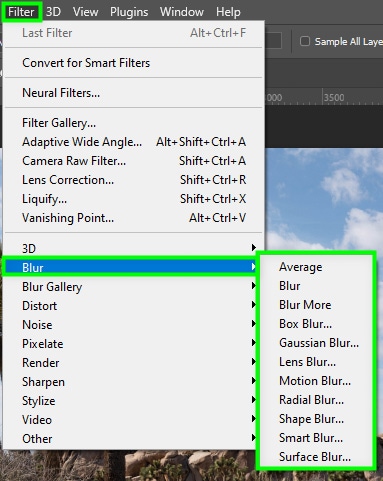
Once you click the arrow next to Blur, you will see all the blur filters available. Here’s what each of them do:
Average
This blur effect uses Photoshop artificial intelligence to estimate the average color of all pixels in an image or a selected area. When you apply this filter, it fills your image or section with the averaged color from the area you are applying the blur.
You will need to combine this filter with another effect for the photo elements to be visible, such as a gradient or a blend mode. You can use this filter to apply a blur along with added texture effects to create an uncluttered background.
Blur
It’s a basic blur effect used to soften edges, reduce noise, or remove dust in an image.
Blur More
It works the same way as the standard blur filter, but its effect is four times harsher.
Box Blur
Applies a blur effect on objects while preserving and enhancing their edges. It’s an excellent option to use when you want the edges of your objects to stand out.
Gaussian Blur
Gaussian Blur is a popular blur effect that produces a very smooth and even end result. The gaussian blur uses a curve to blur selected areas creating a softer effect. You can use it to soften skin and reduce noise in images.
Lens Blur
This effect is similar to a blur effect created with a camera lens. It blurs specific areas of an image while bringing focus to other areas. You can use it to blur backgrounds and adjust the depth of field of an image.
Radial Blur
The blur is directed towards a central point, making the blur effect appear to be spinning or zooming. This effect brings attention to objects while giving them a sense of movement.
Motion Blur
It’s a blur effect that gives images a sense of movement, but it’s not directed towards any point, unlike the radial blur. It’s useful, for example, to make a person appear to be running fast or a body of water appear to be flowing. Here is how to apply this effect.
How To Use Standard Blur Filters In Photoshop
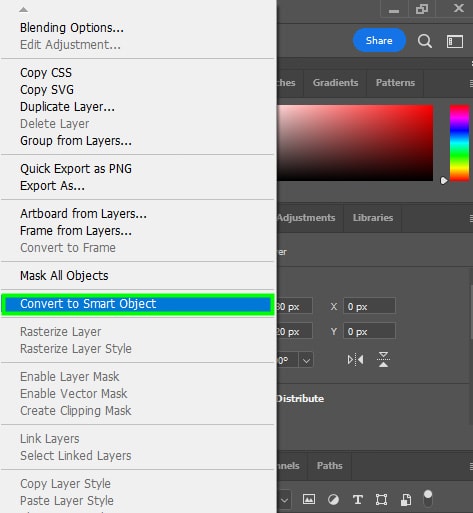
First, bring your image to Photoshop. Then, go to the Layers panel and convert your image to a Smart Object by right-clicking it and choosing Convert To Smart Object. This will apply the filter non-destructively, and you will be able to edit any time in the future.
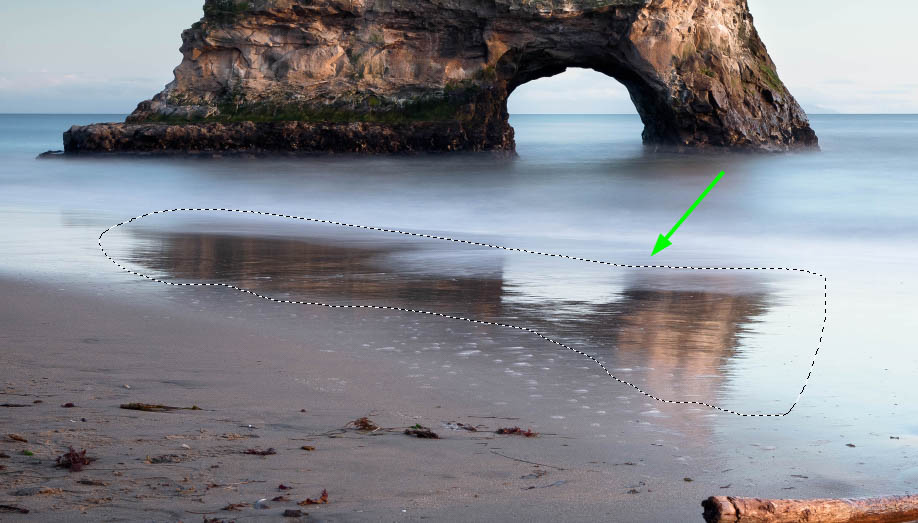
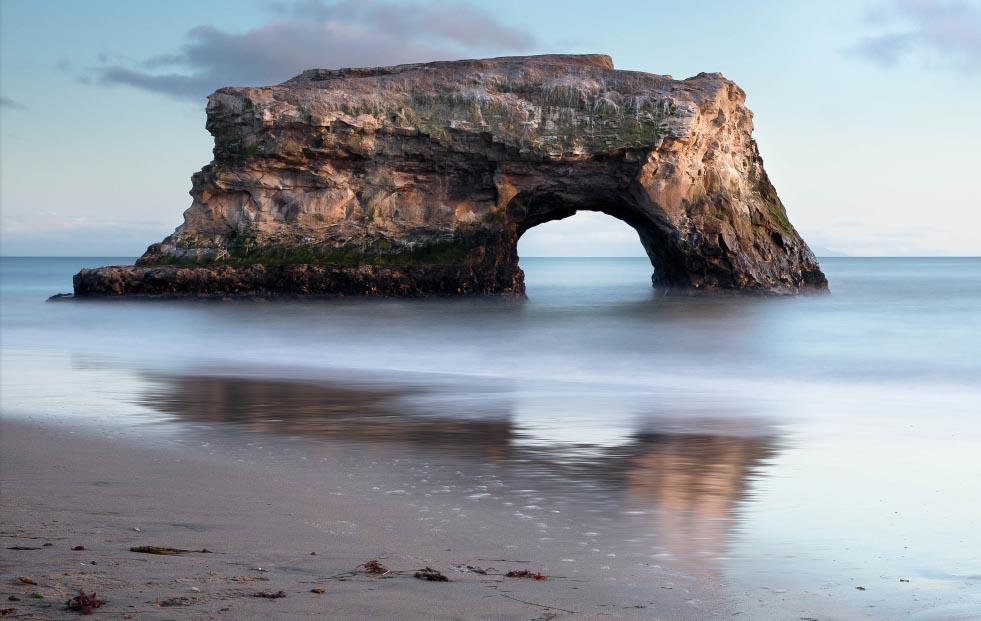
Then, choose the area of your image you want to apply the blur. In this example, I want to apply a motion blur to further distort the reflection in the water.
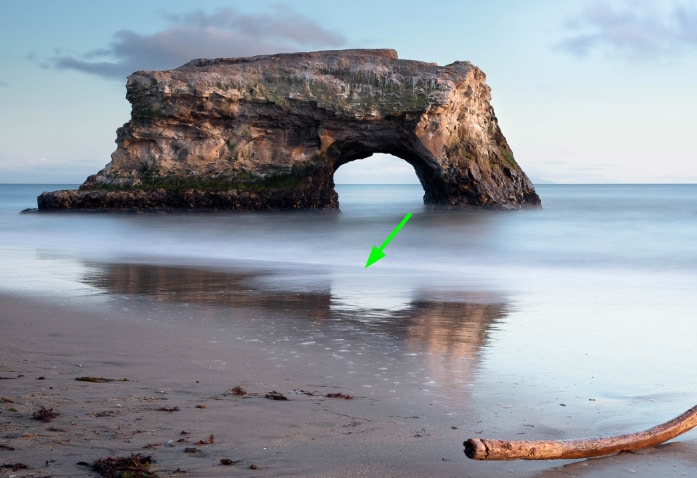
After deciding the area to blur, make a selection around it with the tool of your preference. You don’t need to be precise, but make sure the selection doesn’t expand into other image areas. For example, the effect won’t make sense if I extend my selection to the beach sand.
I chose the lasso tool (L) found in the toolbar for my selection.
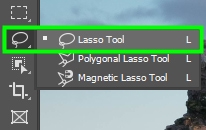
To use the lasso tool, draw around the desired area. As the area I chose doesn’t have well-defined edges, the lasso tool is a good choice for this instance.
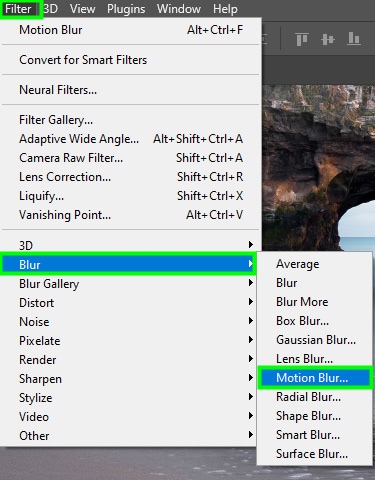
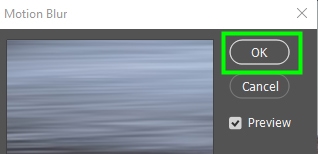
After making your selection, go to Filter > Blur > Motion Blur.
In the Motion Blur dialog box, there are a few settings you should adjust to customize your effect. In Distance, you can adjust the distortion of the pixels that will result in the motion effect. The higher you set the value, the more motion effect you can create.
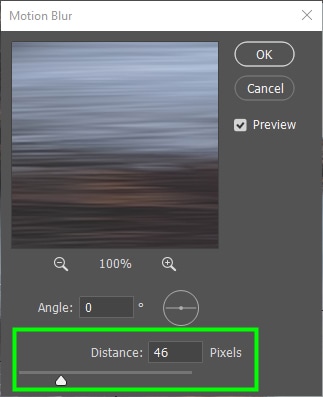
You can see how your image changes in the preview window. You can also adjust the motion blur angle. Set the angle to zero to create horizontal blur patterns or a different value to create diagonal or vertical patterns.
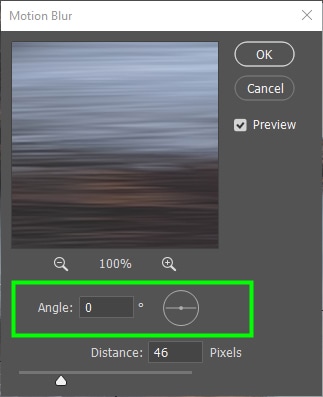
I recommend you choose an angle that matches the concept of your image. In my case, I left the angle at 0. Click OK to close the Motion Blur Dialog box and apply the changes.
Back in the workspace, click Control + D (Win) or Command + D (Mac) to deselect the selected area. Now the blur effect will be isolated to the selection area.

Additional Standard Blur Filters In Photoshop
Shape Blur
Instead of appearing in a standard box shape, the blurred pixels take on other geometrical or custom shapes when you apply this blur.
Smart Blur
The Smart Blur guesses the level of blur applied to pixels based on the blurriness of surrounding pixels. It’s a very precise blur filter and offers you many options to further increase its accuracy.
Surface Blur
This effect blurs objects but keeps their edges untouched. This is a handy filter, for example, to retouch skin.
The Blur Gallery
To open the Blur Gallery, go to Filter > Blur Gallery. Here you will find a handful of more advanced blur effects in Photoshop.
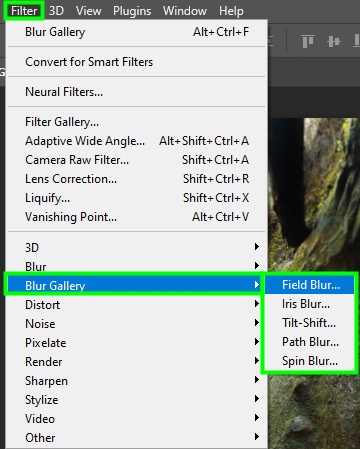
Field Blur
The filter applies different blur levels to an image while bringing focus to a specific spot. It is a great way to create depth of field using Photoshop.
Tilt-Shift Blur
Mimics the effect created by tilt-shift lenses, which are lenses that alter the focal plane of images. The tilt-shift effect in Photoshop divides an image into blocks with and without focus.
Path Blur
You can create blur patterns to add to an image by drawing custom paths in it.
Spin Blur
Adds circular blur patterns to images. You can use it to make circular objects appear to be moving.
Iris Blur
Use this option to apply different blur levels to an image in the shape of an ellipse. Here is how to use this effect.
First, open your image in Photoshop. Then, convert your image layer to a smart object so you can edit the effect later on if needed. To do this, go to the Layers panel, right-click the layer and choose Convert To Smart Object.
Then, go to Filter > Blur Gallery > Iris Blur.
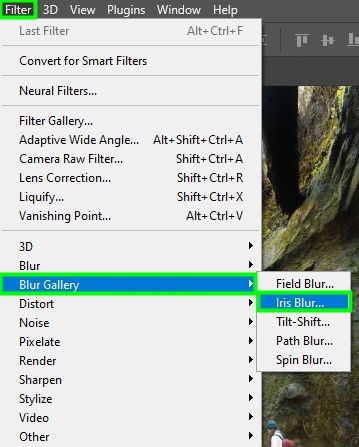
This will open the blur gallery workspace.
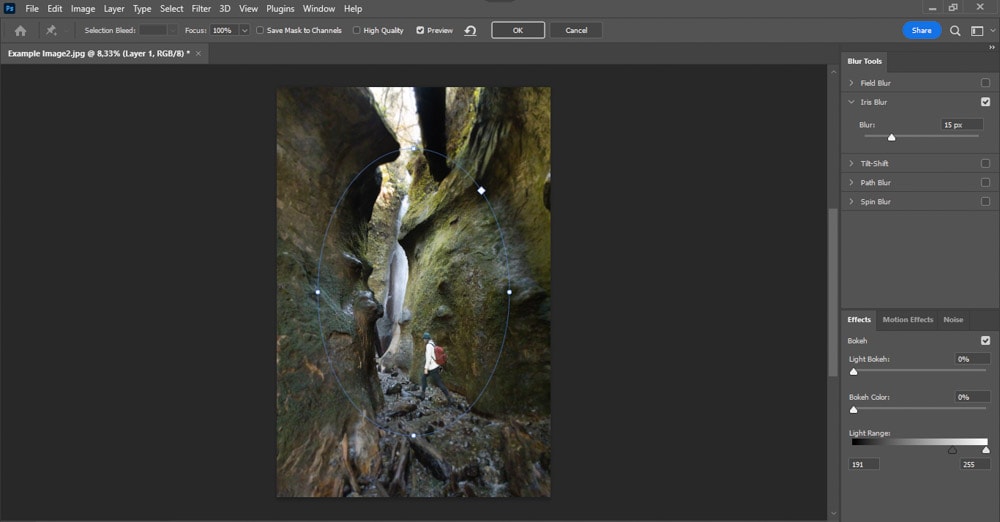
An oval path will appear on your image with a wheel in its middle.
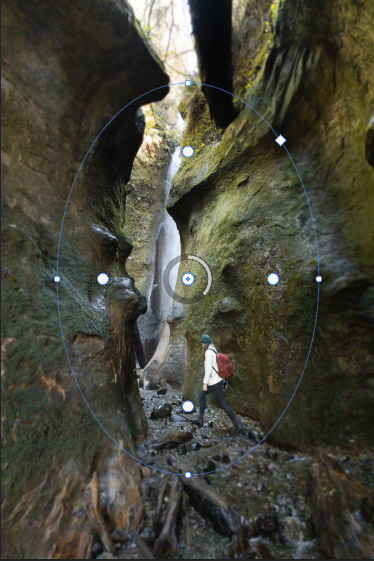
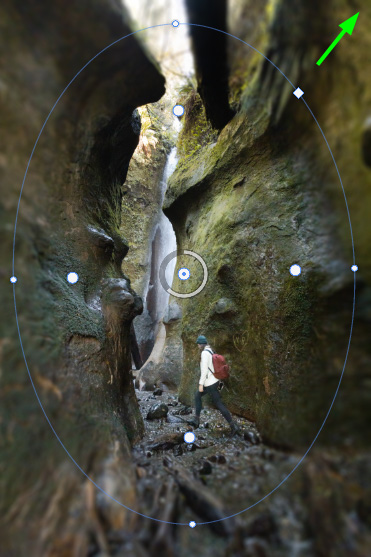
The path delimits the transition between the image focus area and its blur area. You can distort the path by clicking and dragging it anywhere you want. For example, you can drag it inwards to shrink the path.
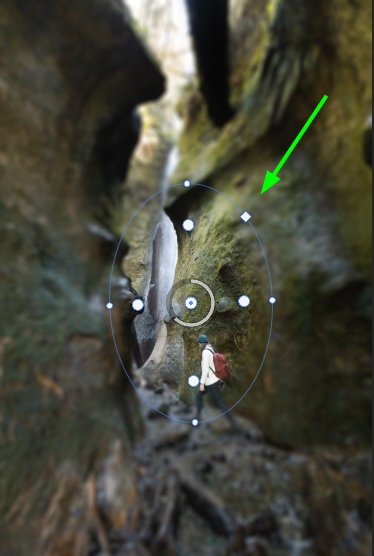
And you can drag it outwards to expand the path.
The wheel around the focal point represents the level of the blur applied to the image. To change it, position your cursor on the wheel and drag the blur bar anticlockwise to decrease the blur level.
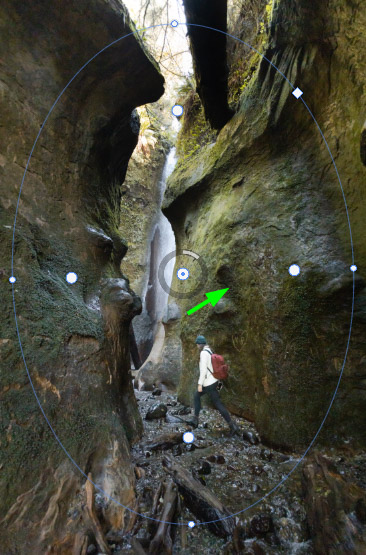
Or drag the wheel clockwise to increase the blur level.

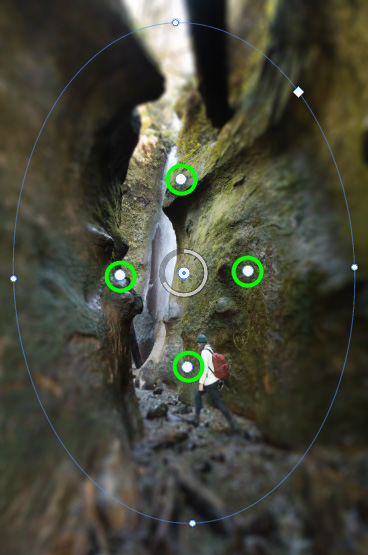
The white dots on the oval path represent the blur feather. The transition between the blur and the image focal point is harsh when they are near the path.

And if you drag them inwards, the transition between the blur and the focal point is more gradual and subtle.
Click Ok when you are finished applying the Iris blur effect.
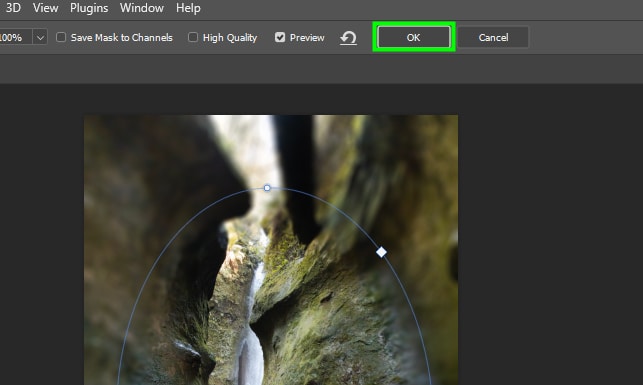
You will have now successfully blurred the image in an ellipse shape around the focal point of your image.


Want An Easier Way To Master Photoshop?
Although there is an endless list of tools and techniques to learn in Photoshop, there are six essential skills that I believe everyone should know. With these six techniques, you can start to feel more confident while using the program, and make typically complicated tasks easier to do. To learn what these techniques are, download my free Photoshop Blueprint Ebook by clicking the button below!


