

Whether you need to adjust the angle of a photo or flip an image for creative purposes, you can rotate a layer in Photoshop. There are a variety of ways to rotate an image in Photoshop to suit your needs perfectly. In this tutorial, you’ll not only learn how to rotate images and layers but to flip them, too! Let’s get started.
How To Rotate A Layer In Photoshop
To rotate a layer in Photoshop, you can use the Transform Tool, which allows you to rotate individual layers.
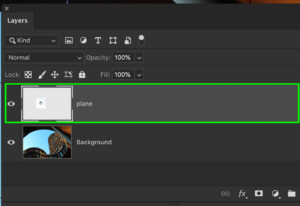
Step 1: Select The Layer
First, click on the layer you want to rotate to select it.
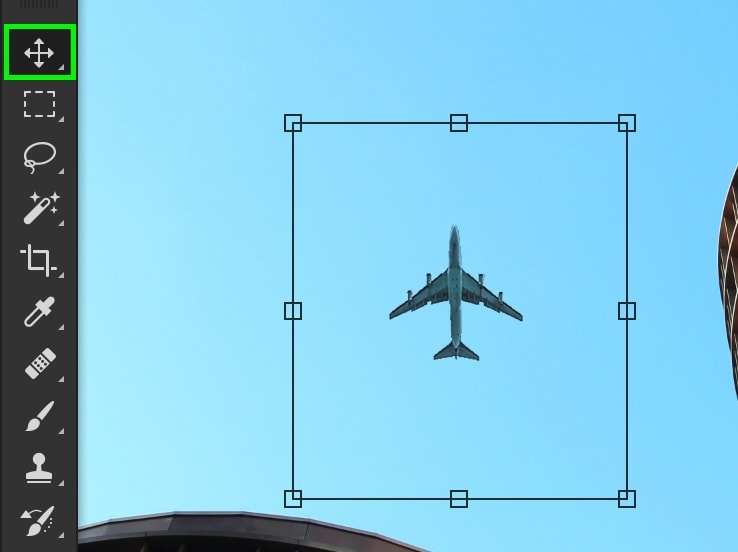
Step 2: Activate the Move Tool (V)
Next, grab your Move Tool by pressing V. Now, a transform box will appear around your layer.
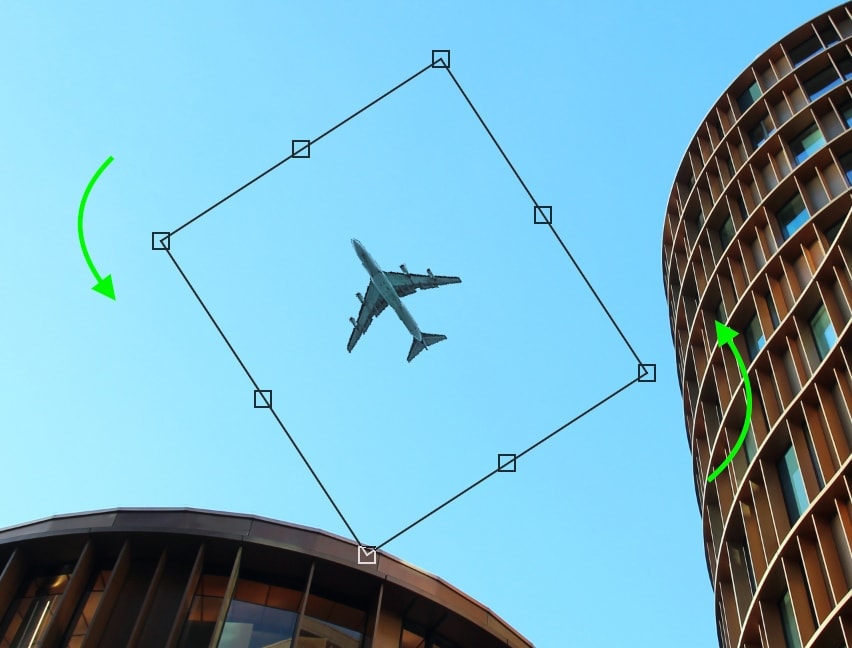
Step 3: Rotate The Layer On The Canvas
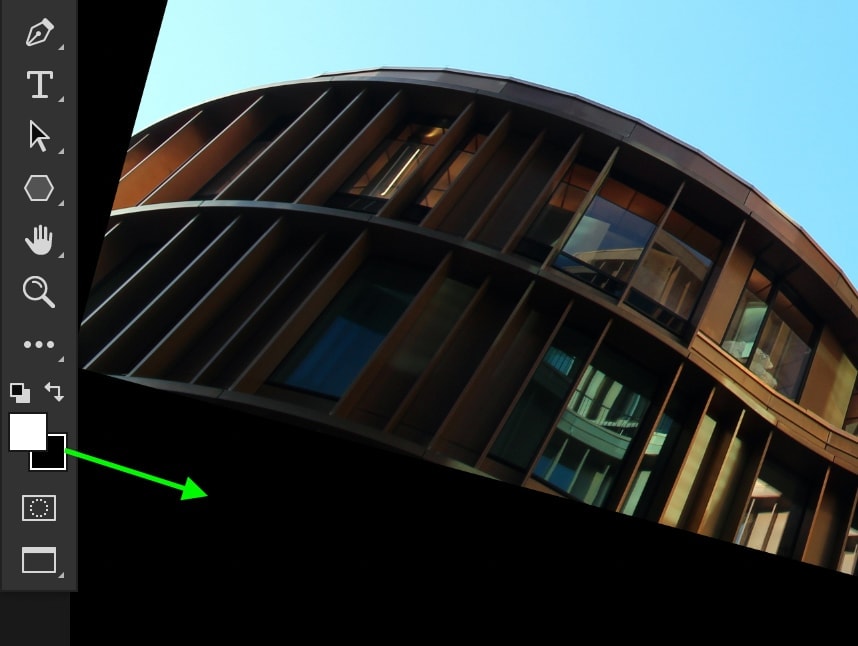
To rotate the layer freely, hover your cursor just outside of any corner of the transform box. A U-shape arrow will appear, meaning you can rotate the selection.
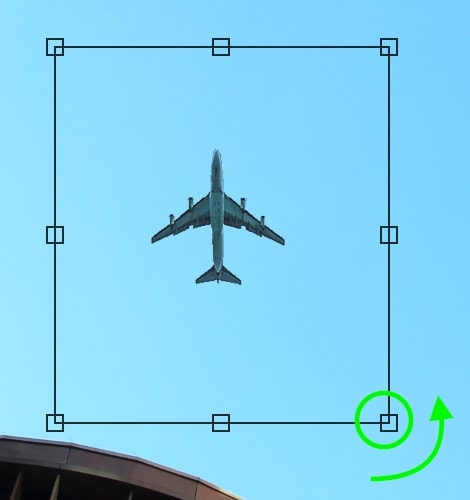
Click and drag your mouse to the left or right to rotate your layer.
Step 4: Rotate The Layer Using Presets
If you’re looking for a preset angle to rotate by, you’ll need to use the Transform Tool. With the Move Tool and layer still selected, press Control + T (Win) or Command + T (Mac).
Right-click inside of the transform box to reveal your transform options. Near the bottom of this menu, you’ll see Rotate 180°, Rotate 90° Clockwise, and Rotate 90° Counter Clockwise.
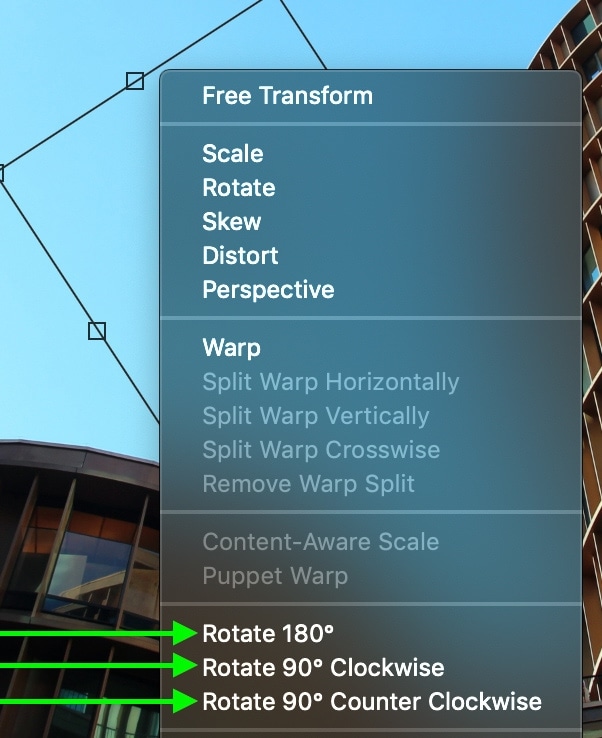
Select any of these options to rotate your layer by the preset amount.
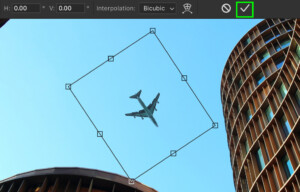
Step 5: Confirm The Changes
To commit to your changes, press Enter or click the checkbox in the Options bar.
How To Flip A Layer In Photoshop
You can flip the contents of a layer horizontally or vertically.
To do this, select the layer you want to flip and grab your Move Tool by pressing V.
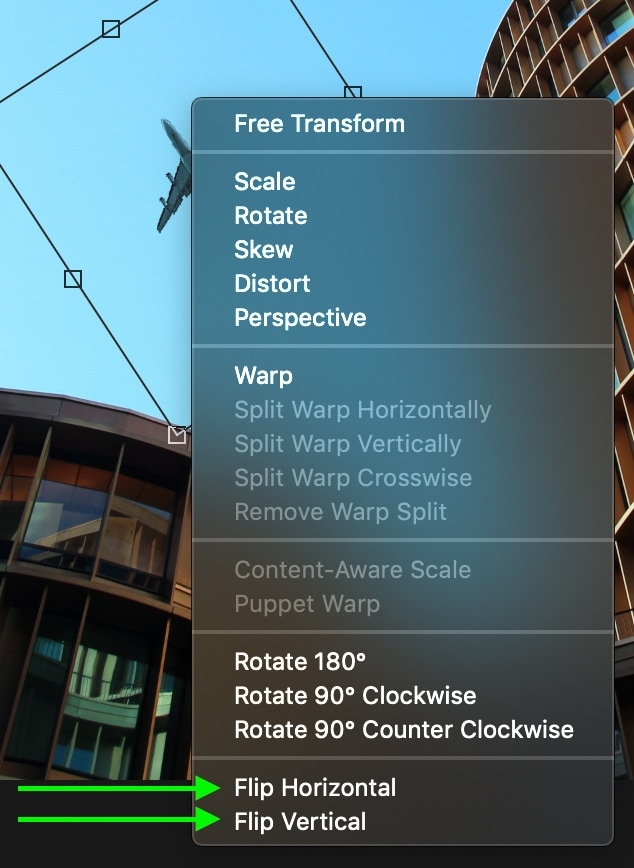
Now access your Transform Tool by pressing Control + T (Win) Command + T (Mac).
With the transform tool selected, right-click in the transform box and choose ‘Flip Horizontal‘ or ‘Flip Vertical.’
With your layer flipped, press Enter or click the checkbox in the Options Bar to commit to the changes.
How To Rotate An Image In Photoshop
If you want to rotate an image in Photoshop, you need to rotate the entire canvas. With this method, you can rotate everything in your image at once without dealing with individual layers.
First, open up your image by going up to File > Open and opening the image you want to rotate.
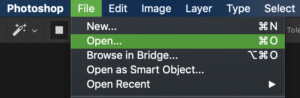
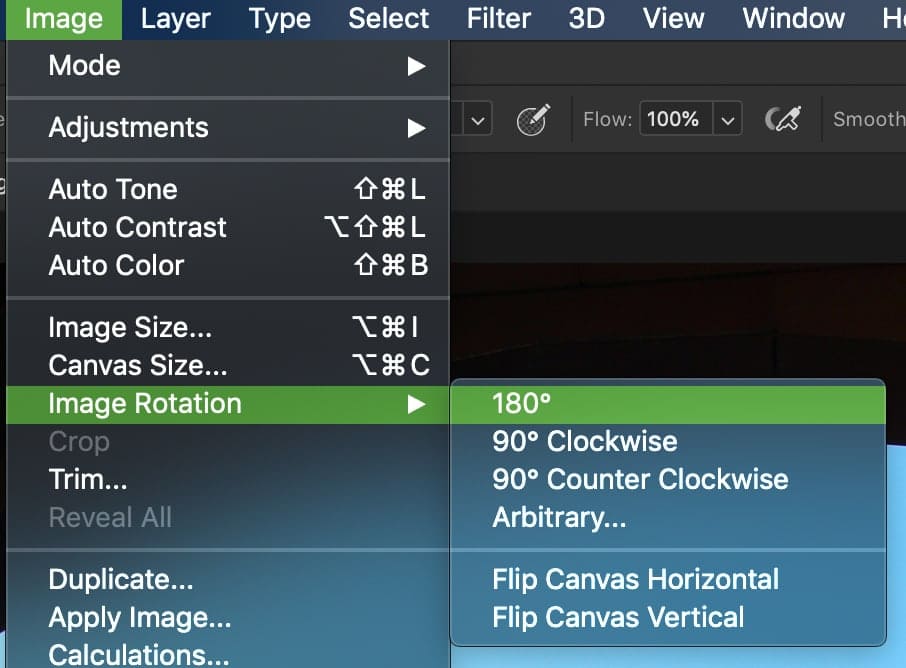
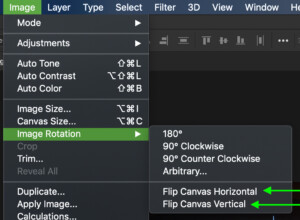
Next, go up to Image > Image Rotation to reveal all of your rotation options.

Image Rotation Options Explained
To rotate an image in Photoshop, you have four options available. Let’s break down each of them to understand their purpose better.

- 180 Degrees: This rotation option will rotate your photo by 180 degrees. That means the image would essentially look like it’s upside down.
- 90 Degrees Clockwise: This will rotate your image 90 degrees to the right. You can press this button multiple times to rotate by 90-degree clockwise increments.
- 90 Degrees Counter Clockwise: This rotation option will rotate your photo 90 degrees to the left. You can also use this option multiple times to rotate by 90-degree CCW increments.
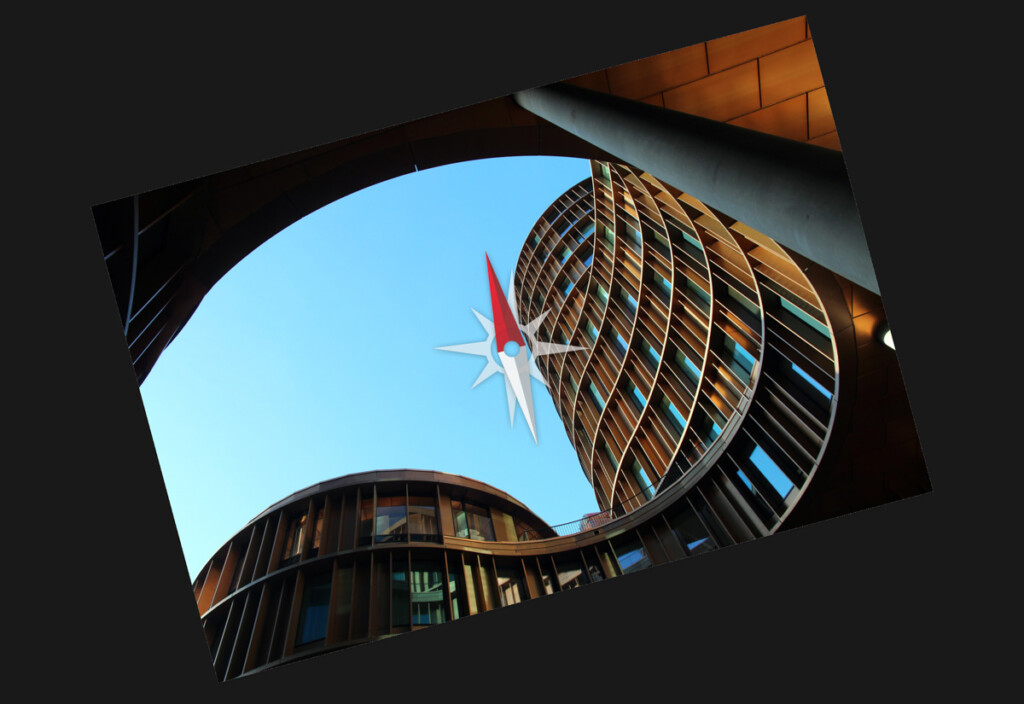
- Arbitrary: Here, you can set a custom angle with a clockwise or counterclockwise rotation. The image will rotate and create a border around the edges filled with your set background color.
Examples Of Each Rotation Option
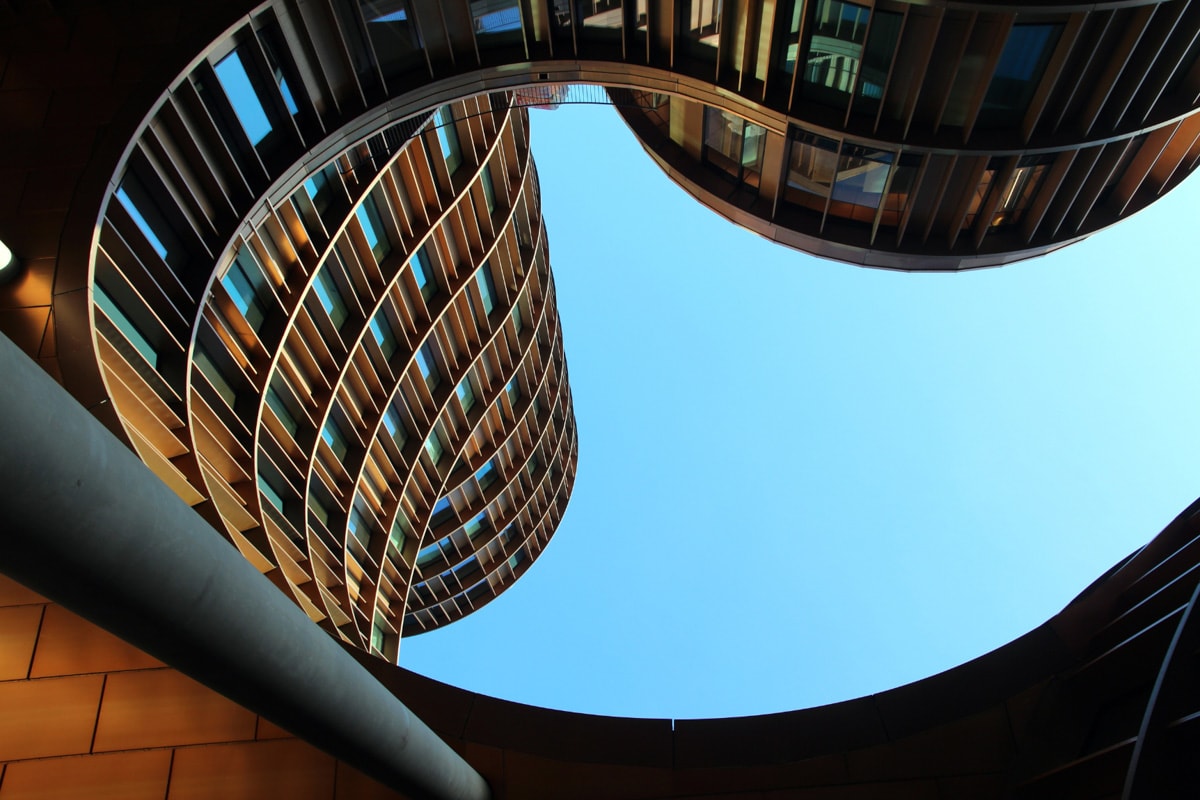
Sometimes, it’s easier to visualize the changes these rotation options will give you. Here’s an example of the different ways you can rotate an image in Photoshop.
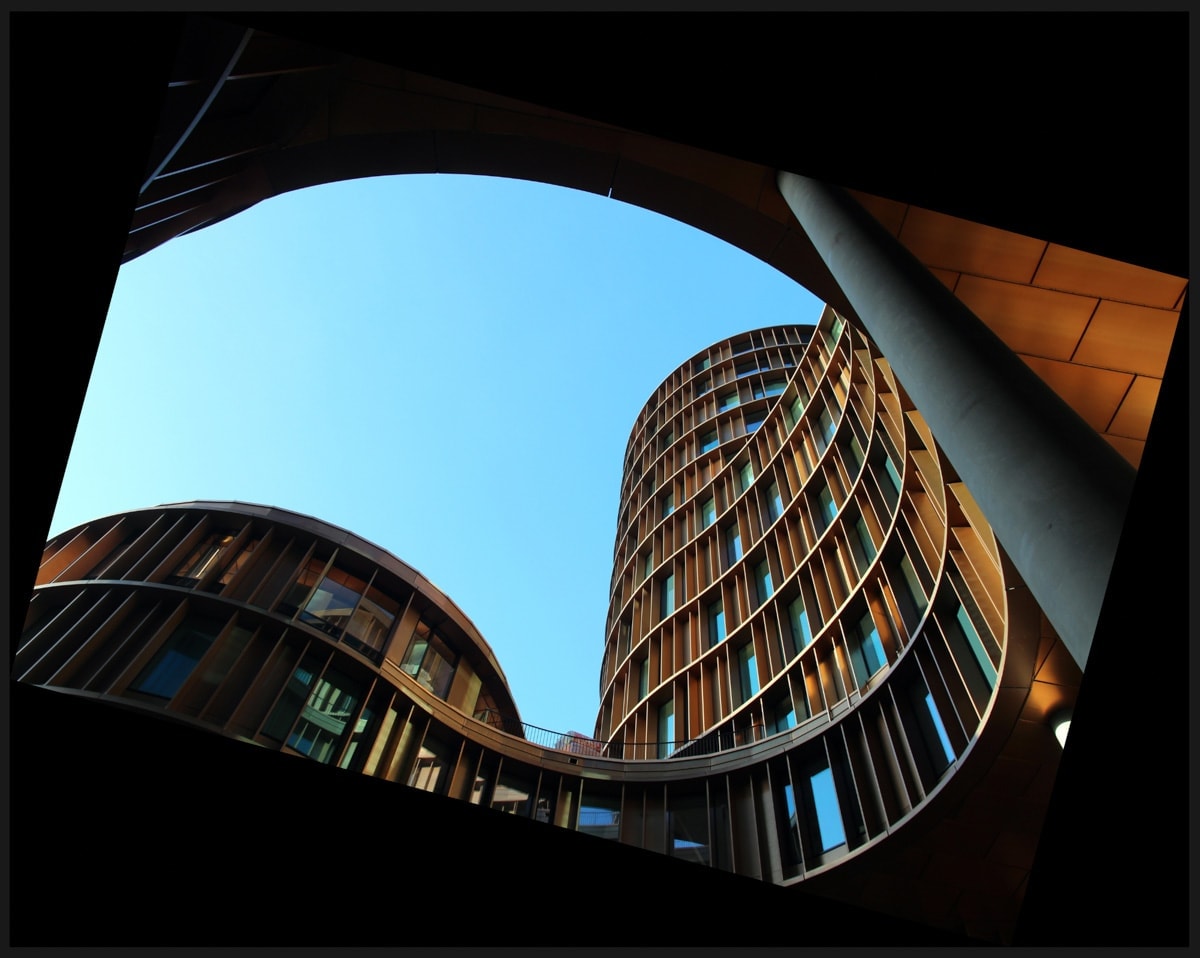
– 180°
To select this option, go to Image > Image Rotation > 180°. This will turn your image upside down from its original state.
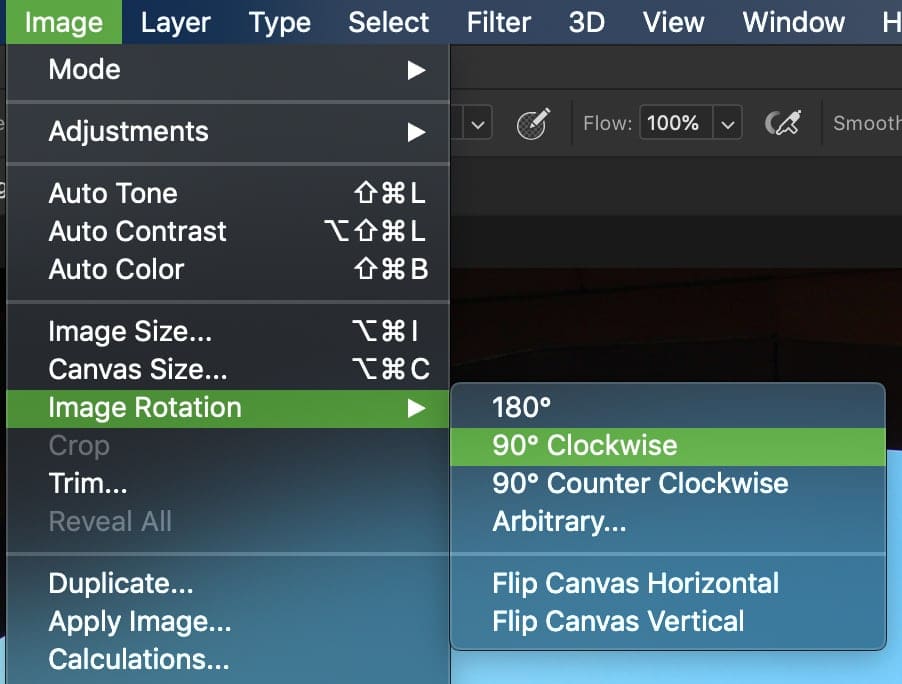
– 90° Clockwise
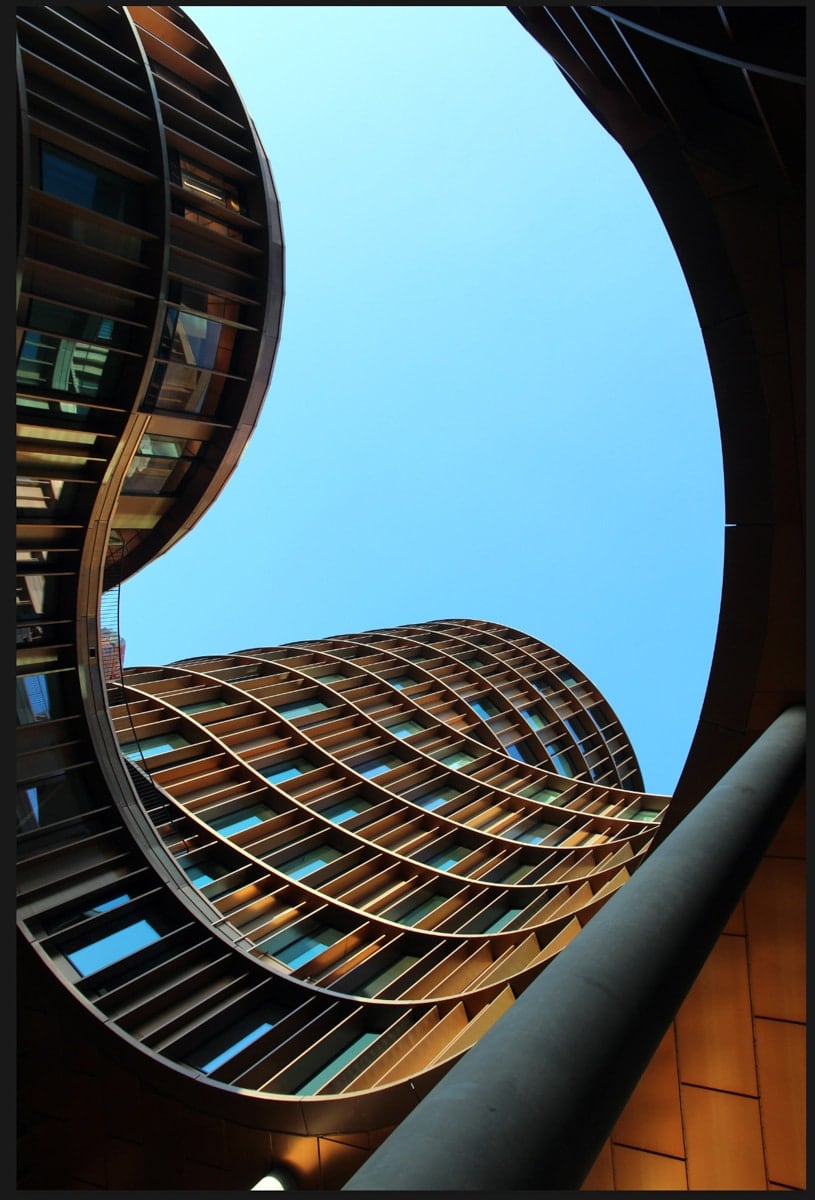
Go up to Image > Image Rotation > 90° Clockwise to rotate your photo 90 degrees to the right.
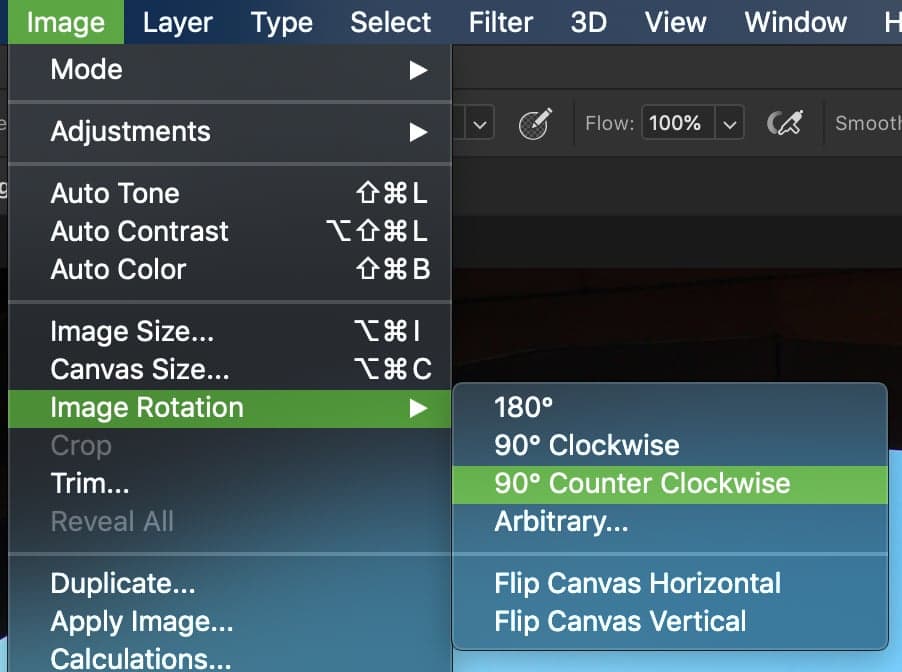
– 90° Counter Clockwise
Select Image > Image Rotation > 90° Counter Clockwise to rotate the image 90 degrees to the left.

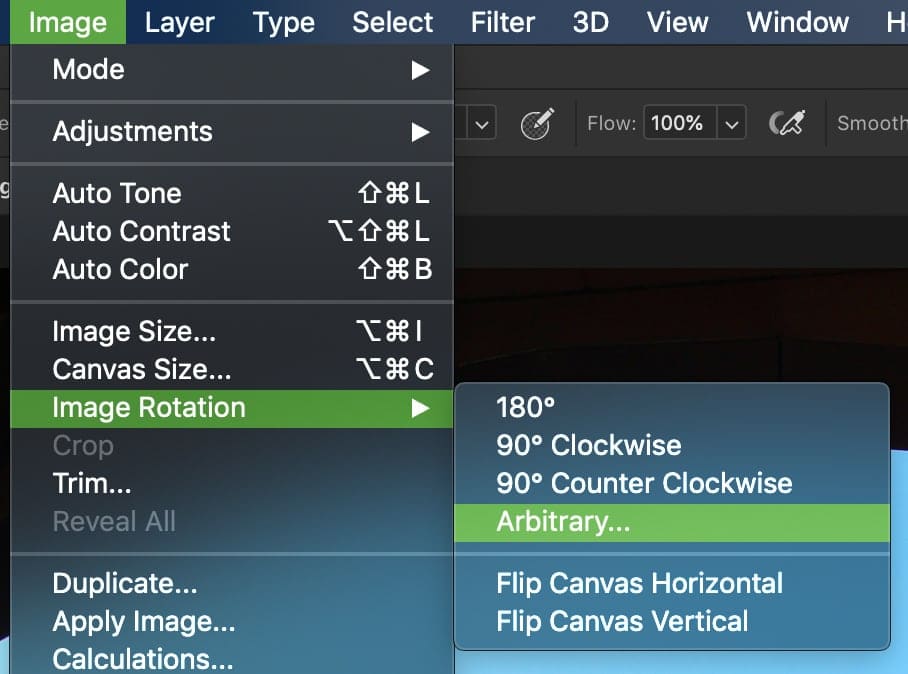
– Arbitrary
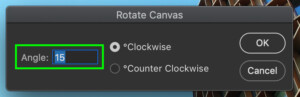
Go to Image > Image Rotation > Arbitrary to bring up the rotate canvas dialogue box.
Here, you can enter the exact angle you’d like to rotate your image.
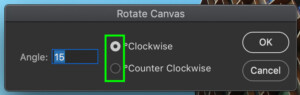
With your angle set, pick whether you want to rotate the canvas clockwise or counterclockwise.
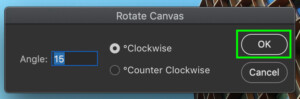
Click OK to save your changes.
The image will rotate, and your canvas will expand to fit the angle you’ve set.
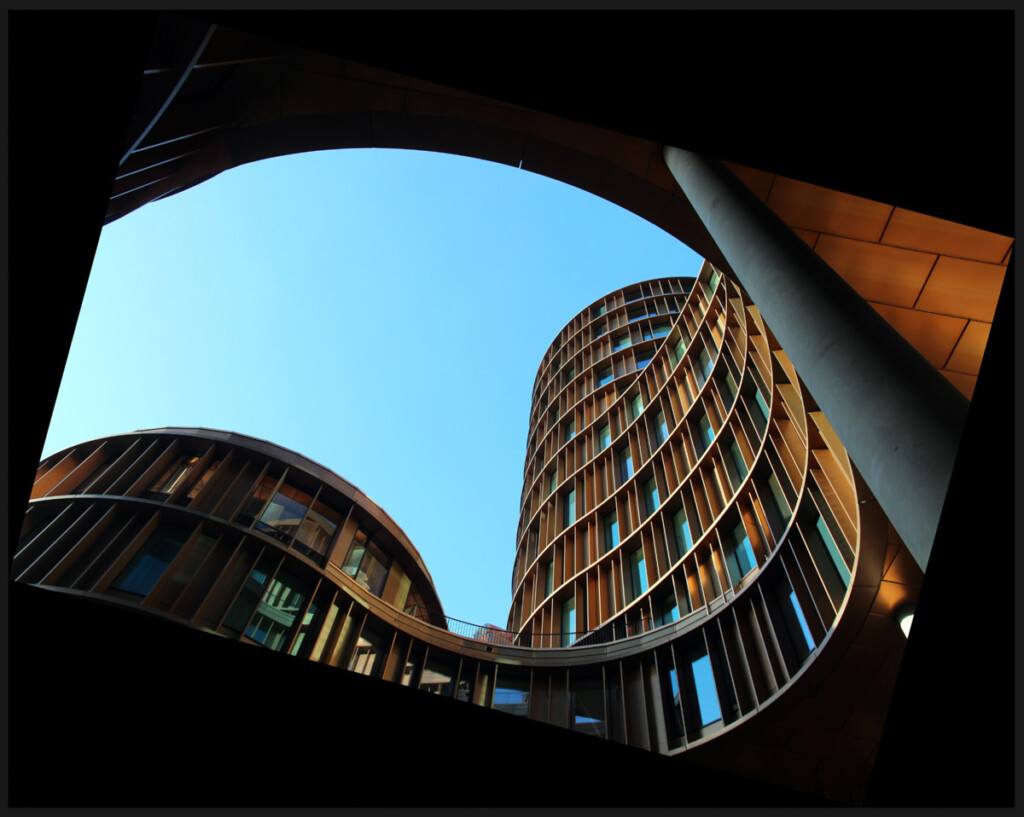
In most cases, there will be space around your photo filled with a solid color. This color is set from your background color.
You can change your background color by clicking on it and finding a new color from the color picker.

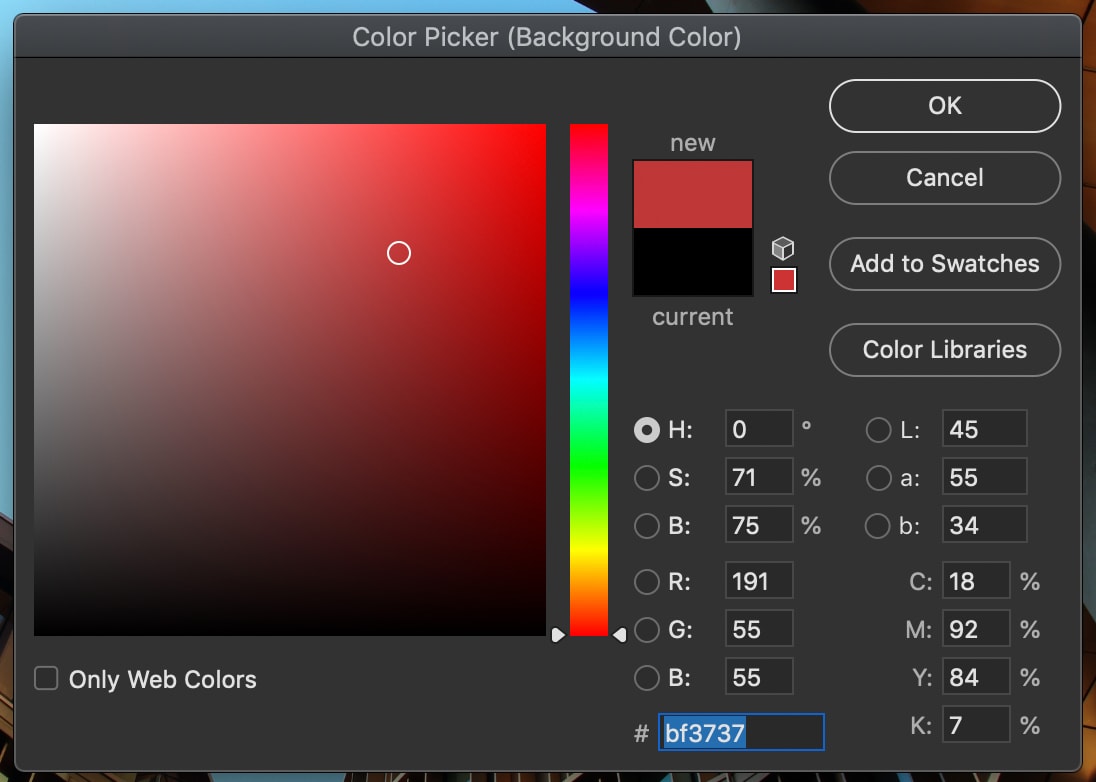
It’s best to set the background color you’d like before you use the arbitrary rotation option. There isn’t a quick way to change the background color once the arbitrary rotation has been made.
If you’d like to make changes, you can always undo (Control/Command + Z) and try again!
How To Temporarily Rotate Your Canvas In Photoshop
In some cases, you’ll need to rotate your image to get a better view of adjustments. Since you don’t want to rotate the canvas permanently, there’s a temporary tool to use instead.
The Rotate Tool (R) lets you adjust the angle of your canvas temporarily to make more accurate adjustments.

To access this tool, just press R on your keyboard and click and drag on your canvas.
This will rotate your entire canvas, but not permanently. Even if you export your photo while your image is rotated, it would still appear exported normally.
Once you’re ready to set your view back to normal, press reset view in the Options Bar.

The rotate tool is a super handy option to rotate an image in Photoshop temporarily!
How To Flip Your Canvas
No matter how many times you rotate a canvas, you still won’t get the same results as flipping. When you flip an image in Photoshop, the photo keeps the same orientation, but the contents change from left to right.
You can flip an image both horizontally or vertically in Photoshop with one click.
To flip your entire canvas, go up to Image > Image Rotation > Flip Canvas Horizontal / Flip Canvas Vertical.

How To Save And Export Your Image
Now that you’ve rotated your photo, you’ll probably want to save it!
To save your image, go up to File > Save As.
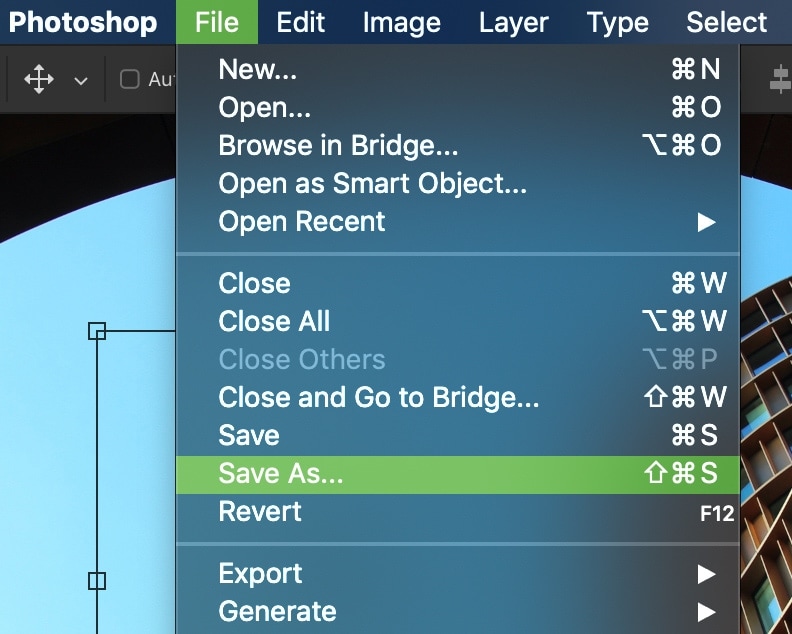
After you set a location and filename, choose the proper format for your photo.
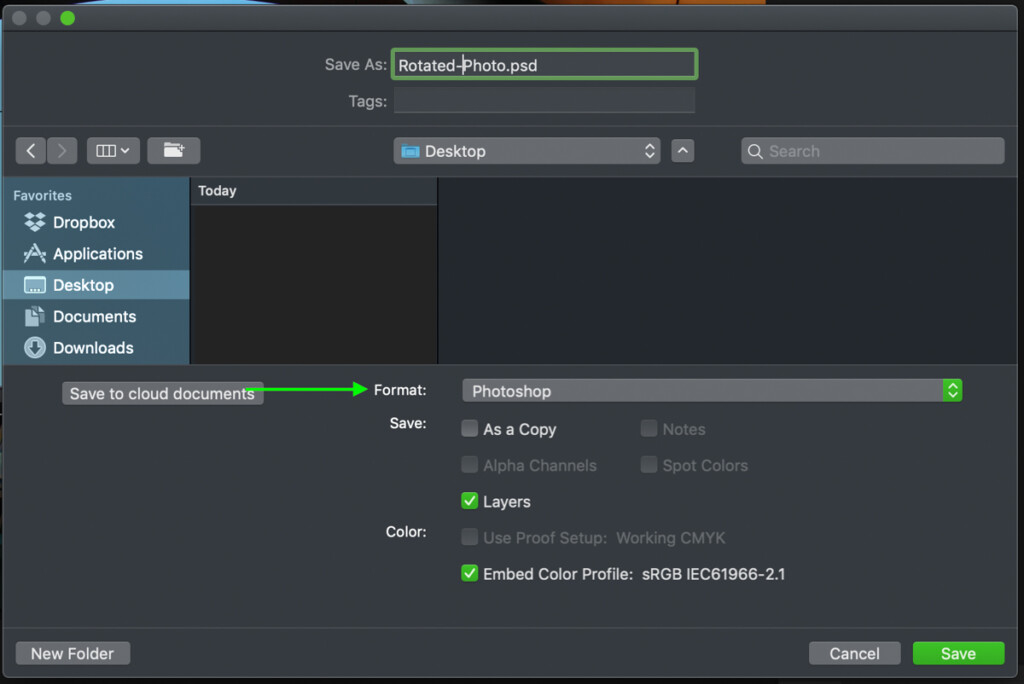
To save your image as a project that you can access and edit layers later on, save it in ‘Photoshop’ format.

If you want to export your photo to a jpeg, save it in ‘JPEG’ format.

Lastly, click save!

Conclusion
There are several ways you can rotate an image in Photoshop. Luckily, all of the options are easy to navigate. Whether you’re looking for a preset option or to set your own, you can find the rotation settings you need.
Know someone who would find this tutorial helpful? Be sure to share it with them and help support this blog. I really appreciate it!
Want more tutorials like this? Subscribe to my weekly newsletter for more photography and photo editing tips delivered straight to your inbox!
– Brendan 🙂
