

There is nothing quite as annoying as trying to paint or draw in Photoshop while watching your brush lag behind, taking its time to catch up with your cursor. Brush lag can make it difficult to work in a smooth and timely manner as it prevents you from painting as quickly as you’d like. Luckily fixing this issue is often pretty easy, with one reason being the main culprit for the lag.
The most common reason for brush lag in Photoshop is due to the smoothing setting. To turn off smoothing and fix brush lag, select the Brush Tool (B), then set the smoothing to 0% in the upper settings bar.
Besides smoothing, there are many different issues that could explain this bothersome lag. That’s why this post breaks down all 6 possibilities for brush lag so that you can understand why it’s happening and how to fix it.
Video Tutorial
6 Ways To Fix Brush Lag In Photoshop
1. Turn Off Smoothing
Brush Smoothing settings are a great way to make sure the brush strokes are smooth and clean, rather than bumpy and uneven. The brush smoothing helps even out any imperfections in your strokes that happen naturally. Unfortunately, the higher you set the percentage of brush smoothing, the more the brush tends to lag.
If the lag is bothering you, you can decrease your smoothing percentage or turn off brush smoothing entirely, which will decrease the amount of lag. You can alter your smoothing settings by first activating the brush tool (B). Next, click the drop-down arrow in the options bar to decrease the percentage of smoothing, or set it to 0%.


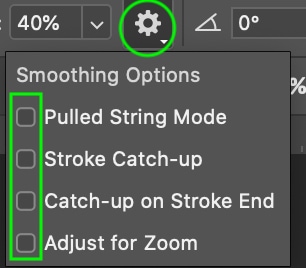
If you still notice a lag, click the gear icon and uncheck all the smoothing options. That will get rid of all smoothing settings and make the brush less laggy.
2. Remove Custom Brush Settings
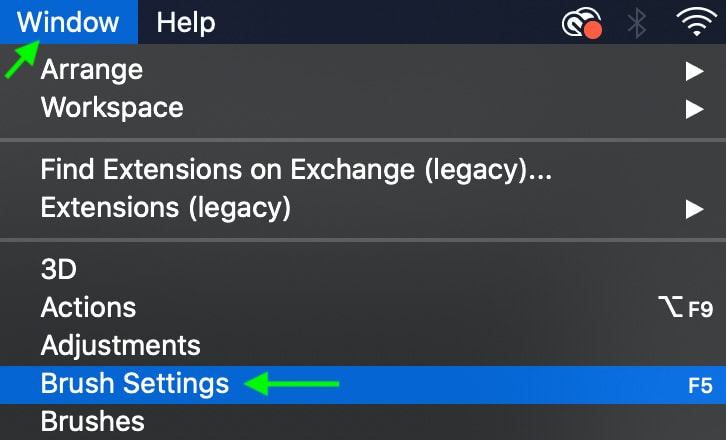
In addition to smoothing, there may be other brush settings causing your brush to lag. To see what issues may be at play, head to Window > Brush Settings to access the Brush Panel.
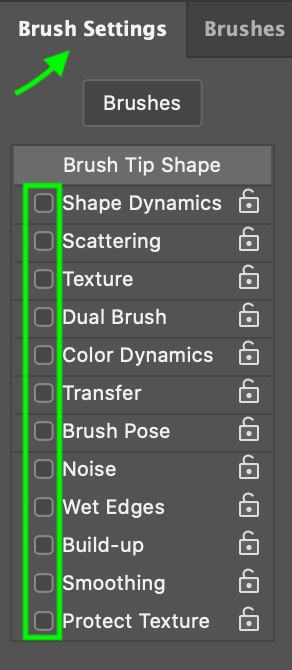
In the Brush Settings tab, first, uncheck as many settings as you can. Leave the ones you need, but the fewer settings checked, the less the brush tool is being altered as you use it.
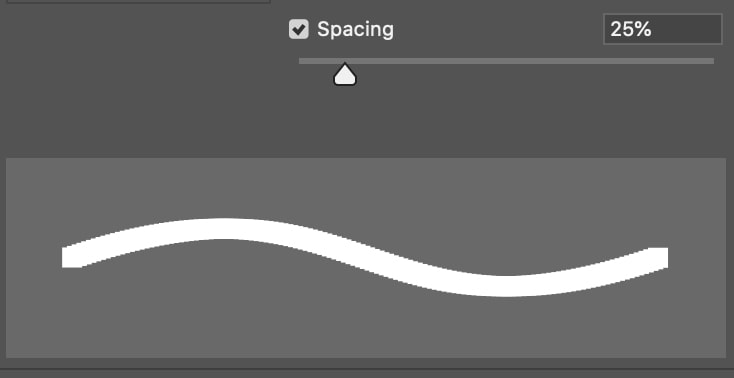
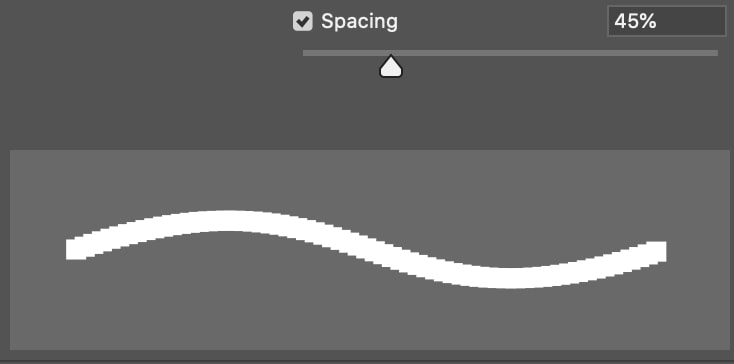
You can also decrease the brush spacing in this same tab. Brush spacing is the amount of space between each brush mark in a stroke. Less space creates a smoother stroke, but can often add a bit of lag as the system must work harder to maintain a steady stroke.
In the Brush Spacing area, you’ll notice that Photoshop automatically sets brush spacing to 25%, which creates a smooth enough stroke in most instances. You can increase the brush spacing by dragging the toggle arrow up, but keep in mind that bigger brush spacing will create some pixelation in the stroke. Below, you’ll notice the difference between the lines with 25% spacing and 45% using a square brush.
3. Turn Off Rulers
Turning off rulers seems to work well in speeding up the brush as it is one less thing for the program to work on. Head to View > Rulers and turn the ruler off by clicking on it, the checkmark indicates when the ruler is switched on. You can also toggle rulers by using Control + R (Win) or Command + R (Mac).
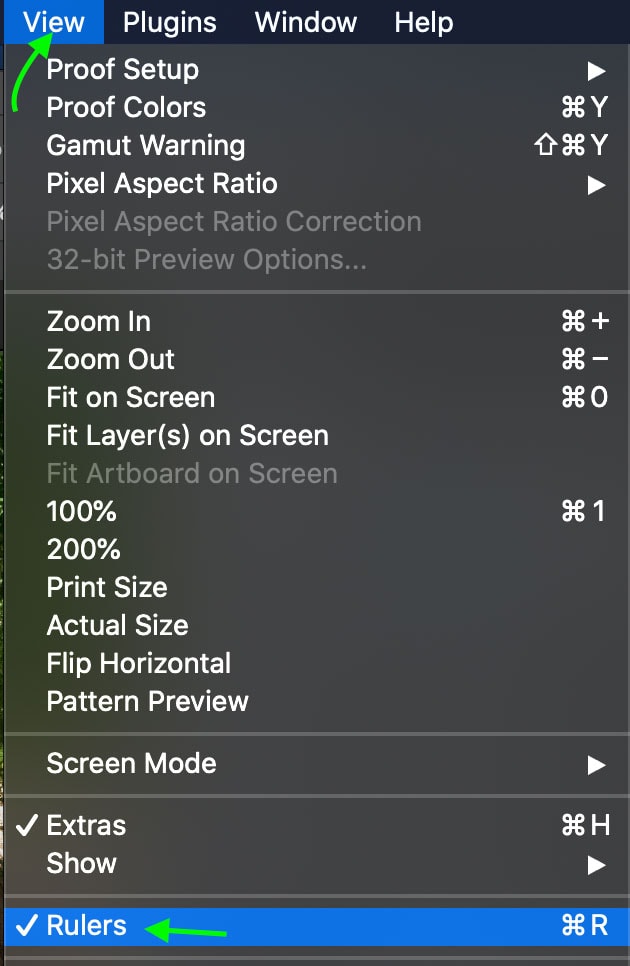
Now, you’ll notice the rulers are gone from your workspace. Follow the same steps to turn them back on again if you need them.
4. Reduce File Size
If the file size of the project you’re working on is too big, the tools may work slower, including the brush tool. There are a few things you can do to decrease the size of your project and with it, the amount of lag when you’re drawing with the brush.
To start, head to Image > Image Size.
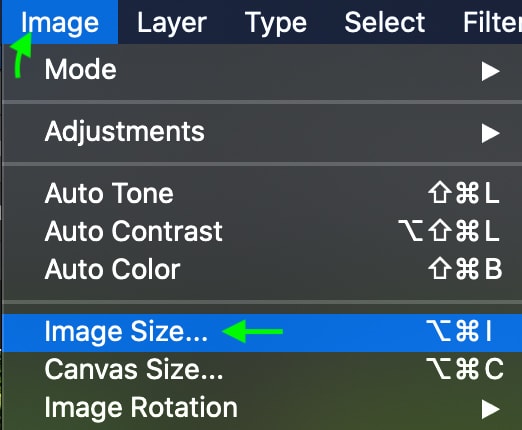
In the window that appears, you should change the resolution if it is unnecessarily high. For most projects, especially if they’re only meant for screen and not print, 72 pixels/inch is the standard resolution. A low enough resolution will free up memory and help reduce the file size.

Another way to reduce file size is to optimize your layers. Working with many different layers tends to slow Photoshop down as it requires more processing power and creates a larger file.
To reduce the size of the document due to the layers, you can merge any layers you’ve finished working on by heading to Layer > Merge Down or Merge Visible. Using Layer > Flatten Image also works similarly by flattening all the layers into one.

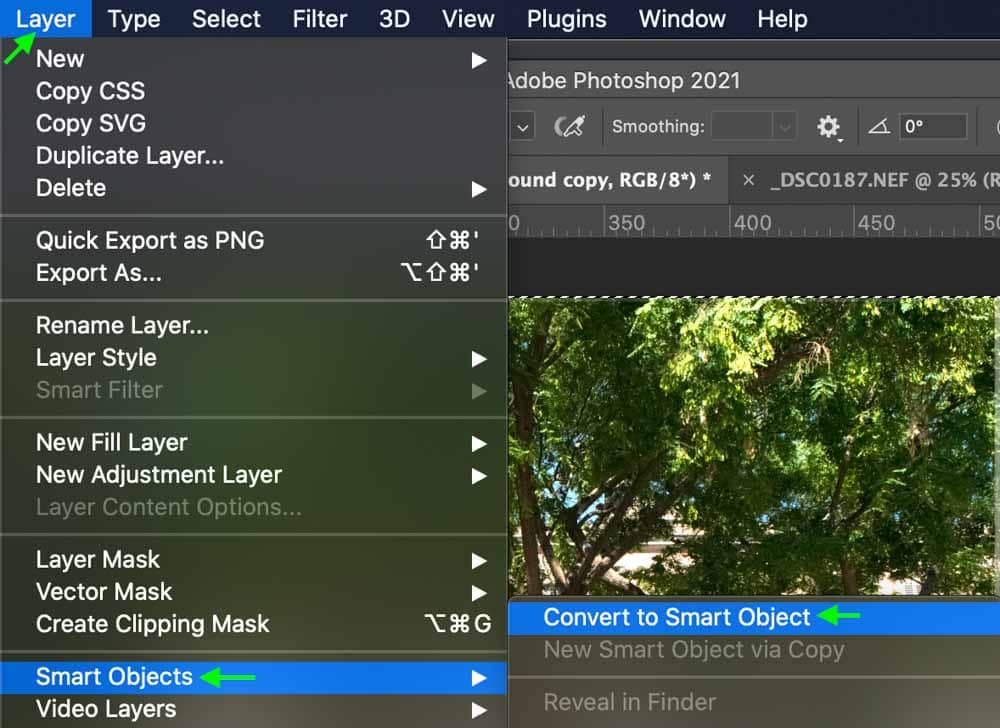
Alternatively, you can convert a finished layer to a Smart Object at Layer > Smart Objects > Convert to Smart Object.
All of these methods will help you reduce the file size of your project, reduce the load on your computer, and ultimately help with brush lag.
5. Optimize Photoshop
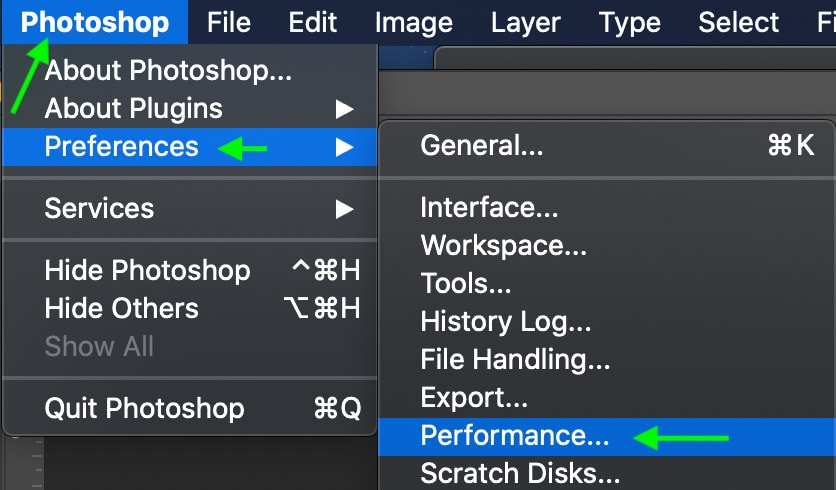
Sometimes, Photoshop’s preferences may be set up a certain way that causes the program to run slower, thus creating lag. To check out some of the settings that may be causing the lag, head to Photoshop > Preferences > Performance.
There are several settings you can adjust in the Performance window that might speed things up. To start, you can allow Photoshop to take up more of your computer’s memory by navigating to the Memory Usage area. Unless you’ve changed this before, it will automatically be set to the recommended 70%. You can increase this to allow Photoshop to use more of your computer’s RAM.
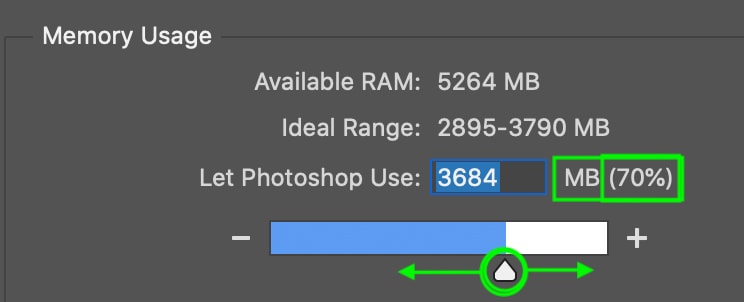
However, increasing the amount of RAM Photoshop uses might make other programs run slower while Photoshop is open.
Another way to potentially improve the program’s performance is to reset each of the relevant preferences by turning them off and on, one by one.
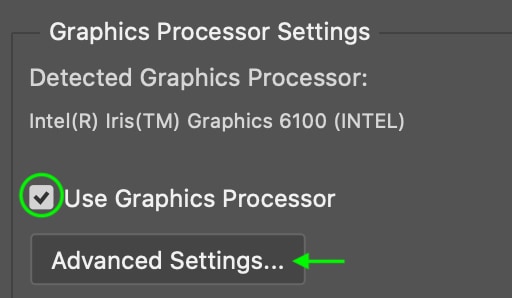
Start by unchecking the Graphics Processor. Then, if things are still running slow, you can head to Advanced Settings.
In the pop-up, uncheck the OpenCL, Anti-alias, and 30 Bit Display settings. You can uncheck them all at once, or one at a time if you’d like to figure out exactly which one might be the issue.
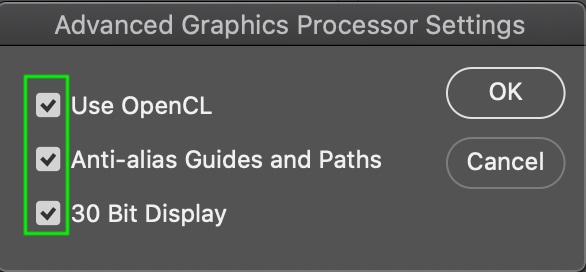
Keep in mind you’ll have to restart Photoshop for these changes to come into effect.
6. Optimize Your Computer
If your computer’s CPU is slow, your brush is likely to lag no matter what you do. You can free up some CPU by closing programs running in the background when you use Photoshop. You can also turn off Bluetooth and, if possible, wifi.
If you’re still having issues, you might want to check that your device isn’t on low-power mode or battery optimization mode. Most devices allow you to turn this setting on and off in the battery area. Turning it off will allow your device to run normally instead of at a reduced performance level. Remember to keep your device charging so you don’t lose your work.
Since many different factors can affect brush lag and the speed of Photoshop, it may take a few tries to figure out what is causing your brush lag. Optimizing different settings will not only make drawing and painting more effortless, but it will help Photoshop run better overall.
Happy Editing!


