

The Polygonal Lasso Tool in Photoshop makes selections around an object using straight lines between anchor points. It’s ideal for selecting polygonal objects or objects with many straight sides.
In this article, you will learn how this tool works and how to use it effectively. The tool is excellent for making quick selections around straight edges, after which you can remove the background, add selective adjustments, and so much more.
Video Tutorial
How To Use The Polygonal Lasso Tool In Photoshop
Step 1: Activate The Polygonal Lasso Tool (L)
Select the Polygonal Lasso Tool from the Toolbar (L) to create a selection with this tool. You will find it under the Lasso Tool fly-out menu.

Step 2: Adjust The Settings In The Options Bar
Next, go to the Options bar and adjust the following settings.
- Set the Mode to New Selection
- Keep the Feather at 0px
- Enable the Anti-alias option

Step 3: Click On The Canvas To Add Points
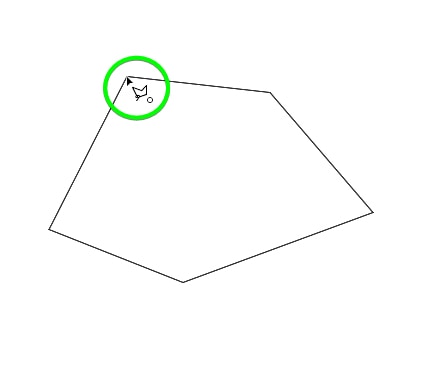
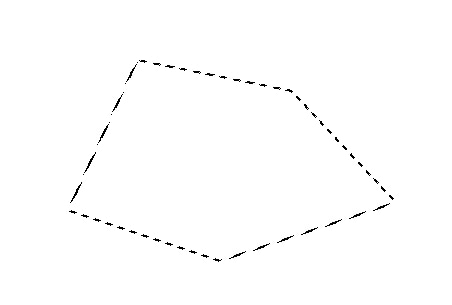
Click on your canvas or image to create the starting point of the selection. Remember, this will also be the end point of the selection. Then, click on a new point to create a straight line between the two points. Continue this to draw a straight-edged selection around an object or to create a shape.

Step 4: Click On The Starting Point To Close The Selection
Once you have drawn around the object or in the shape you want, click back on the starting point to close the selection. Once you close the shape, it automatically turns into a selection. You can now use the selection as needed.
How To Cut Out An Image With The Polygonal Lasso Tool
Step 1: Select The Polygonal Lasso Tool And Set The Selection Type
If you want to remove the background of an image using the Polygonal Lasso Tool, select the tool and choose the right Selection setting in the Options Bar. The first icon Creates a New Selection, the second icon Adds to a Selection, the third icon Subtracts from a Selection, and the fourth icon Intersects with a selection.

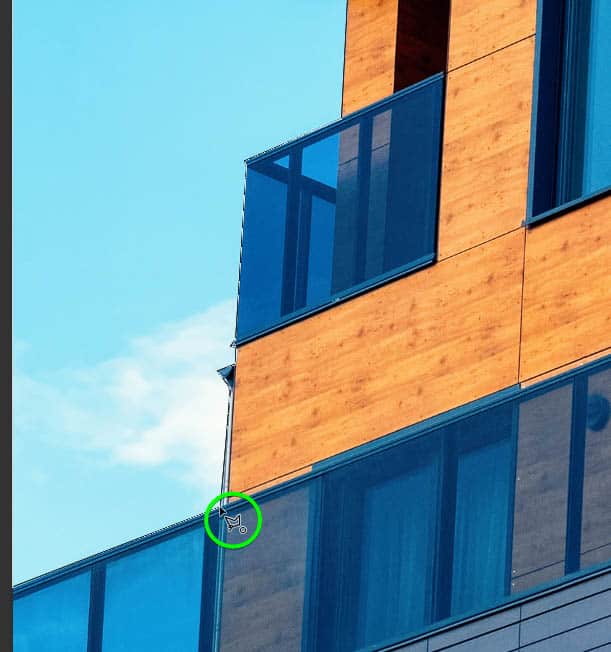
Step 2: Add Points Around The Area You Want Removed
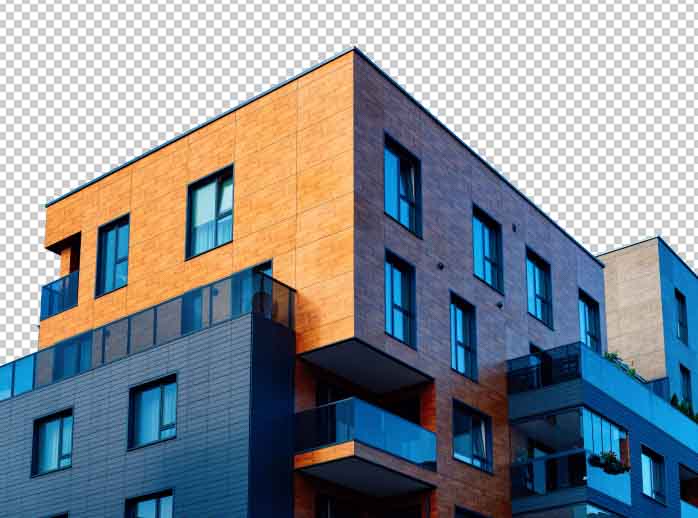
Next, add points around the area you want to remove from the image, which, in this case, is the sky in the background. To do this, click to add a starting point, then continue clicking to create points around the area. Click on the starting point at the end to close the area and create a selection.
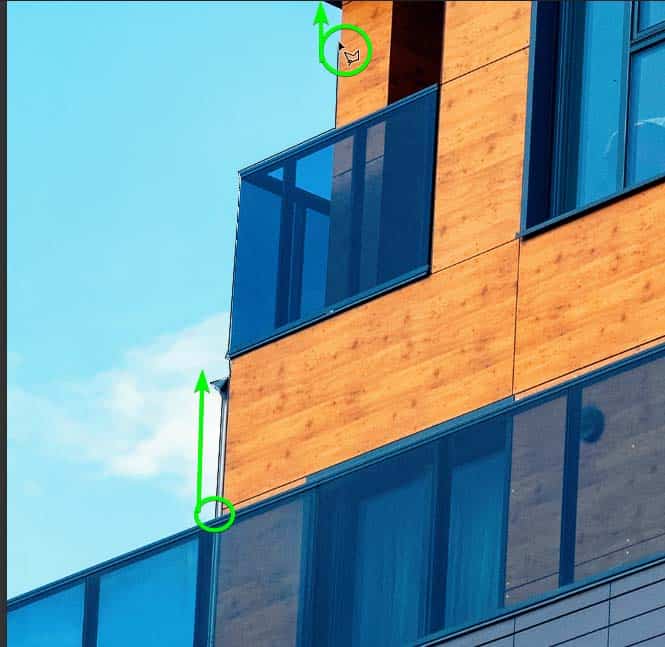
You will now have an active selection around the background.

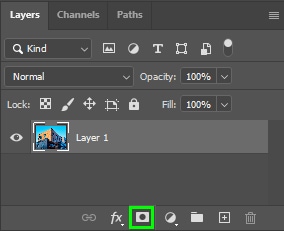
Step 3: Invert And Apply The Selection To A Layer Mask
When using Layer Masks, the area that is selected is kept while hiding the rest. You need to invert the selection and add a layer mask to it to remove the background. To do this, hold in Alt (Win) or Option (Mac) and click on the Layer Mask icon at the bottom of the Layers Panel. This will create a layer mask linked to the original layer.
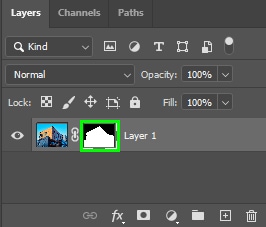
The layer mask will hide the background, successfully removing it.
The advantage of cutting out your image using layer masks is that it’s a non-destructive method. Thus, if you want to bring back portions of the areas you cut, you can double-click the layer mask and open up the Select And Mask workspace. Besides bringing back erased areas, you can also refine your selection in that workspace.
Important Shortcuts & Tips For The Polygonal Lasso Tool In Photoshop
- Temporarily Activate The Regular Lasso Tool: Hold Alt (Win) or Option (Mac) then click and drag your cursor to temporarily switch tools.
- Complete A Selection Automatically: Hold Control (Win) or Command (Mac) and click anywhere to quickly close a selection. This will draw a straight line back to the starting point from the point where your mouse cursor is.
- Add To Selection: Hold Shift and add more points to quickly add to a selection without changing the mode.
- Subtract From Selection: Hold Alt (Win) or Option (Mac) and add more points to quickly remove an area from the selection without changing the mode.
- Intersect With Selection: Hold Shift + Alt (Win) or Shift + Option (Mac) and add more points to create a new selection where the original and your new area intersect.
- Deselect: To deselect the selection(s) you have on the canvas, press Control + D (Win) or Command + D (Mac).
The Polygonal Lasso Tool is great for selection areas with straight edges, but it isn’t great for cutting out subjects or any edges with extreme details like hair. For those situations, you need to use other selection methods like the ones I share here in my guide to removing backgrounds in Photoshop.


