
Photoshop offers several editing tools which can be confusing for new editors. As a new photographer or designer using Photoshop, you may find this software too much to handle all at once. So to help you out, here are the 15 best tools in Photoshop which are essential to get you started with editing.
These top tools will help you start editing using the basics. Not only will they allow you to create stunning images, but you will also continue using them even when you are a pro at editing. These are the fundamentals that anyone using Photoshop will need to learn early on. Most of them will become the basis of any editing job you take on.
Best General Purpose Tools In Photoshop
The following are general tools that you are likely to use in most of your editing projects. These are the foundational tools that offer a lot more than you would initially think.
1. The Move Tool
The move tool is essential to position parts of your image correctly. As the name suggests, you will use this tool to move elements in your workspace. You can move layers, text, and selections as needed.
To move an element on your image, make sure the correct layer is selected. Then select the move tool which is at the top of your toolbar. Alternatively, you can simply press V on your keyboard to use the shortcut.

Once the move tool is selected, click on the object and drag it to the new position. You can also use the arrow keys to move the object. Holding in Shift while pressing the arrows will move the image in larger increments. You can learn the ins and outs of this tool by clicking here.
2. The Crop Tool
The crop tool is helpful for many reasons in Photoshop. The crop tool will cut out elements on the edges of your image that may be distracting or that you simply don’t want.
The crop tool will also help you resize images for print by using ratios. You can straighten your image using the crop tool too.
To use the crop tool, select the tool from the toolbar on the left-hand side of your workspace, or use the shortcut by pressing C on your keyboard. The crop dimensions will automatically appear over your image. You can then drag on the edges to cut the image.

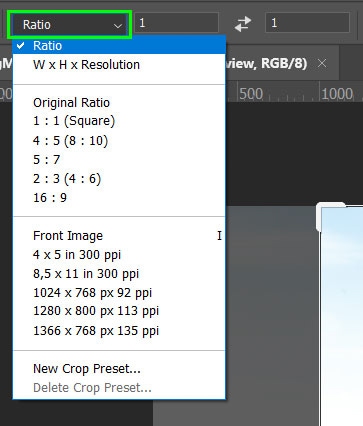
If you would like to use a specific ratio, use the Ratio dropdown option on the top menu bar, this will let you keep your image within set dimensions.
You can also straighten your image by selecting the Straighten option at the top of the menu bar, then click and hold anywhere near one of the corners of your image and tilt the image until it is correctly straightened.

Here are some helpful tutorials to get you started with cropping images:
3. The Brush Tool
The brush tool is your digital paintbrush that can be used in the same way as a traditional paintbrush. You can draw elements on your image with several styles of brushes to choose from. You can also download and add more brush styles to your workspace.
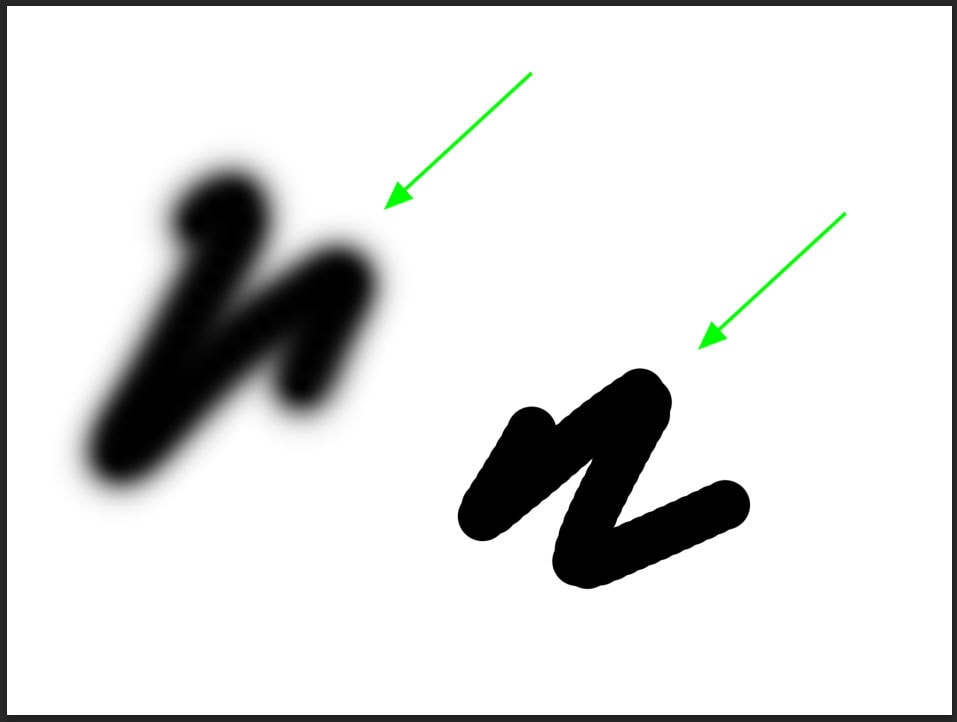
When using the brush tool you can change several elements such as the hardness, the flow, and the opacity of the brush. The brush tool is also useful for adding or subtracting areas from your channels or selections.
To use the brush tool, select it from the toolbar or press B on your keyboard. Once selected, you can change the opacity and flow of the brush on the top options bar.


You can also adjust the size of the brush on the options bar or by pressing the square brackets on your keyboard to decrease ([) or increase (]) the size. Then simply draw on your canvas by dragging the brush around the image. You can then use blending modes to create unique effects which are just one of the many uses of the brush tool.
4. The Text Tool
The text tool allows you to add text to your image with several fonts, colors, and size options to choose from. You can then distort and warp the text in several ways to add new elements to your image.
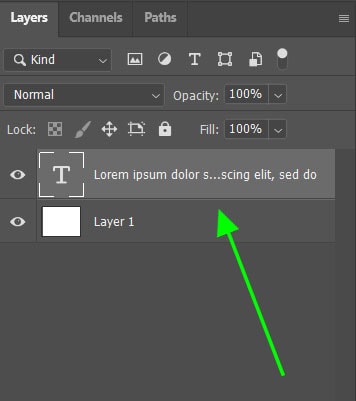
To use the text tool, select it from the toolbar or press T on your keyboard. You can then adjust the font and size on the top options bar. Once you have set your preferences, click and drag on your image to create the text box.


The text box will feature placeholder text, which you can select and retype similar to a word document. A new text layer is also created which you can manipulate in the same way as other layers.
Here are some useful text tutorials to help get your started:
- The ultimate guide to text in Photoshop
- How to scale, flip, and rotate text
- How to outline text in Photoshop
5. The Shape Tool
The shape tool allows you to quickly include general shapes on your image such as a triangle, rectangular, circle, line, or polygon. You can then change the size, colors, and other elements of the shape as desired.
To use the shape tool select it from the toolbar or press U on your keyboard. If you would like to select a different shape, click down on the tool icon until a new menu pops up.

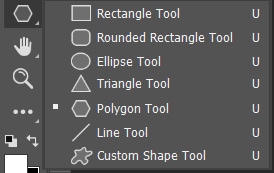
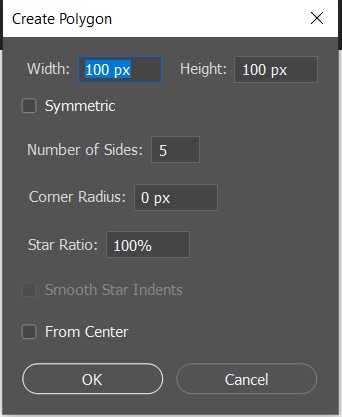
Once selected, click and drag over your image to create the shape to your chosen size. To create a perfectly uniform shape, hold in Shift while creating the shape. To change the number of sides on the polygon tool, click once on the image once you have selected the tool and a menu will appear.
You can then change the shape properties on the top options bar. The shape will be added as a new layer to your Layers panel.

Best Tools For Creating Selections In Photoshop
Creating selections in Photoshop is useful in several ways. A selection can help you isolate objects in an image or you can cut out images with them as well. Below is a video sharing some of the best ways to create selections and remove backgrounds in Photoshop.
6. The Pen Tool
The pen tool is a precise method of creating a path or selection around an object. You can use a path to deep etch objects in other programs, or simply create a selection to edit the object or cut it out from an image.
To use the pen tool, select it from the toolbar or press P on your keyboard. Once selected, you can create anchor points by clicking around your object. If you click and drag when creating a new anchor point, you can create a curved line.

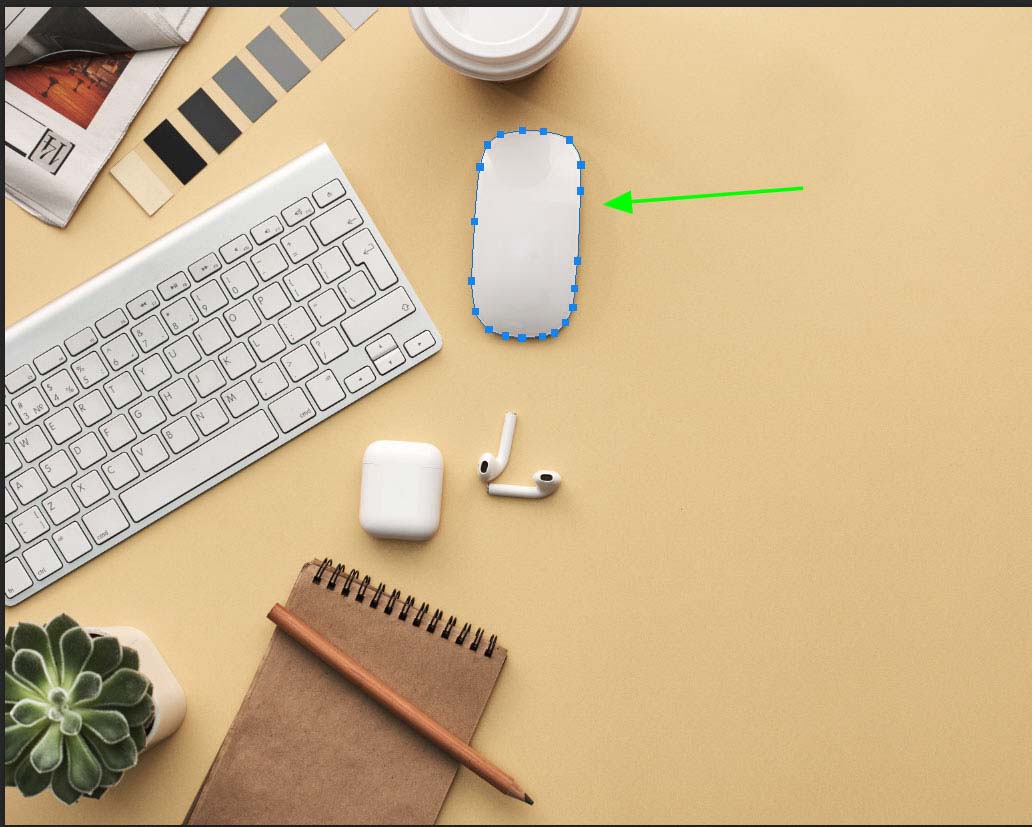
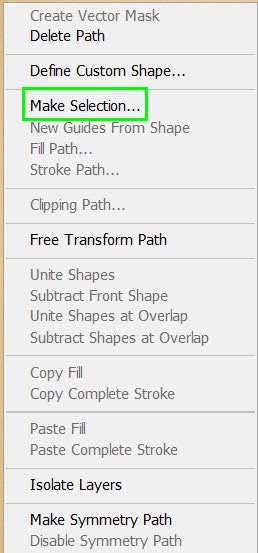
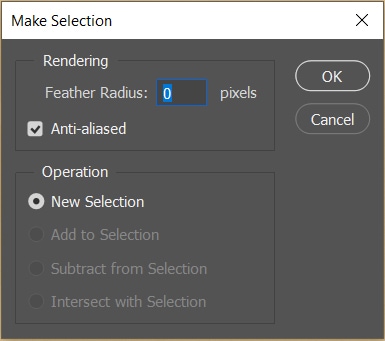
Make sure you close the selection by clicking back on the first anchor point to complete the shape. Right-click and choose “Make Selection…” and then you can define the selection before creating it.
If you want to create a path with the pen tool, first create a new path in the Path panel and then continue to draw the shape. This is a good way to save your selections separately for later use or for deep etching in another program.

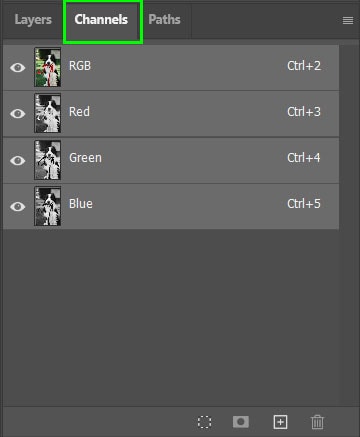
7. Channels
Channels are a useful way to create precise selections using contrast within the image. Each image contains three color profiles known as red, green, and blue for an RGB image. Your image will have these three channels along with an RGB channel found within the Channels panel.
To create a selection using channels, navigate to the Channels panel on the right-hand side of your workspace.
Select the color you want your selection to focus on, if you are using a black and white image, you can choose any color channel. The goal here is to choose the one with the most contrast. Then hold Command or Control and click on the channel layer thumbnail to create a selection. You will need to further refine things from here for an accurate cut-out, which I outline in this tutorial.
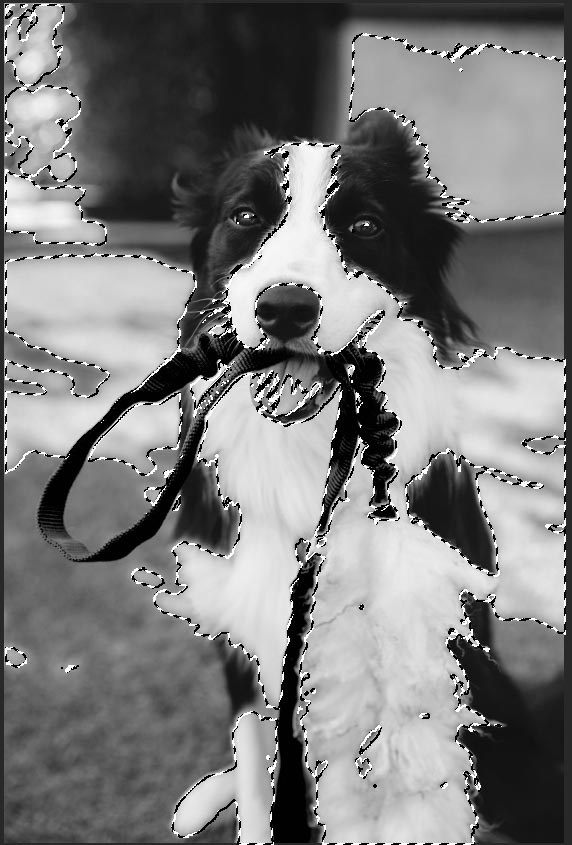
Once your selection is made, note that the selection chooses areas opposite of what you want selected.
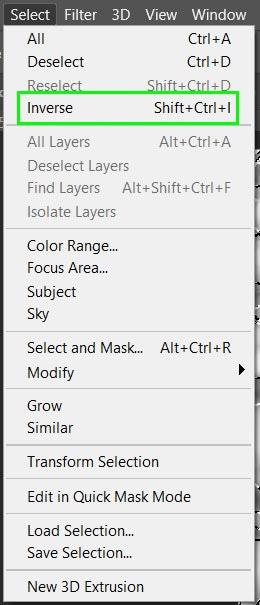
To change this selection around, click Select > Inverse or use the shortcut Shift + Control + I (Windows) or Shift + Command + I (Mac). You can now create a new layer and add to the selected areas as desired.
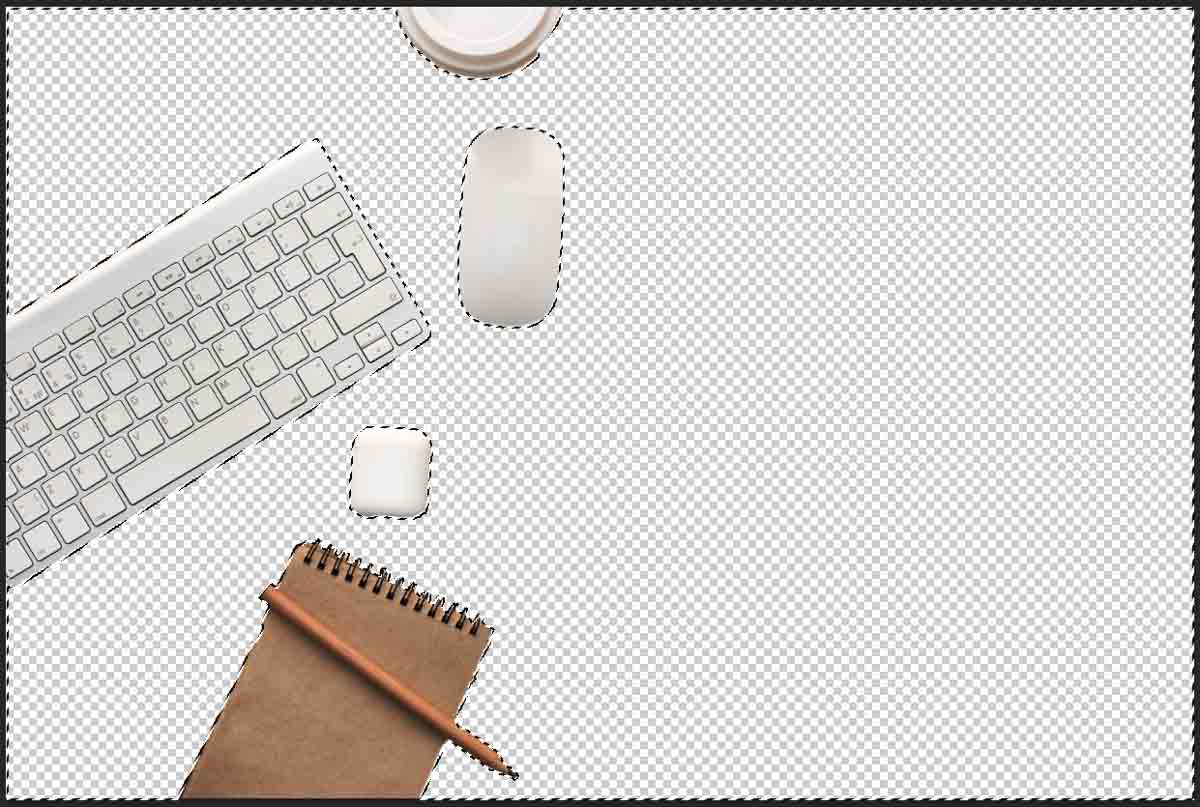
8. The Quick Selection Tool
If you would like to quickly make a selection on a basic object, you can use the quick selection tool. When using this tool, you simply ‘paint’ over the parts of the image you would like selected. You can then isolate objects and remove backgrounds.
To use the quick selection tool, select it from the toolbar or press W on your keyboard. Then click and drag over the object(s) you would like to select. Photoshop will pick up the object(s) as accurately as possible. To delete areas of the selection, hold in Alt (Windows) or Option (Mac) while painting.

You can then select the background by navigating to Select > Inverse or using the shortcut Shift + Control + I (Windows) or Shift + Command + I (Mac). Duplicate the layer, then press delete on your keyboard to get rid of the background.
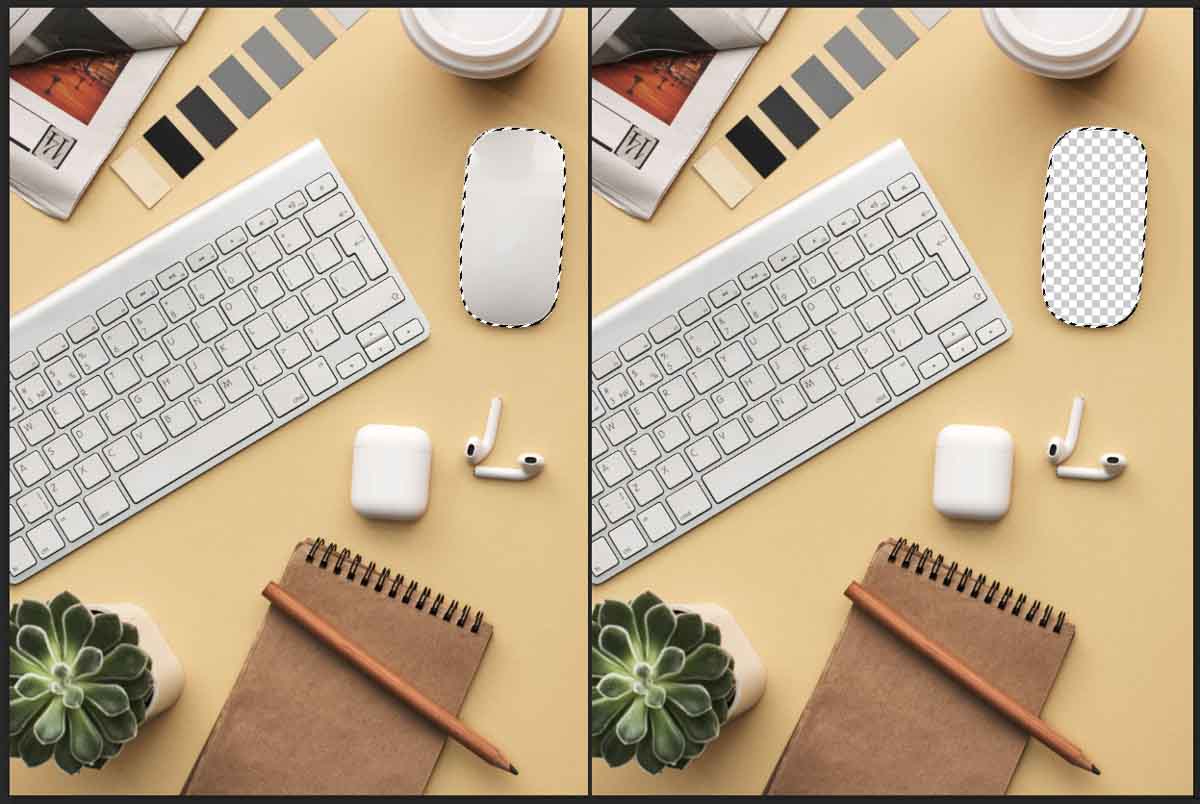
9. Object Selection Tool
If there is a clear object in the image, you can use the Object Selection Tool to quickly select the object you would like to isolate from the background. You can then edit the object separately or remove the background from the image.
To use the tool, click the Object Selection tool on the toolbar or press W. If the Object Selection Tool is not visible click and hold on the tool until a menu pops up. Once the tool is selected, click and drag on your image to create a rectangle around your object.


Once you let go, Photoshop will automatically create a selection around the main object within the rectangle you made. Once you have duplicated the layer, you can click delete on your keyboard to delete the selected object from your image. You can learn about this tool in-depth in this post.
10. The Marquee Tool
If your desired selection is a specific shape, you can use the Marquee tool to easily select it. This tool works well for general selections in the shape of a rectangle.
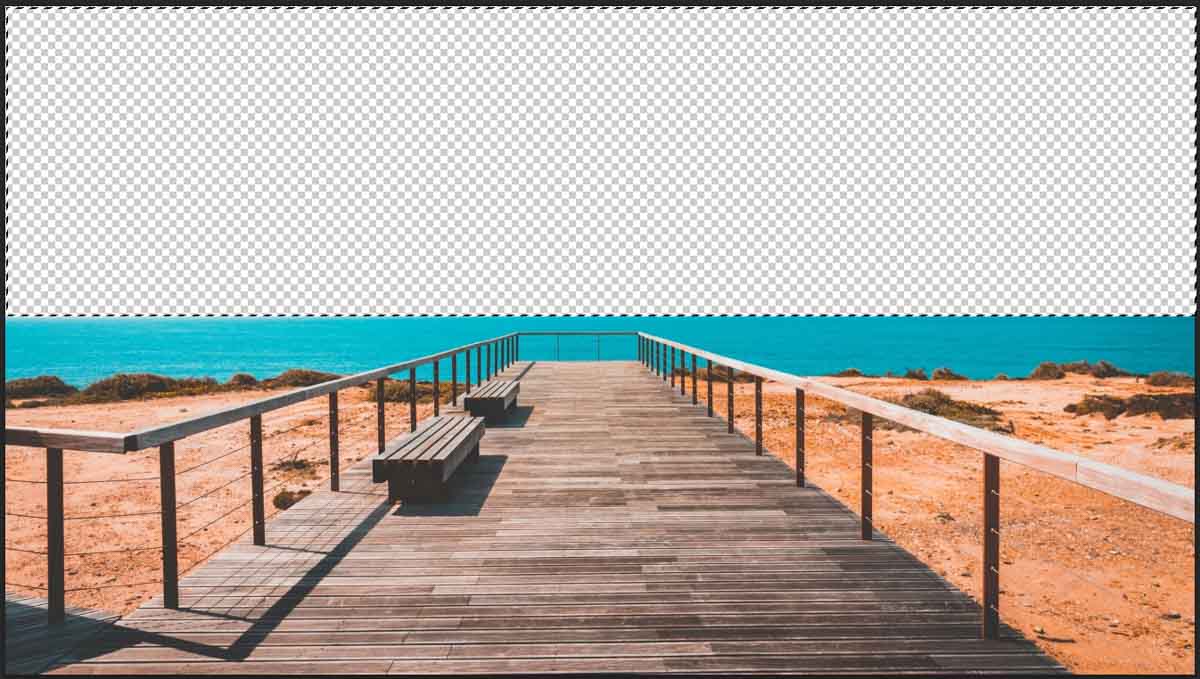
To use the Marquee tool select it from your toolbar or press M on your keyboard. In this example, I’ll use it to remove the sky from a photo. Click and drag to select the horizon of your image using the rectangular tool.

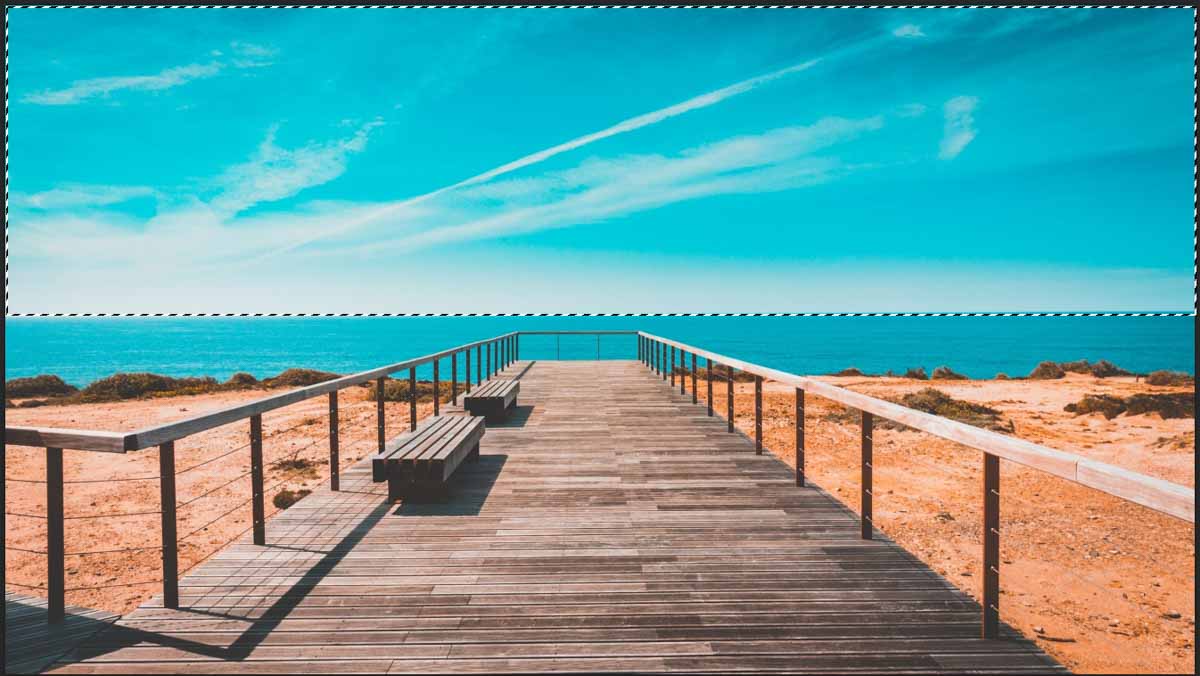
Now press delete to get rid of the sky within your selection! The Marquee Tool is great for quickly cutting out general chunks of your image.
Best Photo Editing Tools In Photoshop
When editing an image, there are a few general touch-ups that will be done on almost all your images, here are a few of these essential editing tools to begin with.
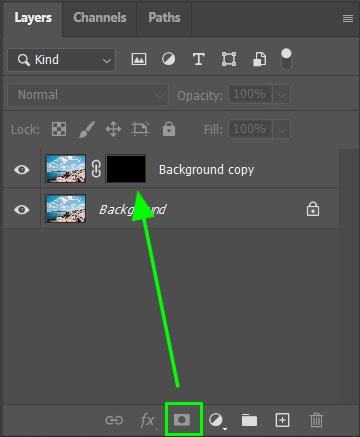
11. Layer Masks
Using a layer mask is a way to hide or reveal certain parts of an image to provide more editing capabilities, without needing to permanently delete parts of your photo. These layer masks control the transparency of the layer you add it to.
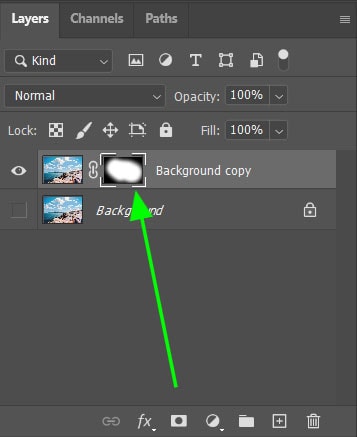
To add a layer mask, make sure you have selected the correct layer and click on the “Add Layer Mask” shortcut at the bottom of the Layers panel. This creates a white or black block next to the layer thumbnail. Black indicates transparency while white indicates visibility.
You can then use the paintbrush tool by clicking B on your keyboard and paint white over parts of the image you would like revealed. Always keep in mind that black hides (detracts from) the layer and white reveals (adds to) the layer.
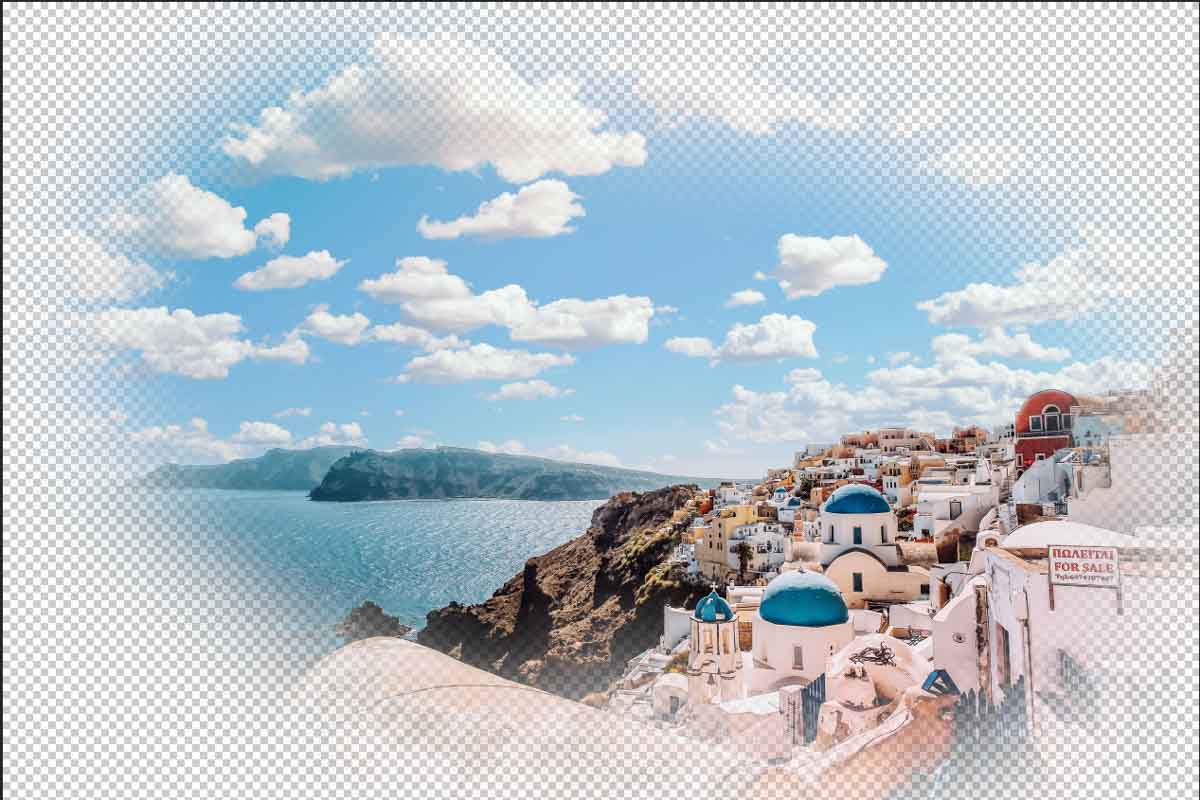
Since I have a black layer mask, I will paint white to make the image visible. You will notice wherever I draw appears white marks in the layer mask, those parts of the image appear. You should have your background layer hidden or deleted to see the transparent parts of the image.
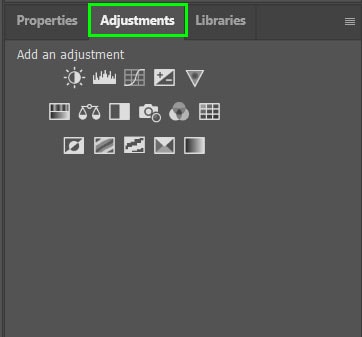
12. Adjustment Layers
Adjustment layers are a grouping of all the basic editing tools such as Contrast, Levels, Vibrance, Brightness, and so much more. As you choose an adjustment it will create a new layer in the layer panels, you can go back to these layers at any time to re-edit the adjustment if needed.
There are two ways to add a new adjustment. Firstly, select the icon “Create new fill or adjustment layer” at the bottom of the Layers panel and select the adjustment of choice. You can then change the properties further up on the right-hand panel of your workspace.
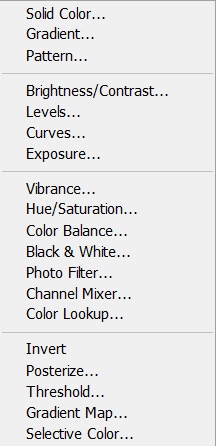
The second method is to navigate to the Adjustments tab on the right-hand panel and select the tool you need. If you don’t see this panel go to Window > Adjustments to reveal it.
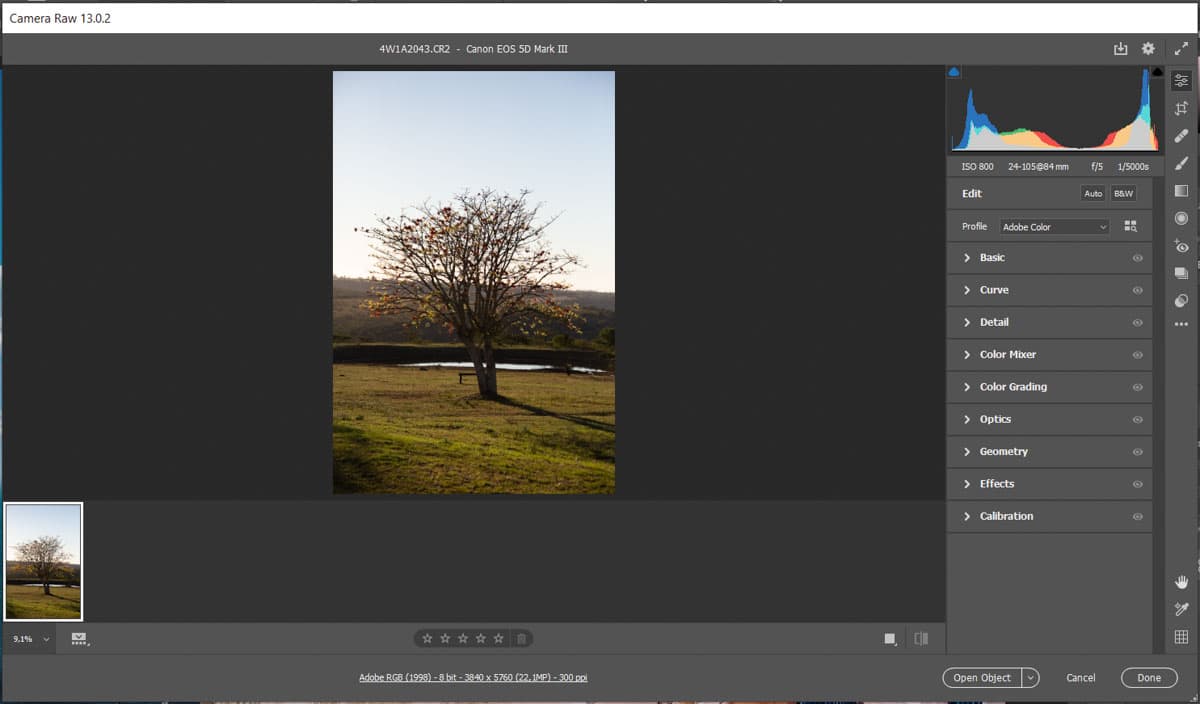
13. Camera Raw
Camera raw is a great tool to use for non-destructive editing of your images. This tool is useful to pre-edit your images before they open in the Photoshop workspace. Especially when you are working with RAW photos.
While there are a few ways to open a JPEG image in Camera Raw, the image will still have editing limitations, whereas an original image in RAW format provides you with extra editing capabilities.
The Camera Raw tool provides you with most of the basic editing tools such as Crop, Brighten, and Sharpen. This editing can be done before moving into the Photoshop workspace or you can use it as a quick edit for your images. The main benefit is that the editing will not reduce the quality of your image.
To use Camera Raw, open your CR2 or Raw file in Photoshop and it will automatically open in the Camera Raw workspace for you to edit as needed.
14. Spot Healing Brush Tool
The Spot Healing Brush Tool is useful when you need to remove small blemishes or spots on the image without disrupting the pixels too much. This tool automatically removes unwanted spots and fills them in with related pixels.
To use the Spot Healing Brush tool, select it from the toolbar or press J on your keyboard. You can then click on areas of the image you would like to have fixed up. Simply place the circle over the area and click once. Use [ and ] on your keyboard to decrease or increase the size of the circle. To remove a larger area, click and drag over any areas you wish to remove.

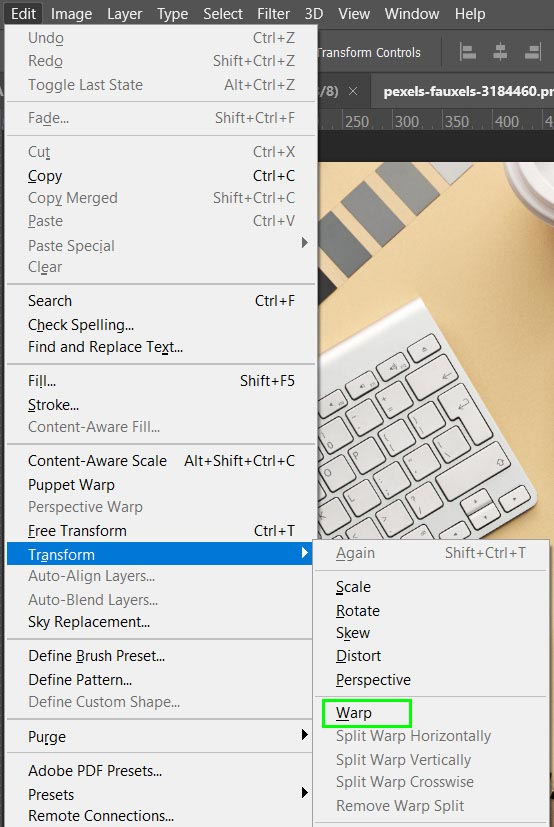
15. The Transform Tool
The Transform tool is a great way to manipulate the size, angle, or to warp objects in different ways. You can select any layer in your project and easily manipulate it by moving around anchor points.
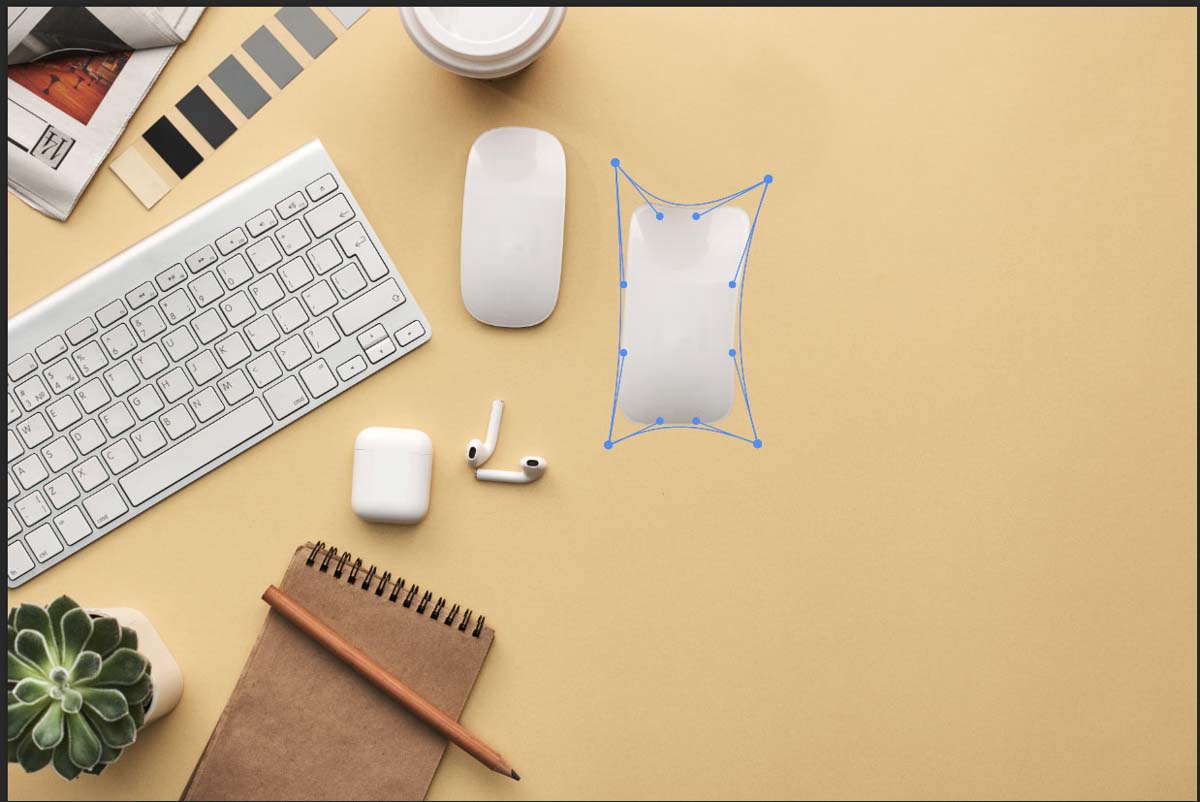
To use the Transform tool, navigate to Edit > Transform and select the method you want to use to change your image. For instance select Warp to pull and drag your image any way you want to.
Once warp is selected, drag on the various anchor points to manipulate the object as needed.
While each of these explanations is only the surface level of these tools, they can all do so much more. The best way to figure them out is to test all the options they offer and see what you can create. To start putting these tools to practice, let’s edit a photo together with a simple ten-step process. Click here to get started!
Happy Editing!


