
The Ruler Tool in Photoshop is a handy way to measure and format elements on your document. For instance, if you often create work for print, the Ruler can assist you in adding margins or measuring your project. The Ruler Tool is also particularly useful for aligning elements in your projects when used together with Guides. So let’s take a look at how to use this tool in any project you’re working on.
How To Access The Ruler Tool In Photoshop
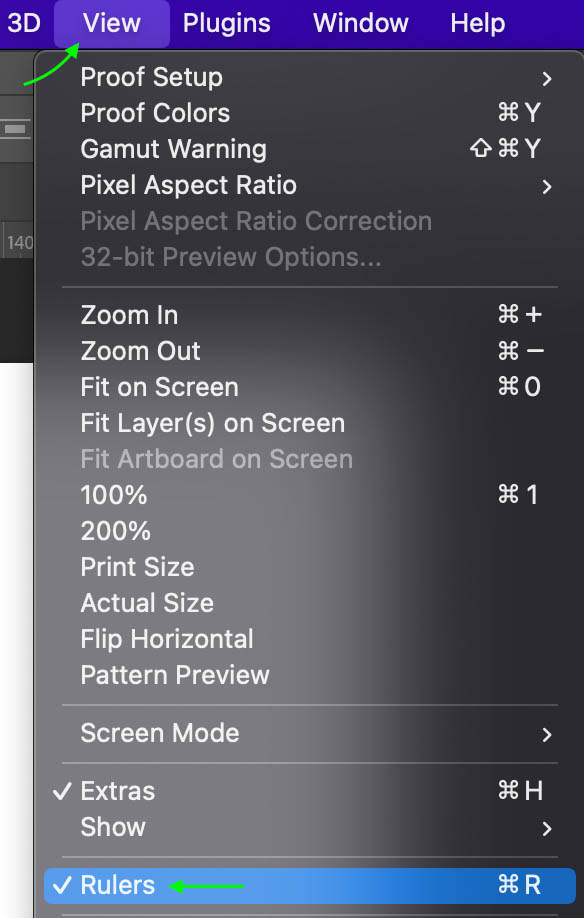
You can easily access the ruler using Control + R (Win) or Command + R (Mac) or head to View > Rulers.
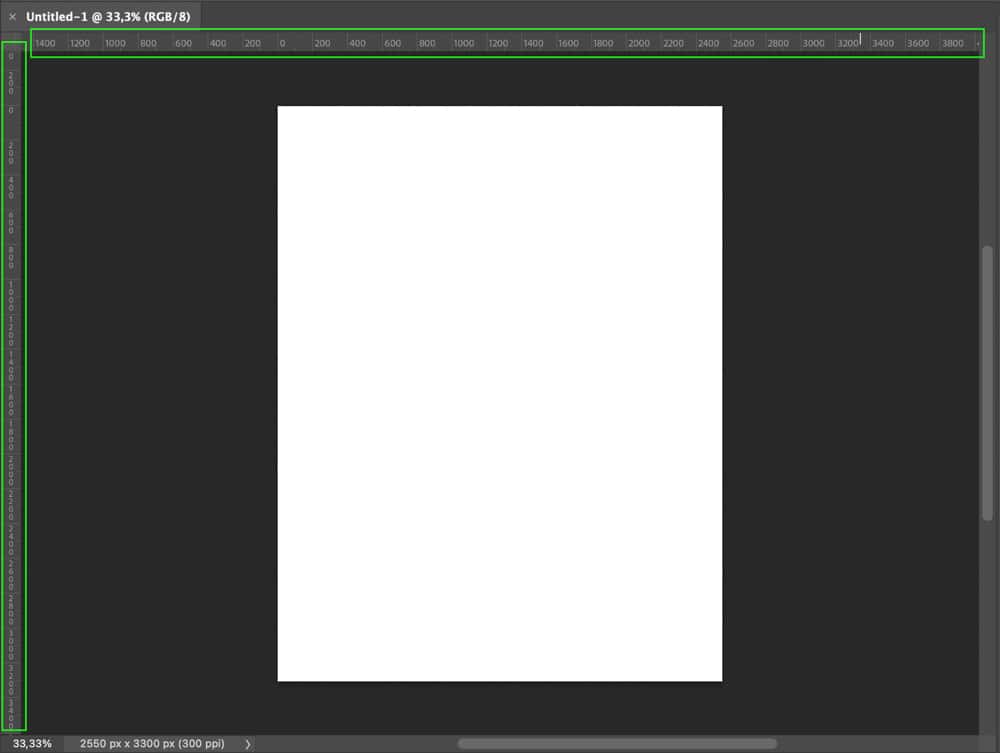
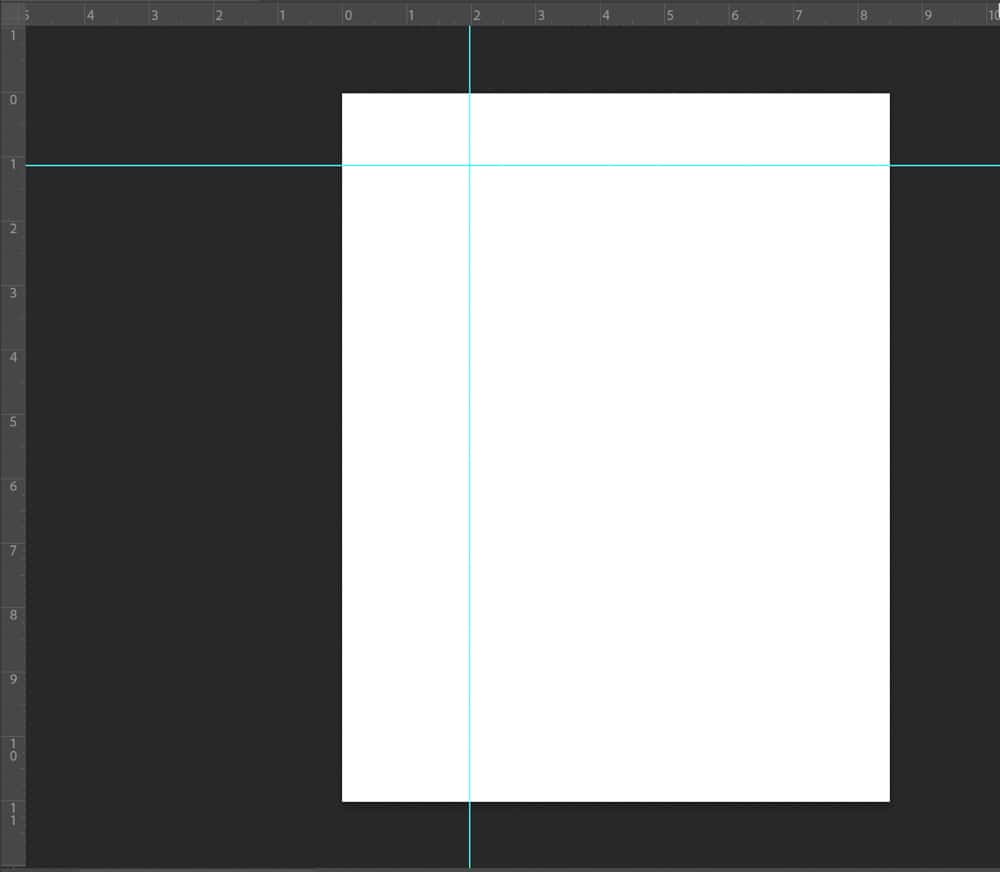
For my example, I’m using an 8.5 x 11-inch document which is the standard size for a piece of printer paper. Use whatever size fits your needs, but keep in mind it helps to know the size of your document when using the ruler so you can understand the size of any objects you measure in relation to the document.
Once active, You’ll see the rulers appear at the top and left side of the workspace.
How To Change The Rulers Unit Of Measurement In Photoshop
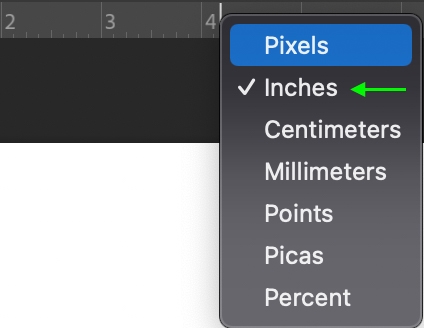
Once the ruler appears on your document, you’ll notice whatever unit of measurement the ruler is set to – for my example, the ruler was set to Pixels by default.
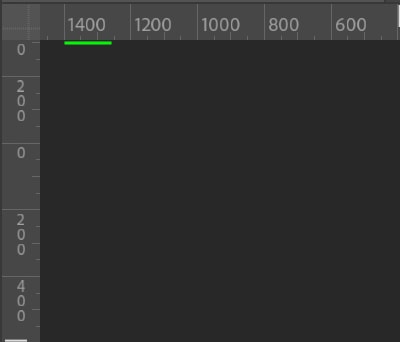
Measuring in pixels won’t help me much, so to change the unit of measurement, I can right-click or Control + click on the ruler and select which unit to use. I’ll go with Inches for my purposes.
The ruler will change to match the unit of measurement you selected. You’ll notice the numbers start at the edge of your page at 0, so you can see the size of your page here for reference.

How To Use Guides With The Ruler Tool
You can quickly add a guide to a measurement on the ruler by clicking either the vertical or horizontal ruler and drag the guide to the document. For instance, a horizontal guide will appear on my document if I click the top ruler and drag the cursor down.

You can add as many horizontal and vertical guides as you’d like or move the guides by clicking and dragging them.
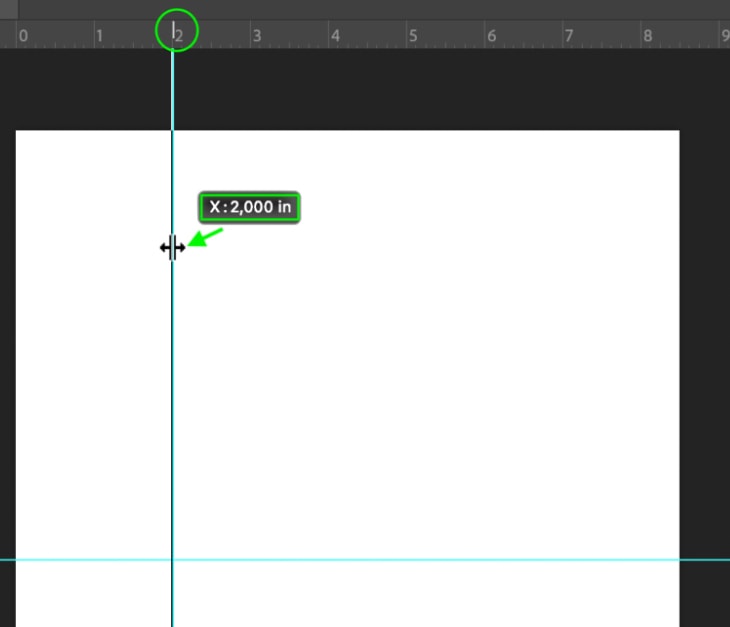
While you’re dragging a guide, you’ll notice that a small box appears next to the guide with the exact measurement the guide is sitting along the ruler.
You can keep an eye on this for extra precision when placing your guides. Hold Shift while dragging to snap the guide into the next inch ending in .000 or .005, which is helpful when placing a guide at an exact inch on the ruler.
Adding a guide from the ruler is particularly helpful if you’re trying to align elements in a project or photo or if you’d like to add margins to the document (which is important if you’re planning to print the project in the future).
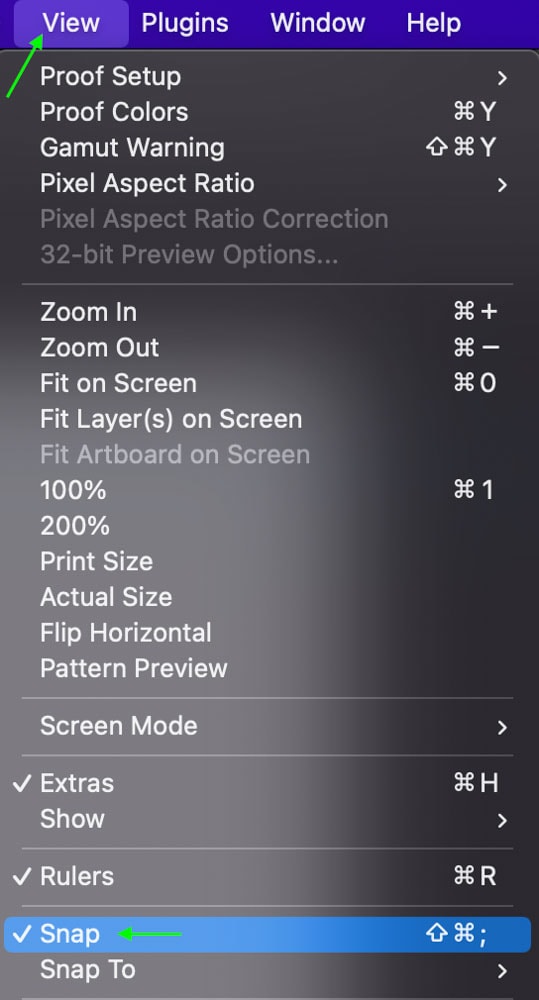
It also helps to ensure you’ve enabled snapping, which means the guides will “snap” to the edges of different elements in your project or to important areas of the document, such as the center. You can enable snapping by heading to View > Snap. You’ll know snapping is enabled when you see a checkmark next to it.
You can also use the shortcut Shift + Control + ; (Win) or Shift + Command + ; (Mac) to toggle Snap on and off.
This allows for the best possible accuracy if you’re trying to line up different elements, as you don’t have to try to find the exact point you want to place the guide manually. The system will take over when you’re close to the point and “snap” the guide into place.
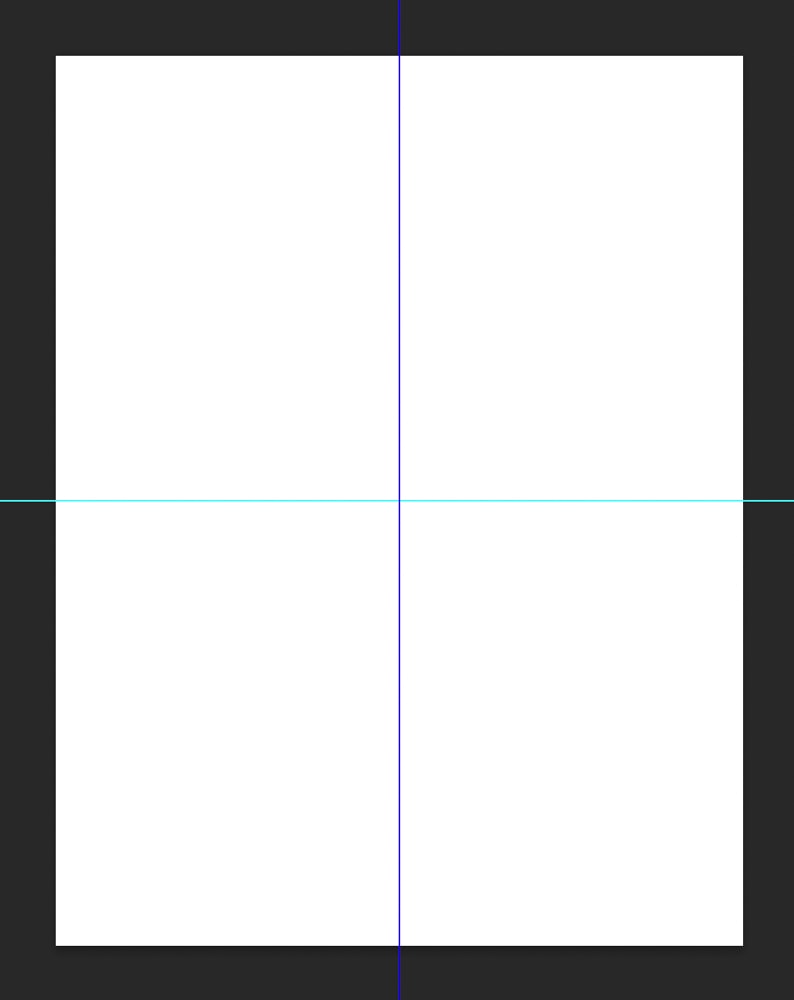
For instance, if I want to apply a guide to the center of the document either horizontally or vertically, I can drag the guide near the center, and it will automatically snap into the exact center.
Snapping works best when you have multiple elements in your document already, as it makes it easier to align different elements. However, snapping can also prevent you from placing an element in the exact location you’d like, so feel free to disable snapping by heading to View > Snap and clicking it again to be sure Snap is unchecked.
How To Measure Layers With The Ruler Tool In Photoshop
The Ruler can also help when measuring elements such as shapes or text boxes, as you can apply guides to exact points on the ruler to match the size you’d like the element. For instance, if you want to create a 2-inch x 1-inch long rectangle, you can add vertical guides around the 2-inch and 4-inch marks and horizontal guides at the 1-inch and 2-inch marks.
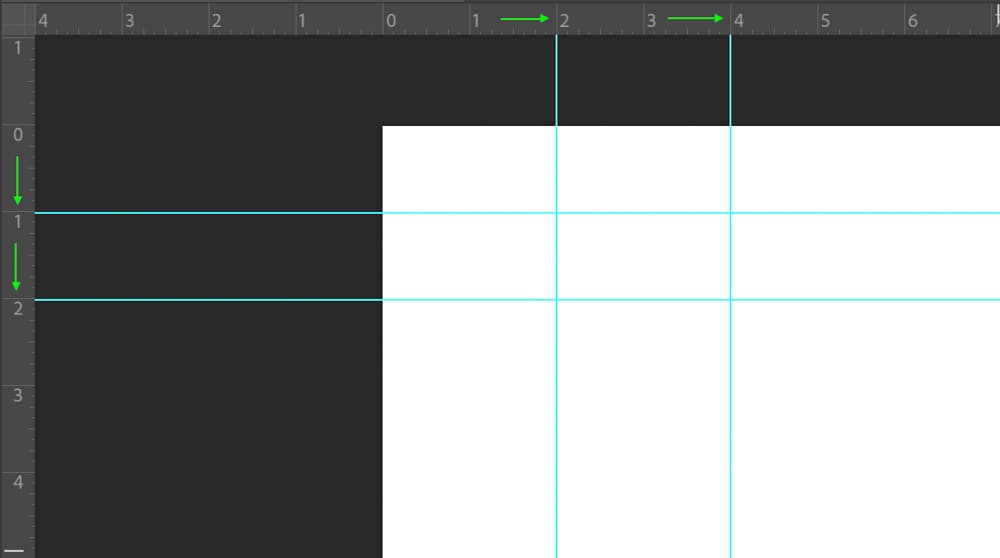
Then, when you draw a shape on the canvas, the shape will snap into place along those guides.

You can now use the Ruler to place Guides that help you measure and place different objects in your project. This can be helpful to know the exact dimensions of something for printing if you plan to use this file as a cutout or even as a project file for sticker design too. Although simple, the Ruler Tool has a lot to offer regarding aligning layers and ensuring things are correctly sized. To learn more ways to align layers in Photoshop, see this guide to aligning and distributing layers in Photoshop.


