
Adobe Photoshop is a fully modular and customizable program, allowing you to adjust your workspace in Photoshop to whatever works best for you. This is both a blessing and a curse, as customizing a workspace is convenient but can be rather complicated. Luckily, the program has a few default options to make this process simpler.
Let’s take a look at the different types of workspaces available in Photoshop, what the primary panels are for, and how you can save a custom workspace to suit your workflow.
What Are The Main Parts Of The Photoshop Workspace?
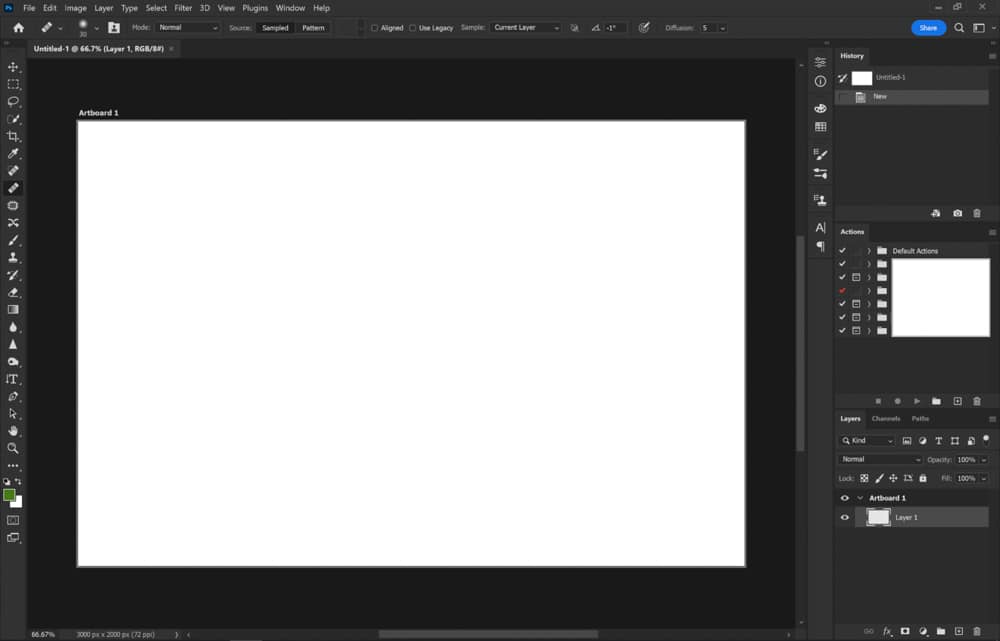
To understand the best way to adjust your Photoshop workspace, let’s first explore the primary components of the default workspace. Photoshop is a multipurpose creative software, and the workspace is divided into a few specific parts: layers, menus, options, the toolbar, and project tabs.
The Layers Panel
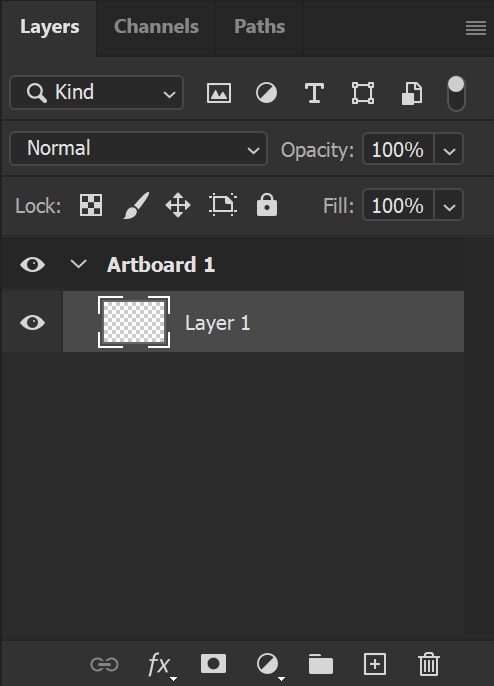
Located on the right-hand side of your screen, there are various panels that change depending on the workspace you have customized. One of the most important of these panels is the Layers panel, where you can switch between the various layers of your image or add adjustments and filters to individual layers. For photographers and visual artists, this is very useful.
The Menu Bar

You will find the Menu bar at the top of your screen. This is where you find various useful aspects of the program, such as file options, editing options, image tools, and more. This menu never changes.
The Menu bar is also how you access the Workspace options, but more on this later.
The Options Bar

Directly underneath the Menu bar, you will find the Options bar. The Options bar changes based on what tool you currently have selected, as this is where you customize the settings for the tool you are using.
The Toolbar

The Toolbar is located on the very left-hand side of your screen. This is where you select a tool to use on your project or switch between multiple tools while working.
The Project Tabs

Located directly underneath the Options bar is the Project Tab(s). This is how you know what file you are currently viewing or working on.
Depending on how many files you have open at a time, this bar will hold multiple tabs (eventually showing an arrow at the end if there are too many files open to display on the tab).
This is also how you easily switch between open files — just click on the tab with the file you want to view or work on.
Choosing A Default Workspace In Photoshop
The default workspaces are very useful for quickly adjusting your program screen to any type of visual project you are currently working on. These defaults are also a great foundation to build upon if you are trying to create a custom workspace for yourself.
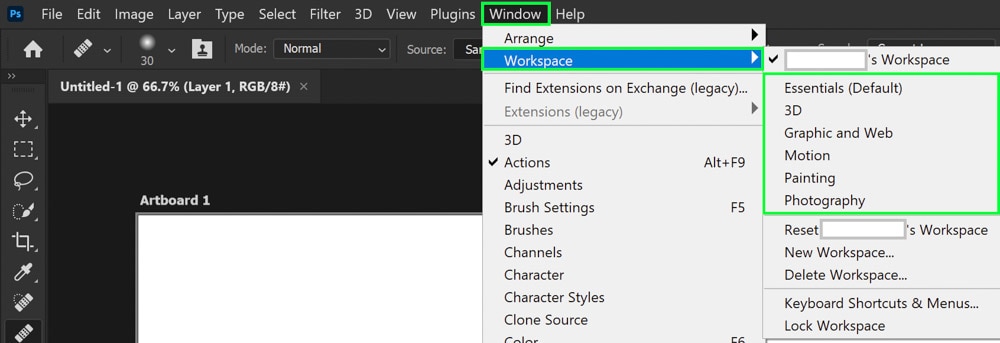
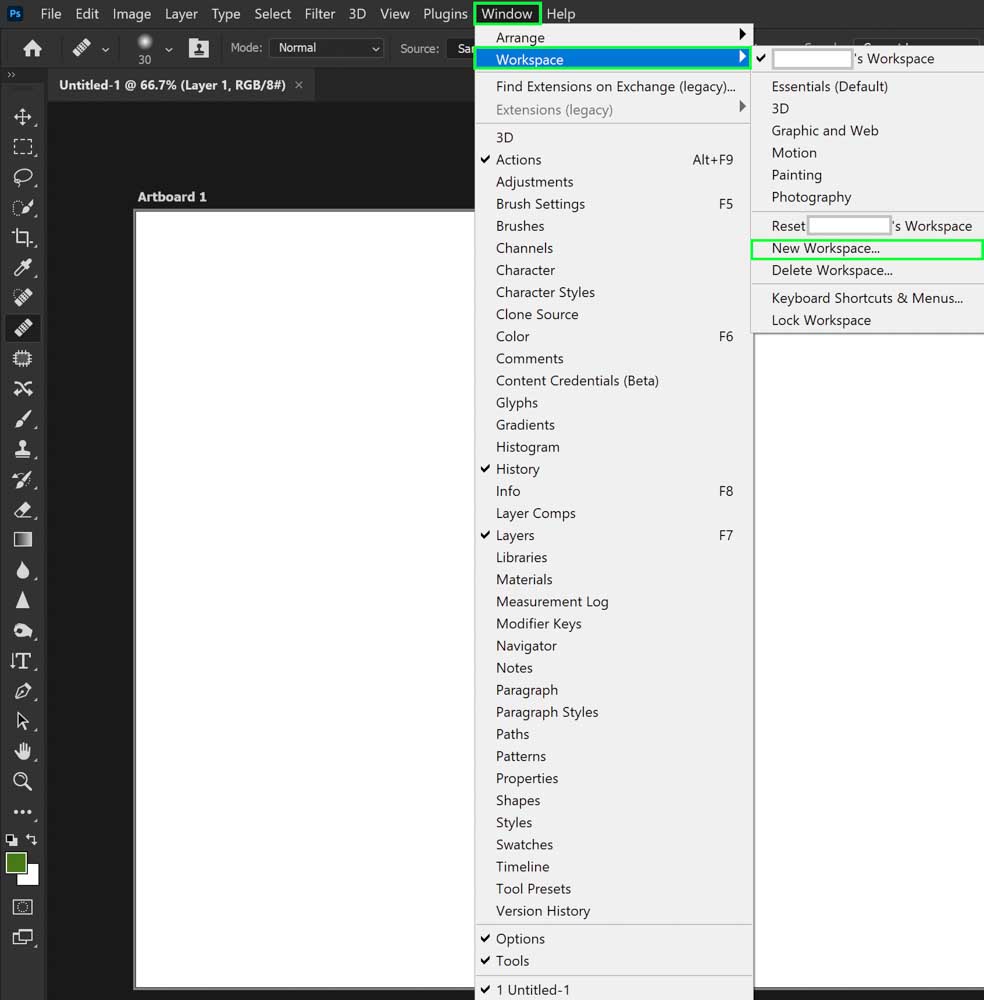
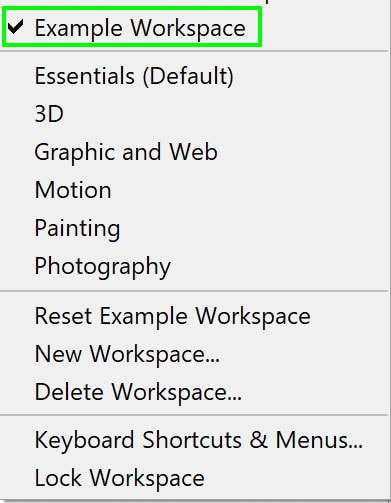
To get to the Default workspaces (and adjust workspaces as a whole), at the top of your screen, go to Window > Workspace.
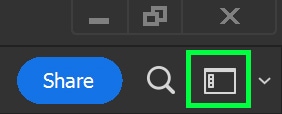
You can also quickly access Workspace by clicking the workspace icon in the upper right-hand corner.
From here, you will find your defaults and the ability to reset, add a new workspace, or delete a workspace.
Essentials Workspace
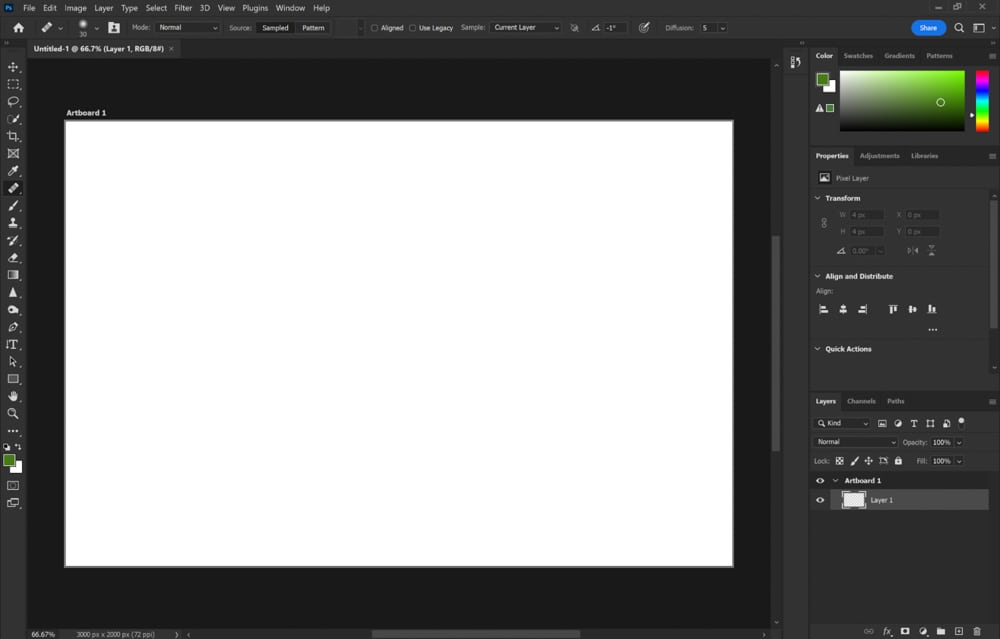
By default, your workspace is in the Essentials. This is a good starting point for workspaces as the panels it features are all generally useful for various Photoshop applications, from photo editing to some minor design work.
At the top, you will find your color picker, followed by Properties, Adjustment, Libraries for your tools, alignment options for various layers and text, any saved Quick Actions, and your Layers panel.
3D Workspace
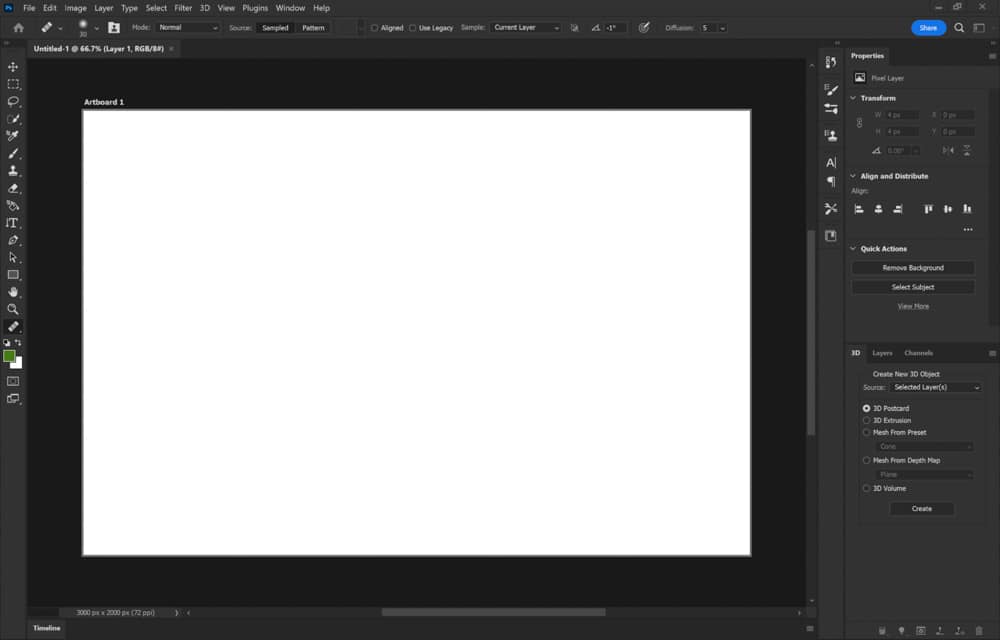
For 3D artists, the 3D workspace is designed to make whatever element is on your screen three-dimensional. You’ll find various 3D transformation and alignment options in the open panels. Since many 3D tools are being discontinued in Photoshop, this workspace may not be around for much longer.
Motion Workspace
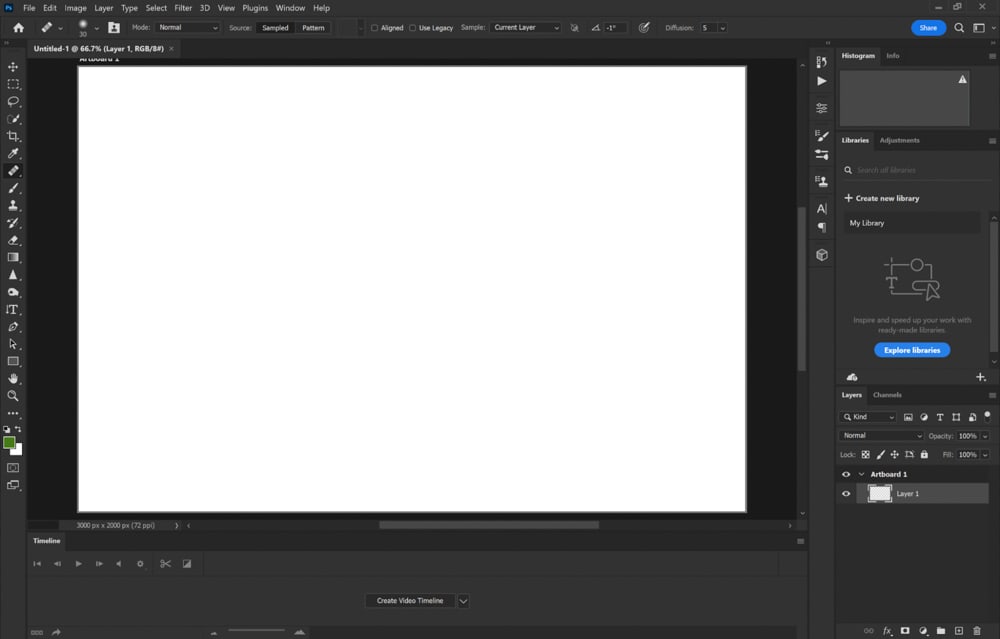
The Motion default is excellent for video makers, GIF makers, and animators. All your panels have to do with adding multiple scenes or still images for video purposes.
This workspace also transforms the bottom of your screen into the Timeline panel, which lets you adjust a motion timeline.
Painting Workspace
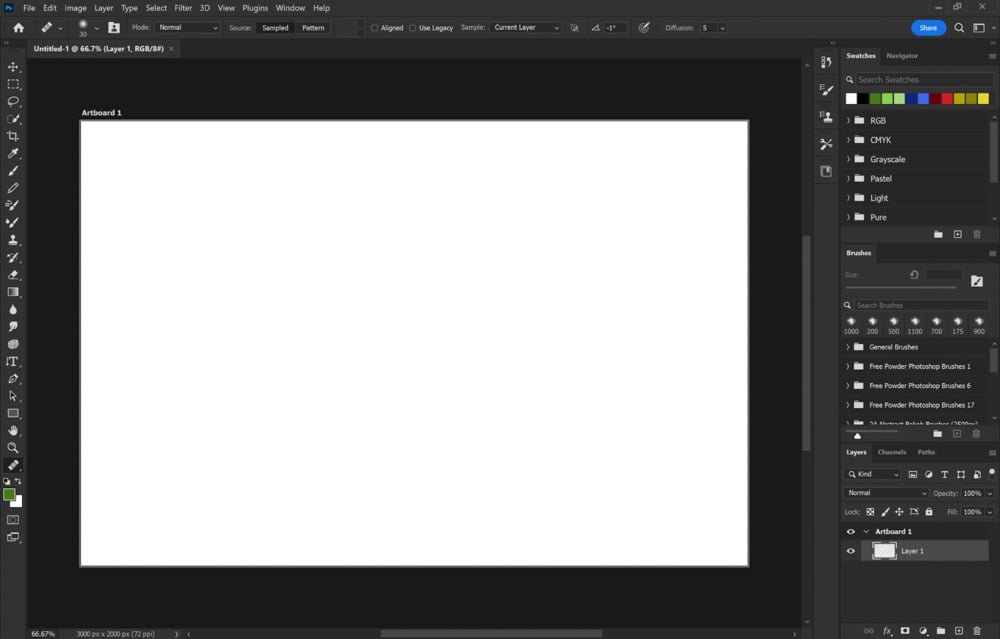
For the painters out there, the Painting workspace is intended to make digital art easy for you. All the panels focus on brushes and colors to help get that painting going!
Photography Workspace
The Photography workspace is all about editing images efficiently. Here you will find a History panel (to go back in time and fix any mistakes that may have happened along the editing way), the Actions panel, and your Layers.
Graphic And Web Workspace
For the designers out there, the Graphic and Web Workspace is very text and alignment based. The featured tools include those most used when creating marketing materials, websites, and other graphic-oriented designs.
How To Create A Custom Workspace In Photoshop
Photoshop makes creating a custom workspace reasonably easy to do! Saving your workspace as a custom one after being done is a great way to ensure you can always get back to it should you make some adjustments to your workspace later on.
First, go to Window in your Menu bar. Here, you will see a variety of workspace panels available for you to add to your workspace. The added ones will feature a checkmark next to them. Go ahead and mark all the panels you want viewable in your workspace.
After doing so, you can save the workspace by clicking Window > Workspace > New Workspace.
You will be prompted to enter a name for this workspace.
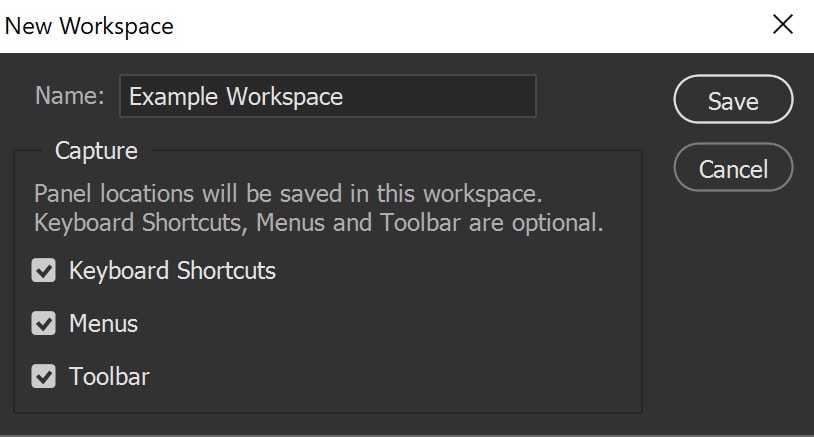
In this same window, you will see checkboxes for Keyboard Shortcuts, Menus, and Toolbars. This indicates whether or not these options are saved along with the workspace. Generally speaking, you want all three of these boxes checked, but it depends on what you wish to save.
Once a name has been entered, you will see this workspace appear every time you go to Window > Workspace.
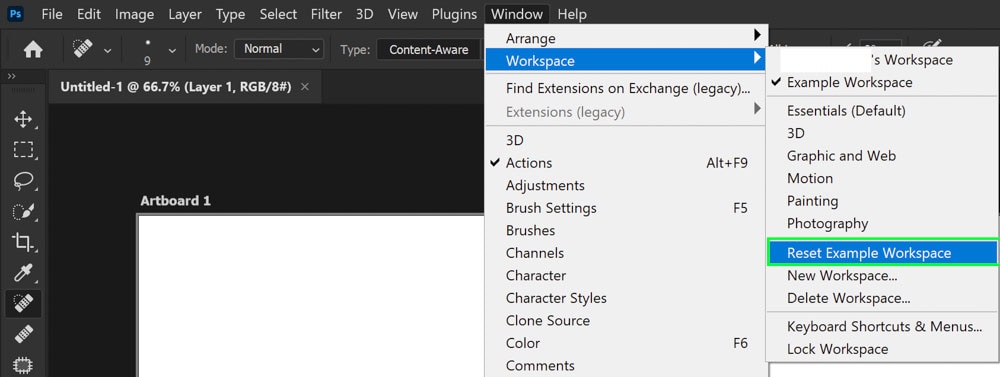
How To Reset Your Workspace
If you find that your customization has gone a bit awry, you can reset the workspace to Photoshop’s default. Just go to Window > Workspace > Reset Example Workspace.
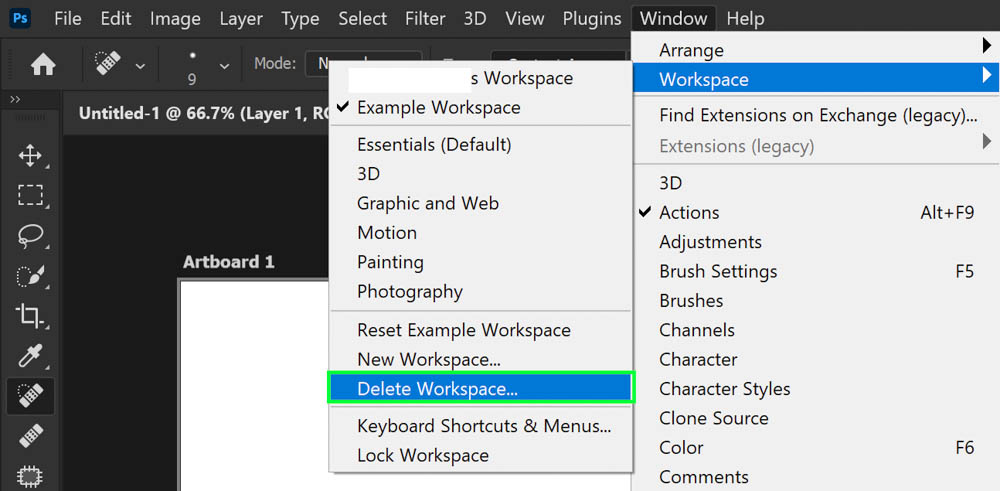
How To Delete A Custom Workspace
If you find you’ve created too many workspaces and need to delete one or more, you can do so easily. Go to Window > Workspace > Delete Workspace.
Select the workspace you wish to delete from the dropdown menu that appears. You cannot delete a workspace you are actively using, so first open a different workspace if you’d like to delete the one you are currently on.
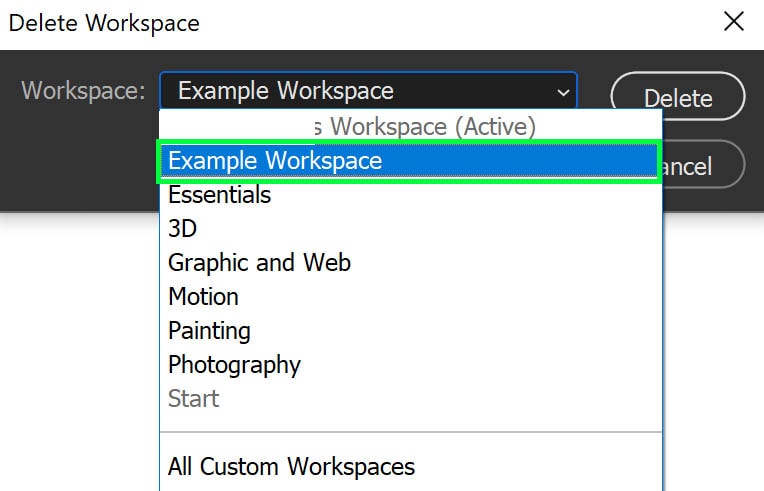
Note: this is a permanent deletion, so ensure that you definitely want to get rid of that workspace!
To learn more about the different uses of each panel in Photoshop, see my guide to the Photoshop interface here.


