
Although there are a ton of export options in Photoshop, the save for web method gives a streamlined approach for accurate colors and reasonable final file sizes. In this guide, you’ll learn how to use this function inside Photoshop to optimize your web-destined projects.
You’ll also learn essential settings such as the preset setting, changing your file type, adjusting your Web Snap and more. By the end of this post, you’ll be able to take the largest images you can find and get them ready for the web with ease.
How To Access Save For Web In Photoshop
Not everyone knows about the Save For Web feature in Photoshop, and finding this option can be tricky if you don’t know where to look.
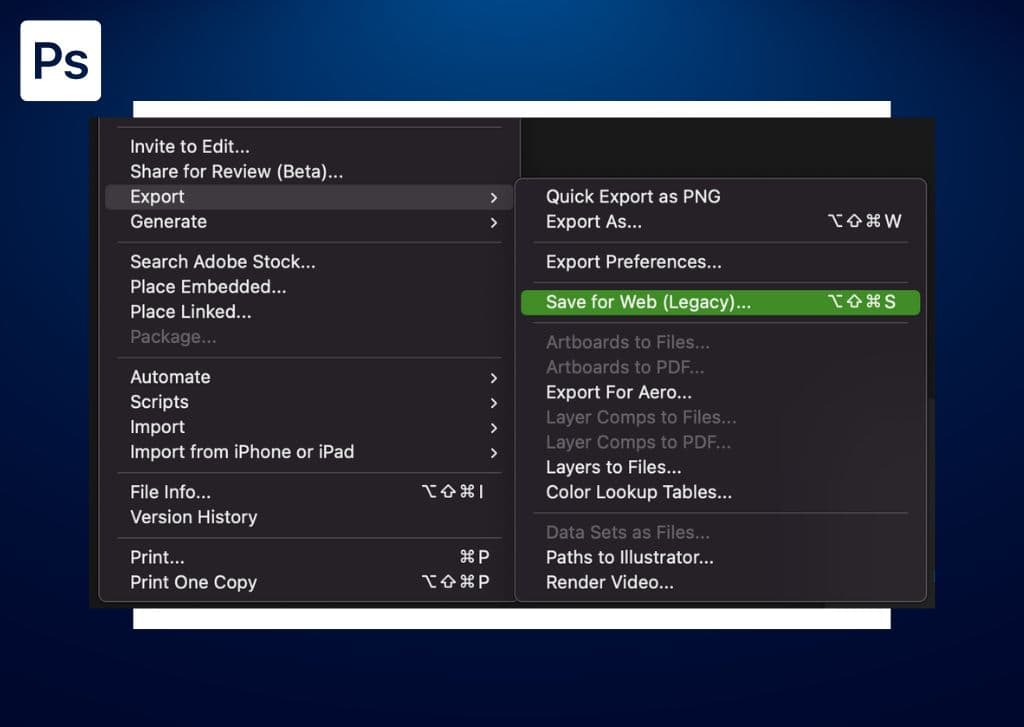
To access this feature, go to File > Export > Save For Web (Legacy). You can also use the shortcut Shift + Alt + Control + S (Win) or Shift + Option + Command + S (Mac).

How To Export A File With Save For Web In Photoshop
When attempting to save for the web, you’ll notice that there are a lot of options to choose from. In this guide, I’m only going to cover the options that help optimize your photo for the web and not the options that help stylize the image.
Once you’ve gone to File > Export > Save For Web (Legacy), work through the steps below to export your image.
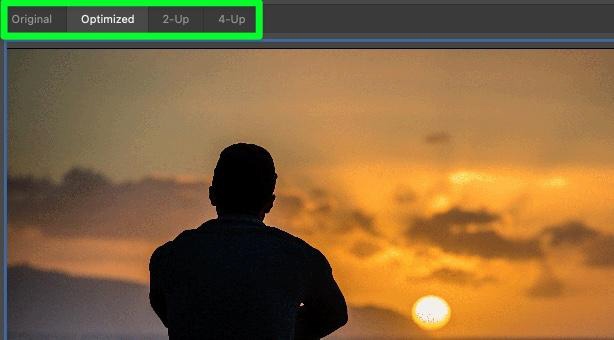
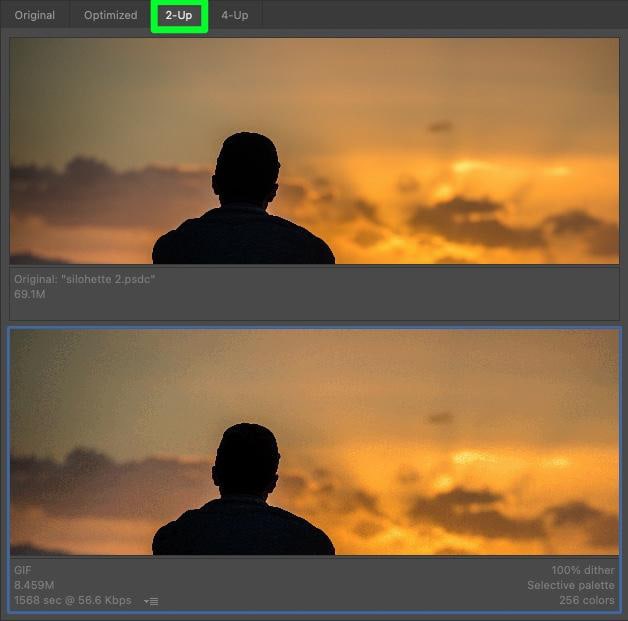
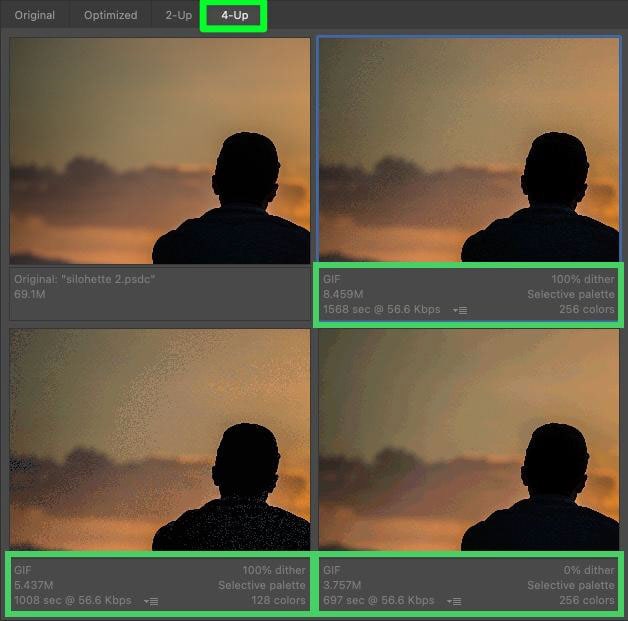
Step 1: Choose Your Viewpoint
At the top of the Options Menu, you’ll find a series of tabs: Original, Optimized, 2-Up, and 4-Up.
The Original tab will display what your photo looks like unchanged.
The Optimized tab will show you the optimizations from the export window taking place on your photo in real time.
Clicking the 2-UP tab will show you a split-screen view with your original image on the top and the version you’re optimizing on the bottom. You can use this tab to compare the two versions as you make your changes.
Clicking the 4-UP tab will show you a four-way split screen. In the top left corner is the original unchanged image. The other windows will present three different optimized versions of your image. Each image will have a different size, color palette, and amount of dither. You’ll also get an estimated time for how long the picture will take to load.
This tab is best used when you have a huge photo and need to find the best size to convert it. With three different options, you’ll have a much easier time finding the best-looking image that doesn’t sacrifice too much quality.
In most cases, the Optimized view is all you need to use.
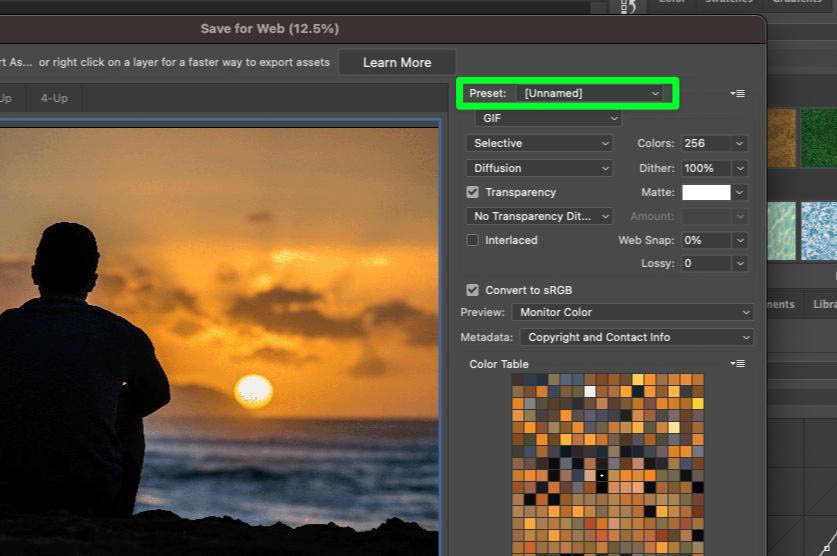
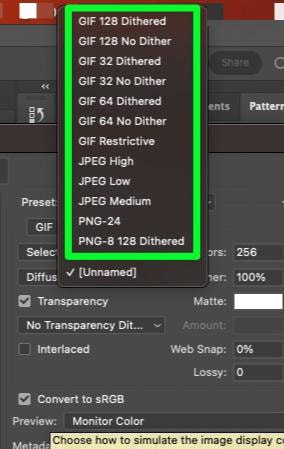
Step 2: Consider Using A Preset
The first setting you can adjust before exporting your photo to the web is the Preset Setting. A preset will change your picture using default settings.
Open the Preset drop-down menu to find the complete list of available presets. You can click each preset down the list and see which fits your needs the best. These are meant to get you to a set of premade settings for various common file types. This can help save some time compared to individually working through each save for web setting.
Using a preset is optional, but if you need to export to GIF, JPEG, or PNG, they are worth putting to use!
Step 3: Change The File Type
The file format type is one of the most critical settings to change when exporting your photo to the web. The file type you choose will determine how long it will take to load the image.
In the file type drop-down menu, you’ll find the following:
- GIF
- JPEG
- PNG-8
- PNG-24
- WBMP
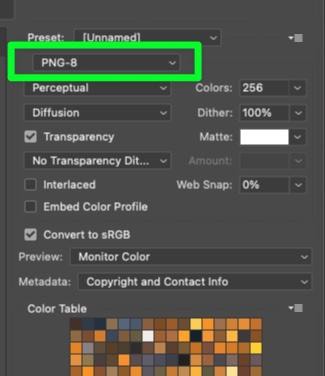
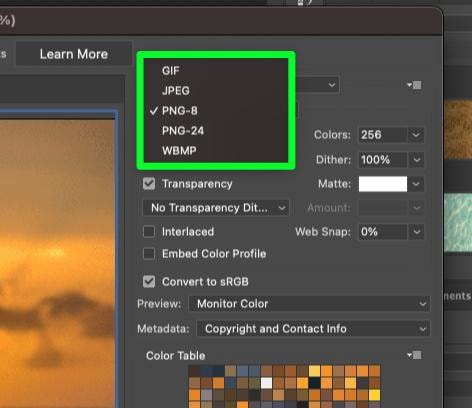
Choose JPEG or PNG to ensure a quick load time for your image and make them compatible with virtually any web-based application or computer software.
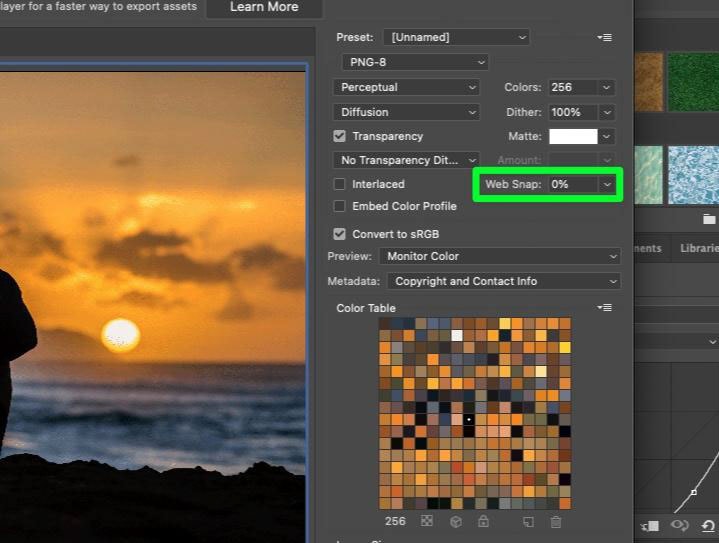
Step 4: Adjust The Web Snap
The more colors you have in your image, the longer it will take to load on the website. Adjusting your picture’s Web Snap will change the palette’s tolerance. For example, if your image has four shades of blue next to each other, these four shades will be condensed into one.
Play around with the percentage of the Web Snap to see what works the best. It’s okay to leave the percentage at 0% if you can’t get your image to look right. Generally, 0% is the best option unless you are trying to reduce the file size.
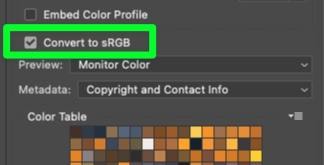
Step 5: Make Sure sRGB Is Checked On
sRGB is the color profile that all devices can read and display. This ensures that the colors you see on your screen will look the same on anyone else’s too. If your project was done in a different profile, such as CMYK, enabling this option will convert the colors to sRGB and make them more compatible for web use.
The big difference between the two is that sRGB has a more narrow range of colors. This limited range of colors will reduce your final file size while preserving the details of your project.
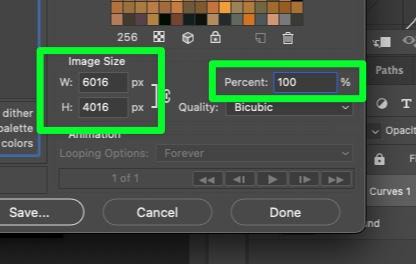
Step 6: Resize Your Photo
Another important way to cut down file size is to cut down on the size of your photo. Doing this is optional, but if your image takes too long to load, you can try bringing down the photo size. I do not recommend resizing your image unless you are resizing to a specific dimension, such as for a banner, profile photo, or website logo.
You can do this by inputting a different Width or Height or entering a lower number in the Percent box.
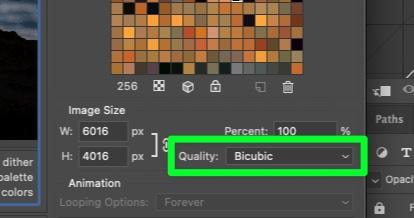
Step 7: Set Your Image Quality
In older versions of Photoshop, there was a Quality slider. This slider has been replaced with a drop-down menu with five options: Nearest Neighbor, Bilinear, Bicubic, Bicubic Smoother, and Bicubic Sharper.
In general, keep the quality at Bicubic. Of course, you can play around with it, but Bicubic is usually good enough.

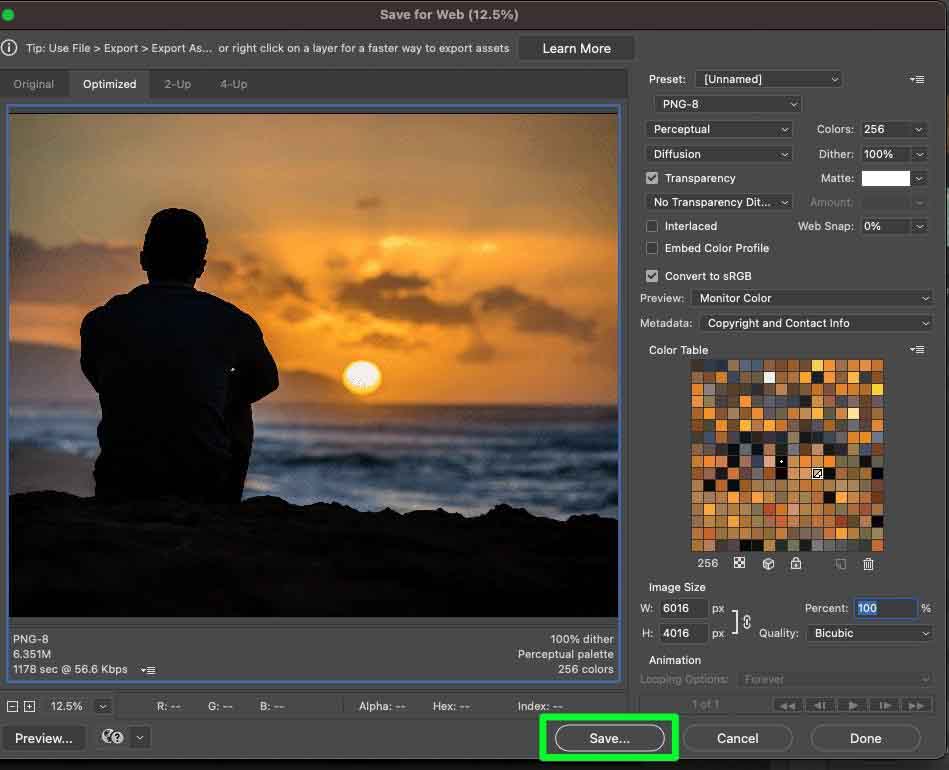
Step 8: Click The Save Button
Once you’ve chosen all of your settings, click Save to confirm.
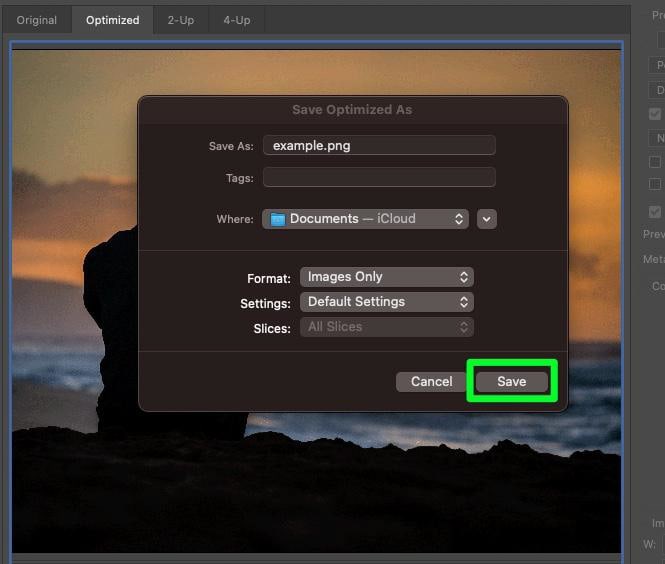
You will be prompted to name your file and choose where to save it. Click Save to confirm.
Now your image will be saved in the file format you have chosen and will be ready for use on the web!
What’s The Difference Between Save As And Save For Web?
Using Save As in Photoshop is a faster way of exporting images to a variety of file types. However, it limits the export setting controls that dictate color output, file size, dimensions, and bit depth.
The Save For Web option offers more control over the colors, file settings, and dimensions of an image. It’s also a solution in cases where your colors look slightly off after using the Save As or Save A Copy methods. Generally, it’s easiest just to use File > Save A Copy to export your projects, but learning to use Save For Web opens up some extra export settings you might be itching for.


