

After spending precious minutes or even hours working on a project in Photoshop, it can be frustrating if Photoshop can’t save a file in JPEG or other common file formats, such as GIF or EPS.
In this quick guide, you will find the solution to this common issue. Plus, you will learn how to save your photos using the Save a Copy and Export As options to optimize your exported files.
Why Can’t Photoshop Save JPEG Or Other Common File Types
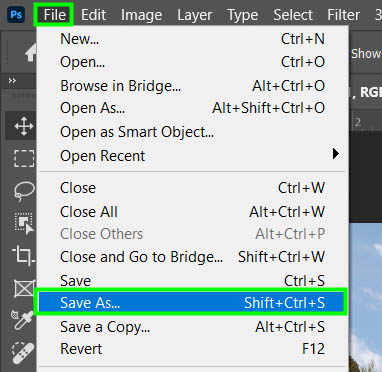
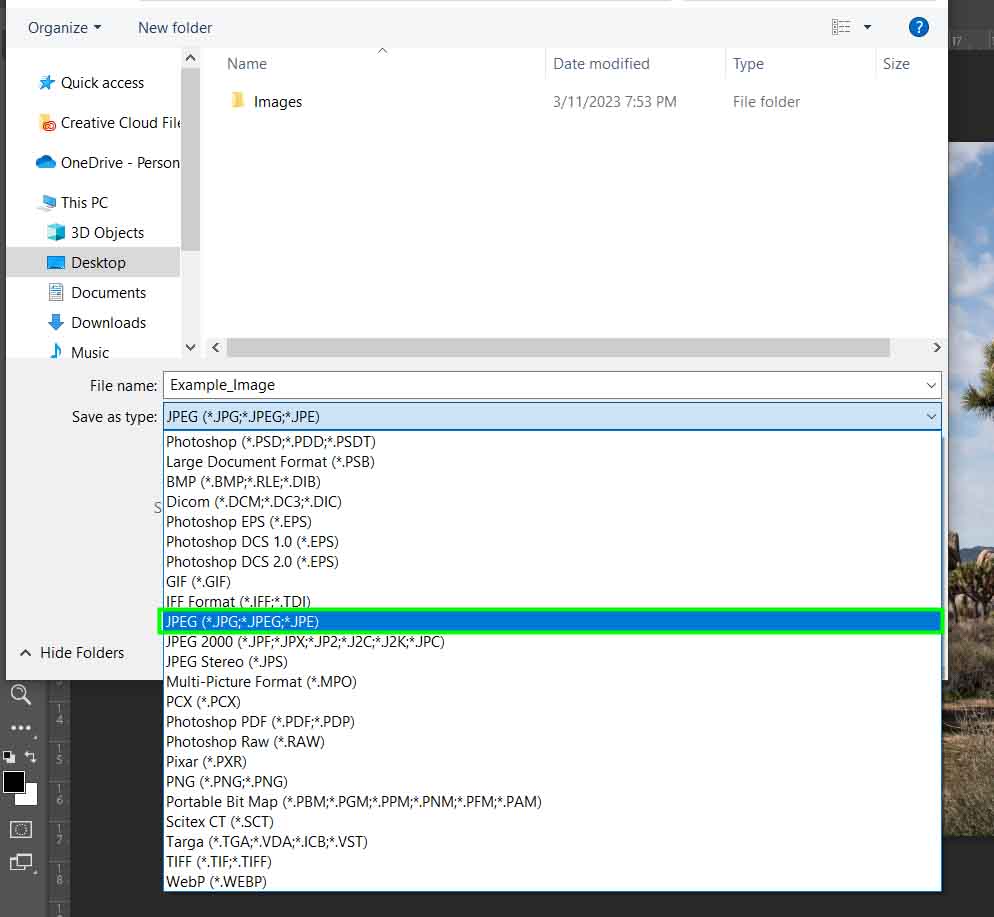
If you can’t save your files as JPEG and other standard formats, you might be trying to save them in the Save As menu, which in some cases, doesn’t offer the JPEG file format.
Adobe changed the file format options for the Save As command from version 22.4 and later, and JPEG is now only available in this method if you are using the Legacy Save As function.
To check whether you have this option, go to File > Save As. Alternatively, press Control + Shift + S (Win) or Command + Shift + S (Mac).
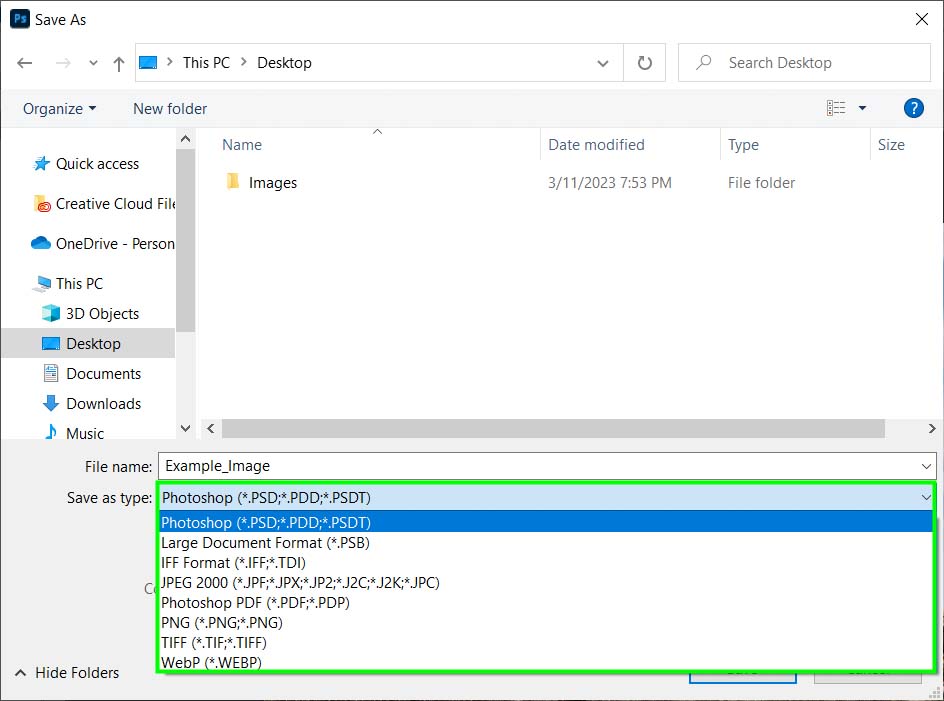
There will be a list of file formats, but JPEG might not be listed. Depending on your Photoshop version, you may find the JPEG 2000 option, but this is different from JPEG.
But you don’t have to worry since Photoshop does allow you to save your files as JPEG and other standard file formats. However, when you can’t find this option in the Save As panel, you will find it in the Save A Copy menu. I will show you how to find such a menu in the next section.
2 Ways To Quickly Export JPEG Files From Photoshop
There are two main ways to export your files as JPEG in Photoshop. One is super quick, and the other is slower but allows you to optimize your exported file.
Option 1: File > Save A Copy
To start the first method, go to File > Save A Copy. Alternatively, press Alt + Control + S (Win) or Option + Command + S (Mac).
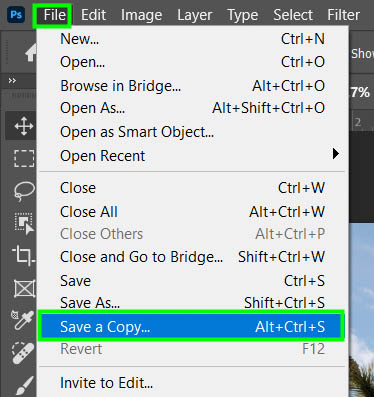
Within the saving options, you will find JPEG and other file formats that weren’t in the Save As menu.
Once you have selected JPEG from the file format options, you can choose a save location and click Save as you normally would when saving a file.
This is the most convenient and fastest way to save files as JPEG. However, I will show you how to save your files using the Export As menu if you want more optimization options.
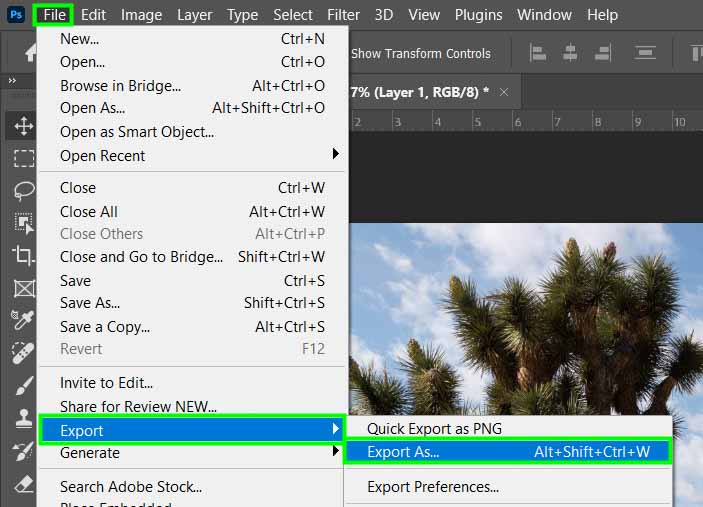
Option 2: File > Export As
The Export As menu allows you to optimize your file in many ways. For example, you can change your image dimensions and alter the canvas size. This gives you control over image optimization, unlike the Save a Copy option I showed you in the previous section.
To check those options, go to File > Export > Export As. Alternatively, press Alt + Shift + Control + W (Win) or Option + Shift + Command + W (Mac).
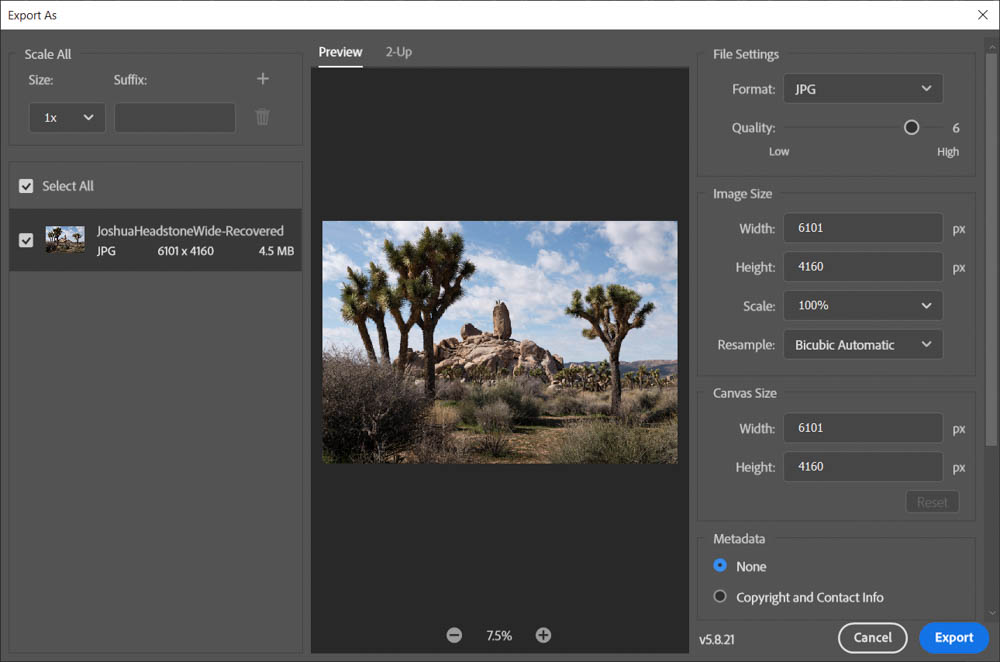
The Export As dialog will pop up.
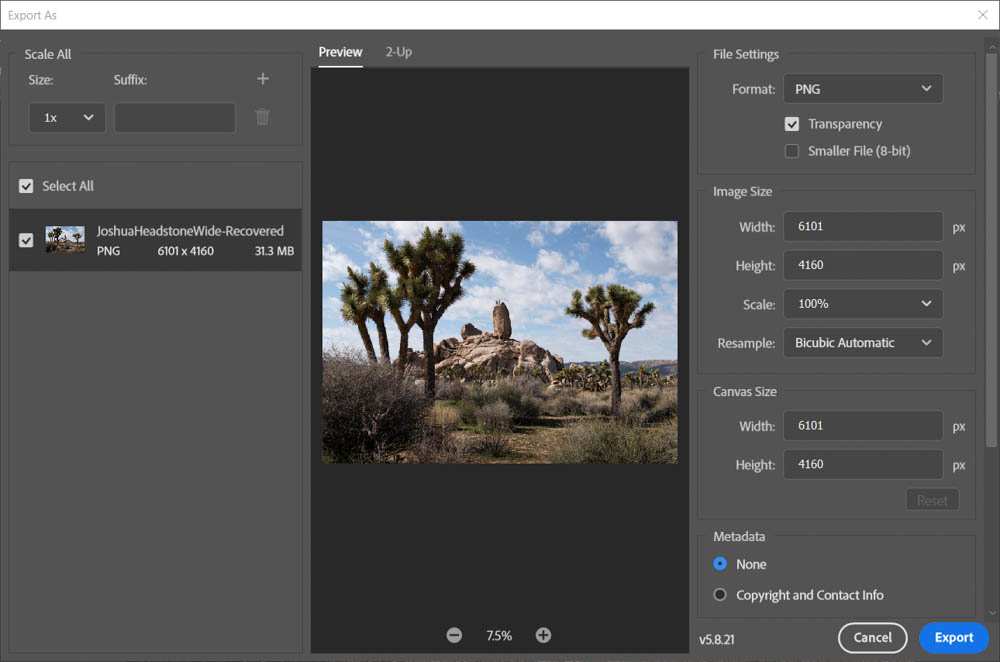
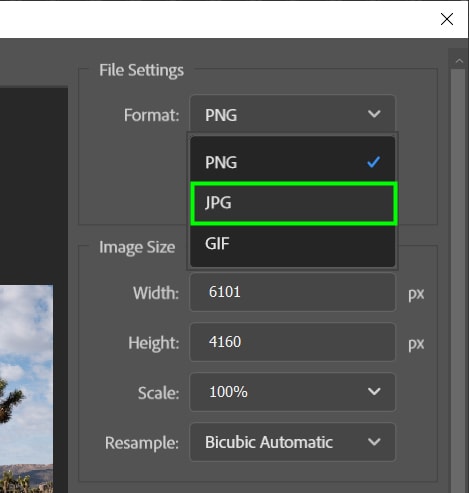
On the right side of the window, set Format to JPG.
After doing this, you will see many options to customize your new JPG file.
I will walk you through each one of these options.
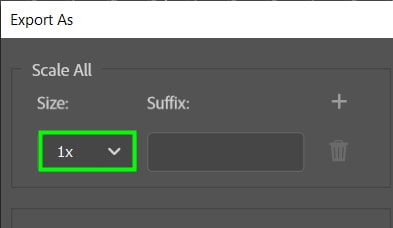
On the left side of the dialog, you will see the Scale All option. It allows you to change the size of your exported files.
The file’s original dimensions are preserved when the size is set to 1x.
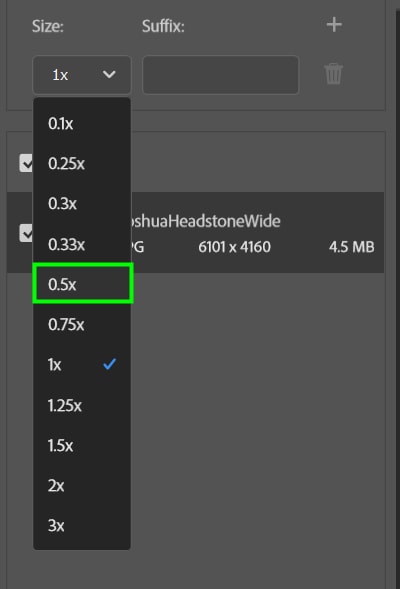
When you set the size to 0.5x, you will get a file with half of its original dimensions.
When you click the plus sign icon in the Scale All menu, you can create multiple copies of your original file in different sizes.
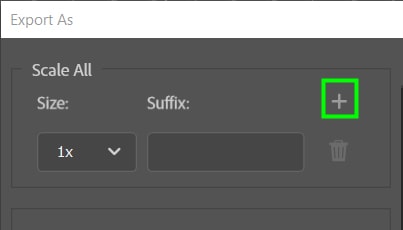
In my case, I created three versions of my image in three sizes. All copies will be placed in a folder when you Export the file.

Now let’s move on to the right side of the dialog. I recommend setting your photo to a high quality unless you have a size limit.

I only recommend you change your photo’s Width and Height when you have a specific size in mind. Otherwise, you might end up distorting the image.
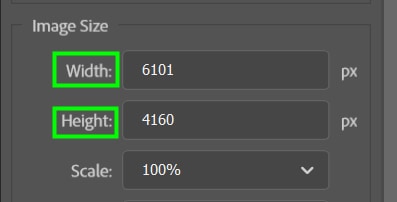
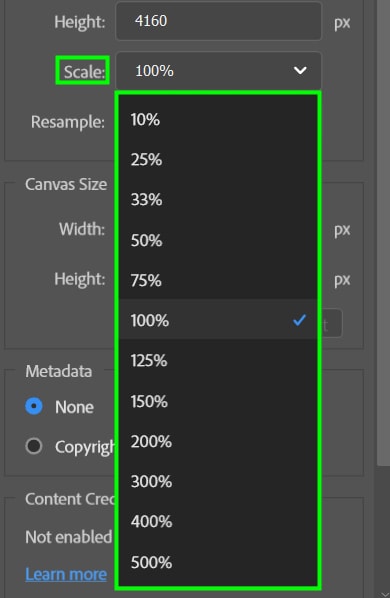
You will find options to resize your photo in the Scale drop-down menu. By default, the image’s scale is set to 100%. If you resize the photo to 10%, it will be 10% of the original size.
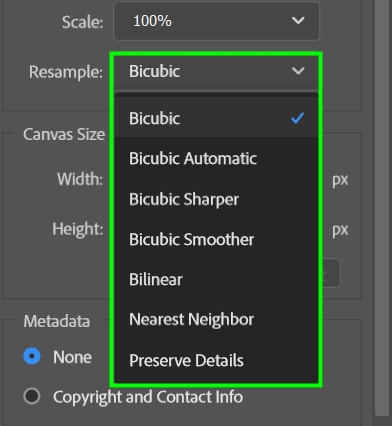
In Resample, you can choose how Photoshop will add pixels to your image or adjust its resolution to alter the amount of data it contains if you are resizing the image.
For example, by setting Resample to Bicubic, you tell Photoshop to sample pixels from different parts of the image to determine the sizes and colors of the new pixels to be added to the file.
The other Bicubic options work the same way but differ slightly. For instance, Bicubic Sharper not only guesses the new pixel’s size and color but also sharpens them, especially at the edges.
Experiment with the options available to determine which one meets your needs in terms of quality within the size limitations you must follow.
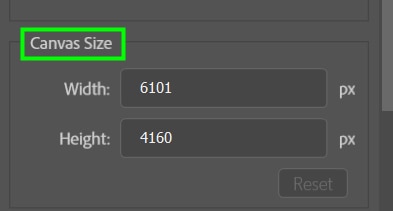
In Canvas Size, you can determine the Width and Height of your canvas. Sometimes the image you are working with must be smaller than the canvas, so this option is handy for situations like this.
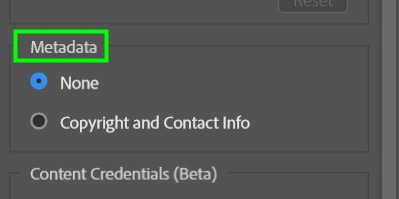
In Metadata, you can include your Copyright and contact information in your exported file.
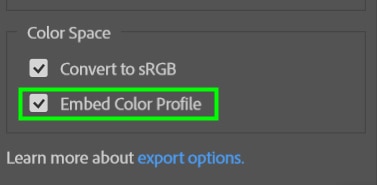
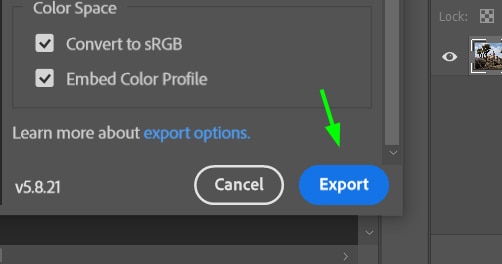
For the Color Space option, ensure the Convert To sRGB checkbox is checked if you want to export your image for the web.

I also recommend leaving the Embed Color Profile checkbox checked because it preserves the colors of your image, preventing them from being distorted across different monitors, for example.
Click Export when you’re finished changing all the necessary settings.
As Photoshop has multiple saving menus, finding the option to save your file as a JPEG is not as intuitive as it might seem. But as you use Photoshop more regularly, it becomes easier to know where everything is.
