
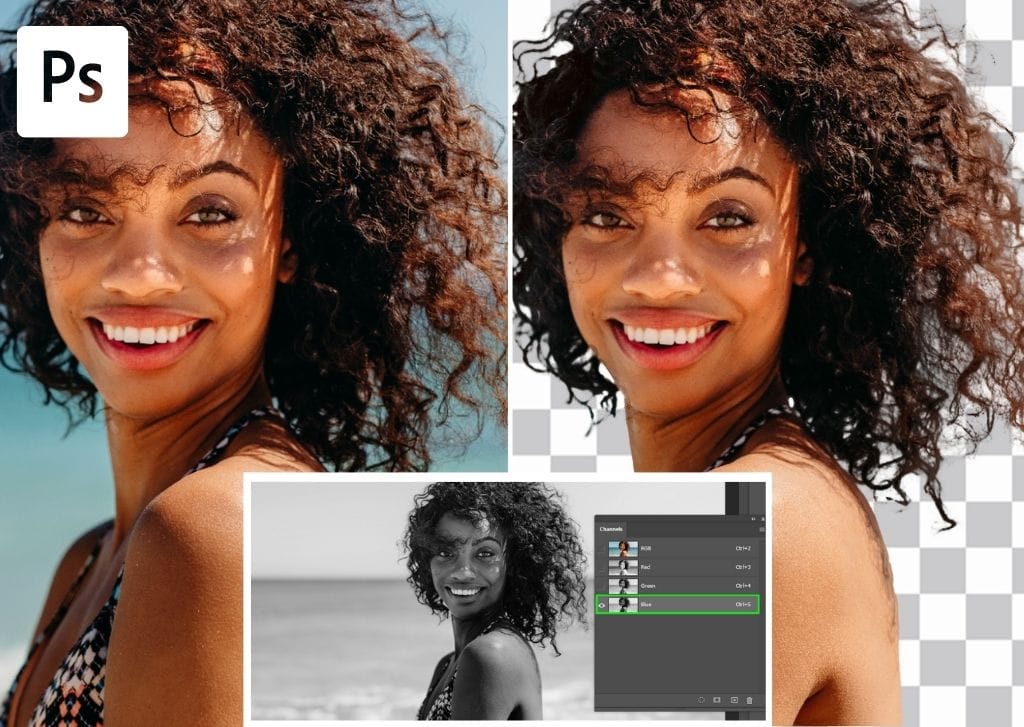

Channels are one of the lesser-known yet uber-powerful selection methods. When you know how to use channels in Photoshop, you can make extremely precise selections of complex edges. A single color channel can be used to create the parameters for a mask by using the natural contrast in your photo.
I know that might sound overwhelming, but trust me when I say this will be your new favorite selection method.


What Are Channels In Photoshop?
There are different types of channels in Photoshop, such as alpha channels, which store selections, and color channels, which store color information about your photo.
Photoshop has a panel dedicated to channels that change according to the color mode you choose. For example, if you choose RGB, you will view RGB channels; if you choose CMYK, you will view CMYK channels.
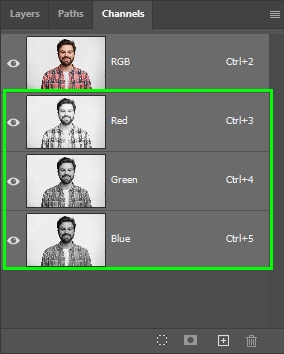
Digital images are colorized in RGB mode, which is three color channels working together to make every color you see appear as it should. Although digital photos contain multiple colors, they are all red, green, and blue combinations. When you select the Red channel, for example, you will view the amount of red in a particular image represented by a grayscale preview.
Note: By default, color channels are displayed in grayscale, but you can also view them in colors by going to Edit > Preferences > Interface (Win) or Photoshop > Preferences > Interface (Mac). Then, select Show Channels In Color.
How To Create Complex Selections With Channels
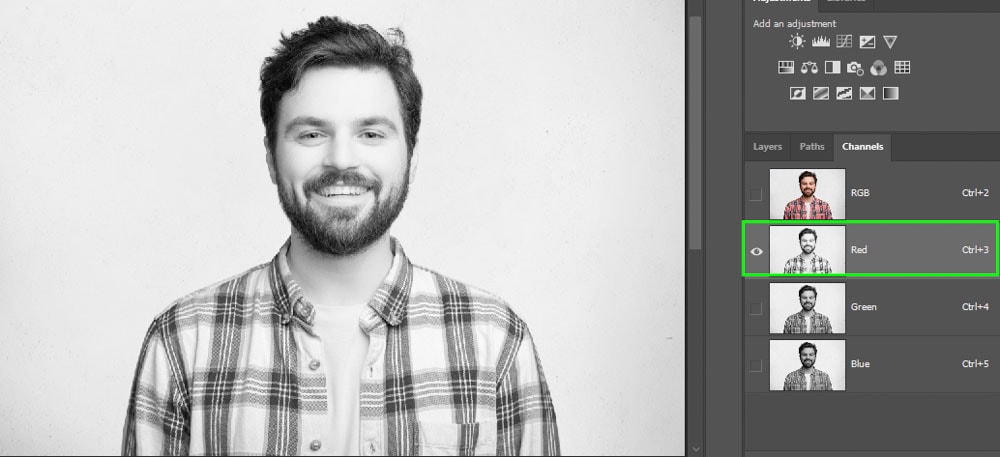
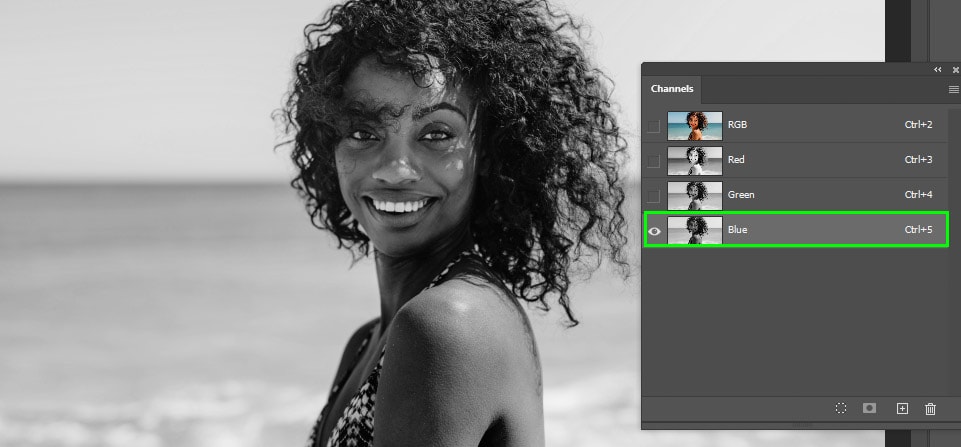
Step 1: Find The Channel With The Most Contrast In Your Image
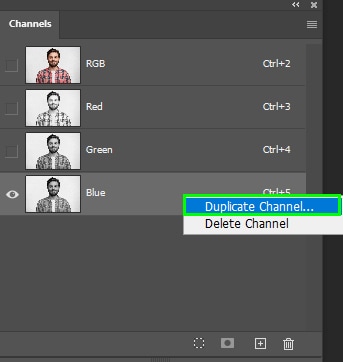
Open the Channels Panel and find the channel with the most contrast. Click on a channel to preview the greyscale version on your canvas.
Step 2: Right-Click And Select Duplicate Channel
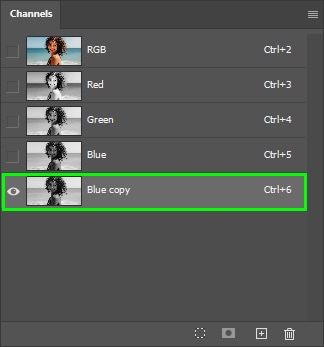
Duplicate the chosen channel by right-clicking its layer and selecting Duplicate Channel. A copy of the chosen layer will be generated. Keep it active.
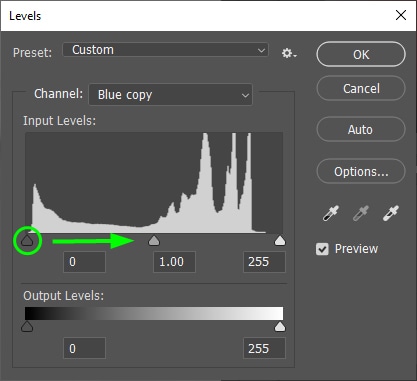
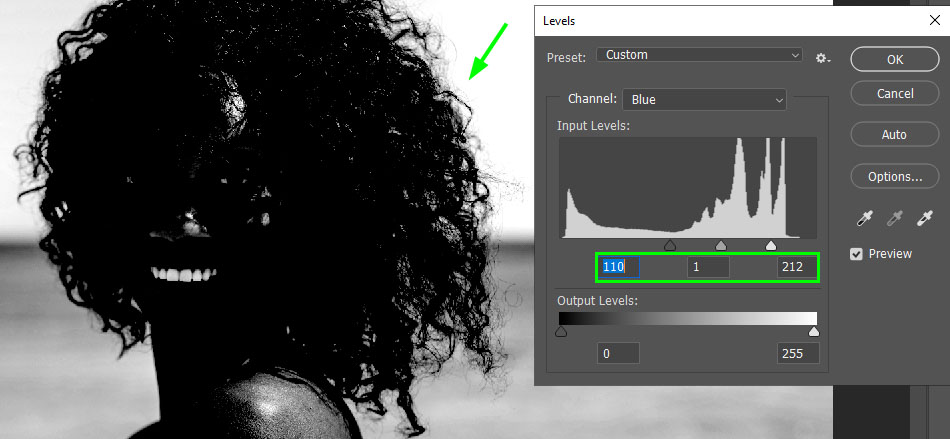
Step 3: Press Control/Command + L To Boost Up Your Image Contrast Using Levels
When using Levels to increase an image’s contrast, you must avoid losing the image details. Keep the chosen channel copy active and press Control + L (Win) or Command + L (Mac) to bring up the Levels adjustment. Move the black arrow to the right to increase shadows. Move the white arrow to the left to increase the highlights.
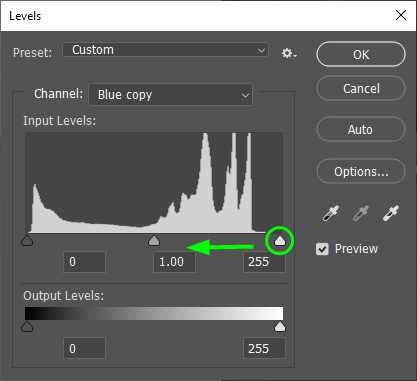
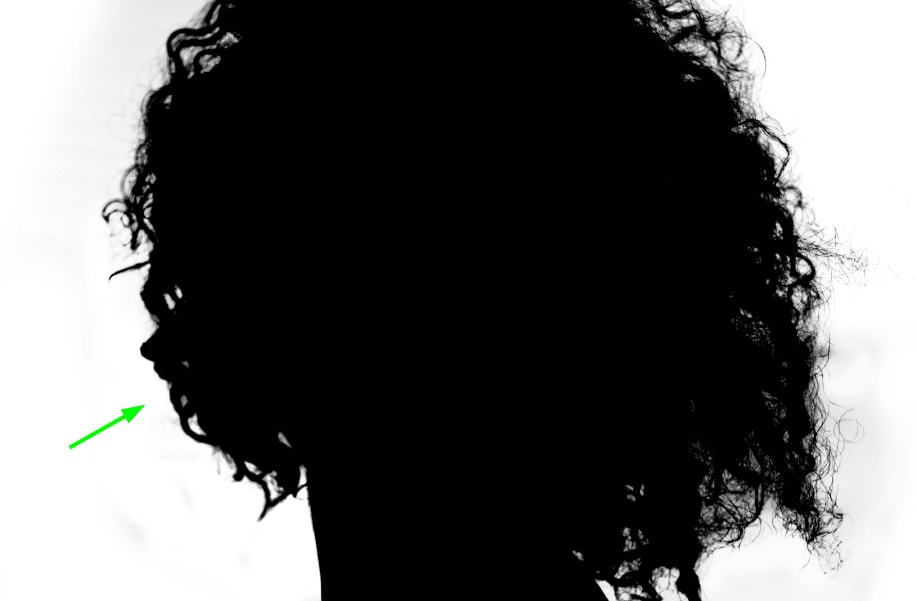
You must adjust levels to the point where the background turns whiter, but the image doesn’t lose details, such as in the example below. Notice I was getting close to making a 100% black-and-white area, but the model’s flyaway hairs were still visible.
With so many white and grey areas left over, we need to call on additional methods to refine our channel before selecting. Let’s start by making our subject fully back.
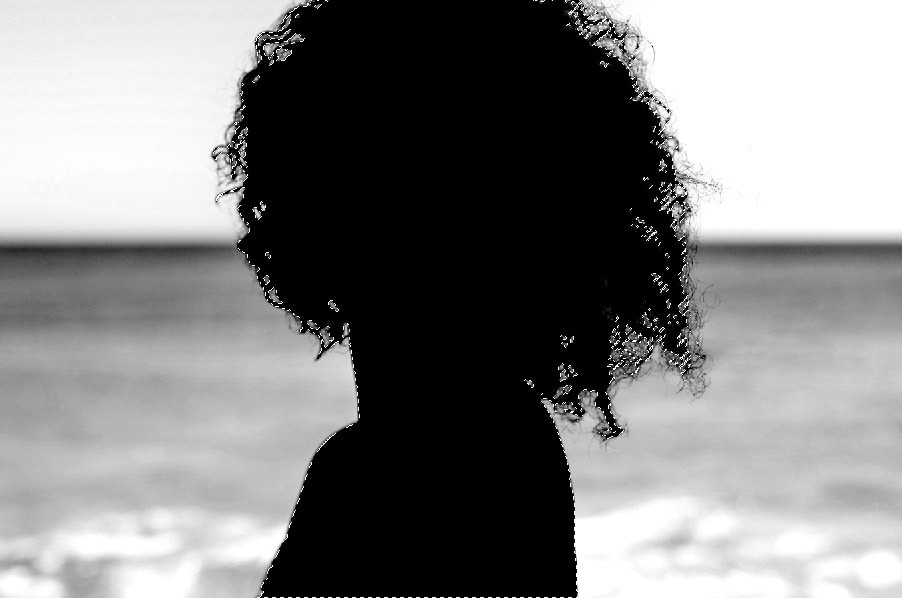
Step 4: Make A Selection Around The Subject With The Quick Selection Tool
By using the Quick Selection Tool, you can get a quick and easy selection of your subject to paint black within. However, you still retain the fine details of the flyaway hairs that would have been removed with other selection methods. Go to the Toolbar and select the Quick Selection Tool (W).

Then, choose Select Subject in the Options bar. Photoshop will generate a selection around your subject.

Step 5: Use The Brush Tool (B) To Paint Your Subject Black And Your Background White
Once your subject is selected, enable the Brush Tool by pressing B on your keyboard. Afterward, go back to the Toolbar and set the foreground color to black.
Now, start painting the selection. Make sure to paint the entire selection black. With the active selection around your subject, you can only paint black within the selected area. This makes it much easier to “color inside the line.”
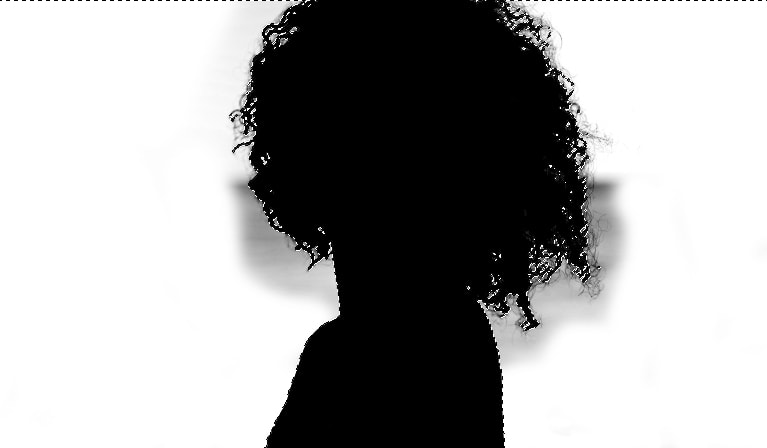
After finishing painting your subject, you need to invert the selection so you can paint the background white and finish creating your layer mask. To do this, press Control + Shift + I (Win) or Command + Shift + I (Mac).
After painting black over your subject, you need to invert the selection to paint the background white and finish creating your layer mask. To do this, enable the Brush Tool (B). Then, go to the Toolbar and set the Foreground color to white.

Now, paint over the entire background except for the area near the hair. This area requires special treatment because it contains many details that need to be preserved.
Once you have painted everything properly, press Control + D (Win) or Command + D (Mac) to deselect the selected area.
Step 6: Use The Brush Tool Set To Overlay To Refine The Area Around The Hair
First, select the Brush Tool by pressing B. Next, set the foreground color to white in the Toolbar. After that, go to the Options Bar and change the brush blend mode to Overlay.

The overlay blend mode removes gray pixels and preserves black pixels, which helps refine the hair. Now, you can paint over the hair edges. When painting inside the hair, you need to decrease the Brush Tool opacity to 40% or 50%. This will help you preserve flyaway hairs in those areas.
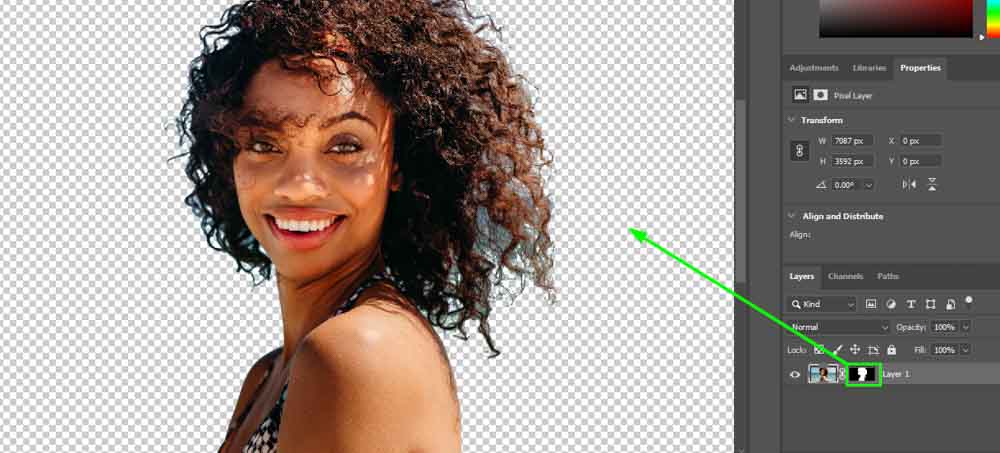
Step 7: Create A Selection And Then Select The Layer Mask Icon In The Layers Panel
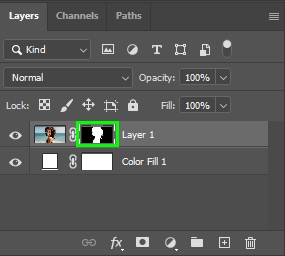
Once you finish creating your layer mask, enable the selection by pressing Control (Win) or Command (Mac) on your keyboard and then clicking the channel thumbnail. Then, go back to the Layers Panel, hold Alt (Win) or Option (Mac), and click the layer mask thumbnail.


Step 8: Click On Refine Hair In The Select And Mask Workspace (Optional)
You can touch up your selection in the Select and Mask workspace if you find color fringing, jagged edges, or any other related problem. To fix any issues, double-click the layer mask.
This will open the Select And Mask workspace. If your subject needs refinements, press the Refine Hair button in the Selection And Mask Options Bar.

That will remove most of your image hair fringing.
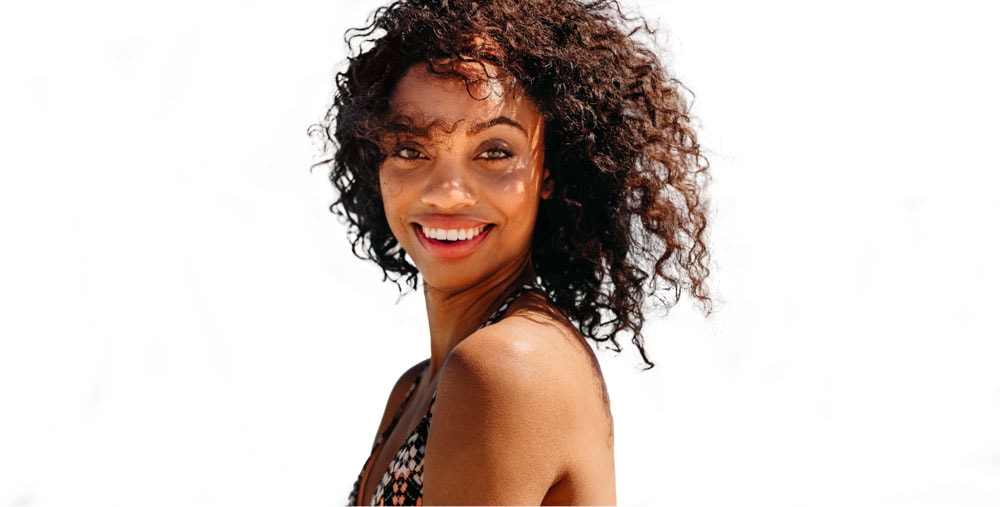
With channels, I could create selections that would have taken me hours to make otherwise. Although they take some practice to understand fully, you’ll be glad to have this technique in your back pocket.
To further improve your background removal skills in Photoshop, check out my guide to the best background removal techniques in Photoshop to build on what you learned here!
