

One of the most valuable tactics used in Photoshop is to select part of your image and apply a mask to it. Did you know that you can apply your entire image to your mask? Once you know how to apply an image to a mask, it can lead to a more practical application of any Adjustment Layer.
Today I will explain the difference between what your image will look like with an Adjustment Layer and what it will look like with your photo on your mask. You will learn the best settings to use when applying your image and how to do this by creating a luminance mask. You will also learn how to invert your mask selection and make sure your Adjustment Layer only affects the layer with your image imprinted on the mask.
2 Ways To Apply An Image To A Mask In Photoshop
Option 1: Using Image > Apply Image
To explain the process of applying an image to a layer mask in the best way possible, let me show you the difference between using a normal adjustment layer and an adjustment layer with an image applied to the layer mask.
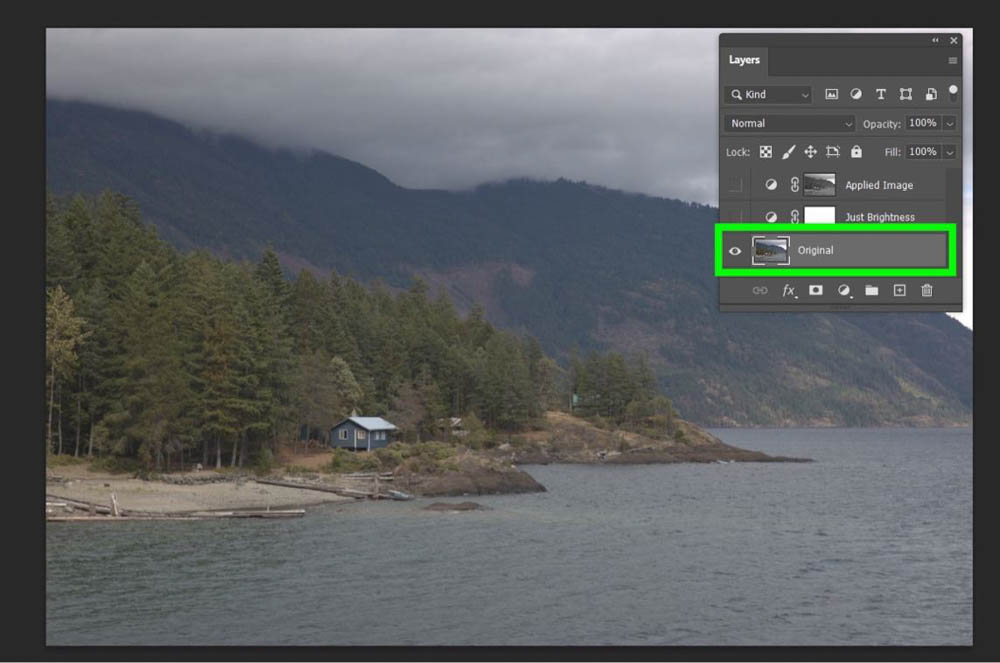
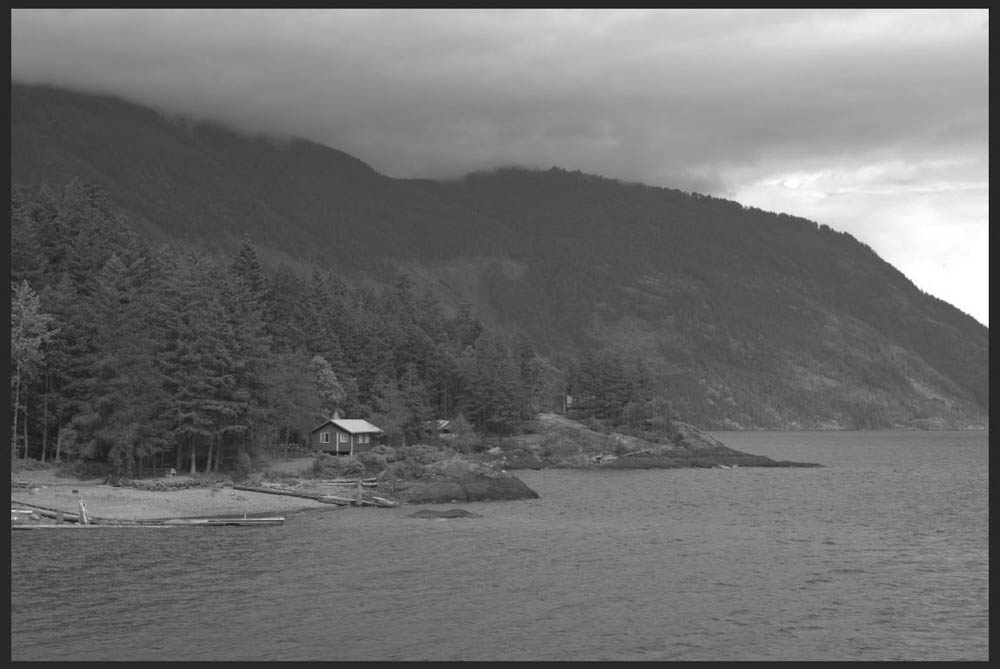
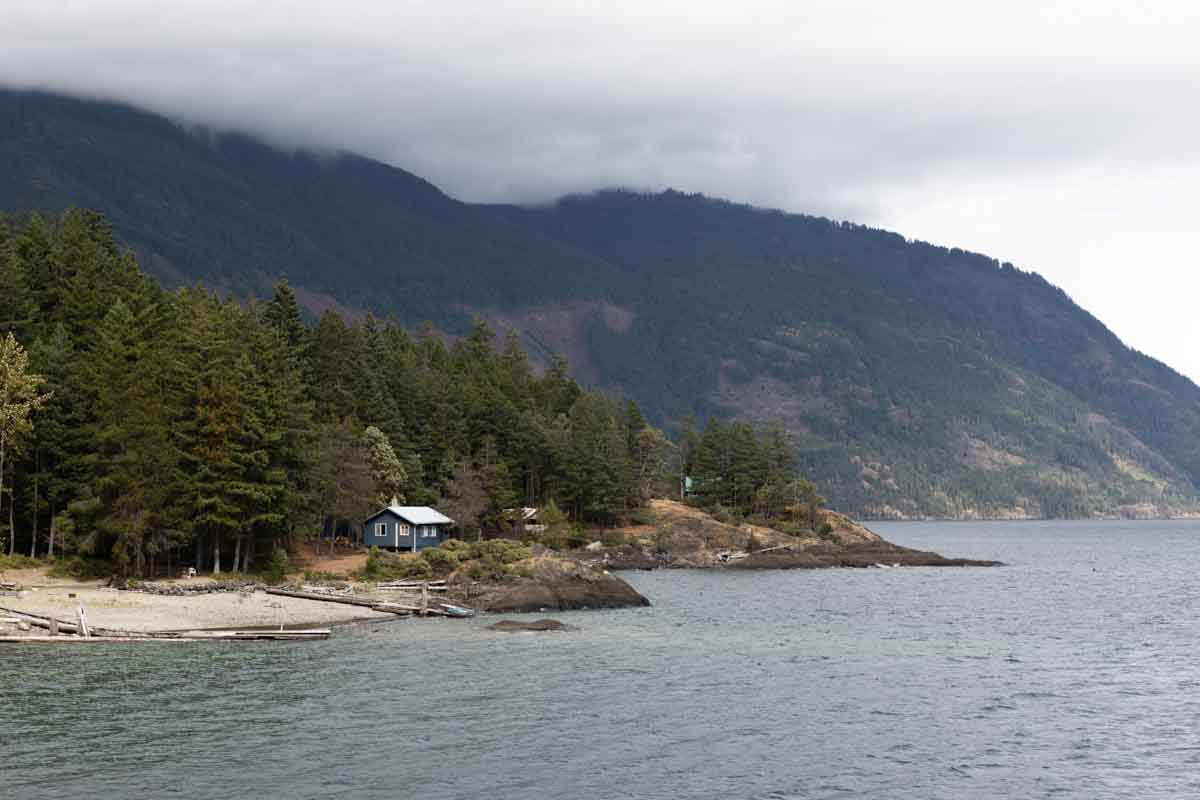
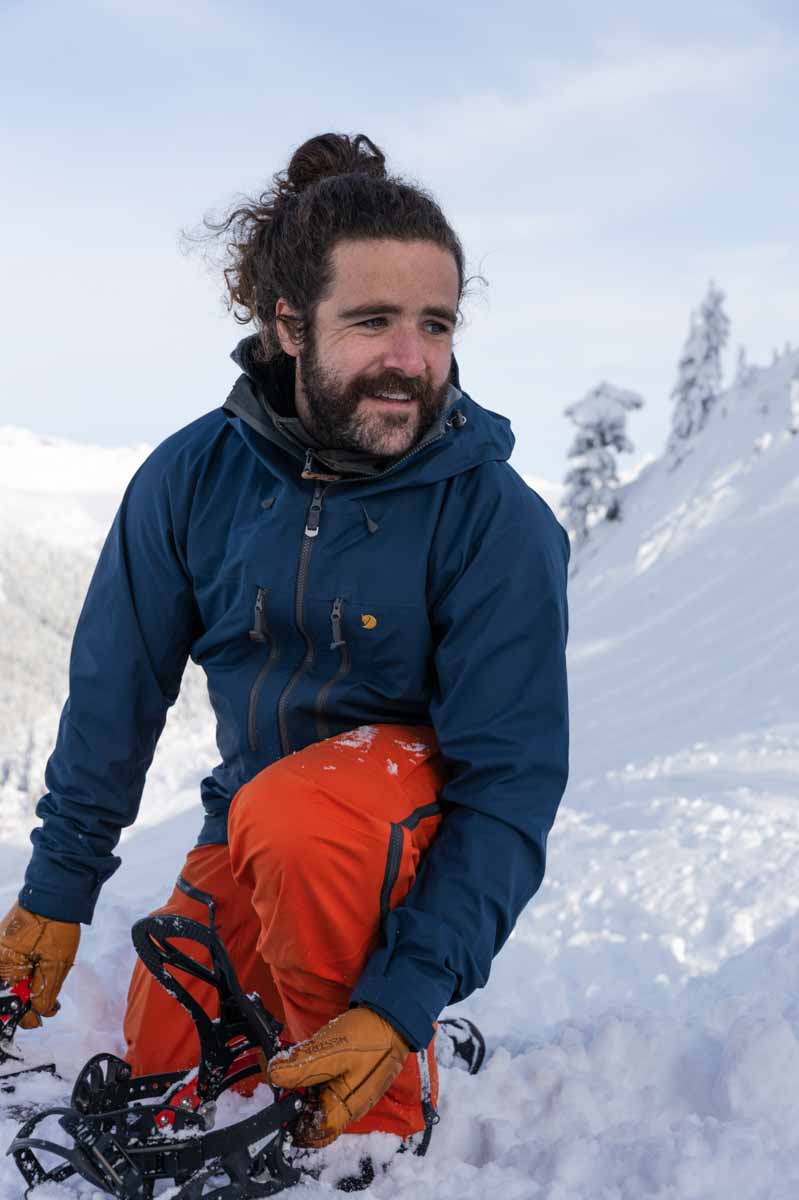
Here’s my example without any adjustment layers. As you can see, the photo is a bit dreary. This photo could certainly use a brightness adjustment.
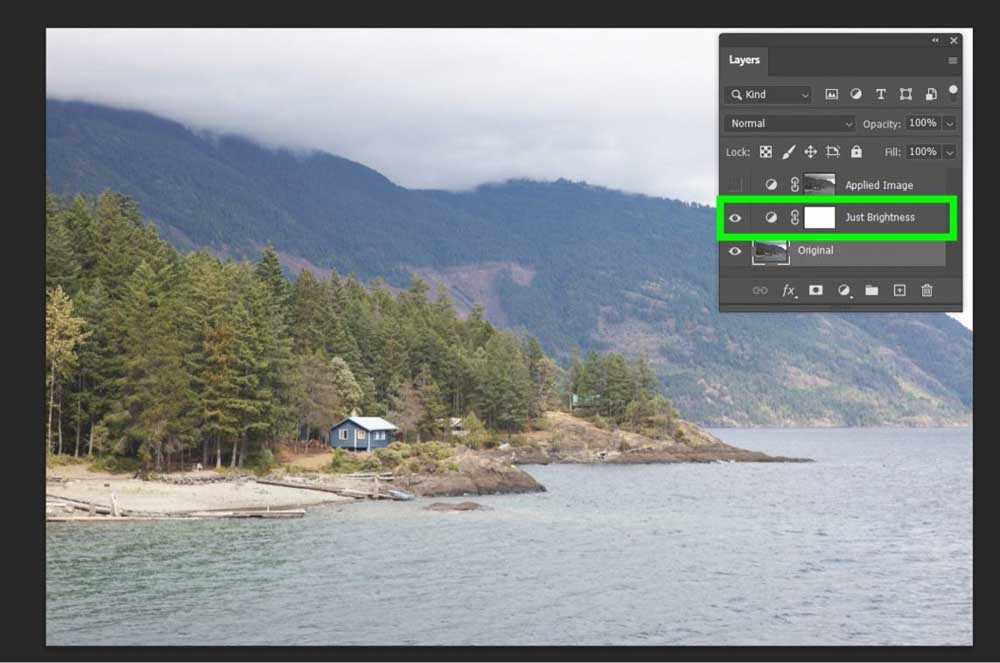
Here’s my example with just a Brightness Adjustment Layer applied. The brightness is turned up, and look how blown out everything looks. That’s because this adjustment layer is affecting every area of the photo equally, therefore adding too much brightness to the whites.
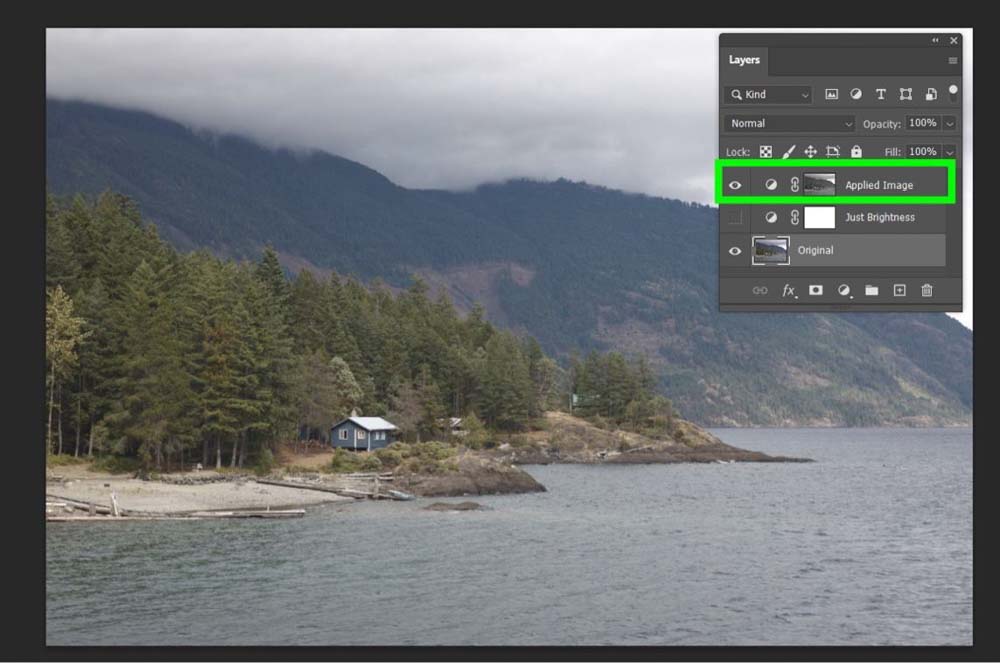
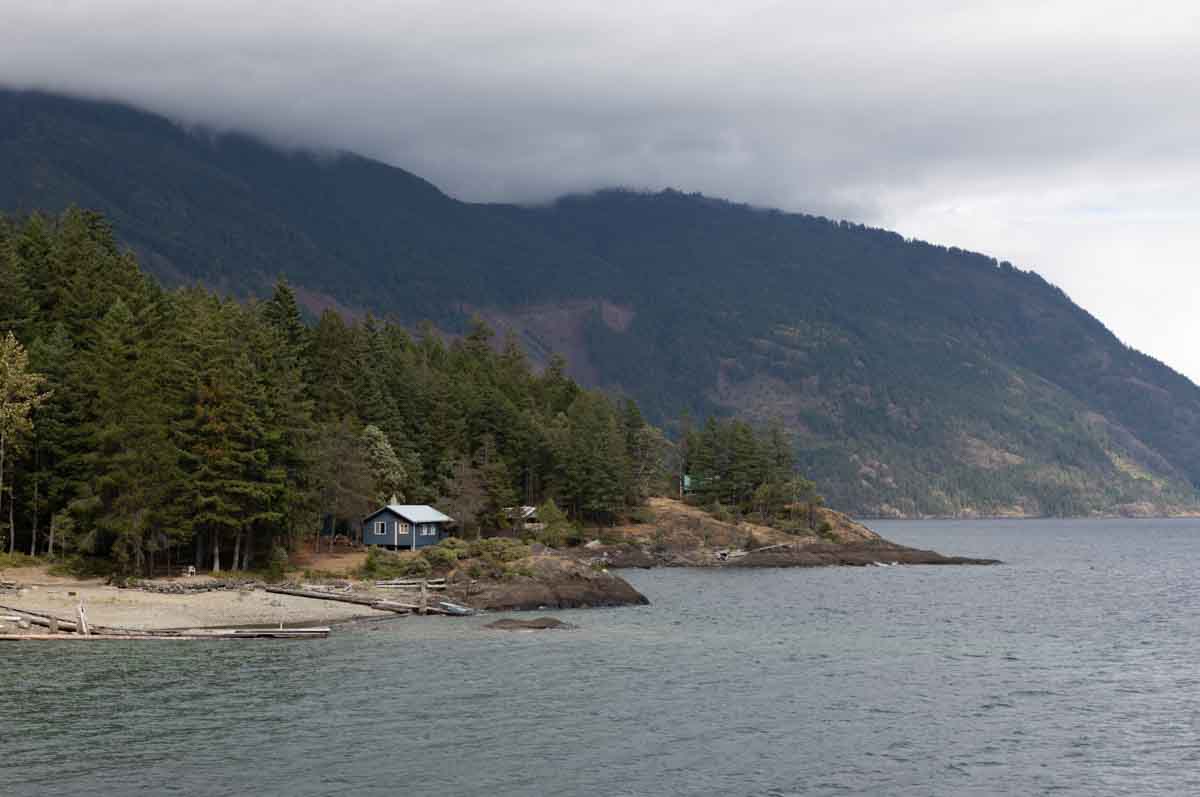
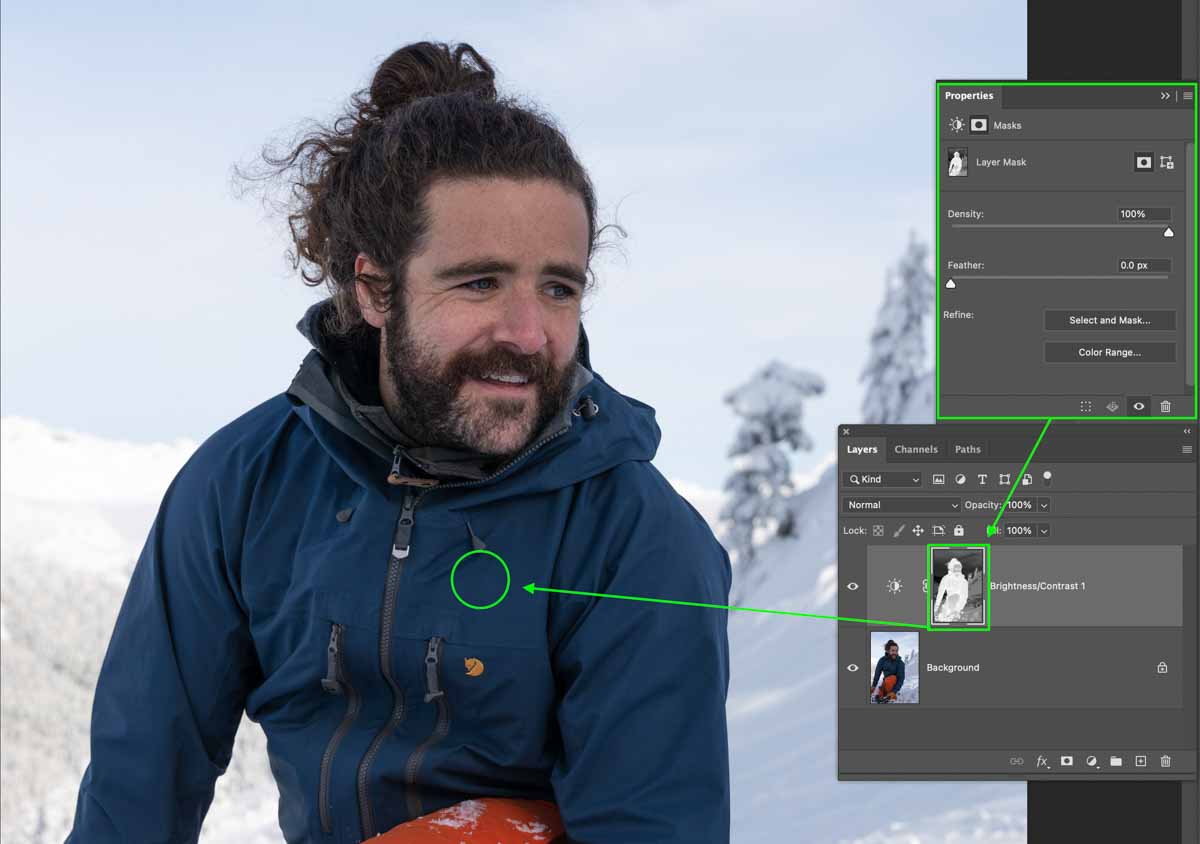
Here is the same Brightness Adjustment Layer, but this time with the image applied to the layer mask. Notice that it’s brighter than the original picture but not too bright. This is because of how a layer mask works in Photoshop.
To help you better visualize how applying an image to a mask will affect your final product, here is the actual layer mask for my example:
The most common phrase when regarding the logic of a layer mask is: “white reveals, black conceals.” So the lighter the pixel on the mask, the more your adjustment layer will affect it. The darker the pixel on your mask, the less your adjustment layer will affect it.
The gray pixels on your mask will vary depending on how bright or dark they are.
Applying Your Image To Your Layer Mask
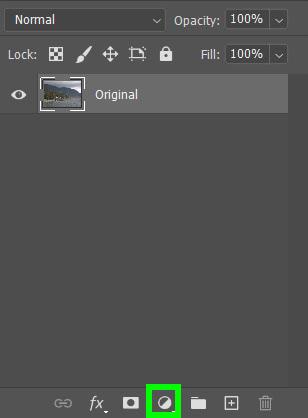
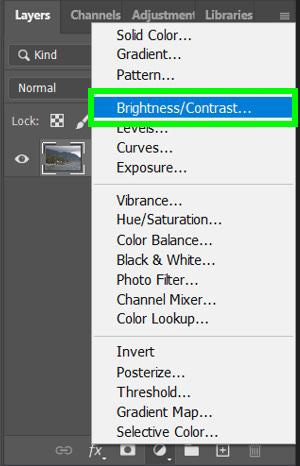
To start this process, select your layer and apply an Adjustment Layer by clicking the New Adjustment Layer button in the Layers panel. Select the Adjustment Layer that best fits your needs.
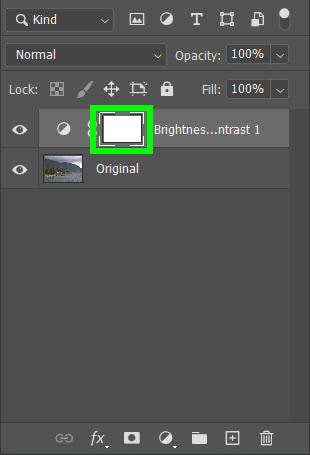
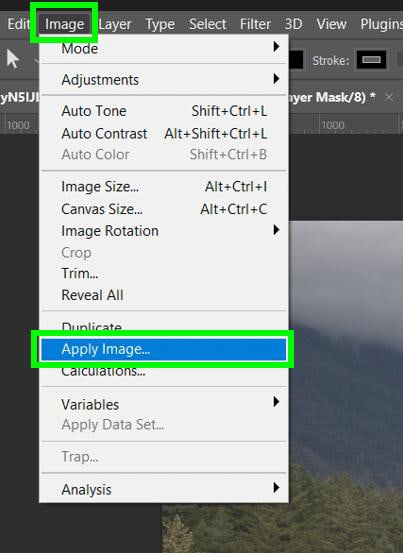
You will now have an Adjustment Layer above your original layer. Click on the Adjustment Layer mask, which is the white block, and go to Image > Apply Image.
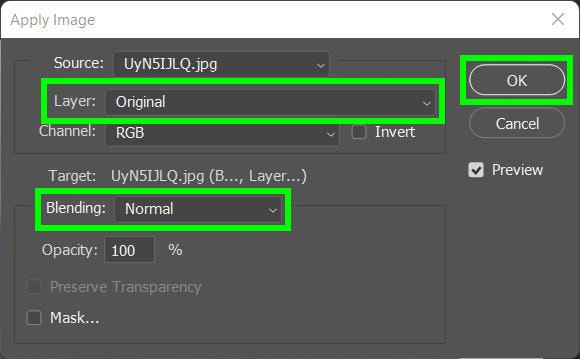
Once you apply your image, the Apply Image Window will pop up. There are only two options to be concerned about in the window.
For the Layer option, make sure the name of the image layer you’re working on is selected in the Drop Down Menu.
For Blending, you can leave it to Normal. You can experiment with the Blending Modes if you wish, but Normal works fine.
When you’re done, click OK.
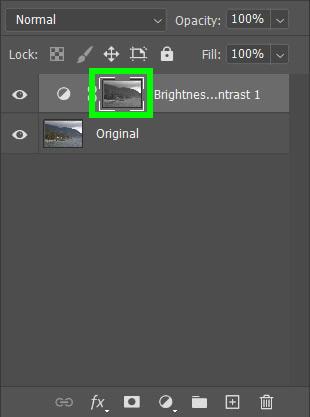
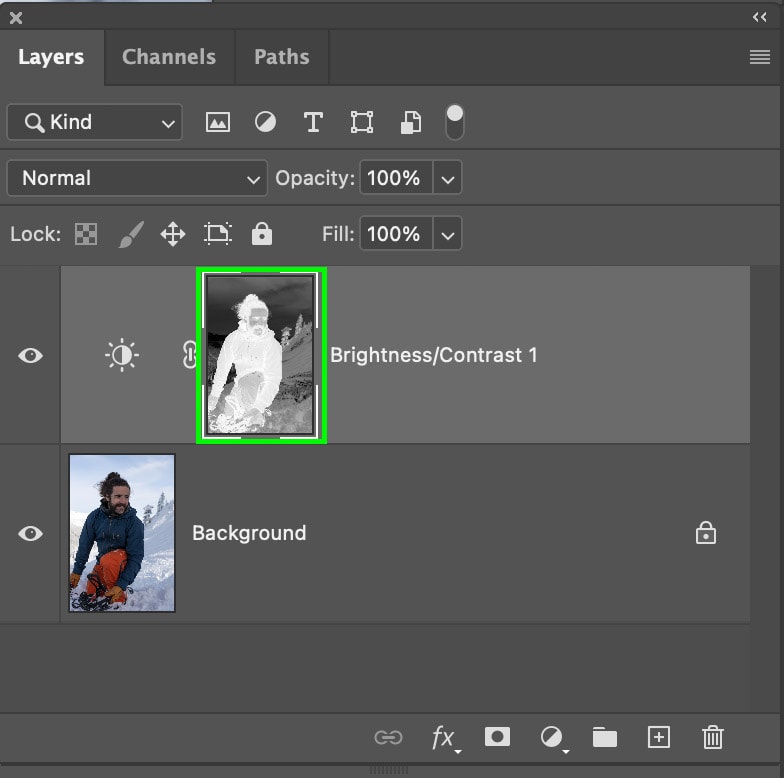
Once you apply your image to the mask, you will see your image actually on your mask in the Layers panel.
If you want to see your mask on the project you’re working on, hold Alt (Win) or Option (Mac) and click on the mask itself. This will show you what your mask looks like in your workspace. Again, white is 100% visible, black is 100% transparent, and the shades of grey in between represent varying levels of transparency.
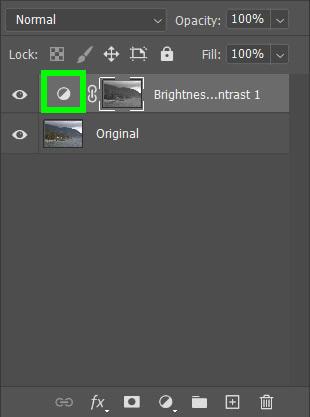
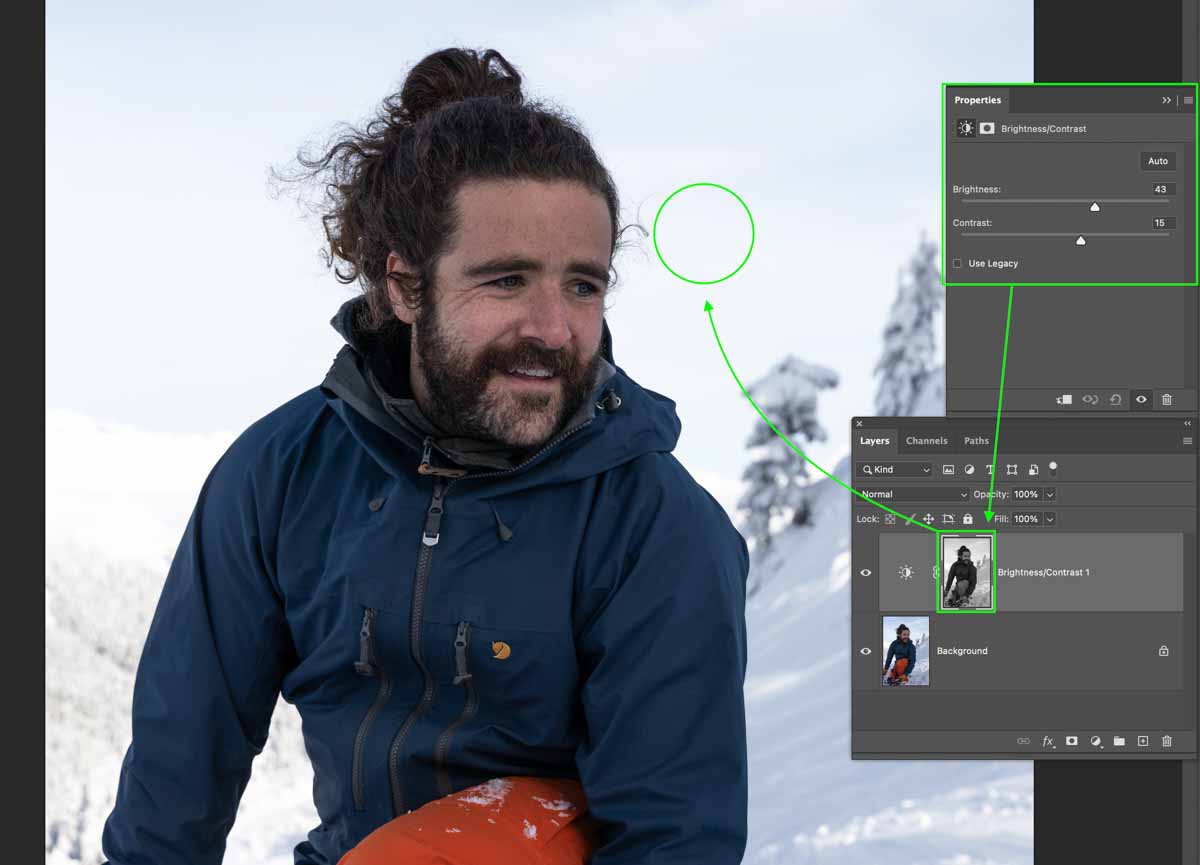
If you need to edit how your Adjustment Layer affects your image, click on the Adjustment Layer Properties button to open up the Properties panel for the Adjustment Layer.
This process will work for any of the Adjustment Layers, and each one will affect your image differently depending on the amount of dark and light pixels on your mask. This technique is a great way to blend color adjustments more realistically or add subtle brightening enhancements, as with this example.
Option 2: Create A Luminance Mask
The other way to apply your image directly onto a layer mask is to create a luminance mask. This easy method allows you to selectively edit the highlights or shadows in your image with ease.
Step 1: Add Your Highlights To An Adjustment Layer Mask
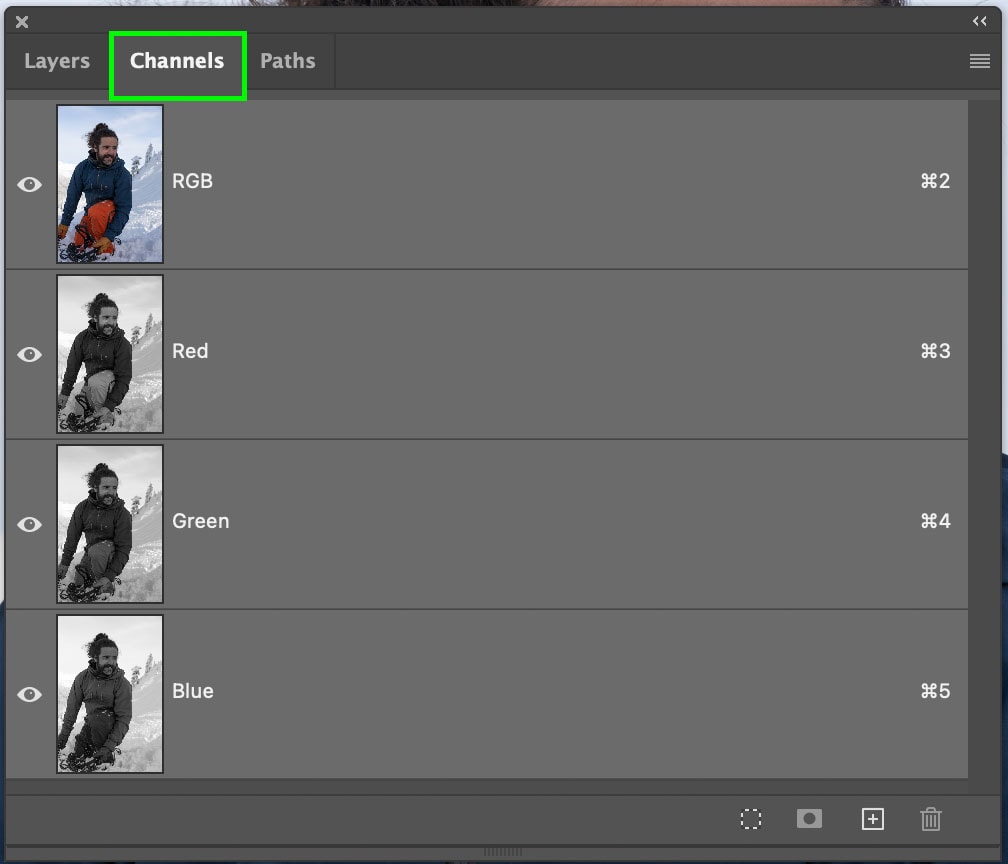
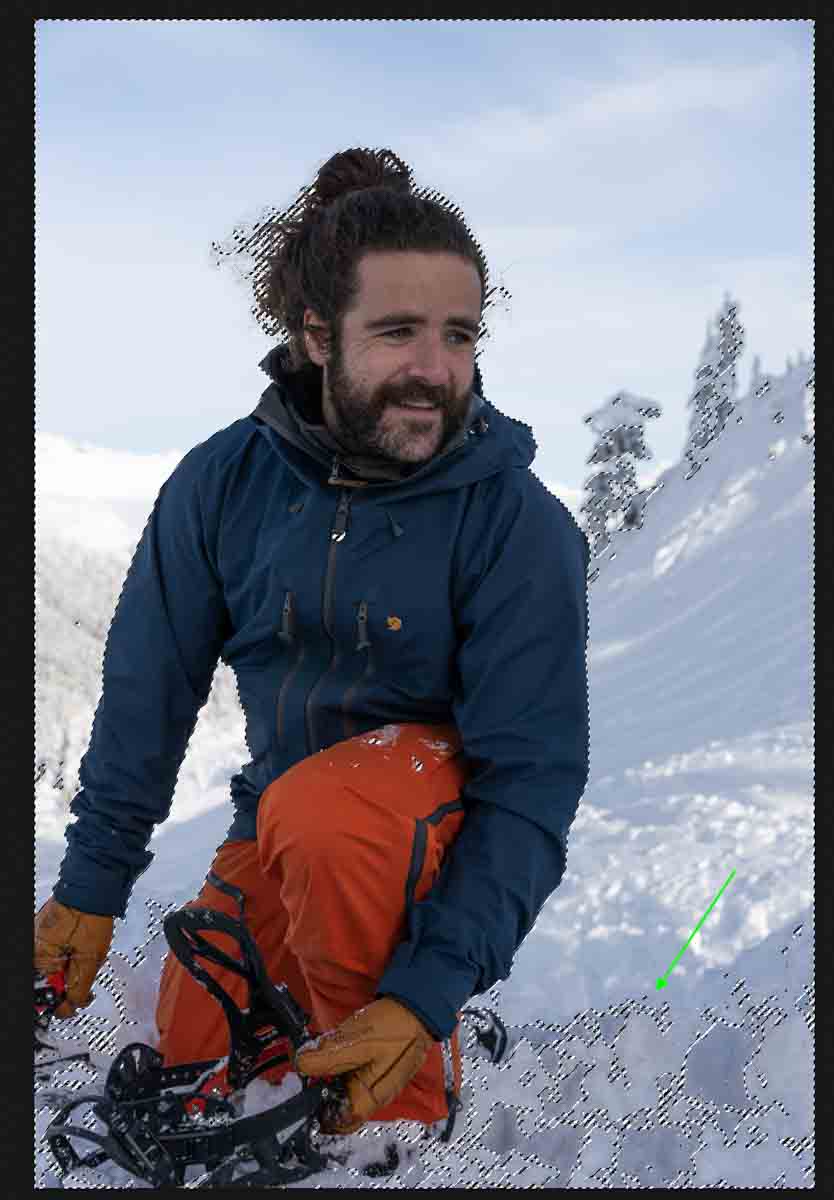
To start, open the Channels panel. Then, hold Control (Win) or Command (Mac) and click on the RGB channel. This will select the highlights of your picture. If you don’t see this panel, go to Window > Channels.
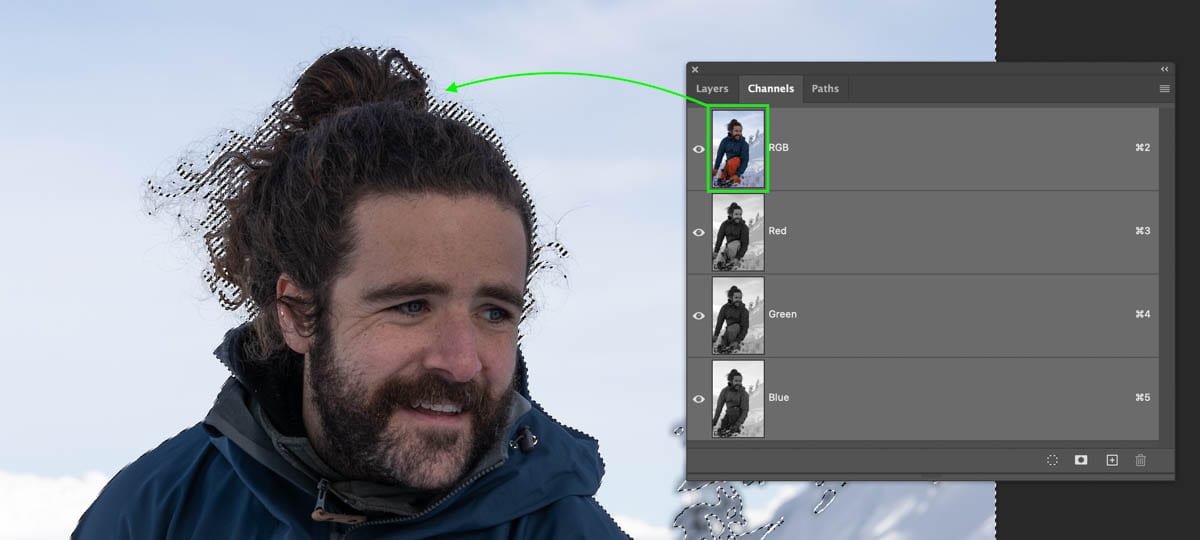
Click on the Layers panel again, and you’ll find all the highlights selected on your screen, represented by the marching ants.
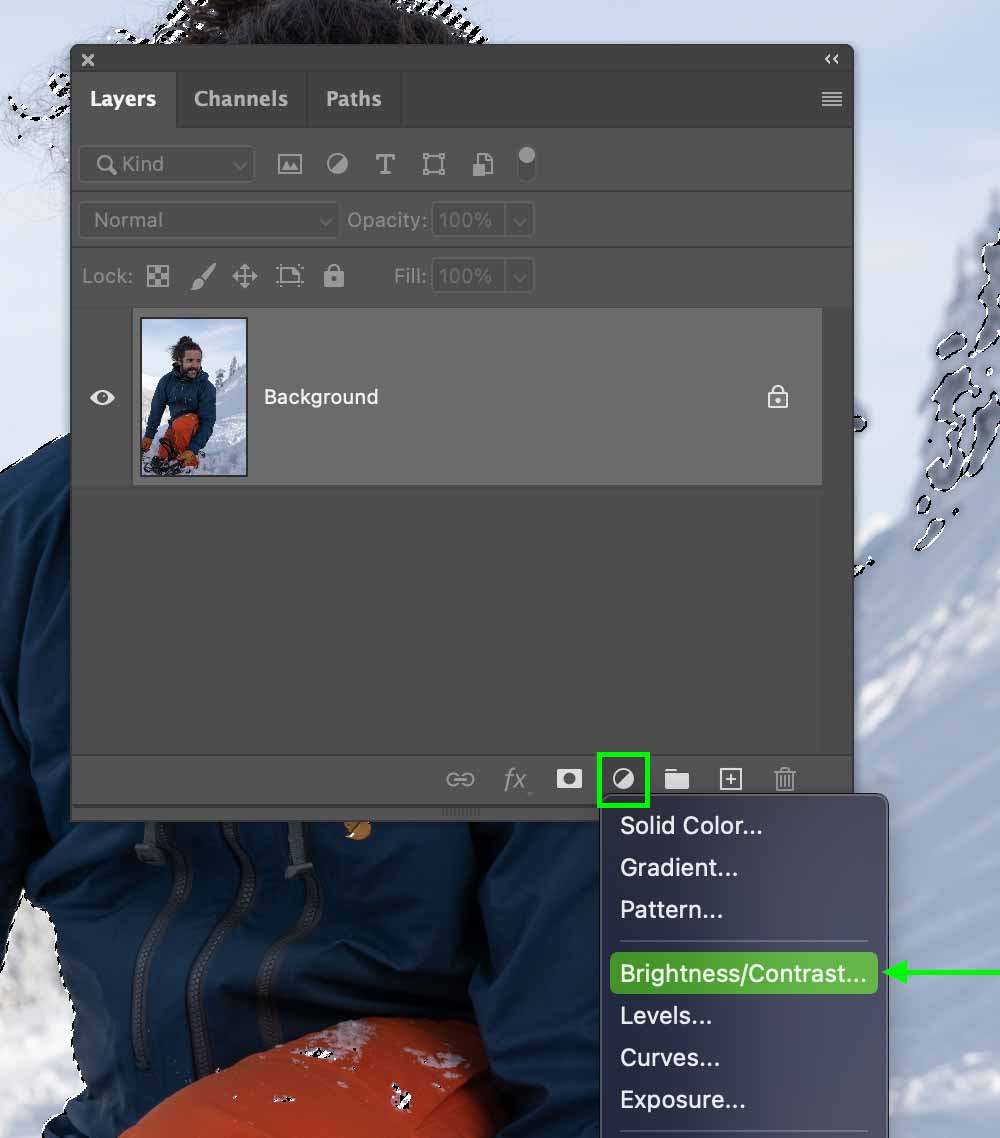
Now to use this luminance mask to adjust the image, select your adjustment layer of choice. For this example, I want to brighten and add contrast to the shadows, so I will add a brightness/contrast adjustment layer. You can access all the adjustment layers by clicking on the New Adjustment Layer Icon.
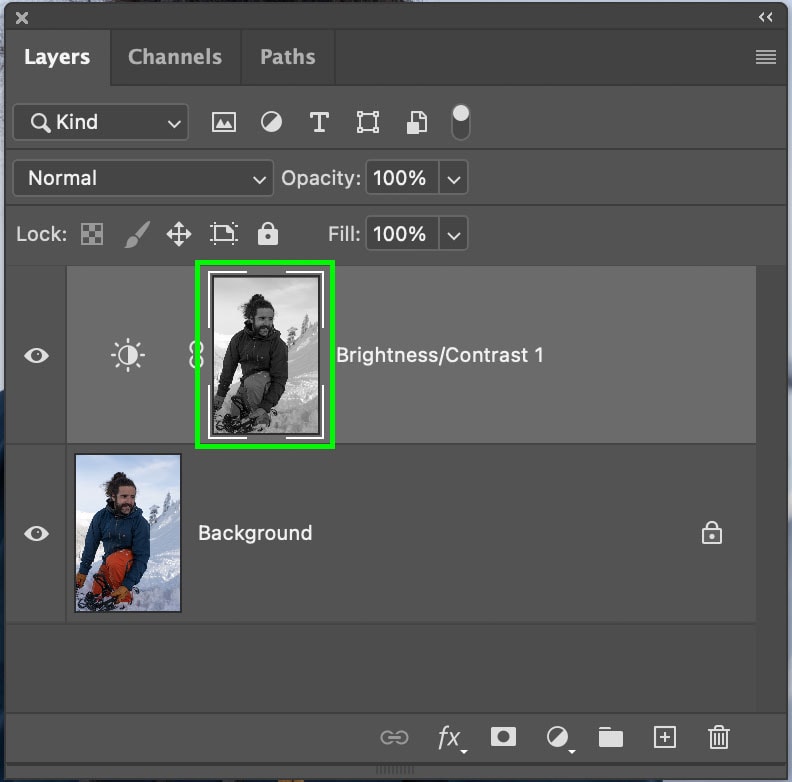
Now the luminance mask is automatically applied to the adjustment layer mask. This means that any adjustments I make will now primarily affect the brighter tones in my image. If you aren’t sure what will be most affected, just remember that any white areas will have the adjustments fully applied while black areas on the mask won’t be affected.
Step 2: Invert Your Luminance Mask To Affect The Shadows (Optional)
If you wanted to affect the shadows and mid-tones in your image instead of the highlights, all you need to do is invert the layer mask of your adjustment layer.
By selecting your adjustment layer mask and pressing Control + I (Win) or Command + I (Mac), your adjustment will now target the shadows and mid-tones instead of the highlights.
Since your original selection was based on the highlights, inverting the mask reverses this so that the shadows of your image are applied to the mask instead. By using a combination of both highlight and shadow luminance masks, you can more easily blend exposure and color adjustments into your images!
You can use this method with any Adjustment Layer, so you can get creative after you apply your image to a layer mask.
Happy Editing!
