


Batch editing can save you loads of time, particularly if you’ve got a bunch of images from the same location or images that you’d like to edit in a similar way. Batch editing works by applying the same edits to multiple images without needing to adjust the Develop settings on each image.
When you have taken multiple images at an event or in places with similar lighting conditions, it is a good idea to simply batch edit the images. This saves a ton of time so you can get back to shooting or working on more demanding images that require complex adjustments.
Batch editing is ideal for general exposure, color, and contrast adjustments, but doesn’t work as well with spot adjustments or spot removal adjustments. Anything that is specific to an image such as cropping or brush adjustments for example doesn’t often give the best results when applied in batches. For the best results, you want to ensure your adjustment settings are global.
Luckily you’ll learn exactly how to do that in this tutorial.
So let’s first start with batch editing in Lightroom Classic, then go over the slightly different options in Lightroom CC.
How To Batch Edit In Lightroom Classic
There are four different ways to batch edit your images in Lightroom Classic. You can choose the one that suits your needs.
Option 1: Apply Presets On Import
One of the quickest ways to edit many images at once is to use presets. Presets apply a whole array of edits to an image with merely a click and are useful if you’d like your photos to fit a specific mood or style. To speed things up even further, you can apply presets to a batch of images at the same time as you import them.
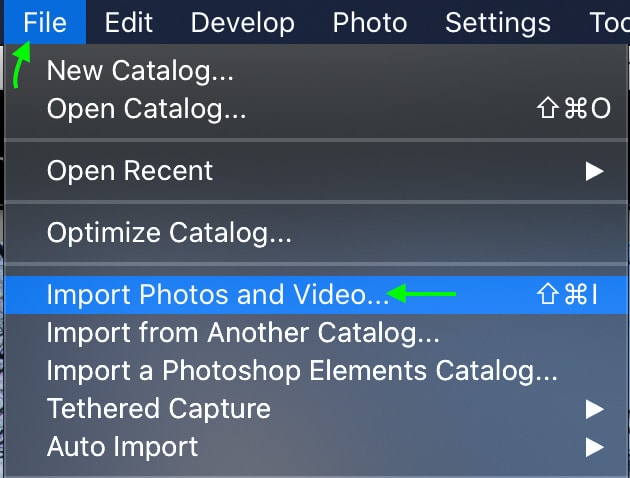
To do this, first import a batch of images by heading to File > Import Photos and Video.
The Import window will appear, and it is here that you can select the photos you’d like to import from the tabs on the left, which represent your computer’s files.
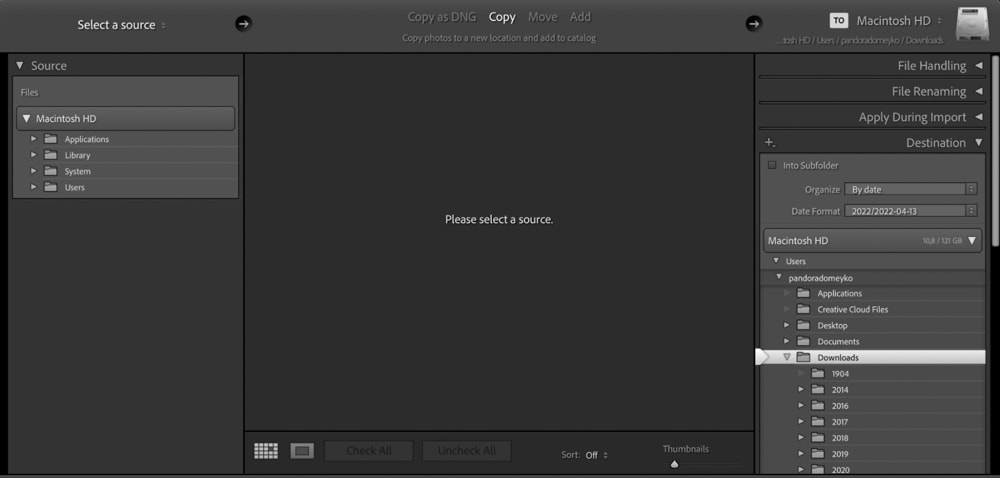
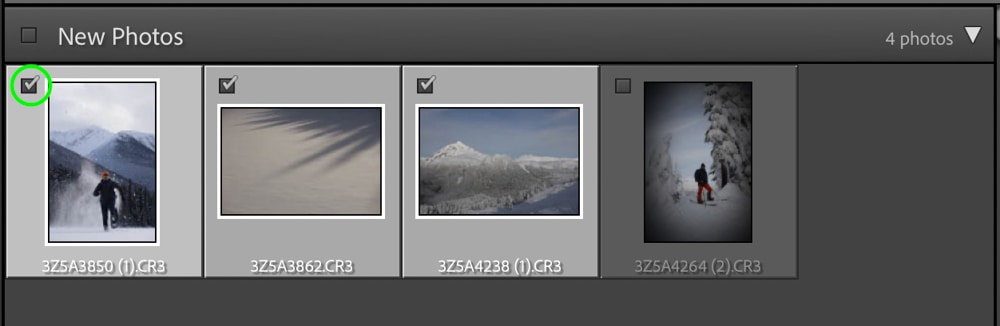
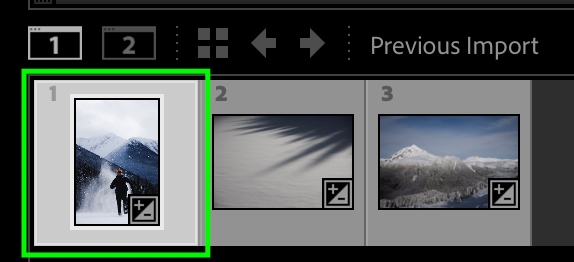
To select multiple images at once, you can click the checkmarks on the top of any images you’d like to import (they might automatically be checked, so you may actually have to uncheck any images you wouldn’t like to import).
You can also hold Control (Win) or Command (Mac) while clicking any images you’d like to import, and then click the checkmark of one image to select all the images you’ve clicked. Selected images will turn from dark gray to light gray.
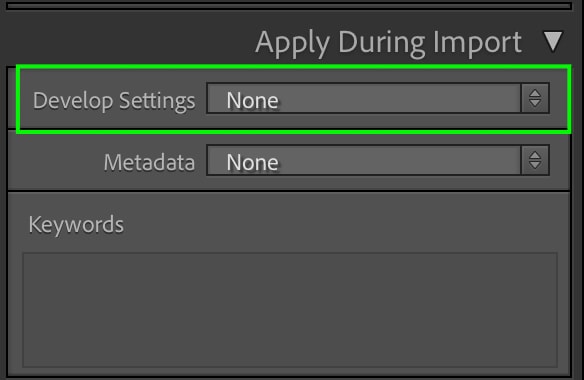
Once you’ve selected the images, head to the right-hand side of this window and, from the available tabs, click Apply During Import.
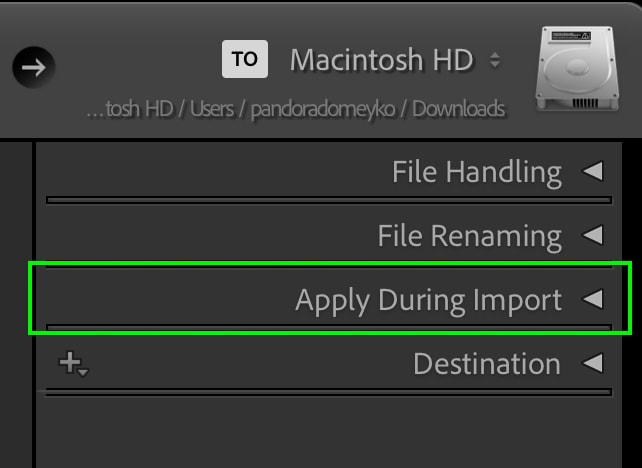
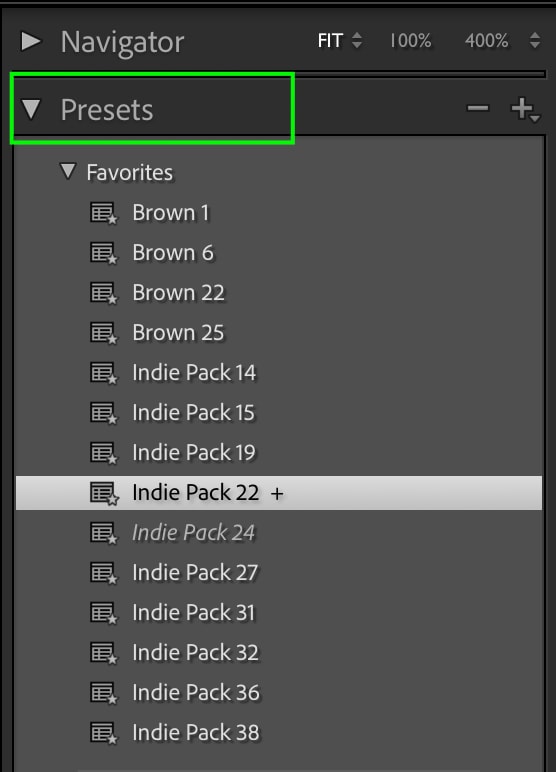
In this area, you can select Develop Settings, and then you’ll see a list of all the presets you’ve imported, as well as the ones that come with Lightroom. Click the one you’d like to apply to the images you’ve selected.
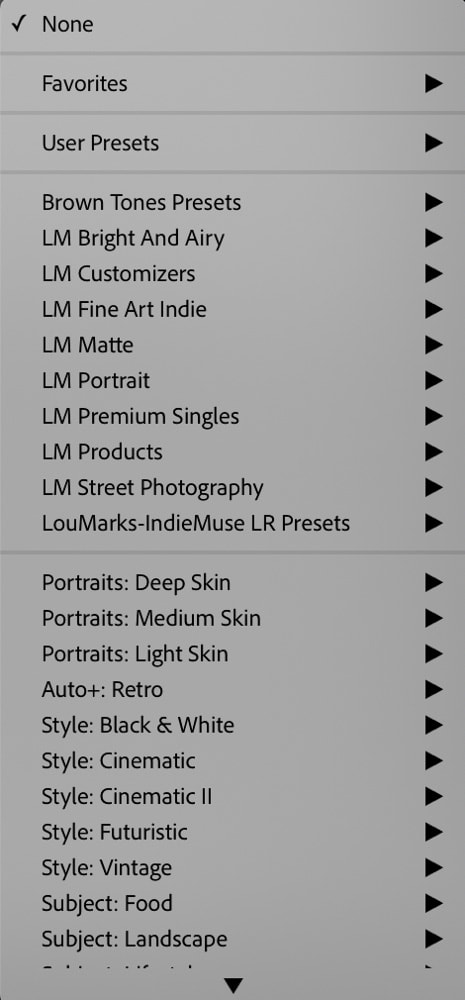
If you’d like to apply a preset you’ve made and saved yourself, hover over User Presets and you’ll see the list of your user presets appear to the left.

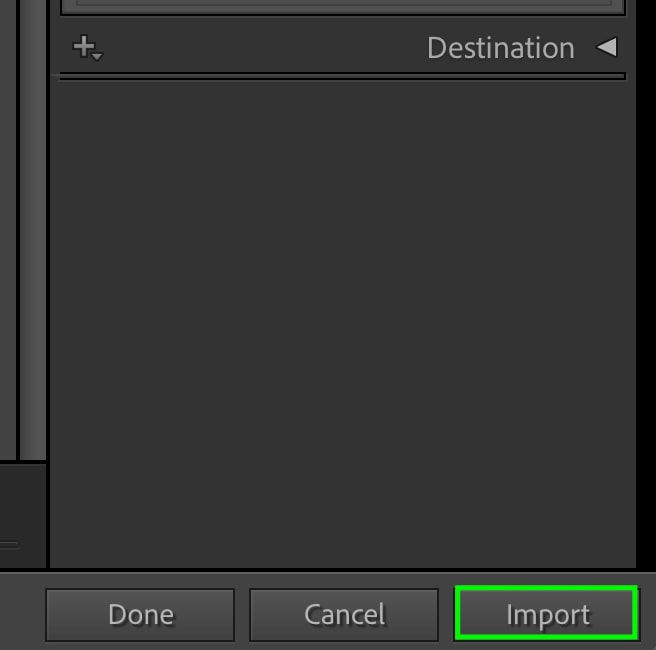
Once you’ve selected the preset you’d like to add to the images, click Import on the bottom right.
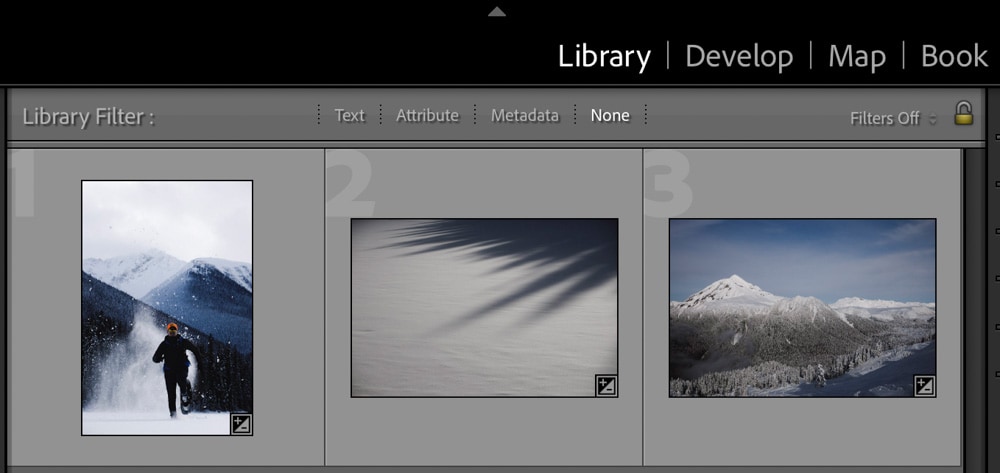
After the images have been imported, they will appear in your Library with the preset applied.
You can develop the images further by heading to the Develop module.

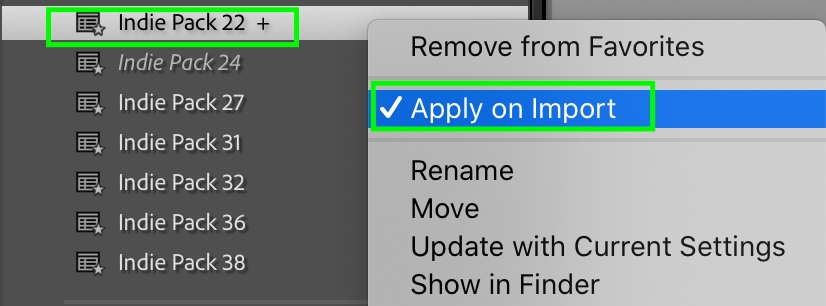
If you’d like to remove the preset you applied on import, select the photo you’d like from the film strip and head to the Presets tab on the left.
The preset you chose to apply on import will be selected. You can remove it by right-clicking (Win) or Control + clicking (Mac) the preset, and clicking to uncheck Apply on Import.
Option 2: Using Quick Develop In The Library Module
If you’d like to make adjustments to multiple photos you’ve already imported to Lightroom, you can use the Quick Develop tool, which allows you to apply some adjustments to your images straight from the Library tab — meaning you don’t have to go to the Develop tab at all.
This is the best method if you’d only like to make basic edits to multiple photos, and if you don’t need to make any of the more complex adjustments, as the Quick Develop tool only allows you to edit the following areas:
- Temperature
- Tint
- Exposure
- Contrast
- Highlights
- Shadows
- Whites
- Blacks
- Clarity
- Vibrance
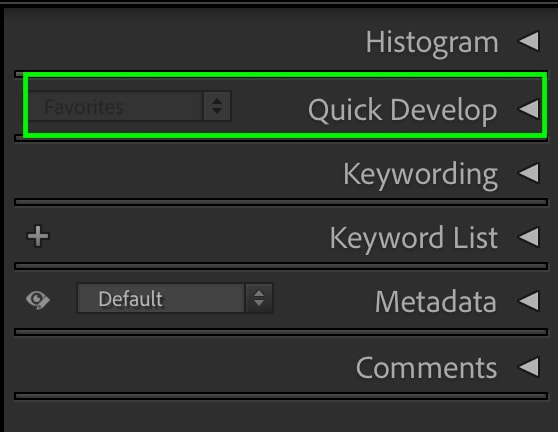
You can also apply presets to your images in Quick Develop. Quick Develop can be found by heading to the Library tab.

Here, you’ll see your image library. You can select multiple images from this Library by holding Control (Win) or Command (Mac) and clicking the images. Selected images will appear light gray.
Head to the tabs on the right and click Quick Develop.
You’ll see the various adjustments you can make here.
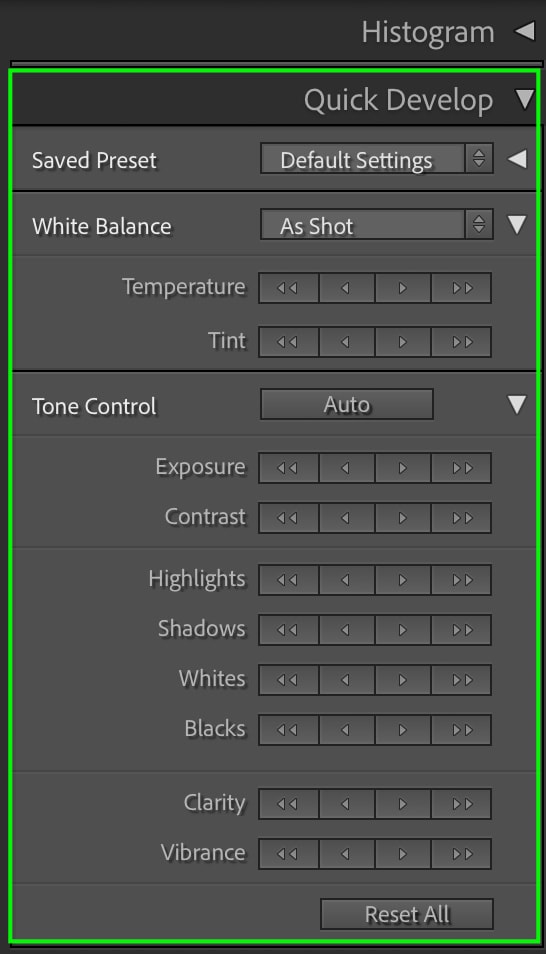
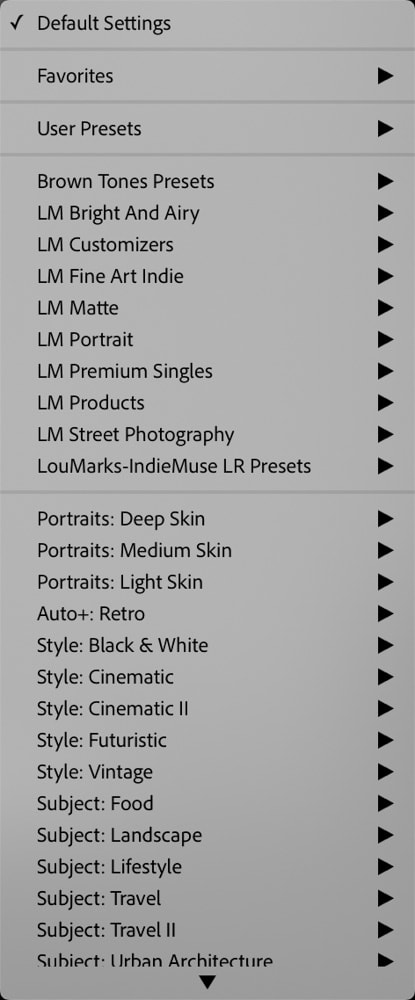
Use the buttons to edit the images the way you like, and any adjustments you make will be applied to all the selected images. You can also apply presets to selected images here as well, by clicking the bar at the top across from Saved Preset.
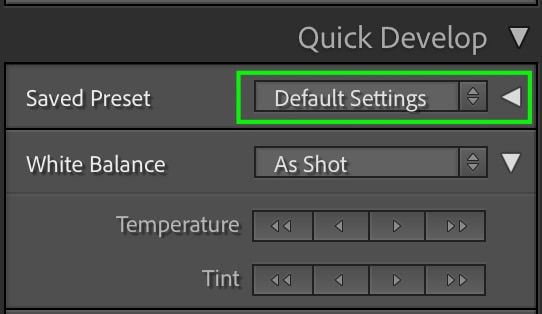
A list of all your presets will appear, and you can click to apply them to your selected photos.
Option 3: Copy & Paste Edit Settings
The next option is to copy the adjustments you’ve made from one image and paste them to other images. This takes a bit longer than the previous two methods but comes in handy if you’ve got specific edits you’d like to take from one image to another (or to multiple).
You’ll only have to edit one image the way you’d like it to look, and there are no restrictions on the adjustments you can make, so this method is still much faster than individually editing each image one by one.
To do this, first, choose an image from the batch you’d like to edit, and edit it the way you’d like the images to look. Once you’ve finished, head to the film strip at the bottom, and make sure the image you’ve just edited is selected.

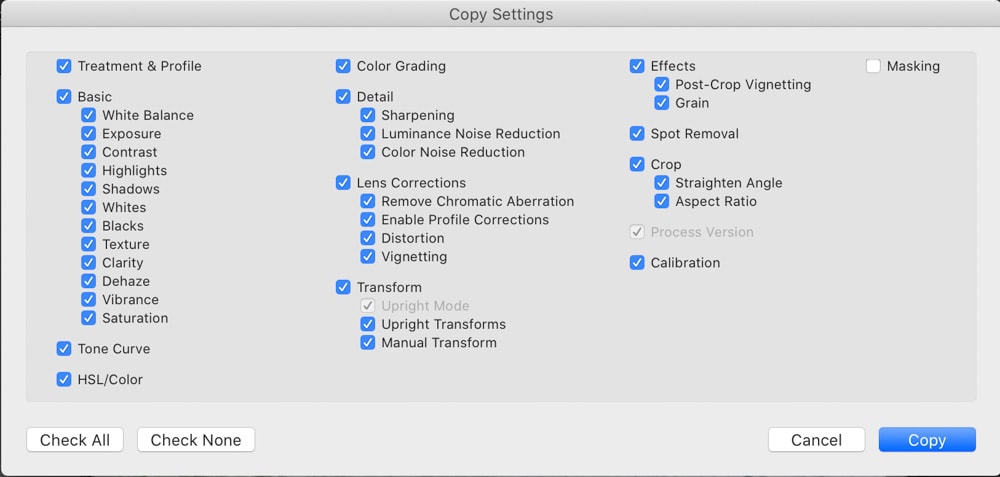
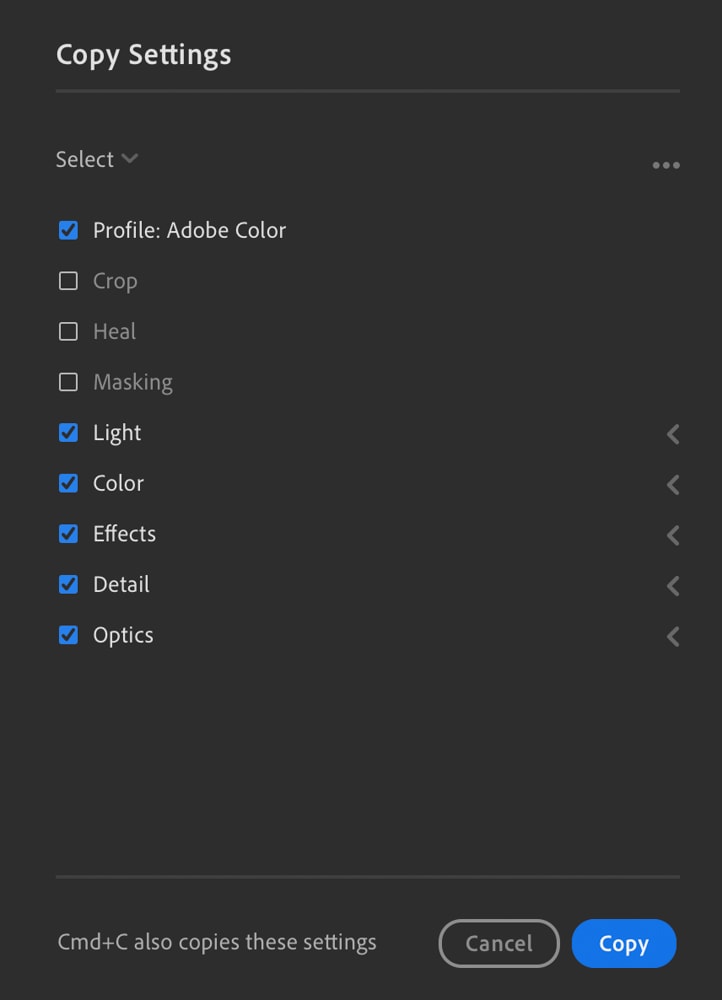
Now you can copy the edit settings. To do this, you can right-click (Win) or Control + click (Mac) to bring up more options, and head to Develop Settings > Copy Settings. You can also press Control + C (Win) or Command + C (Mac).

A window will appear where you can check the adjustments you’d like to copy. When you’re done, click Copy.
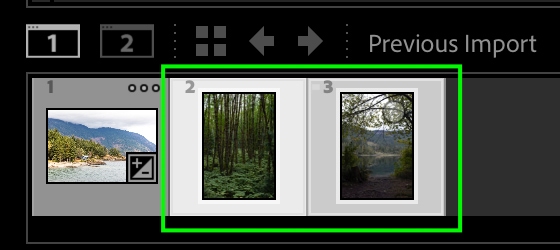
Once you’ve copied the settings, select the images you’d like to paste them to in the film strip. You can select multiple by holding Control (Win) or Command (Mac) and clicking on the images.
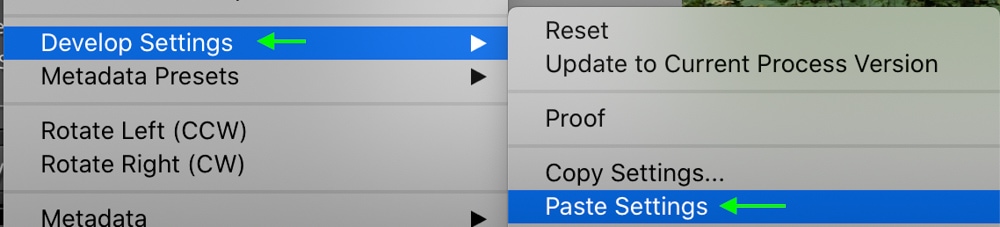
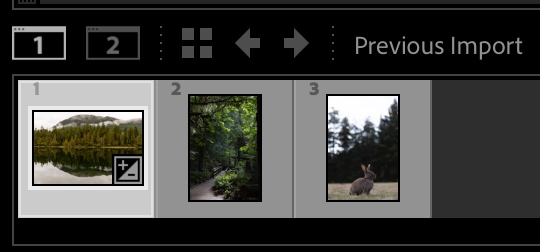
With the images selected, right-click (Win) or Control + click (Mac) one of them and head to Develop Settings > Paste Settings. You can also press Control + V (Win) or Command + V (Mac). The edits will transfer to the images you selected.
Option 4: Syncing Settings Between Multiple Photos
The final option for batch editing in Lightroom Classic is to sync your images settings between multiple images. This is a slightly faster alternative to Copy and Paste as you can immediately apply adjustments to as many photos as you want with just a click of the Sync button.
To do this, head to the develop module.
Edit a photo the way you’d like, and when you’re finished, go to the film strip area below.
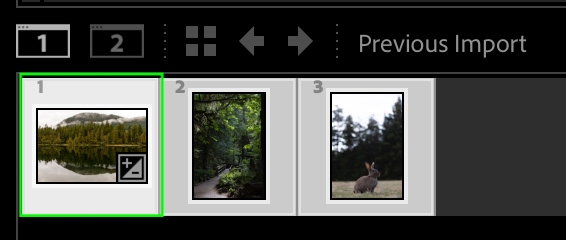
With the image you’ve just edited as the first image selected, hold Control (Win) or Command (Mac) and click the other images you’d like to apply the same settings to. It is important that your edited image is the first image you select, as the first image will be the one whose Develop settings are synced to the rest of them.
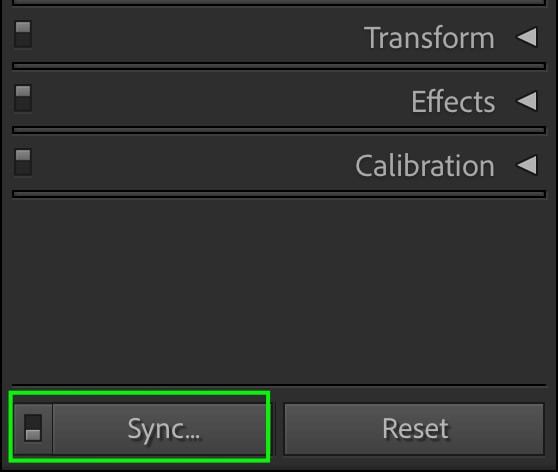
Now you can press the Sync button below the develop settings on the right.
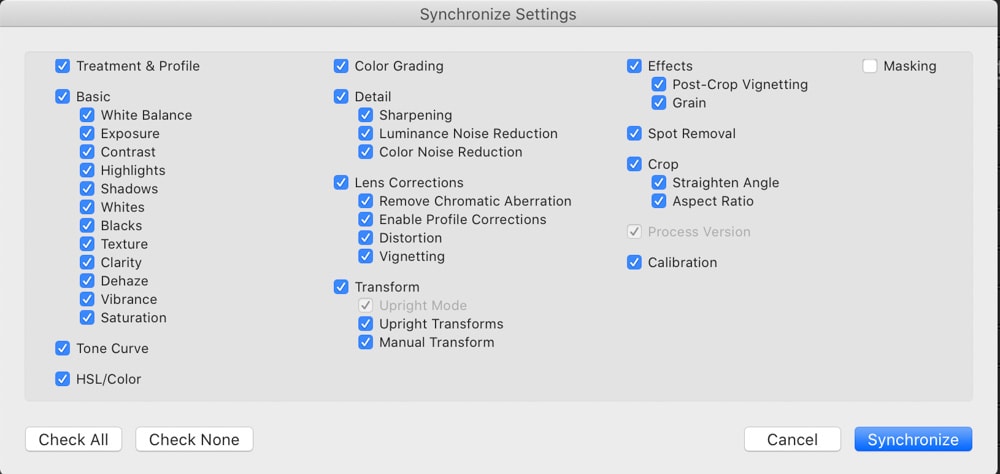
The window will appear where you can check all the settings you’d like applied to the other images, and press Synchronize when you’re done. All the settings will be applied to the images you selected.
How To Batch Edit In Lightroom CC
Batch editing is possible in Lightroom CC, but there aren’t as many methods to do so. In fact, the only way to batch edit in Lightroom Classic is to copy and paste the settings.
To do this, first edit an image the way you’d like by heading to the Edit area, where you’ll find all the available settings.


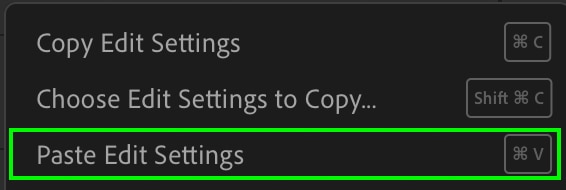
Once you’re satisfied with the edits you’ve made, you can copy the settings by selecting the image and clicking on the three dots icon on the right-hand toolbar.

You can then choose either Copy Edit Settings if you’d like to copy all the settings and paste them to other images or Choose Edit Settings to Copy if you’d like to select specific settings.
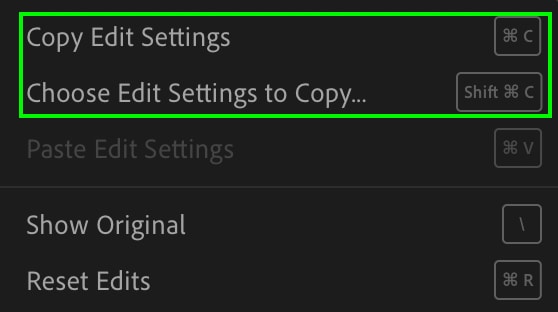
You can also hold Control + C (Win) or Command + C (Mac) to copy all edit settings automatically. Or you can press Shift + Control + C (Win) or Shift + Command + C (Mac) to choose edit settings to copy.
If you select Choose Edit Settings to Copy, a window will appear that allows you to check the specific settings you’d like to copy and paste.
Click Copy when you’re satisfied with your selections, then head to an image you’d like to paste the settings to. Click the three dots icon again and select Paste Edit Settings. Then, repeat this for each image you’d like to paste these settings to.

So although Lightroom CC can batch edit to some degree, it’s pretty underwhelming compared to what Lightroom Classic offers. That’s why I would highly recommend using Lightroom Classic when working in large batches since there are more image organization options and batch editing options as you learned here.
Happy Editing!
