
How To Edit Golden Hour Photos
Nothing beats the warm orange glow of golden hour. This time of day is one of the best times to take pictures simply because of how rich and vibrant colors become. When you’re taking golden hour pictures, you might be pretty happy with how your images look in-camera. However, you can easily enhance your golden hour photos with some basic photo editing techniques. In this tutorial, you’ll learn how to edit golden hour photos to take any sunset image to the next level.
To Edit Your Golden Hour Photos In Lightroom, Follow These Steps:
- Edit The Exposure And Contrast Of Your Image
- Adjust The White Balance To Make Your Photo “Warmer”
- Add Stylized Contrast And Color With The Tone Curve
- Use The HSL Adjustment To Enhance Any Golden Colors
- Add Split Toning To Make The Colors Pop
- Profile Corrections
- Color Calibration
- Export Your Photo!
With these 8 steps, you can edit golden hour photos in no time. Whether you’re a seasoned pro or a total beginner, the tips here will change the way you think about editing golden hours photos in Lightroom. Using some basic color and exposure adjustments to your advantage, you can enhance colors and improve upon the golden light that’s naturally in your photo. Let’s get started!
What Counts As “Golden Hour”?
As I’ve talked about in how to take pictures at golden hour, this is the time right before the sunset or sunrise. All the colors in a scene appear more vibrant at this time of day and are bathed in a yellow-orange light. This “golden” appearance is the reason this time of day gets its name. Since these colors don’t last long, this quickly changing light is more challenging to capture and requires a bit more planning.
If you already have a great golden hour picture to work with for this tutorial, then perfect! If not, check out these tips for predicting an amazing sunrise or sunset to help get the perfect shot. After all, if you don’t get the right golden light in-camera, it’s going to be a lot harder to make your golden hour photo “pop” while photo editing.
8 Steps For Editing Golden Hour Photos In Lightroom
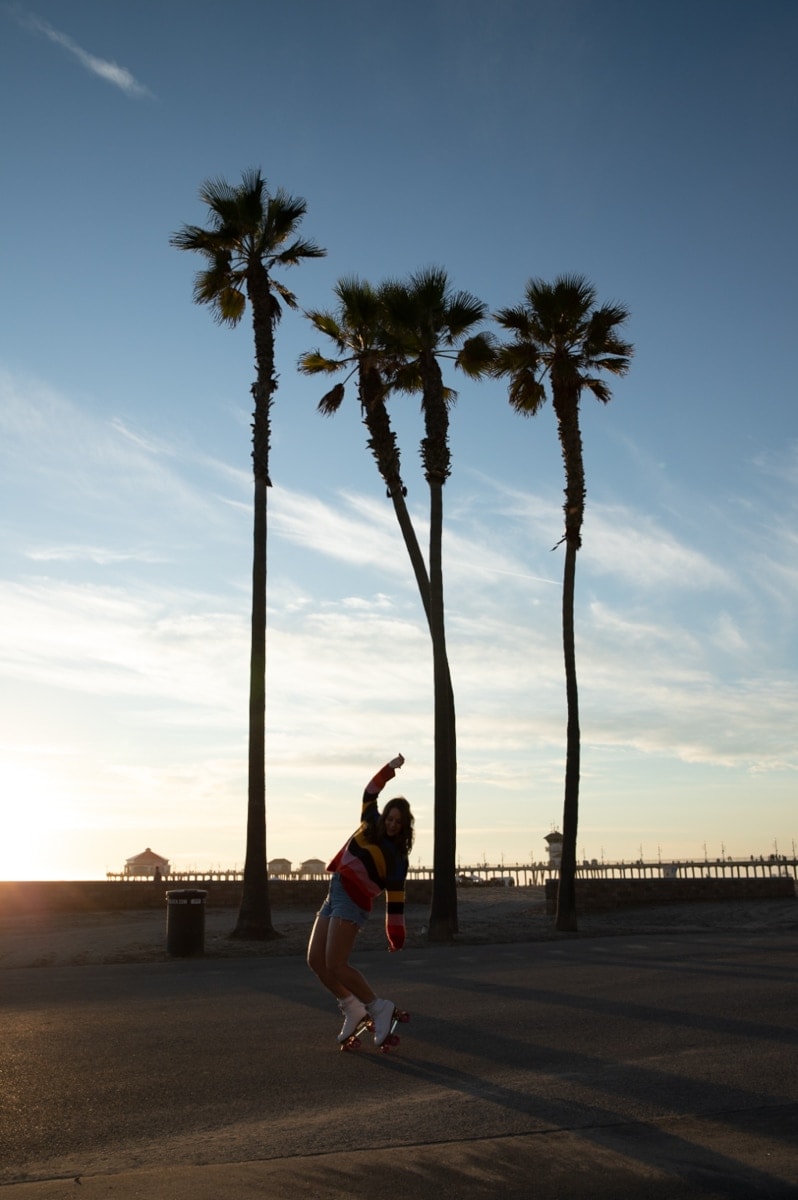
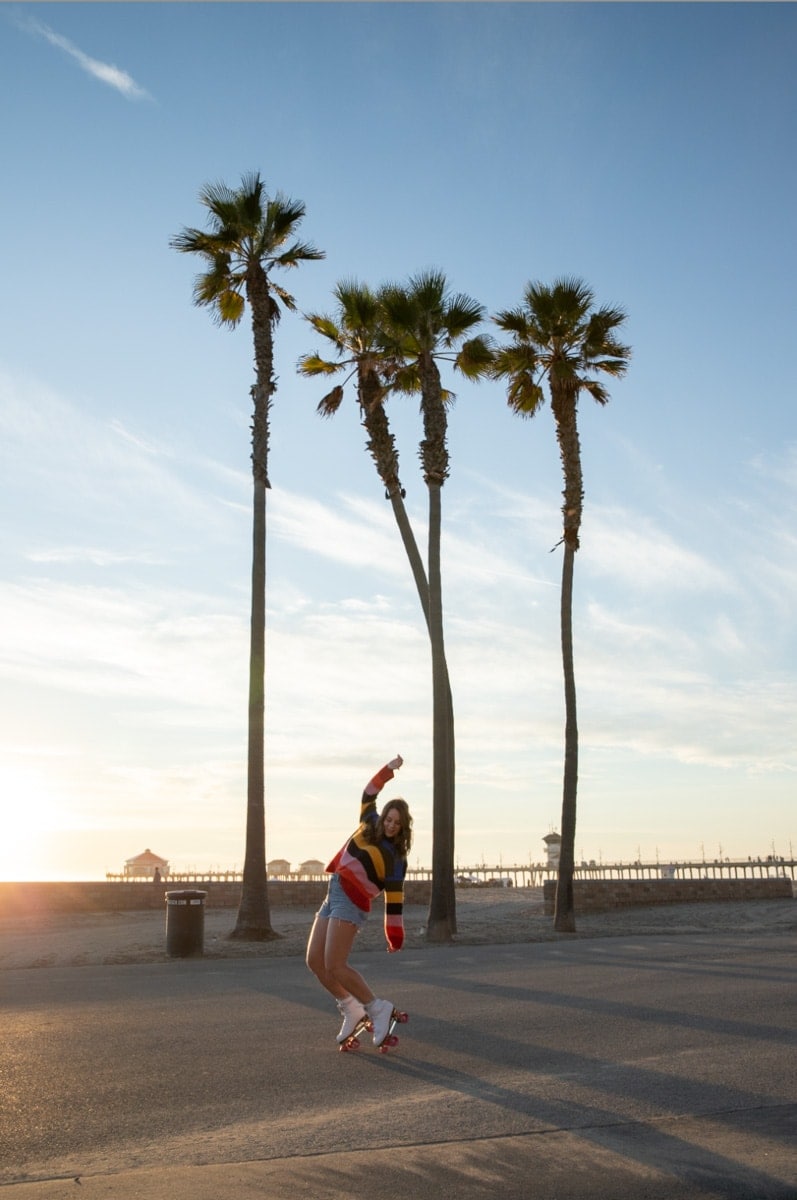
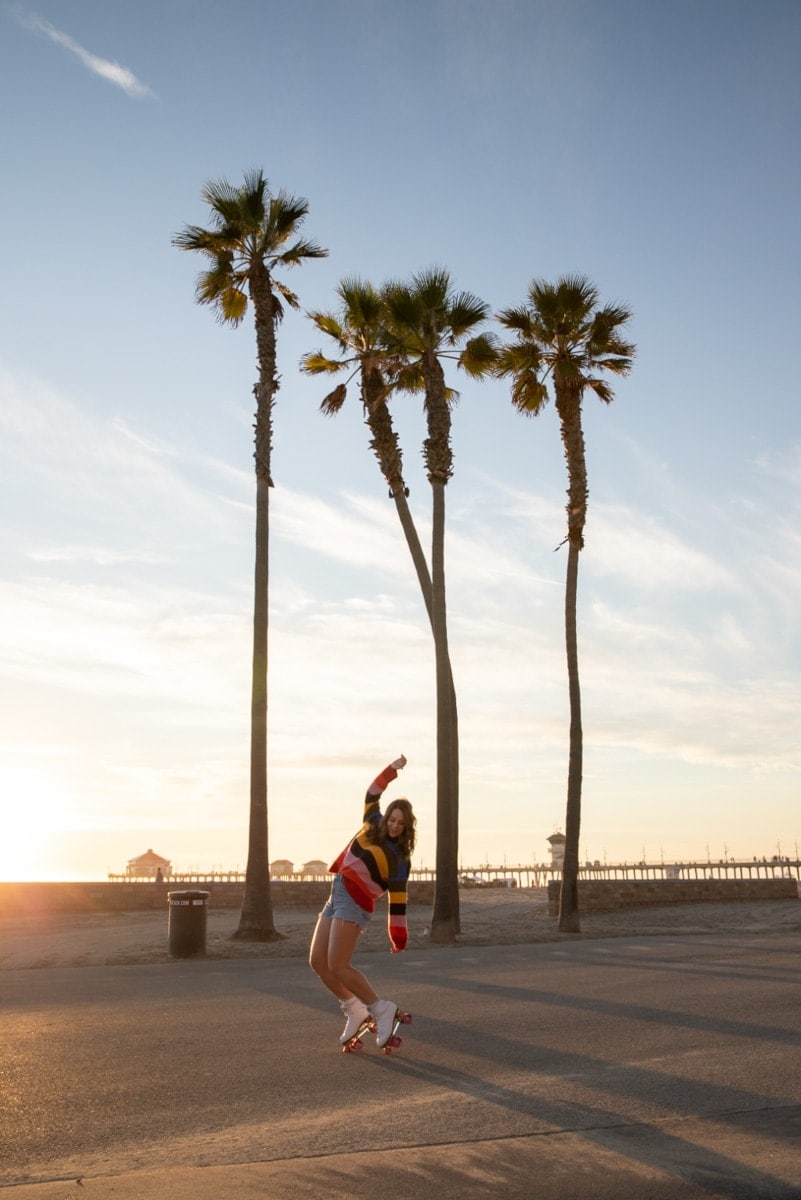
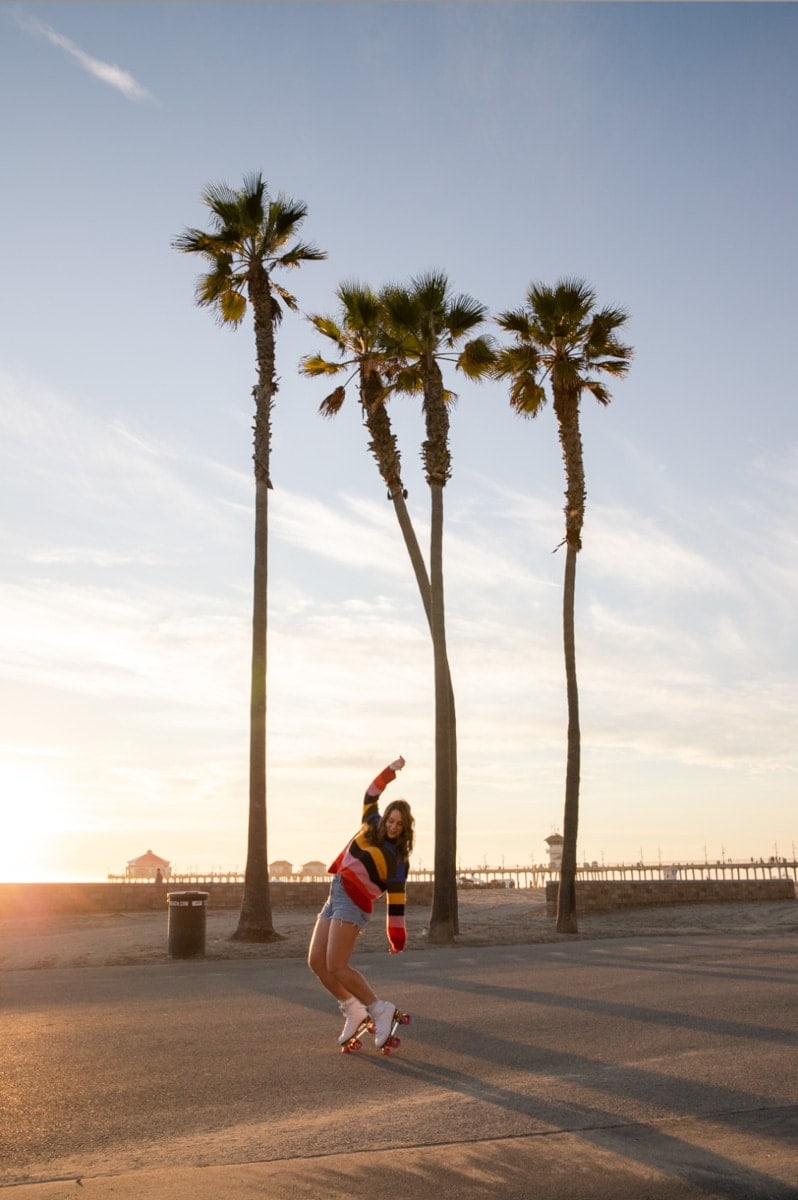
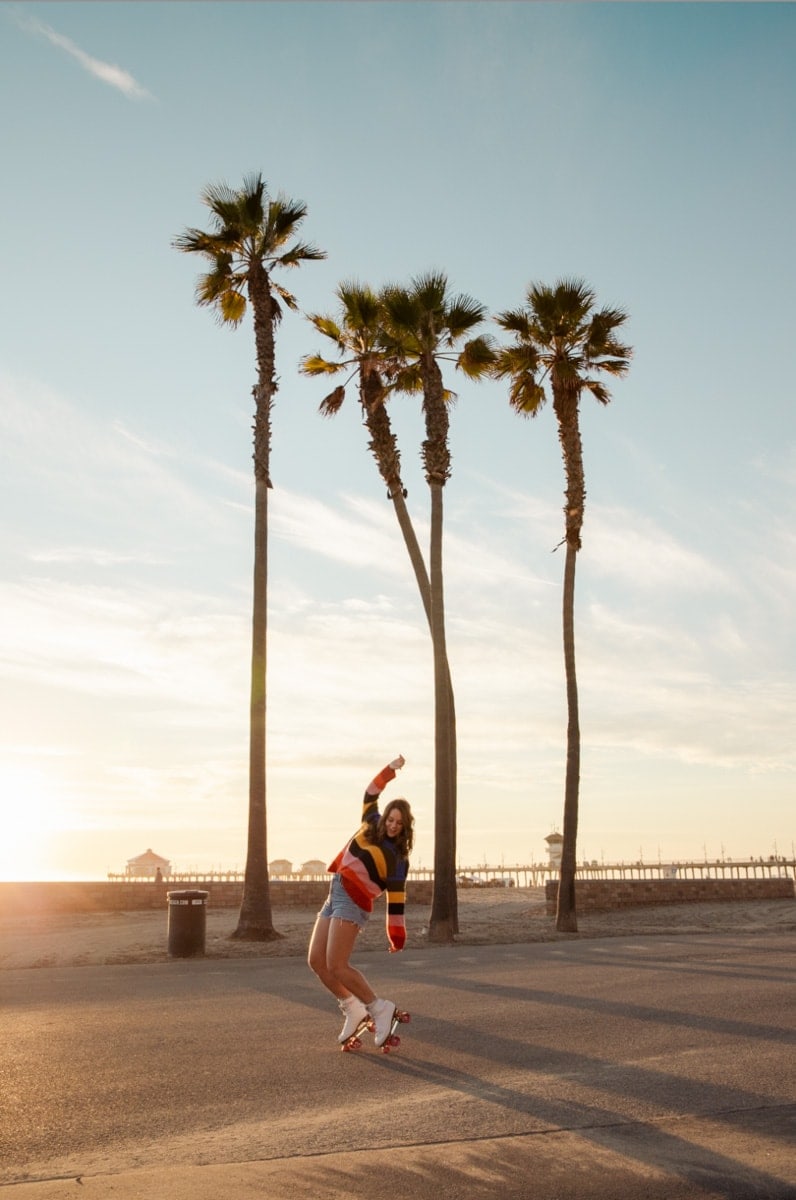
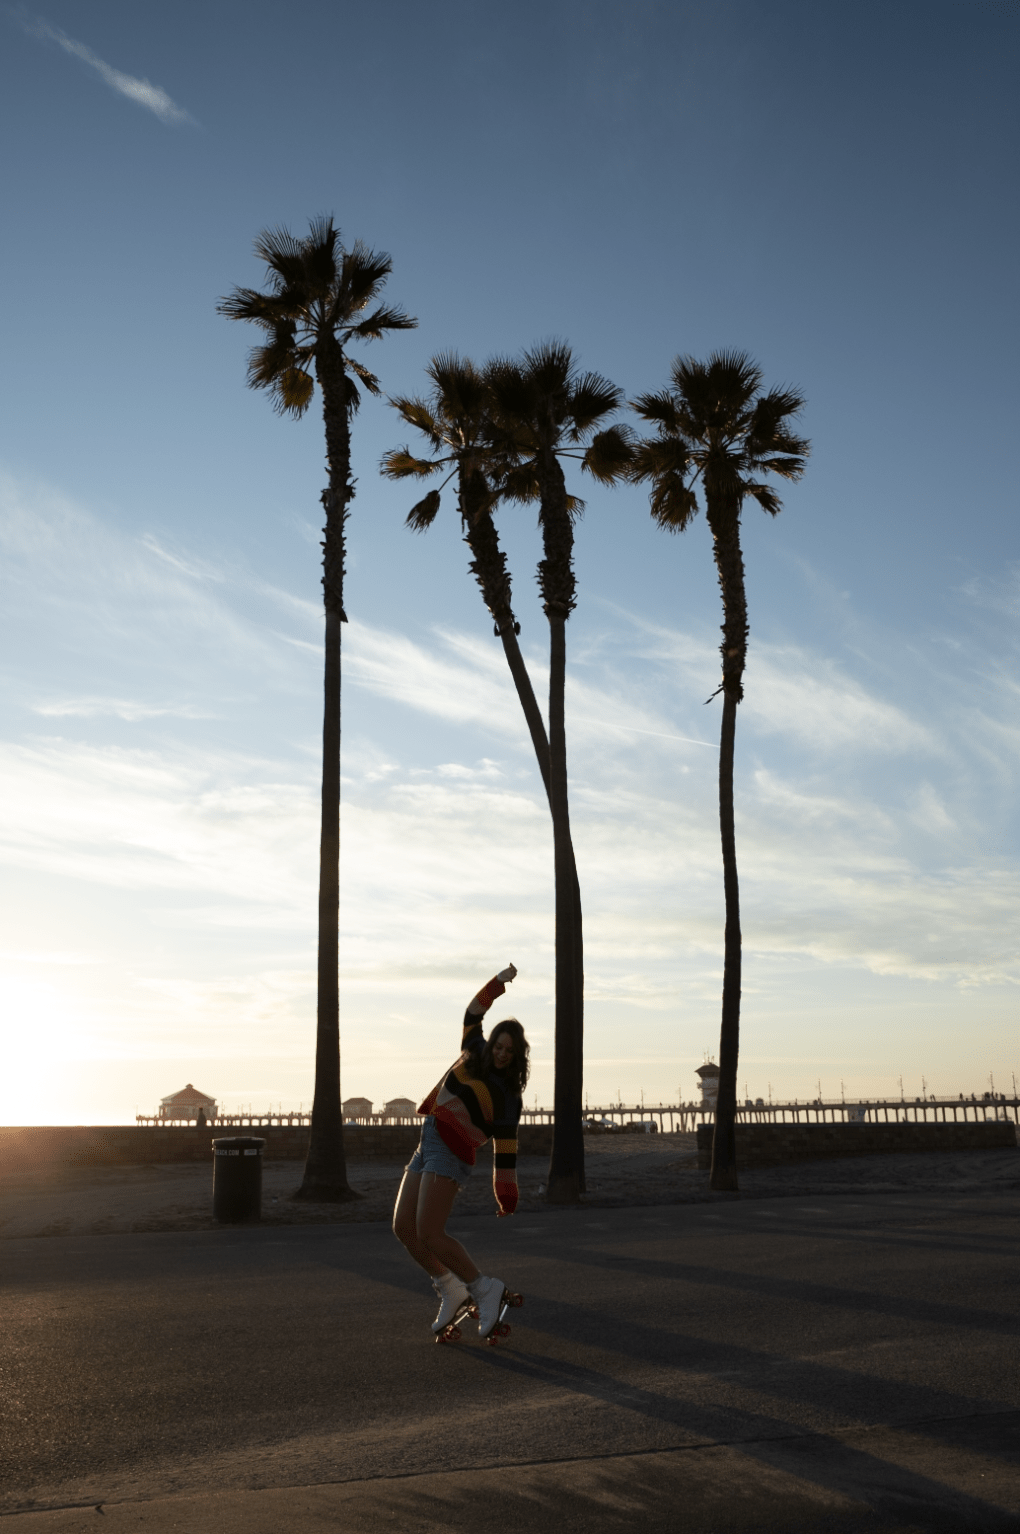
For this example, I’ll be editing a photo I took at Huntington Beach. This image is a perfect example of the “usual” golden hour photo since it has a nice warm light that’s only found during this time of day.
Before you start editing your picture, you’ll want to make sure that your picture is a RAW file. That means that you’ll be able to push the exposure and color in your photo without any quality loss while editing. Unfortunately, this is something that can only be changed in-camera before you take a picture. If you’re still shooting in JPEG, remember to switch your camera’s file format to RAW before the next time you’re out shooting!
If your picture is a JPEG file, it’s not the end of the world. You can still follow the steps in this tutorial, but watch out for banding. When you try to push the contrast or color values too far in a JPEG image, it creates pixelated lines in your photo, indicating there’s not enough information. So just stay aware of how far you’re pushing your photo if you’re working with a JPEG file!
With that out of the way, let’s dive into these 8 steps for editing golden hour photos! With your image selected, access the “Develop” tab to find all your adjustment tools.

Step 1: Exposure And Contrast
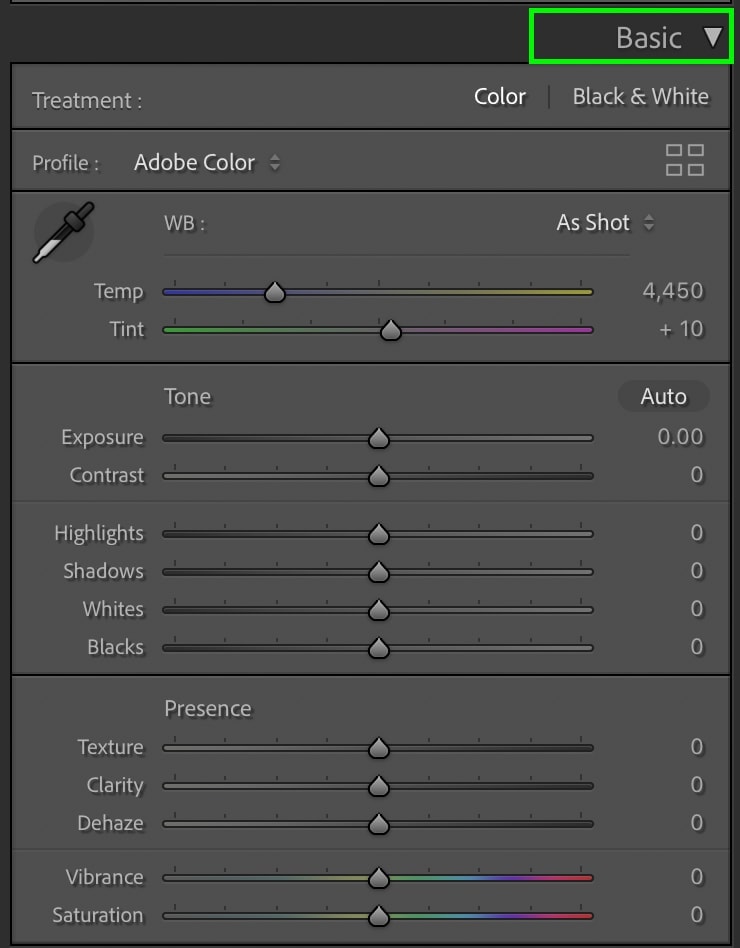
Just like any photo you’re editing, the first step is to adjust the exposure and contrast. In Lightroom, this is easily done with a handful of sliders in the Basics Panel.
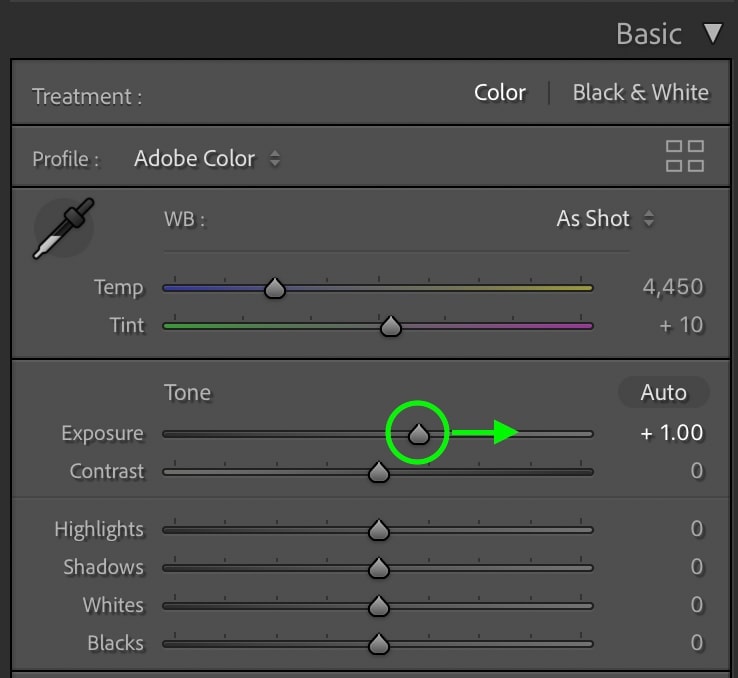
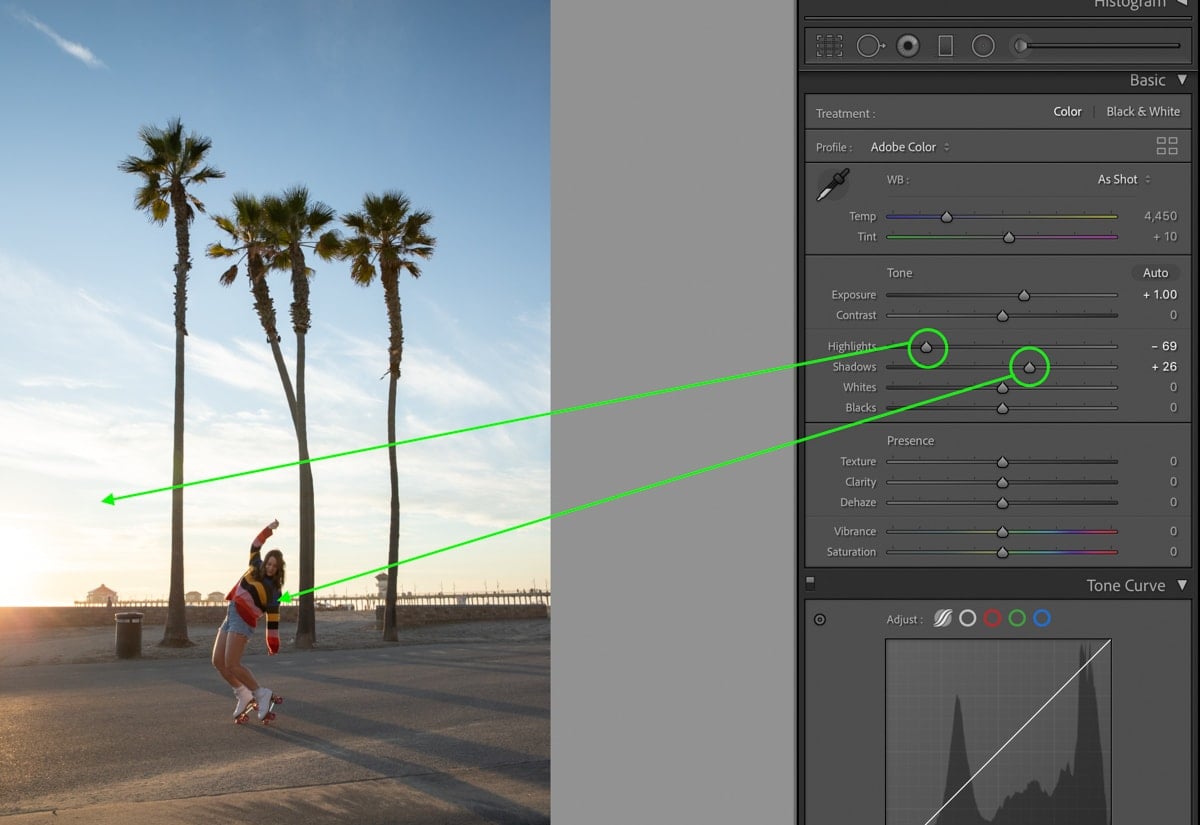
Depending on the camera settings you had, your photo might look a little too dark or a hair too bright. To correct the overall brightness of your photo, use the exposure slider to balance things out.
In my case, the photo is a little too dark in the shadowy areas, so I’ll bring up the exposure value to balance out the image. Be careful not to go overboard with this, or you’ll end up clipping your photo!
With your baseline exposure set, it’s time to work through the highlights, shadows, whites, and blacks sliders. These all help to target certain exposures in your picture to make them brighter or darker.
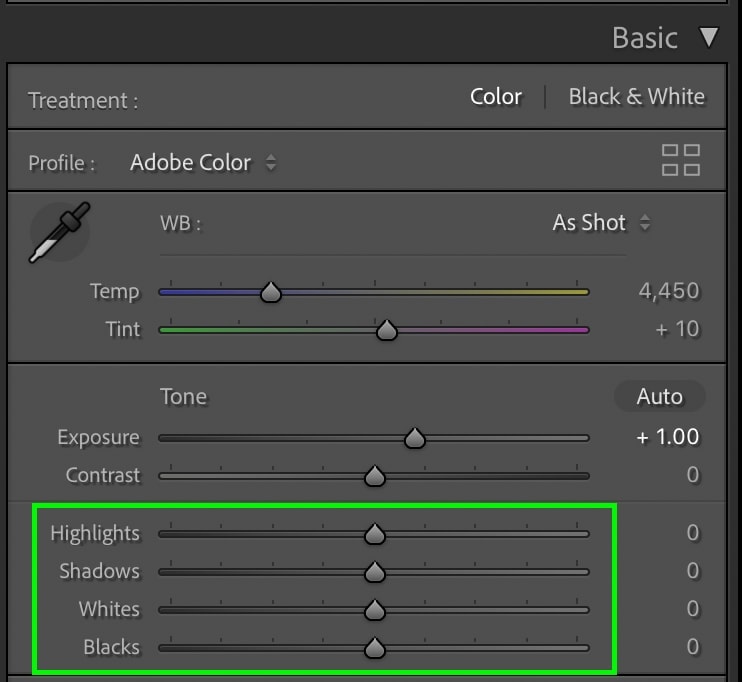
Start by bringing down your highlights to help reveal more details in the sky. Then bring up the shadows to make the shadowy areas more visible.
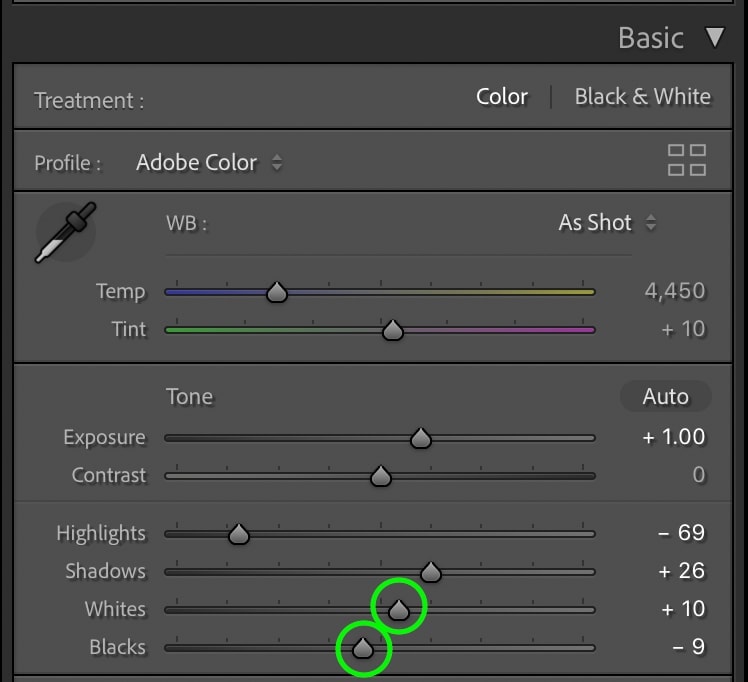
Since you’ve already brought down the highlights and up the shadows, you don’t want to do the same with your blacks and whites. If you did, you’d get rid of a lot of contrast in your picture and make it appear too “flat.”
Instead, try to add a bit to your whites and darken your blacks to add a subtle hint of contrast back into the photo. Especially when editing golden hour pictures, contrast is a key part of making your photo appear more eye-catching.
With these basic adjustments, your photo now has a more balanced exposure and more customized contrast values. This creates the perfect starting point for the rest of your edit.
Step 2: White Balance
As I’ve gone over in how to use white balance in photography, this adjustment is an amazing way to make your photo feel more like sunset. By adjusting the white balance to be more yellow, all the colors in your picture start to appear more like golden hour.
Especially when you already have those vibrant reds and oranges in your picture, a warmer white balance further enhances them.
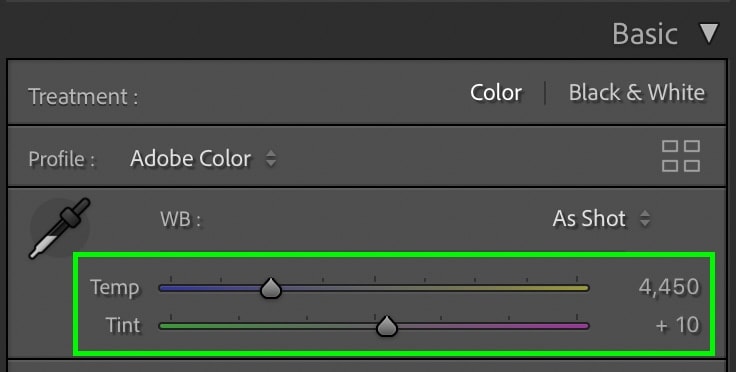
The white balance adjustment in Lightroom is found at the top of the Basics Panel. To “warm-up” (add more yellow) to your white balance, move the slider to the right. Without going too crazy, bring this adjustment up until your photo has the right amount of warmth to match the scene.

To help improve the sunset colors, even more, you can increase the tint slider to add more purple.

By adding both yellow and purple together, you start to create the same natural tones found at golden hour. That way, you can “fake” a golden hour look or enhance the actual sunset already in your picture.
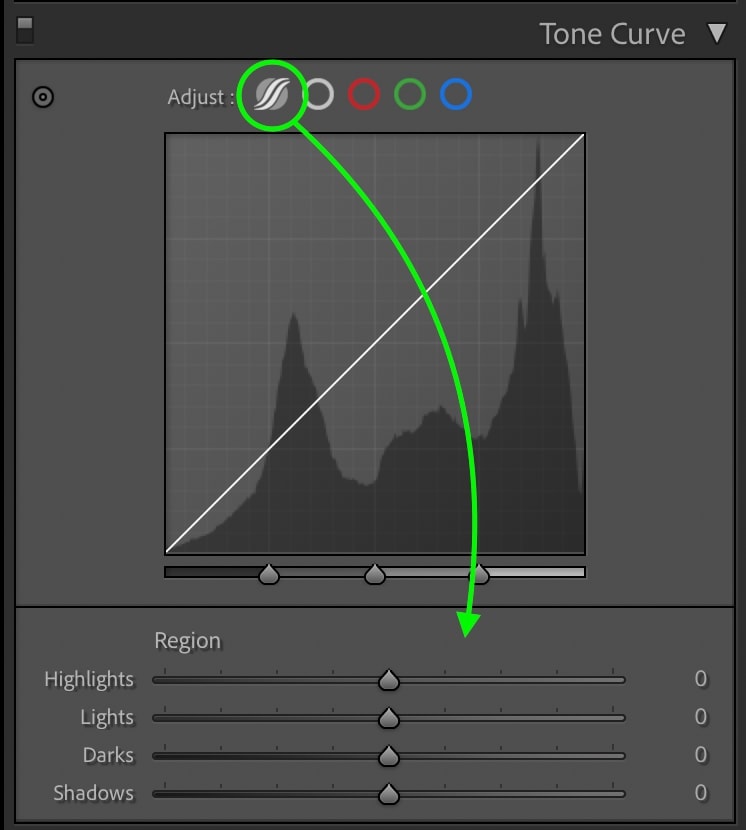
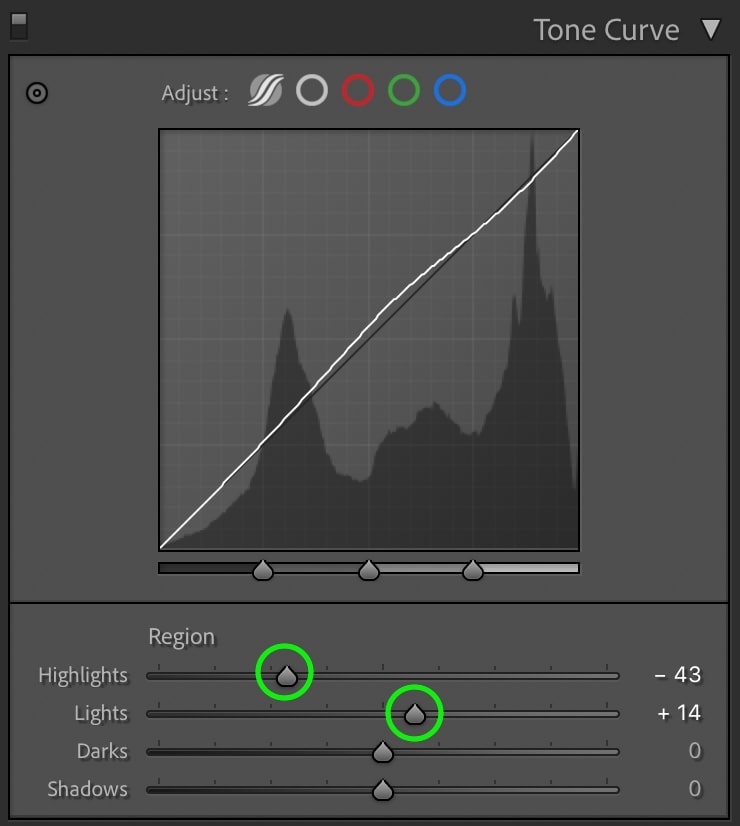
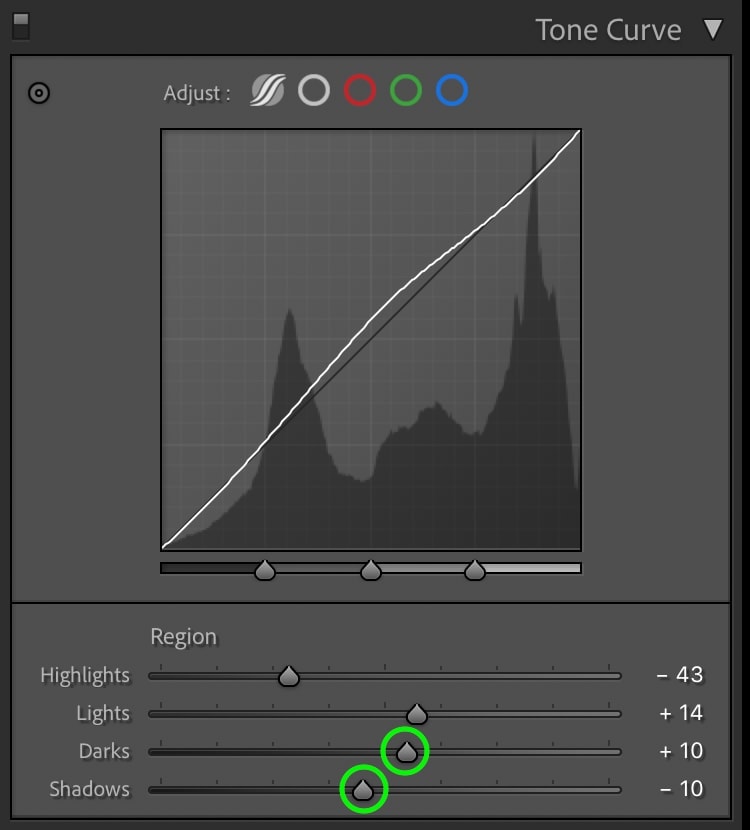
Step 3: Tone Curve Adjustments
At this point, the basic image adjustments are complete, and it’s time to start adding more stylized effects. To start things off, one of the best tools to use is the tone curve in Lightroom. This adjustment lets you add stylized contrast and color adjustments based on different exposure values in your photo.
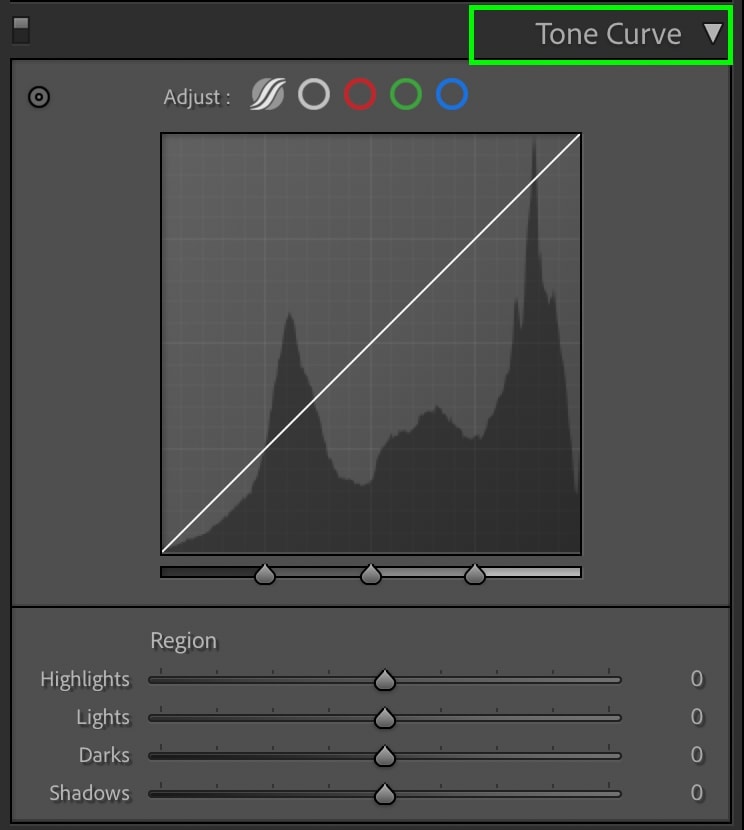
The easiest way to make adjustments to the tone curve is via the parametric curve. Rather than manually creating anchor points, you can use sliders to target different exposures.
For this step, you want to add a little more contrast to your photo to make things pop. In most cases, it’s best to just enhance the contrast that’s already in your photo.
In my image, I’ll bring down the highlights to make the sky more visible while increasing the lights to make them pop.
As for the darks and shadows, I want this photo to have a slightly more matte look to it. By lifting the darks slightly, I can make the photo appear a bit softer. Especially for golden hour pictures, I love the look this adds!
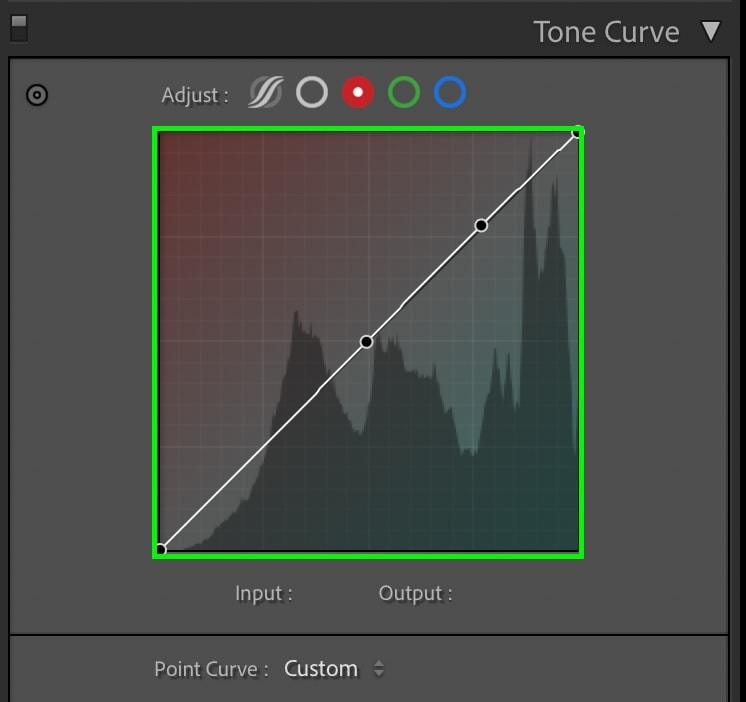
With your contrast adjustments made, you can begin to edit colors with the tone curve. Rather than editing specific colors, you’re able to add color hues based on the exposure range. This is a super easy way to stylize any picture.
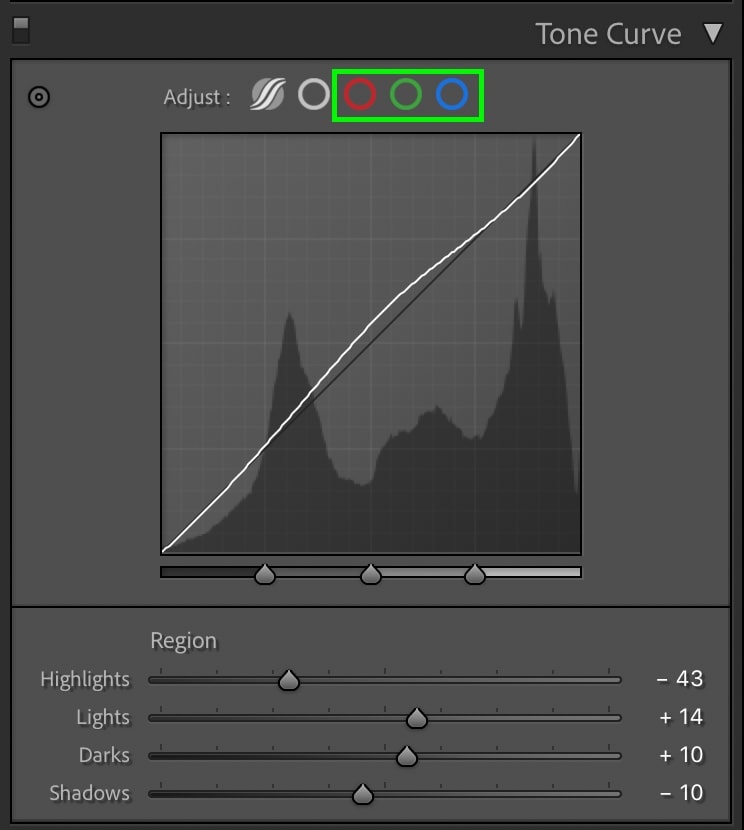
Working through the red, green, and blue channels, try adding some subtle color hues to your sunset photo. You’ll be amazed at how much of a difference the smallest adjustment can make!
I could talk all day about how to edit color with the tone curve, but it’s a bit outside the scope of this post. Instead, I wrote all about how to do it in this tutorial.
Ultimately, just play around with these adjustments to see what types of results you get!
Step 4: Hue, Saturation, And Luminance Adjustments (HSL)
The HSL adjustment is my favorite tool for changing and enhancing color in Lightroom. Here’s what each adjustment will do to your photo:
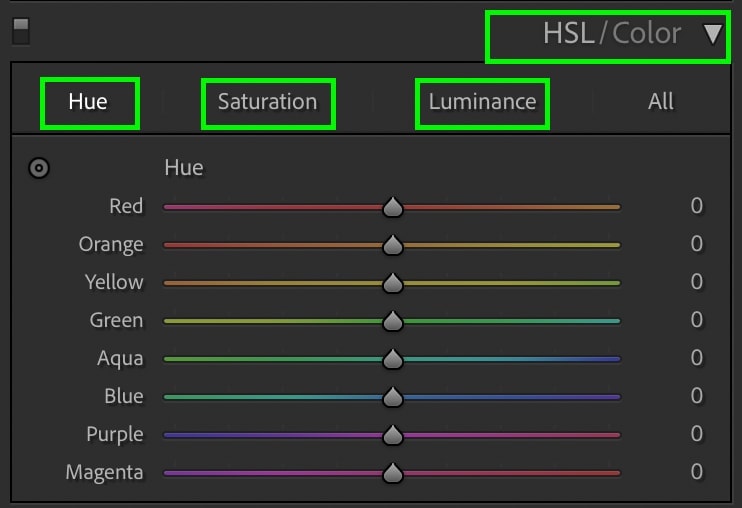
- Hue: Changes the look of colors to favor different appearances. For example, blue can become cyan or purple, while yellow can become orange or green.
- Saturation: Makes colors appear richer. Works well to draw more attention to certain colors in golden hour pictures.
- Luminance: Controls how bright or dark different colors appear. By increasing the luminance, it’s like you’re increasing the exposure of a particular color range. The opposite is true when decreasing luminance values.
There’s no “perfect” way of using this tool while editing photos. Just go through each of the sliders and see what types of effects it creates.
I like to work from left to right going through the hue adjustments, then saturation, and finally luminance. With that said, don’t feel like you have to adjust every single color channel. Only work on the ones that make a worthwhile difference in your picture!
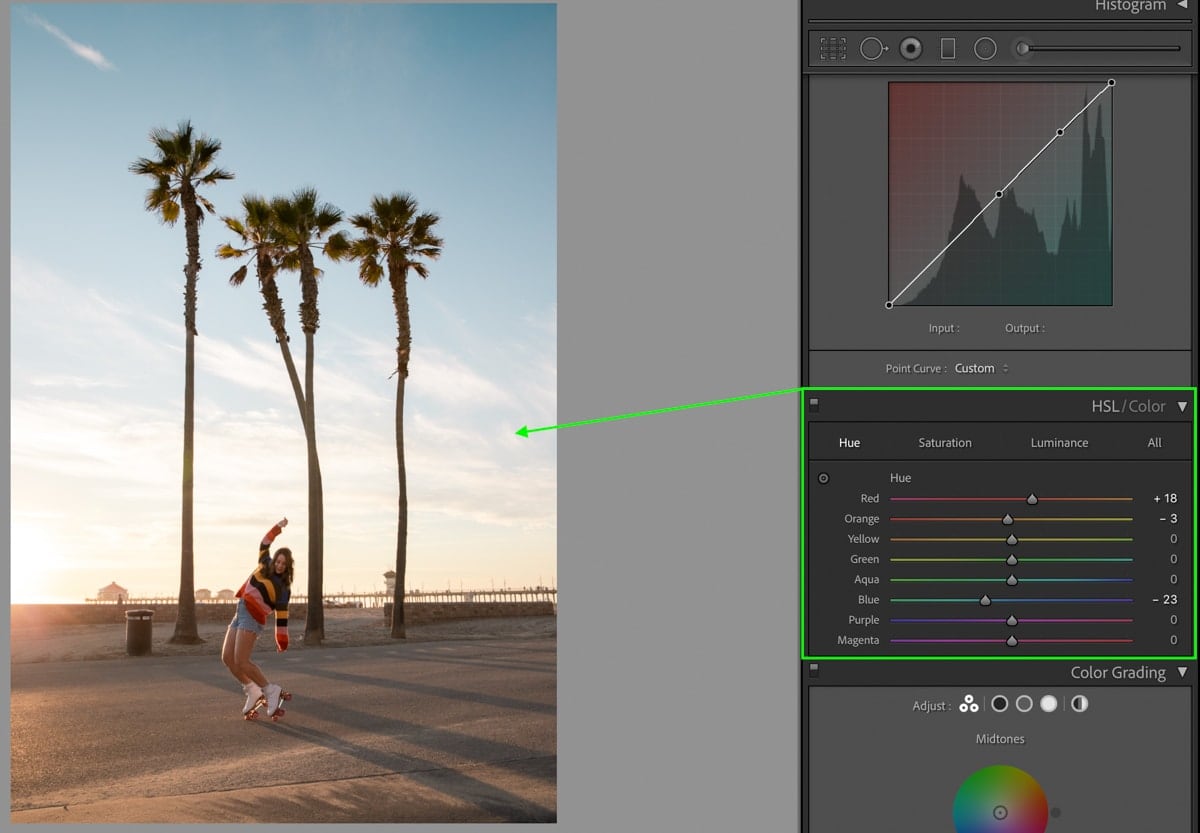
After going through all the HSL adjustments, this sunset photo is really starting to come along.
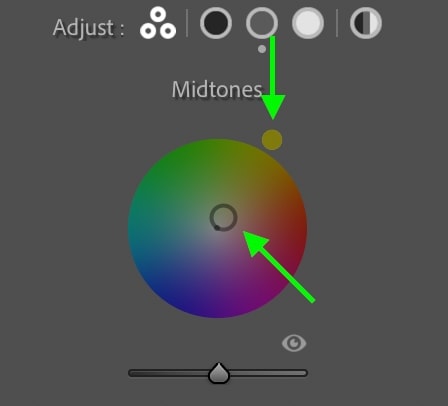
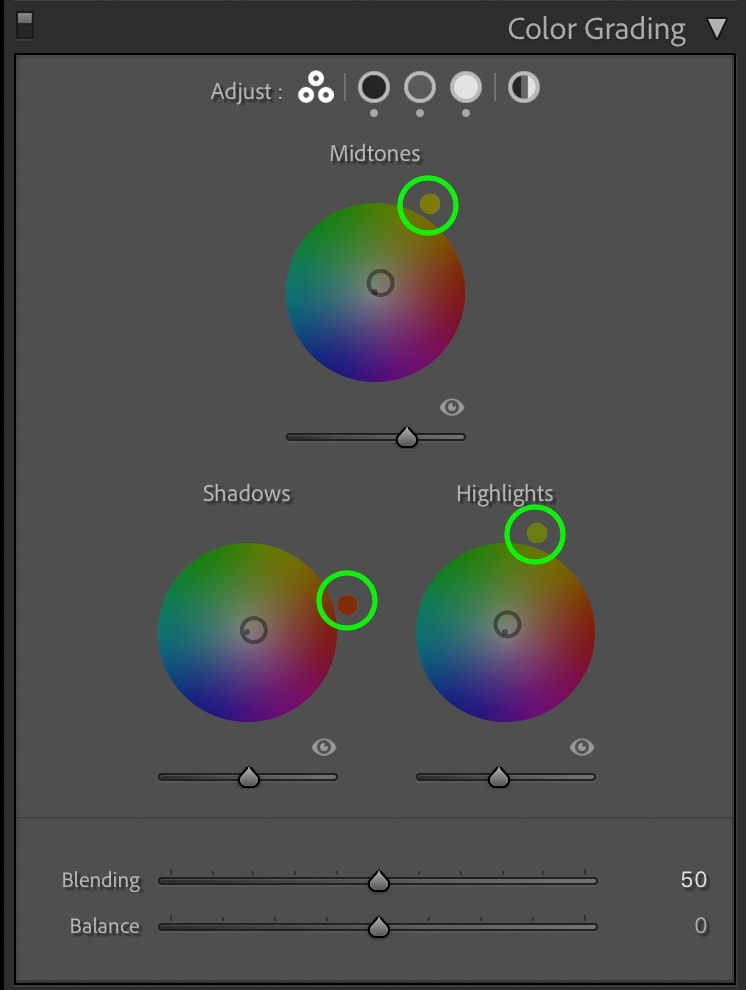
Step 5: Split Toning/Color Grading
Especially when editing golden hour pictures, split toning (now known as color grading) will be your best friend. With this tool, you can quickly add certain hues to the midtones, shadows, and highlights of your photo.
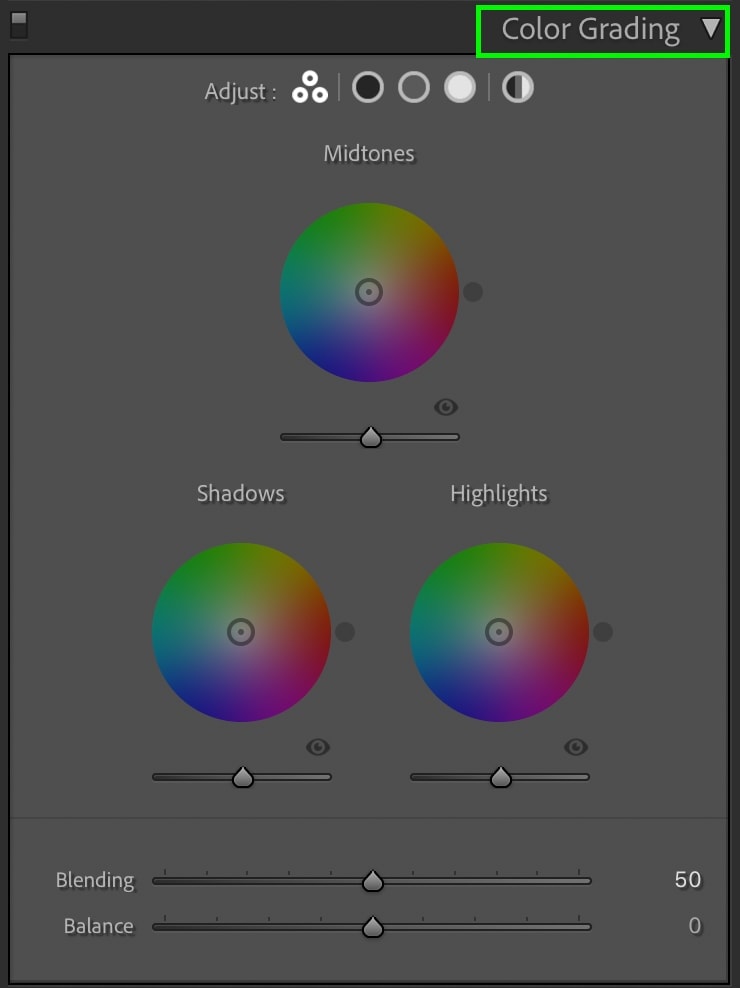
Thinking of the colors in golden hour, there are lots of yellows, reds, purples, and oranges. That means those are the types of colors you’ll want to add with the color grading adjustment.
By clicking on the circle within each individual color wheel, you can position it to favor a certain hue. Your selected color will be shown as a small circle on the outside of your color wheel.
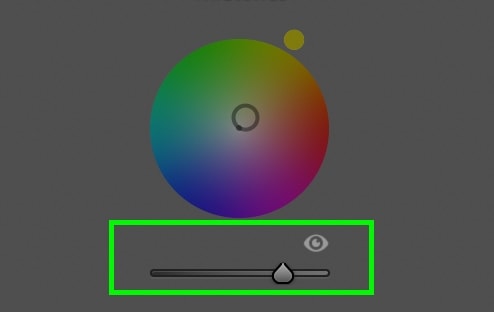
Below each color wheel is a luminance slider to help you adjust each exposure range’s luminance values. This works the same way as the luminance slider in the HSL adjustment but targets exposure ranges rather than color channels.
For my image, I’ve added a different sunset hue to each of my color wheels. This makes a huge difference with the colors of an image and helps to enhance the sunset.
Step 6: Profile Corrections And Remove Chromatic Abberation
Moving down to the Lens Corrections Panel, check off the boxes beside “Remove Chromatic Abberation” and “Enable Profile Corrections.”
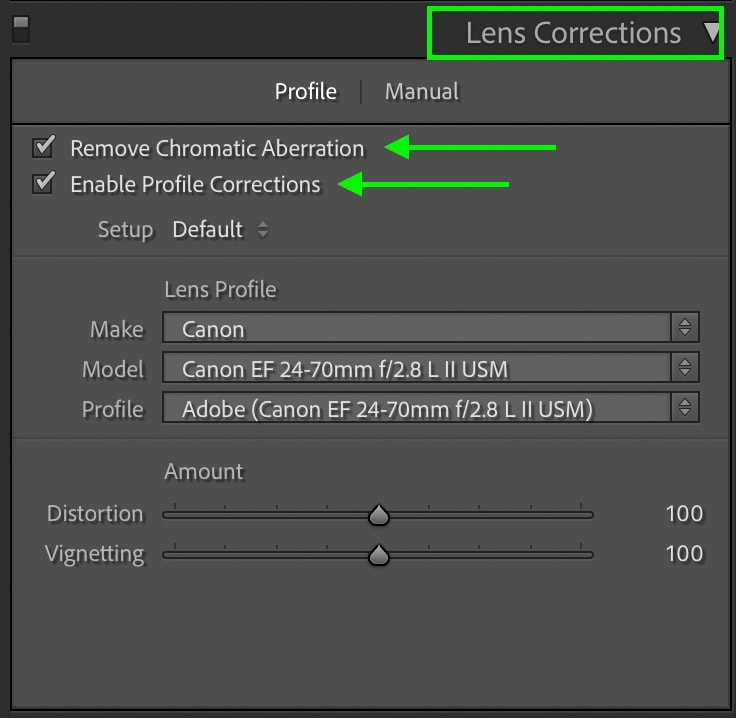
These adjustments are often slight but help to make your image appear as clear as possible.
Depending on your camera and lens, the profile corrections can end up brightening your entire photo. In that case, you may have to go back to the basics panel to refine some exposure adjustments.
Step 7: Color Calibration Adjustment
Scrolling to the very last adjust panel; you’ll find “Calibration.” This tool lets you adjust the hue and saturation of the RGB channels.
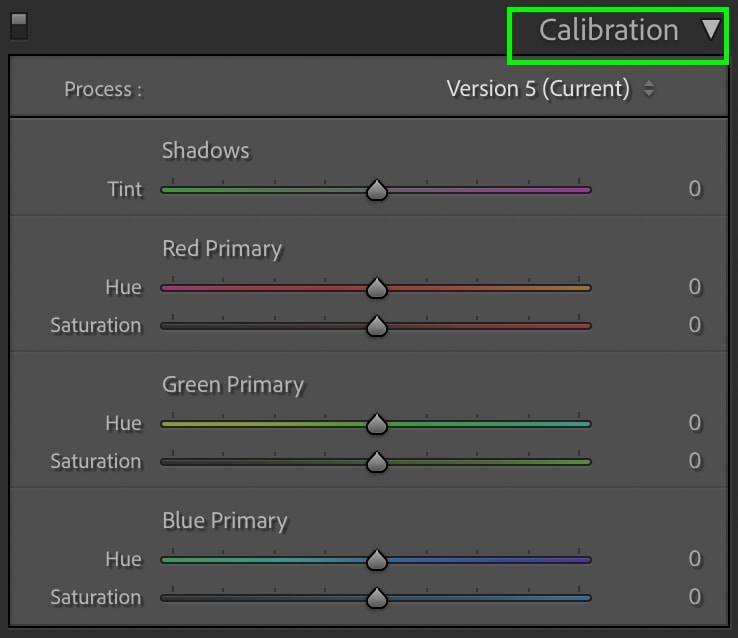
In a nutshell, these three channels make up all the colors in your photo. Rather than getting into all the technical specs, try to think of it as a way to add a general stylized look to your photo.
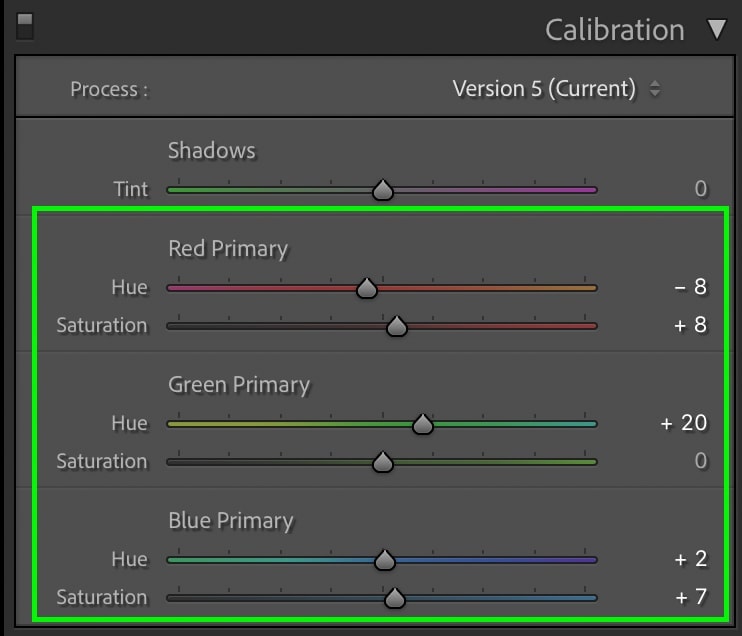
Although it’s worthwhile to experiment with each of the adjustments, golden hour photos tend to get the most results from the red and blue sliders.
By playing around with the hue of these different channels, you’ll end up with a uniquely stylized image. These types of color adjustments can’t be made with any other tool, which makes the calibration tool so valuable.
Step 8: Export Your Golden Hour Picture
Wahoo! You’ve officially learned how to edit golden hour photos in Lightroom. Now it’s time to export your photo and start sharing it with the world.
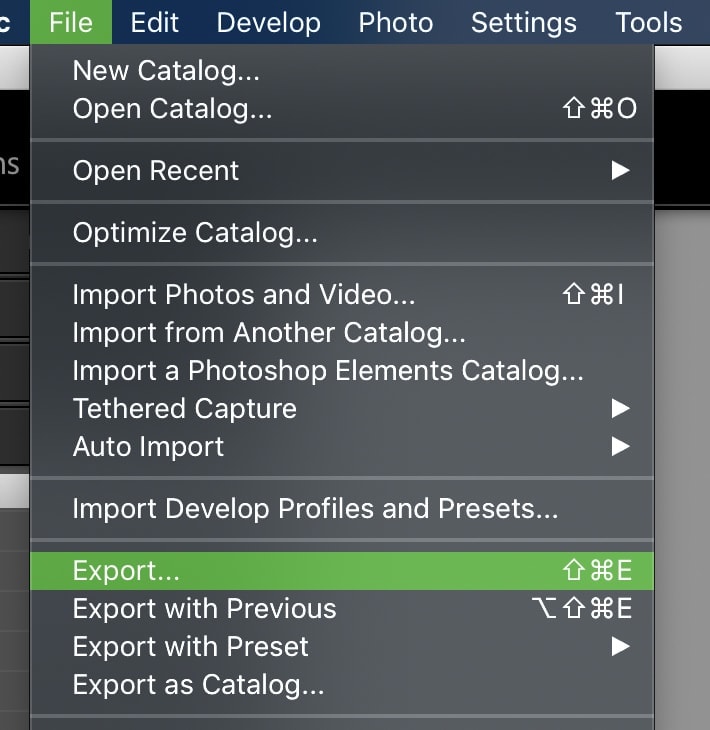
First, select your photo(s) you want to export from the filmstrip.

Then go up to File > Export.
Set your export location, file name, and file settings for your picture.
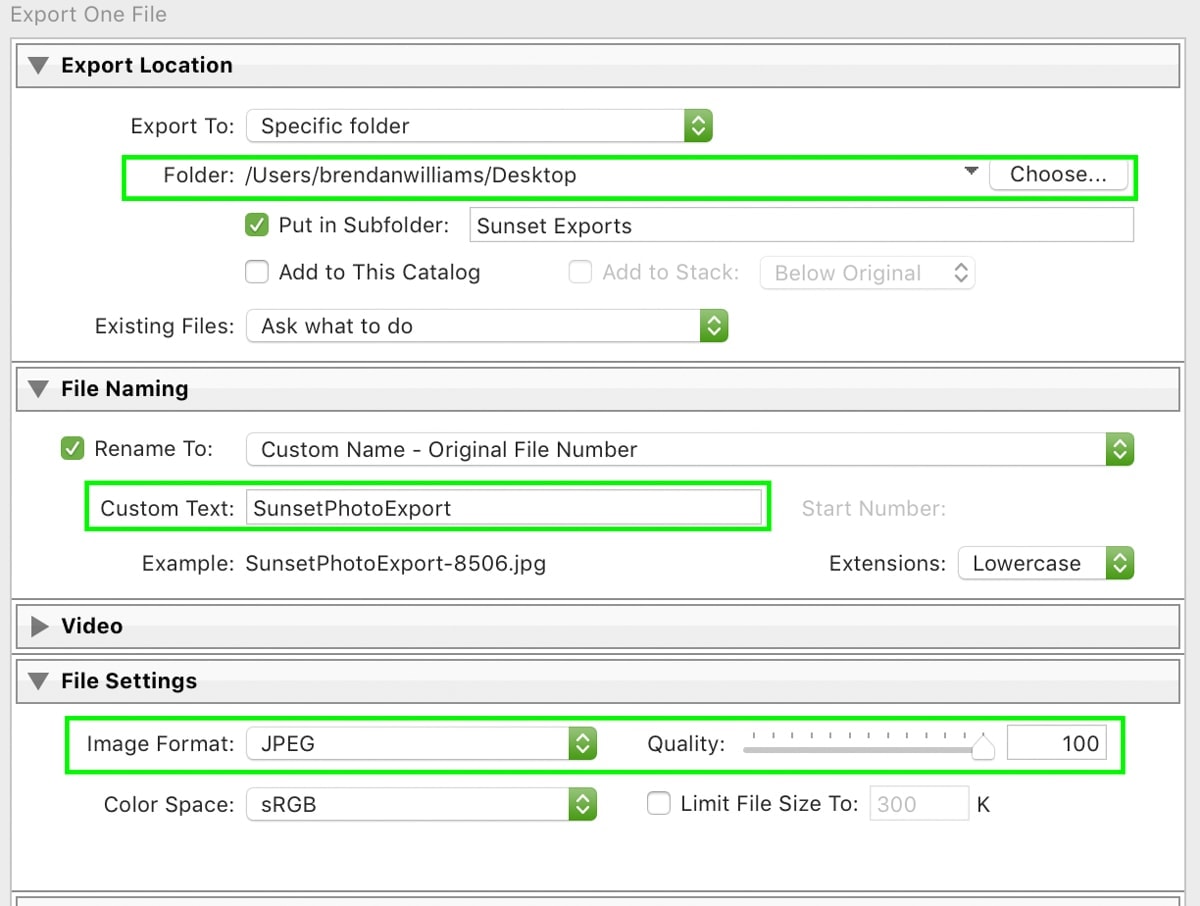
Make sure your image format is set to JPEG with a quality of 100.
Likewise, make sure your resolution is set to 150 pixels per inch or higher.

Once complete, hit export to export your picture to your computer.
A lot goes into the export panel and there’s a wide array of options to choose from. If you want to learn the best ways to export pictures from Lightroom for web, social, or print, check out this post.
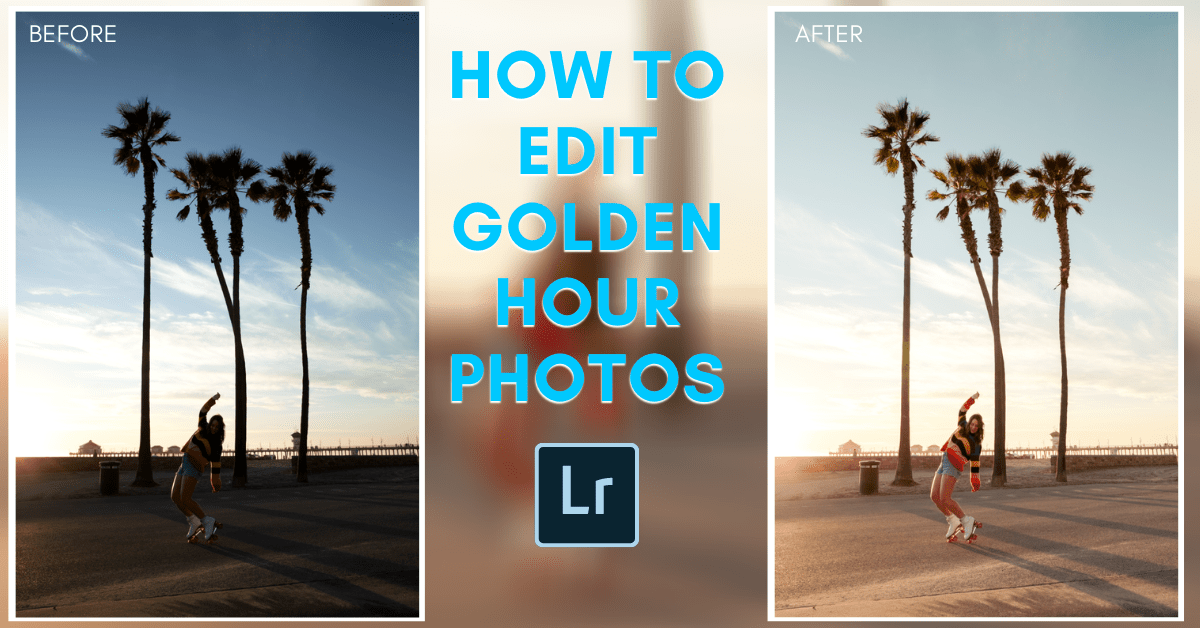
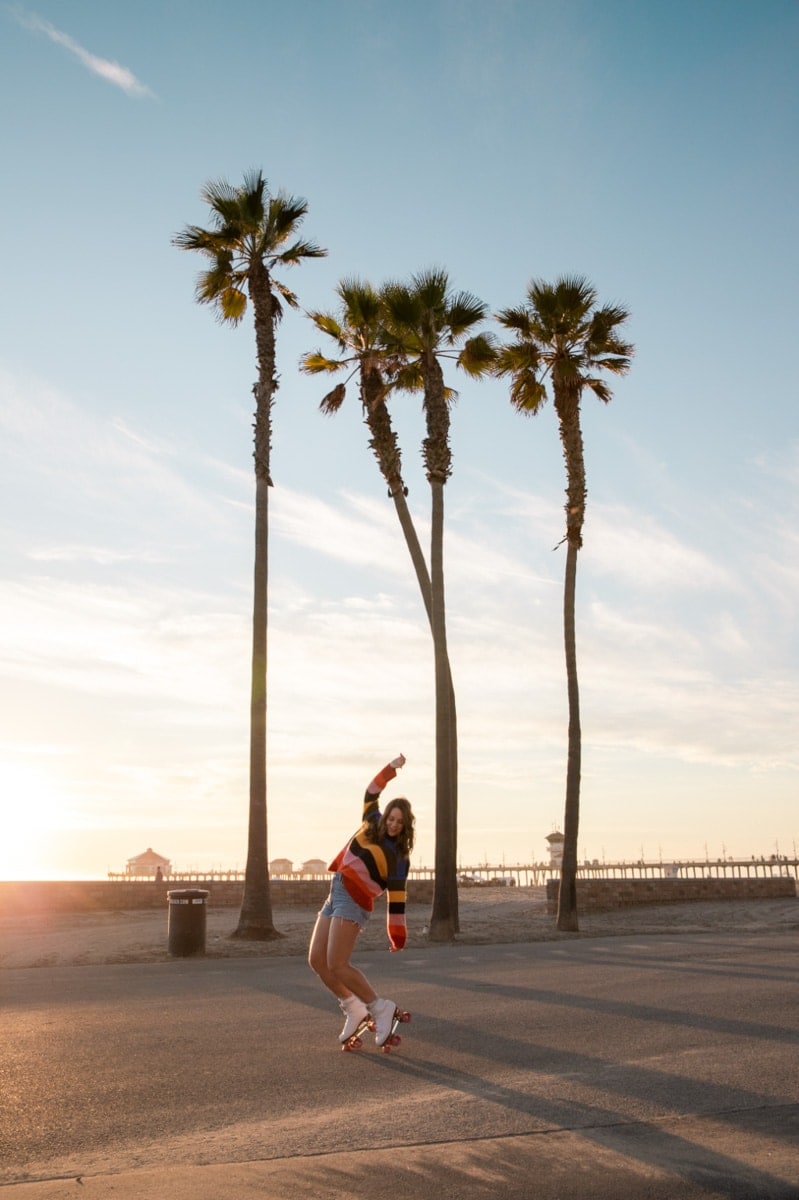
The Result
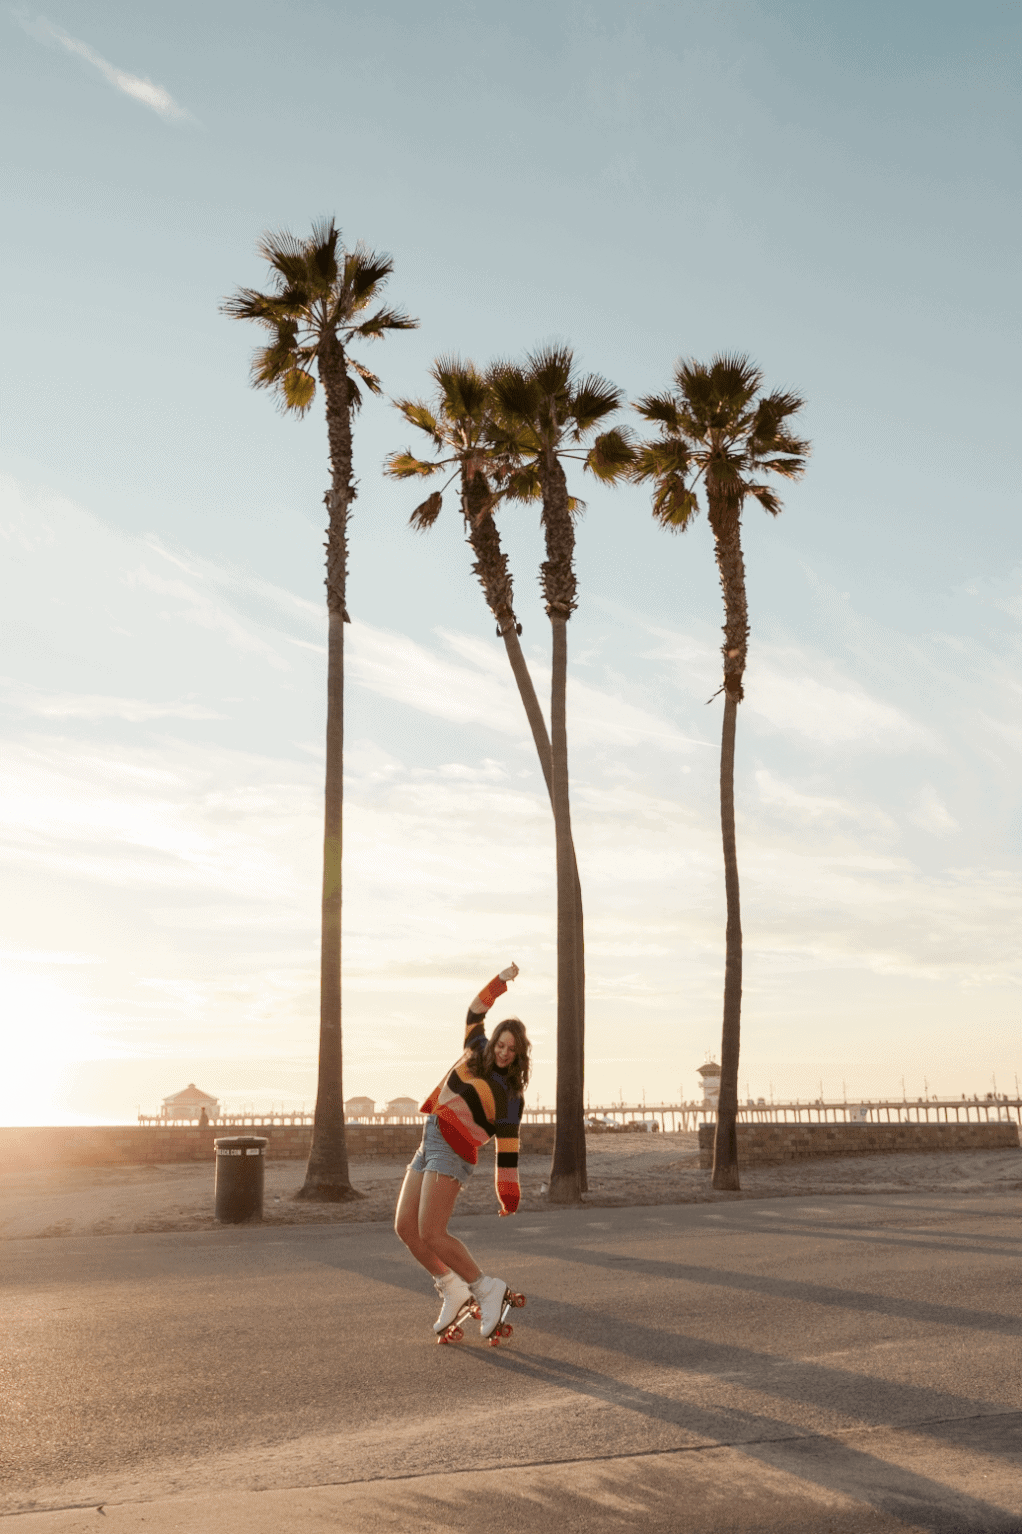
Looking at the before and after, it’s amazing how easily you can edit sunset photos with Lightroom. By working through the exposure adjustments, you’re able to show off more details while adding a more stylized look. After that, a few easy color adjustments help to enhance the light of golden hour and make all the colors appear richer. What you’re left with is an amazing golden hour picture that’s sure to turn a few heads!
Now that you’ve mastered how to edit sunset photos in Lightroom, what about other styles of pictures? To help keep the learning going, check out this post on How To Edit Photos In Lightroom. There you’ll learn a step-by-step workflow that will make editing any type of pictures easier than ever. Best of all, you’ll figure out how to stay organized during the entire process.
Happy editing!
Brendan 🙂


