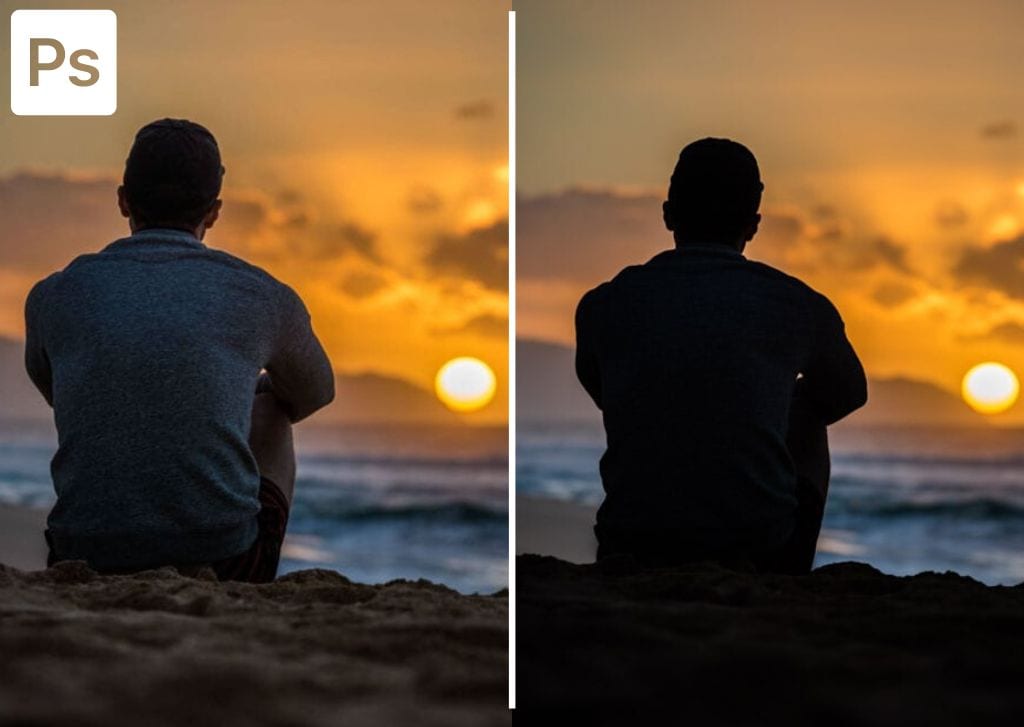

Whether you want to make a backlit photo look more dramatic or create a silhouette for a graphic in another project, there are two easy methods to create a silhouette in Photoshop.
In this tutorial, you’ll first learn how to turn a photo into a silhouette graphic for use in other projects. In the second example, you’ll see how to create a more realistic-looking silhouette by darkening specific areas of a backlit photo. Let’s get started!
Video Tutorial
Method 1: How To Make A Silhouette In Photoshop Using Selections
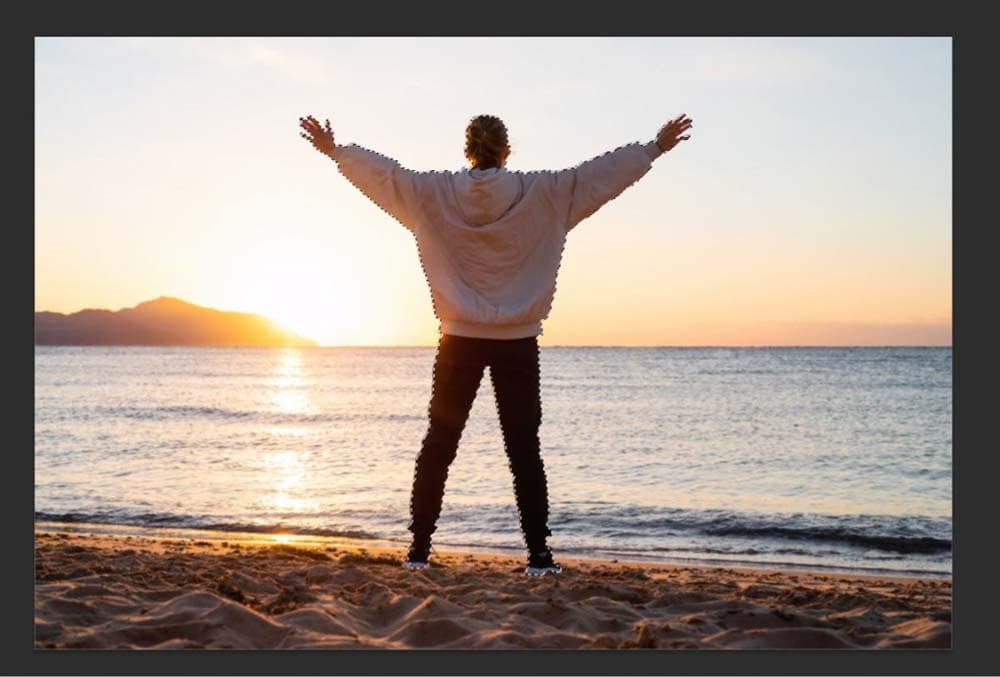
Step 1: Select Your Subject Using Select Subject
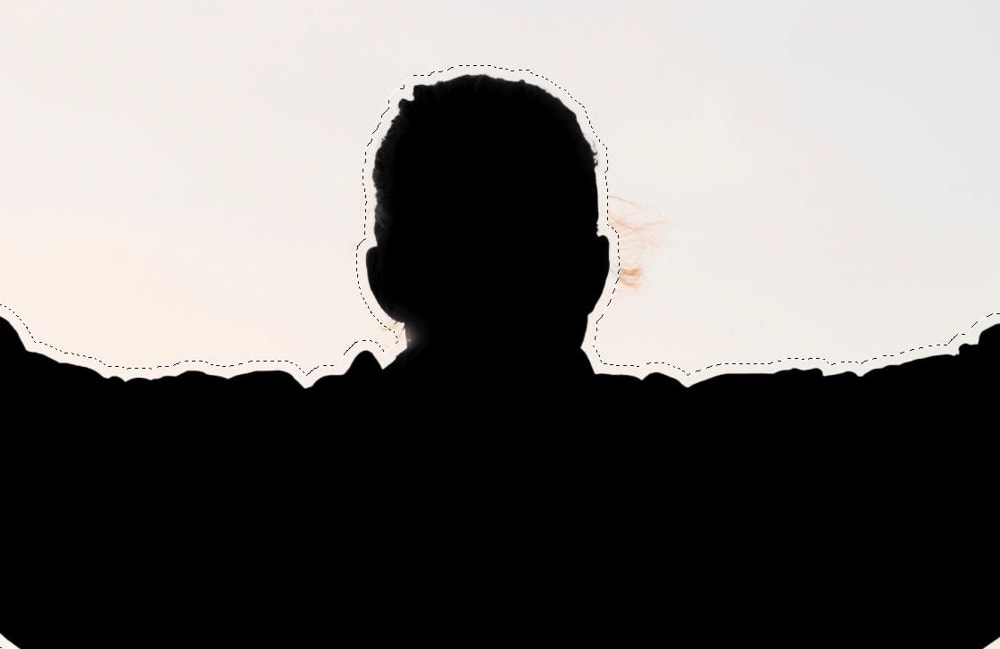
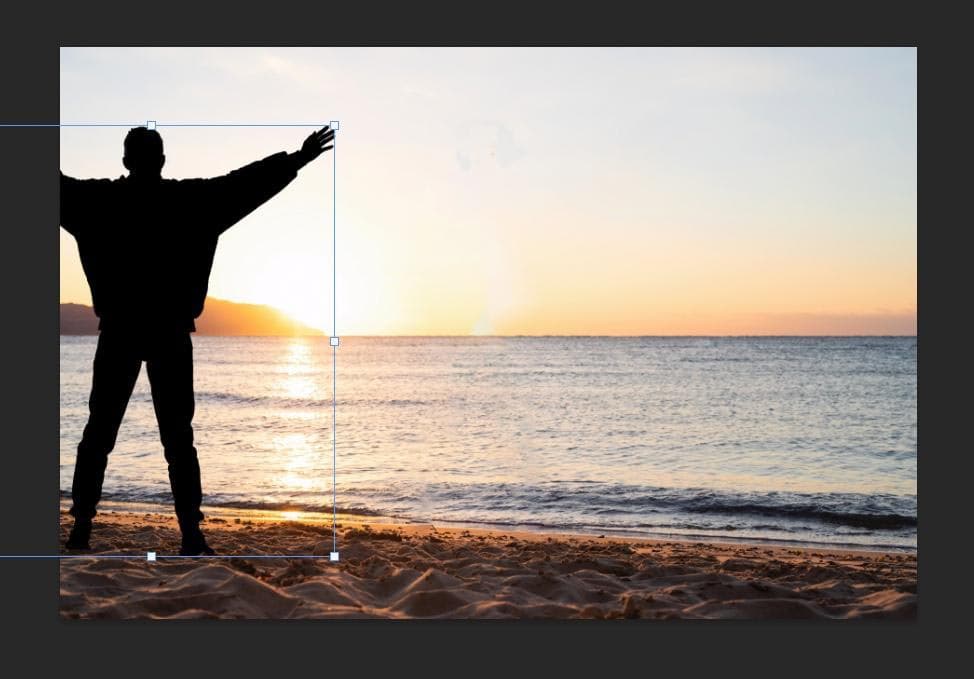
The first thing you need to do is select the person or object to be silhouetted. One of the easiest ways to do this is to use Photoshop’s AI. Click Select Subject in the Contextual Task Bar.

Photoshop’s AI will automatically find the edges around most of your subject. This can be confirmed by the “marching ants” around your subject.
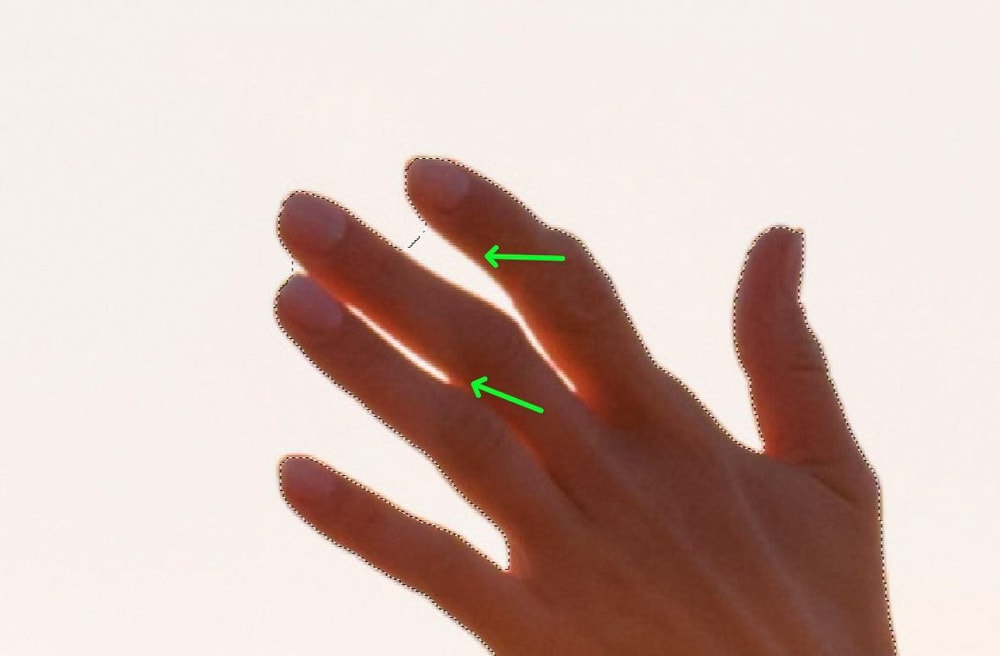
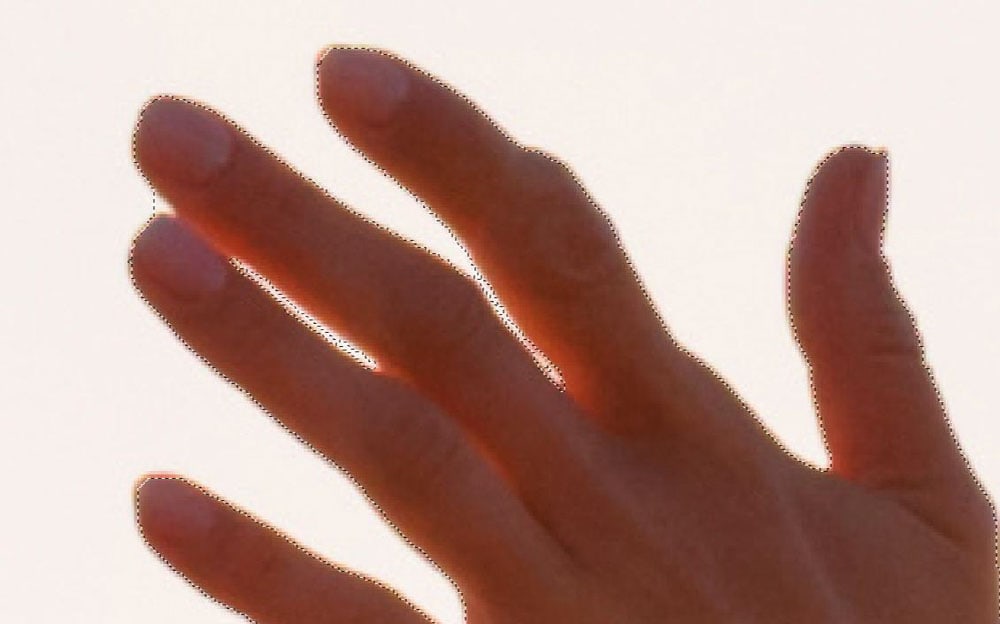
Step 2: Redefine Your Selection Using The Quick Selection Tool (W)
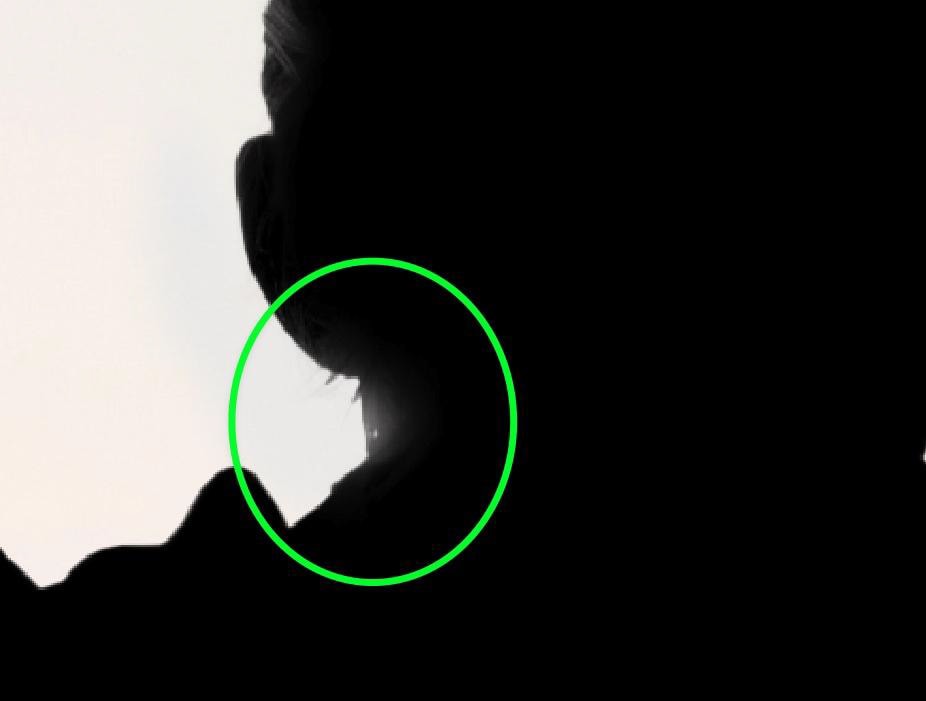
When it comes to small areas of your subject that need to be redefined, it’s better to use a different tool, like the Quick Selection Tool (W).
Once the Quick Selection Tool is selected, click the Subtract From Selection Button to delete pixels. Click the Add To Selection button if you need to fix what you over-corrected. While using the Quick Selection Tool, use the [ and ] keys to adjust the size.
Step 3: Go To Layer > New Fill Layer > Solid Color To Create A Black Fill Layer
Now that your subject is fully selected, it’s time to add the effect of a silhouette with a black fill layer. Go to Layer > New Fill Layer > Solid Color to do this.
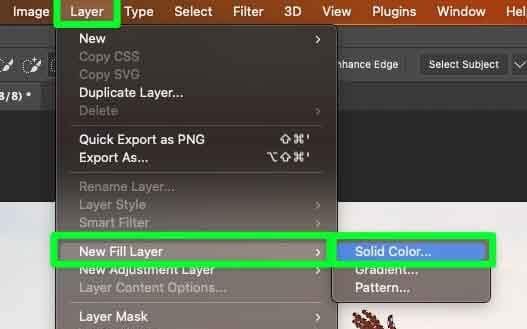
For Color, leave it as None. Then, click OK. Once you click OK, the Color Picker window opens. You can change the color to something else, but select black for the most realistic silhouette.
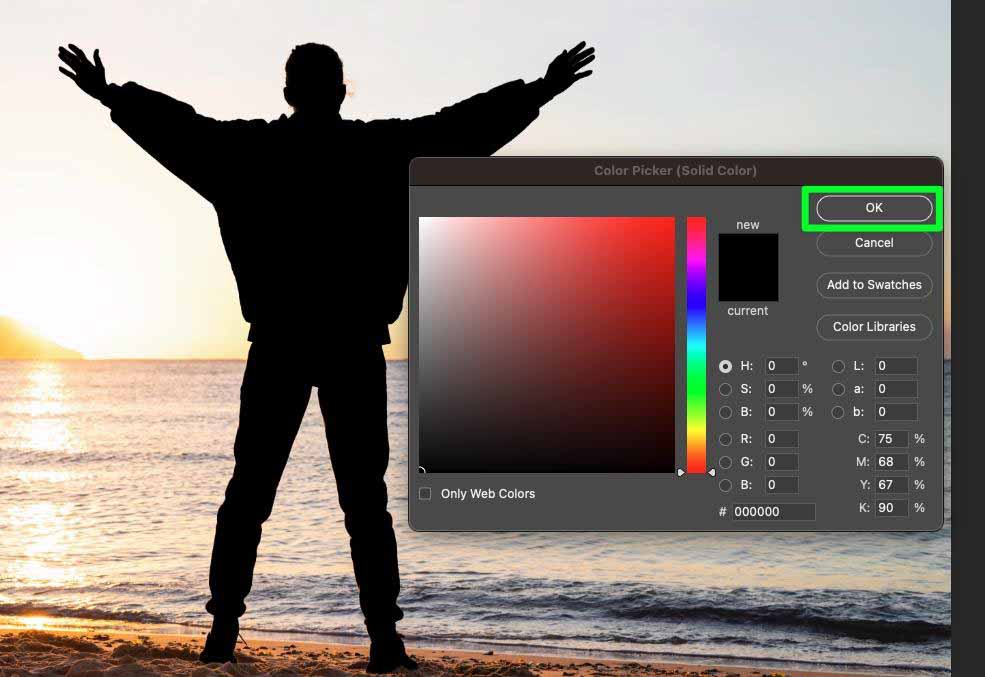
Your fill layer will appear as a new layer above the original in the Layers Panel. The fill layer will also include a Mask.
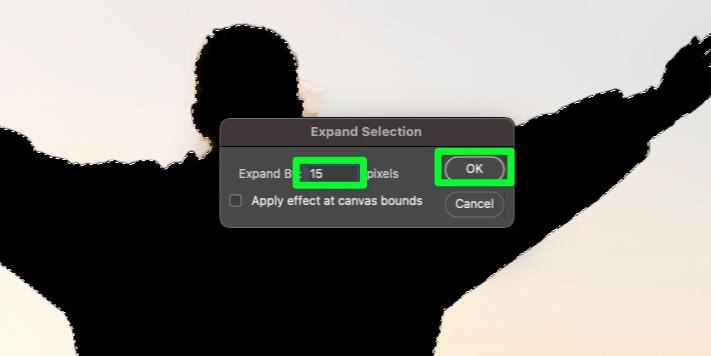
Step 4: Go To Select > Modify > Expand To Expand Your Selection
Reactivate your selection by holding Control (Win) or Command (Mac) and selecting the mask on the fill layer. With your silhouette selected, go to Select > Modify > Expand.
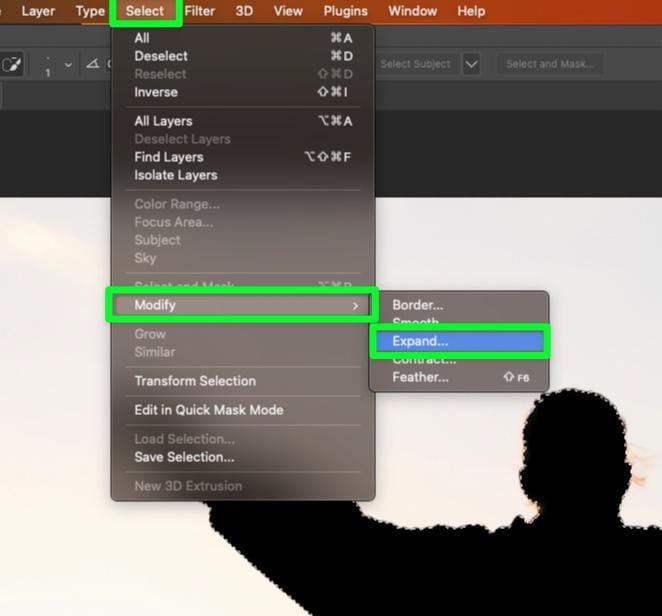
In the Expand Selection Info Panel, enter the number of pixels needed to clean up the area around the silhouette. Once you hit OK, you will see how far your expansion will go.
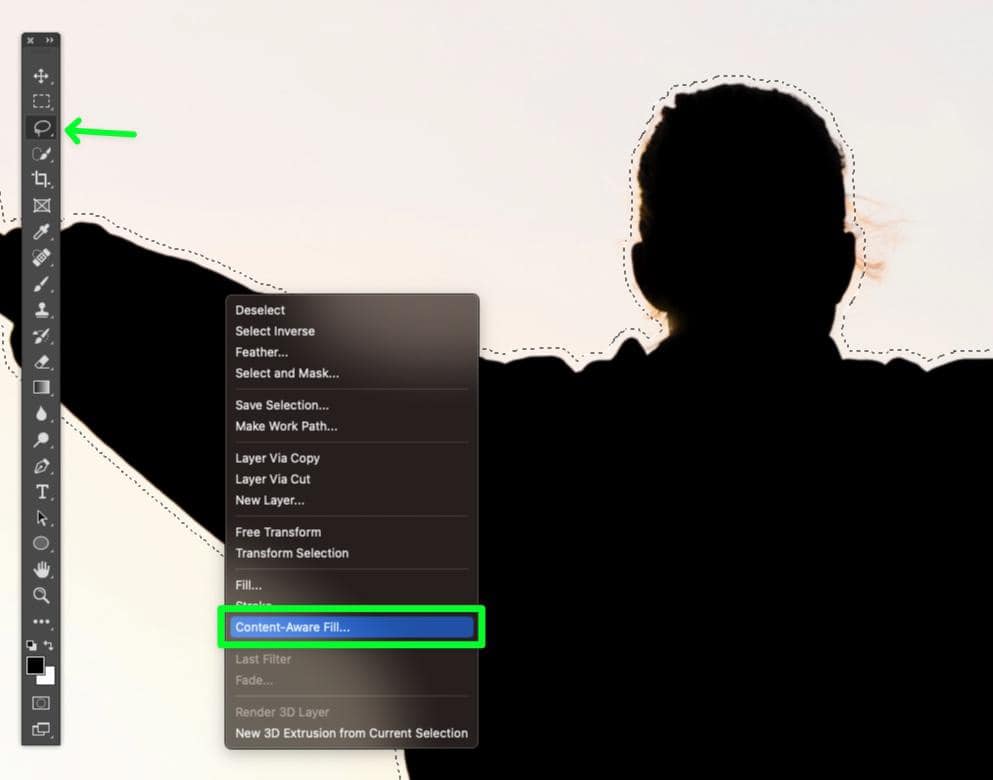
Step 5: Erase Your Silhouette From The Original Layer With Content-Aware Fill
Select your original image layer in the Layers Panel. Make sure you have one of the selection tools active. Then, right-click your silhouette and select Content-Aware Fill.
In the window that pops up, you will see that most of your photo will turn green. This green signifies everything in your image that will be used as a sample for applying the Content-Aware Fill.
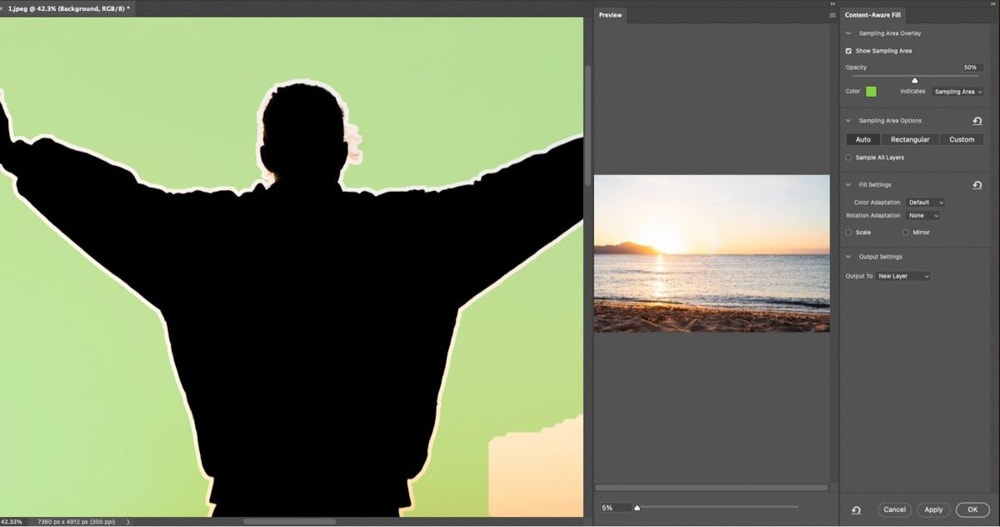
In the preview window, you will see your silhouette completely removed from your image. In the Output To drop-down menu, choose Current Layer. When ready, click OK.
Before moving on to the next step, make sure to deselect your selection by pressing Control + D (Win) or Command + D (Mac).
Step 6: Clean Up Extra Pixels With The Clone Stamp Tool
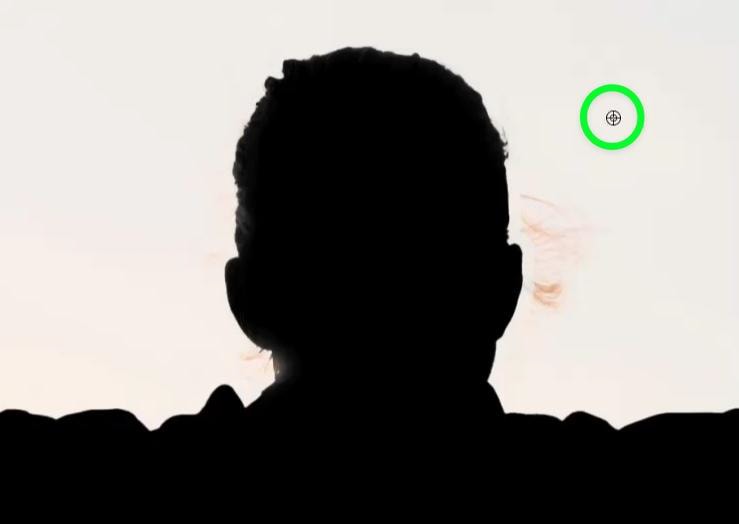
Chances are, you have some extra pixels that need to be erased from your photo. This is easy to do with the Clone Stamp Tool. First, choose the Clone Stamp Tool (S) from the Toolbar.
While holding down Alt (Win) or Option (Mac), click somewhere outside your silhouette to grab a “sample.” Then, drag your mouse over any extra pixels you need to get rid of.

Step 7: Make Final Refinement Touches
Make sure to look for any other imperfections that may be present.
Once you find an imperfection, click the mask itself on the color fill layer. Then, grab the Brush Tool (B) in the Toolbar and change your Foreground Color to black (or the color of your silhouette). Paint over the area that you need to fix to fill in any problem areas.

Step 8: Use The Move Tool To Move The Silhouette (Optional)
To move your silhouette, select the Move Tool (V) in the Toolbar. Click on your silhouette to select it and drag it around the document.
You can now reposition your silhouette anywhere around your design or drag and drop your silhouette into another project.


Method 2: How To Create A Silhouette In Photoshop Using Adjustment Layers
Step 1: Click On Select Subject In The Contextual Task Bar
Select your subject by clicking on Select Subject in the Contextual Task Bar.
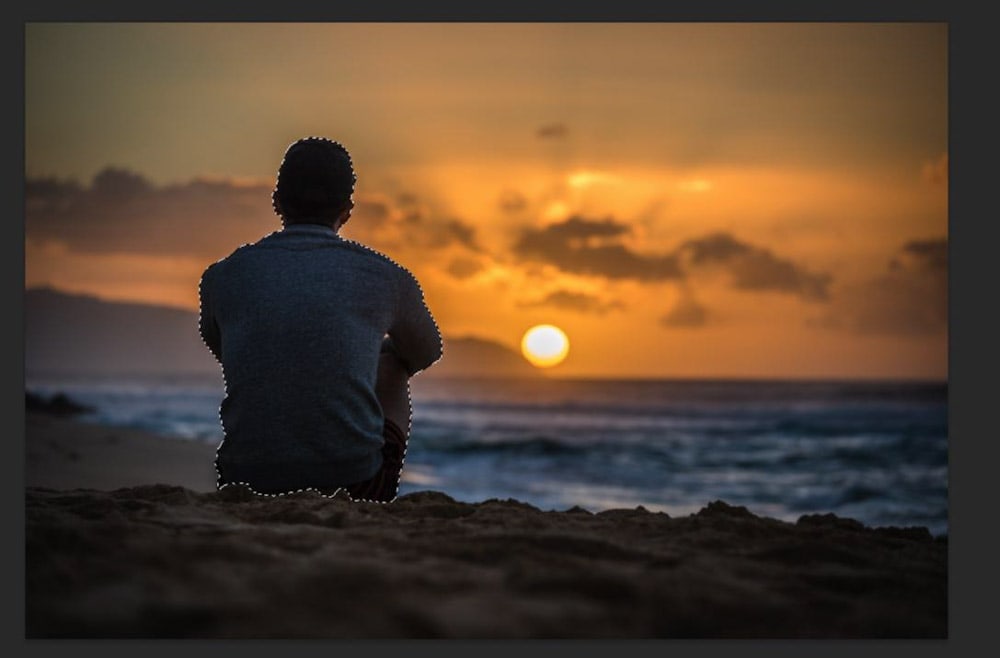
Step 2: Use The Quick Selection Tool To Refine Your Selection
To select additional areas, just use the Quick Selection Tool (W) on the areas you need to add. In my example, I selected the foreground, which is the sand on the beach.
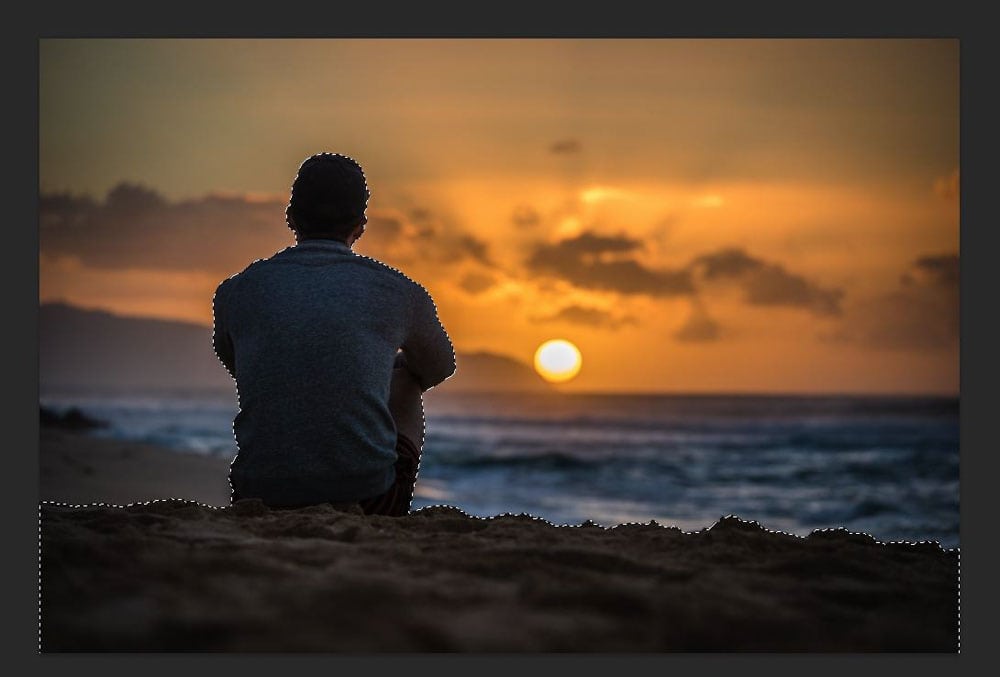
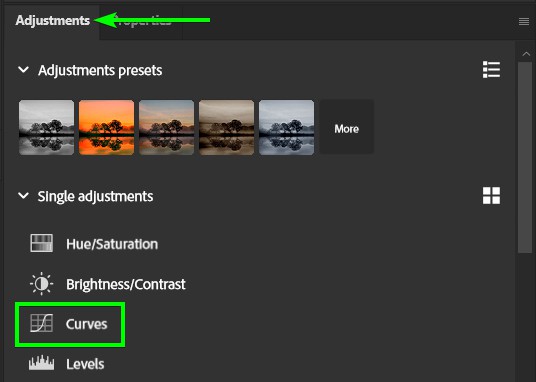
Step 3: Add A Curves Adjustment Layer
Once you have your selection fully selected, it’s time to add the Curves Adjustment Layer. In the Adjustments Panel, click on the Curves Option.
To create your silhouette effect, you will need to adjust the midtones of your image. First, click in the middle of the curve line. This will add an anchor point. Pull the anchor point down to darken the selection.
If you pull the anchor point all the way down, your silhouette will look completely dark. Pull the anchor point down just a bit to make a more realistic and natural-looking silhouette.
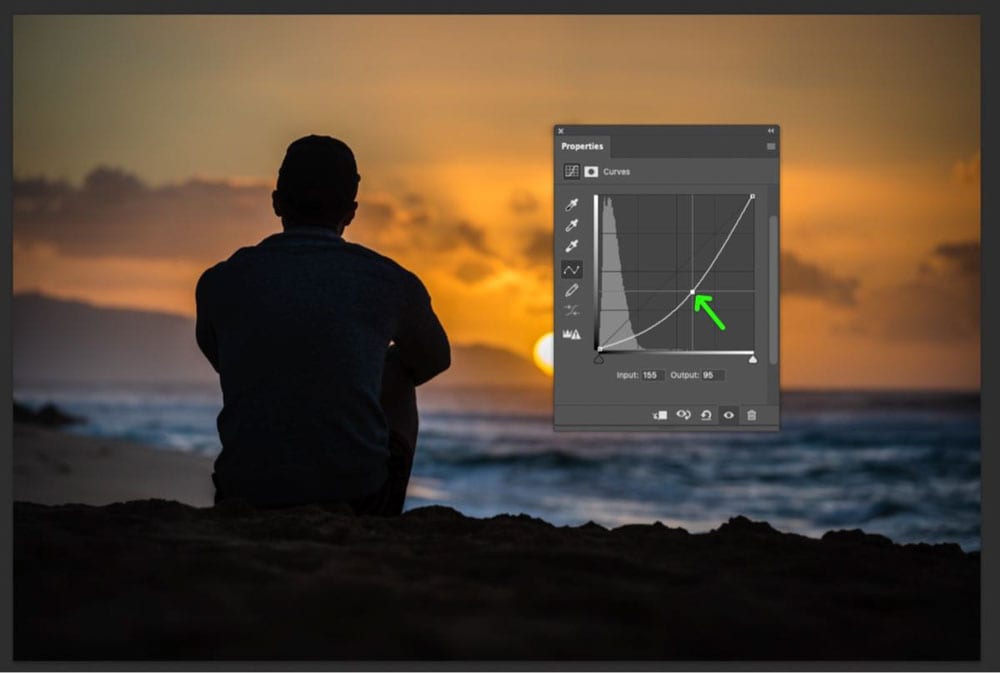
Adjust the Curves graph until the silhouette is as dark as you’d like it.