
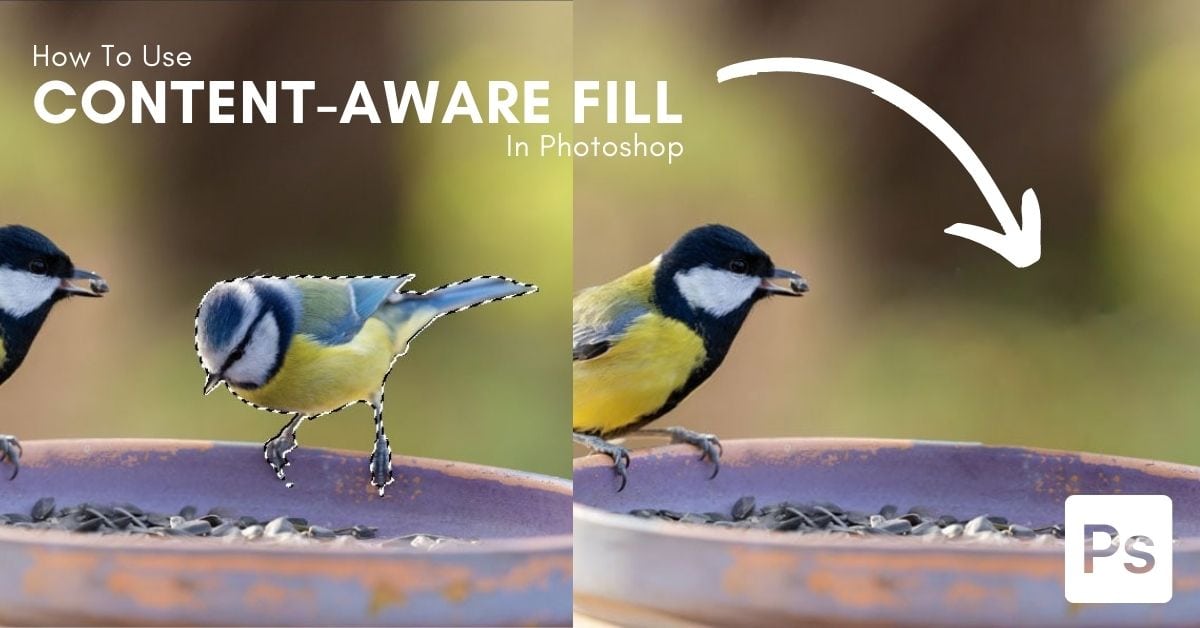

Knowing how to use content-aware fill in Photoshop is one of the easiest ways to manually remove unwanted objects from your images. The Content-Aware Fill allows you to select the pixels to blend into the area you want to cover up.
I will teach you how to use this tool to cover up objects on simple backgrounds when you want to control the results’ appearance.


How To Use Content-Aware Fill In Photoshop To Remove Objects
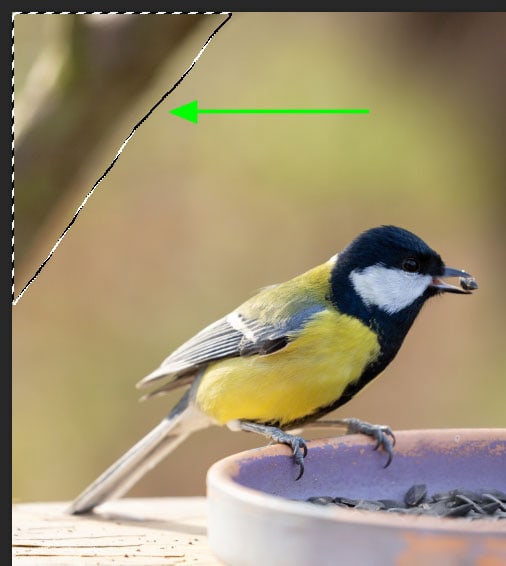
Step 1: Select The Object Using The Lasso Tool
First, select the area you want to remove using any selection tool to select the area. For basic areas, the Lasso Tool works well, as you simply draw around an object or area to make a selection.
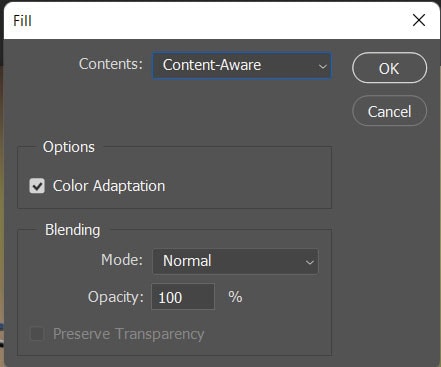
Step 2: Go To Edit > Fill To Remove The Object
With the area selected, head to Edit > Fill or press Shift + F5. In the Fill window, use the Contents drop-down menu to select Content-Aware and ensure you check the box next to Color Adaptation. The Mode should stay on Normal and the Opacity at 100%. Click OK to apply the fill.
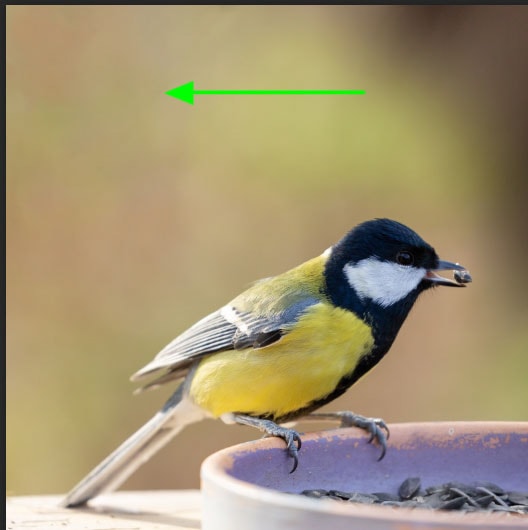
Once the Fill is applied, press Control + D (Win) or Command + D (Mac) to deselect the area.
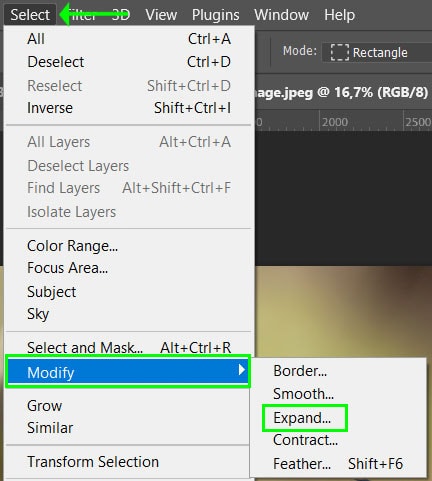
Step 3: Select A Complex Object And Go To Select > Modify > Expand
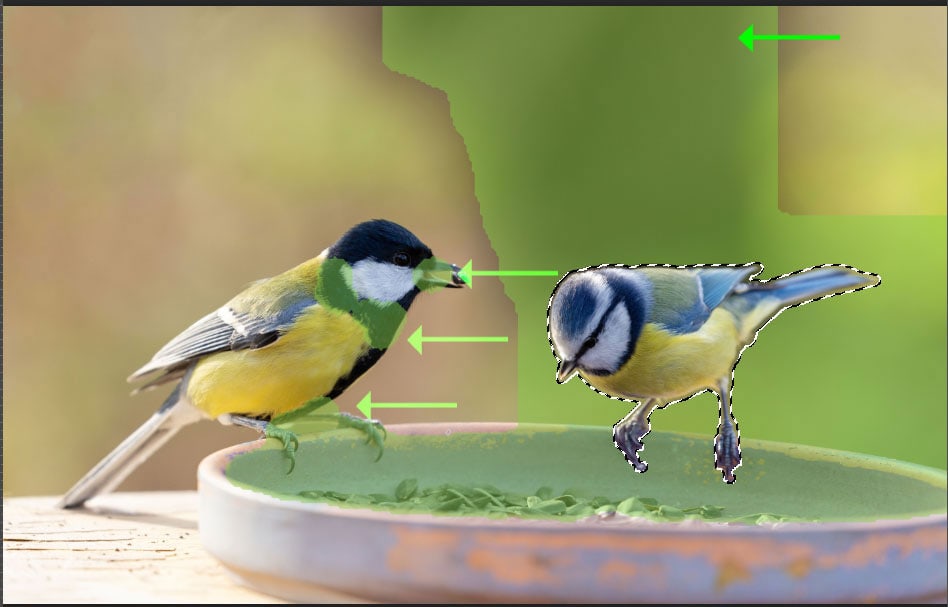
When removing more complex objects or areas of an image, you will need to open the Content-Aware Fill workspace. The selection, in this instance, should be slightly away from the object’s edges when using the Content-Aware Fill command. Otherwise, you will get a halo effect around where the object was after adding the fill.
You can use the Select Subject or Object Selection Tool to select more complex objects. Then, to move the selection away from the object, head to Select > Modify > Expand.
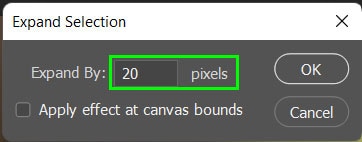
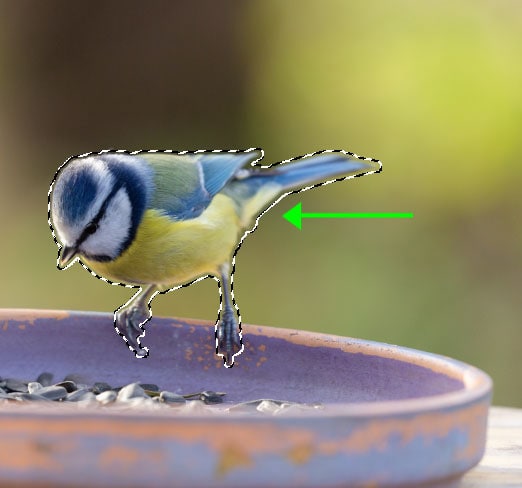
For this example, I will expand the selection by 20 pixels. After expanding the selection, you will notice the marching ants pattern that indicates the selection sits slightly away from the object.
Step 4: Go To Edit > Content-Aware Fill And Use The Settings To Remove The Object
To open the Content-Aware Fill workspace and begin removing the object, navigate to Edit > Content-Aware Fill.
In the middle left panel of the workspace, the image has an overlay showing which sample pixels Photoshop has chosen to use to replace the object. The middle-right window shows a preview of how the image will look with the new pixels added.
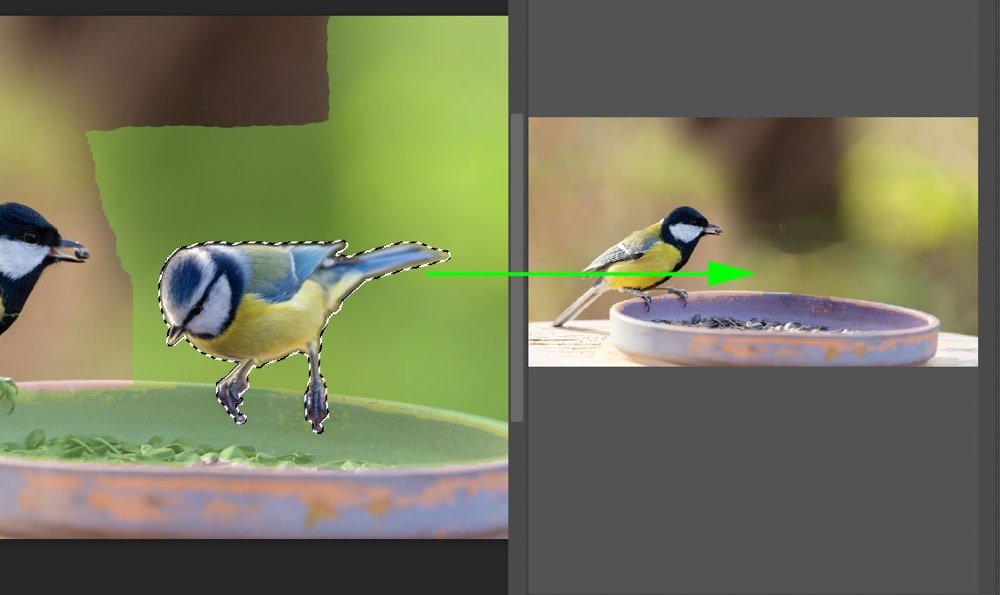
Use the various settings, which I explain in further detail below, to use the correct sample pixels to remove the object, ensuring the result looks as you’d like it to. The most important is to remove the overlay from areas you don’t want to be sampled and add the overlay to the areas you do want to be sampled.
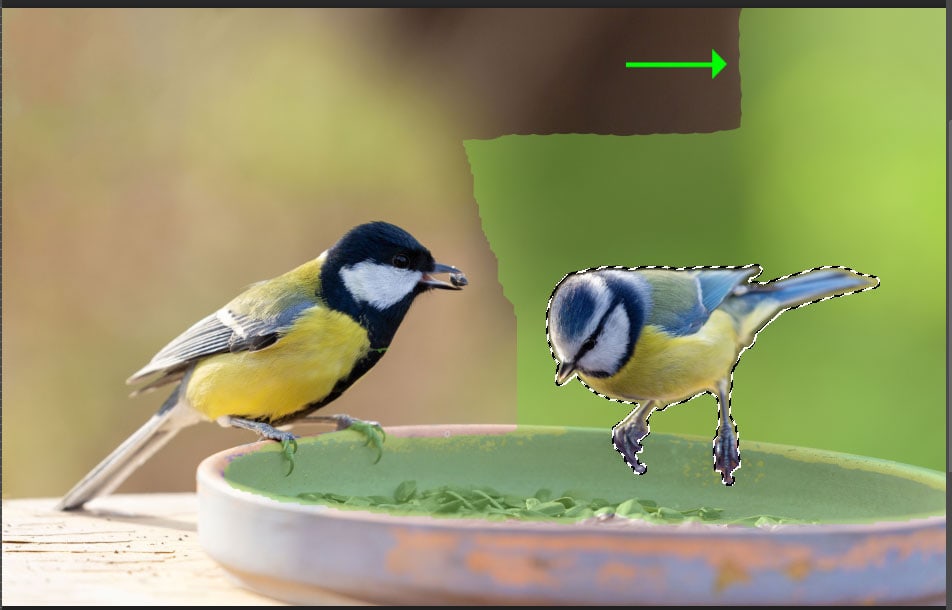
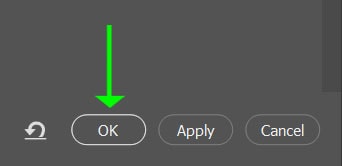
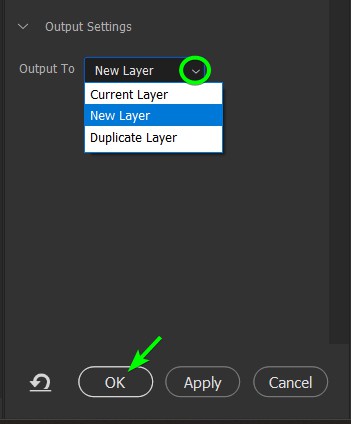
Once you are finished, set the Output To option to New Layer. Then, click on OK to save the changes.

You will now have successfully removed basic and complex objects while filling the areas with pixels that match the background.
The Content-Aware Fill Settings Explained
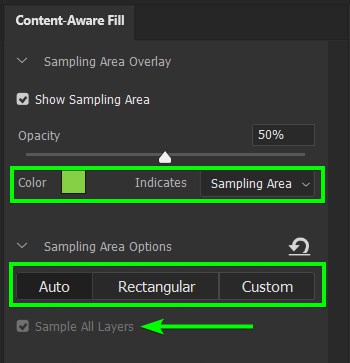
You can choose the overlay color and whether it indicates the Sampling Area or the Excluded Area in the drop-down menu next to Indicates.
The Sampling Area Options section lets you choose how the sampled pixels are selected. The option is set to Auto by default to allow Photoshop to choose the sample pixels automatically.
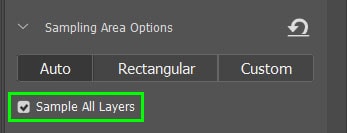
If you are working with multiple layers, you will have the option to check the box next to Sample All Layers to choose pixels from all the layers in the document when selecting the sample pixels.
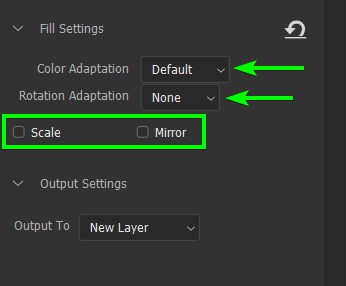
The Color Adaptation option tells Photoshop how much of the surrounding colors to blend with the replacement pixels. You can choose between None, Default, High, or Very High.
The Rotation Adaptation option will tell the program to consider round or curved edges. Then, Scale considers shapes of various sizes when replacing pixels. Lastly, the Mirror option works by copying pixels as reflections when replacing pixels in a symmetrical pattern.
The tools on the lefthand side enable you to correct the sample overlay and create new selections if needed.
- The Sampling Brush Tool lets you adjust the sample pixels used to replace the object.
- You can use the Lasso Tool to make a new selection or fix up the current selection you have made.
- The Hand Tool lets you move the images around.
- The Zoom Tool lets you magnify areas of the image.
Lastly, you can select the Output To option to determine how Photoshop saves the changes. Whether it’s to a new layer, the same layer, or a duplicate layer. Click OK to save your changes.
Reasons Why Content-Aware Fill Isn’t Working & How To Fix It
1. No Selection Is Made
If you open the Edit menu to select the Content-Aware Fill command and it’s grayed out, you won’t be able to open the workspace.
You will need to use any selection tools to create a new selection before opening the workspace.
2. The Wrong Layer Is Selected
You can’t use Content-Aware Fill on all types of layers (for example, Smart Object layers are exempt), so if you have made a selection and the option is still grayed out in the edit menu, check the layer you are working on.
3. Working On A Blank Layer
If you have created the selection and then added a new layer to work on, you will be able to open the Content-Aware Fill workspace. However, you may encounter an issue where the preview panel shows a blank canvas.

In this case, select a different layer to work on. You could also check the box next to Sample All Layers in the right-hand panel to continue editing on the current layer.
Now that you’ve mastered how to use Content-Aware Fill in Photoshop, there are three other tools you should know about when removing objects. I share what these tools are and the steps to learn how to use them in my guide to removing objects in Photoshop.
