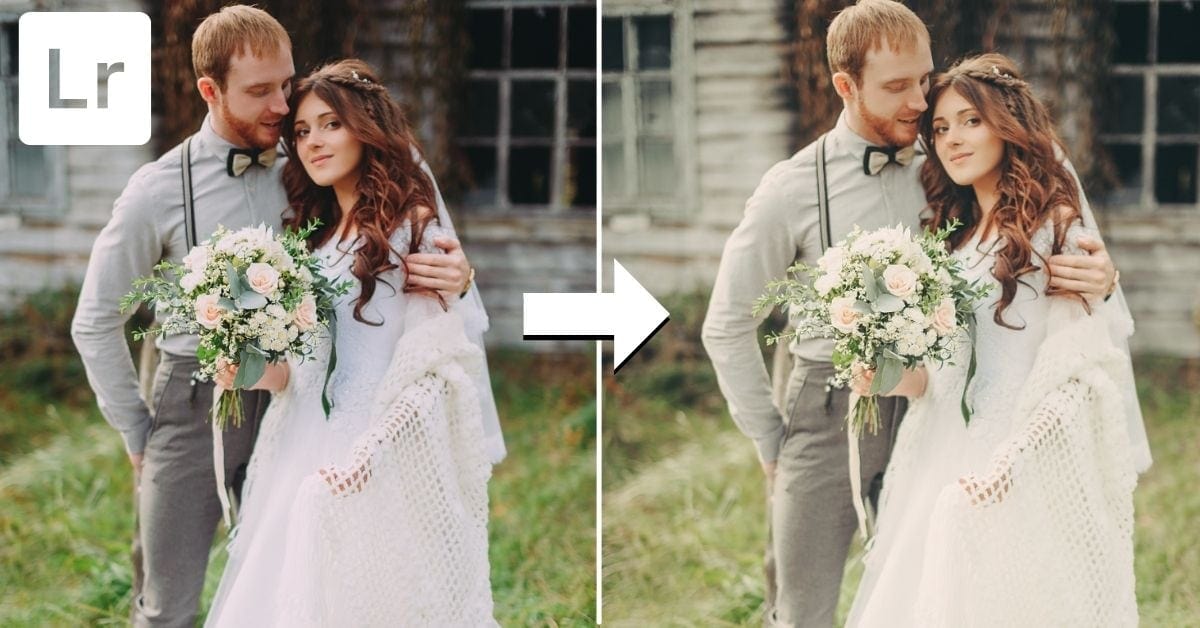

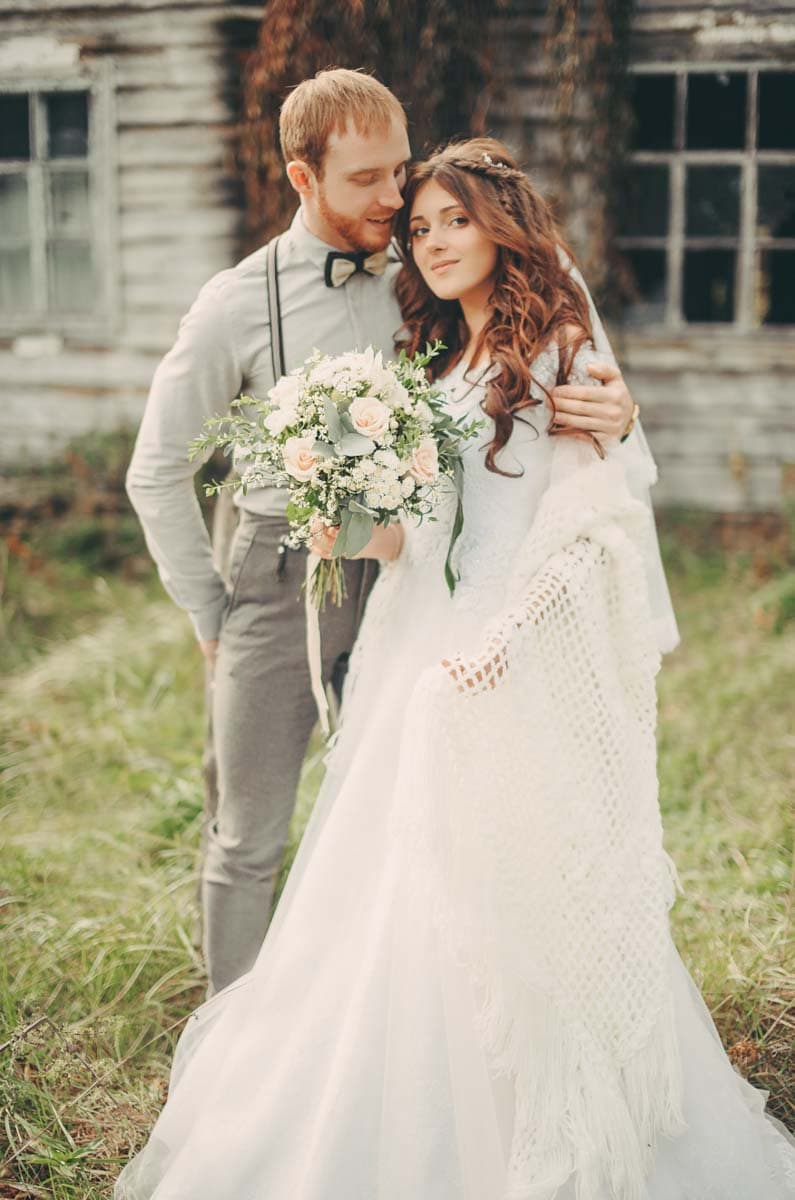
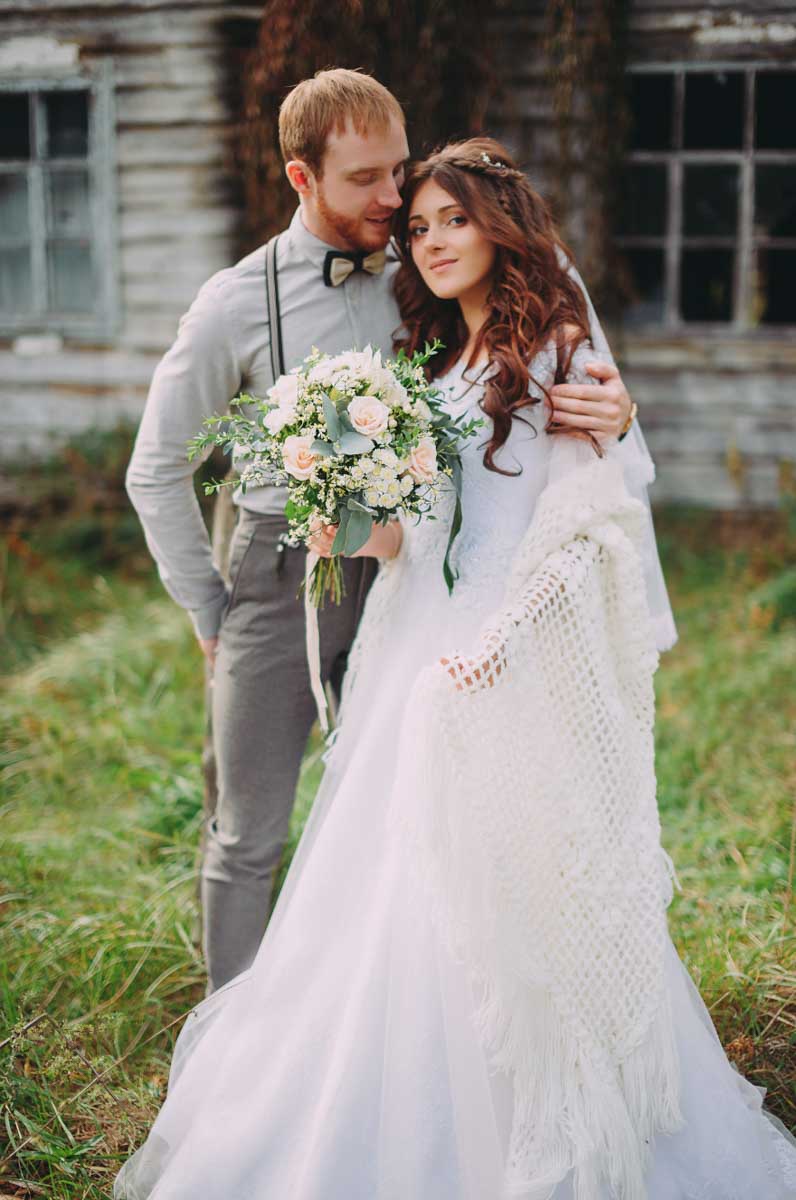
Giving your images a rustic feel is the perfect aesthetic for family photos, weddings, social media, and more. This editing style softens the tones in your image to give it a cozy and welcoming feel. Similar to a film-style edit, rustic editing styles use soft contrast and color grading to create a unique atmosphere in the image. Although there are many apps you can make this effect in, Adobe Lightroom and the free Lightroom Mobile app are the two best tools for the job.
Here are the basic steps for creating a rustic looking image in Lightroom:
- Slightly brighten your photo with the exposure slider.
- Adjust the white balance to a warmer color temperature.
- Adjust the white balance tint to favor green.
- Lift the shadows to soften the contrast.
- Use HSL to slightly desaturate any dominant colors.
- Add a blue or green hue with Color Grading.
- Add a slight vignette within the Effect Panel.
- Experiment with the Calibration adjustment to refine colors.
I get it, this might seem like a lot of steps, but I promise you it’s easy! With the simple workflow that I break down below, you can achieve a rustic-looking edit in minutes! Let’s get started.
How To Give Photos A Rustic Feel In Lightroom
The steps below will serve as a general outline to achieve this look in your photos. For this first example, I will be using Adobe Lightroom Classic.
Step 1: Adjust The Exposure
Similar to any edit you create, you must start by adjusting the exposure. The Basic Panel is home to all of your exposure and contrast adjustments within the Develop Module of Lightroom.
For a rustic editing style, the goal is to brighten your photo while softening the shadows. This is quickly done using the Exposure, Shadows, and Blacks sliders.
To brighten your overall photo, begin by increasing the exposure slider just a bit. Of course, if your image is already too bright, you can skip this step.
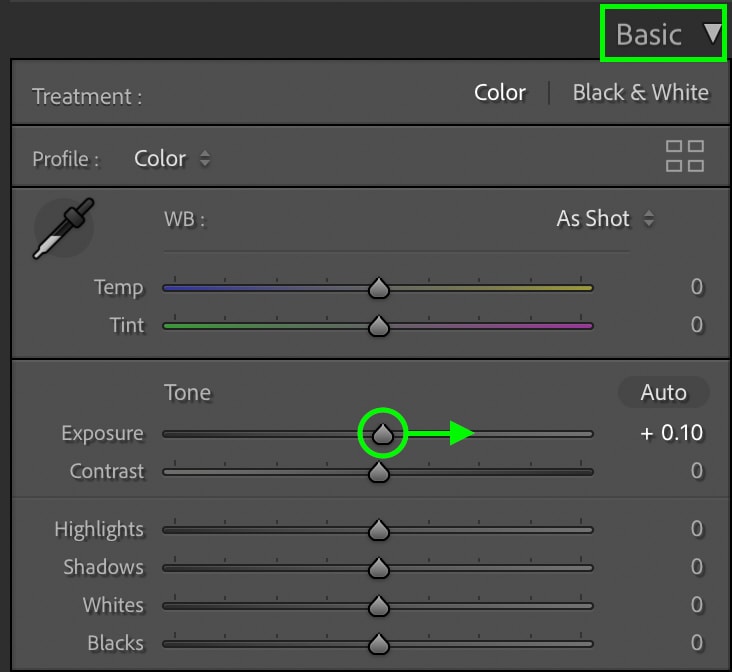
Next, you need to soften some of the shadows. Going to the shadows and blacks sliders, move them to the right to lighten the darkest areas in your photo. Be careful not to go overboard with this, or your image may appear too washed out. Just a slight adjustment here to reduce the amount of contrast in your photo.

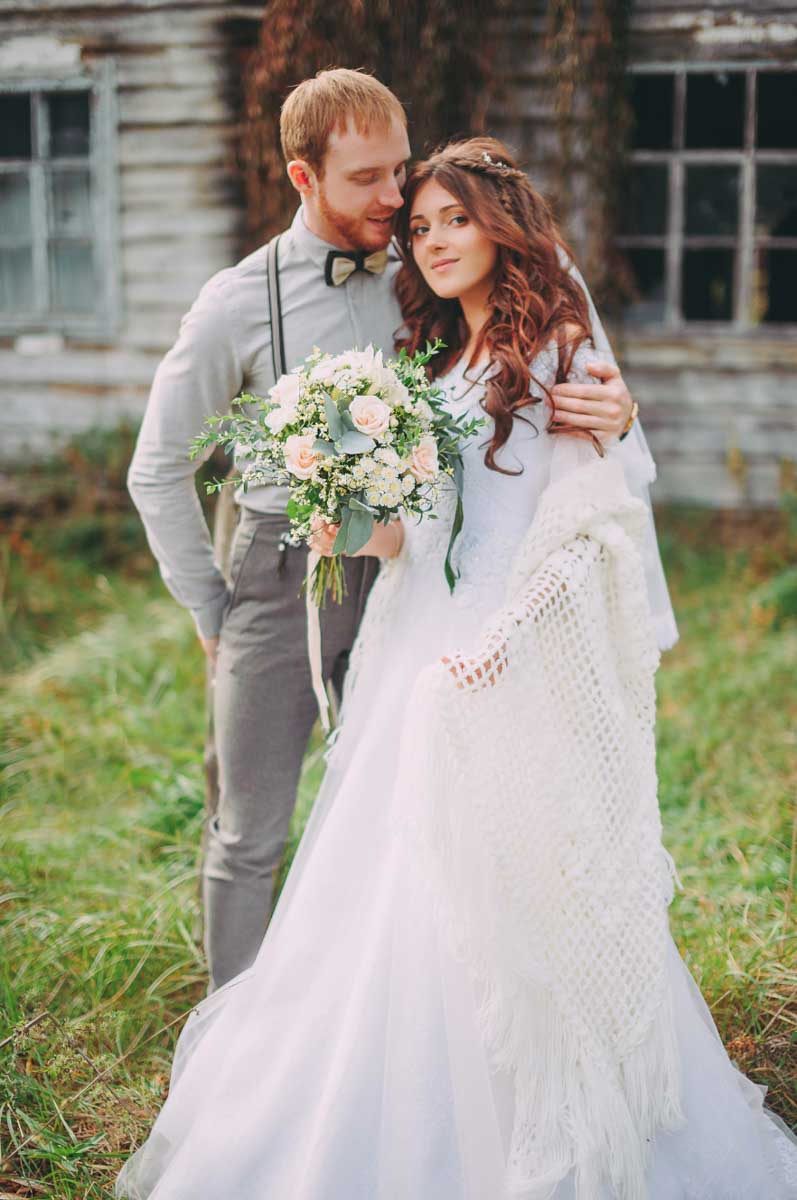
Here’s how my image looks after these exposure adjustments:
Step 2: Adjust The White Balance
With the exposure brightened and the contrast slightly reduced, it’s time to give the image a warm country feel by adjusting the white balance. At the top of the Basic Panel, you will see two sliders called Temp and Tint. These sliders control your white balance.
To begin, move the Temp slider towards a more yellow (aka warm) hue. This will help create the most dominant characteristic of a rustic editing style which is warmer color tones.
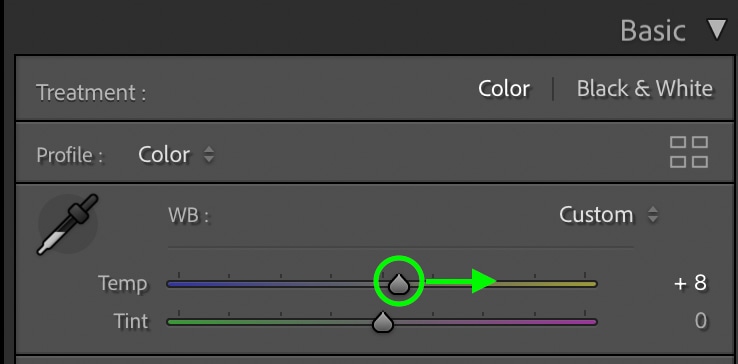
Next, go to the Tint slider and add more green to your image by moving the slider left. Combining a yellow and green white balance helps to give your image a more country feel.
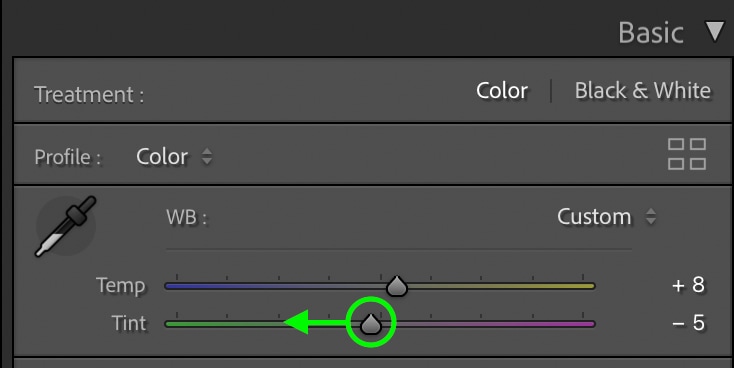
Here’s the result in my image after making these adjustments:

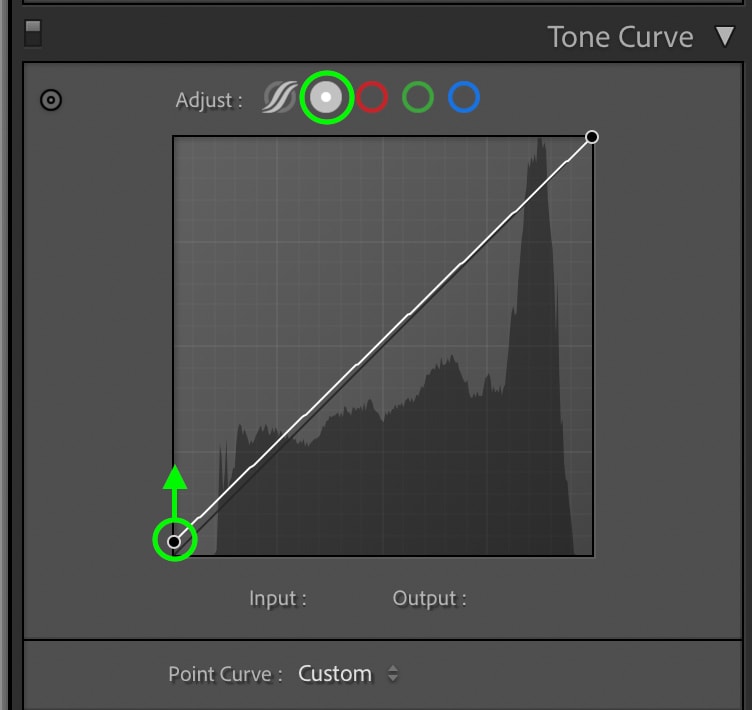
Step 3: Lift The Shadows Using The Tone Curve
Now you can further refine the contrast using the Tone Curve. To start, access the Point Curve by clicking on the white circle. This version of the tone curve allows you to add manual anchor points along your curve. Clicking on the shadow’s base point, drag it upwards to add a matte look to your photo.
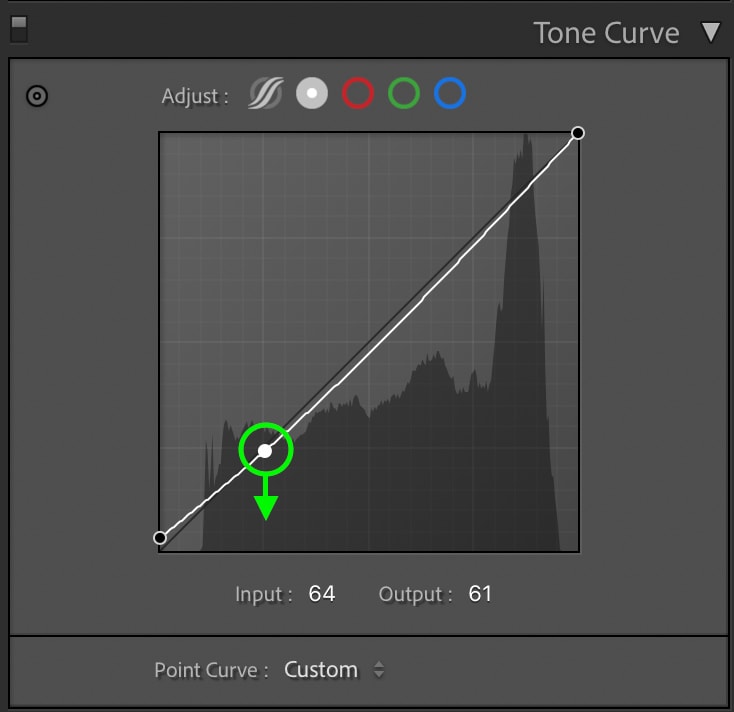
At this point, your image will likely look very washed out. Luckily you can add back some contrast by creating another anchor point in the shadows range and dragging down. This will darken the shadowy areas of your photo, white retaining that soft matte look you just created.
To finish things off, click on the Region Curve. This version of the tone curve lets you edit your tone curve using sliders for each exposure range. Starting with the darks and shadows sliders, adjust these to refine the contrast. For example, I would suggest lifting the darks slightly while bringing down the shadows. The more you bring down the shadows, the richer your image will feel as it gains contrast.
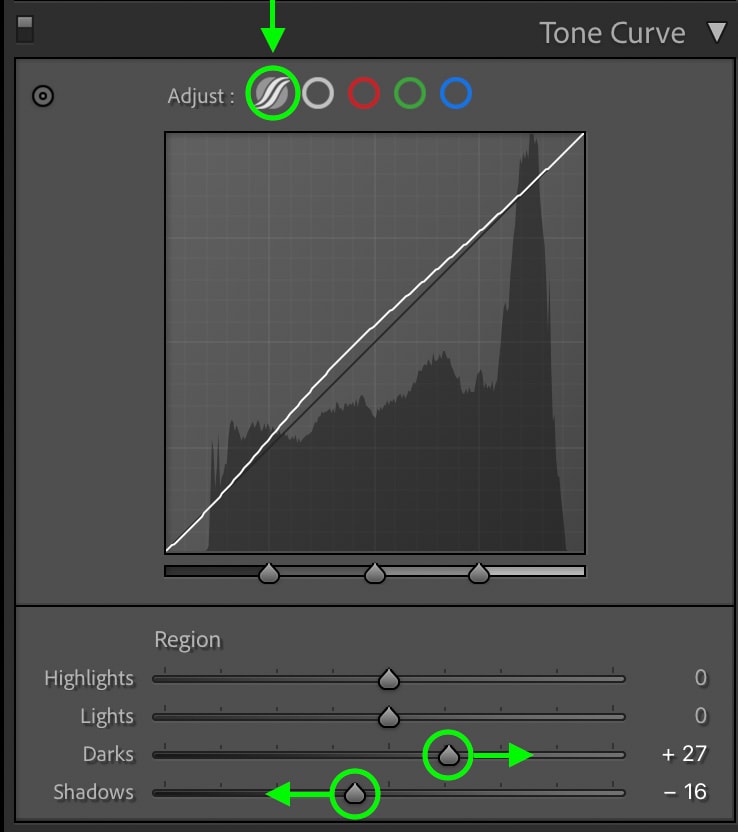
Then play around with the highlights and lights sliders to improve the overall exposure of your photo. If you want to have more glowy highlights, increasing these sliders can help achieve that look.
Here’s how the image looks after these tone curve adjustments:
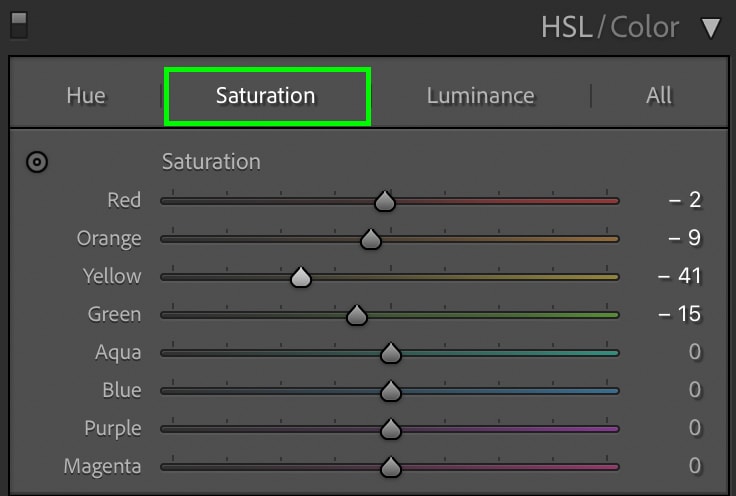
Step 4: Mute Colors Using HSL
With the exposure and white balance taken care of, let’s begin editing the colors. To give your image a rustic feel, desaturating some of the colors is key. Better yet, altering the hue to favor some warmer tones can also improve this effect. The HSL adjustment is the perfect tool for the job.
Within the HSL panel, click on the Hue option. This will allow you to change the color of different color channels in your photo. Play around with these sliders until you’re happy with the look. In some cases, you may not notice much of a change with a specific slider, that’s because that particular color isn’t very present in your photo. For the most noticeable results, focus on the dominant hues.
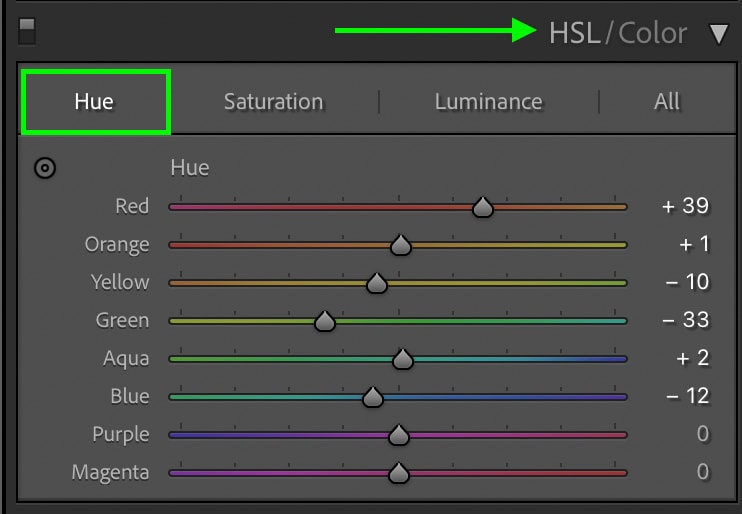
While adjusting the hue, try to make your colors favor a more warm yellow hue. For example, adjusting the yellows to favor a more orange color or adjusting the greens to favor a yellow color. These hue adjustments will help to give your photo a rustic country aesthetic.
Next, click on the Saturation option and slightly desaturate any of the dominant color hues in your photo. This will give your colors a muted look. But, don’t worry, we’ll spice up your image with some more color in the next step!
Lastly, select the Luminance option and adjust these settings as you wish. The luminance adjustment simply brightens or darkens different colors in your photo. It’s less crucial for this editing style but is worth experimenting with nonetheless!
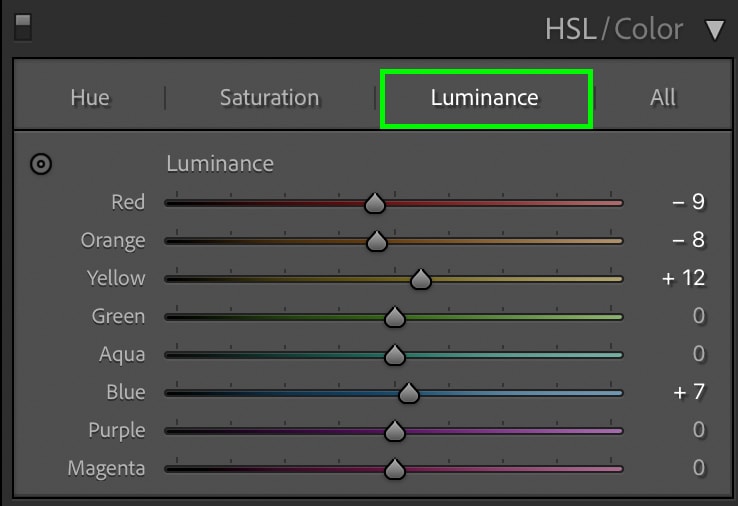
Here’s how the photo looks after the HSL adjustments:
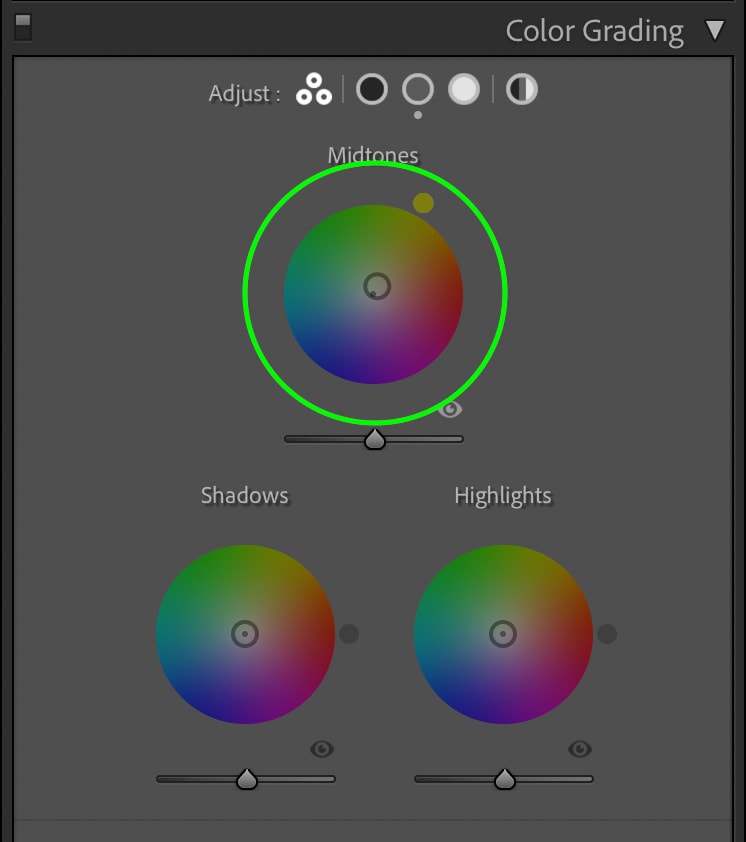
Step 5: Add Color Hues Using Color Grading
In many cases, your image will look quite desaturated and grey. Luckily using Color Grading, you can add some color tones to the mid-tones, shadows, and highlights.
Within the Color Grading Panel, start with the mid-tones color wheel and choose a warm yellow color. Somewhere between yellow and green often works well for rustic edits in Lightroom.
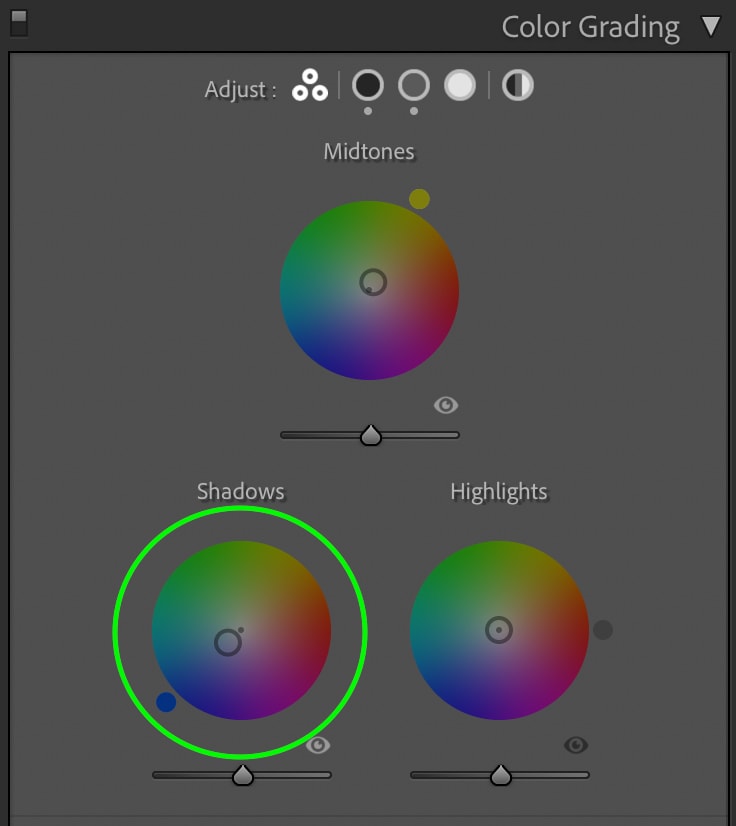
Then going to the Shadows color wheel, add a slightly blue hue to contrast the yellow tones you just added.
Lastly, choose a color for your highlights. You may want to use the same color as the mid-tones or experiment with something completely different.
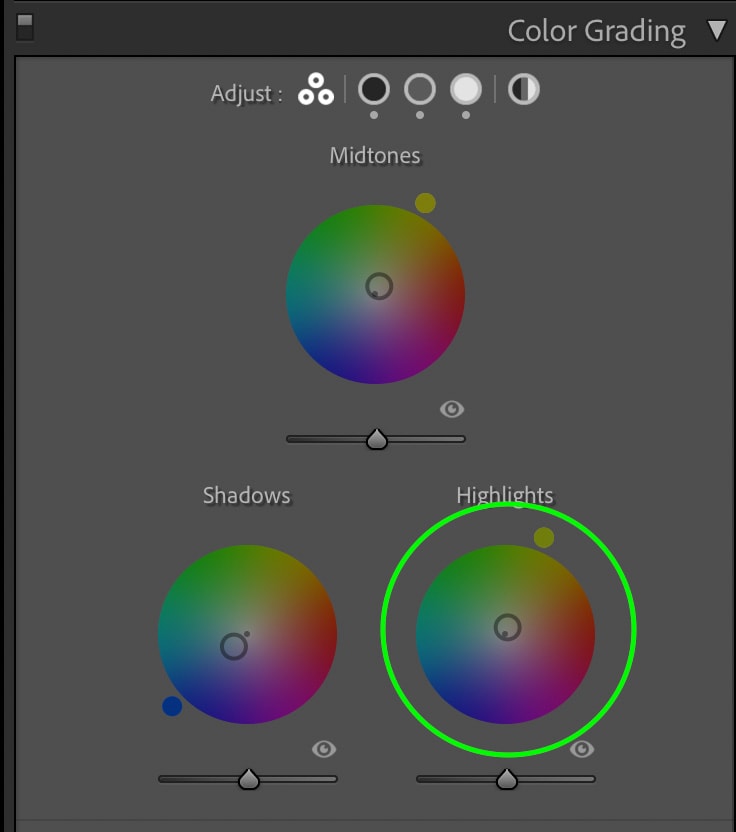
With your colors chosen, try boosting the luminance of the mid-tones by moving the luminance slider to the right. This will brighten the mid-tone exposure range throughout your photo and make things pop a bit more.
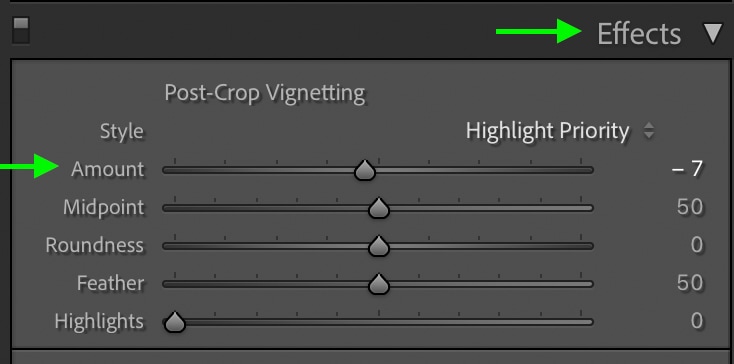
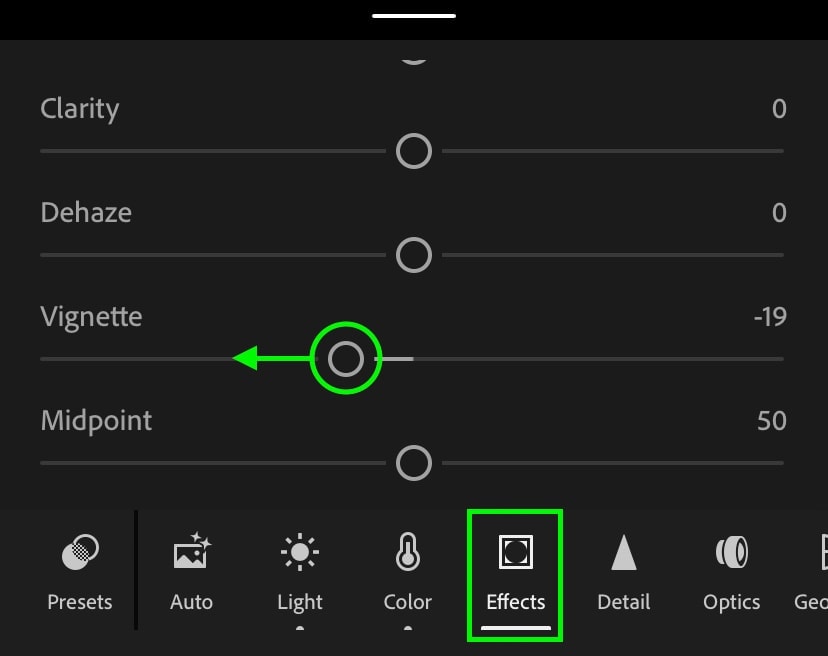
Step 6: Add A Slight Vignette
To give your image a more cozy feel, let’s add a vignette. This effect darkens the edges of your photo and helps draw your attention towards the center of the image. Within the Effects Panel in Lightroom, simply increase the Post-Crop Vignetting amount by adjusting the amount slider.
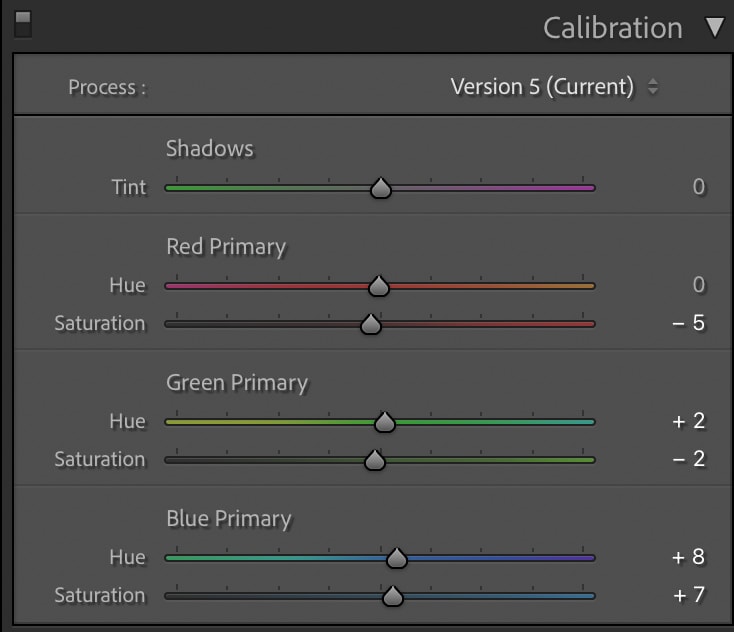
Step 7: Refine The Colors Using The Calibration Panel
Now to complete your rustic edit in Lightroom, Calibration can help to improve some of your colors. I like to start with whatever is the most dominant hue in my image and edit that color channel. For example, I would edit the Green Primary for a forested photo or the Blue Primary for a snowy winter photo.
This adjustment often yields the best results just by playing around with the settings, so take a moment to explore the options you have with this adjustment.
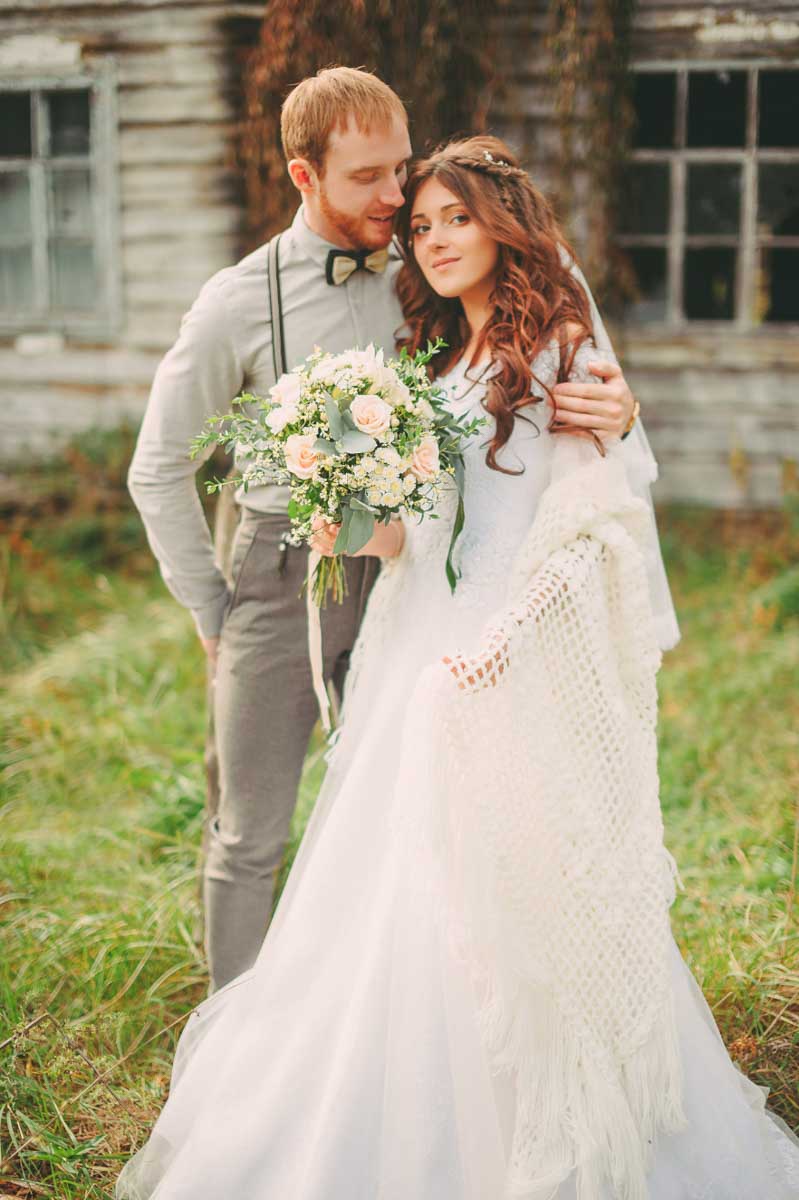
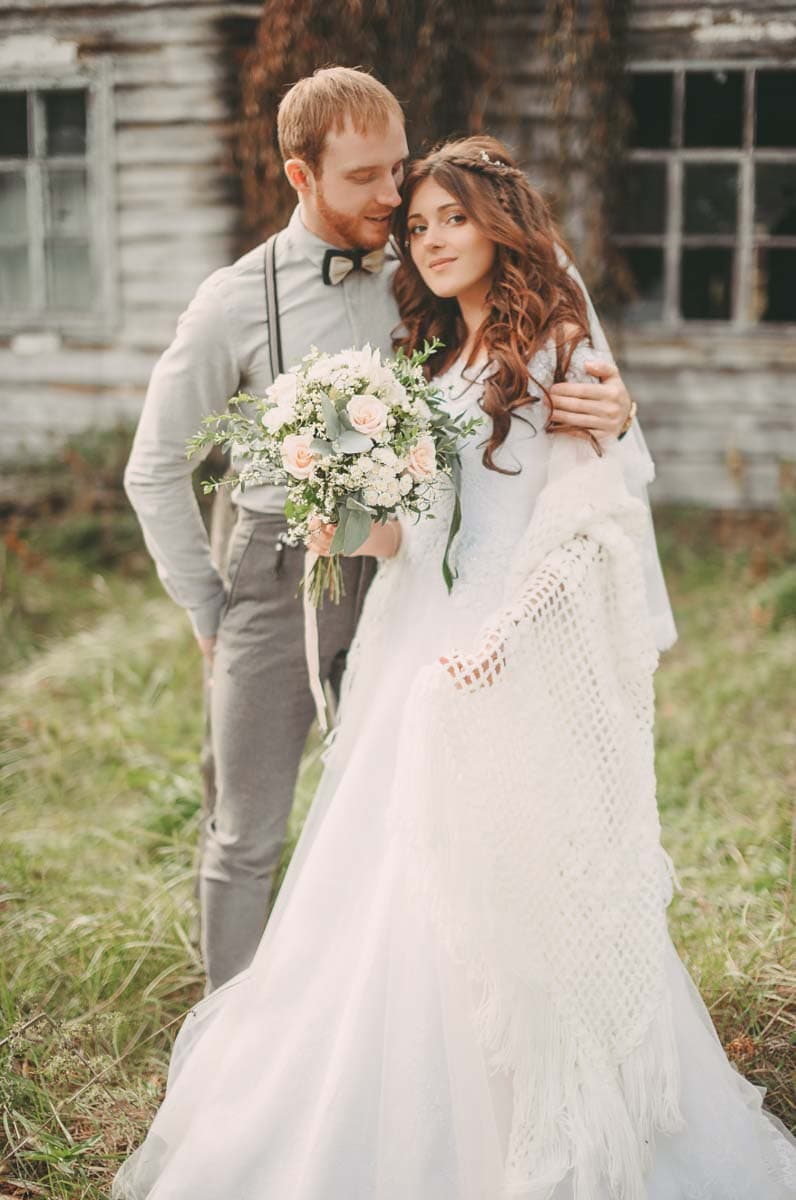
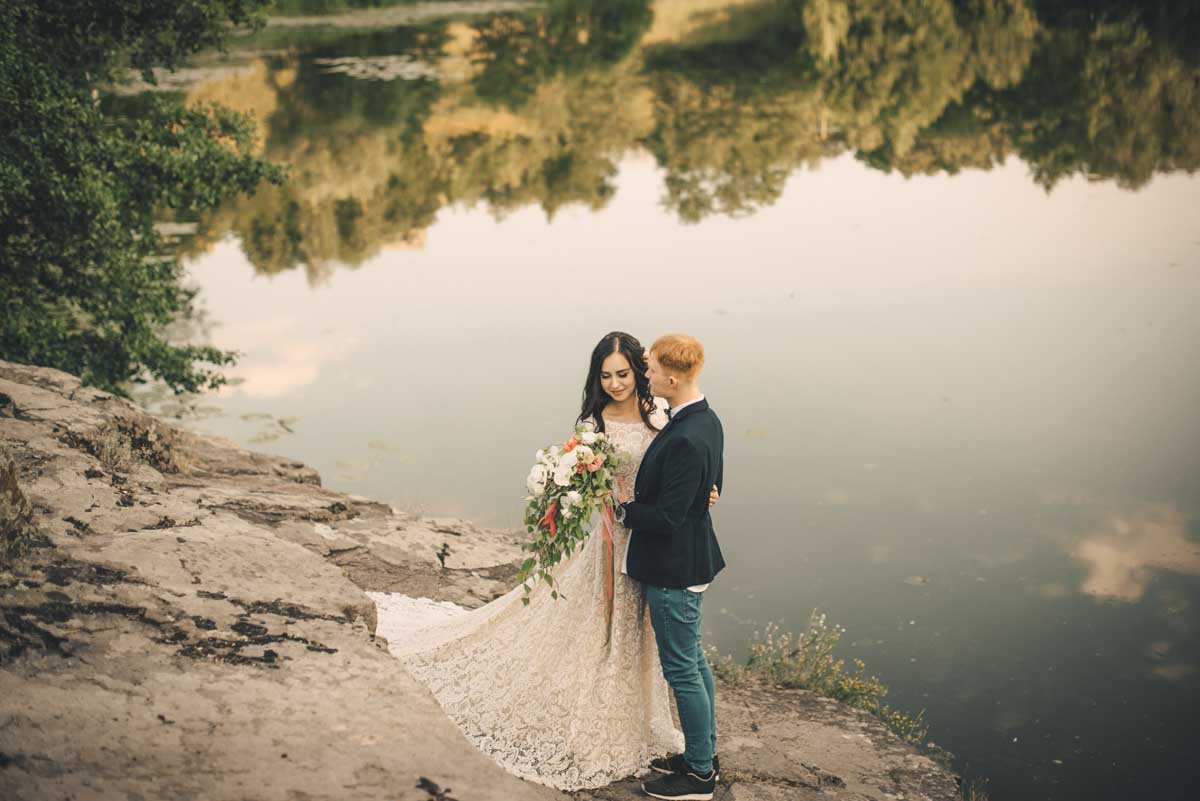
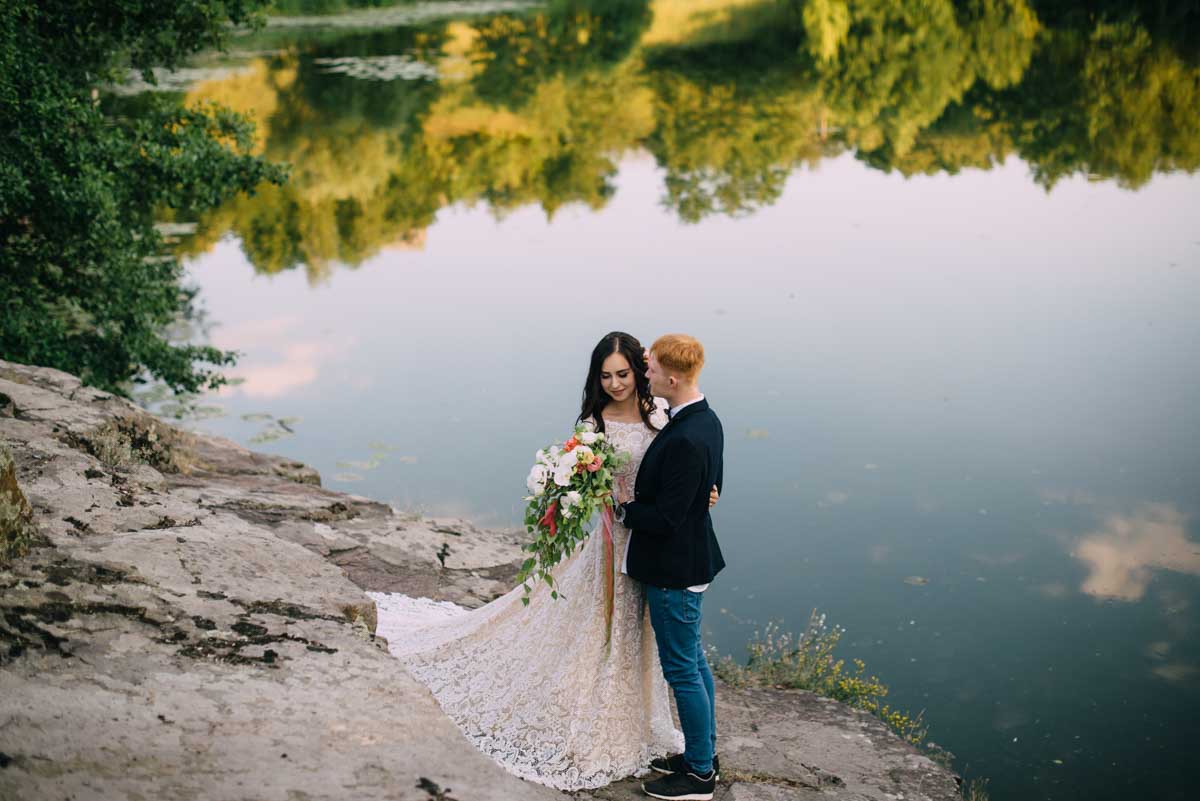
The Result
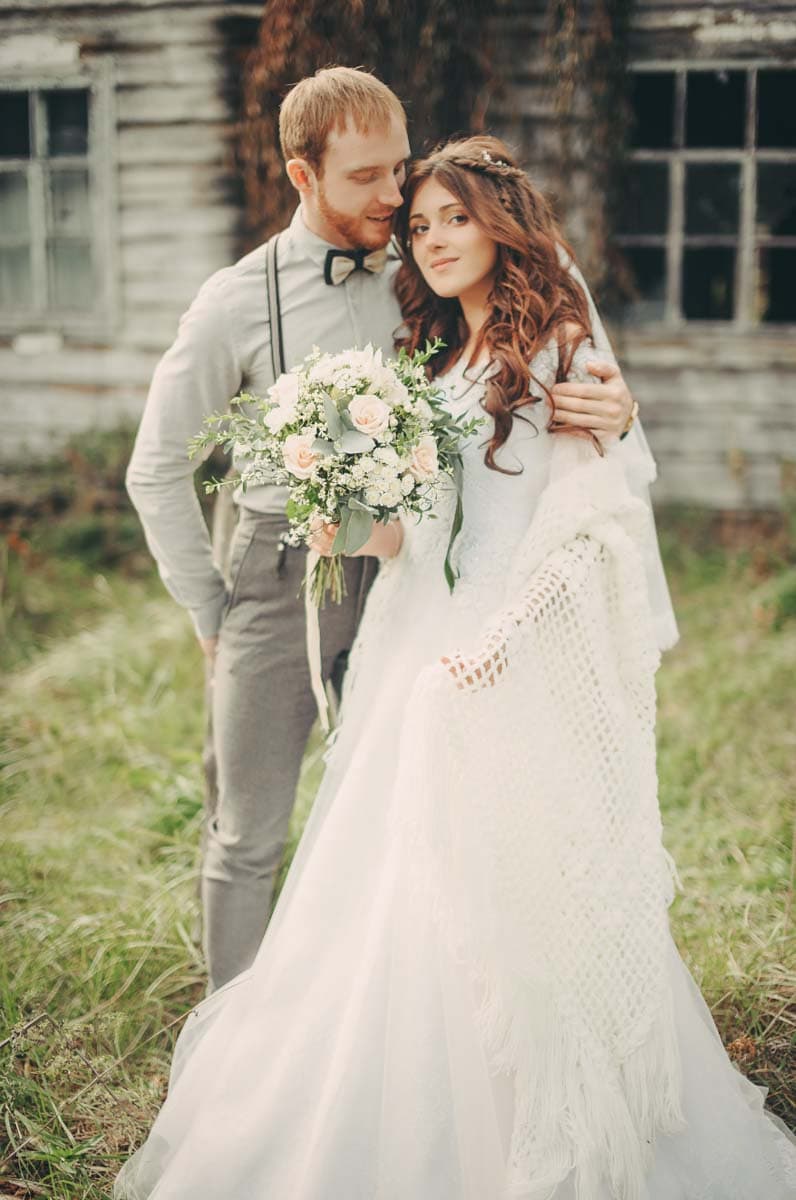

Before After
After these seven steps, you have successfully made your photo look more rustic by softening the contrast, warming the color hues, desaturating the image, and adding color grading adjustment! Now that you have this process nailed down in Lightroom Desktop let’s discuss how to do it in the free Lightroom Mobile app.
How To Make Photos Look Rustic In Lightroom Mobile
This process will follow a similar set of steps; however, the tools are slightly different on the mobile app. Although they make the same adjustments, how to access everything is a bit different. Luckily it’s still super easy!
If this is your first time using Lightroom Mobile, I highly suggest reading my complete guide to Lightroom Mobile to help get your bearings.
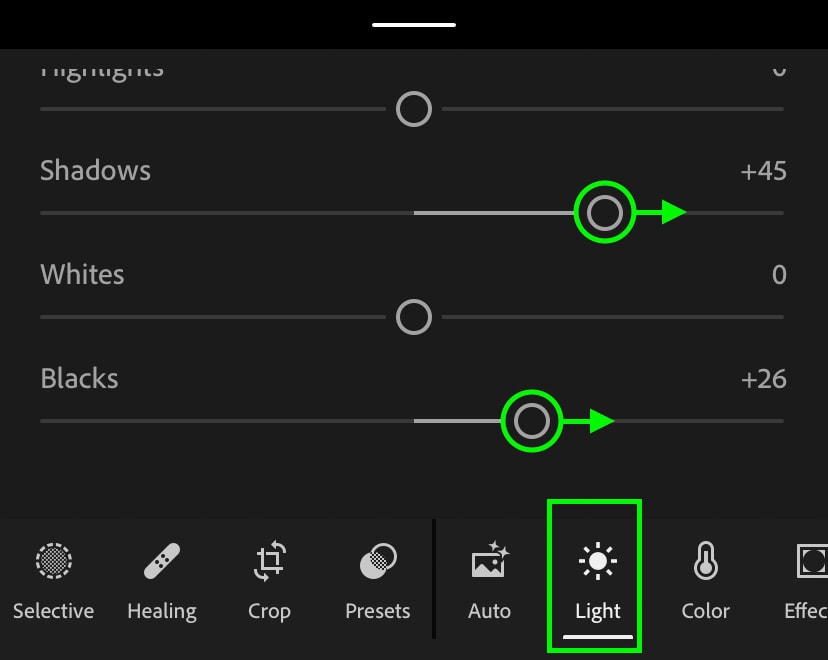
Step 1: Edit Exposure Within The “Light” Adjustment
First, you need to brighten your overall exposure and soften the contrast in your photo. Clicking on the Light adjustment, increase the exposure slider slightly to brighten the entire photo.
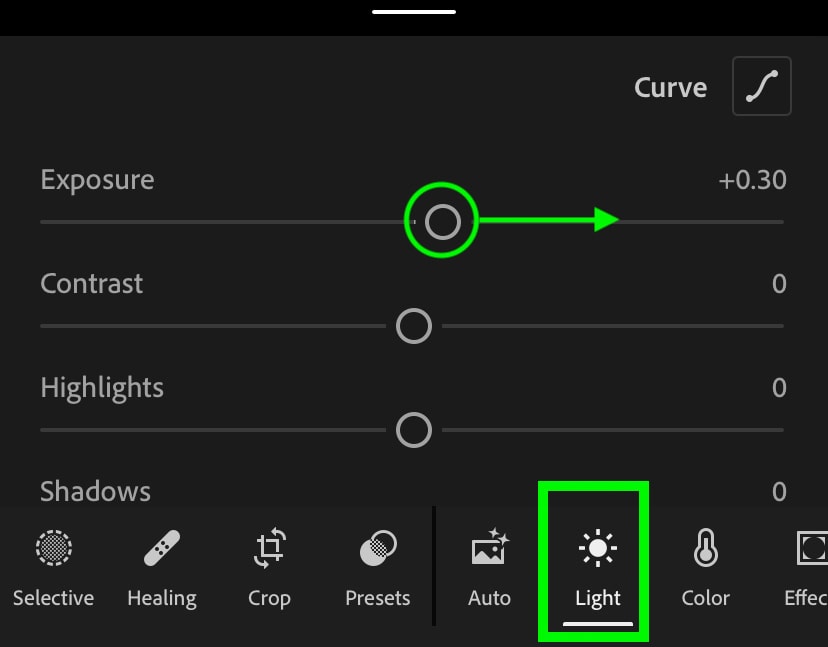
Next, go to the Shadows and Blacks sliders and move them to the right. This will soften the contrast in your photo and give you a great starting point for this rustic look.
Step 2: Adjust The Curves With The “Light” Adjustment
Still within the Light adjustment, click on the “Curve” option found at the top of the panel.
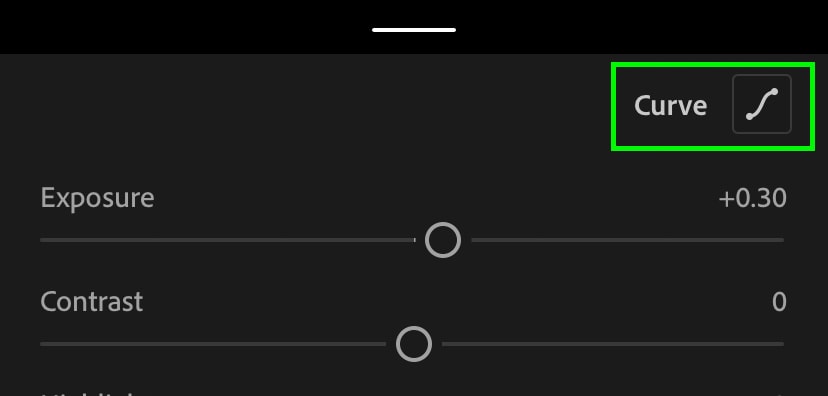
Using the exposure curve, lift the basepoints of your blacks to create a matte look in your photo. To add back some additional contrast and prevent things from looking washed out, click and drag down the shadows range.

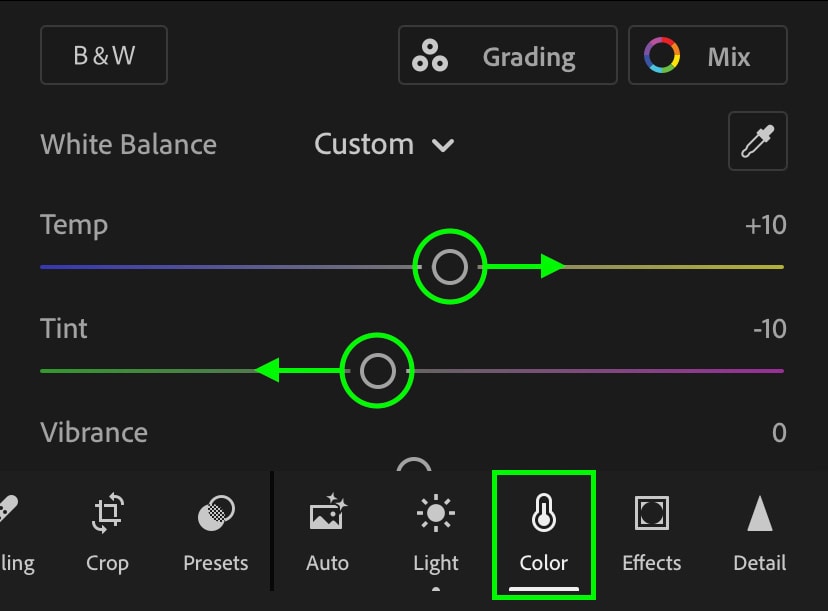
Step 3: Adjust The White Balance
With the exposure and contrast adjustment complete, click on the “Color” Adjustment.
Now move the Temp slider to the right to create a warmer color temperature. Then move the Tint slider to the left to add more green. These two colors combined are essential for any rustic look you’re trying to create in your photos!
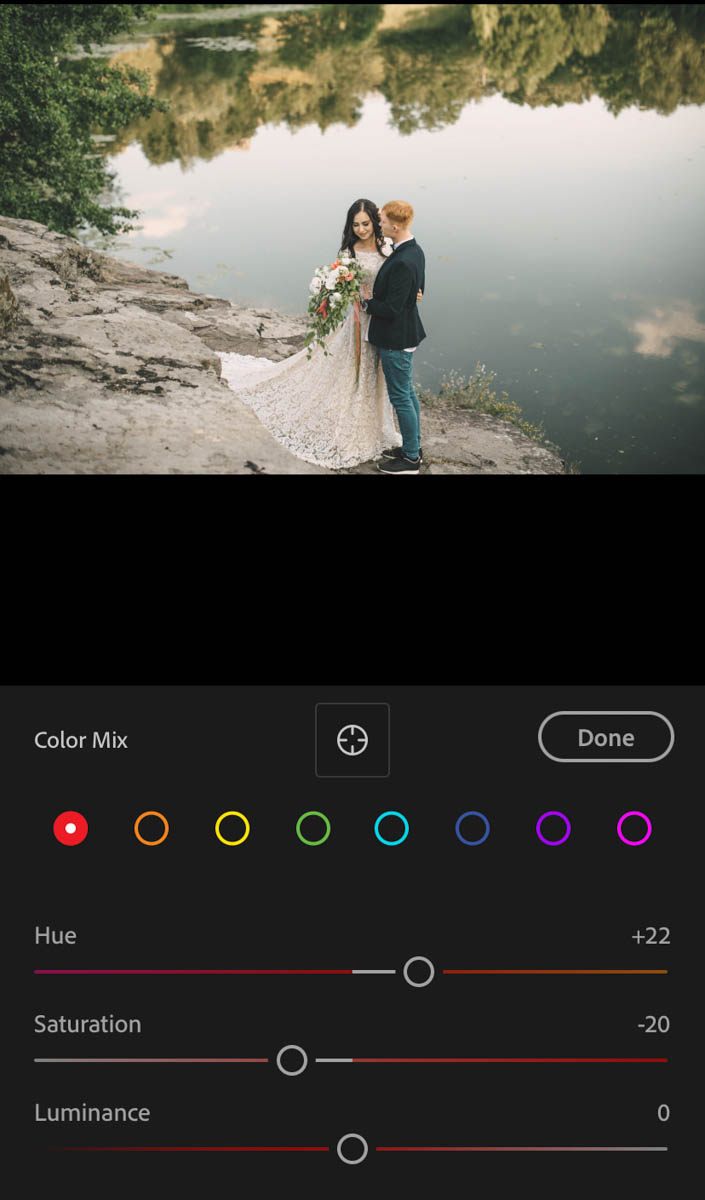
Step 4: Edit Hue & Saturation Using The Mix Adjustment
At the top of your color adjustment window, click on the “Mix” option. If you are familiar with HSL in Lightroom Desktop, this is essentially the same thing.

Work through each color range and adjust the hue to favor a warmer color while slightly desaturating your most dominant hues. By pressing between the different colored circles, you can target every color channel in your photo. You can learn more about how to use this tool in this post.
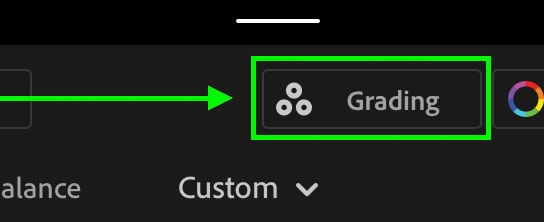
Step 5: Color Grading
After pressing “Done” within the Mix adjustment, click on the Color Grading option. This is found directly beside the Mix adjustment with the Color adjustment panel.
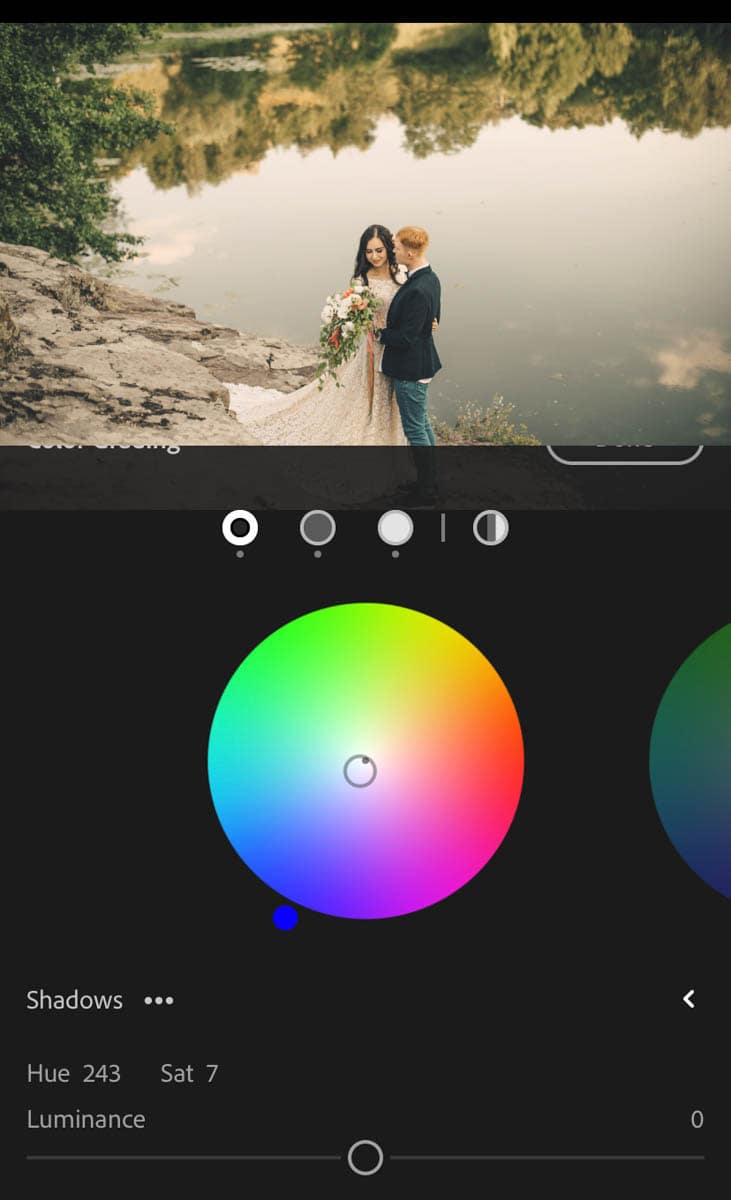
The color grading tool will add specific color hues to the shadows, mid-tones, and highlights in your photo. To create a rustic feel, add a blue hue to your shadows, a yellow hue to your mid-tones, and a yellow or green hue to your highlights.
From there, you can experiment with the luminance value of each exposure range to improve the look of these colors. Sometimes brightening or darkening the luminance of an exposure range can really make your colors pop!
Step 6: Apply A Vignette With The Effects Adjustment
To finalize this rustic edit in Lightroom Mobile, let’s add a vignette. Clicking on the “Effects” adjustment, look for the Vignette slider. Now move this slider to the left to add a dark vignette around the photo.
The Result

Before After
This time using Lightroom Mobile, you have created another rustic editing style for your photo!
Creating a rustic look in your images is surprisingly simple once you nail down the proper steps. By focusing on warm color tones and soft contrast, it’s easy to apply this look to any image you’re working with. If you love this editing style, be sure to check out this next tutorial creating the Vintage Film Look in Lightroom. This editing style builds off of some of the skills you learned here and helps you to replicate the look of actual film with a digital camera!
Happy Editing!
Brendan 🙂


