There are a few different ways that you can rotate or flip an image in Lightroom. There are even a series of keyboard shortcuts perfect for streamlining this process. You can rotate a photo in Lightroom using either the Library and Develop Module. This way, you can change your image orientation, whether you’re culling or in the middle of editing a photo. Here you’ll learn the best methods to rotate or flip a photo in Lightroom CC. Let’s get started!
How To Rotate Photos In Lightroom
Since the techniques to rotate images will vary based on whether you are in the Library or Develop Modules, I’ve broken it down into two separate sections, starting with the 4 Library Module methods.

The Library Module is where you can organize and cull all of your images at once. You cannot make any color adjustments in the Library Module since it’s strictly meant for organizing and viewing images.
Although you can’t edit colors, you can still rotate images by 90 degrees within this module. Let’s go over the different ways you can rotate a photo in Lightroom’s Library.
Option 1: Use The Rotation Arrows In Loupe View
One of the easiest methods for rotating a photo in Lightroom is with the rotate image arrows in the toolbar. This toolbar can be found beneath your image when in loupe view.

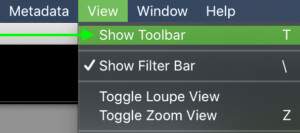
If you do not see your toolbar, press T or go up to View > Show Toolbar.
Within this toolbar, you’ll notice two right-angled arrows. The arrow pointing right will rotate your photo 90 degrees counterclockwise while the left-pointing arrow will rotate 90 degrees clockwise.
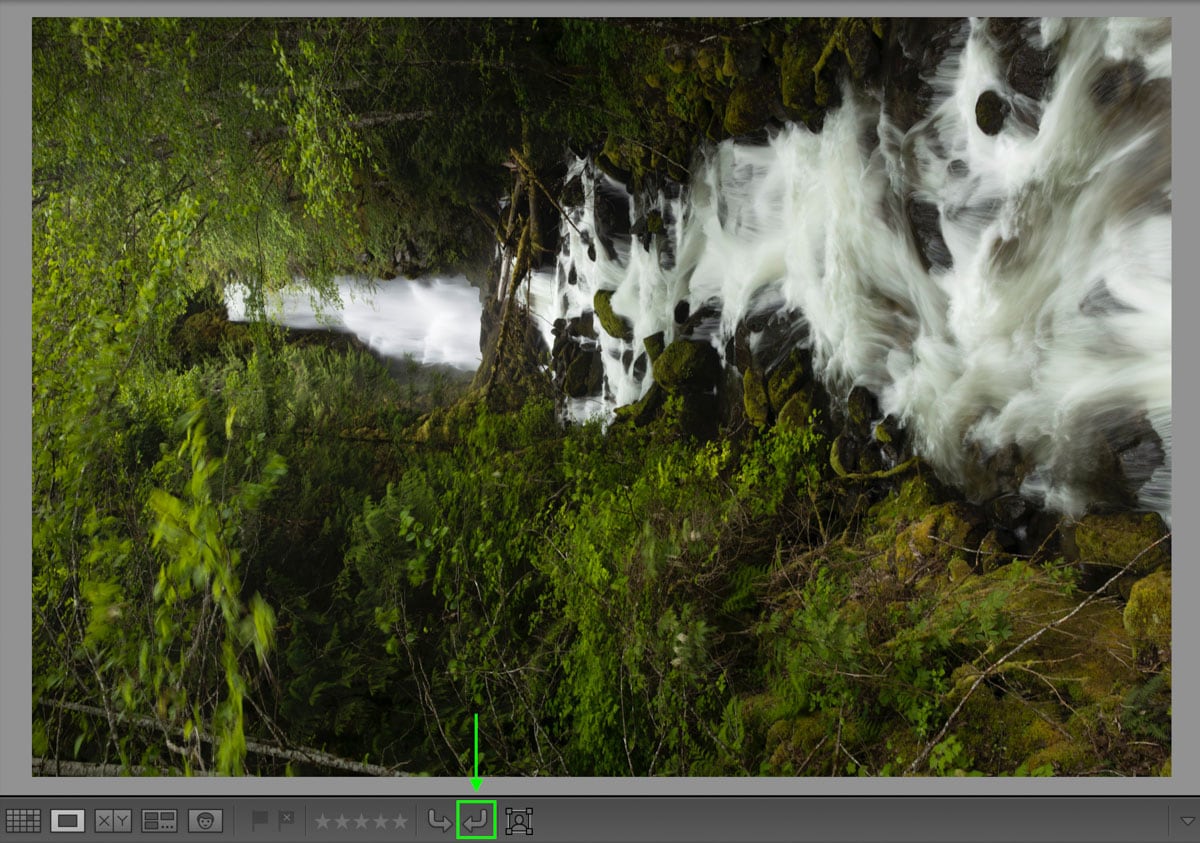
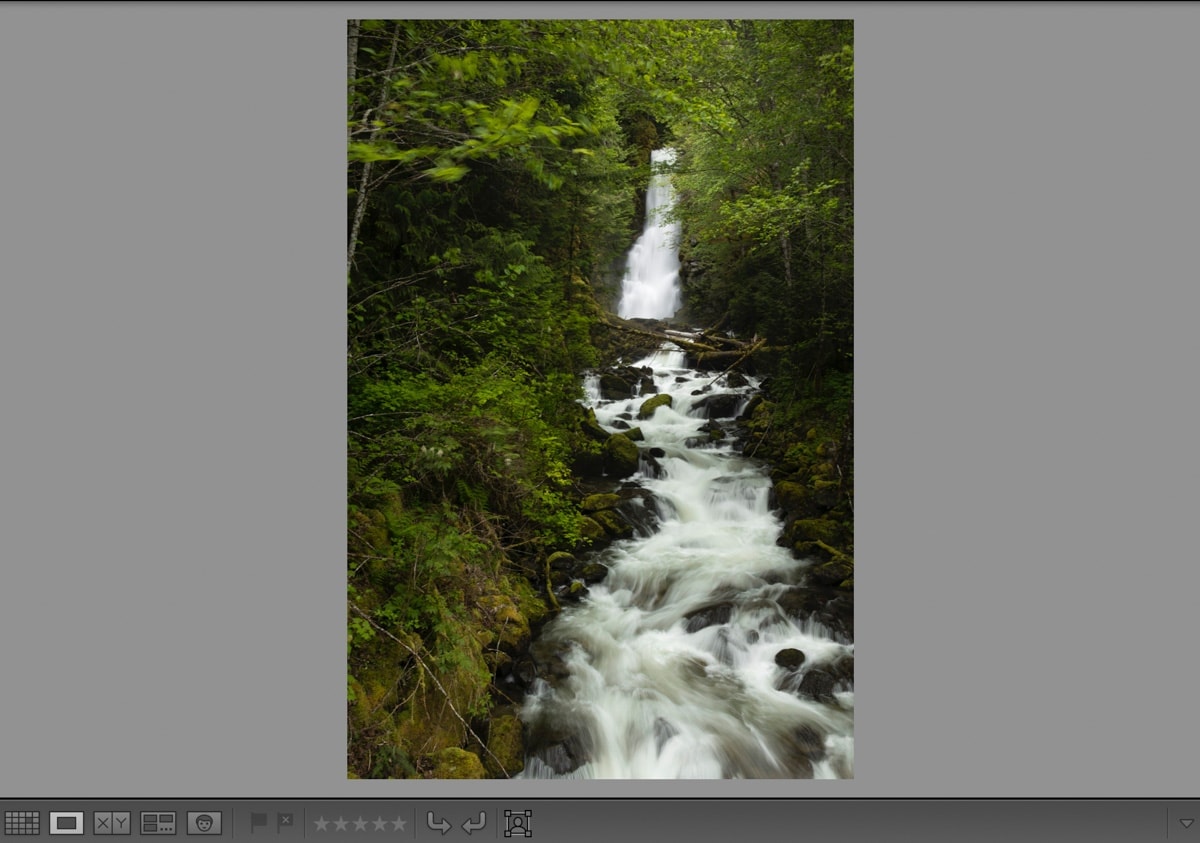
Click on either of these arrows to rotate your selected image in Lightroom.
Option 2: Press Command or Control + ] / [ (Mac or Windows)
Another simple method to rotate a photo in Lightroom is by using a keyboard shortcut. By using a shortcut, you can reduce clicks and save time! Here’s how to do it:
Select an image you want to rotate. It does not matter whether you’re in the Loupe or Grid view.
Use the keyboard shortcuts Command or Control + ] / Command or Control + [ to rotate the photo 90 degrees in either direction.
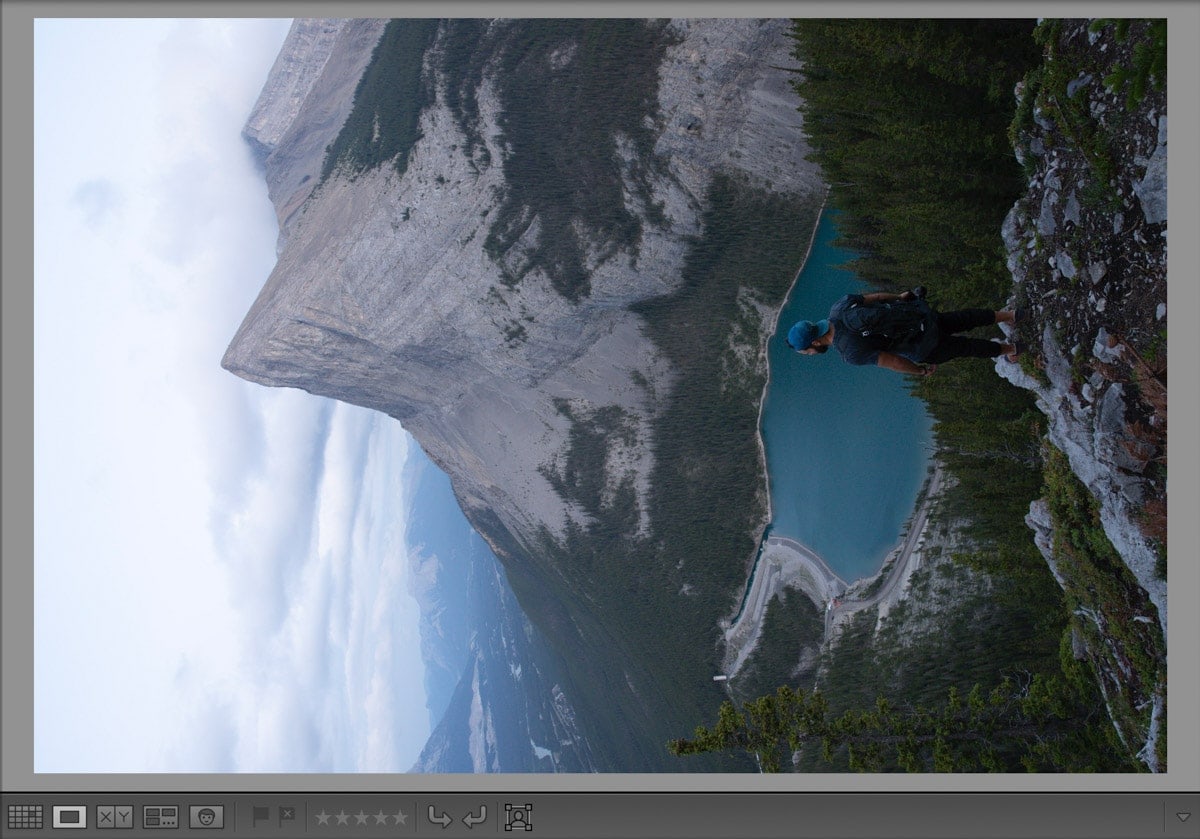
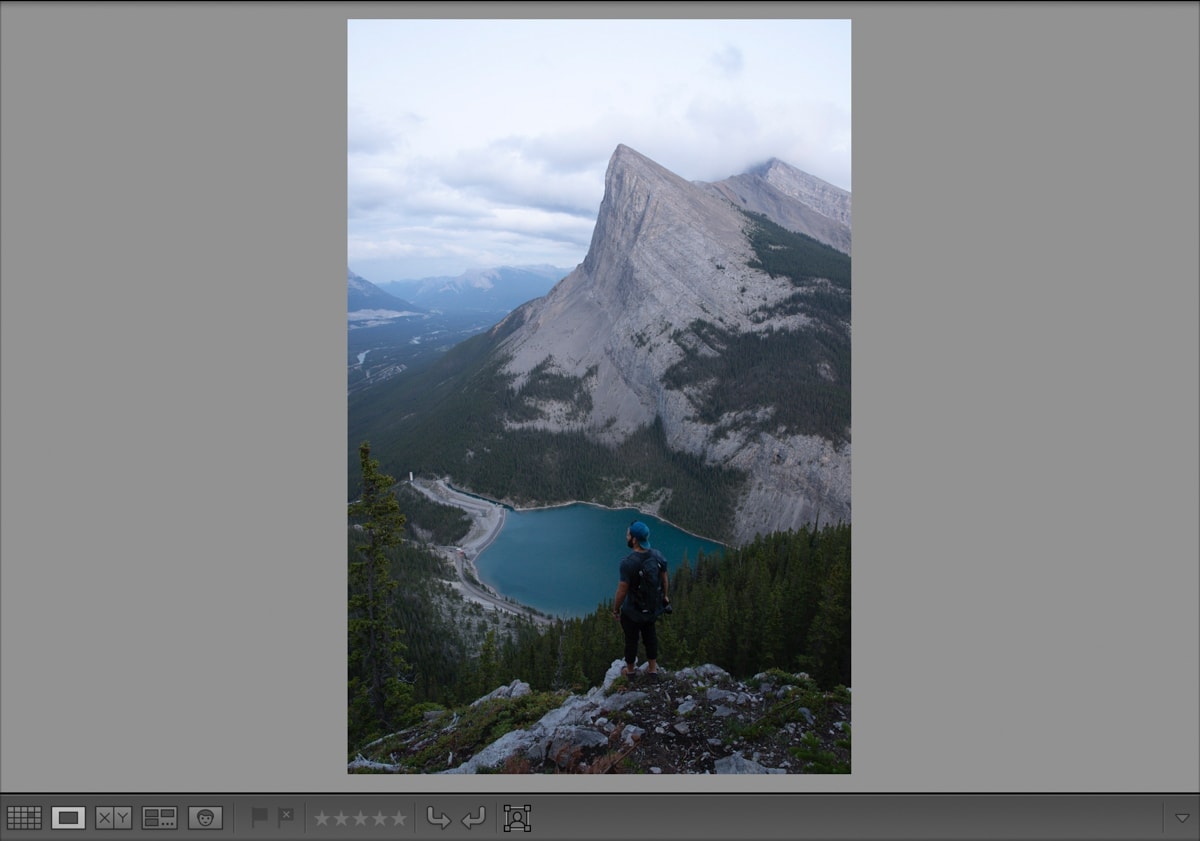
You can press this shortcut multiple times to rotate further.
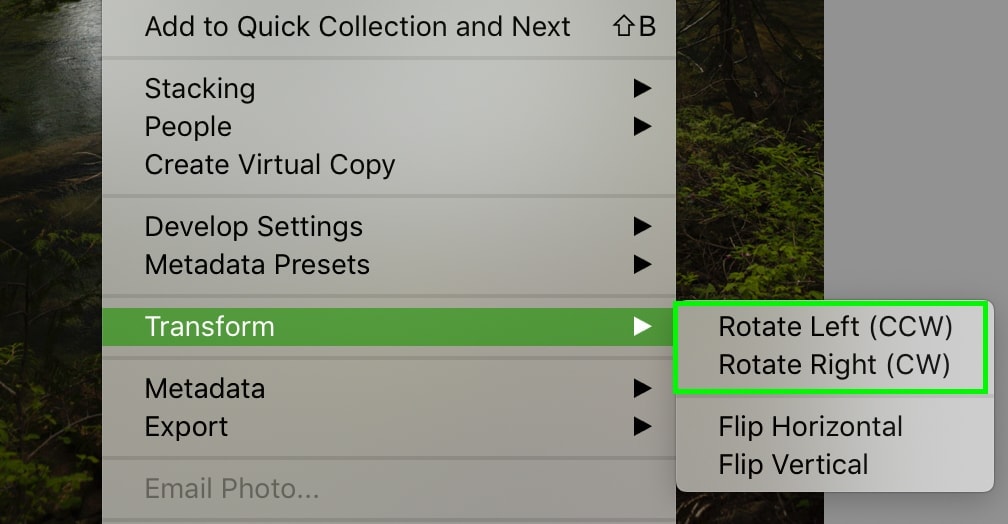
Option 3: Right-Click > Transform > Rotate Left or Rotate Right
You can rotate a photo in Lightroom by right-clicking on the image and selecting how you want to rotate. Depending on if you’re in the Loupe or Grid view, this method changes slightly.
– In Loupe View

When in Loupe View, right-click on your photo and go to Transform > Rotate Left or Rotate Right. Selecting either of these options will rotate your photo 90 degrees in the specified direction.
– In Grid View

When in Grid View, right-click on the selected photo and select Rotate Left or Rotate Right. In Grid View, it is slightly more streamlined to rotate your image.
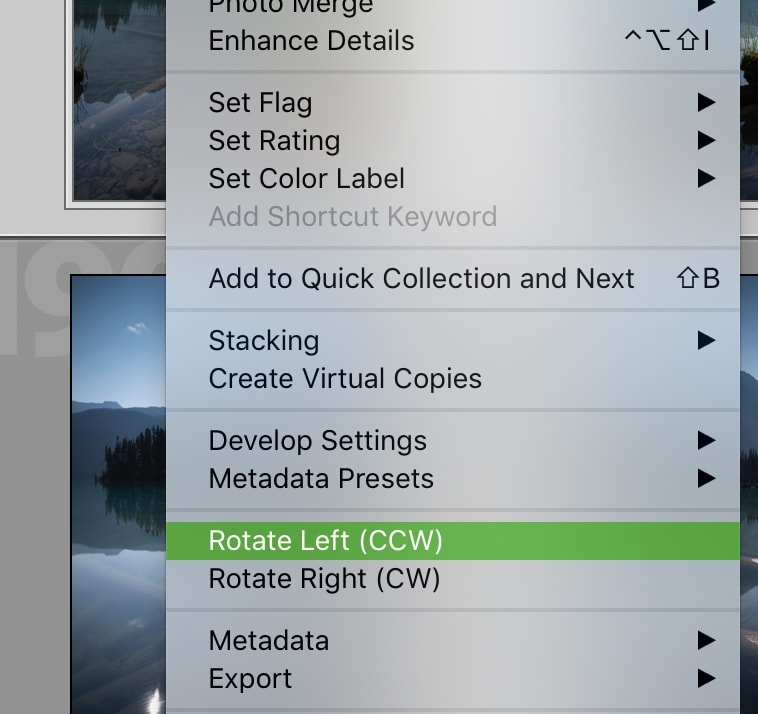
Option 4: Go to Photo > Rotate Left or Rotate Right
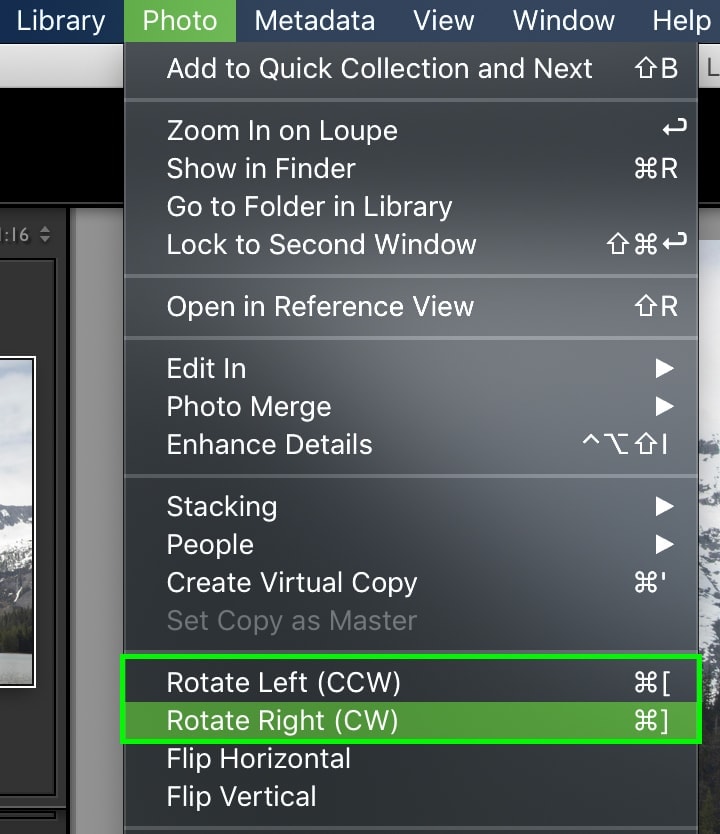
Lastly, you can rotate a photo in Lightroom using the menu bar at the top of your screen. With any photo selected, go up to Photo > Rotate Left (CCW) or Rotate Right (CW).
How To Rotate Photos In The Develop Module Of Lightroom

Even if you’re in the middle of editing a photo, you can still rotate it while using the Develop Module. This Module is home to all of your color and spot adjustments in Lightroom. You can learn how to use all of these features in my Guide To Lightroom For Beginners.
The methods available for rotating images in this Module are slightly different than that of the Library Module. You don’t have a toolbar or different viewing options to deal with, so it’s much more simplified.
The best way to rotate photos in the Develop Module is by using the keyboard shortcut Command or Control + ] / Command or Control + [. This shortcut will rotate your photo by 90 degrees in either direction.
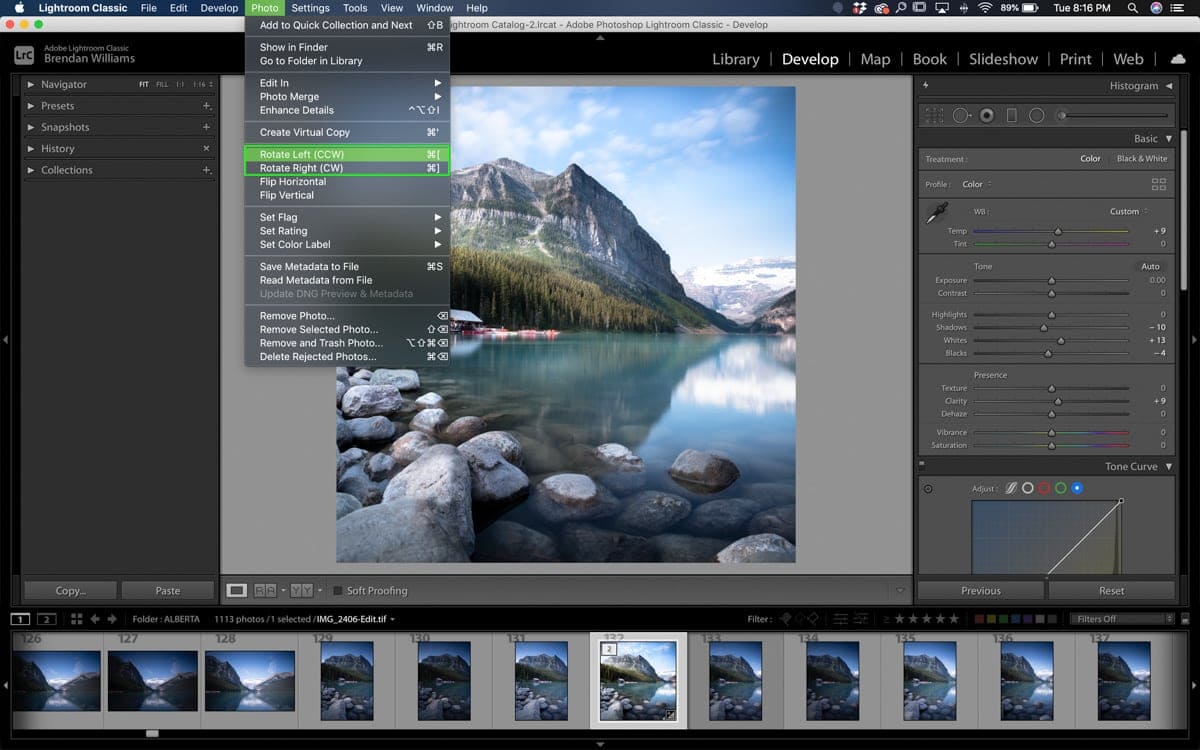
If you’re not interested in keyboard shortcuts, you can also use the top menu bar. Simply go to Photo > Rotate Left (CCW) or Rotate Right (CW) to rotate your photo as necessary.
How To Rotate Multiple Photos At Once In Lightroom
It’s not uncommon to have to rotate a series of images from your shoot. Rather than rotating each photo individually, you can rotate multiple images at once! Depending on which module you’re using, the steps will change slightly. Here’s how to rotate multiple images in both the Library and Develop Modules.
– In The Library Module
The benefit of rotating multiple photos with this module is you can see more images at once. Rather than being confined to your filmstrip, you can use the grid view to select large groups of photos. Here’s how it works:
First, you need to select a series of photos you want to rotate. If you want to choose a continuous sequence, hold Shift and click between the first and last photos. This highlights every image in between.
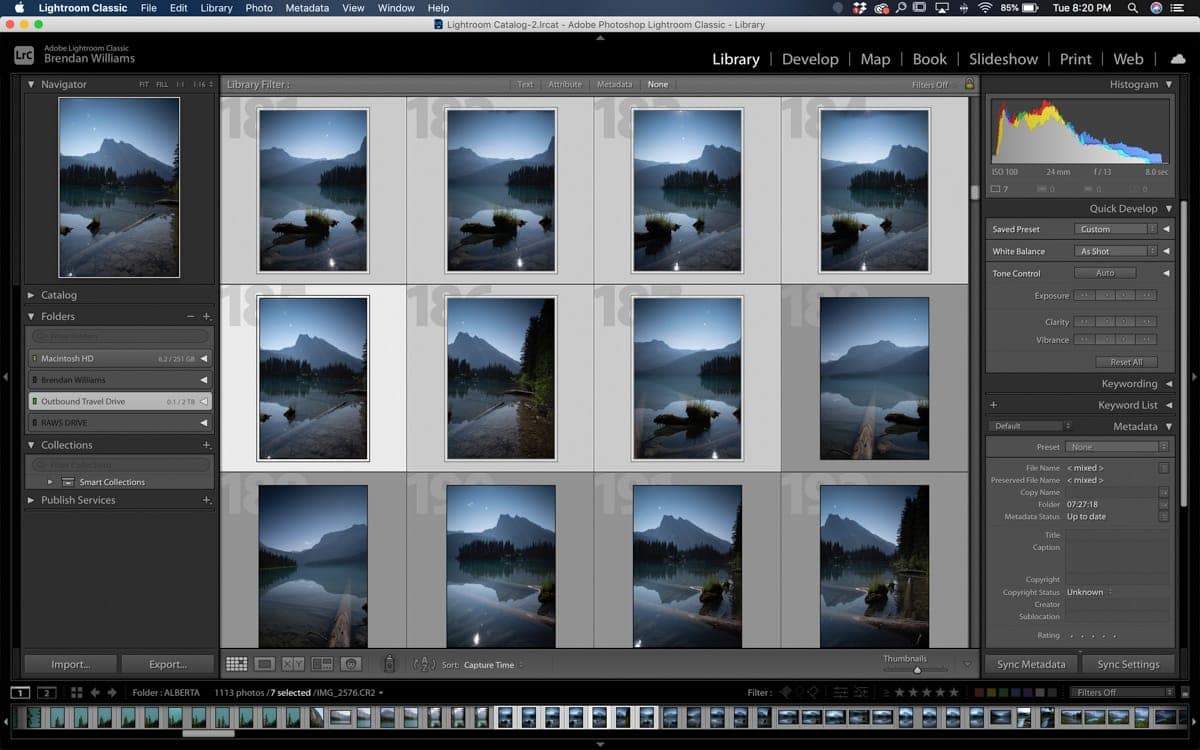
If you want to rotate a specific set of photos, hold Command or Control and click on individual images to select them.
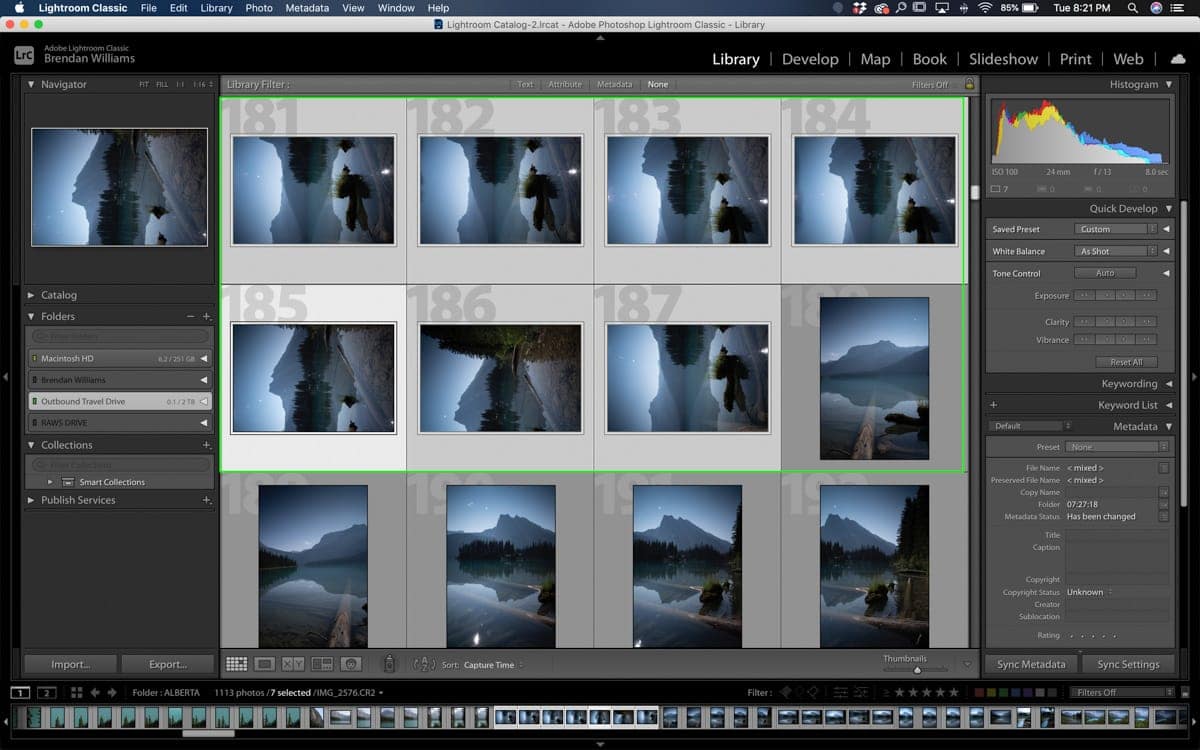
With your multiple photos selected, use the keyboard shortcut Command or Control + ] / Command or Control + [ to rotate all the images.
Alternatively, you can right-click on the highlighted photos and select Rotate Left or Rotate Right.

Either method is a simple way to rotate multiple photos at once in Lightroom while using the Library Module.
– In The Develop Module
The trouble with rotating multiple photos with the Develop Module is that you can’t get a general view of all your images. All you have access to is your filmstrip. It’s slightly harder to get a general view of an entire set, but it’s still possible by scrolling through your filmstrip.
Since you only view one image at a time, you will need to view each image individually to rotate it. This makes the process of rotating multiple images much slower.
While working in the Develop Tab, select a series of images in your filmstrip by holding Shift or Command/Control (Mac/PC).

If your filmstrip isn’t visible, go to Windows > Panels > Show Film Strip.
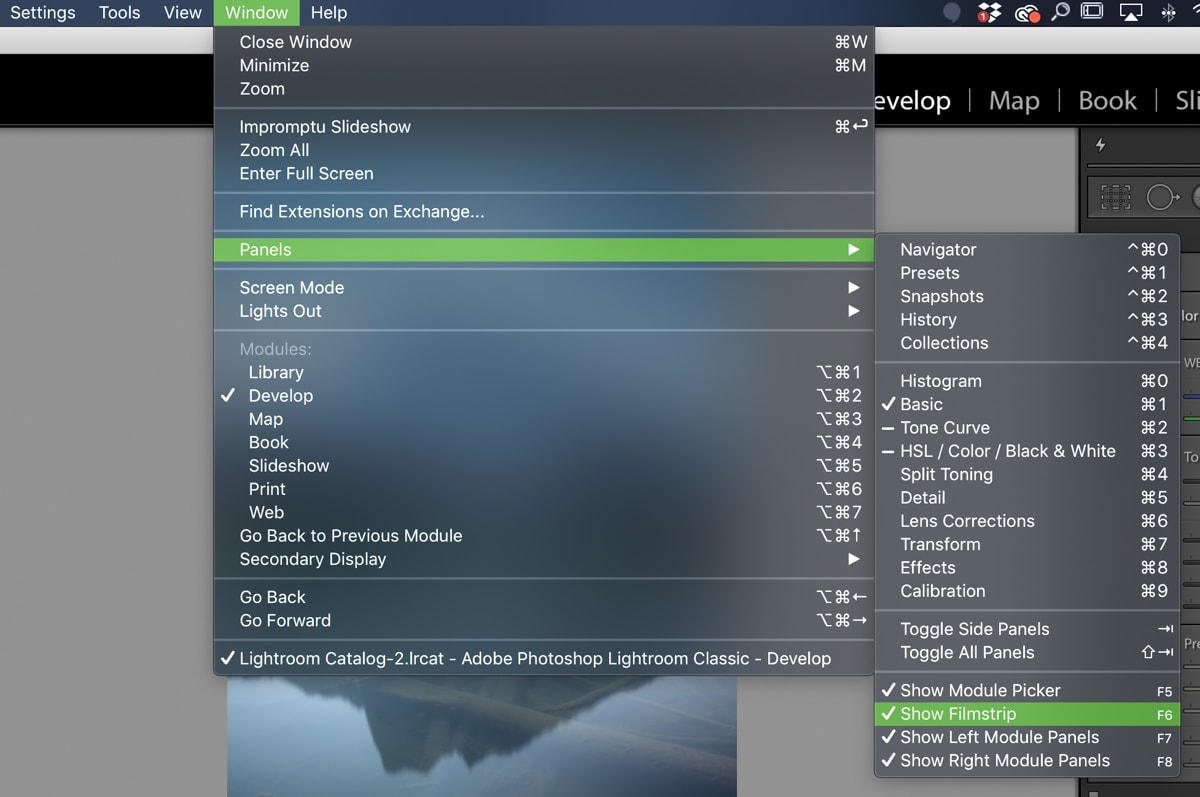
With a group of photos highlighted, use the keyboard shortcut Command or Control + ] / Command or Control + [ to rotate your select images.
Additionally, you can go up to Photo > Rotate Left (CCW) or Rotate Right (CW).

You can use both of these options to rotate a photo in Lightroom while working in the Develop Module!
How To Rotate A Photo Less Than 90 Degrees In Lightroom
With all the methods I’ve covered so far, it only allows you to rotate a photo by 90 degrees. What if you want to rotate your image less than that?
Go to your Develop Module and select the Crop Tool.
A new panel will appear with an angle slider.
Move this slider in either direction to rotate the angle of your photo. Although it will crop into your photo as you rotate, this is the only method to rotate an image less than 90 degrees in Lightroom.
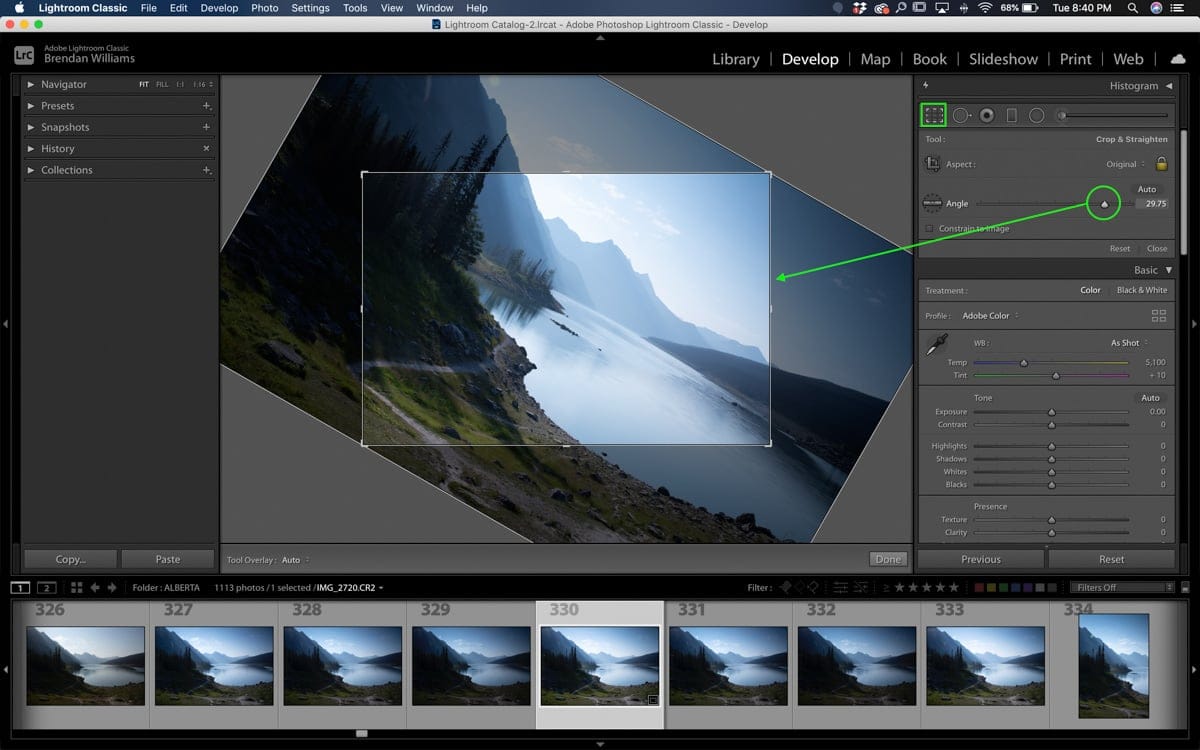
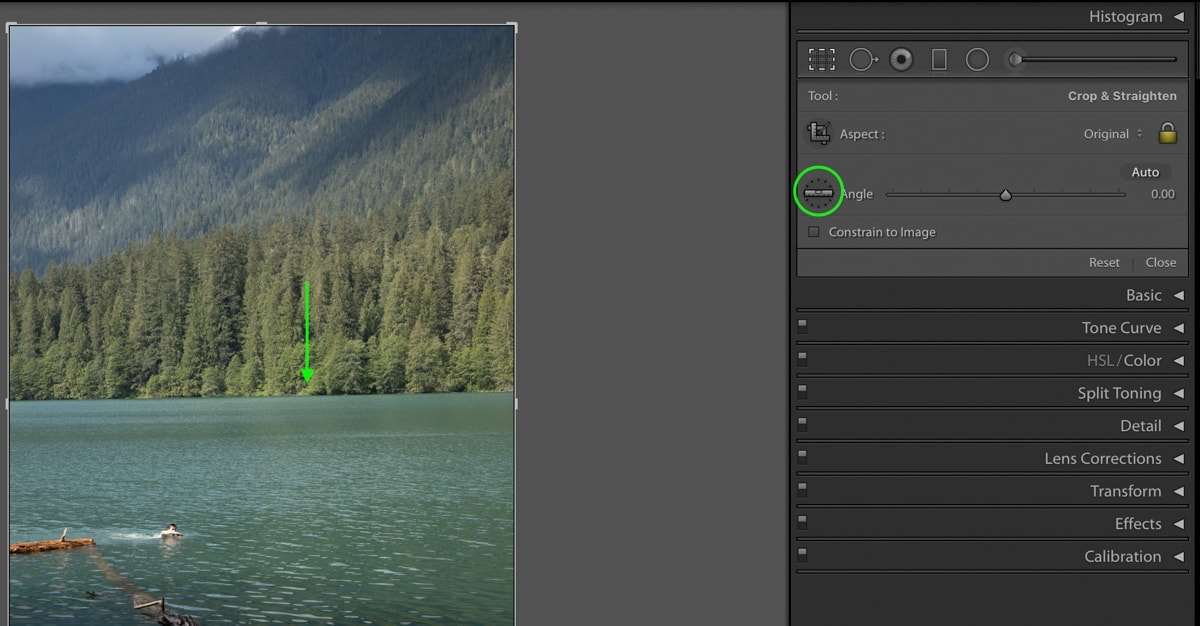
If you need to straighten your photo to a specific edge, try using the Straighten Tool instead.
To access this tool, click the ruler icon within the Crop Tool Panel.
Click and drag across an edge in your photo you want to align your crop with. Once you’re happy with the line, let go.
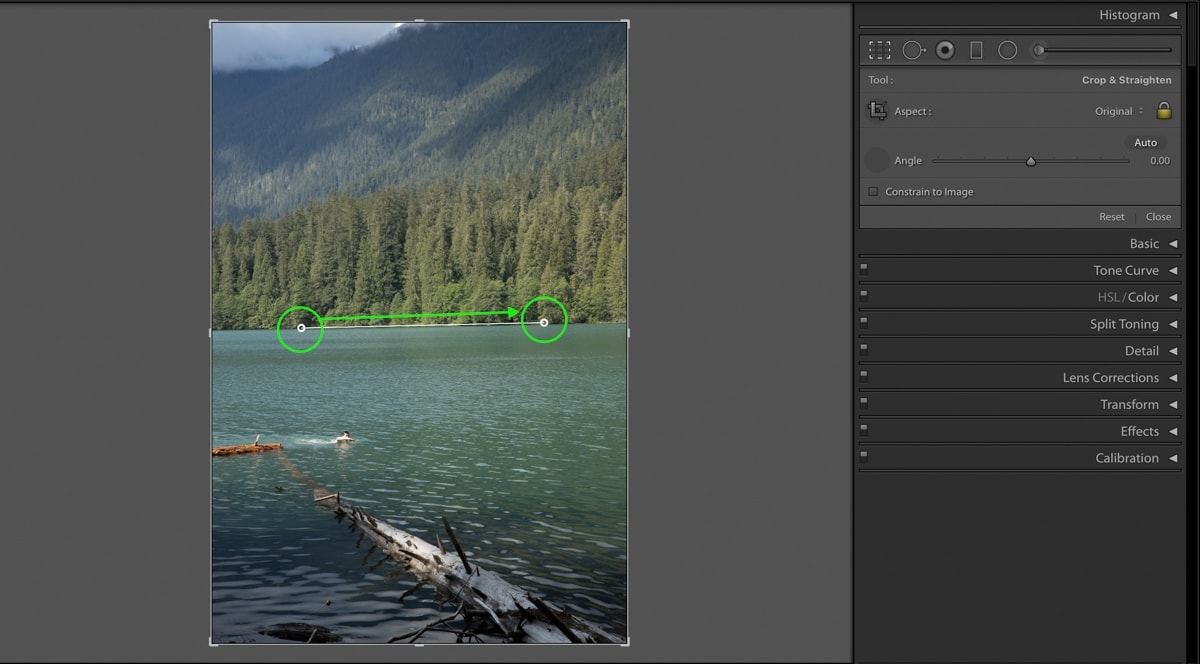
Lightroom will automatically rotate the crop of your photo to match the line you just drew. The straighten tool is one of the easiest ways to straighten your images in Lightroom!
Learn More: How To Crop And Straighten Photos In Lightroom
How To Rotate A Photo 180° In Lightroom
To rotate your photo 180°, select your desired photo in Lightroom and press Command or Control + ] or [ two times to rotate the image 180° left or right. Alternatively, go to Photo > Rotate Left or Rotate Right two times to rotate your selected image to the desired amount.
How To Flip A Photo In Lightroom
No matter how much you rotate an image, you won’t be able to flip it. That requires another set of steps to follow. Fortunately, these steps are extremely easy, and it only takes a couple of clicks. Here are the best ways to flip a photo in Lightroom in both the Library and Develop Modules.
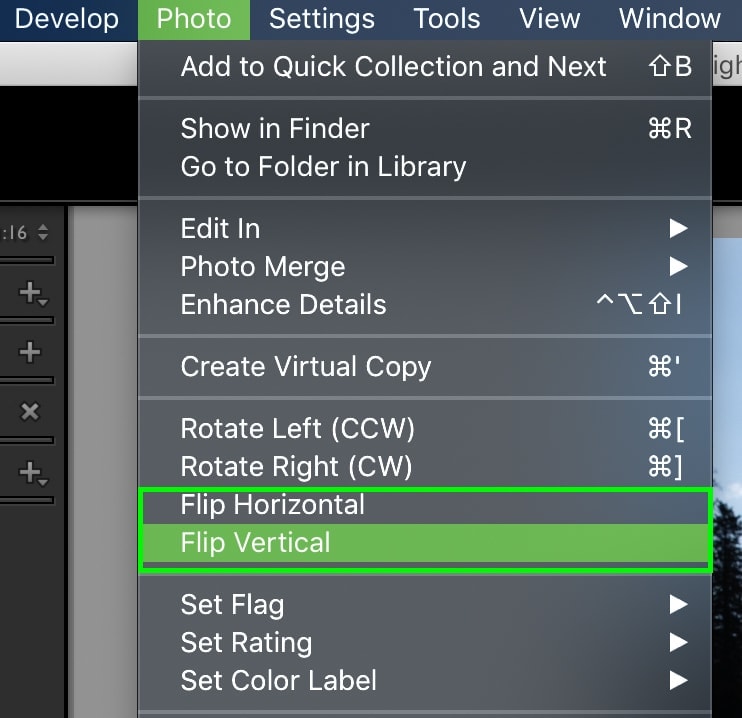
Option 1: Go To Photos > Flip Horizontal / Flip Vertical
Using the top menu bar is by far the easiest and most efficient way to flip a photo in Lightroom. The reason it’s so efficient is that it can be used across any module or view options. That way, you don’t need to remember a bunch of additional methods for varying scenarios.
Simply go up to Photos > Flip Horizontal / Flip Vertical.
Option 2: Right-Click > Transform > Flip Horizontal / Flip Vertical
The second way to flip a photo in Lightroom is with the right-click method. This method is equally effective but is limited to specific view modes and varies depending on the module you’re using.
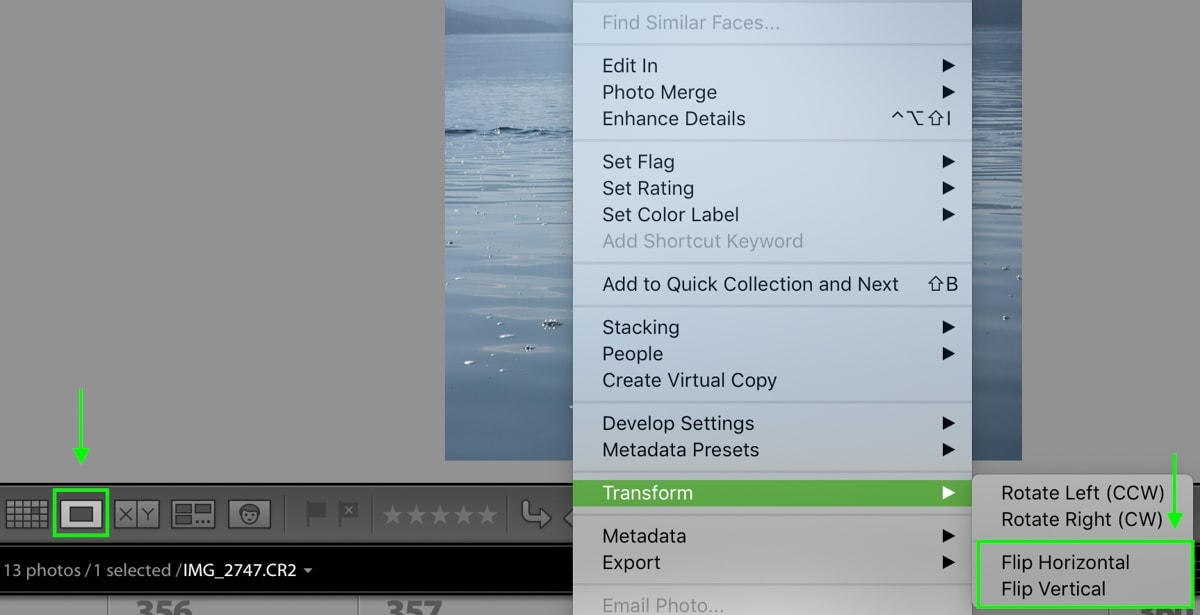
– In The Library Module
The only way you can flip a photo in this module using the right-click method is in Loupe View. While in Loupe View, right-click on your image and go to Transform > Flip Horizontal / Flip Vertical.
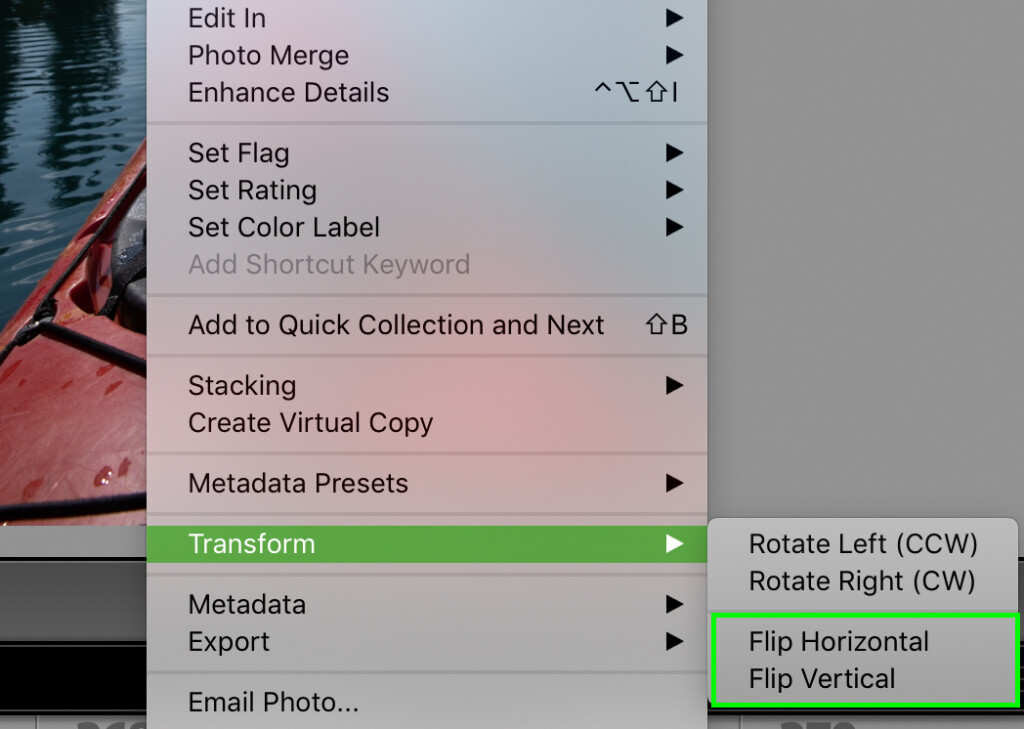
– In The Develop Module
You can flip an image while using the Develop Module by right-clicking on the photo and selecting Transform > Flip Horizontal / Flip Vertical. The bonus to this module is that this method will work regardless of what view option you’re using!
How To Flip Multiple Photos At Once In Lightroom
If you need to flip a series of photos at once, you can do that with either method discussed in the previous section. I tend to use method #1 as it’s always there and takes fewer clicks. Here’s how you can flip multiple photos at once:
First, you need to select multiple photos in either your grid view or filmstrip. You can do this by holding Shift and clicking a group of pictures or pressing Command/Control (Mac/PC) to select individual images.
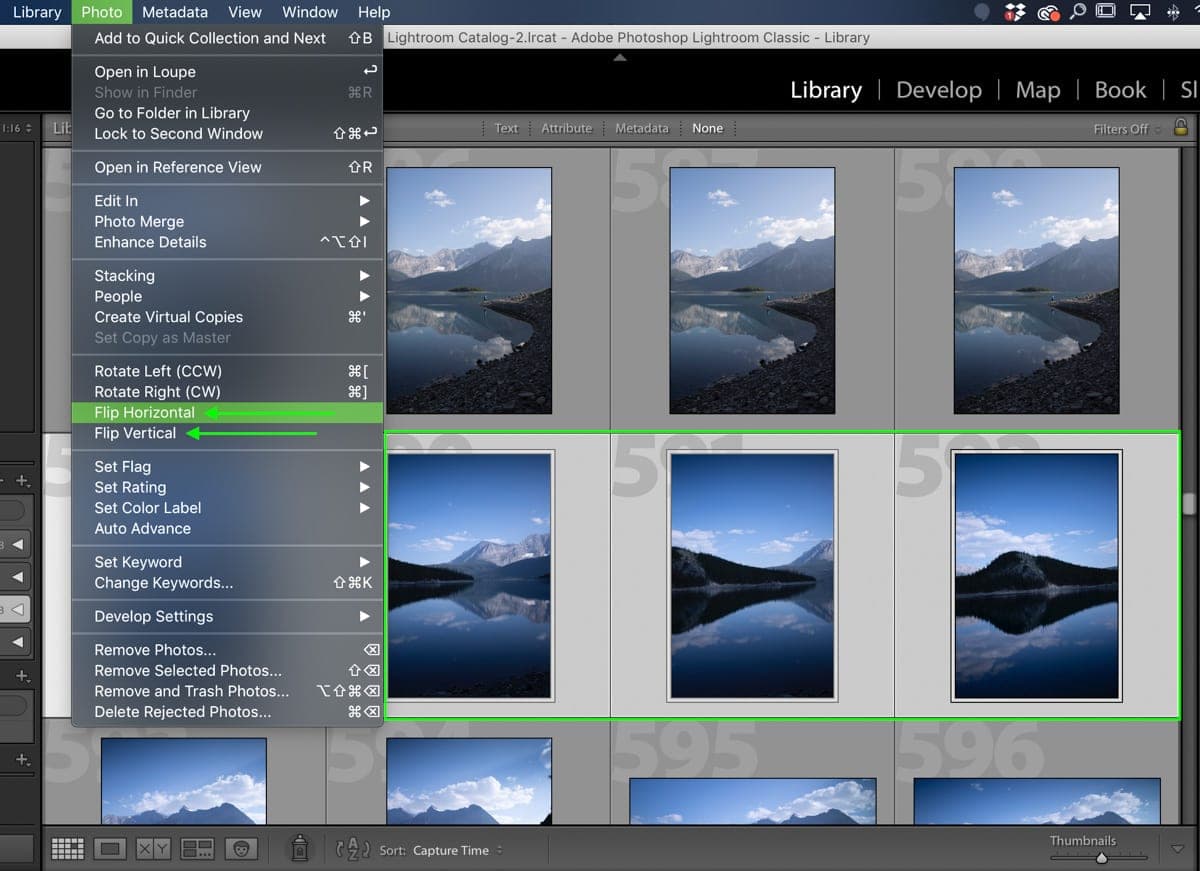
With all your desired images highlighted, go up to Photos > Flip Horizontal / Flip Vertical. The effect will be applied to all of your selected images.
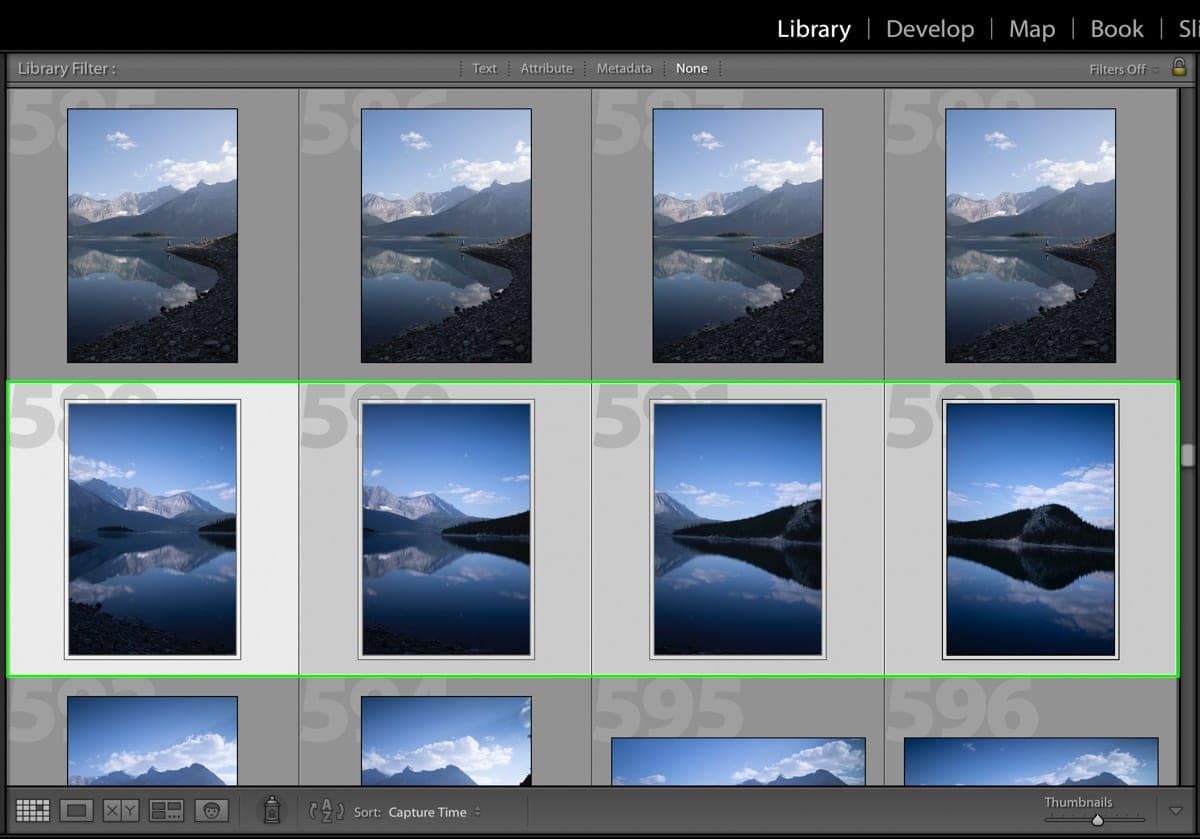
This is the fastest way to flip multiple photos at once without any unnecessary worry. It’s quick, to the point, and lets you move onto your next task faster!
There are a ton of different ways to rotate a photo in Lightroom. Depending on what module you’re using, the methods do change a little bit. Remembering the different rotate and flip options available is key to keep your workflow organized and be more efficient in Lightroom.
If you’re new to photo editing in Lightroom, check out my post on How To Edit Photos In Lightroom For Beginners!
