

Adobe’s Lightroom is an organizational workforce – and Quick Collections in Lightroom can help narrow images down much easier. However, these folders are unique compared to the software’s other collection options. Quick collections are temporary and best used for specific tasks.
These collections can be a valuable tool in your editing workflow, and with this short guide, I will help you make the most of them.
What Is A Quick Collection In Lightroom?
Generally speaking, the collection tools in Lightroom are a way to quickly and easily organize sets of images into dedicated folders.
Regular Collections is the folder system you know and love, much like your computer desktop. Smart Collections group images into folders based on the dedicated features you select. Quick Collections, however, are a bit different from the above.
Quick Collections are temporary – you can only have one Quick Collection at a time, and these collections are used in the process of working or editing. This type of Collections is intended to group images quickly for specific tasks. This explanation may be better expressed with an example such as the following.
Say you were doing a photo shoot that yielded about 600 images. The sunlight was inconsistent due to the weather, so some photos were nice and bright, and others came out very dark.
You can use Quick Collections to speedily group the pictures that were too dark so that you can batch edit their exposure. This would make life much easier than adjusting exposure one by one on each individual image, especially if you have 600 to go through.
The above is just one use of a Quick Collection. There are plenty of ways to implement this tool – all corresponding with easing your workflow as a photographer.
Where To Find A Quick Collection In Lightroom
The Quick Collection is located under the Catalog tab rather than the Collections tab you may expect it in.
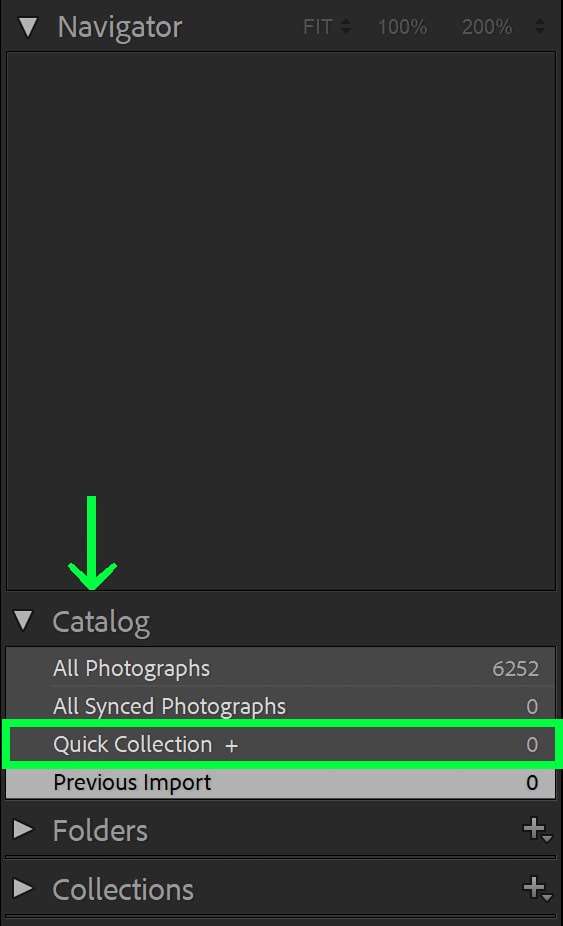
Because the collection is temporary, there was likely no reason to include it in the Collections tab, which could lead to confusion.
How To Add Images To A Quick Collection In Lightroom
You can add images to a Quick Collection in two ways: drag and drop or press B on your keyboard.
To drag and drop, select the image (or images) you want to move into a quick collection. Then hold down the left mouse key on a selected image and physically move the cursor across the screen into the Quick Collection.
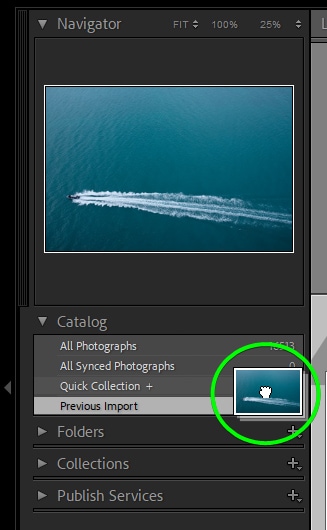
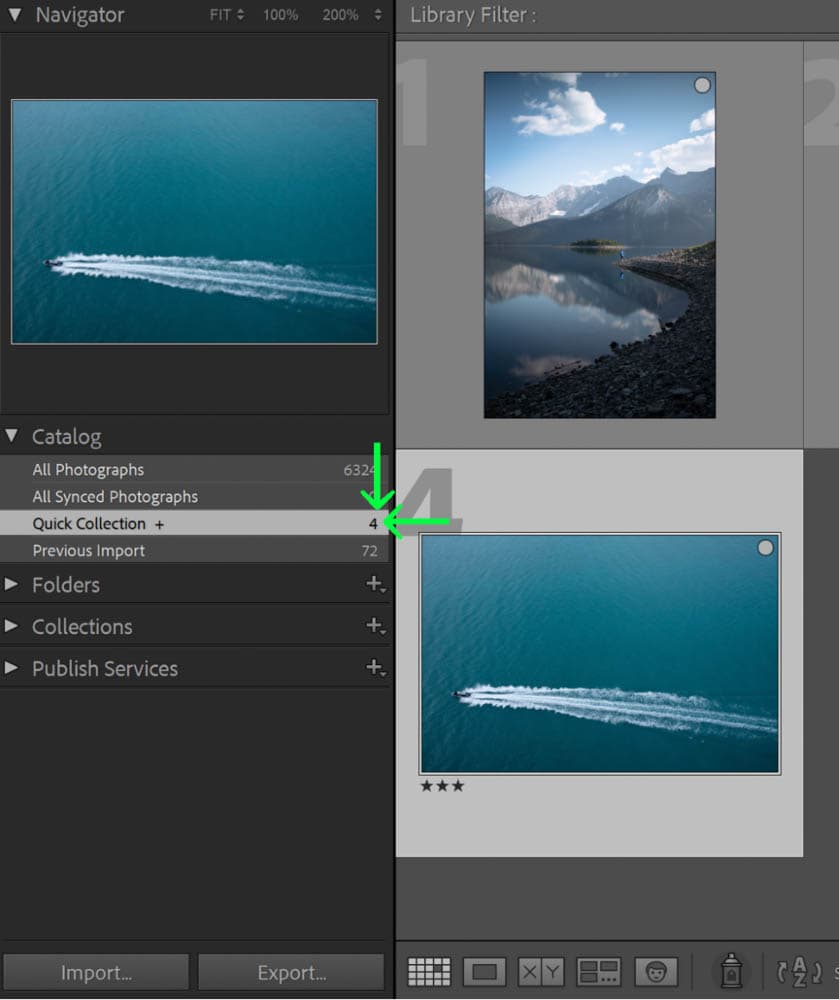
For a faster approach, select the image (or images) you want, then press B on your keyboard. This will automatically move the selected content into the Quick Collection. To remove the photo(s) from the Quick Collection, just tap B on them again.
If you want to see everything in a Quick Collection, you can use the keyboard shortcut Control + B (Win) or Command + B (Mac) to quickly take you to the Quick Collection so that you can see everything there. Pressing Control + B (Win) or Command + B (Mac) again will take you back to your previous screen.
To remove all the images in a Quick Collection, you can press Control + Shift + B (Win) or Command + Shift + B (Mac). It is suggested to clear Quick Collections whenever you are finished with the job you are using it for.
Tips For Using Quick Collections In Your Photo Editing
Although Quick Collections are versatile and intended for you to use as you see fit, here are three quick tips for making the most of this feature.
1. Quick Collection Usage Ideas
Here are three common uses for Quick Collections in the photography workflow to get those gears turning.
- Cull Images During A Shoot
Culling is likely the most intensive part of a photo shoot process, primarily because photographers tend to take a lot of photos! You can use a Quick Collection to rapidly select the images you plan to edit or show to a client.
Pressing B on images you like can be much speedier than deleting pictures you don’t like.
- Pick Out Images For A Specific Purpose Amongst Multiple Collections
If you find yourself with several collections of images but need to group specific ones together, you can use a Quick Collection to do so.
For example, say you are writing a blog post on dog action photography. You can look through your various dog shoot collections and quickly mark the action shots. Then you can easily export those specific images rather than going through each collection individually.
- Temporarily Store Images For Exporting
Suppose you need to export a specific set of images to someone. In that case, you can use a Quick Collection to rapidly group these images so that all you need to do is use Control + A (Win) or Command + A (Mac) to select everything in the folder and then export them as a batch. Of course, easier than selecting each image one by one for exporting.
2. It Is Possible To Convert A Quick Collection Into A Regular Collection
If you find that you may need the Quick Collection to become a more permanent collection, you can easily convert it into a Regular Collection.
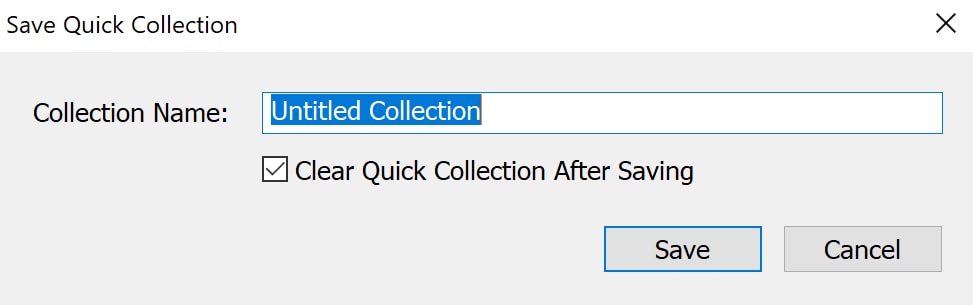
All you have to do is Right-click (Win) or Control + Click (Mac) to bring up the Save Quick Collection option, or press Control + Alt + B (Win) or Command + Option + B (Mac) when viewing the Quick Collection.
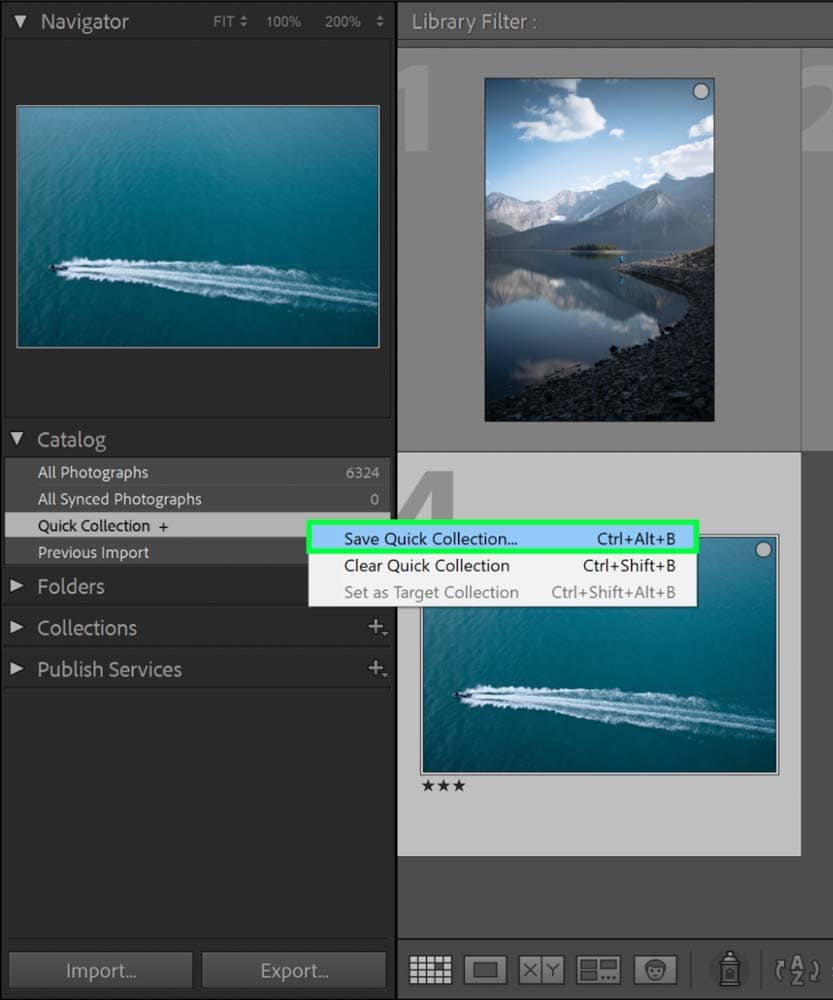
You will then be prompted to name the Regular Collection, which will appear in the Collections tab.
3. You Can Set A Regular Collection To Behave Like A Quick Collection
The ease of a Quick Collection is the ability to press B on your keyboard to add images to it. Believe it or not, you can actually temporarily convert a Regular Collection to behave the same way. You do this by setting the Regular Collection as a Target Collection.
Just hover over the Regular Collection you want to convert into a Target Collection and press Right-click (Win) or Control + Click (Mac) and click on Set as Target Collection.
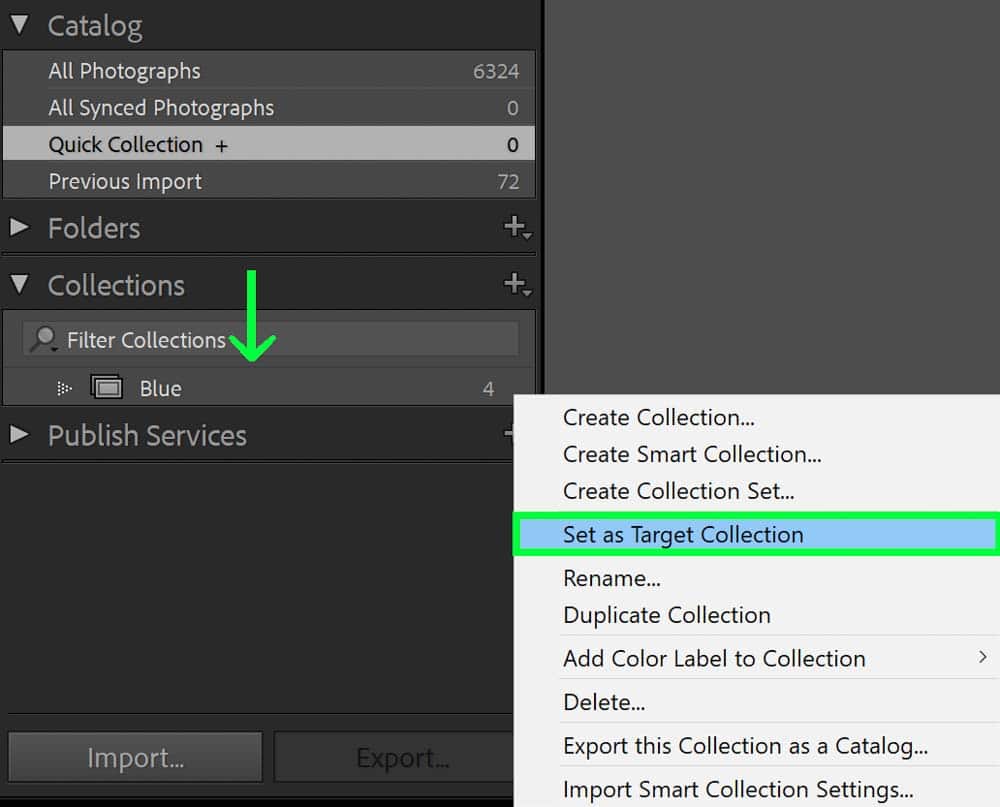
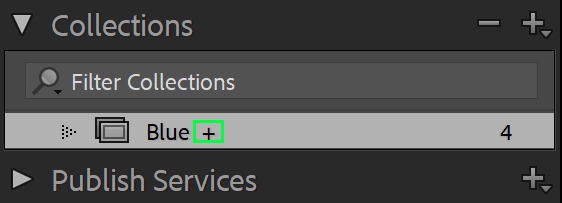
A small plus (+) icon will appear next to the collection to indicate it is a target. You can now add images to it quickly by pressing B, just like a Quick Collection.
Learning to use Quick Collections in Lightroom is just one of the many pieces that fit into your organizational workflow in Lightroom. To learn more about staying organized in Lightroom, see my guide to sorting images in Lightroom here.
