
You can create and use Collections in Lightroom to help organize your immense library of photos. Collections are very useful for keeping specific photographs in one place for easy access, rather than having to sift through the entire Catalog.
With three different types of Collections to utilize, organizing your images for whatever current project you’re working on is very much possible. Let’s do a deep dive into Collections and see how useful this tool is for your workflow.
Why Use Collections In Lightroom?
Collections are a great organizational tool in Lightroom because it allows you to group selected photos in a single place. You can make as many Collections as your heart desires.
Collections are very useful for a variety of circumstances, and you can adapt this organizational tool to fit your needs.
As an example, you can use Collections to segment a photo shoot into the images you wish to edit or images that might need extra editing. Collections are often implemented by wedding photographers to organize images from an event into the ceremony, reception, details, and newlywed portraits (each with their own collection).
If you’re prepping a portfolio gallery with just photographs of flowers, you can select all of the various flower photographs you’ve taken over the years in your Catalog and move them all to one particular Collection for easy access. This saves you time in sifting through the Catalog.
You can also use Collections to create a slideshow, contact sheet, or a web photo gallery directly in the Lightroom application itself.
Types Of Collections In Lightroom
Lightroom has three different types of Collections, each with its own general purpose.
1. Regular Collections
Regular Collections are simply a grouping of selected photographs. Regular Collections are created manually, so you have to pick the images you want to add yourself.
2. Smart Collections
Smart Collections automate the image grouping process. You set a rule or series of rules for the collection to follow, and it will automatically put those photos into the Smart Collection.
For example, you can tell your Smart Collection to group all photographs that have both a five-star rating and a yellow color label on them. Whenever you go through your image grid library, if you add both a five-star rating and a yellow color label to a photograph, it will automatically appear in the Smart Collection.
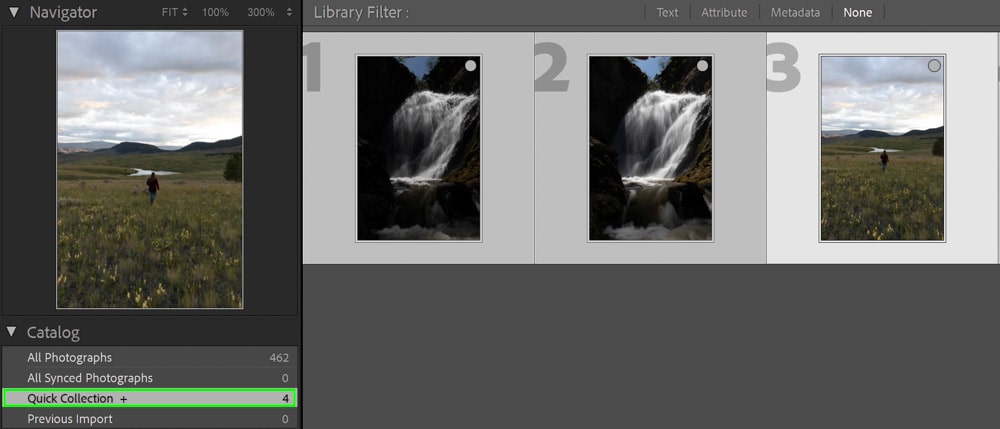
3. Quick Collections
Unlike Regular Collections and Smart Collections, a Quick Collection is “temporary”, so to speak. Its use is to quickly group photographs together for specific tasks. You can only have one Quick Collection at a time, and this collection type tends to be implemented while editing or working on a particular job.
For example, say you’re editing a portrait session. The sun kept peeking in and out of the clouds, so your exposure kept changing from normal to dark. You can use a Quick Collection to group all of the darkly exposed images and then batch process them all to be lighter and match the normal exposure.
Quick Collections are located under the Catalog tab rather than the Collections tab.
How To Create And Use A Collection In Lightroom
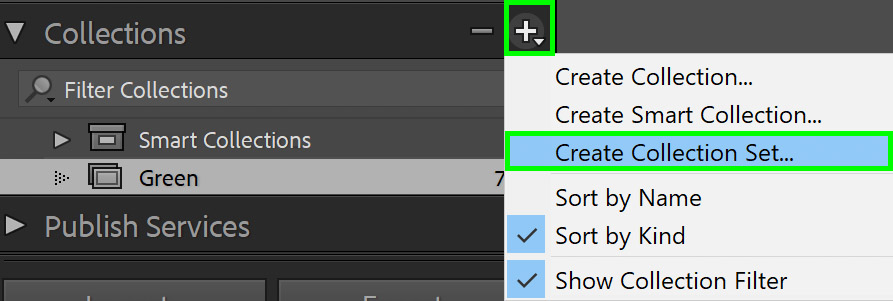
To create a new collection in Lightroom, locate the Collections Panel and click the + icon. From the menu that appears, choose Create Collection, Create Smart Collections, or Create Collection Set. To add images to a collection, select your desired photos and drag and drop them into the collection.
Let’s take a more detailed view of this process.
In any module (whether it be Library, Develop, etc.), locate the Collections tab on the left-hand side of your screen.
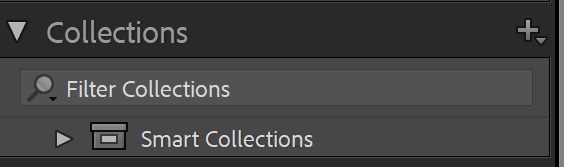
The panel may be closed, so hit the arrow to open it up.

In order to make a new Collection, click the plus icon. This will bring down a menu from which you can make your selection.
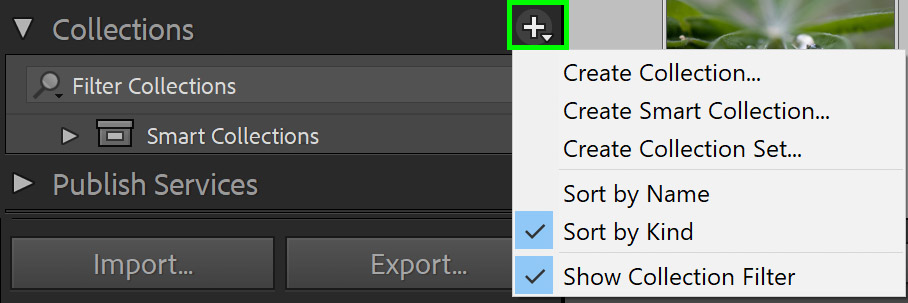
If you select Create Collection, a new menu will open asking for Collection settings. Input the name and mark the options as you see fit.
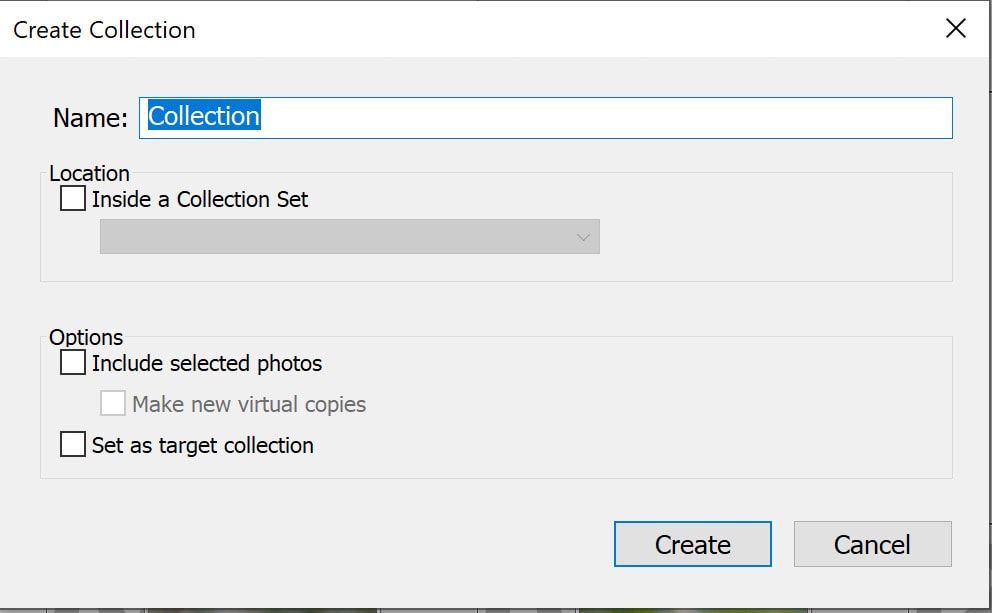
If you did not have the photos already marked to move into the Collection, you can drag and drop them.

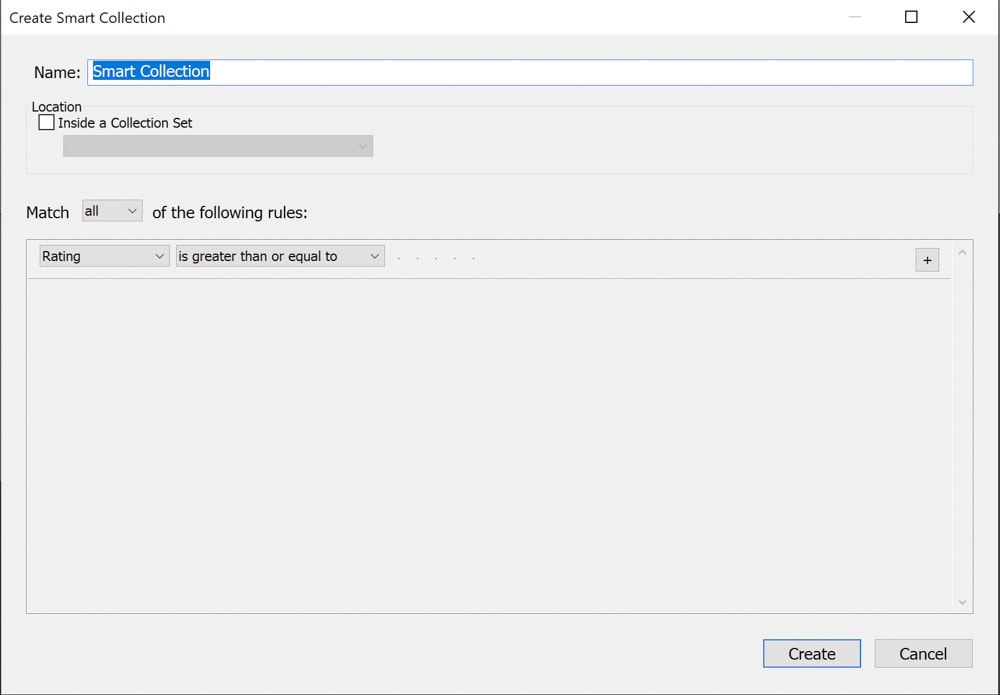
If you select Create Smart Collection, a more advanced menu will appear, prompting you to select the rules for the Smart Collection.
Making A Collection Set
Another option you will find in the dropdown menu is Collection Sets. You can use a Collection Set to group various collections together (for example, you can do a Collection Set called “dogs” and, within it, have various Collections such as “border collie”, “German shepherd”, and so forth).
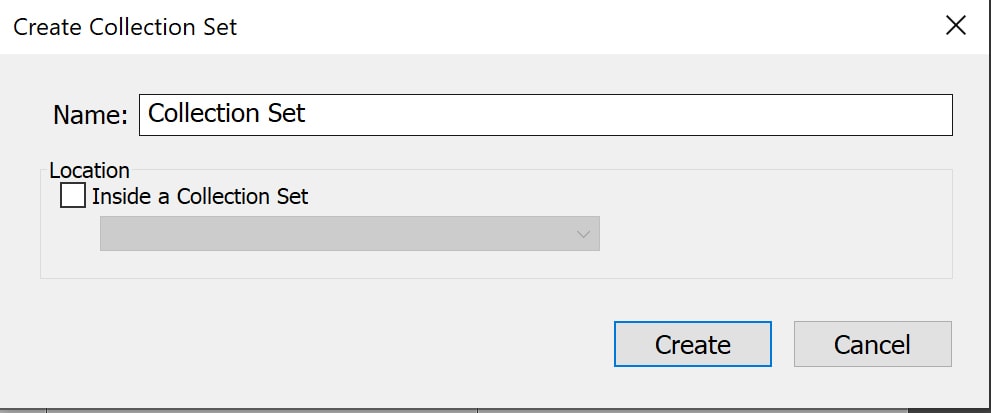
This just further helps organize all of your collections together, kind of like the folder structure on the computer.
Setting A Target Collection
Lightroom does have a less-known nifty trick in its Collections features called Target Collection. As the name implies, you can mark or “target” a Regular Collection to behave similarly to a Quick Collection. The Target Collection will override a Quick Collection and allow you to add all of your marked photographs directly to it by pressing B on images in either the Library module or Develop module.
Just note that a Collection Set cannot be a target; only a Collection can.
To set a target on a collection, right-click (Windows) or control + click (Mac) on the desired collection and click Set As Target Collection.
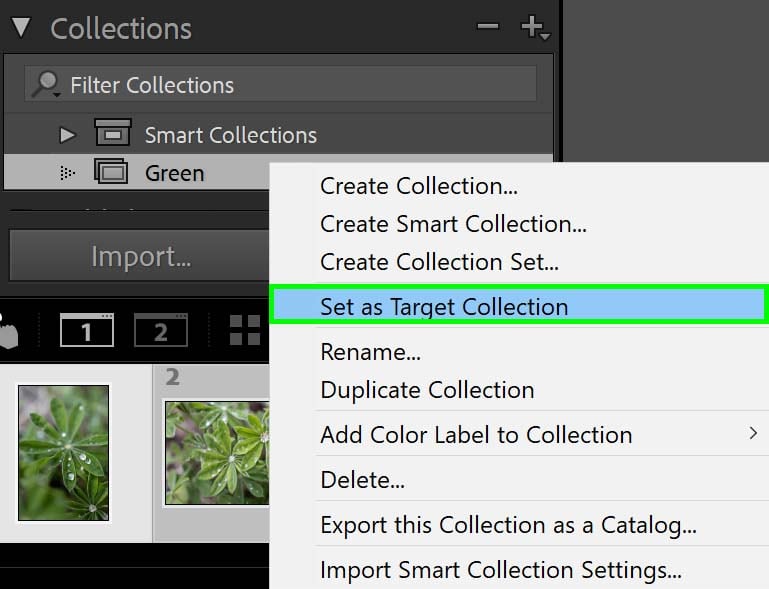
The collection will then have a little plus icon on it to indicate that it has been targeted.

To remove the collection as being a target collection, simply repeat the above steps and deselect the Set As Target Collection option.
Adding Color Labels To Collections
If you find yourself with many collections, it can be helpful to add a color label to them. You can use the color label to visually find collections or to use the Filter Collections option to quickly find labeled collections.
To add a color label, right-click (Windows) or control + click (Mac) on the desired collection and click Add Color Label to Collection.
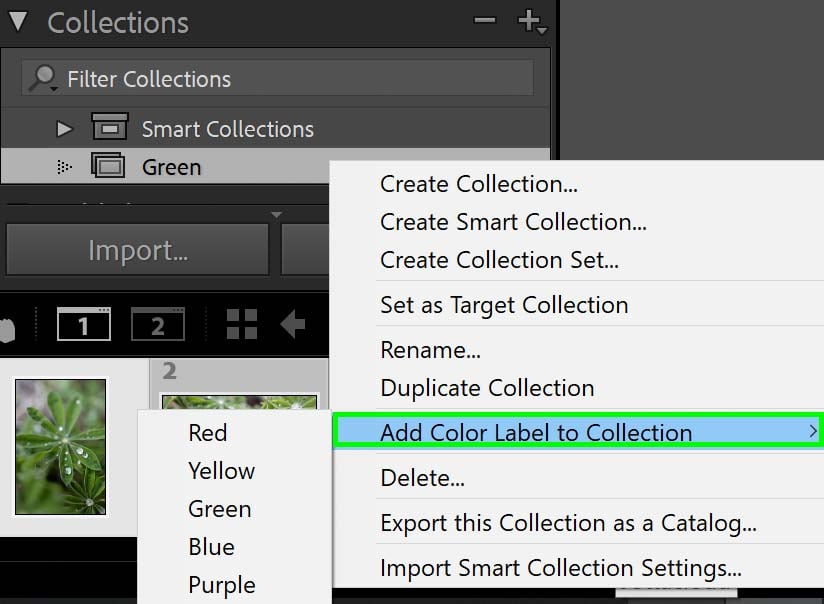
Select your color, and that’s it! Repeat this to take the label off as well.

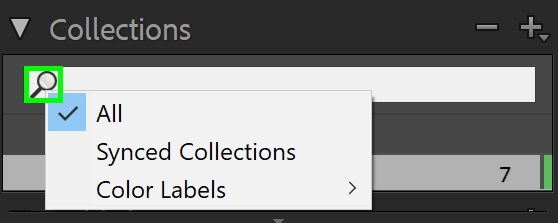
Filtering Collections
You can search through your Collections using the Filter Collections search bar.
You can either type the Collection name into the panel or select the magnifying glass to have further filtering options. This is where you can search by the color label as well.
Collections VS Folders VS Catalogs – What’s The Difference?
The Catalog simply links to your photographs. The Catalog will show you a preview of your folder structure and photos, and memorize all of the editing and metadata adjustments you do on the photos. This also means that if you delete an image from the Catalog, it will vanish from Lightroom.
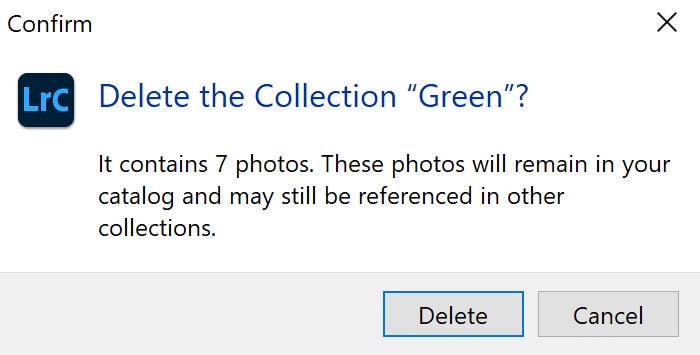
Moving or deleting photographs in Collections won’t have a permanent impact on Lightroom: you’ll still be able to find images removed from a collection intact in the Catalog. Once more, this is because the Catalog is a direct link to the images on your hard drive, while a Collection simply groups photos already inside a catalog separate from their image folders.
Folders in the Library Module simply mirror the same exact folders on your hard drive. When you import images to your Catalog, the folder in which they live will appear as well. That’s why having a good organizational structure on your hard drive is important. That being said, Folders do impact your photos on the hard drive, unlike the Catalog (which won’t change the files themselves) and Collections.
The changes you make to Folders in Lightroom will be reflected on your hard drive. For example, if you make a new Folder, you will see this folder physically created on your hard drive.
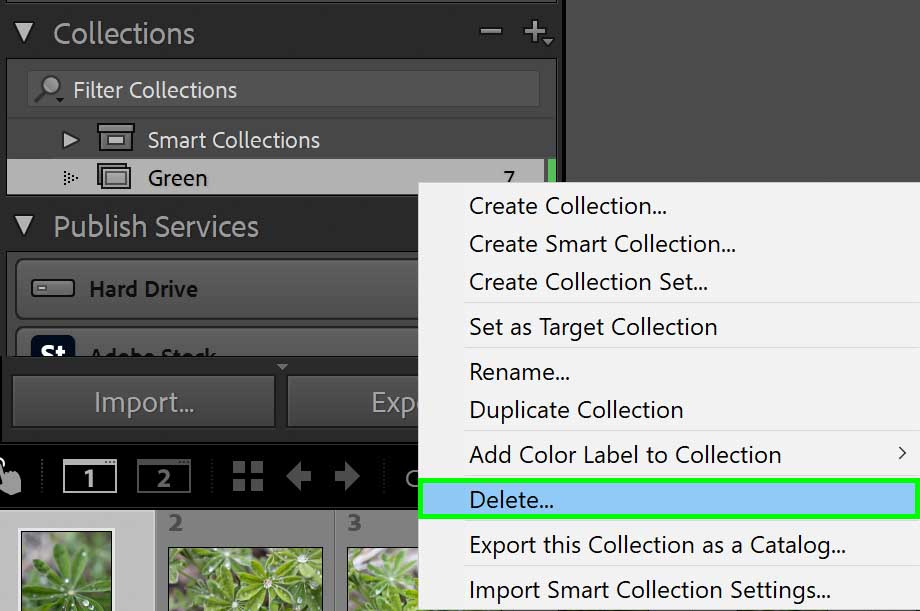
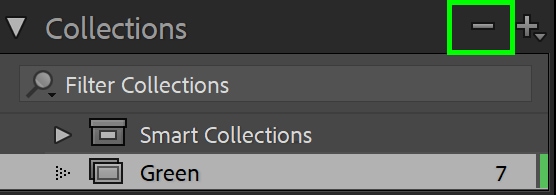
How To Delete A Collection From Lightroom
To delete a collection, click on the collection in your Collections panel. Then, click the minus icon.
A message will appear asking if you’re sure that you want to delete the collection.
Alternatively, you can right-click (Windows) or control + click (Mac) on the desired collection and choose Delete.