

Smart filters give you a wider range of editing options. Ultimately, smart filters provide flexibility to your editing workflow because you can always go back and edit them at a later stage. However, you may be missing out on some valuable features if you don’t know how to use them to their full potential.
So, to help you make the most of this nifty tool, this complete guide will share everything you need to know about using smart filters in Photoshop!
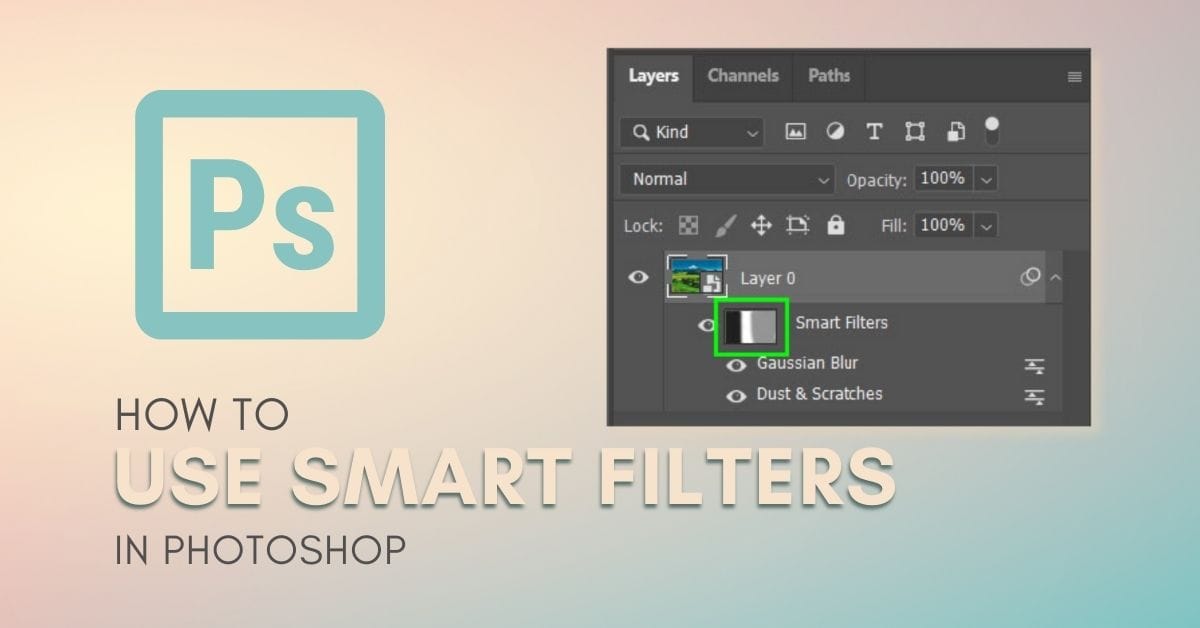
What Is A Smart Filter In Photoshop?
Filters are layers that you can add over your original image to change the appearance of the photo. A Smart Filter is any Photoshop filter placed over a smart object instead of a regular layer. While your image will still be altered similarly, smart filters allow you to edit the filter after it’s applied.
Smart filters are more beneficial than regular filters as they offer more flexibility in editing. You can stack smart filters together, move the filter layer order around, and duplicate the filters easily. They allow you to navigate back to them later in the project and re-edit them, making them a non-destructive method of editing your image. You can easily delete a smart filter if you change your mind.
While smart filters offer several benefits there are a few drawbacks. Since you need to create a smart object before being able to apply a smart filter, your project will be limited by this. When using a smart object you can’t use editing tools that alter the pixels of the layer directly such as the cloning, burning, dodging, or brush tool. To use these tools, you must convert the smart object to a rasterized layer. Smart objects also increase the file size of your project.
How To Use Smart Filters In Photoshop
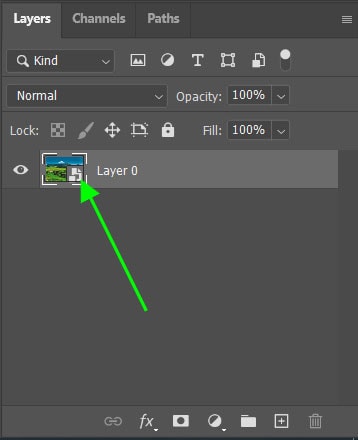
Step 1: Convert Your Layer To A Smart Object By Right Clicking On Your Selected Layer
First, ensure that the layer with your image is selected. Then, right-click on your image layer and select Convert to Smart Object. Now your image is converted to a smart object as you can see by the icon in the bottom right corner of the thumbnail.
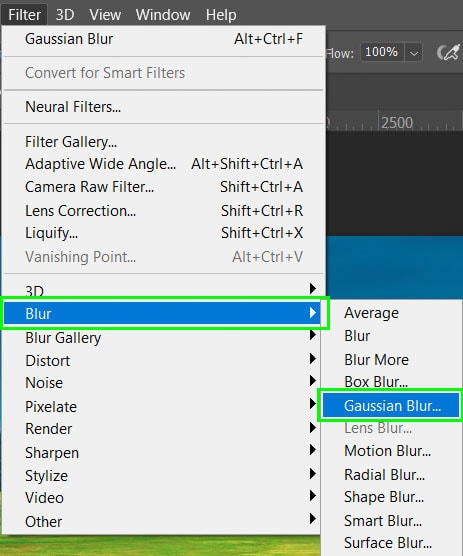
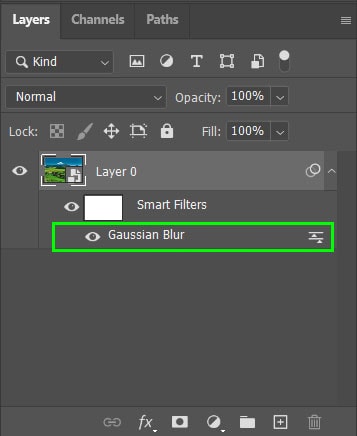
Step 2: Add A Smart Filter By Opening The Filter Menu
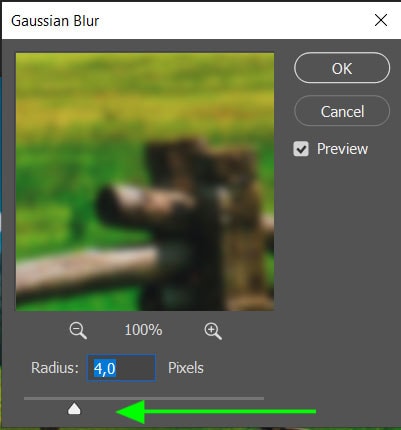
You can now add any smart filter you would like to your image, let’s try the blur filter. To do this, select Filter > Blur > Gaussian Blur. You can then adjust and apply the filter by sliding the radius slider before clicking “OK”. Since you can always come back to the adjustments window, you don’t have to worry about it too much at this stage.
Once the filter has been applied, a new sub-layer will appear underneath your smart object. When adding new filters, they will appear in a list here and can be edited at any time.
Step 3: Double Click On the Smart Filter Name To Re-Adjust The Original Settings Of Your Smart Filter
To re-edit a smart filter after it’s applied, double-click on its name. The adjustments window will open once more, and you can readjust the settings. Once you click “OK”, the changes will be applied. Since smart filters are non-destructive, the settings will be updated to replace the original ones.
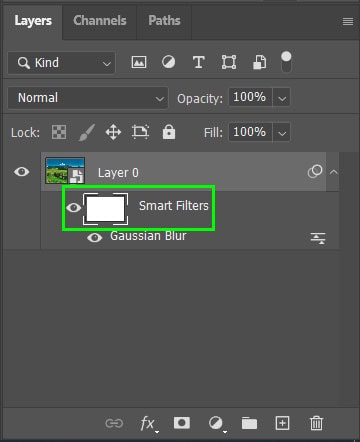
Step 4: Editing The Smart Filter Layer Mask
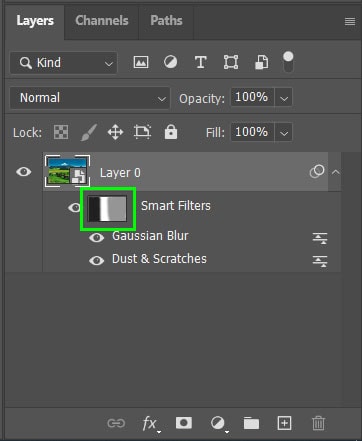
Smart filters automatically have a layer mask applied to them. To edit the smart filter layer mask, click on the white block next to the name Smart Filters to select it. You will notice a border around it to let you know it has been selected.
Next, select the Brush Tool from your toolbar or press B on your keyboard. This allows you to use a brush on the layer mask to paint over the areas where you want to hide the filter effects.
How To Copy & Paste Smart Filters To Another Project
Step 1: Hold Alt/Option While Clicking The Smart Filter To Duplicate The Smart Filter
To duplicate the smart filter, hold down Alt (Win) or Option (Mac) while clicking on the smart filter and dragging it to where you want to duplicate it. If you have another smart object in your Layers Panel, you can drop the smart filter on the thumbnail to add it to the layer.

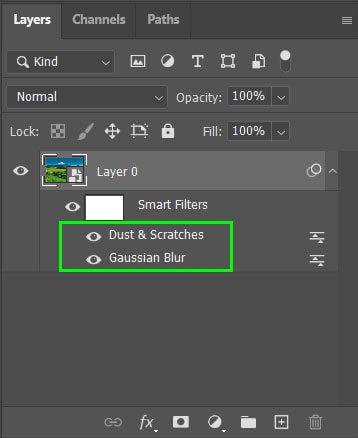
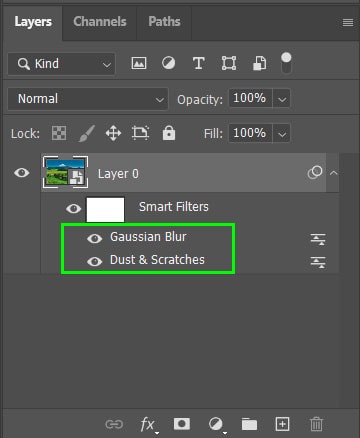
Step 2: Change The Order Of The Smart Filters By Dragging And Dropping
If you have applied more than one smart filter, you can change the order of the filters before or after you duplicate them. This is important as the layers on top of others are visible over the bottom layers.
To move a smart filter, click and hold on the smart filter and drag it to the desired position before releasing it.
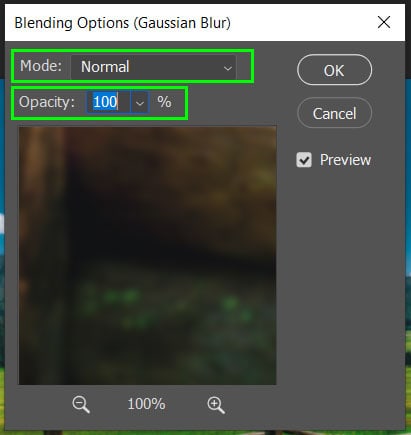
How To Change Smart Filters Blend Mode & Opacity
The blend mode will alter how the filter blends in with the smart object’s original contents, and the opacity affects how strong or weak the filter should be over the original layer.
To change these two elements, double-click on the slider icon at the right of the smart filter that has been applied. This will open up the Blending Options window. Select the drop-down menu next to “Mode” to choose a blending mode. Otherwise, choose a percentage next to “Opacity” to reduce or increase the strength of the filter.
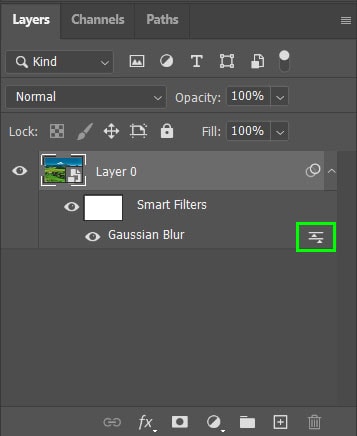
These two adjustments will only affect the filter applied to the smart object. This is different from the opacity and blend mode options found at the top of the Layers panel. The layer panel options will alter the entire layer as it interacts with the layer below.
How To Delete Smart Filters From A Layer
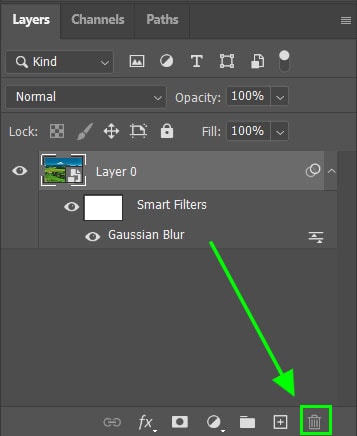
Click and hold on the smart filter you would like to delete and drag it down to the bin icon at the bottom of the Layers panel. Release the mouse once it is hovering over the bin.
Instead of deleting, you can turn a smart filter on or off by clicking the eyeball icon beside the Smart Filters layer mask. If you want to hide only individual filters, click the eyeball icon beside the desired smart filter.
How To Use The Smart Filter Mask In Photoshop
The mask on the smart filter lets you edit specific areas of your image. This is helpful if you only want your smart filter applied to your subject or the background, for example.
To edit areas of the smart filter, select the Brush Tool by pressing B on your keyboard, then choose the color you would like to use on your toolbar. The color you paint on the mask will determine how your smart filter is affected:
Black: Is transparent and will hide any smart filter adjustments you paint over.
White: Is visible and reveals any smart filter adjustments you paint over.
Grey: Hides or reveals the original layer with some degree of transparency.
The smart filter mask will show the areas that have been painted over with the various colors. You can see this in the thumbnail next to the layer mask section.
It is important to note that smart filter layer masks will apply to all the smart filters added to the smart object. When you use the brush tool to edit areas, it will mask all of the smart filters that are applied to the smart object. There is no way to apply a layer mask to individual smart filters.
Happy Editing!
