

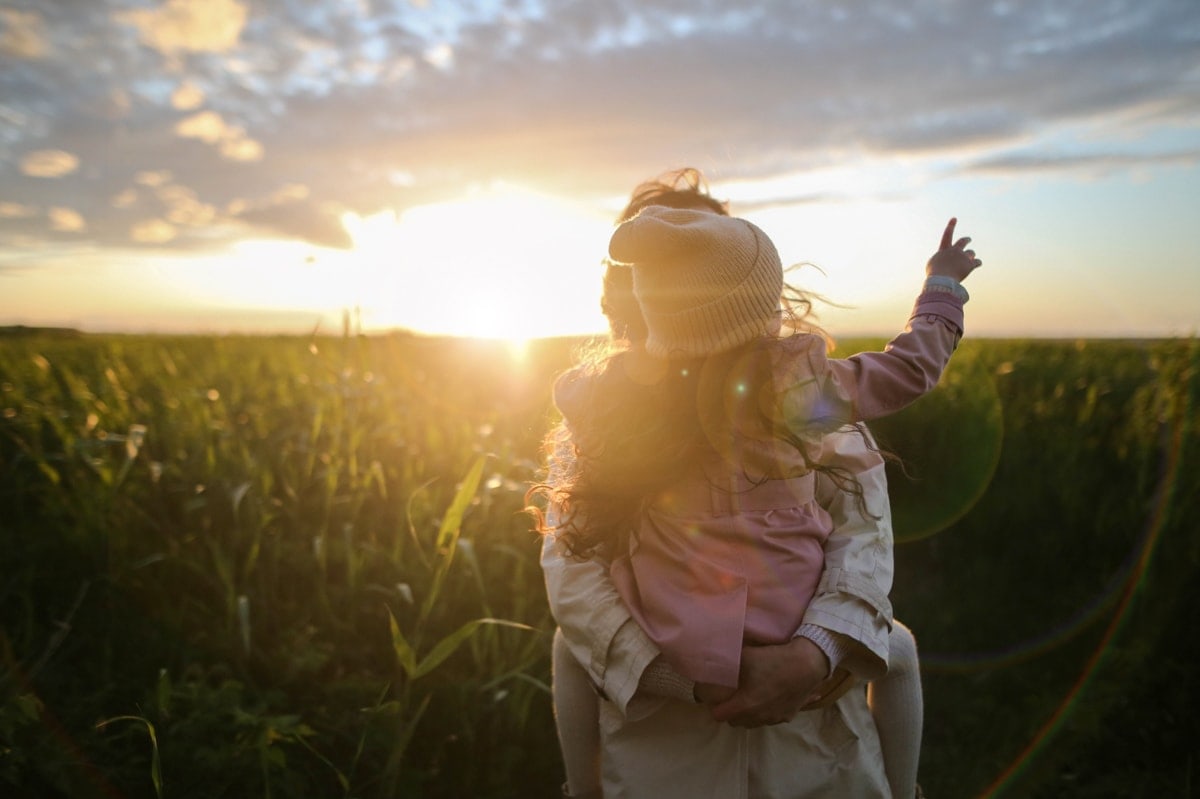
Knowing how to add a lens flare in Photoshop can create more dimension and transform the feel of your photo. The process is quick and easy, but it takes a few extra steps to get the effect just right.
In this tutorial, you’ll learn an effective way to create a lens flare that allows you to adjust the flare to perfectly suit your image. It’s straightforward, and even those new to Photoshop can follow along.


How To Create A Lens Flare In Photoshop
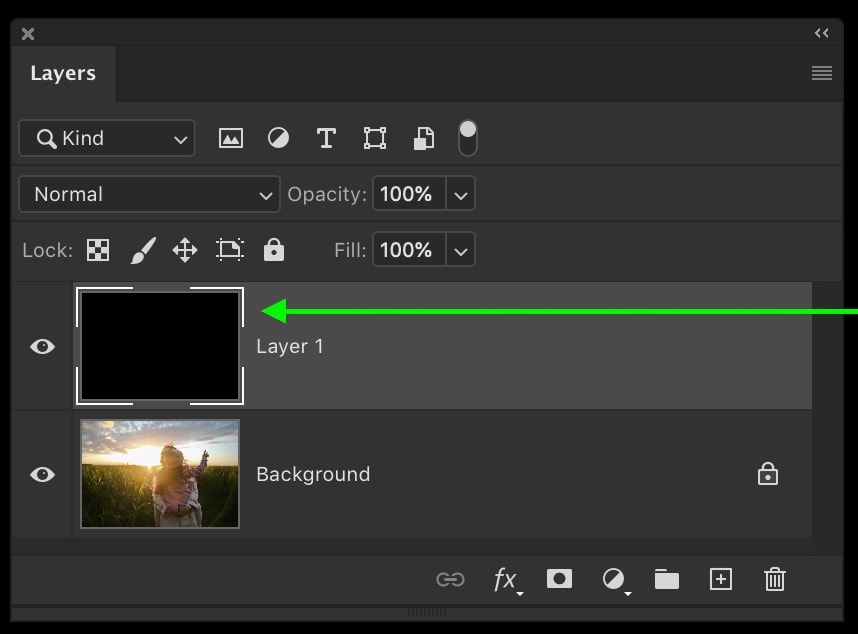
Step 1: Create A New Layer And Press X, Then Alt/Option + Delete
Create a new layer and place it above your image. To fill the layer with black, press X to set your foreground color to black. Then press Alt + Delete (Win) or Option + Delete (Mac) to fill your layer with the foreground color. Now, you will have a completely black layer.

Step 2: Go To Filter > Render > Lens Flare And Adjust The Settings
With this layer selected, go up to Filter > Render > Lens Flare.

In the lens flare dialogue box are a few different options to help you customize the flare. You can choose between a few different types of flares by clicking on any of the options. Additionally, you can change the brightness of the flare using the brightness slider.
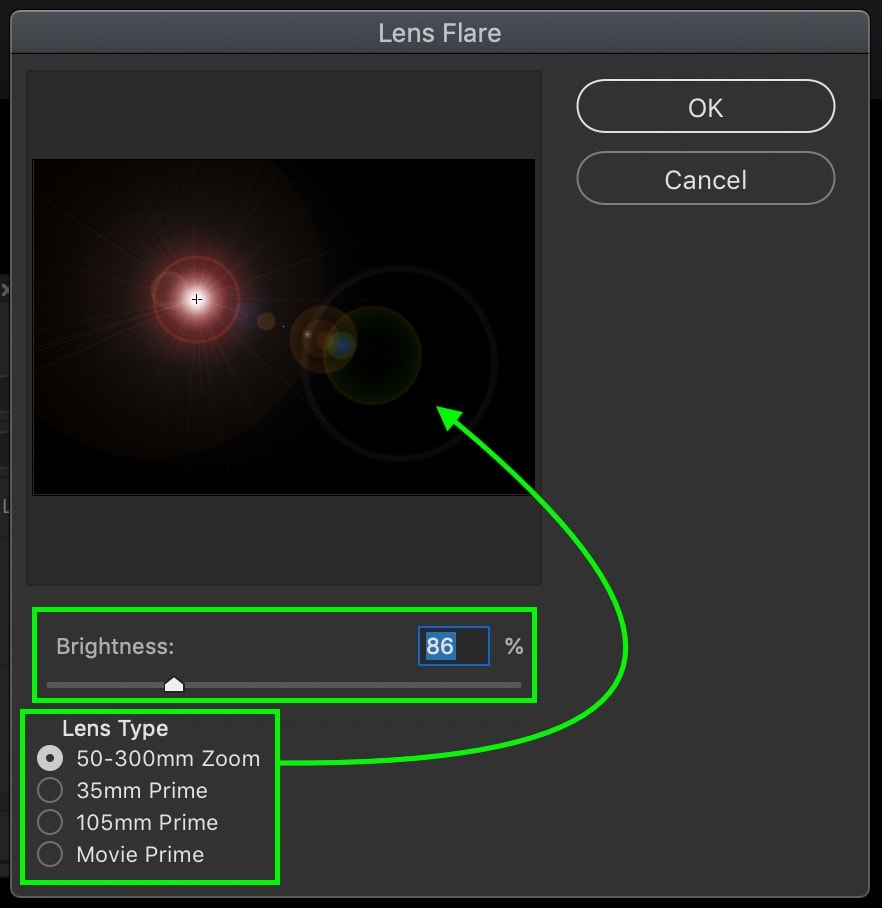
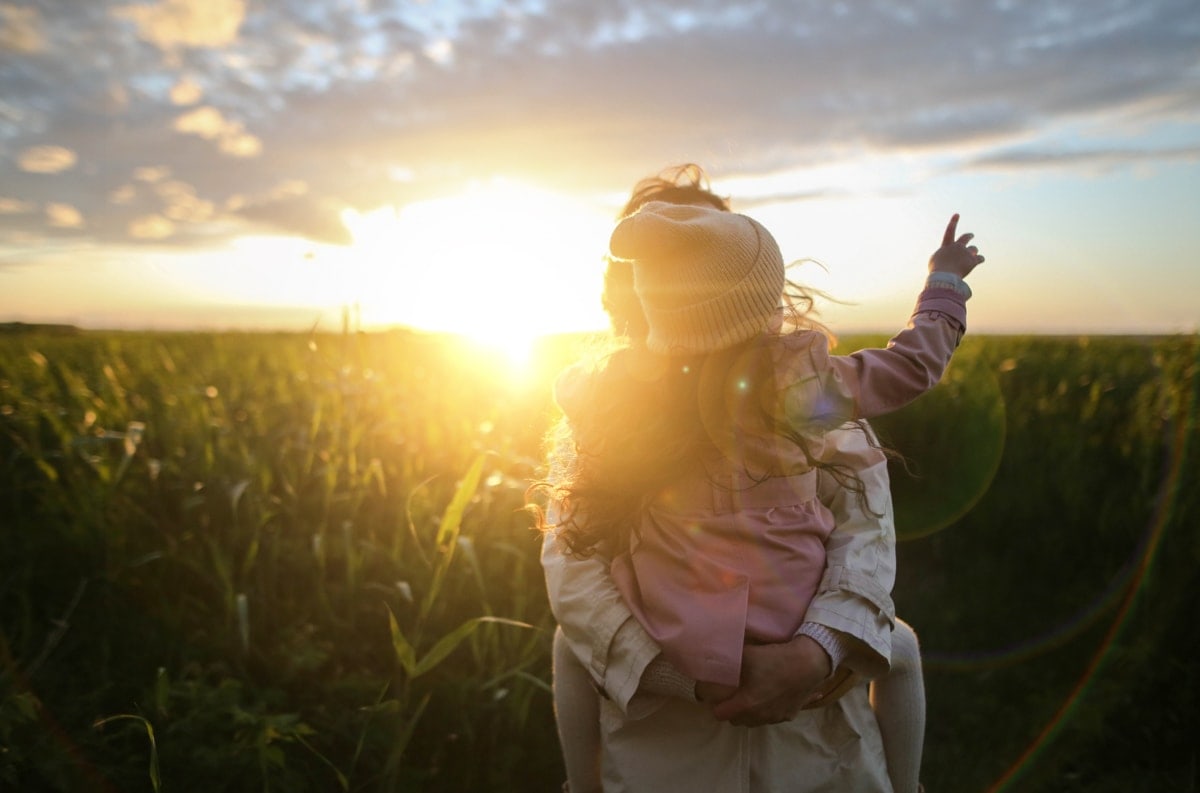
Besides look adjustments, you can also change the actual position of your lens flare. Click on the flare and reposition it to the same location as the main light source in your image. Once you’re happy, click OK.
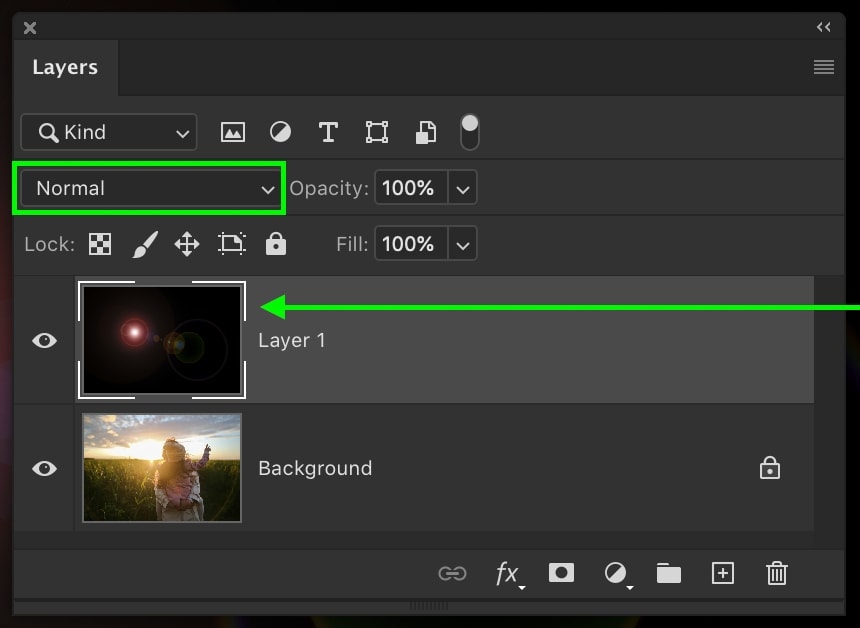
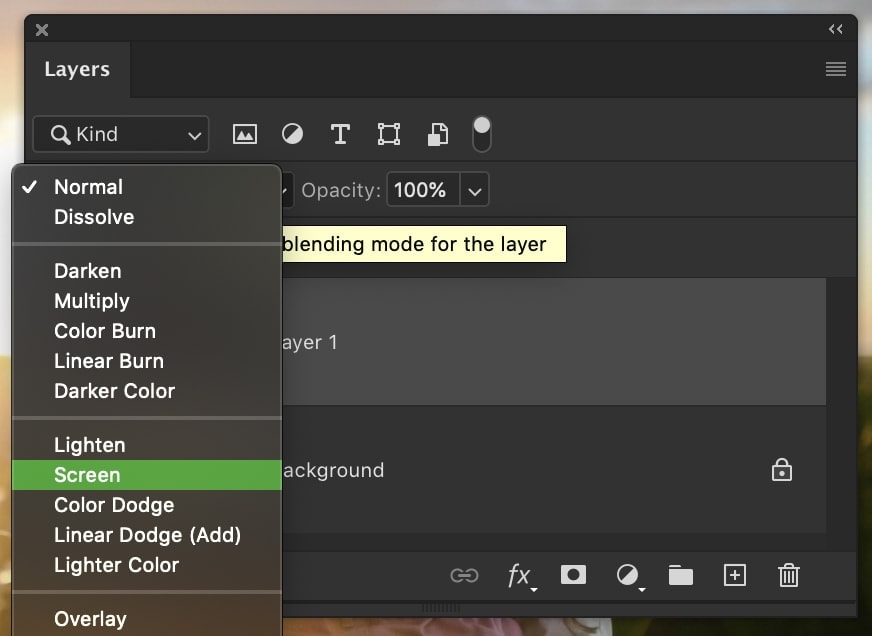
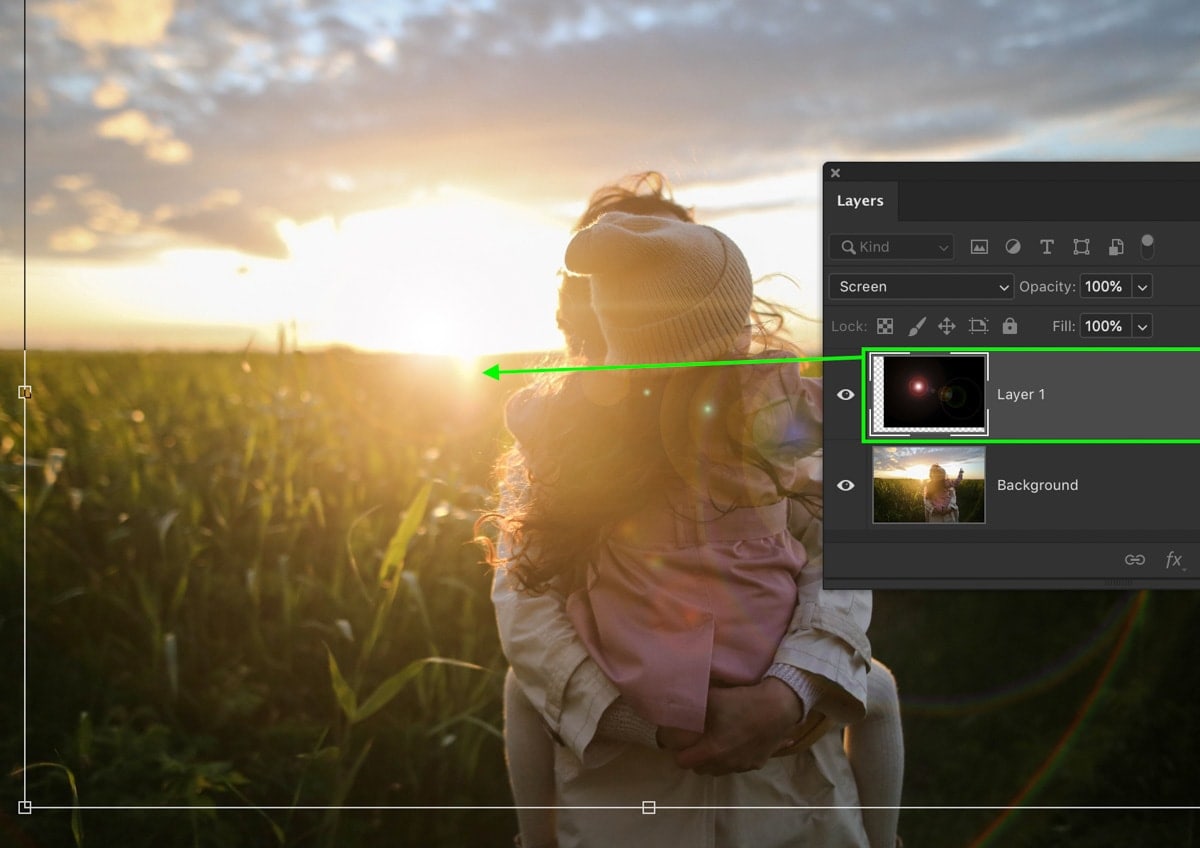
Step 3: Change The Layer’s Blend Mode To Screen
Now, you need to get rid of your black background by changing your layer blending mode from Normal to Screen. This blend mode makes all the black in your layer completely transparent.
Step 4: Move The Lens Flare Using The Move Tool (Optional)
Now, you have a lens flare ready for action on its very own layer. Grab your Move Tool by pressing V. Then, click and drag the layer to reposition the lens flare as necessary.
Step 5: Go To Filter > Blur > Gaussian Blur (Optional)
A lens flare in Photoshop can look unnaturally sharp. To help make it blend into your image more, add a slight blur. With your lens flare layer selected, go up to Filter > Blur > Gaussian Blur.
Set your blur radius to something conservative. You don’t want to go overboard with this, or you run the risk of making it look even more unnatural. I’ll set my blur radius to 2.5 pixels.
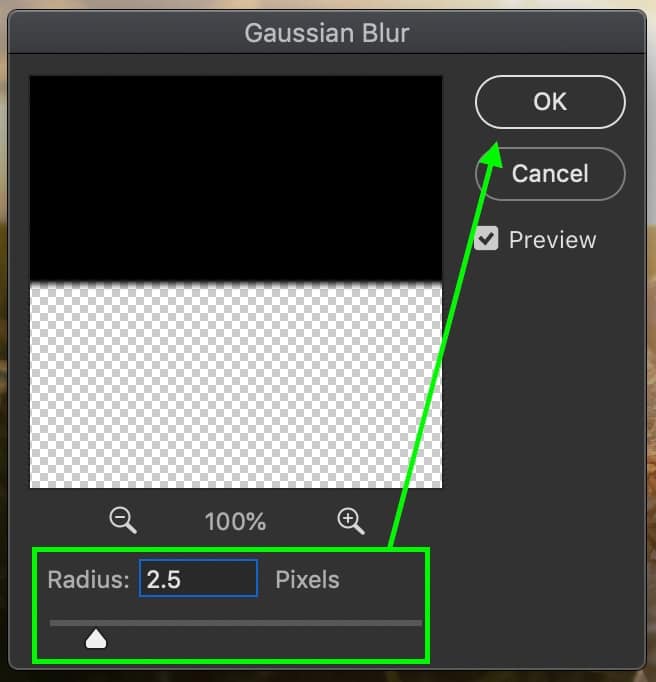
Click OK to commit to your changes. Now, with a slight blur, your lens flare is looking more realistic.
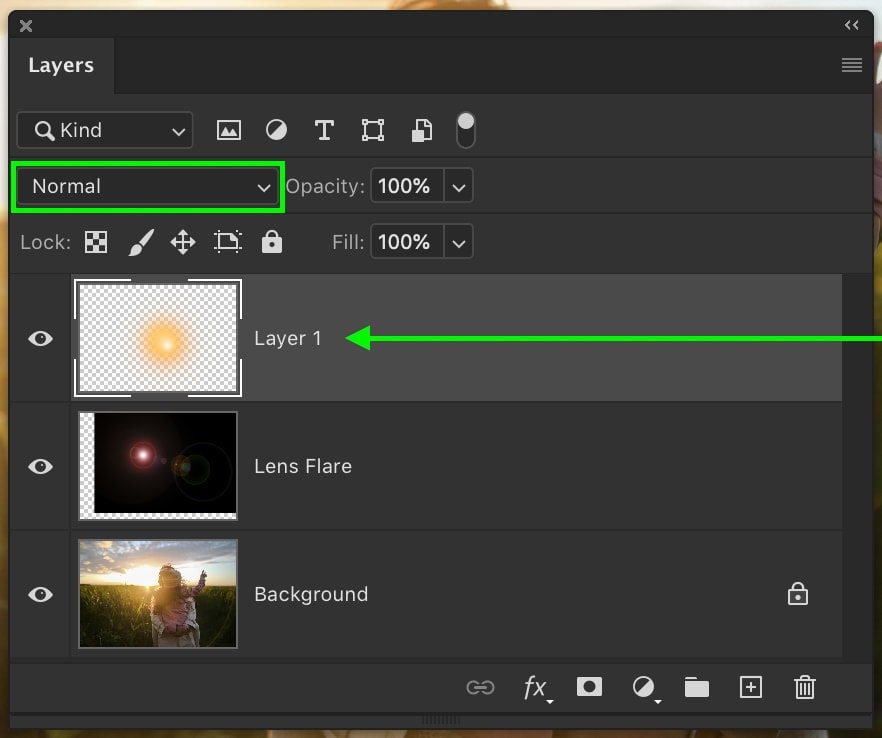
Step 6: Add A Sun Glow To Your Lens Flare (Optional)
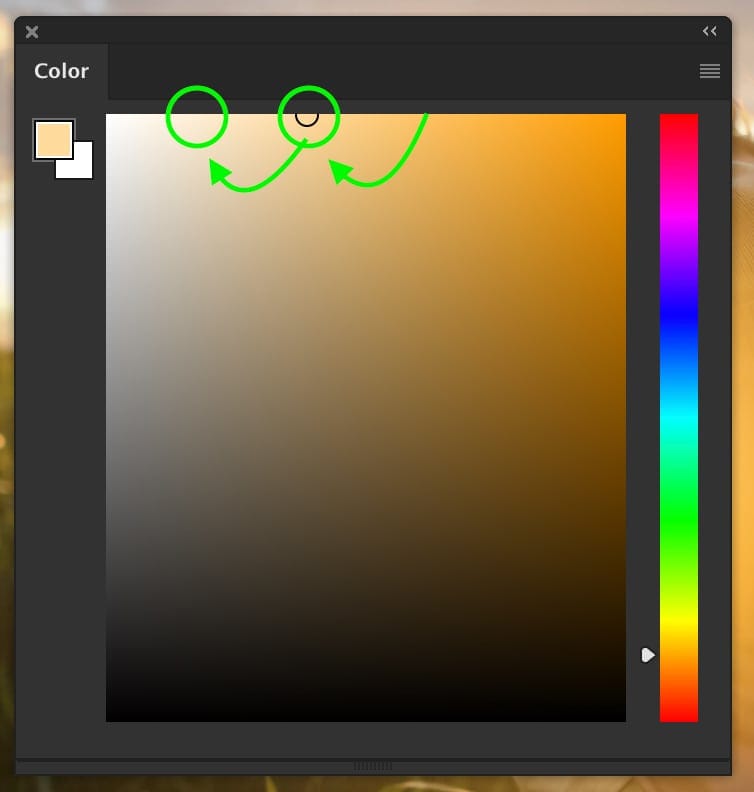
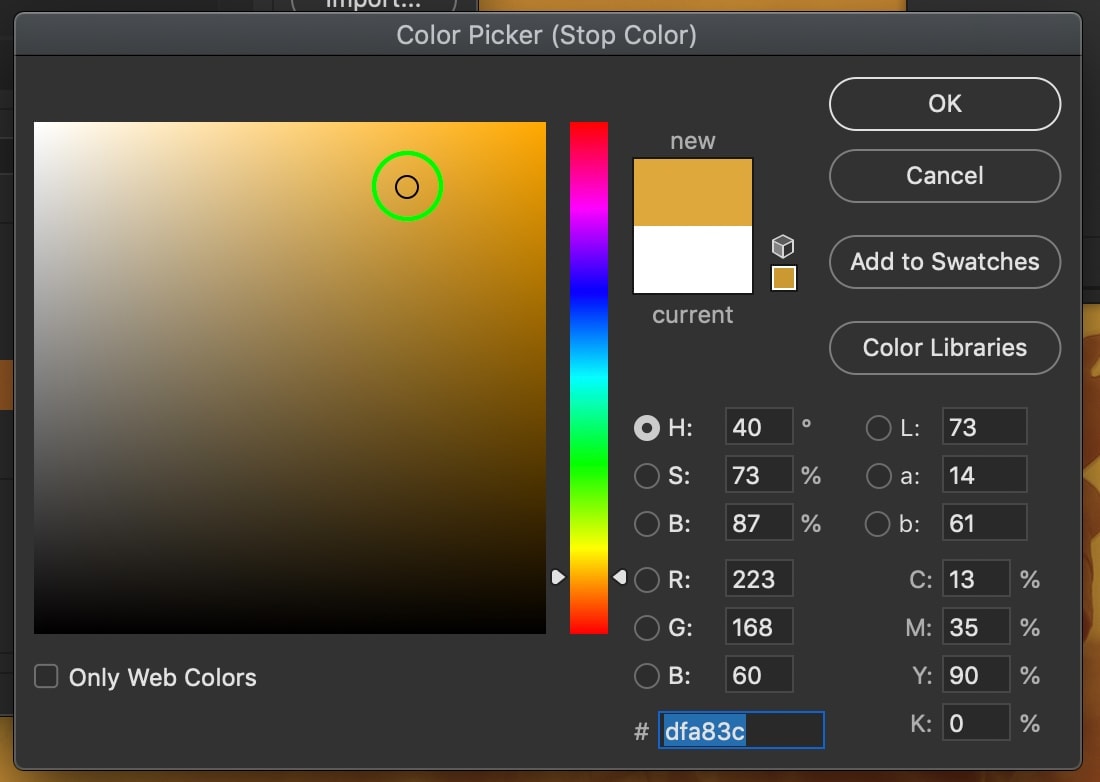
Grab your Brush Tool by pressing B and create a large brush at 0% hardness. Go to your color palette and select a deep orange color to match the light of a sunset. Create a new layer and click once in the center of your image.
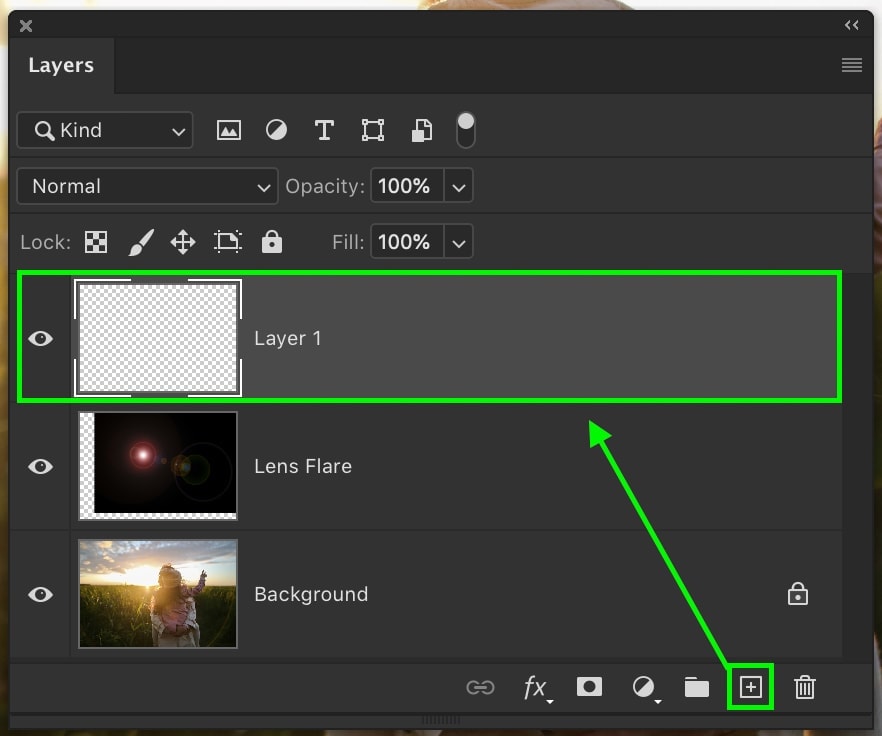
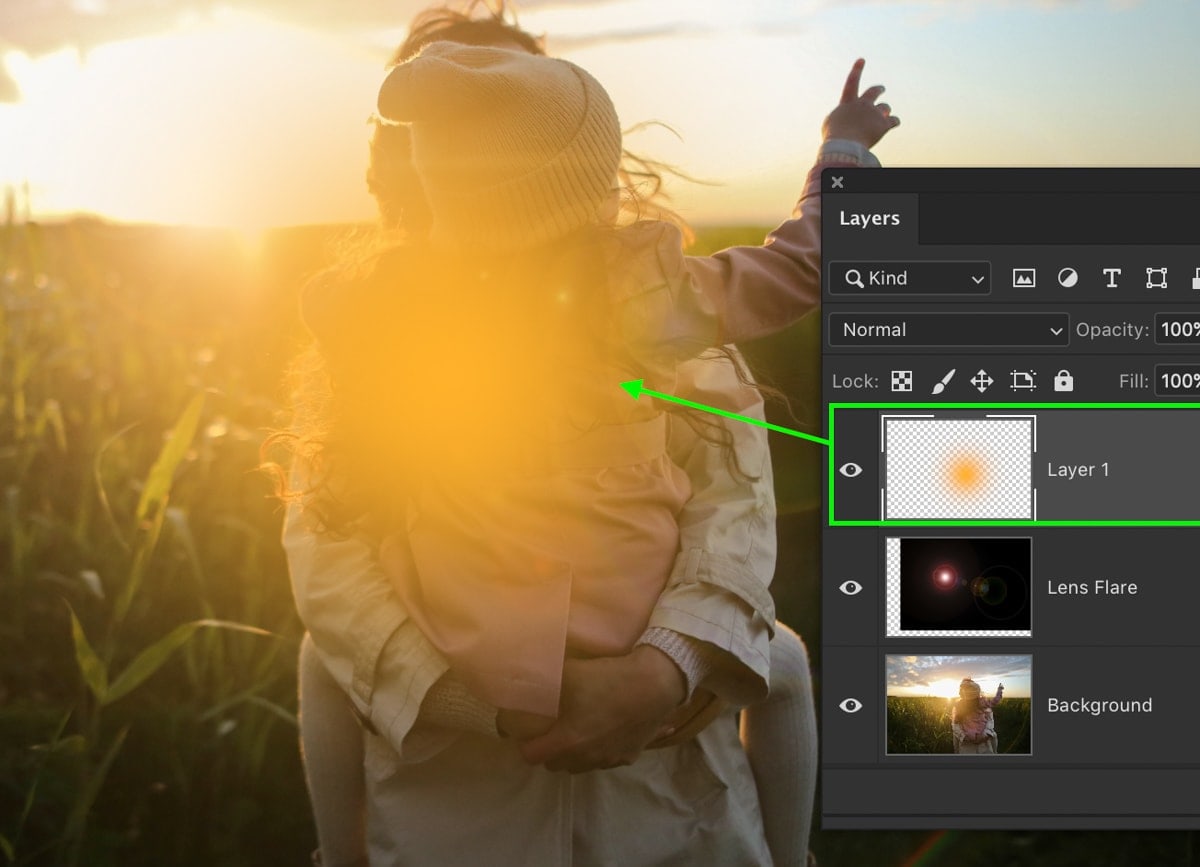
Go back up to your color palette and choose a slightly lighter orange color. Reduce your brush size by using the [ or ] keys and add a smaller dot within your first one. Rinse and repeat this process until you have a few different layers of color.

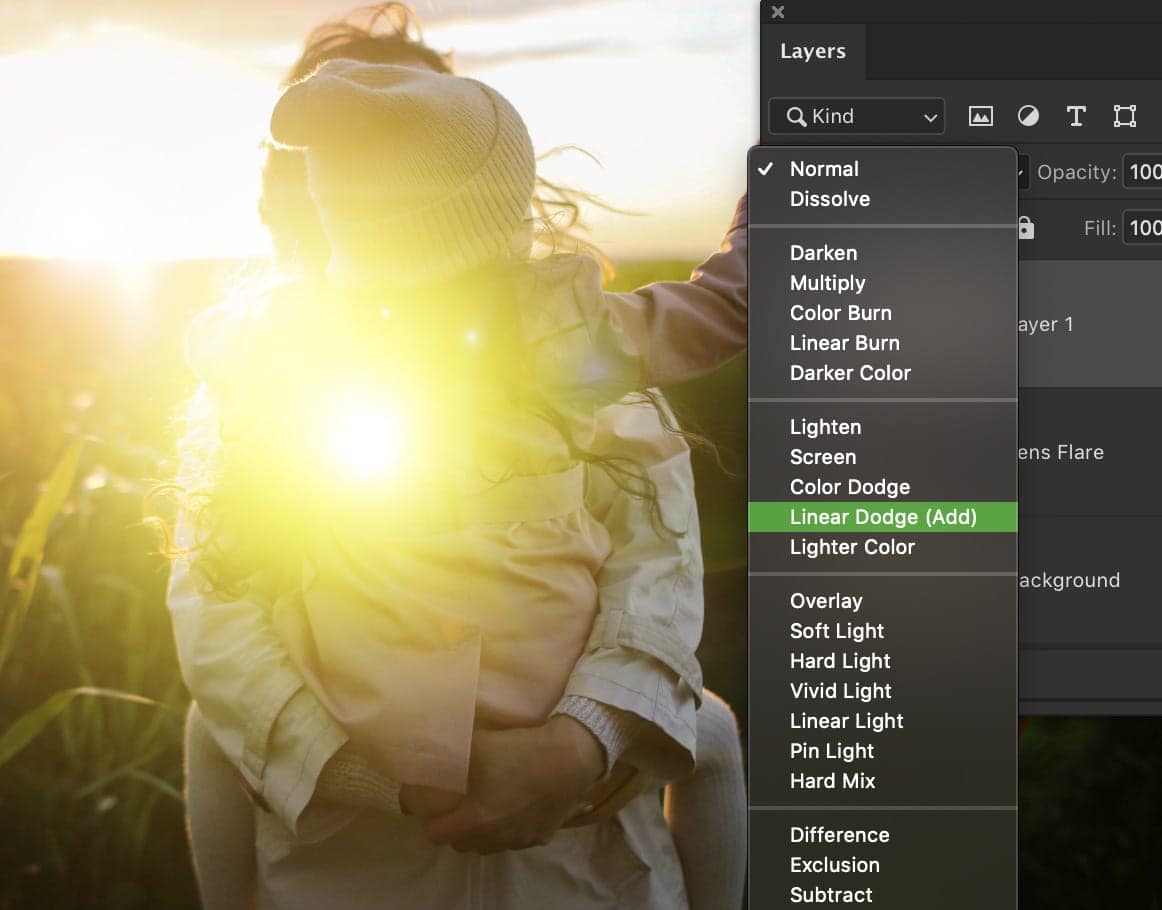
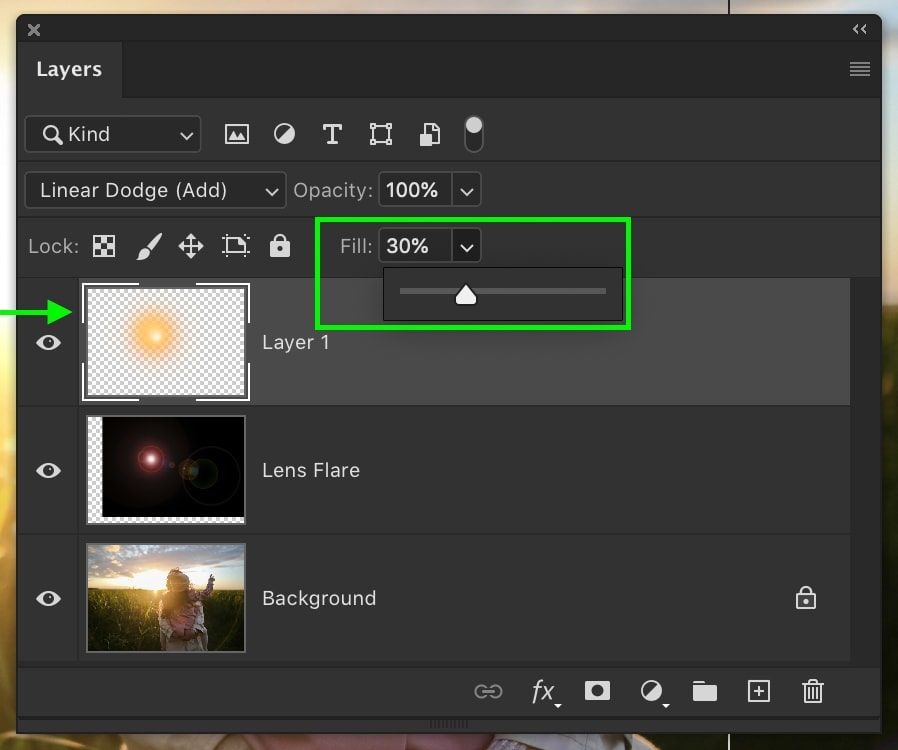
With your light orb created, change the layer blending mode from Normal to Linear Dodge (Add).
Grab your Move Tool (V) and reposition your glow over the source of your lens flare. Lastly, change the Fill value of your sun glow to help it blend better in your photo.
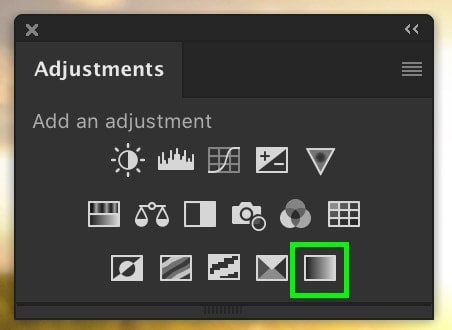
Step 7: Enhance Your Lens Flare With A Gradient Map (Optional)
To start, create a new Gradient Map from your adjustments panel.
Open the editor by clicking on the gradient bar. To change the gradient colors, click on the color swatches in your gradient. Double-click on the left color swatch and choose the color for your shadows. Next, double-click on the right color swatch to choose a color for the highlights.
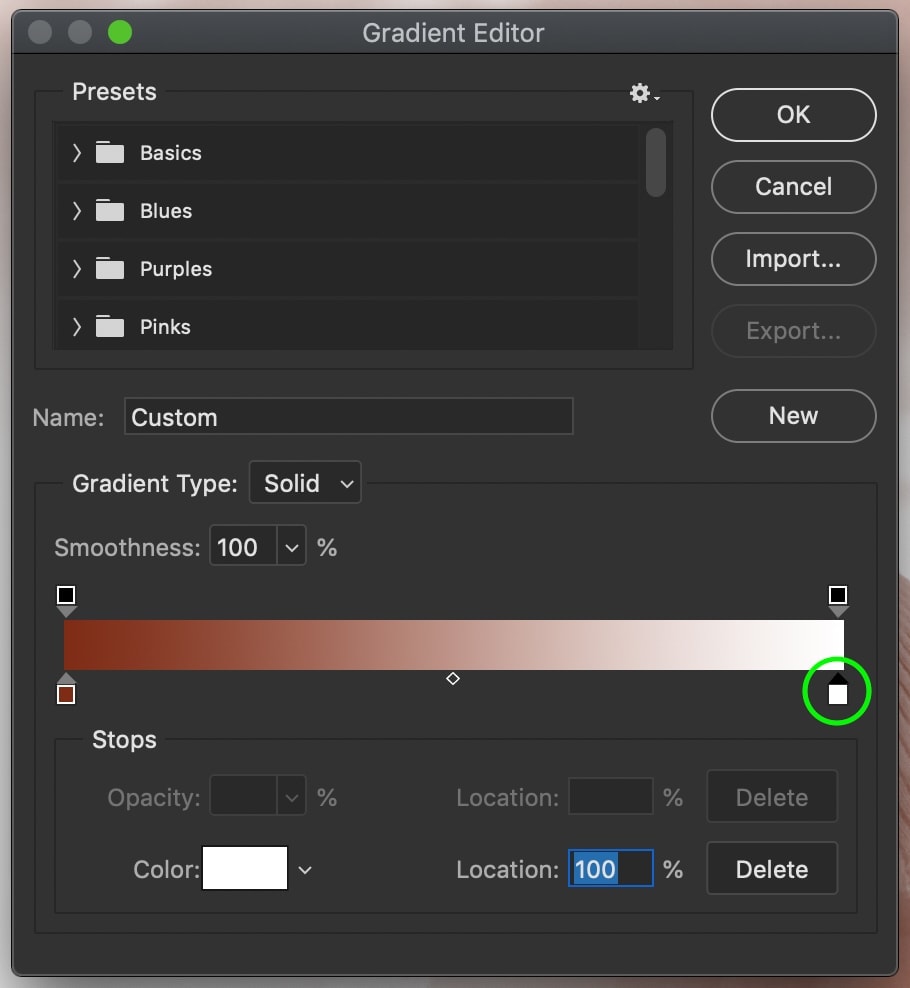
Commit to your changes by pressing OK. Now, using the process detailed previously, change your layer blending mode from Normal to Overlay. Then, change the Fill value of your gradient map to something that looks a bit more natural.
Creating a lens flare in Photoshop is only the beginning. After applying a few other techniques, you can create a far more realistic and captivating look. The main reason why a Photoshop lens flare won’t look natural is that it isn’t properly blended. Using sun glows and gradient maps helps to fix this problem!
– Brendan 🙂


